
8V CORDLESS GREASE GUN
MODEL NO: CPG8V
Thank you for purchasing a Sealey product. Manufactured to a high standard, this product will, if used according to these
instructions, and properly maintained, give you years of trouble free performance.
I
MPORTANT:
PLEASE READ THESE INSTRUCTIONS CAREFULLY. NOTE THE SAFE OPERATIONAL REQUIREMENTS, WARNINGS & CAUTIONS. USE
THE PRODUCT CORRECTLY AND WITH CARE FOR THE PURPOSE FOR WHICH IT IS INTENDED. FAILURE TO DO SO MAY CAUSE DAMAGE AND/OR
PERSONAL INJURY AND WILL INVALIDATE THE WARRANTY. KEEP THESE INSTRUCTIONS SAFE FOR FUTURE USE.
1. SAFETY
1.1. ELECTRICAL SAFETY FOR USE OF CHARGER
USE ONLY THE SUPPLIED CHARGER PLUG FOR CONNECTING THE 8V CORDLESS GREASE GUN TO THE POWER SUPPLY
WARNING! It is the user’s responsibility to read, understand and comply with the following instructions:
You must ensure the risk of electric shock is minimised by the installation of appropriate safety devices. An RCCB (Residual Current
Circuit Breaker) should be incorporated in the main distribution board. We also recommend that an RCD (Residual Current Device) is
used with all electrical products, particularly portable equipment which is plugged into an electrical supply not protected by an RCCB
YOU MUST also read and understand the following instructions concerning electrical safety.
1.1.1. The Electricity At Work Act 1989 requires all portable electrical appliances, if used on business premises, to be tested by a quali ed
electrician, using a Portable Appliance Tester (PAT), at least once a year.
1.1.2. The Health & Safety at Work Act 1974 makes owners of electrical appliances responsible for the safe condition of the appliance and
the safety of the appliance operator. If in any doubt about electrical safety, contact a qualifi ed electrician.
1.1.3. You must ensure that you:
Inspect the charger plug, cable and connector for wear and damage to ensure items are safe before connecting to the power supply.
8 DO NOT use if worn or damaged.
IMPORTANT: Check that the voltage marked on the charger plug is the same as the power supply to be used.
8 DO NOT pull the charger plug from the mains socket by the lead.
8 DO NOT use any other type of charger with this product.
8 DO NOT try to take the charger apart.
8 DO NOT use the charger plug to charge or power any other electrical item.
8 DO NOT get the charger wet, or use in wet, damp conditions (for indoor use only).
WARNING! NEVER substitute a standard 13amp 3 pin plug, or any other type of plug, for the charger plug.
1.2. BATTERY SAFETY
WARNING! To reduce the risk of burns or re:
8 DO NOT attempt to open, dismantle, modify or service the battery.
8 DO NOT crush, puncture, short external contacts or dispose of in re or water.
8 DO NOT expose to temperatures above 60ºC (140ºF).
Recycle or dispose of used battery as stipulated by local regulation.
1.3. GENERAL SAFETY
WARNING! Disengage the grease gun from the battery before changing accessories, servicing or performing and maintenance.
Maintain gun in good condition (use an authorised service agent).
Replace or repair damaged parts. Use recommended parts only. Unauthorised parts may be dangerous and will invalidate the warranty.
Wear appropriate protective clothing. When handling lubricants refer to manufacturer’s instructions and conform to local regulations.
Use the gun in a suitable working area. Keep area clean and tidy and free from unrelated materials and ensure there is adequate lighting.
Maintain correct balance and footing whilst performing the task. Ensure floor is not slippery and wear non-slip shoes.
Keep children and unauthorised persons away from the work area.
Dispose of waste grease in accordance with local authority regulations.
When not in use ensure the battery is removed.
8 DO NOT allow unauthorised persons to operate the gun.
WARNING! DO NOT tamper with or open pump unit. Doing so will invalidate your warranty.
8 DO NOT point grease gun at yourself or other persons or animals.
8 DO NOT pull the grease gun unit by the hose.
8 DO NOT use the gun for a task it is not designed to perform.
8 DO NOT operate the gun when you are tired or under the influence of alcohol, drugs or intoxicating medication.
When not in use, clean the unit and store in a dry, safe, childproof area.
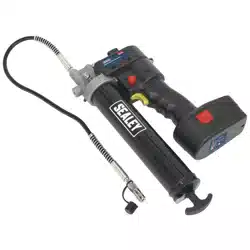
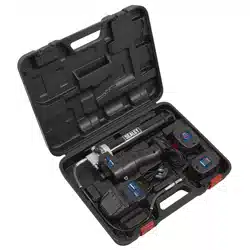
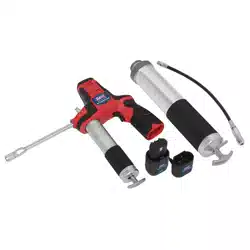
2. INTRODUCTION
Lightweight versatile cordless grease gun, producing 3000psi. Ideal for on site jobs where space is at a premium. Suitable for 85g/3oz
and 400g/14oz cartridges. Supplied with exi and rigid delivery nozzles, as well as a 400g cartridge adaptor and 2Ah 8V battery and
mains charger.
NOTE: grease cartridges sold separately (Model No. SGC1 & SGC12).
Refer to
instructions
Wear eye
protection
Wear protective
gloves
CPG8V Issue 4 (2,4,F) 31/07/23
Original Language Version
© Jack Sealey Limited
3. SPECIFICATION
Model: ................................................................ CPG8V
Battery: ............................................8V 2Ah Lithium-ion
Hose length: .............. Rigid = 175mm. Flexible = 330mm
Plug Type: .........................................................3-Pin BS
Pressure: ............................................................3000psi
Replacement parts: ..............CPG8VBP - 8V 2Ah battery
4. OPERATION
IMPORTANT WARRANTY INFORMATION: the battery pack fitted to this cordless tool are considered to be a consumable item and its
ability to accept charge will reduce over time. We will provide warranty against mechanical and electrical defect for a period of one year
- this does not cover fair wear and tear. If the battery is not properly charged before first use, or regularly conditioned, its capacity will
diminish. Under these circumstances we will not replace the battery pack even if it is less than one year old.
4.1. CHARGING THE BATTERY
IMPORTANT: Before using the grease gun for the first time the battery must be fully charged
4.1.1. To charge the battery place the battery into the charging base.
NOTE: The battery can only be inserted into the charger one way. If the battery will not fit into the charger, rotate it by 180º.
4.1.2. Plug the charger into the mains. The green LED, on the left hand side, will turn on. When the battery is being charged the red LED, on the
right hand side will turn on and the green LED will turn off. When the battery is fully charged, the red LED will turn off and the green LED
will turn on.
NOTE: A completely discharged battery will take approximately 2 hours to become fully charged.
4.2. INSTALLING THE BATTERY
4.2.1. Remove the discharged battery from the grease gun handle by pressing the battery release buttons on the sides of the battery.
4.2.2. Insert a fully charged battery into the battery cavity in the grease gun handle. The battery release buttons will “click” when the battery is
fully inserted.
NOTE: The battery can only be inserted into the handle one way. If the battery will not fit into the handle, rotate it by 180º.
4.3. ATTACHING THE DELIVERY NOZZLE
4.3.1. Thread the rigid or flexible delivery nozzle into the front of the grease gun and tighten using a 15mm wrench. Do not over tighten.
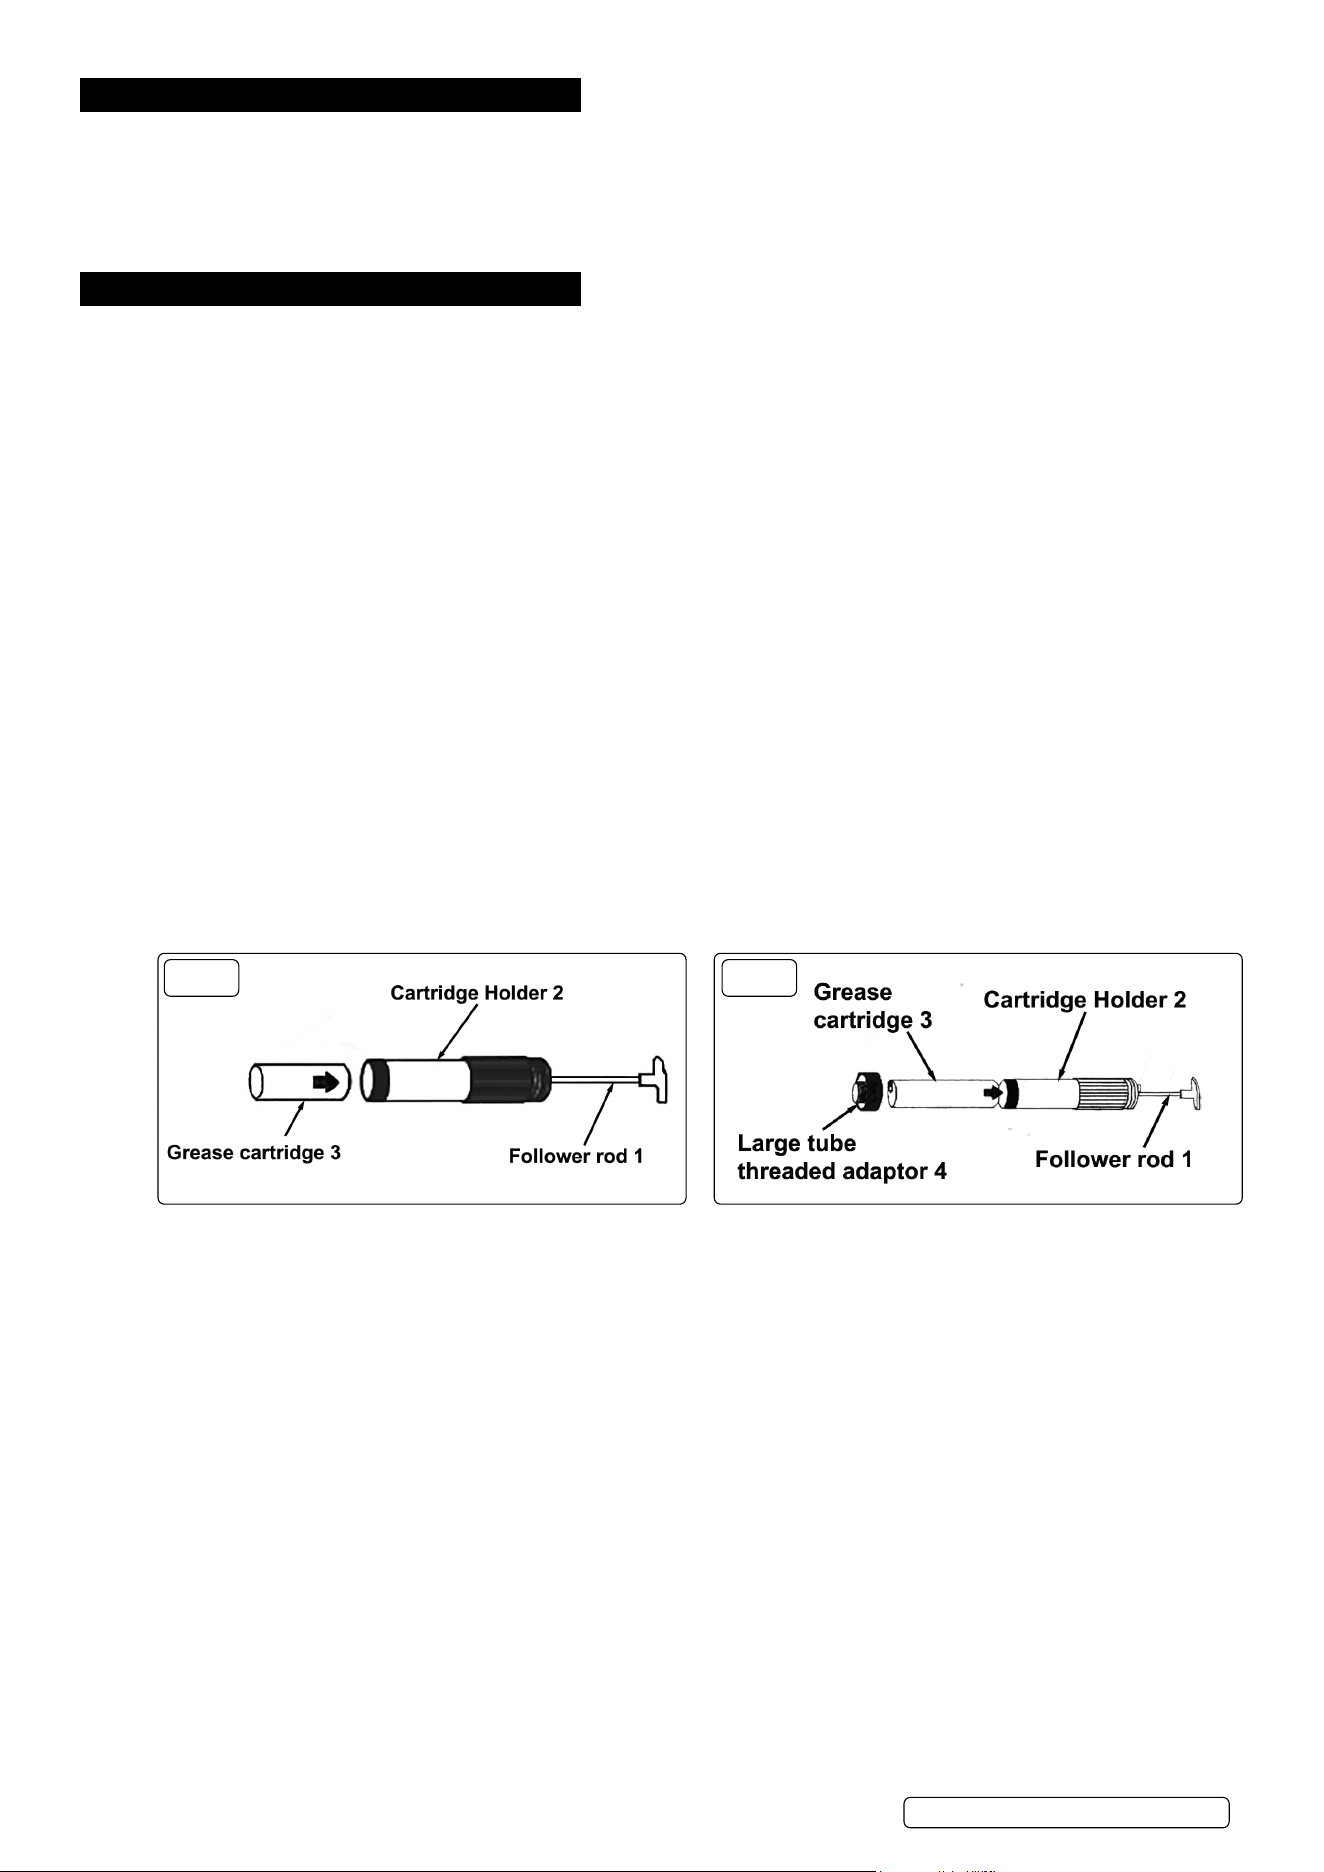
4.4. LOADING A GREASE CARTRIDGE (3oz/85g) INTO THE SMALL CARTRIDGE HOLDER
4.4.1. Pull the follower rod (fig 1 - 1) out and towards the side of the cartridge (fig 1 - 2) as far as possible until the groove on the follower rod
engages with the slot in the end cap.
4.4.2. Remove the plastic cap from the bottom of the grease cartridge (fig 1 - 3).
4.4.3. Insert the bottom of the grease cartridge into the cartridge holder and push the cartridge fully in.
NOTE: The top of the grease cartridge should not extend beyond the end of the cartridge holder.
4.4.4. Remove and peel away tab on top side of grease cartridge.
WARNING! Be careful not to bump the follower rod as it is spring loaded. This will result in the rapid ejection of grease and the cartridge.
4.5. ATTACHING THE SMALL CARTRIDGE (3oz/85g)
NOTE: Remove the large tube threaded adaptor (fig 2 - 4) from the grease gun, if applicable. Turn the cartridge adaptor clockwise (left
hand thread).
4.5.1. Thread the loaded small cartridge into the grease gun by turning it counter-clockwise (left hand thread). Hand tight only.
4.5.2. Release the following rod (fig 1 -1) by moving it sideways towards the centre of the grease tube. When released, slowly push the follower
rod back into the cartridge.
4.6. LOADING A GREASE CARTRIDGE (14oz/400g) INTO THE LARGE CARTRIDGE HOLDER
NOTE: Loading a grease cartridge (fig 2 - 3) into the large cartridge holder (fig 2 - 2) is similar in operation to loading the smaller cartridge.
4.6.1. Pull the follower rod out (fig 2 - 1) as far as possible.
NOTE: The follower rod has a self-locking latch and will lock automatically.
4.6.2. Repeat steps 4.4.2, 4.4.3 and 4.4.4 as listed above.
4.7. ATTACHING THE LARGE CARTRIDGE HOLDER (14oz/400g)
NOTE: Remove the smaller (3oz/85g) cartridge from the grease gun, if applicable. Turn the small cartridge clockwise (left hand thread).
4.7.1. Thread the large tube threaded adaptor (fig 2 - 4) into the grease gun housing, by turning it counter-clockwise (left hand thread). Hand
tight only.
4.7.2. Thread the loaded large cartridge holder into the large tube threaded adaptor (fig 2 - 4).
4.7.3. Release the follower rod (fig 2 - 1) by pressing on the self-locking latch.
4.8. PRIMING THE GREASE GUN
4.8.1. Before loading the grease gun with a cartridge (85g or 400 g), it is ideal to prime the gun.
4.8.2. To prime the grease gun pack grease into the cavity (where the grease tube screws into the gun) and operate the trigger (fig 3 - 1). This
will induce the intake of grease into the gun assembly.
g.2g.1
CPG8V Issue 4 (2,4,F) 31/07/23
Original Language Version
© Jack Sealey Limited
5. OPERATION
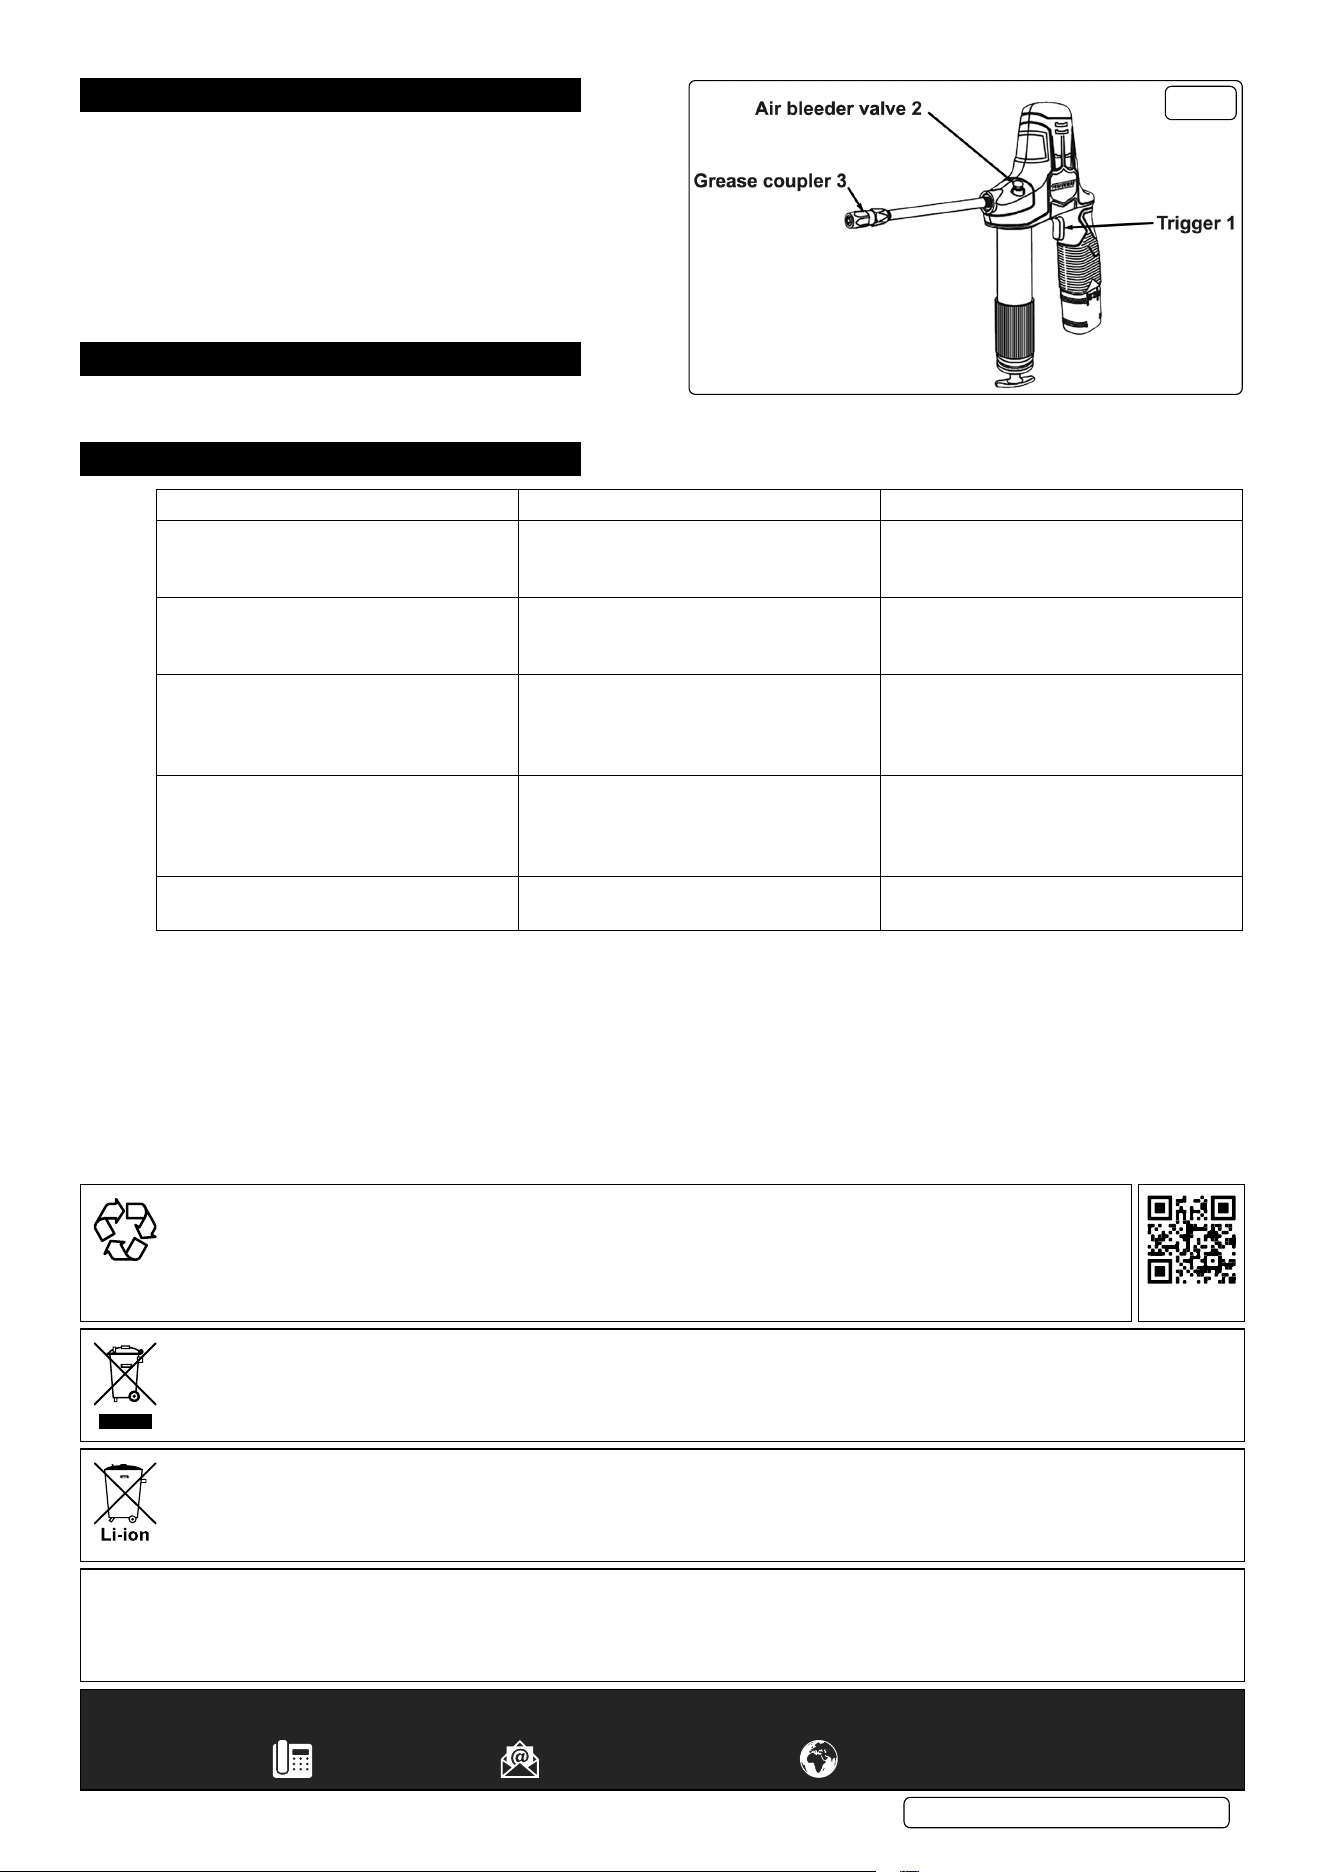
5.1. To operate the grease gun push the grease coupler (g 3 - 3)
onto the grease nipple and squeeze the trigger (g 3 - 1) until
the desired amount of grease has been delivered.
5.2. AIR PURGING
5.2.1. If you encounter air pockets during operation, or after a new
cartridge (85g or 400g) has been installed, exert force on the
follower rod, press the air bleeder valve (g 3 - 2), and operate
the trigger (g 3 - 1) in short, sharp bursts until grease begins to
ow from the grease couple (g 3 - 3).
6. MAINTENANCE
6.1. Use a clean cloth to remove dirt, dust, oil, grease etc.
8 DO NOT use solvents to clean the grease gun.
7. TROUBLESHOOTING
CONDITION POSSIBLE CAUSE CORRECTIVE ACTION
Motor fails to run. - Battery needs recharging.
- Faulty wiring to motor.
- Recharge battery.
- Remove battery, disassemble handle and
check wiring for loose connections.
Pressure release valve opens to discharge
grease.
- Blocked line.
- Blocked bearing.
- Blocked grease fitting.
- Check lines, pipe joints and grease
fittings and remove any obstructions.
Grease gun fails to dispense grease. - Grease tube is out of grease.
- Loss of prime.
- Check valve is not functioning.
- Check that the tube contains grease.
- Repeat priming operation.
- Remove check valve, clean and inspect
the valve seat.
Grease gun continues to lose prime. - Air may be trapped in locations throughout
the
grease tube ass’y after bulk filling.
- Grease tube follower may be binding.
- Empty grease tube ass’y, refill and repeat
priming operation.
- Replace grease tube ass’y.
Battery fails to charge. - Charger may not have power.
- Battery may be dead.
- Check the mains charger is providing
power.
g.3
CPG8V Issue 4 (2,4,F) 31/07/23
Original Language Version
© Jack Sealey Limited
Sealey Group, Kempson Way, Suffolk Business Park, Bury St Edmunds, Suffolk. IP32 7AR
01284 757500 sales@sealey.co.uk www.sealey.co.uk
ENVIRONMENT PROTECTION
Recycle unwanted materials instead of disposing of them as waste. All tools, accessories and packaging should be sorted,
taken to a recycling centre and disposed of in a manner which is compatible with the environment. When the product
becomes completely unserviceable and requires disposal, drain any fluids (if applicable) into approved containers and
dispose of the product and fluids according to local regulations.
WEEE REGULATIONS
Dispose of this product at the end of its working life in compliance with the EU Directive on Waste Electrical and Electronic Equipment
(WEEE). When the product is no longer required, it must be disposed of in an environmentally protective way. Contact your local solid
waste authority for recycling information.
BATTERY REMOVAL
Under the Waste Batteries and Accumulators Regulations 2009, Jack Sealey Ltd are required to inform potential purchasers of products
containing batteries (as defined within these regulations), that they are registered with Valpak’s registered compliance scheme. Jack
Sealey Ltd’s Batteries Producer Registration Number (BPRN) is BPRN00705.
Note: It is our policy to continually improve products and as such we reserve the right to alter data, specifications and component parts without prior
notice.
Important: No Liability is accepted for incorrect use of this product.
Warranty: Guarantee is 12 months from purchase date, proof of which is required for any claim.
REGISTER YOUR
PURCHASE HERE