Loading ...
Loading ...
Loading ...

7
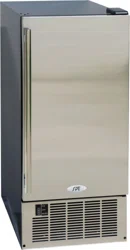
CONNECTING THE WATER SUPPLY
• The water supply should be ready at the point of installation. The water supply pressure should be
15-psig minimum with static pressure no more than 80 psig.
• A wall outlet directly behind the icemaker will make installation easier.
•
Be sure pipes are not pinched or kinked or damaged during installation.
•
Check for leaks after connection
• All the necessary hardware is NOT PROVIDED (as the plumbing fixtures at the installation point
may differ). It is necessary to hire a professional licensed plumber to complete the installation.
Tools required: ½ in. open-end wrench, Phillips screwdriver
Connecting the water line:
1. Turn off main water supply. Turn on nearest faucet long enough to clear line of water.
2. Find a ½ in. to ¾ in. vertical cold water pipe near the installation location. The distance should be
less than 9 feet. The water supply hose provided is approximately 9 ft long.
3. A shut-off valve must be installed to the main water supply. If the water pipe has a plain piece of
cooper tubing, attach a ¼” O.D. compression union to the tubing and remove the nut.
4. Connect water supply hose nut to tap and water inlet valve. Tighten firmly by hand, then one-half
turn with wrench.
5. Turn on main water supply at tap. Check for water supply connection leaks. Tighten every
connection (including connections at the water inlet).
IMPORTANT: When connecting the water supply hose, pay attention to the indication of “Water
Inlet” on the machine.
DRAINAGE
NOTE: There is a drain line on the icemaker. Please drain water to your drain through the drain
line provided with the icemaker.
1. Locate the floor drain. The distance should be less than 5 feet. The length of the drain hose
provided is approximately 5 feet long.
2. Find the drain hose on the back of the icemaker. Insert the other end of the hose into the drain line.
3. All horizontal runs of drain line must have a fall of ¼” per foot. An air gap will likely be required
between the drain hose and the drain receptacle. A standpipe with a trap below it would be
acceptable for the drain receptacle. A floor drain is also acceptable.
4. Pour 1 gallon of water into the ice storage bin to check for proper drainage.
Note: a condensate pump can allow for installation of drain that is more than 5 feet away. Consult your
plumber for advice.
INSTALLATION TYPES
Freestanding installation:
A freestanding installation will allow you to install the icemaker in any place you desire proved you have
access to a water supply and a drain. You must follow the stated instructions for: (a) electrical
requirements, (b) water supply and drain and (c) leveling the icemaker.
Recessed installation:
A recessed installation will allow you to install the icemaker under a counter, or in a kitchen cabinet
provided the required clearance around the unit is respected.
Built-in installation:
If this method of installation is chosen, it will be necessary to allow adequate ventilation space around
the unit (make sure there is at least ventilation behind the unit). The following must also be observed:
1. Place the unit in front of the installation location. Remove the feet and place unit flat on the floor or
on a platform, depending on your installation requirements.
2. The water supply must be plumbed before connecting to the icemaker. Install the drain line to drain.
3. Turn on main water supply and tap. Check for water supply connection leaks. Tighten any
connections (including connections at the tie-in).
4. If electrical outlet for the unit is behind the cabinet, plug in the icemaker.
5. Push the icemaker into position.
6. Seal all around the cabinet to the floor with an approved caulking compound.
WARNING
IMPROPER WATER LINE CONNECTION MAY RESULT IN FLOODING
YOU MUST USE A LICENSED PLUMBER
REVIEW STATE AND LOCAL PLUMBING CO
DES BEFORE INSTALLATION
Loading ...
Loading ...
Loading ...