Loading ...
Loading ...
Loading ...

6
stick together. De-ionized water is not recommended.
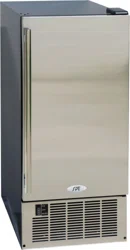
• Place the icemaker on a level surface that is strong enough to support the unit when it is fully
loaded. Remember that the unit will be significantly heavier once it is operational and fully loaded.
Level the unit by adjusting the legs at the front of the icemaker.
•
The unit should be located on a firm and level surface. If needed, adjust the height of the icemaker
by rotating the leveling leg.
• Locate the icemaker away from direct sunlight and other heat sources (stove,
heater, radiator, etc.).
• Extremely cold ambient temperatures may cause the icemaker to
malfunction. This icemaker is designed for installation and use indoors under
controlled ambient conditions.
•
PLUG THE ICE MAKER INTO A DEDICATED, PROPERLY INSTALLED
GROUNDED WALL OUTLET. DO NOT UNDER ANY CIRCUMSTANCES
CUT OR REMOVE THE THIRD (GROUND) PRONG FROM THE POWER
PLUG. ANY QUESTIONS CONCERNING POWER AND/OR GROUNDING
SHOULD BE DIRECTED TOWARD A CERTIFIED ELECTRICIAN.
REVERSING THE DOOR
Tools needed: Flathead screwdriver, Phillips screwdriver
IMPORTANT: before you begin, unplug the icemaker.
To remove door from hinges:
1. Remove the top hinge cover.
2. Use a Phillips screwdriver and remove the screws. Then remove the top hinge mat and top
hinge. Keep all parts together and set aside.
3. Lift the door off the bottom hinge and turn it upside down. Set aside.
To replace door on hinges:
1. Use a flathead screwdriver to pry and remove the plug buttons from the screw holes on the
opposite door hinges, top and bottom. Set aside.
2. Remove the front louver. Set aside.
3. Remove the bottom hinge and transfer it to the opposite side (bottom of door).
4. Position the door on the bottom hinge.
5. Align the door on the bottom hinge and replace the top hinge and top hinge mat.
6. Replace top hinge cover.
7. Insert plug button to cover the original screw holes.
Loading ...
Loading ...
Loading ...