Loading ...
Loading ...
Loading ...

5
Switching Sides for the Depth Gauge
1. Turn OFF the tool.
2. Remove the battery pack.
3. Remove the depth stop (see "Removing/Installing
the Depth Stop").
4. Remove the screw attaching the front depth brack-
et to the ruler assembly with a philips screwdriver.
5. Remove the bit depth gauge button (front button):
a. Adjust the accessory tment adjuster button
(rear button) to be in the middle of the ruler
assembly.
b. Press the front button and move it forward until
the bottom plate is completely out of the front
button.
c. Using the tabs, remove the bit depth gauge
button from the ruler assembly.
6. Remove the rear depth bracket from the ruler as-
sembly and reassemble it so the bracket hangs
on the desired side.
7. Attach the bit depth gauge button (front button)
to the ruler assembly using the tabs, then press
the front button and slide the bottom ruler plate
into the front button (reverse of step 5).
8. Attach the front depth bracket on to the desired
side of the ruler with the supplied Phillips screw.
9. Install the depth stop (see "Removing/Installing
the Depth Stop").
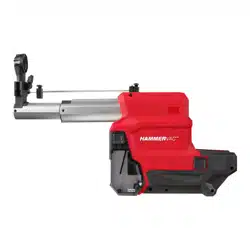
Attaching the HAMMERVAC™ to the
Rotary Hammer
These HAMMERVAC™ Dust Extractors are for use
with dedicated rotary hammers. Refer to the Speci-
cations chart for compatible tools.
1. Remove the battery pack from the rotary hammer.
2. Slide the foot of the rotary hammer onto the dust
extractor.
3. Push the contacts through the protective cover
on the rotary hammer. The hammer release will
snap into place.
Installing/Removing the Bit
Slide the bit through the nozzle and then install into
the tool according to the tool manufacturer's instruc-
tions. For best results, use a bit 8" in length or shorter
for the 2912-DE and use a bit 10" in length or shorter
for the 2915-DE.
Fitting the HAMMERVAC™
to the Tool and Bit
For proper suction and depth
Correct
Incorrect
Incorrect
control, position the nozzle as-
sembly so the bit is ush with the
forward face of the nozzle:
1. Press and hold the tool and bit
depth gauge button.
2. Push in the nozzle assembly
until the bit is ush with the
front face of the nozzle.
3. Release the tool and bit depth
gauge button.
NOTE: Fully extend the
HAMMERVAC™ before storing
to preserve spring life.
Setting the Drilling Depth
1. Fit the HAMMERVAC™ to the tool and bit.
2. Press and hold the depth gauge button and slide
the depth gauge to the desired depth. The drilling
depth is the last visible measurement shown when
viewed from the depth gauge on the top of the
tool. To ensure the HAMMERVAC™ is properly
set to the tool, bit, and desired depth, always drill
a test hole.
Drill Depth
NOTE: When using the optional Crevice Tool
(Cat. No. 49-90-2325) accessory, set the drill depth to 0.
OPERATION
WARNING
To reduce the risk of
re and injury, do not
use to pick up ammable or combustible materi-
als. Empty dust box completely before use.
To reduce the risk of injury, always wear proper
eye protection marked to comply with ANSI Z87.1.
When working in dusty situations, wear appro-
priate respiratory protection or use an OSHA
compliant dust extraction solution.
Proper Operation
1. Empty the dust box.
NOTE: For optimal use to remove debris in the
dust box, connect a hose to a vacuum and remove
debris.
2. Install and position the nozzle assembly to the
desired side.
3. Fit the HAMMERVAC™ to the tool and bit.
4. Set the drill depth.
5. Install the battery pack.
6. Pull trigger to start HAMMERVAC™.
7. Begin use according to tool manufacturer instructions.
8. Always hold the tool securely using both handles
to maintain control.
Loading ...
Loading ...
Loading ...