Loading ...
Loading ...
Loading ...
USER GUIDE
u-line.com
Door Adjustments
Door Adjustments
DOOR ALIGNMENT AND ADJUSTMENT
Align and adjust the door if it is not level or is not sealing
properly. If the door is not sealed, the unit may not cool
properly, or excessive frost may form in the interior.
NOTICE
Properly aligned, the door’s gasket should be
rmly in contact with the cabinet all the way
around the door (no gaps). Carefully examine the
door’s gasket to ensure that it is rmly in contact
with the cabinet. Also make sure the door gasket
is not pinched on the hinge side of the door.
To align and adjust the door:
1. Loosen (do not remove) top and bottom hinge screws
using a Torx T-25 screwdriver on the top and a 1/4”
socket on the bottom.
2. Align door squarely with cabinet.
3. Make sure gasket is rmly in contact with cabinet all
the way around the door (no gaps).
4. Tighten bottom hinge screws.
5. Tighten top hinge screws.
REVERSING THE DOOR
Location of the unit may make it desirable to mount the
door on the opposite side of the cabinet.
The hinge hardware will be removed and reinstalled on the
opposite side of the cabinet.
Remove door latch assembly
Remove door latch assembly and reinstall on opposite side
of door (see DOOR LATCH).
TO REVERSE THE DOOR
Remove top hinge and door:
1. Hold door to keep it
from falling.
2. Remove top hinge
from cabinet using a
Torx T-25 screwdriver
to remove three
screws.
3. Remove door by tilting forward and lifting door o
bottom hinge. Retain shoulder washers; they will be
reused.
4. Remove three screws from hinge holes on the opposite
side.
5. Install three screws into holes where the hinge was
removed.
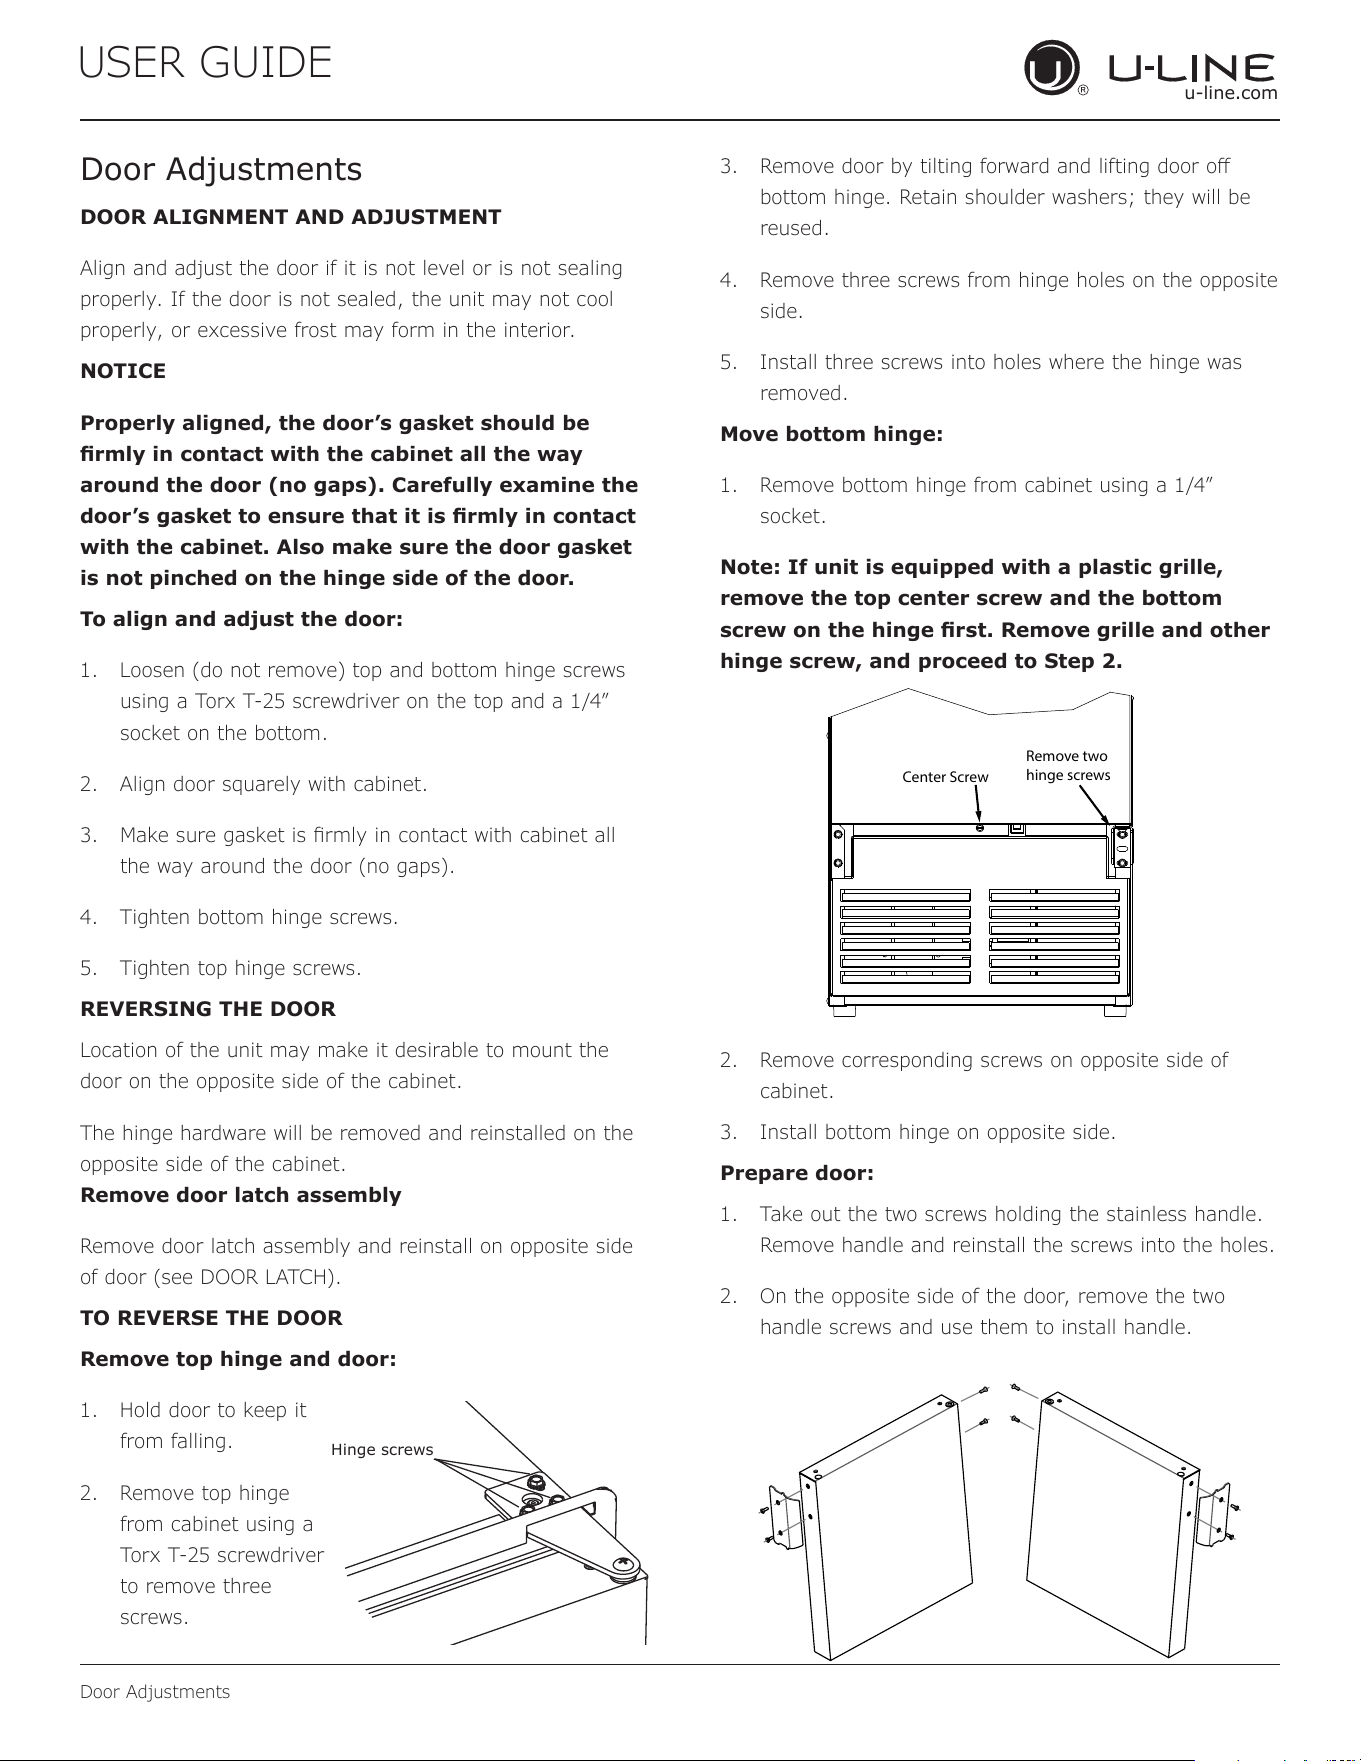
Move bottom hinge:
1. Remove bottom hinge from cabinet using a 1/4”
socket.
Note: If unit is equipped with a plastic grille,
remove the top center screw and the bottom
screw on the hinge rst. Remove grille and other
hinge screw, and proceed to Step 2.
2. Remove corresponding screws on opposite side of
cabinet.
3. Install bottom hinge on opposite side.
Prepare door:
1. Take out the two screws holding the stainless handle.
Remove handle and reinstall the screws into the holes.
2. On the opposite side of the door, remove the two
handle screws and use them to install handle.
Hinge screws
Remove two
hinge screws
Center Screw
13
Loading ...
Loading ...
Loading ...