w WARNING
Fire Hazard.
• If contents ignite, do not open oven door. Unplug oven and allow contents to stop burning and cool before
opening door.
• Do not operate oven unattended.
• Do not use with oven cooking bags.
• Do not heat foods in plastic containers.
• Do not heat taco shells in toaster oven. Always use full-size conventional oven.
• Always allow at least 1 inch (2.5 cm) between food and heating element.
• Follow food manufacturer’s instructions.
• Always unplug oven when not in use.
• Regular cleaning reduces risk of fire hazard.
IMPORTANT SAFEGUARDS
When using electrical appliances, basic safety precautions should always be followed to reduce the risk of fire,
electric shock, and/or injury to persons, including the following:
1. Read all instructions.
2. This appliance is not intended for use by persons
(including children) with reduced physical, sensory,
or mental capabilities, or lack of experience and
knowledge, unless they are closely supervised and
instructed concerning use of the appliance by a
person responsible for their safety.
3. Close supervision is necessary when any
appliance is used by or near children. Cleaning and
user maintenance shall not be made by children
unless they are supervised. Children should be
supervised to ensure that they do not play with the
appliance.
4. Do not touch hot surfaces. Use handles or knobs.
5. To protect against electrical shock, do not immerse
cord, plug, or oven in water or other liquid.
6. Unplug from outlet when not in use and before
cleaning. Allow to cool before cleaning appliance
and putting on or taking off parts. To unplug, grasp
the plug and pull from the outlet. Never pull from
the power cord.
7. Do not operate any appliance with a damaged
supply cord or plug, or after the appliance
malfunctions or has been dropped or damaged
in any manner. Supply cord replacement and
repairs must be conducted by the manufacturer,
its service agent, or similarly qualified persons
in order to avoid a hazard. Contact Customer
Service for information on examination, repair, or
adjustment as set forth in the Limited Warranty.
8. The use of accessory attachments not
recommended by the appliance manufacturer may
cause injuries.
9. Do not use outdoors.
10. Do not let cord hang over edge of table or counter
or touch hot surfaces.
11. Do not place on or near a hot gas or electric
burner or in a heated oven.
12. Extreme caution must be used when moving an
appliance containing hot oil or other hot liquids.
13. To disconnect, turn all controls to OFF ( ); then
remove plug from wall outlet.
14. Use extreme caution when removing pan or
disposing of hot grease.
15. Do not clean with metal scouring pads. Pieces
can break off the pad and touch electrical parts,
creating a risk of electrical shock.
16. Oversize foods or metal utensils must not be
inserted in an oven as they may create a fire or risk
of electric shock.
17. The bread may burn. A fire may occur if toaster
oven is covered or touching flammable material,
including curtains, draperies, walls, overhead
cabinets, paper or plastic products, cloth towels,
and the like, when in operation. Do not store any
item on top of the appliance when in operation.
18. Extreme caution should be exercised when using
containers constructed of materials other than
metal or glass.
19. Do not store any materials, other than
manufacturer-recommended accessories, in this
oven when not in use.
20. Do not place any of the following materials in the
oven: paper, cardboard, plastic, and the like.
21. Do not cover crumb tray or any part of the oven
with metal foil. This will cause overheating of the
oven.
22. To turn oven off, turn Timer to OFF ( ) position.
See “Parts and Features” section.
23. Do not place eyes or face in close proximity with
tempered safety glass door, in the event that the
safety glass breaks.
24. Always use appliance with crumb tray securely in
place.
25. Do not use appliance for other than intended use.
26. Clean oven interior carefully. Do not scratch or
damage heating element tube.
27. Do not operate unattended.
28. Do not operate the appliance by means of an
external timer or separate remote-control system.
29. CAUTION: HOT SURFACE. The temperature
of accessible surfaces may be high when
the appliance is operating.
SAVE THESE INSTRUCTIONS
Other Consumer Safety Information
This appliance is intended for household use only.
w WARNING
Electrical Shock Hazard: This
appliance is provided with a polarized plug (one wide
blade) to reduce the risk of electric shock. The plug
fits only one way into a polarized outlet. Do not defeat
the safety purpose of the plug by modifying the plug
in any way or by using an adapter. If the plug does
not fit fully into the outlet, reverse the plug. If it still
does not fit, have an electrician replace the outlet.
The length of the cord used on this appliance was
selected to reduce the hazards of becoming tangled
in or tripping over a longer cord. If a longer cord is
necessary, an approved extension cord may be used.
The electrical rating of the extension cord must be
equal to or greater than the rating of the appliance.
Care must be taken to arrange the extension cord so
that it will not drape over the countertop or tabletop
where it can be pulled on by children or accidentally
tripped over.
This appliance is equipped with a fully tempered
safety glass door. The tempered glass is four times
stronger than ordinary glass and more resistant to
breakage. Tempered glass can break; however, it
breaks into pieces with no sharp edges. Care must
be taken to avoid scratching door surface or nicking
edges. If the door has a scratch or nick, call our
customer service number.
Always unplug your toaster oven from the outlet
when not in use.
To order parts:
hamiltonbeach.com/parts
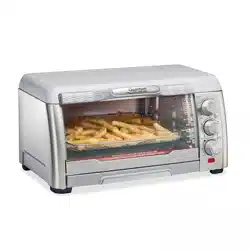
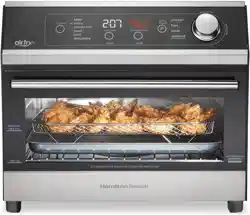
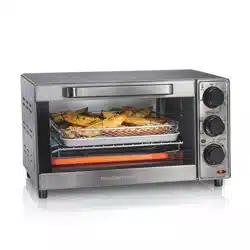
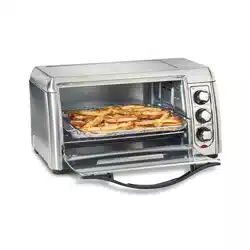
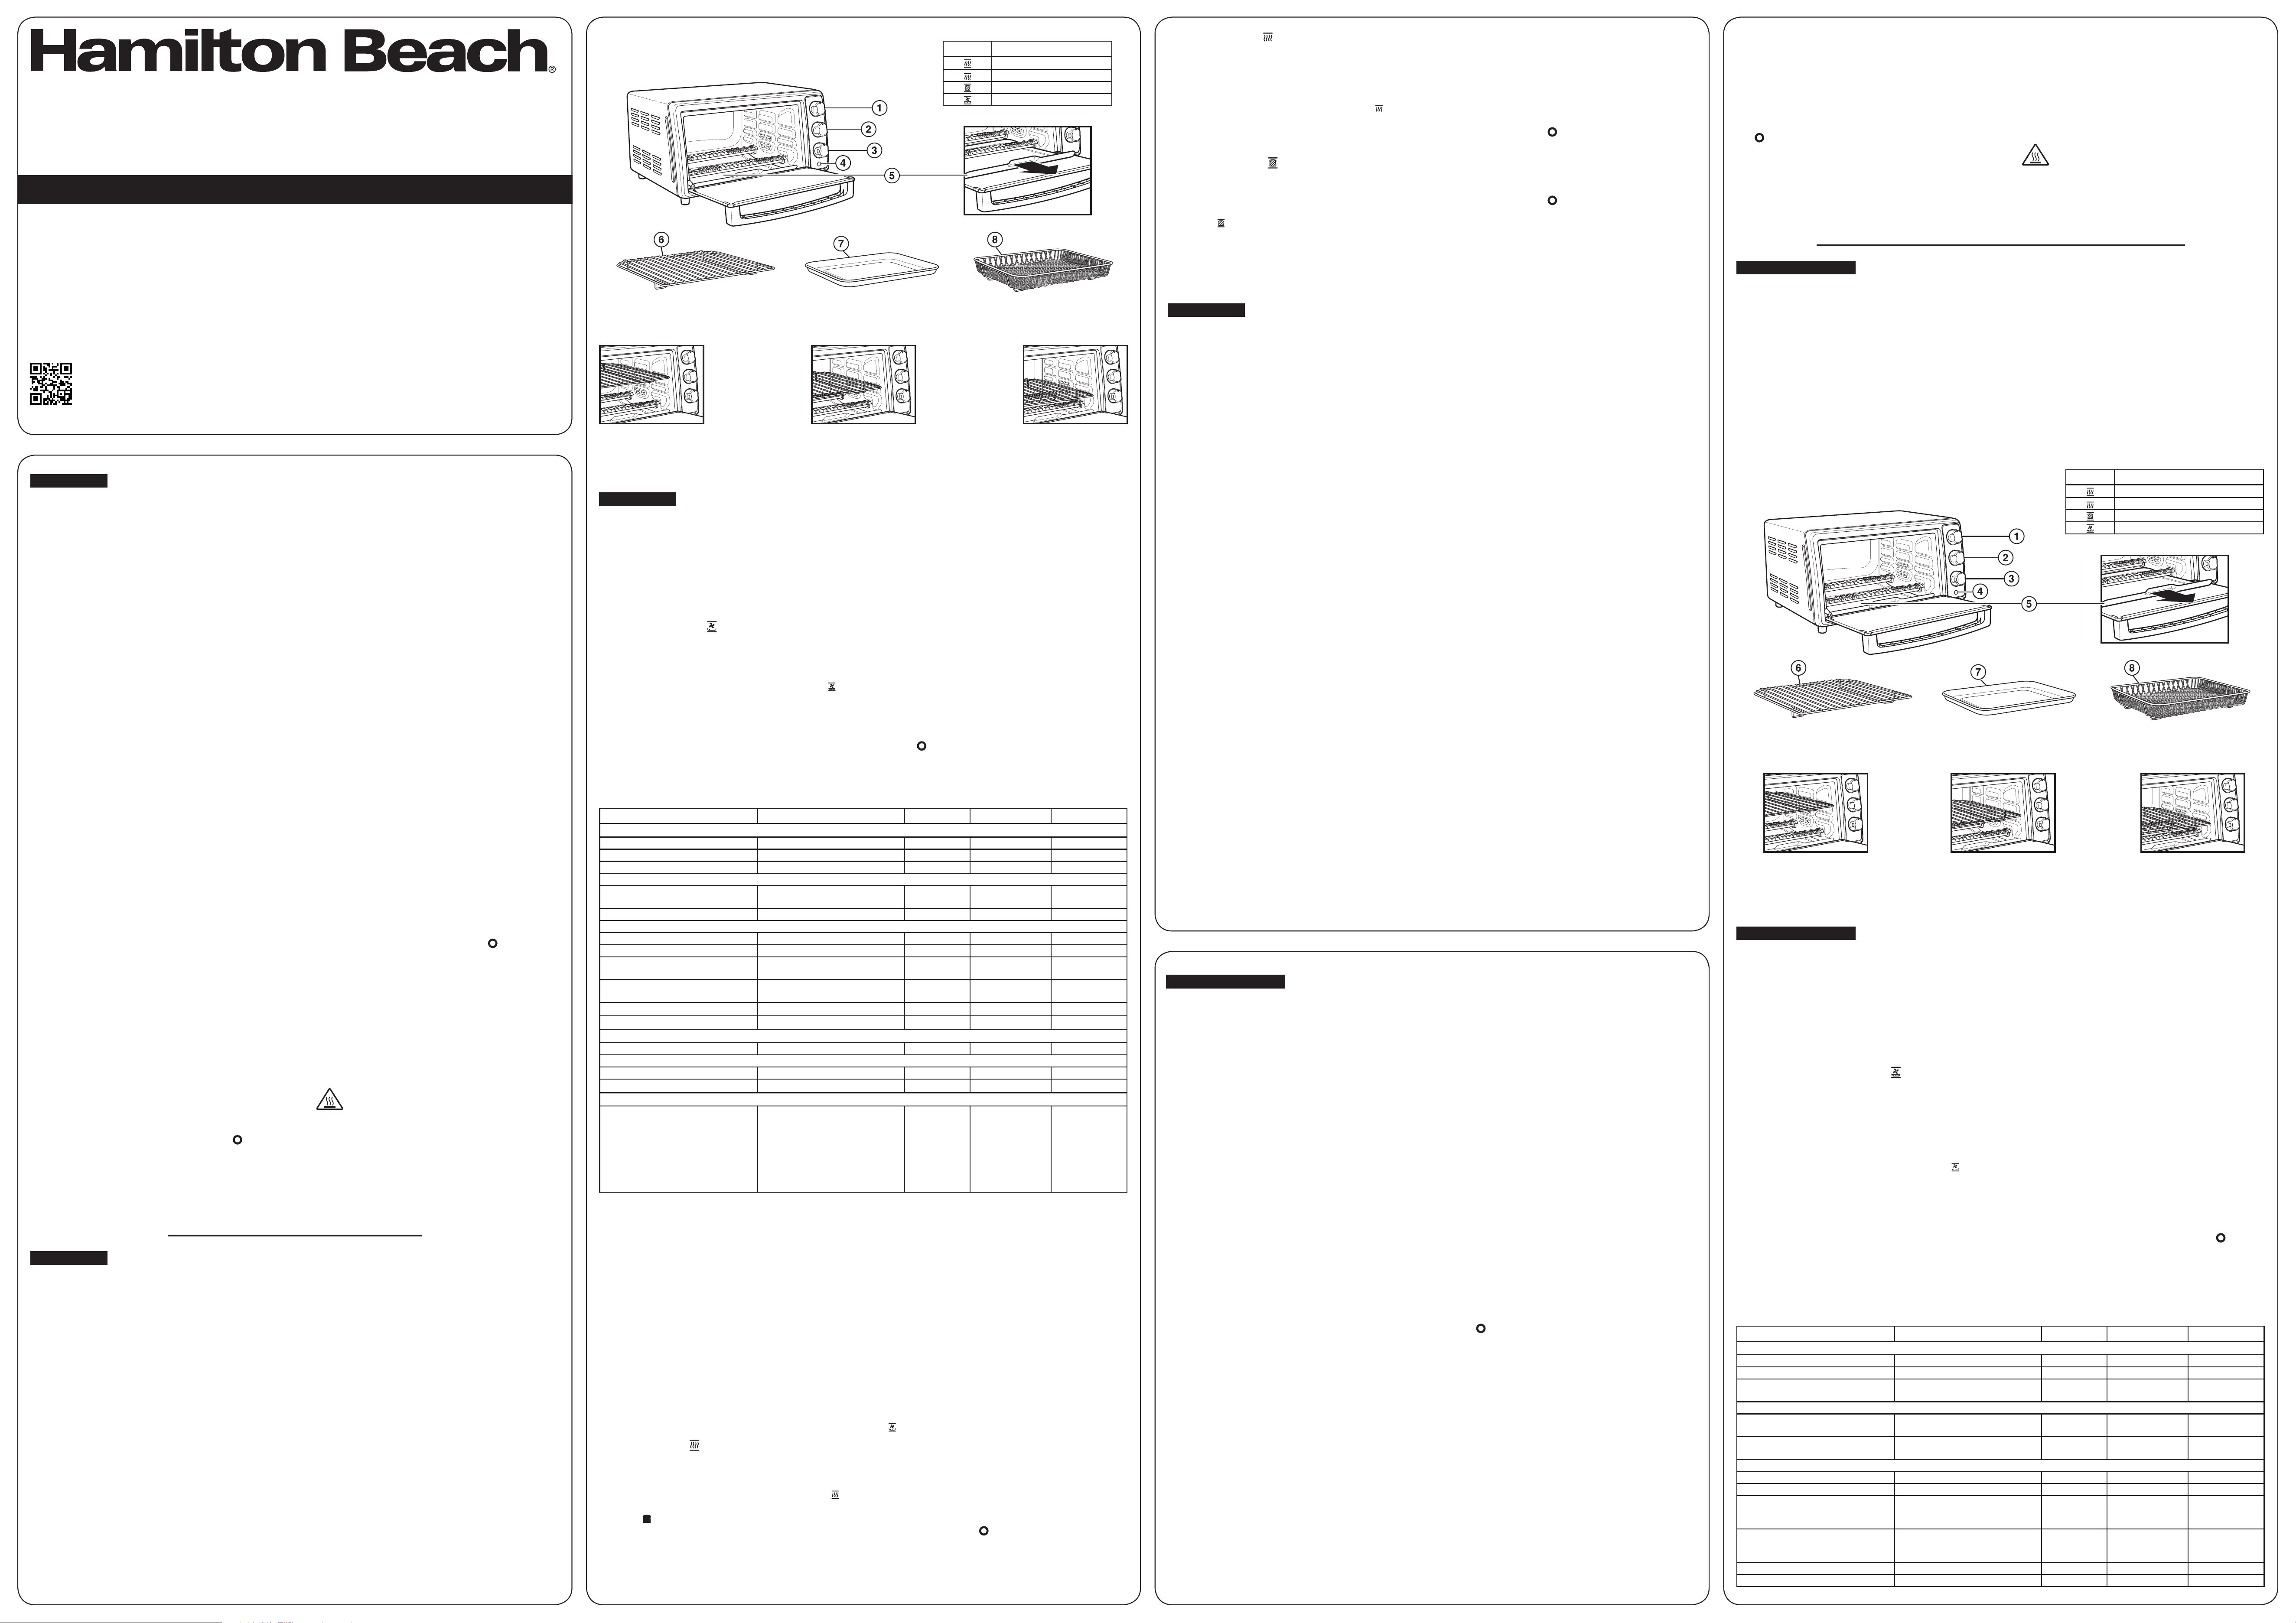
1. Temperature Dial
2. Function Dial
3. Toast/Timer Dial
4. ON Indicator Light
5. Slide-Out Crumb Tray
6. Oven Rack
7. Baking/Broiling Pan
8. Air Frying Basket
Top Rack Position:
BROIL/TOAST (BAGEL)
Bottom Rack Position:
BAKE
Read before use | Lire avant utilisation | Lea antes de usar.
For Questions:
For recipes, tips,
product information and
registration:
hamiltonbeach.com
Pour des questions :
Pour des recettes, des conseils,
des renseignements sur le produit
et l’enregistrement :
hamiltonbeach.ca
Para preguntas:
Para recetas, consejos,
información del producto
y registro:
hamiltonbeach.com.mx
Le invitamos a leer cuidadosamente este instructivo antes de usar su aparato.
6-slice Sure-Crisp
®
Air Fryer Toaster Oven
Four grille-pain à 6 tranches avec friture à air Sure-Crisp
®
Horno tostador para 6 rebanadas y freidora de aire Sure-Crisp
®
Parts and Features
Middle Rack Position:
AIR FRY/BAKE/TOAST
ENTER TO WIN $100 TO SPEND
ON WEBSITE
Visit
register.hamiltonbeach.com
PARTICIPEZ POUR COURIR
LA CHANCE DE GAGNER UN
MONTANT DE 100 $ À DÉPENSER
SUR NOTRE SITE WEB
Visitez le
register.hamiltonbeach.com
INGRESE PARA TENER LA
OPORTUNIDAD DE GANAR $100
PARA GASTAR EN NUESTRO
SITIO WEB
Visite
register.hamiltonbeach.com
Open to US customers only • Ce concours s’adresse aux clients des États-Unis
seulement • Este concurso está disponible solo a clientes de los Estados Unidos
How to Use
w WARNING
Fire Hazard.
• If contents ignite, do not open oven door. Unplug toaster oven and allow contents to stop burning and cool
before opening door.
• Do not use oven cooking bags.
• Always allow at least 1 inch (2.5 cm) between food and heating element.
• Always unplug toaster oven when not in use.
Before first use: Most heating appliances produce an odor and/or smoke when used the first time. Plug Oven into
an outlet. Turn Temperature Dial to 450°F (232°C). Heat at this temperature for 10 minutes. Odor should not be
present after this initial preheating. Wash all removable oven parts as shown above in hot, soapy water. Rinse
and dry.
AIR FRY Mode ( )
Use AIR FRY Mode to crisp foods using little added oil. Foods may need to be flipped, stirred, or rotated halfway
through cooking. AIR FRY Mode cooks and browns evenly by circulating forced hot air which crisps food. For
faster cooking, preheat Oven to reduce cooking time. Rack position used to air fry depends on the size of the food
to be cooked. Check food for doneness before recommended packaging cook time.
1. Plug into outlet. Rotate Function Dial to Air Fry ( ).
2. Insert Oven Rack. Add food to Air Frying Basket.
Place Basket into Baking/Broiling Pan on Oven Rack.
Make sure food is at least 1 inch (2.5 cm) from
heating element.
3. Turn Temperature Dial to Air Fry position.
4. Rotate Timer clockwise past 10, then to the desired
cooking time. Or, rotate counterclockwise to Stay On
while pressing and holding buttons on side of Dial.
5. If time is selected, Timer will sound when selected
time is complete. If Stay On is selected, rotate Timer
to OFF ( ) to end cycle at any time.
6. Unplug.
Cooking Guide
Sure-Crisp
®
Air Fry Mode may require more cooking time than standalone air fryers.
NOTE: Some foods may need to be flipped, stirred, or rotated halfway through cooking.
FOOD AMOUNT MODE TEMPERATURE TIME
Frozen Fries and Snacks
Frozen regular French fries 12 oz. (340 g) AIR FRY AIR FRY 18–20 minutes
Frozen chicken nuggets 1/2 package (16 oz./453 g) AIR FRY AIR FRY 11–13 minutes
Frozen breaded chicken tenders about 12 strips (16 oz./453 g) AIR FRY AIR FRY 18–20 minutes
Vegetables
Cauliflower 1 small head (14 oz./397 g) cut
into florets
AIR FRY AIR FRY 13–15 minutes
Fresh potato fries 2 medium potatoes AIR FRY AIR FRY 25–30 minutes
Meat & Poultry
Fresh whole chicken wings
6 whole wings AIR FRY AIR FRY 25–30 minutes
Fresh chicken tenders 1 lb. (454 g) AIR FRY AIR FRY 16–18 minutes
Hamburger (1/2-inch thick
[1.3 cm]) 80% lean, 20% fat
2 burgers AIR FRY AIR FRY 20–25 minutes
Hamburger (1/2-inch thick
[1.3 cm]) 80% lean, 20% fat
4 (4 oz./113 g each) burgers BROIL BROIL 14–16 minutes
Steak (3/4-inch [1.9 cm] thick) 10 oz. (283 g) AIR FRY AIR FRY 15–20 minutes
Steak (3/4-inch [1.9 cm] thick) 10 oz. (283 g) BROIL BROIL 14–18 minutes
Fish & Seafood
Fresh fish fillets 2 (5 oz./142 g each) fillets AIR FRY AIR FRY 10–12 minutes
Bakery & Desserts
Refrigerated biscuits 4 biscuits BAKE 350°F (177°C) 8–10 minutes
Yellow cake 1 cake layer (8 inches) BAKE 350°F (177°C) 24–26 minutes
Sheet Pan Supper
Pork Tenderloin & Veggies 1 lb. pork tenderloin; 2 large
carrots, sliced 1/2-inch thick; 2
large potatoes, cut into cubes;
1/2 small sweet onion, cut in thin
wedges; 1 tsp steak seasoning;
1 tbsp olive oil; salt and pepper
to taste; 1/2 cup apricot jam; 1
tbsp balsamic vinegar
AIR FRY AIR FRY 30 minutes
*Times are a guide for different types of foods which vary in cook time. Cook food until desired crispness.
NOTE: Cooking times are based on a preheated Oven.
Sure-Crisp
®
Air Frying Tips From Our Test Kitchen
• Sure-Crisp
®
AIR FRY Mode may require more cooking time than standalone air fryers.
• Always use Baking/Broiling Pan on rack under Air Frying Basket to catch drips.
• Arrange foods in a single, even layer in Air Frying Basket.
• Most foods (larger/thicker) may need to be flipped, stirred, or rotated during cooking.
• Breadcrumbs make crunchy air fried coatings. Avoid sauces or batters.
• Rack position used to air fry depends on size of food to be cooked. Use Middle Rack Position for most foods.
Keep at least 1 inch (2.5 cm) between food and heating elements.
• Do not line Air Frying Basket; that blocks air flow. Do line Baking/Broiling Pan under Basket for easy cleanup.
• Preheat Oven for shorter cook times/improved crispness.
• Cut uniform-sized pieces for even cooking results.
• A light spritz of cooking oil before cooking provides crispier texture, especially for fresh foods.
• Review food packaging-suggested cook times and adjust time for desired crispness.
• Avoid opening Oven door while cooking frozen French fries or chicken nuggets until cooking cycle is nearly
done.
• Check food for desired doneness before end of cooking cycle. Add or reduce cooking time as needed
• For best results when air frying, set temperature to AIR FRY ( ).
BAKE Mode ( )
Use BAKE Mode for cakes, casseroles, cookies and roasting meats, poultry or vegetables. Place Oven Rack in
Middle or Bottom Rack Position. Preheating Oven for 5 minutes is necessary for BAKE Mode.
1. Plug into outlet. Turn Temperature Dial to desired
temperature, then rotate Function Dial to BAKE ( ).
2. Rotate Timer clockwise past 10, then back to “dark
toast” ( ) to preheat Oven for 5 minutes before
beginning to bake.
3. After Oven is preheated, set Timer to desired time by
rotating clockwise past 10, then to the desired baking
time. Or, rotate counterclockwise to Stay On while
pressing and holding buttons on side of Dial.
4. Rotate Timer to OFF ( ) to end cycle at any time.
5. Unplug.
Stay On Function
The Oven can be set to stay on by turning Timer to Stay On while pressing and holding buttons on side of Dial.
BROIL Mode ( )
Place Oven Rack in Oven. Use Top Rack Position for faster broiling times. Middle Rack Position for browning
casserole tops, toasting sandwiches, or melting cheese on bread. Bottom Rack Position for foods needing longer
broiling times, like chicken and thick cuts of meat. Place Baking/Broiling Pan on Oven Rack. Place in Oven. No
preheating necessary. Food must be a minimum of 1 inch (2.5 cm) from heating elements.
1. Plug into outlet. Turn Temperature Dial to AIR FRY/
TOAST/BROIL and Function Dial to BROIL ( ).
2. Rotate Timer clockwise past 10, then to the desired
broiling time. Or, rotate Timer counterclockwise to
Stay On while pressing and holding buttons on side
of Dial. Turn foods when browned or halfway through
cooking time. Oven broils on high temperature and
may not be adjusted.
3. Rotate Timer to OFF ( ) to end cycle at any time.
4. Unplug.
TOAST Mode ( )
Use for browning and toasting breads, bagels, and English muffins. Place food cut/split side facing up. Rack should
be in middle position.
1. Plug into outlet. Turn Temperature Dial to AIR FRY/
TOAST/BROIL and then rotate Function Dial to
TOAST ( ).
2. Select shade of browning by turning Timer clockwise
past 10, then back to desired toast color. A bell will
sound when Toast cycle is complete.
3. Rotate Timer to OFF ( ) to end cycle at any time.
4. Unplug.
TIP: The number of slices of bread and bread
freshness will affect toast color. For example, toasting
4 slices of bread will require a darker toast color
setting than 2 slices of bread. Adjust Toast based on
desired color and number of slices.
Care and Cleaning
w WARNING
Electrical Shock Hazard. Do not clean with metal scouring pads. Pieces can break off pad and
touch electrical parts.
Oven should be cleaned regularly for best performance and long life. Regular cleaning will also reduce the risk of
fire hazard.
1. Unplug and allow to cool completely.
2. To clean inside of Oven, wipe Oven walls, bottom
of Oven, and glass door with a damp, soapy cloth.
Repeat with a damp, clean cloth. For stubborn stains,
use a plastic scouring pad.
3. Wipe outside of Oven with a damp cloth. Do not use
abrasive cleansers or metal scouring pads.
4. Wash Slide-Out Crumb Tray, Baking/Broiling Pan, Air
Frying Basket, and Oven Rack in hot, soapy water.
Rinse and dry.
Troubleshooting
Oven will not heat.
• Check to make sure electrical outlet is working and
Oven is plugged in. Turn Temperature Dial to 350°F
(177°C). Turn Function Dial to BAKE; then turn Timer
counterclockwise to Stay On while pressing and
holding buttons on side of Dial.
Moisture forms on inside of Oven door when
toasting.
• This is normal when toasting in a toaster oven.
Moisture is slower to escape from a toaster oven
than from a toaster. The amount of moisture will
differ between fresh bread, bagels, and frozen
pastries.
An odor and smoke come from Oven.
• Smoke and odor are normal during first use of most
heating appliances. These will not be present after
initial heating period.
Oven will not TOAST.
• Check to make sure outlet is working and Oven
is plugged in. Turn Temperature Dial to AIR FRY/
TOAST/BROIL. Turn Function Dial to TOAST; then
rotate Timer clockwise past 10 and then back to the
desired toast color.
Some foods burn and some are not done.
• Adjust Oven Rack position to center food in Oven.
• Adjust Oven temperature or cooking time for best
results with your recipes.
Limited Warranty
This warranty applies to products purchased and
used in the U.S. and Canada. This is the only express
warranty for this product and is in lieu of any other
warranty or condition.
This product is warranted to be free from defects in
material and workmanship for a period of five (5) years
from the date of original purchase in Canada and one
(1) year from the date of original purchase in the U.S.
During this period, your exclusive remedy is repair
or replacement of this product or any component
found to be defective, at our option; however, you
are responsible for all costs associated with returning
the product to us and our returning a product or
component under this warranty to you. If the product
or component is no longer available, we will replace
with a similar one of equal or greater value.
This warranty does not cover glass, filters, wear from
normal use, use not in conformity with the printed
directions, or damage to the product resulting from
accident, alteration, abuse, or misuse. This warranty
extends only to the original consumer purchaser or
gift recipient. Keep the original sales receipt, as proof
of purchase is required to make a warranty claim.
This warranty is void if the product is used for other
than single-family household use or subjected to any
voltage and waveform other than as specified on the
rating label (e.g., 120 V ~ 60 Hz).
We exclude all claims for special, incidental, and
consequential damages caused by breach of express
or implied warranty. All liability is limited to the
amount of the purchase price. Every implied warranty,
including any statutory warranty or condition of
merchantability or fitness for a particular purpose, is
disclaimed except to the extent prohibited by law, in
which case such warranty or condition is limited to
the duration of this written warranty. This warranty
gives you specific legal rights. You may have other
legal rights that vary depending on where you live.
Some states or provinces do not allow limitations
on implied warranties or special, incidental, or
consequential damages, so the foregoing limitations
may not apply to you.
To make warranty claim, do not return this appliance
to the store. Please write Hamilton Beach Brands, Inc.,
Customer Service Department, 4421 Waterfront Dr.,
Glen Allen, VA 23060, or visit hamiltonbeach.com/
customer-service in the U.S. or hamiltonbeach.ca/
customer-service in Canada. For faster service, locate
the model, type, and series numbers on your appliance.
ICON MODE
BAKE
BROIL
TOAST (up to 6 slices)
AIR FRY
w AVERTISSEMENT
Danger d’incendie.
• Si le contenu de votre grille-pain se met à brûler, n’ouvrez jamais la porte du grille-pain. Débranchez
l’appareil et laisser le contenu s’éteindre et refroidir avant d’ouvrir la porte.
• Ne pas utiliser l’appareil sans surveillance.
• N’utilisez jamais avec des sacs de cuisson au four.
• Ne pas chauffer d’aliments dans des plats de plastique.
• Ne pas faire chauffer les coquilles à taco dans le four grille-pain. Toujours faire réchauffer dans un four
conventionnel.
• Toujours laisser un espace de 2,5 cm (1 po) entre les aliments et l’élément chauffant.
• Suivre les instructions du fournisseur de produits alimentaires.
• Débranchez toujours votre grille-pain quand vous ne l’utilisez pas.
• Un nettoyage régulier réduit le danger d’incendie.
PRÉCAUTIONS IMPORTANTES
Pour utiliser un appareil électroménager, vous devez toujours prendre des mesures élémentaires de sécurité pour
réduire le risque d’incendie, d’électrocution et/ou de blessure corporelle, en particulier les mesures suivantes :
1.
Lire toutes les instructions.
2.
Cet appareil n’est pas destiné à être utilisé par des
personnes (y compris les enfants) dont les capacités
physiques, sensorielles ou mentales sont réduites,
ou manquant d’expérience et de connaissance,
sauf si elles sont étroitement surveillées et instruites
sur l’utilisation de l’appareil par une personne
responsable de leur sécurité.
3.
Une surveillance étroite est requise pour tout
appareil utilisé par ou près des enfants. Le nettoyage
et l’entretien ne doit pas fait par des enfants à moins
d’être sous supervision. Surveiller que les enfants ne
jouent pas avec l’appareil.
4.
Ne pas toucher les surfaces chaudes. Utiliser les
poignées ou boutons.
5.
Pour protéger contre le risque de choc électrique, ne
pas immerger le cordon, la fiche ou le four grille-pain
dans l’eau ou autre liquide.
6.
Débrancher l’appareil de la prise de courant
électrique lorsqu’il n’est pas utilisé et avant un
nettoyage. Le laisser refroidir avant le nettoyage
et avant d’y placer ou d’y enlever des pièces. Pour
débrancher, saisir la fiche et la retirer de la prise. Ne
pas tirer sur le cordon d’alimentation.
7.
Ne pas faire fonctionner un appareil électroménager
avec un cordon ou une fiche endommagée, ou
lorsque l’appareil ne fonctionne pas bien ou a été
échappé ou endommagé d’une manière quelconque.
Le remplacement et la réparation du cordon
d’alimentation doivent être faits par le fabricant, son
agent de service ou toute personne qualifiée de
façon à éviter tout danger. Veuillez communiquer
avec le service à la clientèle pour obtenir de
l’information concernant l’inspection, la réparation ou
le réglage, comme précisé dans la garantie limitée.
8.
L’utilisation d’accessoires non recommandés par le
fabricante d’appareil peut causer des blessures.
9.
Ne pas utiliser à l’extérieur.
10.
Ne pas laisser le cordon pendre du bord d’une table
ou d’un comptoir, ou toucher des surfaces chaudes.
11.
Ne pas placer l’appareil sur ou près d’un brûleur
chaud à gaz ou d’un élément électrique, ou dans un
four chauffé.
12.
Une précaution extrême doit être employée lors
du déplacement d’un appareil électroménager
contenant de l’huile chaude ou autre liquide chaud.
13.
Pour débrancher l’appareil, tourner la minuterie à
OFF ( /arrêt), ensuite retirer la fiche de la prise de
courant murale.
14.
Une prudence extrême s’impose lors de
l’enlèvement du plateau ou de la vidange de graisse
chaude.
15.
Ne pas nettoyer avec des tampons à récurer en
métal. Des particules peuvent se détacher du
tampon et toucher les pièces électriques, créant un
risque de choc électrique.
16.
Des aliments de grosseur excessive ou des
ustensiles de métal ne doivent pas être insérés dans
un four grille-pain, car ils peuvent créer un incendie
ou un risque de choc électrique.
17.
Le pain peut brûler. Un incendie peut survenir si le
four grille-pain est recouvert ou en contact avec un
matériau inflammable, y compris rideaux, tentures,
murs, armoires en surplomb, produits en papier ou
en plastique, serviettes en tissu et autres articles
semblables, lorsqu’il fonctionne. Ne rangez aucun
article sur le dessus de l’appareil lorsqu’il fonctionne.
18.
Une grande précaution doit être prise lors de
l’utilisation de contenants construits en matériaux
autre que le métal ou le verre.
19.
Ne pas remiser des matériaux autres que les
accessoires recommandés par le fabricant dans cet
appareil lorsqu’il n’est pas utilisé.
20.
Ne pas placer l’un des matériaux suivants dans le
four : papier, carton, plastique et articles semblables.
21.
Ne pas couvrir le plateau ramasse-miettes amovible
ou toute pièce du four avec du papier métallique.
Ceci causera un surchauffe du four.
22.
Pour éteindre le four, tourner la minuterie à OFF
( /arrêt). Voir la section « Pièces et caractéristiques ».
23.
Ne pas placer les yeux ou le visage près de la porte
en verre renforcé de sécurité, au cas où le verre de
sécurité se briserait.
24.
Toujours utiliser cet appareil avec le ramasse-miettes
amovible bien en place.
25.
Ne pas utiliser cet appareil pour tout autre usage que
celui recommandé.
26.
Nettoyer l’intérieur du four avec précaution. Ne pas
égratigner ou endommager le tube de l’élément
chauffant.
27.
Ne pas faire fonctionner le four sans supervision.
28.
Ne pas faire fonctionner cet appareil avec une
minuterie externe ou un système de télécommande
distinct.
29.
ATTENTION : SURFACE CHAUDE. La
température des surfaces extérieures sera
plus élevée pendant le fonctionnement de
l’appareil.
CONSERVER CES INSTRUCTIONS
Autres consignes de sécurité pour le consommateur
Cet appareil est destiné à un usage domestique uniquement.
w AVERTISSEMENT
Risque de choc électrique :
Cet appareil est fourni avec une fiche polarisée (une broche
large) pour réduire le risque d’électrocution. Cette fiche
n’entre que dans un seul sens dans une prise polarisée. Ne
contrecarrez pas l’objectif sécuritaire de cette fiche en la
modifiant de quelque manière que ce soit ou en utilisant un
adaptateur. Si vous ne pouvez pas insérer complètement la
fiche dans la prise, inversez la fiche. Si elle refuse toujours
de s’insérer, faire remplacer la prise par un électricien.
La longueur du cordon installé sur cet appareil a été
sélectionnée afin de réduire les risques d’enchevêtrement
ou de faux pas causés par un fil trop long. L’utilisation
d’une rallonge approuvée est permise si le cordon est trop
court. Les caractéristiques électriques de la rallonge doivent
être équivalentes ou supérieures aux caractéristiques de
l’appareil. Prendre toutes les précautions nécessaires pour
installer la rallonge de manière à ne pas la faire courir sur le
comptoir ou sur une table pour éviter qu’un enfant ne tire
sur le cordon ou trébuche accidentellement.
Cet appareil est doté d’une porte en verre renforcé de
sécurité. Le verre renforcé est quatre fois plus fort que
le verre ordinaire et plus résistant aux bris. Le verre
renforcé peut se briser, mais il se brise en pièces sans
bords coupants. Il faut prendre soin d’éviter d’égratigner la
surface de la porte ou d’endommager le contour. Si la porte
a une égratignure ou un bris, composer notre numéro
d’assistance à la clientèle.
Toujours débrancher votre four grille-pain lorsqu’il n’est pas
utilisé.
Pour commander des pièces :
hamiltonbeach.ca/parts
1. Cadran de températur
2. Cadran de fonction
3. Cadran de minuterie/rôties
4. Têmoin lumineux ON (marche)
5. Ramasse-miettes amovible
6. Grille du four
7. Plateau pour cuisson/grillage
8. Panier pour friture à air
Position pour grille supérieure :
GRILLER/RÔTIES (BAGEL)
Position pour grille inférieure :
CUISSON
Pièces et caractéristiques
Position pour grille du milieu :
FRITURE À AIR/CUISSON/
RÔTIES
ICÔNET MODE
CUISSON
GRILLER
RÔTIES (jusqu’à 6 tranches)
FRITURE À AIR
Utilisation
w AVERTISSEMENT
Danger d’incendie.
• Si le contenu s’enflamme, ne pas ouvrir la porte. Débrancher le four grille-pain et laisser le contenu s’éteindre et
refroidir avant d’ouvrir la porte.
• Ne pas utiliser des sacs de cuisson au four.
• Toujours garder au moins 2,5 cm (1 po) entre les aliments et l’élément chauffant.
• Toujours débrancher le four lorsqu’il n’est pas utilisé.
Avant la première utilisation : La plupart des appareils ménagers qui chauffent produisent une odeur et/ou une
fumée lors de l’utilisation pour la première fois. Brancher le four grille-pain dans une prise de courant. Tourner
le cadran de température à 232 °C (450 °F). Chauffer à cette température pendant 10 minutes. L’odeur ne devrait
pas survenir après ce préchauffage initial. Laver toutes les pièces amovibles du four montrées ci-dessus à l’eau
chaude savonneuse. Rincer et sécher.
Mode FRITURE À AIR ( )
Utiliser le mode friture à air pour rendre les aliments plus croustillants en ajoutant très peu d’huile. Certains
aliments doivent être retournés, remués ou tournés à la moitié de la cuisson. Le mode de friture à air permet de
cuire et griller uniformément à l’aide d’une circulation d’air chaud forcé qui rend les aliments croustillants. Pour une
cuisson plus rapide, veuillez préchauffer le four afin de réduire la durée de cuisson. La position de la grille utilisée
en mode de friture à air dépend de la taille des aliments à faire cuire. Vérifier la cuisson des aliments avant la fin de
la durée de cuisson recommandée sur l’emballage.
1. Brancher dans la prise de courant. Tourner le cadran
de fonction jusqu’au mode FRITURE À AIR (/ ).
2. Insérer la grille du four. Déposer les aliments dans
le panier pour friture à air. Placer le panier dans le
plateau pour cuisson/grillage sur la grille du four.
Veiller à ce que les aliments se trouvent à au moins 1
po (2,5 cm) de l’élément chauffant.
3. Tourner le cadran de température à la position de
friture à air.
4. Tourner le cadran de minuterie dans le sens horaire
au-delà de 10 et ensuite jusqu’à la durée de cuisson
souhaitée. Ou tourner la minuterie à la position Stay
On (rester allumé) en appuyant et en maintenant les
boutons situés sur le côté du cadran.
5. Si une durée a été sélectionnée, la minuterie émettra
une sonorité lorsque la durée sélectionnée est
écoulée. Si vous avez sélectionné la fonction Stay On
(rester allumer) tourner la minuterie à OFF ( /arrêt)
pour arrêter le cycle en tout temps.
6. Débrancher.
Guide de cuisson
Le mode de friture à air Sure-Crisp
®
pourrait demander un temps de cuisson plus long que celui des friteuses à air
indépendantes.
REMARQUE : Certains aliments pourraient devoir être retournés, remués ou tournés à mi-cuisson.
ALIMENT QUANTITÉ MODE TEMPÉRATURE TEMPS
Frites congelées et collations
Frites régulières congelées 340 g (12 oz.)
FRITURE À AIR
FRITURE À AIR 18–20 minutes
Croquettes de poulet 1/2 paquet (453 g (16 oz.)
FRITURE À AIR
FRITURE À AIR 11–13 minutes
Filets de poitrine de poulet
panés, congelés
environ 12 lanières
(453 g (16 oz.)
FRITURE À AIR
FRITURE À AIR 18–20 minutes
Légumes
Chou-fleur 1 petite tête (14 oz [397 g])
coupée en fleurettes
FRITURE À AIR
FRITURE À AIR 13–15 minutes
Frites de pommes de terre
fraîches
2 pommes de terre moyennes
FRITURE À AIR
FRITURE À AIR 25–30 minutes
Viandes et volailles
Ailes de poulet entières, fraîches
6 ailes entières
FRITURE À AIR FRITURE À AIR
25–30 minutes
Filets de poitrine de poulet frais 454 g (1 lb.)
FRITURE À AIR FRITURE À AIR
16–18 minutes
Hamburger (1,3 cm [1/2” ] épais)
80 % viande maigre, 20 %
viande grasse
2 hamburger
FRITURE À AIR FRITURE À AIR
20–25 minutes
Hamburger (1,3 cm [1/2” ] épais)
80 % viande maigre, 20 %
viande grasse
4 (113 g/ 4 oz. chaque)
hamburger
GRILLER GRILLER 14–16 minutes
Steak (¾ po [1,9 cm] d’épaisseur) 283 g (10 oz.)
FRITURE À AIR FRITURE À AIR
15–20 minutes
Steak (¾ po [1,9 cm] d’épaisseur) 283 g (10 oz.) GRILLER GRILLER 14–18 minutes
w WARNING
Fire Hazard.
• If contents ignite, do not open oven door. Unplug oven and allow contents to stop burning and cool before
opening door.
• Do not operate oven unattended.
• Do not use with oven cooking bags.
• Do not heat foods in plastic containers.
• Do not heat taco shells in toaster oven. Always use full-size conventional oven.
• Always allow at least 1 inch (2.5 cm) between food and heating element.
• Follow food manufacturer’s instructions.
• Always unplug oven when not in use.
• Regular cleaning reduces risk of fire hazard.
IMPORTANT SAFEGUARDS
When using electrical appliances, basic safety precautions should always be followed to reduce the risk of fire,
electric shock, and/or injury to persons, including the following:
1. Read all instructions.
2. This appliance is not intended for use by persons
(including children) with reduced physical, sensory,
or mental capabilities, or lack of experience and
knowledge, unless they are closely supervised and
instructed concerning use of the appliance by a
person responsible for their safety.
3. Close supervision is necessary when any
appliance is used by or near children. Cleaning and
user maintenance shall not be made by children
unless they are supervised. Children should be
supervised to ensure that they do not play with the
appliance.
4. Do not touch hot surfaces. Use handles or knobs.
5. To protect against electrical shock, do not immerse
cord, plug, or oven in water or other liquid.
6. Unplug from outlet when not in use and before
cleaning. Allow to cool before cleaning appliance
and putting on or taking off parts. To unplug, grasp
the plug and pull from the outlet. Never pull from
the power cord.
7. Do not operate any appliance with a damaged
supply cord or plug, or after the appliance
malfunctions or has been dropped or damaged
in any manner. Supply cord replacement and
repairs must be conducted by the manufacturer,
its service agent, or similarly qualified persons
in order to avoid a hazard. Contact Customer
Service for information on examination, repair, or
adjustment as set forth in the Limited Warranty.
8. The use of accessory attachments not
recommended by the appliance manufacturer may
cause injuries.
9. Do not use outdoors.
10. Do not let cord hang over edge of table or counter
or touch hot surfaces.
11. Do not place on or near a hot gas or electric
burner or in a heated oven.
12. Extreme caution must be used when moving an
appliance containing hot oil or other hot liquids.
13. To disconnect, turn all controls to OFF ( ); then
remove plug from wall outlet.
14. Use extreme caution when removing pan or
disposing of hot grease.
15. Do not clean with metal scouring pads. Pieces
can break off the pad and touch electrical parts,
creating a risk of electrical shock.
16. Oversize foods or metal utensils must not be
inserted in an oven as they may create a fire or risk
of electric shock.
17. The bread may burn. A fire may occur if toaster
oven is covered or touching flammable material,
including curtains, draperies, walls, overhead
cabinets, paper or plastic products, cloth towels,
and the like, when in operation. Do not store any
item on top of the appliance when in operation.
18. Extreme caution should be exercised when using
containers constructed of materials other than
metal or glass.
19. Do not store any materials, other than
manufacturer-recommended accessories, in this
oven when not in use.
20. Do not place any of the following materials in the
oven: paper, cardboard, plastic, and the like.
21. Do not cover crumb tray or any part of the oven
with metal foil. This will cause overheating of the
oven.
22. To turn oven off, turn Timer to OFF ( ) position.
See “Parts and Features” section.
23. Do not place eyes or face in close proximity with
tempered safety glass door, in the event that the
safety glass breaks.
24. Always use appliance with crumb tray securely in
place.
25. Do not use appliance for other than intended use.
26. Clean oven interior carefully. Do not scratch or
damage heating element tube.
27. Do not operate unattended.
28. Do not operate the appliance by means of an
external timer or separate remote-control system.
29. CAUTION: HOT SURFACE. The temperature
of accessible surfaces may be high when
the appliance is operating.
SAVE THESE INSTRUCTIONS
Other Consumer Safety Information
This appliance is intended for household use only.
w WARNING
Electrical Shock Hazard: This
appliance is provided with a polarized plug (one wide
blade) to reduce the risk of electric shock. The plug
fits only one way into a polarized outlet. Do not defeat
the safety purpose of the plug by modifying the plug
in any way or by using an adapter. If the plug does
not fit fully into the outlet, reverse the plug. If it still
does not fit, have an electrician replace the outlet.
The length of the cord used on this appliance was
selected to reduce the hazards of becoming tangled
in or tripping over a longer cord. If a longer cord is
necessary, an approved extension cord may be used.
The electrical rating of the extension cord must be
equal to or greater than the rating of the appliance.
Care must be taken to arrange the extension cord so
that it will not drape over the countertop or tabletop
where it can be pulled on by children or accidentally
tripped over.
This appliance is equipped with a fully tempered
safety glass door. The tempered glass is four times
stronger than ordinary glass and more resistant to
breakage. Tempered glass can break; however, it
breaks into pieces with no sharp edges. Care must
be taken to avoid scratching door surface or nicking
edges. If the door has a scratch or nick, call our
customer service number.
Always unplug your toaster oven from the outlet
when not in use.
To order parts:
hamiltonbeach.com/parts
1. Temperature Dial
2. Function Dial
3. Toast/Timer Dial
4. ON Indicator Light
5. Slide-Out Crumb Tray
6. Oven Rack
7. Baking/Broiling Pan
8. Air Frying Basket
Top Rack Position:
BROIL/TOAST (BAGEL)
Bottom Rack Position:
BAKE
Read before use | Lire avant utilisation | Lea antes de usar.
For Questions:
For recipes, tips,
product information and
registration:
hamiltonbeach.com
Pour des questions :
Pour des recettes, des conseils,
des renseignements sur le produit
et l’enregistrement :
hamiltonbeach.ca
Para preguntas:
Para recetas, consejos,
información del producto
y registro:
hamiltonbeach.com.mx
Le invitamos a leer cuidadosamente este instructivo antes de usar su aparato.
6-slice Sure-Crisp
®
Air Fryer Toaster Oven
Four grille-pain à 6 tranches avec friture à air Sure-Crisp
®
Horno tostador para 6 rebanadas y freidora de aire Sure-Crisp
®
Parts and Features
Middle Rack Position:
AIR FRY/BAKE/TOAST
ENTER TO WIN $100 TO SPEND
ON WEBSITE
Visit
register.hamiltonbeach.com
PARTICIPEZ POUR COURIR
LA CHANCE DE GAGNER UN
MONTANT DE 100 $ À DÉPENSER
SUR NOTRE SITE WEB
Visitez le
register.hamiltonbeach.com
INGRESE PARA TENER LA
OPORTUNIDAD DE GANAR $100
PARA GASTAR EN NUESTRO
SITIO WEB
Visite
register.hamiltonbeach.com
Open to US customers only • Ce concours s’adresse aux clients des États-Unis
seulement • Este concurso está disponible solo a clientes de los Estados Unidos
How to Use
w WARNING
Fire Hazard.
• If contents ignite, do not open oven door. Unplug toaster oven and allow contents to stop burning and cool
before opening door.
• Do not use oven cooking bags.
• Always allow at least 1 inch (2.5 cm) between food and heating element.
• Always unplug toaster oven when not in use.
Before first use: Most heating appliances produce an odor and/or smoke when used the first time. Plug Oven into
an outlet. Turn Temperature Dial to 450°F (232°C). Heat at this temperature for 10 minutes. Odor should not be
present after this initial preheating. Wash all removable oven parts as shown above in hot, soapy water. Rinse
and dry.
AIR FRY Mode ( )
Use AIR FRY Mode to crisp foods using little added oil. Foods may need to be flipped, stirred, or rotated halfway
through cooking. AIR FRY Mode cooks and browns evenly by circulating forced hot air which crisps food. For
faster cooking, preheat Oven to reduce cooking time. Rack position used to air fry depends on the size of the food
to be cooked. Check food for doneness before recommended packaging cook time.
1. Plug into outlet. Rotate Function Dial to Air Fry ( ).
2. Insert Oven Rack. Add food to Air Frying Basket.
Place Basket into Baking/Broiling Pan on Oven Rack.
Make sure food is at least 1 inch (2.5 cm) from
heating element.
3. Turn Temperature Dial to Air Fry position.
4. Rotate Timer clockwise past 10, then to the desired
cooking time. Or, rotate counterclockwise to Stay On
while pressing and holding buttons on side of Dial.
5. If time is selected, Timer will sound when selected
time is complete. If Stay On is selected, rotate Timer
to OFF ( ) to end cycle at any time.
6. Unplug.
Cooking Guide
Sure-Crisp
®
Air Fry Mode may require more cooking time than standalone air fryers.
NOTE: Some foods may need to be flipped, stirred, or rotated halfway through cooking.
FOOD AMOUNT MODE TEMPERATURE TIME
Frozen Fries and Snacks
Frozen regular French fries 12 oz. (340 g) AIR FRY AIR FRY 18–20 minutes
Frozen chicken nuggets 1/2 package (16 oz./453 g) AIR FRY AIR FRY 11–13 minutes
Frozen breaded chicken tenders about 12 strips (16 oz./453 g) AIR FRY AIR FRY 18–20 minutes
Vegetables
Cauliflower 1 small head (14 oz./397 g) cut
into florets
AIR FRY AIR FRY 13–15 minutes
Fresh potato fries 2 medium potatoes AIR FRY AIR FRY 25–30 minutes
Meat & Poultry
Fresh whole chicken wings
6 whole wings AIR FRY AIR FRY 25–30 minutes
Fresh chicken tenders 1 lb. (454 g) AIR FRY AIR FRY 16–18 minutes
Hamburger (1/2-inch thick
[1.3 cm]) 80% lean, 20% fat
2 burgers AIR FRY AIR FRY 20–25 minutes
Hamburger (1/2-inch thick
[1.3 cm]) 80% lean, 20% fat
4 (4 oz./113 g each) burgers BROIL BROIL 14–16 minutes
Steak (3/4-inch [1.9 cm] thick) 10 oz. (283 g) AIR FRY AIR FRY 15–20 minutes
Steak (3/4-inch [1.9 cm] thick) 10 oz. (283 g) BROIL BROIL 14–18 minutes
Fish & Seafood
Fresh fish fillets 2 (5 oz./142 g each) fillets AIR FRY AIR FRY 10–12 minutes
Bakery & Desserts
Refrigerated biscuits 4 biscuits BAKE 350°F (177°C) 8–10 minutes
Yellow cake 1 cake layer (8 inches) BAKE 350°F (177°C) 24–26 minutes
Sheet Pan Supper
Pork Tenderloin & Veggies 1 lb. pork tenderloin; 2 large
carrots, sliced 1/2-inch thick; 2
large potatoes, cut into cubes;
1/2 small sweet onion, cut in thin
wedges; 1 tsp steak seasoning;
1 tbsp olive oil; salt and pepper
to taste; 1/2 cup apricot jam; 1
tbsp balsamic vinegar
AIR FRY AIR FRY 30 minutes
*Times are a guide for different types of foods which vary in cook time. Cook food until desired crispness.
NOTE: Cooking times are based on a preheated Oven.
Sure-Crisp
®
Air Frying Tips From Our Test Kitchen
• Sure-Crisp
®
AIR FRY Mode may require more cooking time than standalone air fryers.
• Always use Baking/Broiling Pan on rack under Air Frying Basket to catch drips.
• Arrange foods in a single, even layer in Air Frying Basket.
• Most foods (larger/thicker) may need to be flipped, stirred, or rotated during cooking.
• Breadcrumbs make crunchy air fried coatings. Avoid sauces or batters.
• Rack position used to air fry depends on size of food to be cooked. Use Middle Rack Position for most foods.
Keep at least 1 inch (2.5 cm) between food and heating elements.
• Do not line Air Frying Basket; that blocks air flow. Do line Baking/Broiling Pan under Basket for easy cleanup.
• Preheat Oven for shorter cook times/improved crispness.
• Cut uniform-sized pieces for even cooking results.
• A light spritz of cooking oil before cooking provides crispier texture, especially for fresh foods.
• Review food packaging-suggested cook times and adjust time for desired crispness.
• Avoid opening Oven door while cooking frozen French fries or chicken nuggets until cooking cycle is nearly
done.
• Check food for desired doneness before end of cooking cycle. Add or reduce cooking time as needed
• For best results when air frying, set temperature to AIR FRY ( ).
BAKE Mode ( )
Use BAKE Mode for cakes, casseroles, cookies and roasting meats, poultry or vegetables. Place Oven Rack in
Middle or Bottom Rack Position. Preheating Oven for 5 minutes is necessary for BAKE Mode.
1. Plug into outlet. Turn Temperature Dial to desired
temperature, then rotate Function Dial to BAKE ( ).
2. Rotate Timer clockwise past 10, then back to “dark
toast” ( ) to preheat Oven for 5 minutes before
beginning to bake.
3. After Oven is preheated, set Timer to desired time by
rotating clockwise past 10, then to the desired baking
time. Or, rotate counterclockwise to Stay On while
pressing and holding buttons on side of Dial.
4. Rotate Timer to OFF ( ) to end cycle at any time.
5. Unplug.
Stay On Function
The Oven can be set to stay on by turning Timer to Stay On while pressing and holding buttons on side of Dial.
BROIL Mode ( )
Place Oven Rack in Oven. Use Top Rack Position for faster broiling times. Middle Rack Position for browning
casserole tops, toasting sandwiches, or melting cheese on bread. Bottom Rack Position for foods needing longer
broiling times, like chicken and thick cuts of meat. Place Baking/Broiling Pan on Oven Rack. Place in Oven. No
preheating necessary. Food must be a minimum of 1 inch (2.5 cm) from heating elements.
1. Plug into outlet. Turn Temperature Dial to AIR FRY/
TOAST/BROIL and Function Dial to BROIL ( ).
2. Rotate Timer clockwise past 10, then to the desired
broiling time. Or, rotate Timer counterclockwise to
Stay On while pressing and holding buttons on side
of Dial. Turn foods when browned or halfway through
cooking time. Oven broils on high temperature and
may not be adjusted.
3. Rotate Timer to OFF ( ) to end cycle at any time.
4. Unplug.
TOAST Mode ( )
Use for browning and toasting breads, bagels, and English muffins. Place food cut/split side facing up. Rack should
be in middle position.
1. Plug into outlet. Turn Temperature Dial to AIR FRY/
TOAST/BROIL and then rotate Function Dial to
TOAST ( ).
2. Select shade of browning by turning Timer clockwise
past 10, then back to desired toast color. A bell will
sound when Toast cycle is complete.
3. Rotate Timer to OFF ( ) to end cycle at any time.
4. Unplug.
TIP: The number of slices of bread and bread
freshness will affect toast color. For example, toasting
4 slices of bread will require a darker toast color
setting than 2 slices of bread. Adjust Toast based on
desired color and number of slices.
Care and Cleaning
w WARNING
Electrical Shock Hazard. Do not clean with metal scouring pads. Pieces can break off pad and
touch electrical parts.
Oven should be cleaned regularly for best performance and long life. Regular cleaning will also reduce the risk of
fire hazard.
1. Unplug and allow to cool completely.
2. To clean inside of Oven, wipe Oven walls, bottom
of Oven, and glass door with a damp, soapy cloth.
Repeat with a damp, clean cloth. For stubborn stains,
use a plastic scouring pad.
3. Wipe outside of Oven with a damp cloth. Do not use
abrasive cleansers or metal scouring pads.
4. Wash Slide-Out Crumb Tray, Baking/Broiling Pan, Air
Frying Basket, and Oven Rack in hot, soapy water.
Rinse and dry.
Troubleshooting
Oven will not heat.
• Check to make sure electrical outlet is working and
Oven is plugged in. Turn Temperature Dial to 350°F
(177°C). Turn Function Dial to BAKE; then turn Timer
counterclockwise to Stay On while pressing and
holding buttons on side of Dial.
Moisture forms on inside of Oven door when
toasting.
• This is normal when toasting in a toaster oven.
Moisture is slower to escape from a toaster oven
than from a toaster. The amount of moisture will
differ between fresh bread, bagels, and frozen
pastries.
An odor and smoke come from Oven.
• Smoke and odor are normal during first use of most
heating appliances. These will not be present after
initial heating period.
Oven will not TOAST.
• Check to make sure outlet is working and Oven
is plugged in. Turn Temperature Dial to AIR FRY/
TOAST/BROIL. Turn Function Dial to TOAST; then
rotate Timer clockwise past 10 and then back to the
desired toast color.
Some foods burn and some are not done.
• Adjust Oven Rack position to center food in Oven.
• Adjust Oven temperature or cooking time for best
results with your recipes.
Limited Warranty
This warranty applies to products purchased and
used in the U.S. and Canada. This is the only express
warranty for this product and is in lieu of any other
warranty or condition.
This product is warranted to be free from defects in
material and workmanship for a period of five (5) years
from the date of original purchase in Canada and one
(1) year from the date of original purchase in the U.S.
During this period, your exclusive remedy is repair
or replacement of this product or any component
found to be defective, at our option; however, you
are responsible for all costs associated with returning
the product to us and our returning a product or
component under this warranty to you. If the product
or component is no longer available, we will replace
with a similar one of equal or greater value.
This warranty does not cover glass, filters, wear from
normal use, use not in conformity with the printed
directions, or damage to the product resulting from
accident, alteration, abuse, or misuse. This warranty
extends only to the original consumer purchaser or
gift recipient. Keep the original sales receipt, as proof
of purchase is required to make a warranty claim.
This warranty is void if the product is used for other
than single-family household use or subjected to any
voltage and waveform other than as specified on the
rating label (e.g., 120 V ~ 60 Hz).
We exclude all claims for special, incidental, and
consequential damages caused by breach of express
or implied warranty. All liability is limited to the
amount of the purchase price. Every implied warranty,
including any statutory warranty or condition of
merchantability or fitness for a particular purpose, is
disclaimed except to the extent prohibited by law, in
which case such warranty or condition is limited to
the duration of this written warranty. This warranty
gives you specific legal rights. You may have other
legal rights that vary depending on where you live.
Some states or provinces do not allow limitations
on implied warranties or special, incidental, or
consequential damages, so the foregoing limitations
may not apply to you.
To make warranty claim, do not return this appliance
to the store. Please write Hamilton Beach Brands, Inc.,
Customer Service Department, 4421 Waterfront Dr.,
Glen Allen, VA 23060, or visit hamiltonbeach.com/
customer-service in the U.S. or hamiltonbeach.ca/
customer-service in Canada. For faster service, locate
the model, type, and series numbers on your appliance.
ICON MODE
BAKE
BROIL
TOAST (up to 6 slices)
AIR FRY
w AVERTISSEMENT
Danger d’incendie.
• Si le contenu de votre grille-pain se met à brûler, n’ouvrez jamais la porte du grille-pain. Débranchez
l’appareil et laisser le contenu s’éteindre et refroidir avant d’ouvrir la porte.
• Ne pas utiliser l’appareil sans surveillance.
• N’utilisez jamais avec des sacs de cuisson au four.
• Ne pas chauffer d’aliments dans des plats de plastique.
• Ne pas faire chauffer les coquilles à taco dans le four grille-pain. Toujours faire réchauffer dans un four
conventionnel.
• Toujours laisser un espace de 2,5 cm (1 po) entre les aliments et l’élément chauffant.
• Suivre les instructions du fournisseur de produits alimentaires.
• Débranchez toujours votre grille-pain quand vous ne l’utilisez pas.
• Un nettoyage régulier réduit le danger d’incendie.
PRÉCAUTIONS IMPORTANTES
Pour utiliser un appareil électroménager, vous devez toujours prendre des mesures élémentaires de sécurité pour
réduire le risque d’incendie, d’électrocution et/ou de blessure corporelle, en particulier les mesures suivantes :
1.
Lire toutes les instructions.
2.
Cet appareil n’est pas destiné à être utilisé par des
personnes (y compris les enfants) dont les capacités
physiques, sensorielles ou mentales sont réduites,
ou manquant d’expérience et de connaissance,
sauf si elles sont étroitement surveillées et instruites
sur l’utilisation de l’appareil par une personne
responsable de leur sécurité.
3.
Une surveillance étroite est requise pour tout
appareil utilisé par ou près des enfants. Le nettoyage
et l’entretien ne doit pas fait par des enfants à moins
d’être sous supervision. Surveiller que les enfants ne
jouent pas avec l’appareil.
4.
Ne pas toucher les surfaces chaudes. Utiliser les
poignées ou boutons.
5.
Pour protéger contre le risque de choc électrique, ne
pas immerger le cordon, la fiche ou le four grille-pain
dans l’eau ou autre liquide.
6.
Débrancher l’appareil de la prise de courant
électrique lorsqu’il n’est pas utilisé et avant un
nettoyage. Le laisser refroidir avant le nettoyage
et avant d’y placer ou d’y enlever des pièces. Pour
débrancher, saisir la fiche et la retirer de la prise. Ne
pas tirer sur le cordon d’alimentation.
7.
Ne pas faire fonctionner un appareil électroménager
avec un cordon ou une fiche endommagée, ou
lorsque l’appareil ne fonctionne pas bien ou a été
échappé ou endommagé d’une manière quelconque.
Le remplacement et la réparation du cordon
d’alimentation doivent être faits par le fabricant, son
agent de service ou toute personne qualifiée de
façon à éviter tout danger. Veuillez communiquer
avec le service à la clientèle pour obtenir de
l’information concernant l’inspection, la réparation ou
le réglage, comme précisé dans la garantie limitée.
8.
L’utilisation d’accessoires non recommandés par le
fabricante d’appareil peut causer des blessures.
9.
Ne pas utiliser à l’extérieur.
10.
Ne pas laisser le cordon pendre du bord d’une table
ou d’un comptoir, ou toucher des surfaces chaudes.
11.
Ne pas placer l’appareil sur ou près d’un brûleur
chaud à gaz ou d’un élément électrique, ou dans un
four chauffé.
12.
Une précaution extrême doit être employée lors
du déplacement d’un appareil électroménager
contenant de l’huile chaude ou autre liquide chaud.
13.
Pour débrancher l’appareil, tourner la minuterie à
OFF ( /arrêt), ensuite retirer la fiche de la prise de
courant murale.
14.
Une prudence extrême s’impose lors de
l’enlèvement du plateau ou de la vidange de graisse
chaude.
15.
Ne pas nettoyer avec des tampons à récurer en
métal. Des particules peuvent se détacher du
tampon et toucher les pièces électriques, créant un
risque de choc électrique.
16.
Des aliments de grosseur excessive ou des
ustensiles de métal ne doivent pas être insérés dans
un four grille-pain, car ils peuvent créer un incendie
ou un risque de choc électrique.
17.
Le pain peut brûler. Un incendie peut survenir si le
four grille-pain est recouvert ou en contact avec un
matériau inflammable, y compris rideaux, tentures,
murs, armoires en surplomb, produits en papier ou
en plastique, serviettes en tissu et autres articles
semblables, lorsqu’il fonctionne. Ne rangez aucun
article sur le dessus de l’appareil lorsqu’il fonctionne.
18.
Une grande précaution doit être prise lors de
l’utilisation de contenants construits en matériaux
autre que le métal ou le verre.
19.
Ne pas remiser des matériaux autres que les
accessoires recommandés par le fabricant dans cet
appareil lorsqu’il n’est pas utilisé.
20.
Ne pas placer l’un des matériaux suivants dans le
four : papier, carton, plastique et articles semblables.
21.
Ne pas couvrir le plateau ramasse-miettes amovible
ou toute pièce du four avec du papier métallique.
Ceci causera un surchauffe du four.
22.
Pour éteindre le four, tourner la minuterie à OFF
( /arrêt). Voir la section « Pièces et caractéristiques ».
23.
Ne pas placer les yeux ou le visage près de la porte
en verre renforcé de sécurité, au cas où le verre de
sécurité se briserait.
24.
Toujours utiliser cet appareil avec le ramasse-miettes
amovible bien en place.
25.
Ne pas utiliser cet appareil pour tout autre usage que
celui recommandé.
26.
Nettoyer l’intérieur du four avec précaution. Ne pas
égratigner ou endommager le tube de l’élément
chauffant.
27.
Ne pas faire fonctionner le four sans supervision.
28.
Ne pas faire fonctionner cet appareil avec une
minuterie externe ou un système de télécommande
distinct.
29.
ATTENTION : SURFACE CHAUDE. La
température des surfaces extérieures sera
plus élevée pendant le fonctionnement de
l’appareil.
CONSERVER CES INSTRUCTIONS
Autres consignes de sécurité pour le consommateur
Cet appareil est destiné à un usage domestique uniquement.
w AVERTISSEMENT
Risque de choc électrique :
Cet appareil est fourni avec une fiche polarisée (une broche
large) pour réduire le risque d’électrocution. Cette fiche
n’entre que dans un seul sens dans une prise polarisée. Ne
contrecarrez pas l’objectif sécuritaire de cette fiche en la
modifiant de quelque manière que ce soit ou en utilisant un
adaptateur. Si vous ne pouvez pas insérer complètement la
fiche dans la prise, inversez la fiche. Si elle refuse toujours
de s’insérer, faire remplacer la prise par un électricien.
La longueur du cordon installé sur cet appareil a été
sélectionnée afin de réduire les risques d’enchevêtrement
ou de faux pas causés par un fil trop long. L’utilisation
d’une rallonge approuvée est permise si le cordon est trop
court. Les caractéristiques électriques de la rallonge doivent
être équivalentes ou supérieures aux caractéristiques de
l’appareil. Prendre toutes les précautions nécessaires pour
installer la rallonge de manière à ne pas la faire courir sur le
comptoir ou sur une table pour éviter qu’un enfant ne tire
sur le cordon ou trébuche accidentellement.
Cet appareil est doté d’une porte en verre renforcé de
sécurité. Le verre renforcé est quatre fois plus fort que
le verre ordinaire et plus résistant aux bris. Le verre
renforcé peut se briser, mais il se brise en pièces sans
bords coupants. Il faut prendre soin d’éviter d’égratigner la
surface de la porte ou d’endommager le contour. Si la porte
a une égratignure ou un bris, composer notre numéro
d’assistance à la clientèle.
Toujours débrancher votre four grille-pain lorsqu’il n’est pas
utilisé.
Pour commander des pièces :
hamiltonbeach.ca/parts
1. Cadran de températur
2. Cadran de fonction
3. Cadran de minuterie/rôties
4. Têmoin lumineux ON (marche)
5. Ramasse-miettes amovible
6. Grille du four
7. Plateau pour cuisson/grillage
8. Panier pour friture à air
Position pour grille supérieure :
GRILLER/RÔTIES (BAGEL)
Position pour grille inférieure :
CUISSON
Pièces et caractéristiques
Position pour grille du milieu :
FRITURE À AIR/CUISSON/
RÔTIES
ICÔNET MODE
CUISSON
GRILLER
RÔTIES (jusqu’à 6 tranches)
FRITURE À AIR
Utilisation
w AVERTISSEMENT
Danger d’incendie.
• Si le contenu s’enflamme, ne pas ouvrir la porte. Débrancher le four grille-pain et laisser le contenu s’éteindre et
refroidir avant d’ouvrir la porte.
• Ne pas utiliser des sacs de cuisson au four.
• Toujours garder au moins 2,5 cm (1 po) entre les aliments et l’élément chauffant.
• Toujours débrancher le four lorsqu’il n’est pas utilisé.
Avant la première utilisation : La plupart des appareils ménagers qui chauffent produisent une odeur et/ou une
fumée lors de l’utilisation pour la première fois. Brancher le four grille-pain dans une prise de courant. Tourner
le cadran de température à 232 °C (450 °F). Chauffer à cette température pendant 10 minutes. L’odeur ne devrait
pas survenir après ce préchauffage initial. Laver toutes les pièces amovibles du four montrées ci-dessus à l’eau
chaude savonneuse. Rincer et sécher.
Mode FRITURE À AIR ( )
Utiliser le mode friture à air pour rendre les aliments plus croustillants en ajoutant très peu d’huile. Certains
aliments doivent être retournés, remués ou tournés à la moitié de la cuisson. Le mode de friture à air permet de
cuire et griller uniformément à l’aide d’une circulation d’air chaud forcé qui rend les aliments croustillants. Pour une
cuisson plus rapide, veuillez préchauffer le four afin de réduire la durée de cuisson. La position de la grille utilisée
en mode de friture à air dépend de la taille des aliments à faire cuire. Vérifier la cuisson des aliments avant la fin de
la durée de cuisson recommandée sur l’emballage.
1. Brancher dans la prise de courant. Tourner le cadran
de fonction jusqu’au mode FRITURE À AIR (/ ).
2. Insérer la grille du four. Déposer les aliments dans
le panier pour friture à air. Placer le panier dans le
plateau pour cuisson/grillage sur la grille du four.
Veiller à ce que les aliments se trouvent à au moins 1
po (2,5 cm) de l’élément chauffant.
3. Tourner le cadran de température à la position de
friture à air.
4. Tourner le cadran de minuterie dans le sens horaire
au-delà de 10 et ensuite jusqu’à la durée de cuisson
souhaitée. Ou tourner la minuterie à la position Stay
On (rester allumé) en appuyant et en maintenant les
boutons situés sur le côté du cadran.
5. Si une durée a été sélectionnée, la minuterie émettra
une sonorité lorsque la durée sélectionnée est
écoulée. Si vous avez sélectionné la fonction Stay On
(rester allumer) tourner la minuterie à OFF ( /arrêt)
pour arrêter le cycle en tout temps.
6. Débrancher.
Guide de cuisson
Le mode de friture à air Sure-Crisp
®
pourrait demander un temps de cuisson plus long que celui des friteuses à air
indépendantes.
REMARQUE : Certains aliments pourraient devoir être retournés, remués ou tournés à mi-cuisson.
ALIMENT QUANTITÉ MODE TEMPÉRATURE TEMPS
Frites congelées et collations
Frites régulières congelées 340 g (12 oz.)
FRITURE À AIR
FRITURE À AIR 18–20 minutes
Croquettes de poulet 1/2 paquet (453 g (16 oz.)
FRITURE À AIR
FRITURE À AIR 11–13 minutes
Filets de poitrine de poulet
panés, congelés
environ 12 lanières
(453 g (16 oz.)
FRITURE À AIR
FRITURE À AIR 18–20 minutes
Légumes
Chou-fleur 1 petite tête (14 oz [397 g])
coupée en fleurettes
FRITURE À AIR
FRITURE À AIR 13–15 minutes
Frites de pommes de terre
fraîches
2 pommes de terre moyennes
FRITURE À AIR
FRITURE À AIR 25–30 minutes
Viandes et volailles
Ailes de poulet entières, fraîches
6 ailes entières
FRITURE À AIR FRITURE À AIR
25–30 minutes
Filets de poitrine de poulet frais 454 g (1 lb.)
FRITURE À AIR FRITURE À AIR
16–18 minutes
Hamburger (1,3 cm [1/2” ] épais)
80 % viande maigre, 20 %
viande grasse
2 hamburger
FRITURE À AIR FRITURE À AIR
20–25 minutes
Hamburger (1,3 cm [1/2” ] épais)
80 % viande maigre, 20 %
viande grasse
4 (113 g/ 4 oz. chaque)
hamburger
GRILLER GRILLER 14–16 minutes
Steak (¾ po [1,9 cm] d’épaisseur) 283 g (10 oz.)
FRITURE À AIR FRITURE À AIR
15–20 minutes
Steak (¾ po [1,9 cm] d’épaisseur) 283 g (10 oz.) GRILLER GRILLER 14–18 minutes
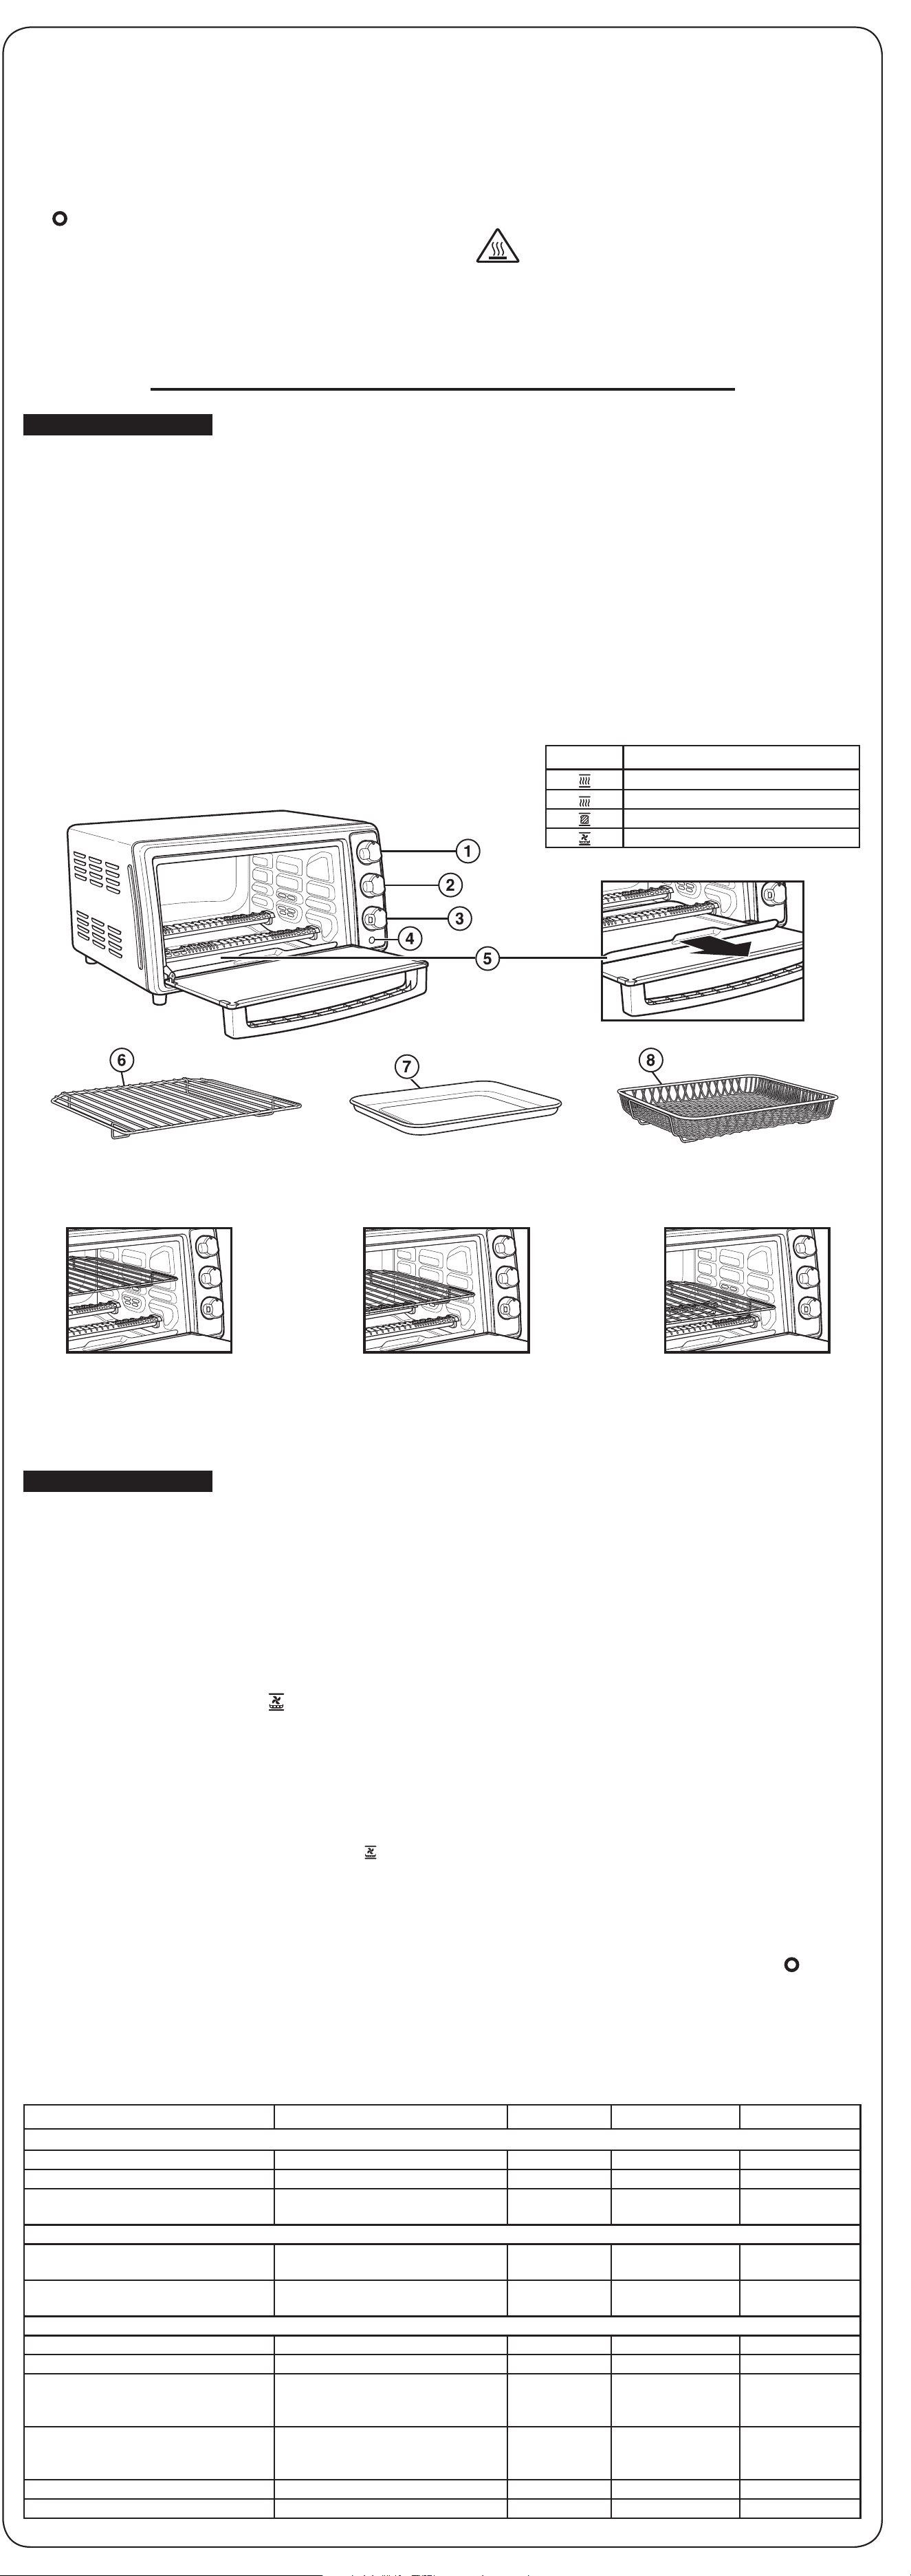
w WARNING
Fire Hazard.
• If contents ignite, do not open oven door. Unplug oven and allow contents to stop burning and cool before
opening door.
• Do not operate oven unattended.
• Do not use with oven cooking bags.
• Do not heat foods in plastic containers.
• Do not heat taco shells in toaster oven. Always use full-size conventional oven.
• Always allow at least 1 inch (2.5 cm) between food and heating element.
• Follow food manufacturer’s instructions.
• Always unplug oven when not in use.
• Regular cleaning reduces risk of fire hazard.
IMPORTANT SAFEGUARDS
When using electrical appliances, basic safety precautions should always be followed to reduce the risk of fire,
electric shock, and/or injury to persons, including the following:
1. Read all instructions.
2. This appliance is not intended for use by persons
(including children) with reduced physical, sensory,
or mental capabilities, or lack of experience and
knowledge, unless they are closely supervised and
instructed concerning use of the appliance by a
person responsible for their safety.
3. Close supervision is necessary when any
appliance is used by or near children. Cleaning and
user maintenance shall not be made by children
unless they are supervised. Children should be
supervised to ensure that they do not play with the
appliance.
4. Do not touch hot surfaces. Use handles or knobs.
5. To protect against electrical shock, do not immerse
cord, plug, or oven in water or other liquid.
6. Unplug from outlet when not in use and before
cleaning. Allow to cool before cleaning appliance
and putting on or taking off parts. To unplug, grasp
the plug and pull from the outlet. Never pull from
the power cord.
7. Do not operate any appliance with a damaged
supply cord or plug, or after the appliance
malfunctions or has been dropped or damaged
in any manner. Supply cord replacement and
repairs must be conducted by the manufacturer,
its service agent, or similarly qualified persons
in order to avoid a hazard. Contact Customer
Service for information on examination, repair, or
adjustment as set forth in the Limited Warranty.
8. The use of accessory attachments not
recommended by the appliance manufacturer may
cause injuries.
9. Do not use outdoors.
10. Do not let cord hang over edge of table or counter
or touch hot surfaces.
11. Do not place on or near a hot gas or electric
burner or in a heated oven.
12. Extreme caution must be used when moving an
appliance containing hot oil or other hot liquids.
13. To disconnect, turn all controls to OFF ( ); then
remove plug from wall outlet.
14. Use extreme caution when removing pan or
disposing of hot grease.
15. Do not clean with metal scouring pads. Pieces
can break off the pad and touch electrical parts,
creating a risk of electrical shock.
16. Oversize foods or metal utensils must not be
inserted in an oven as they may create a fire or risk
of electric shock.
17. The bread may burn. A fire may occur if toaster
oven is covered or touching flammable material,
including curtains, draperies, walls, overhead
cabinets, paper or plastic products, cloth towels,
and the like, when in operation. Do not store any
item on top of the appliance when in operation.
18. Extreme caution should be exercised when using
containers constructed of materials other than
metal or glass.
19. Do not store any materials, other than
manufacturer-recommended accessories, in this
oven when not in use.
20. Do not place any of the following materials in the
oven: paper, cardboard, plastic, and the like.
21. Do not cover crumb tray or any part of the oven
with metal foil. This will cause overheating of the
oven.
22. To turn oven off, turn Timer to OFF ( ) position.
See “Parts and Features” section.
23. Do not place eyes or face in close proximity with
tempered safety glass door, in the event that the
safety glass breaks.
24. Always use appliance with crumb tray securely in
place.
25. Do not use appliance for other than intended use.
26. Clean oven interior carefully. Do not scratch or
damage heating element tube.
27. Do not operate unattended.
28. Do not operate the appliance by means of an
external timer or separate remote-control system.
29. CAUTION: HOT SURFACE. The temperature
of accessible surfaces may be high when
the appliance is operating.
SAVE THESE INSTRUCTIONS
Other Consumer Safety Information
This appliance is intended for household use only.
w WARNING
Electrical Shock Hazard: This
appliance is provided with a polarized plug (one wide
blade) to reduce the risk of electric shock. The plug
fits only one way into a polarized outlet. Do not defeat
the safety purpose of the plug by modifying the plug
in any way or by using an adapter. If the plug does
not fit fully into the outlet, reverse the plug. If it still
does not fit, have an electrician replace the outlet.
The length of the cord used on this appliance was
selected to reduce the hazards of becoming tangled
in or tripping over a longer cord. If a longer cord is
necessary, an approved extension cord may be used.
The electrical rating of the extension cord must be
equal to or greater than the rating of the appliance.
Care must be taken to arrange the extension cord so
that it will not drape over the countertop or tabletop
where it can be pulled on by children or accidentally
tripped over.
This appliance is equipped with a fully tempered
safety glass door. The tempered glass is four times
stronger than ordinary glass and more resistant to
breakage. Tempered glass can break; however, it
breaks into pieces with no sharp edges. Care must
be taken to avoid scratching door surface or nicking
edges. If the door has a scratch or nick, call our
customer service number.
Always unplug your toaster oven from the outlet
when not in use.
To order parts:
hamiltonbeach.com/parts
1. Temperature Dial
2. Function Dial
3. Toast/Timer Dial
4. ON Indicator Light
5. Slide-Out Crumb Tray
6. Oven Rack
7. Baking/Broiling Pan
8. Air Frying Basket
Top Rack Position:
BROIL/TOAST (BAGEL)
Bottom Rack Position:
BAKE
Read before use | Lire avant utilisation | Lea antes de usar.
For Questions:
For recipes, tips,
product information and
registration:
hamiltonbeach.com
Pour des questions :
Pour des recettes, des conseils,
des renseignements sur le produit
et l’enregistrement :
hamiltonbeach.ca
Para preguntas:
Para recetas, consejos,
información del producto
y registro:
hamiltonbeach.com.mx
Le invitamos a leer cuidadosamente este instructivo antes de usar su aparato.
6-slice Sure-Crisp
®
Air Fryer Toaster Oven
Four grille-pain à 6 tranches avec friture à air Sure-Crisp
®
Horno tostador para 6 rebanadas y freidora de aire Sure-Crisp
®
Parts and Features
Middle Rack Position:
AIR FRY/BAKE/TOAST
ENTER TO WIN $100 TO SPEND
ON WEBSITE
Visit
register.hamiltonbeach.com
PARTICIPEZ POUR COURIR
LA CHANCE DE GAGNER UN
MONTANT DE 100 $ À DÉPENSER
SUR NOTRE SITE WEB
Visitez le
register.hamiltonbeach.com
INGRESE PARA TENER LA
OPORTUNIDAD DE GANAR $100
PARA GASTAR EN NUESTRO
SITIO WEB
Visite
register.hamiltonbeach.com
Open to US customers only • Ce concours s’adresse aux clients des États-Unis
seulement • Este concurso está disponible solo a clientes de los Estados Unidos
How to Use
w WARNING
Fire Hazard.
• If contents ignite, do not open oven door. Unplug toaster oven and allow contents to stop burning and cool
before opening door.
• Do not use oven cooking bags.
• Always allow at least 1 inch (2.5 cm) between food and heating element.
• Always unplug toaster oven when not in use.
Before first use: Most heating appliances produce an odor and/or smoke when used the first time. Plug Oven into
an outlet. Turn Temperature Dial to 450°F (232°C). Heat at this temperature for 10 minutes. Odor should not be
present after this initial preheating. Wash all removable oven parts as shown above in hot, soapy water. Rinse
and dry.
AIR FRY Mode ( )
Use AIR FRY Mode to crisp foods using little added oil. Foods may need to be flipped, stirred, or rotated halfway
through cooking. AIR FRY Mode cooks and browns evenly by circulating forced hot air which crisps food. For
faster cooking, preheat Oven to reduce cooking time. Rack position used to air fry depends on the size of the food
to be cooked. Check food for doneness before recommended packaging cook time.
1. Plug into outlet. Rotate Function Dial to Air Fry ( ).
2. Insert Oven Rack. Add food to Air Frying Basket.
Place Basket into Baking/Broiling Pan on Oven Rack.
Make sure food is at least 1 inch (2.5 cm) from
heating element.
3. Turn Temperature Dial to Air Fry position.
4. Rotate Timer clockwise past 10, then to the desired
cooking time. Or, rotate counterclockwise to Stay On
while pressing and holding buttons on side of Dial.
5. If time is selected, Timer will sound when selected
time is complete. If Stay On is selected, rotate Timer
to OFF ( ) to end cycle at any time.
6. Unplug.
Cooking Guide
Sure-Crisp
®
Air Fry Mode may require more cooking time than standalone air fryers.
NOTE: Some foods may need to be flipped, stirred, or rotated halfway through cooking.
FOOD AMOUNT MODE TEMPERATURE TIME
Frozen Fries and Snacks
Frozen regular French fries 12 oz. (340 g) AIR FRY AIR FRY 18–20 minutes
Frozen chicken nuggets 1/2 package (16 oz./453 g) AIR FRY AIR FRY 11–13 minutes
Frozen breaded chicken tenders about 12 strips (16 oz./453 g) AIR FRY AIR FRY 18–20 minutes
Vegetables
Cauliflower 1 small head (14 oz./397 g) cut
into florets
AIR FRY AIR FRY 13–15 minutes
Fresh potato fries 2 medium potatoes AIR FRY AIR FRY 25–30 minutes
Meat & Poultry
Fresh whole chicken wings
6 whole wings AIR FRY AIR FRY 25–30 minutes
Fresh chicken tenders 1 lb. (454 g) AIR FRY AIR FRY 16–18 minutes
Hamburger (1/2-inch thick
[1.3 cm]) 80% lean, 20% fat
2 burgers AIR FRY AIR FRY 20–25 minutes
Hamburger (1/2-inch thick
[1.3 cm]) 80% lean, 20% fat
4 (4 oz./113 g each) burgers BROIL BROIL 14–16 minutes
Steak (3/4-inch [1.9 cm] thick) 10 oz. (283 g) AIR FRY AIR FRY 15–20 minutes
Steak (3/4-inch [1.9 cm] thick) 10 oz. (283 g) BROIL BROIL 14–18 minutes
Fish & Seafood
Fresh fish fillets 2 (5 oz./142 g each) fillets AIR FRY AIR FRY 10–12 minutes
Bakery & Desserts
Refrigerated biscuits 4 biscuits BAKE 350°F (177°C) 8–10 minutes
Yellow cake 1 cake layer (8 inches) BAKE 350°F (177°C) 24–26 minutes
Sheet Pan Supper
Pork Tenderloin & Veggies 1 lb. pork tenderloin; 2 large
carrots, sliced 1/2-inch thick; 2
large potatoes, cut into cubes;
1/2 small sweet onion, cut in thin
wedges; 1 tsp steak seasoning;
1 tbsp olive oil; salt and pepper
to taste; 1/2 cup apricot jam; 1
tbsp balsamic vinegar
AIR FRY AIR FRY 30 minutes
*Times are a guide for different types of foods which vary in cook time. Cook food until desired crispness.
NOTE: Cooking times are based on a preheated Oven.
Sure-Crisp
®
Air Frying Tips From Our Test Kitchen
• Sure-Crisp
®
AIR FRY Mode may require more cooking time than standalone air fryers.
• Always use Baking/Broiling Pan on rack under Air Frying Basket to catch drips.
• Arrange foods in a single, even layer in Air Frying Basket.
• Most foods (larger/thicker) may need to be flipped, stirred, or rotated during cooking.
• Breadcrumbs make crunchy air fried coatings. Avoid sauces or batters.
• Rack position used to air fry depends on size of food to be cooked. Use Middle Rack Position for most foods.
Keep at least 1 inch (2.5 cm) between food and heating elements.
• Do not line Air Frying Basket; that blocks air flow. Do line Baking/Broiling Pan under Basket for easy cleanup.
• Preheat Oven for shorter cook times/improved crispness.
• Cut uniform-sized pieces for even cooking results.
• A light spritz of cooking oil before cooking provides crispier texture, especially for fresh foods.
• Review food packaging-suggested cook times and adjust time for desired crispness.
• Avoid opening Oven door while cooking frozen French fries or chicken nuggets until cooking cycle is nearly
done.
• Check food for desired doneness before end of cooking cycle. Add or reduce cooking time as needed
• For best results when air frying, set temperature to AIR FRY ( ).
BAKE Mode ( )
Use BAKE Mode for cakes, casseroles, cookies and roasting meats, poultry or vegetables. Place Oven Rack in
Middle or Bottom Rack Position. Preheating Oven for 5 minutes is necessary for BAKE Mode.
1. Plug into outlet. Turn Temperature Dial to desired
temperature, then rotate Function Dial to BAKE ( ).
2. Rotate Timer clockwise past 10, then back to “dark
toast” ( ) to preheat Oven for 5 minutes before
beginning to bake.
3. After Oven is preheated, set Timer to desired time by
rotating clockwise past 10, then to the desired baking
time. Or, rotate counterclockwise to Stay On while
pressing and holding buttons on side of Dial.
4. Rotate Timer to OFF ( ) to end cycle at any time.
5. Unplug.
Stay On Function
The Oven can be set to stay on by turning Timer to Stay On while pressing and holding buttons on side of Dial.
BROIL Mode ( )
Place Oven Rack in Oven. Use Top Rack Position for faster broiling times. Middle Rack Position for browning
casserole tops, toasting sandwiches, or melting cheese on bread. Bottom Rack Position for foods needing longer
broiling times, like chicken and thick cuts of meat. Place Baking/Broiling Pan on Oven Rack. Place in Oven. No
preheating necessary. Food must be a minimum of 1 inch (2.5 cm) from heating elements.
1. Plug into outlet. Turn Temperature Dial to AIR FRY/
TOAST/BROIL and Function Dial to BROIL ( ).
2. Rotate Timer clockwise past 10, then to the desired
broiling time. Or, rotate Timer counterclockwise to
Stay On while pressing and holding buttons on side
of Dial. Turn foods when browned or halfway through
cooking time. Oven broils on high temperature and
may not be adjusted.
3. Rotate Timer to OFF ( ) to end cycle at any time.
4. Unplug.
TOAST Mode ( )
Use for browning and toasting breads, bagels, and English muffins. Place food cut/split side facing up. Rack should
be in middle position.
1. Plug into outlet. Turn Temperature Dial to AIR FRY/
TOAST/BROIL and then rotate Function Dial to
TOAST ( ).
2. Select shade of browning by turning Timer clockwise
past 10, then back to desired toast color. A bell will
sound when Toast cycle is complete.
3. Rotate Timer to OFF ( ) to end cycle at any time.
4. Unplug.
TIP: The number of slices of bread and bread
freshness will affect toast color. For example, toasting
4 slices of bread will require a darker toast color
setting than 2 slices of bread. Adjust Toast based on
desired color and number of slices.
Care and Cleaning
w WARNING
Electrical Shock Hazard. Do not clean with metal scouring pads. Pieces can break off pad and
touch electrical parts.
Oven should be cleaned regularly for best performance and long life. Regular cleaning will also reduce the risk of
fire hazard.
1. Unplug and allow to cool completely.
2. To clean inside of Oven, wipe Oven walls, bottom
of Oven, and glass door with a damp, soapy cloth.
Repeat with a damp, clean cloth. For stubborn stains,
use a plastic scouring pad.
3. Wipe outside of Oven with a damp cloth. Do not use
abrasive cleansers or metal scouring pads.
4. Wash Slide-Out Crumb Tray, Baking/Broiling Pan, Air
Frying Basket, and Oven Rack in hot, soapy water.
Rinse and dry.
Troubleshooting
Oven will not heat.
• Check to make sure electrical outlet is working and
Oven is plugged in. Turn Temperature Dial to 350°F
(177°C). Turn Function Dial to BAKE; then turn Timer
counterclockwise to Stay On while pressing and
holding buttons on side of Dial.
Moisture forms on inside of Oven door when
toasting.
• This is normal when toasting in a toaster oven.
Moisture is slower to escape from a toaster oven
than from a toaster. The amount of moisture will
differ between fresh bread, bagels, and frozen
pastries.
An odor and smoke come from Oven.
• Smoke and odor are normal during first use of most
heating appliances. These will not be present after
initial heating period.
Oven will not TOAST.
• Check to make sure outlet is working and Oven
is plugged in. Turn Temperature Dial to AIR FRY/
TOAST/BROIL. Turn Function Dial to TOAST; then
rotate Timer clockwise past 10 and then back to the
desired toast color.
Some foods burn and some are not done.
• Adjust Oven Rack position to center food in Oven.
• Adjust Oven temperature or cooking time for best
results with your recipes.
Limited Warranty
This warranty applies to products purchased and
used in the U.S. and Canada. This is the only express
warranty for this product and is in lieu of any other
warranty or condition.
This product is warranted to be free from defects in
material and workmanship for a period of five (5) years
from the date of original purchase in Canada and one
(1) year from the date of original purchase in the U.S.
During this period, your exclusive remedy is repair
or replacement of this product or any component
found to be defective, at our option; however, you
are responsible for all costs associated with returning
the product to us and our returning a product or
component under this warranty to you. If the product
or component is no longer available, we will replace
with a similar one of equal or greater value.
This warranty does not cover glass, filters, wear from
normal use, use not in conformity with the printed
directions, or damage to the product resulting from
accident, alteration, abuse, or misuse. This warranty
extends only to the original consumer purchaser or
gift recipient. Keep the original sales receipt, as proof
of purchase is required to make a warranty claim.
This warranty is void if the product is used for other
than single-family household use or subjected to any
voltage and waveform other than as specified on the
rating label (e.g., 120 V ~ 60 Hz).
We exclude all claims for special, incidental, and
consequential damages caused by breach of express
or implied warranty. All liability is limited to the
amount of the purchase price. Every implied warranty,
including any statutory warranty or condition of
merchantability or fitness for a particular purpose, is
disclaimed except to the extent prohibited by law, in
which case such warranty or condition is limited to
the duration of this written warranty. This warranty
gives you specific legal rights. You may have other
legal rights that vary depending on where you live.
Some states or provinces do not allow limitations
on implied warranties or special, incidental, or
consequential damages, so the foregoing limitations
may not apply to you.
To make warranty claim, do not return this appliance
to the store. Please write Hamilton Beach Brands, Inc.,
Customer Service Department, 4421 Waterfront Dr.,
Glen Allen, VA 23060, or visit hamiltonbeach.com/
customer-service in the U.S. or hamiltonbeach.ca/
customer-service in Canada. For faster service, locate
the model, type, and series numbers on your appliance.
ICON MODE
BAKE
BROIL
TOAST (up to 6 slices)
AIR FRY
w AVERTISSEMENT
Danger d’incendie.
• Si le contenu de votre grille-pain se met à brûler, n’ouvrez jamais la porte du grille-pain. Débranchez
l’appareil et laisser le contenu s’éteindre et refroidir avant d’ouvrir la porte.
• Ne pas utiliser l’appareil sans surveillance.
• N’utilisez jamais avec des sacs de cuisson au four.
• Ne pas chauffer d’aliments dans des plats de plastique.
• Ne pas faire chauffer les coquilles à taco dans le four grille-pain. Toujours faire réchauffer dans un four
conventionnel.
• Toujours laisser un espace de 2,5 cm (1 po) entre les aliments et l’élément chauffant.
• Suivre les instructions du fournisseur de produits alimentaires.
• Débranchez toujours votre grille-pain quand vous ne l’utilisez pas.
• Un nettoyage régulier réduit le danger d’incendie.
PRÉCAUTIONS IMPORTANTES
Pour utiliser un appareil électroménager, vous devez toujours prendre des mesures élémentaires de sécurité pour
réduire le risque d’incendie, d’électrocution et/ou de blessure corporelle, en particulier les mesures suivantes :
1.
Lire toutes les instructions.
2.
Cet appareil n’est pas destiné à être utilisé par des
personnes (y compris les enfants) dont les capacités
physiques, sensorielles ou mentales sont réduites,
ou manquant d’expérience et de connaissance,
sauf si elles sont étroitement surveillées et instruites
sur l’utilisation de l’appareil par une personne
responsable de leur sécurité.
3.
Une surveillance étroite est requise pour tout
appareil utilisé par ou près des enfants. Le nettoyage
et l’entretien ne doit pas fait par des enfants à moins
d’être sous supervision. Surveiller que les enfants ne
jouent pas avec l’appareil.
4.
Ne pas toucher les surfaces chaudes. Utiliser les
poignées ou boutons.
5.
Pour protéger contre le risque de choc électrique, ne
pas immerger le cordon, la fiche ou le four grille-pain
dans l’eau ou autre liquide.
6.
Débrancher l’appareil de la prise de courant
électrique lorsqu’il n’est pas utilisé et avant un
nettoyage. Le laisser refroidir avant le nettoyage
et avant d’y placer ou d’y enlever des pièces. Pour
débrancher, saisir la fiche et la retirer de la prise. Ne
pas tirer sur le cordon d’alimentation.
7.
Ne pas faire fonctionner un appareil électroménager
avec un cordon ou une fiche endommagée, ou
lorsque l’appareil ne fonctionne pas bien ou a été
échappé ou endommagé d’une manière quelconque.
Le remplacement et la réparation du cordon
d’alimentation doivent être faits par le fabricant, son
agent de service ou toute personne qualifiée de
façon à éviter tout danger. Veuillez communiquer
avec le service à la clientèle pour obtenir de
l’information concernant l’inspection, la réparation ou
le réglage, comme précisé dans la garantie limitée.
8.
L’utilisation d’accessoires non recommandés par le
fabricante d’appareil peut causer des blessures.
9.
Ne pas utiliser à l’extérieur.
10.
Ne pas laisser le cordon pendre du bord d’une table
ou d’un comptoir, ou toucher des surfaces chaudes.
11.
Ne pas placer l’appareil sur ou près d’un brûleur
chaud à gaz ou d’un élément électrique, ou dans un
four chauffé.
12.
Une précaution extrême doit être employée lors
du déplacement d’un appareil électroménager
contenant de l’huile chaude ou autre liquide chaud.
13.
Pour débrancher l’appareil, tourner la minuterie à
OFF ( /arrêt), ensuite retirer la fiche de la prise de
courant murale.
14.
Une prudence extrême s’impose lors de
l’enlèvement du plateau ou de la vidange de graisse
chaude.
15.
Ne pas nettoyer avec des tampons à récurer en
métal. Des particules peuvent se détacher du
tampon et toucher les pièces électriques, créant un
risque de choc électrique.
16.
Des aliments de grosseur excessive ou des
ustensiles de métal ne doivent pas être insérés dans
un four grille-pain, car ils peuvent créer un incendie
ou un risque de choc électrique.
17.
Le pain peut brûler. Un incendie peut survenir si le
four grille-pain est recouvert ou en contact avec un
matériau inflammable, y compris rideaux, tentures,
murs, armoires en surplomb, produits en papier ou
en plastique, serviettes en tissu et autres articles
semblables, lorsqu’il fonctionne. Ne rangez aucun
article sur le dessus de l’appareil lorsqu’il fonctionne.
18.
Une grande précaution doit être prise lors de
l’utilisation de contenants construits en matériaux
autre que le métal ou le verre.
19.
Ne pas remiser des matériaux autres que les
accessoires recommandés par le fabricant dans cet
appareil lorsqu’il n’est pas utilisé.
20.
Ne pas placer l’un des matériaux suivants dans le
four : papier, carton, plastique et articles semblables.
21.
Ne pas couvrir le plateau ramasse-miettes amovible
ou toute pièce du four avec du papier métallique.
Ceci causera un surchauffe du four.
22.
Pour éteindre le four, tourner la minuterie à OFF
( /arrêt). Voir la section « Pièces et caractéristiques ».
23.
Ne pas placer les yeux ou le visage près de la porte
en verre renforcé de sécurité, au cas où le verre de
sécurité se briserait.
24.
Toujours utiliser cet appareil avec le ramasse-miettes
amovible bien en place.
25.
Ne pas utiliser cet appareil pour tout autre usage que
celui recommandé.
26.
Nettoyer l’intérieur du four avec précaution. Ne pas
égratigner ou endommager le tube de l’élément
chauffant.
27.
Ne pas faire fonctionner le four sans supervision.
28.
Ne pas faire fonctionner cet appareil avec une
minuterie externe ou un système de télécommande
distinct.
29.
ATTENTION : SURFACE CHAUDE. La
température des surfaces extérieures sera
plus élevée pendant le fonctionnement de
l’appareil.
CONSERVER CES INSTRUCTIONS
Autres consignes de sécurité pour le consommateur
Cet appareil est destiné à un usage domestique uniquement.
w AVERTISSEMENT
Risque de choc électrique :
Cet appareil est fourni avec une fiche polarisée (une broche
large) pour réduire le risque d’électrocution. Cette fiche
n’entre que dans un seul sens dans une prise polarisée. Ne
contrecarrez pas l’objectif sécuritaire de cette fiche en la
modifiant de quelque manière que ce soit ou en utilisant un
adaptateur. Si vous ne pouvez pas insérer complètement la
fiche dans la prise, inversez la fiche. Si elle refuse toujours
de s’insérer, faire remplacer la prise par un électricien.
La longueur du cordon installé sur cet appareil a été
sélectionnée afin de réduire les risques d’enchevêtrement
ou de faux pas causés par un fil trop long. L’utilisation
d’une rallonge approuvée est permise si le cordon est trop
court. Les caractéristiques électriques de la rallonge doivent
être équivalentes ou supérieures aux caractéristiques de
l’appareil. Prendre toutes les précautions nécessaires pour
installer la rallonge de manière à ne pas la faire courir sur le
comptoir ou sur une table pour éviter qu’un enfant ne tire
sur le cordon ou trébuche accidentellement.
Cet appareil est doté d’une porte en verre renforcé de
sécurité. Le verre renforcé est quatre fois plus fort que
le verre ordinaire et plus résistant aux bris. Le verre
renforcé peut se briser, mais il se brise en pièces sans
bords coupants. Il faut prendre soin d’éviter d’égratigner la
surface de la porte ou d’endommager le contour. Si la porte
a une égratignure ou un bris, composer notre numéro
d’assistance à la clientèle.
Toujours débrancher votre four grille-pain lorsqu’il n’est pas
utilisé.
Pour commander des pièces :
hamiltonbeach.ca/parts
1. Cadran de températur
2. Cadran de fonction
3. Cadran de minuterie/rôties
4. Têmoin lumineux ON (marche)
5. Ramasse-miettes amovible
6. Grille du four
7. Plateau pour cuisson/grillage
8. Panier pour friture à air
Position pour grille supérieure :
GRILLER/RÔTIES (BAGEL)
Position pour grille inférieure :
CUISSON
Pièces et caractéristiques
Position pour grille du milieu :
FRITURE À AIR/CUISSON/
RÔTIES
ICÔNET MODE
CUISSON
GRILLER
RÔTIES (jusqu’à 6 tranches)
FRITURE À AIR
Utilisation
w AVERTISSEMENT
Danger d’incendie.
• Si le contenu s’enflamme, ne pas ouvrir la porte. Débrancher le four grille-pain et laisser le contenu s’éteindre et
refroidir avant d’ouvrir la porte.
• Ne pas utiliser des sacs de cuisson au four.
• Toujours garder au moins 2,5 cm (1 po) entre les aliments et l’élément chauffant.
• Toujours débrancher le four lorsqu’il n’est pas utilisé.
Avant la première utilisation : La plupart des appareils ménagers qui chauffent produisent une odeur et/ou une
fumée lors de l’utilisation pour la première fois. Brancher le four grille-pain dans une prise de courant. Tourner
le cadran de température à 232 °C (450 °F). Chauffer à cette température pendant 10 minutes. L’odeur ne devrait
pas survenir après ce préchauffage initial. Laver toutes les pièces amovibles du four montrées ci-dessus à l’eau
chaude savonneuse. Rincer et sécher.
Mode FRITURE À AIR ( )
Utiliser le mode friture à air pour rendre les aliments plus croustillants en ajoutant très peu d’huile. Certains
aliments doivent être retournés, remués ou tournés à la moitié de la cuisson. Le mode de friture à air permet de
cuire et griller uniformément à l’aide d’une circulation d’air chaud forcé qui rend les aliments croustillants. Pour une
cuisson plus rapide, veuillez préchauffer le four afin de réduire la durée de cuisson. La position de la grille utilisée
en mode de friture à air dépend de la taille des aliments à faire cuire. Vérifier la cuisson des aliments avant la fin de
la durée de cuisson recommandée sur l’emballage.
1. Brancher dans la prise de courant. Tourner le cadran
de fonction jusqu’au mode FRITURE À AIR (/ ).
2. Insérer la grille du four. Déposer les aliments dans
le panier pour friture à air. Placer le panier dans le
plateau pour cuisson/grillage sur la grille du four.
Veiller à ce que les aliments se trouvent à au moins 1
po (2,5 cm) de l’élément chauffant.
3. Tourner le cadran de température à la position de
friture à air.
4. Tourner le cadran de minuterie dans le sens horaire
au-delà de 10 et ensuite jusqu’à la durée de cuisson
souhaitée. Ou tourner la minuterie à la position Stay
On (rester allumé) en appuyant et en maintenant les
boutons situés sur le côté du cadran.
5. Si une durée a été sélectionnée, la minuterie émettra
une sonorité lorsque la durée sélectionnée est
écoulée. Si vous avez sélectionné la fonction Stay On
(rester allumer) tourner la minuterie à OFF ( /arrêt)
pour arrêter le cycle en tout temps.
6. Débrancher.
Guide de cuisson
Le mode de friture à air Sure-Crisp
®
pourrait demander un temps de cuisson plus long que celui des friteuses à air
indépendantes.
REMARQUE : Certains aliments pourraient devoir être retournés, remués ou tournés à mi-cuisson.
ALIMENT QUANTITÉ MODE TEMPÉRATURE TEMPS
Frites congelées et collations
Frites régulières congelées 340 g (12 oz.)
FRITURE À AIR
FRITURE À AIR 18–20 minutes
Croquettes de poulet 1/2 paquet (453 g (16 oz.)
FRITURE À AIR
FRITURE À AIR 11–13 minutes
Filets de poitrine de poulet
panés, congelés
environ 12 lanières
(453 g (16 oz.)
FRITURE À AIR
FRITURE À AIR 18–20 minutes
Légumes
Chou-fleur 1 petite tête (14 oz [397 g])
coupée en fleurettes
FRITURE À AIR
FRITURE À AIR 13–15 minutes
Frites de pommes de terre
fraîches
2 pommes de terre moyennes
FRITURE À AIR
FRITURE À AIR 25–30 minutes
Viandes et volailles
Ailes de poulet entières, fraîches
6 ailes entières
FRITURE À AIR FRITURE À AIR
25–30 minutes
Filets de poitrine de poulet frais 454 g (1 lb.)
FRITURE À AIR FRITURE À AIR
16–18 minutes
Hamburger (1,3 cm [1/2” ] épais)
80 % viande maigre, 20 %
viande grasse
2 hamburger
FRITURE À AIR FRITURE À AIR
20–25 minutes
Hamburger (1,3 cm [1/2” ] épais)
80 % viande maigre, 20 %
viande grasse
4 (113 g/ 4 oz. chaque)
hamburger
GRILLER GRILLER 14–16 minutes
Steak (¾ po [1,9 cm] d’épaisseur) 283 g (10 oz.)
FRITURE À AIR FRITURE À AIR
15–20 minutes
Steak (¾ po [1,9 cm] d’épaisseur) 283 g (10 oz.) GRILLER GRILLER 14–18 minutes
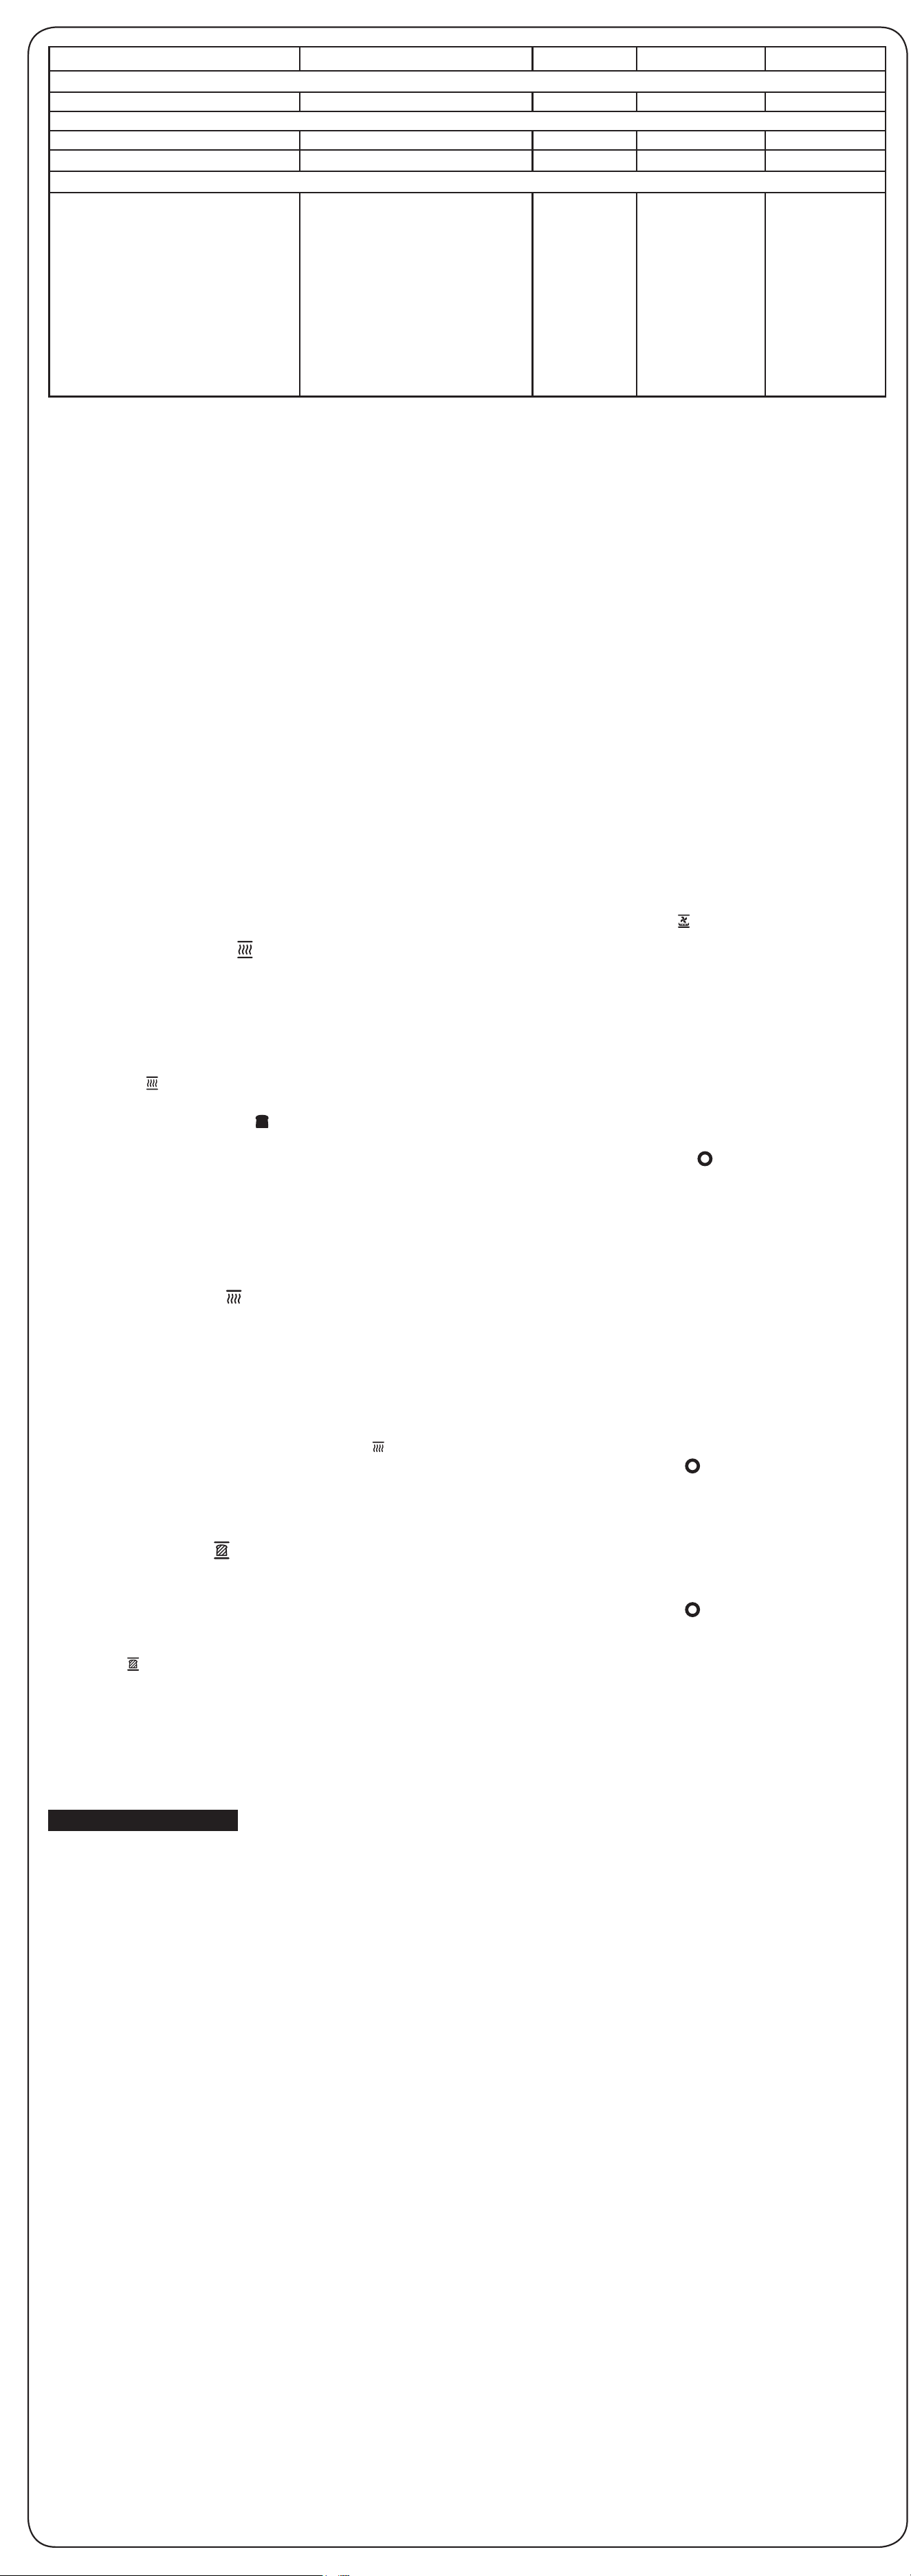
840360800 09/21
Modelos: Tipo
:
Características eléctricas:
31416, 31418 O93 120 V ~ 60 Hz 1500 W
Los modelos incluídos en el instructivo de Uso y Cuidado pueden ir seguidos o no por un sufijo correspondiente a
una o varias letras del alfabeto y sus combinaciones, separadas o no por un espacio, coma, diagonal, o guión. Como
ejemplos los sufijos pueden ser: “Y” y/o “MX” y/o “MXY” y/o “Z”.
Grupo HB PS, S.A. de C.V.
Monte Elbruz No. 124 - 401
Col. Polanco V Sección,
Miguel Hidalgo
Ciudad de México, C.P. 11560
GARANTÍA PARA PRODUCTOS COMPRADOS EN MÉXICO
PRODUCTO: MARCA: MODELO:
Grupo HB PS, S.A. de C.V. cuenta con una Red de Centros de Servicio Autorizada, por favor consulte en la lista anexa
el nombre y dirección de los establecimientos en la República Mexicana en donde usted podrá hacer efectiva la
garantía, obtener partes, componentes, consumibles y accesorios; así como también obtener servicio para productos
fuera de garantía. Para mayor información llame al: Centro de Atención al Consumidor: 800 71 16 100
Grupo HB PS, S.A. de C.V. le otorga a partir de la fecha de compra:
GARANTÍA DE 1 AÑO.
COBERTURA
• Esta garantía ampara, todas las piezas y componentes del producto que resulten con defecto de fabricación
incluyendo la mano de obra.
• Grupo HB PS, S.A. de C.V. se obliga a reemplazar, reparar o reponer, cualquier pieza o componente defectuoso;
proporcionar la mano de obra necesaria para su diagnóstico y reparación, todo lo anterior sin costo adicional para el
consumidor.
• Esta garantía incluye los gastos de transportación del producto que deriven de su cumplimiento dentro de su red de
servicio.
LIMITACIONES
• Esta garantía no ampara el reemplazo de piezas deterioradas por uso o por desgaste normal, como son: cuchillas,
vasos, jarras, filtros, etc.
• Grupo HB PS, S.A. de C.V. no se hace responsable por los accidentes producidos a consecuencia de una instalación
eléctrica defectuosa, ausencia de toma de tierra, clavija o enchufe en mal estado, etc.
EXCEPCIONES
Esta garantía no será efectiva en los siguientes casos:
a) Cuando el producto se hubiese utlizado en condiciones distintas a las normales. (Uso industrial, semi-industrial o
comercial.)
b) Cuando el producto no hubiese sido operado de acuerdo con el instructivo de uso.
c) Cuando el producto hubiese sido alterado o reparado por personas no autorizadas por Grupo HB PS, S.A. de C.V. el
fabricante nacional, importador o comercializador responsable respectivo.
El consumidor puede solicitar que se haga efectiva la garantía ante la propia casa comercial donde adquirió su
producto, siempre y cuando Grupo HB PS, S.A. de C.V. no cuente con talleres de servicio.
PROCEDIMIENTO PARA HACER EFECTIVA LA GARANTÍA
• Para hacer efectiva la garantía, lleve su aparato al Centro de Servicio Autorizado más cercano a su domicilio
(consulte la lista anexa).
• Si no existe Centro de Servicio Autorizado en su localidad llame a nuestro Centro de Atención al Consumidor para
recibir instrucciones de como hacer efectiva su garantía.
FECHA DE
ENTREGA
SELLO DEL
VENDEDOR
QUEJAS Y SUGERENCIAS
DÍA___
MES___
AÑO___
Si desea hacer comentarios o sugerencias con respecto a nuestro servicio
o tiene alguna queja derivada de la atención recibida en alguno de nuestros
Centros de Servicio Autorizados, por favor dirigirse a:
GERENCIA INTERNACIONAL DE SERVICIO
800 71 16 100
Email: [email protected]
CENTROS DE SERVICIO AUTORIZADOS
Ciudad de México
ELECTRODOMÉSTICOS
Av. Plutarco Elias Calles No. 1499
Zacahuitzco, Benito Juárez,
Ciudad de México, C.P. 09490
Tel: 55 5235 2323
CASA GARCÍA
Av. Patriotismo No. 875-B
Mixcoac, Benito Juárez,
Ciudad de México, C.P. 03910
Tel: 55 5563 8723
Nuevo León
FERNANDO SEPÚLVEDA REFACCIONES
Ruperto Martínez No. 238 Ote.
Col. Centro
Monterrey, N.L., C.P. 64000
Tel: 81 8343 6700
Jalisco
SERVICIOS DE MANTENIMIENTO CASTILLO
Garibaldi No. 1450
Ladrón de Guevara
Guadalajara, Jalisco, C.P. 44660
Tel: 33 3825 3480
ALIMENT QUANTITÉ MODE TEMPÉRATURE TEMPS
Poissons et fruits de mer
Filets de poisson frais 2 (142 g/ 5 oz. chaque) filets
FRITURE À AIR
FRITURE À AIR 10–12 minutes
Boulangerie et desserts
Petits pains au babeurre réfrigérés 4 petits pains CUISSON 177 °C (350 °F) 8–10 minutes
Gâteau au beurre 1 étage de gâteau (8 po [20 cm]) CUISSON 177 °C (350 °F) 24–26 minutes
Repas complet préparé sur le plateau
Filet de porc et légumes
454 g (1 lb) de filets de porc, 2
grosses carottes tranchées en
rondelles d’une épaisseur de 1,3
cm (1/2 pouce), 2 grosses pommes
de terre coupées en cubes, 1/2
petit o ignon doux tranché en
petits quartiers minces, 5 ml (1 c. à
thé) d’épices à bifteck, 15 ml (1 c. à
table) d’huile d’olive, sel et poivre
au goût, 125 ml (1/2 tasse) de
confiture d’abricot, 15 ml (1 cuil. à
table) de vinaigre balsamique
FRITURE À AIR
FRITURE À AIR 30 minutes
*Les temps sont des indications pour différents types d’aliments dont le temps de cuisson varie. Cuire les aliments
jusqu’à la croustillance souhaitée.
REMARQUE : Les temps de cuisson sont basés sur un four préchauffé.
Sure-Crisp
®
conseils pour la friture à air de notre cuisine laboratoire
• Le mode FRITURE À AIR de Sure-Crisp
®
peut nécessiter une durée de cuisson plus longue par rapport aux appareils
de friture à air seulement.
• Veuillez toujours placer le plateau pour cuisson/grillage sur la grille et sous le panier pour friture à air pour recueillir les
jus de cuisson.
• Pour de meilleurs résultats, disposer les aliments en une seule couche uniforme dans le panier pour friture à air.
• La majorité des aliments (plus volumineux et plus épais) doivent être retournés, remués ou alternés lors de la cuisson.
• La chapelure permet de rendre les panures frites à l’air. Éviter les sauces ou les pâtes à frire.
• La position de la grille utilisée en mode de friture à air dépend de la taille des aliments à faire cuire. Utiliser la position
pour grille du milieu pour la plupart des aliments. Garder au moins 2,5 cm (1 po) entre les aliments et les éléments
chauffants.
• Ne pas chemiser le panier pour friture à air, car cela bloquerait le flux d’air. Doubler le plateau pour cuisson/grillage
sous le panier assure un nettoyage facile.
• Préchauffer le four pour des temps de cuisson réduits et une meilleure croustillance.
• Couper des morceaux de taille uniforme pour obtenir une cuisson homogène.
• Vaporiser un peu d’huile de cuisson avant la cuisson crée une texture plus croustillante, particulièrement pour les
aliments frais.
• Consulter les durées de cuisson suggérées sur les emballages des aliments et ajuster la durée selon le degré de
croustillant souhaité.
• Éviter d’ouvrir la porte du four lors de la cuisson de frites ou de croquettes de poulet congelées jusqu’à ce que le cycle
de cuisson soit presque terminé.
• Vérifier le degré de cuisson souhaité avant la fin du cycle de cuisson. Augmenter ou réduire la durée de cuisson au
besoin.
• Pour de meilleurs résultats lors de la friture à air, régler la température à FRITURE À AIR ( ).
Mode CUISSON ( )
Utiliser le mode CUISSON pour la cuisson de gâteaux, mets en cocotte, biscuits et pour le rôtissage de viandes,
volailles ou légumes. Placer la grille du four dans la position du milieu, ou inférieure. Il est nécessaire de
préchauffer le four pendant 5 minutes lors de l’utilisation du mode CUISSON.
1. Brancher dans la prise de courant. Tourner le cadran
de température à la température dés souhaitée,
puis tourner le cadran de fonction jusqu’au mode
CUISSON ( ).
2. Tourner la minuterie au-delà de 10 et ensuite
de retour à « dark toast » ( /rôtie foncée) pour
préchauffer le four pendant 5 minutes avant de
commencer la cuisson.
3. Une fois que le four est préchauffé, régler la minuterie
à la durée souhaitée en tournant d’abord le cadran
dans le sens horaire au-delà de 10 et ensuite à la
durée de cuisson souhaitée. Ou tourner le cadran
dans le sens antihoraire jusqu’à la position Stay On
(rester allumé) en appuyant sur les boutons situés sur
les côtés du cadran et en les gardant enfoncés.
4. Tourner la minuterie à OFF ( /arrêt) pour arrêter le
cycle en tout temps.
5. Débrancher.
Fonction Stay On (rester allumé)
Le four peut être réglé pour rester allumer en tournant la minuterie à la position Stay On (rester allumé) tout en
appuyant et en maintenant les boutons sur les côtés du cadran.
Mode GRILLER ( )
Mettre la grille du four dans le four. Utiliser la position pour grille supérieure pour un grillage plus rapide. Position du
milieu pour faire dorer les plats en casserole, griller les sandwichs ou faire fondre le fromage sur du pain. Utiliser la
position pour grille inférieure pour les aliments nécessitant un grillage plus long, comme le poulet et les coupes de viande
épaisses. Mettre le plateau pour cuisson/grillage sur la grille du four. Mettre dans le four. Aucun préchauffage requis. Les
aliments doivent être placés à une distance minimum de 2,5 cm (1 pouce) des éléments chauffants.
1. Brancher dans la prise. Tourner le cadran de température
jusqu’au mode FRITURE À AIR/GRILLER/RÔTIES et le
cadran de fonction jusqu’au mode GRILLER ( ).
2. Tourner le cadran de minuterie dans le sens horaire
au-delà de 10 et ensuite jusqu’à la durée de grillage
souhaitée. Ou tourner la minuterie à la position Stay On
(rester allumé) en appuyant et en maintenant les boutons
situés sur les côtés du cadran. Retourner les aliments
lorsqu’ils sont grillés ou à mi-cuisson. Le four grille à
température élevée et celle-ci ne peut pas être ajustée.
3. Tourner la minuterie à OFF ( /arrêt) pour arrêter le cycle
en tout temps.
4. Débrancher.
Mode RÔTIES ( )
Utiliser pour faire brunir et griller les pains, les bagels et les muffins anglais. Placer le côté coupé de l’aliment face vers le
haut. La grille devrait être dans la position du milieu.
1. Brancher dans la prise. Tourner le cadran de température
jusqu’au mode FRITURE À AIR/GRILLER/RÔTIES et
tourner ensuite le cadran de fonction jusqu’au mode
RÔTIES ( ).
2. Sélectionner le degré de grillage en tournant la minuterie
au-delà de 10 et ensuite de retour au réglage de couleur
de rôties souhaité. Une cloche sonnera lorsque le cycle
de grillage est terminé.
3. Tourner la minuterie à OFF ( /arrêt) pour arrêter le cycle
en tout temps.
4. Débrancher.
CONSEIL : Le nombre de tranches de pain et la fraîcheur
du pain affecteront la couleur de la (des) rôtie(s). Par
exemple, le grillage de 4 tranches de pain nécessitera
un réglage de couleur de rôtie plus foncée que pour
2 tranches de pain. Ajuster le mode RÔTIES selon le
réglage de couleur souhaité et le nombre de tranches.
Entretien et nettoyage
w AVERTISSEMENT
Risque de choc électrique. Ne pas utiliser de tampon à récurer métallique pour le
nettoyage. Des débris métalliques peuvent se détacher et tomber sur des composants électriques.
Votre four grille-pain doit être nettoyé régulièrement afin d’obtenir un meilleur rendement et une durée de vie
prolongée. Le nettoyage régulier permettra également de réduire le risque d’incendie.
1. Débrancher l’appareil et laisser refroidir
complètement.
2. Pour nettoyer l’intérieur du four grille-pain, essuyer
les parois intérieures, le fond et la porte en verre
du four à l’aide d’un chiffon humide et savonneux.
Répéter l’opération à l’aide d’un chiffon propre et
humide. Pour les taches tenaces, utiliser un tampon à
récurer en plastique.
3. Essuyer l’extérieur du four grille-pain à l’aide d’un
chiffon humide. Ne pas utiliser ne nettoyants abrasifs
ou de tampons à récurer en métal.
4. Laver le plateau pour cuisson/grillage, la grille du
four, le panier pour friture à air et le plateau ramasse-
miettes dans de l’eau chaude savonneuse. Rincer et
sécher.
Dépannage
Le four grille-pain ne chauffe pas.
• Assurer le fonctionnement de la prise murale et
le branchement du four. Tourner le cadran de
température à 177 °C (350 °F). Tourner la cadran
de fonction à CUISSON puis tourner le cadran de
minuterie à la position Stay On (rester allumé) en
appuyant et en maintenant les boutons situés sur les
côtés du cadran.
Formation de condensation à l’intérieur du four et sur
la porte pendant le brunissage.
• Cela est normal lors du grillage dans un four
grille-pain. L’humidité s’échappe plus lentement
d’un four grille-pain que d’un grille-pain. La quantité
d’humidité dégagée variera selon la fraîcheur du
pain, des bagels et des pâtisseries congelées.
Odeur et fumée émanant du four.
• La fumée et l’odeur qui se dégage sont normales
au cours de la première utilisation de la plupart des
appareils chauffants. Ceci ne devrait pas se répéter
au cours des utilisations ultérieures.
Aucun brunissage.
• Assurer le fonctionnement de la prise murale et
le branchement du four. Tourner le cadran de
température jusqu’au mode FRITURE À AIR/RÔTIES/
GRILLER. Tourner le cadran de fonction jusqu’au
mode RÔTIES; puis tourner la minuterie au-delà
de 10 et ensuite de retour au réglage de couleur de
rôties souhaité.
Quelques aliments brûlent alors que d’autres ne sont
pas cuits.
• Ajuster la position de la grille de manière à disposer
les aliments au centre du four.
• Régler la température du four ou le temps de
cuisson pour obtenir des résultats optimaux selon
les recettes utilisées.
Garantie limitée
Cette garantie s’applique aux produits achetés et utilisées
aux É.-U. et au Canada. C’est la seule garantie expresse
pour ce produit et est en lieu et place de tout autre
garantie ou condition.
Ce produit est garanti contre tout défaut de matériaux
et de main-d’oeuvre pour une période de cinq (5) ans
à compter de la date d’achat d’origine au Canada et
trois (3) ans à compter de la date d’achat d’origine
aux É.-U. Au cours de cette période, votre recours
exclusif se limitera au remplacement de ce produit ou
tout autre composant défectueux, à notre discrétion.
Cependant, vous êtes responsables des frais associés
au retour du produit ou d’un composant en vertu de la
présente garantie. Si le produit ou le composant est non
disponible, nous le remplacerons avec un article similaire
de valeur égale ou supérieure.
Cette garantie ne couvre pas le verre, les filtres, l’usure
d’un usage normal, l’utilisation non conforme aux
directives imprimées, ou des dommages au produit
résultant d’un accident, modification, utilisation abusive
ou incorrecte. Cette garantie s’applique seulement à
l’acheteur original ou à la personne l’ayant reçu en
cadeau. La présentation du reçu de vente d’origine
comme preuve d’achat est nécessaire pour faire une
réclamation au titre de cette garantie. Cette garantie
s’annule si le produit est utilisé autrement que par une
famille ou si l’appareil est soumis à toute tension ou
forme d’onde différente des caractéristiques nominales
précisées sur l’étiquette (par ex. : 120 V ~ 60 Hz).
Nous excluons toutes les réclamations au titre de cette
garantie pour les dommages spéciaux, consécutifs et
indirects causés par la violation de garantie expresse ou
implicite. Toute responsabilité est limitée au prix d’achat.
Chaque garantie implicite, y compris toute garantie ou
condition de qualité marchande ou d’adéquation à un
usage particulier, est exonérée, sauf dans la mesure
interdite par la loi, auquel cas la garantie ou condition
est limitée à la durée de cette garantie écrite. Cette
garantie vous donne des droits légaux précis. Vous
pouvez avoir d’autres droits qui varient selon l’endroit où
vous habitez. Certaines provinces ne permettent pas les
limitations sur les garanties implicites ou les dommages
spéciaux ou indirects de telle sorte que les limitations
ci-dessus ne s’appliquent peut-être pas à votre cas.
Pour faire une réclamation au titre de la garantie, veuillez
ne pas retourner cet appareil au magasin. Veuillez nous
écrire à Hamilton Beach Brands, Inc., Customer Service
Department, 4421 Waterfront Dr., Glen Allen, VA 23060,
ou visiter le site hamiltonbeach.com/customer-service
aux États-Unis ou hamiltonbeach.ca/customer-service
au Canada. Pour obtenir un service plus rapide, veuillez
repérer les numéros de modèle, de type et de séries sur
votre appareil.
w ADVERTENCIA
Riesgo de incendio.
• Si los contenidos se prenden fuego, no abra la puerta del horno. Desenchufe el horno y espere a que los
contenidos dejen de quemarse y se enfríen antes de abrir la puerta.
• No utilice el horno sin prestarle atención.
• No utilice bolsas de cocción para horno.
• No caliente alimentos en recipientes de plástico.
• No caliente tacos duros en el horno tostador. Siempre use el horno convencional.
• Siempre deje por lo menos 1 pulgada (2.5 cm) de distancia entre los alimentos y el elemento calentador.
• Siga las instrucciones del fabricante de alimentos.
• Siempre desenchufe el horno cuando no lo esté usando.
• Una limpieza regular reduce el riesgo de incendio.
SALVAGUARDIAS IMPORTANTES
Cuando utilice aparatos eléctricos, siempre deben seguirse precauciones de seguridad básicas a fin de reducir el
riesgo de incendio, descarga eléctrica, y/o lesiones a personas, incluyendo las siguientes:
1. Lea todas las instrucciones.
2. Este aparato no se destina para utilizarse por
personas (incluyendo niños) cuyas capacidades
físicas, sensoriales o mentales sean diferentes
o estén reducidas, o carezcan de experiencia
o conocimiento, a menos que dichas personas
reciban una supervisión o capacitación para el
funcionamiento del aparato por una persona
responsable de su seguridad.
3. Se requiere de una estrecha supervisión cuando
el aparato se use por o cerca de niños. La limpieza
y el mantenimiento por parte del usuario no
deben ser realizados por niños a menos que estén
supervisados. Los niños deben supervisarse para
asegurar que ellos no empleen los aparatos como
juguete.
4. Verifique que el voltaje de su instalación
corresponda con el del producto.
5. No toque superficies calientes. Use manijas o
perillas.
6. Para protegerse contra el riesgo de choque eléctrico,
no sumerja el cable, el enchufe o el horno eléctrico
en agua ni en ningún otro líquido.
7. Desenchúfelo del tomacorriente cuando no lo esté
usando y antes de la limpieza. Deje que el aparato
se enfríe antes de limpiarlo o de colocar o sacar
alguna pieza. Para desenchufarlo, tome el enchufe
y retírelo del tomacorriente. Nunca tire del cable
eléctrico.
8. No opere ningún aparato con cables o enchufe
dañados o después de que el aparato funcione mal
o se caiga o dañe de cualquier manera. El reemplazo
del cable de suministro y las reparaciones deben ser
efectuadas por el fabricante, su agente de servicio,
o personas igualmente calificadas para poder evitar
un peligro. Comuníquese con Servicio al cliente para
obtener información sobre la revisión, la reparación
o los ajustes, según lo establecido en la Garantía
limitada.
9. El uso de accesorios no recomendados por el
fabricante del aparato puede causar lesiones.
10. No lo use al aire libre.
11. No deje que el cable cuelgue sobre el borde de
una mesa o de un mostrador, o que toque alguna
superficie caliente.
12. No coloque el aparato sobre o cerca de un
quemador a gas o eléctrico caliente, ni dentro de un
horno caliente.
13. Es importante tener extremo cuidado cuando se
mueva un aparato eléctrico que contenga aceite
caliente u otros líquidos calientes.
14. Para desconectar, gire el temporizador a OFF
( /apagado) y luego saque el enchufe del
tomacorriente.
15. Tenga mucho cuidado cuando saque la charola o
elimine la grasa caliente.
16. No limpie con esponjillas metálicas. La esponjilla
se puede desintegrar y los trozos pueden tocar
las partes eléctricas, creando un riesgo de choque
eléctrico.
17. No introduzca alimentos de tamaño demasiado
grande ni utensilios metálicos en el horno eléctrico
ya que pueden crear un incendio o riesgo de
choque eléctrico.
18. El pan puede arder. Puede ocurrir un incendio
si el horno tostador está cubierto o en contacto
con material inflamable como cortinas, paredes,
armarios por encima, productos de papel o de
plástico, toallas de tela u objetos semejantes,
cuando está en operación. No colocar nada en
la parte superior del aparato cuando está en
funcionamiento.
19. Se debe tener mucho cuidado cuando se usan
envases que no sean de metal o de vidrio.
20. No guarde ningún material adentro del horno
cuando no se use, exceptuando los accesorios
recomendados por el fabricante.
21. No coloque ninguno de los siguientes materiales en
el horno: papel, cartón, plástico y similares.
22. No cubra la bandeja para migas extraíble ni ninguna
otra parte del horno con papel metálico. Eso hará
que el horno se recaliente.
23. Para apagar el horno, gire el temporizador a OFF
( /apagado). Consulte la sección “Piezas y
características”.
24. No ponga los ojos o la cara cerca de la puerta de
seguridad de vidrio templado, en caso de que el
vidrio de seguridad se rompa.
25. Siempre use el aparato con la bandeja para migas
extraíble firmemente en su lugar.
26. No use el aparato para ningún otro fin que no sea el
indicado.
27. Limpie con cuidado el interior del horno. No raye ni
dañe el tubo del elemento de calentamiento.
28. No haga funcionar el horno sin vigilancia.
29. No haga funcionar el aparato mediante un
temporizador externo o un sistema de control
remoto separado.
30. PRECAUCIÓN: SUPERFICIE CALIENTE. La
temperatura de las superficies accesibles
puede ser alta cuando el aparato se encuentra
en funcionamiento.
GUARDE ESTAS INSTRUCCIONES
Otra información de seguridad para el cliente
Este aparato ha sido diseñado solamente para uso doméstico.
w ADVERTENCIA
Riesgo de descarga eléctrica:
Este aparato es provisto con un enchufe polarizado (una
pata más ancha) para reducir el riesgo de una descarga
eléctrica. El enchufe embona únicamente en una dirección
dentro de un tomacorriente polarizado. No trate de obviar
el propósito de seguridad del enchufe modificándolo de
alguna manera o utilizando un adaptador. Si el enchufe no
entra completamente en la toma, invierta el enchufe. Si aún
no entra, haga que un electricista reemplace la toma.
El largo del cable que se usa en este aparato fue
seleccionado para reducir el peligro de que alguien
se enganche o tropiece con un cable más largo. Si es
necesario usar un cable más largo, se podrá usar un cable
de extensión aprobado. La clasificación eléctrica nominal
del cable de extensión debe ser igual o mayor que la
clasificación nominal del aparato. Es importante tener
cuidado de colocar el cable de extensión para que no se
pliegue sobre el mostrador o lamesera en donde niños
puedan tirar del mismo o tropezarse accidentalmente.
Este aparato viene equipado con una puerta de seguridad
de vidrio totalmente templado. El vidrio templado es cuatro
veces más fuerte que el vidrio común y más resistente a las
roturas. El vidrio templado se puede romper, sin embargo
se rompe en trozos sin bordes filosos. Es importante tener
cuidado para evitar rayar la superficie de la puerta o hacer
muescas en los bordes. Si la puerta está rayada o tiene
muescas, llame a nuestro número de servicio al cliente.
Siempre desenchufe el horno del tomacorriente cuando no
lo esté usando.
Para ordenar piezas:
hamiltonbeach.com/parts
Piezas y características
ÍCONO MODO
HORNEAR
ASAR
TOSTAR (hasta 6 rebanadas)
FREÍR CON AIRE
1. Cuadrante de temperatura
2. Cuadrante de función
3. Cuadrante del tostador/
temporizador
4. Luz indicadora ON (encendido)
5. Bandeja para migas extraíble
6. Rejilla del horno
7. Bandeja para hornear/asar
8. Cesta para freír con aire
Posición superior de la rejilla:
ASAR/TOSTAR (BAGEL)
Posición inferior de la rejilla:
HORNEAR
Posición media de la rejilla:
FREÍR CON AIRE/HORNEAR/TOSTAR
Como usar
w ADVERTENCIA
Riesgo de incendio.
• Si el contenido prende fuego, no abra la puerta del horno. Desconecte el horno tostador y deje que el
contenido deje de quemarse y se enfríe antes de abrir la puerta.
• No use bolsas para cocinar en el horno.
• Deje 1 pulgada (2.5 cm) entre el alimento y el elemento de calor.
• Siempre desconecte el horno tostador cuando no esté en uso.
Antes del primer uso: La mayoría de los aparatos de calentamiento producen un olor y/o humo cuando se usan
por primera vez. Enchufe el horno eléctrico en el tomacorriente. Gire el cuadrante de temperatura a 450°F (230°C).
Caliente a esta temperatura por 10 minutos. El olor deberá desaparecer después del precalentamiento inicial. Lave
todas las piezas extraíbles como se muestra arriba con agua caliente jabonosa. Enjuague y seque.
Modo FREÍR CON AIRE ( )
Use el modo FREÍR CON AIRE para cocinar alimentos crujientes con poco aceite agregado. Es posible que los alimentos
deban voltearse, agitarse o girarse a la mitad de la cocción. El modo FREÍR CON AIRE cocina y dora uniformemente
mediante circulación forzada de aire caliente que cocina alimentos crujientes. Para una cocción más rápida, precaliente
el horno para reducir el tiempo de cocción. La posición de la rejilla utilizada para freír al aire depende del tamaño de los
alimentos que se cocinarán. Verifique que los alimentos estén bien cocidos antes del tiempo de cocción recomendado en
el paquete.
1. Enchufe en el tomacorriente. Gire el cuadrante de función
a FREÍR CON AIRE ( ).
2. Inserte la rejilla del horno. Agregue alimentos a la cesta
para freír con aire. Coloque la cesta en la bandeja para
hornear/asar sobre la rejilla del horno. Asegúrese de que
los alimentos estén al menos a 1 pulgada (2,5 cm) del
elemento calefactor.
3. Gire el cuadrante de temperatura a Air Fry (freír con aire).
4. Gire el temporizador en el sentido de las agujas del reloj
más allá de 10, luego al tiempo de cocción deseado. O
bien, gire el temporizador a Stay On (dejar encendido)
mientras presiona y sostiene los botones del lado del
cuadrante.
5. Si se selecciona el tiempo, el temporizador sonará
cuando se complete el tiempo seleccionado. Si la función
Stay on (dejar encendido) es seleccionado, gire el
temporizador a OFF ( /apagado) para finalizar el ciclo en
cualquier momento.
6. Desenchufe.
Guía de cocción
El modo FREÍR CON AIRE del horno tostador Sure-Crisp
®
puede requerir más tiempo de cocción que las freidoras
con aire independientes.
NOTA: Es posible que los alimentos deban voltearse, agitarse o girarse a la mitad de la cocción.
ALIMENTO CANTIDAD MODO TEMPERATURA TIEMPO
Papas fritas y bocadillos congelados
Papas fritas congeladas 12 oz. (340 g)
FREÍR CON AIRE
FREÍR CON AIRE 18–20 minutos
Nuggets de pollo congelados 1/2 paquete (16 oz./453 g)
FREÍR CON AIRE
FREÍR CON AIRE 11–13 minutos
Frituras de pollo empanadas congeladas
aproximadamente 12 tiras (16 oz./453 g) FREÍR CON AIRE
FREÍR CON AIRE 18–20 minutos
Vegetales
Coliflor 1 coliflor pequeño (14 oz./397 g)
cortado en ramitos
FREÍR CON AIRE
FREÍR CON AIRE 13–15 minutos
Papas fritas frescas 2 papas tamaño mediano
FREÍR CON AIRE
FREÍR CON AIRE 25–30 minutos
Carne y aves
Alas de pollo frescas enteras
6 alas enteras
FREÍR CON AIRE
FREÍR CON AIRE 25–30 minutos
Frituras de pollo frescas 1 lb. (454 g)
FREÍR CON AIRE
FREÍR CON AIRE 16–18 minutos
Hamburguesa (grosor de 1/2”
[1.3 cm]) 80% magra, 20% grasa
2 hamburguesas
FREÍR CON AIRE
FREÍR CON AIRE 20–25 minutos
Hamburguesa (grosor de 1/2”
[1.3 cm]) 80% magra, 20% grasa
4 (4 oz./113 g cada una)
hamburguesas
ASAR ASAR 14–16 minutos
Filete (3/4 de pulgada [1.9 cm] de grosor)
10 oz. (283 g)
FREÍR CON AIRE
FREÍR CON AIRE 15–20 minutos
Filete (3/4 de pulgada [1.9 cm] de grosor)
10 oz. (283 g) ASAR ASAR 14–18 minutos
Pescado y mariscos
Filetes de pescado frescos 2 (5 oz./142 g cada una) filete
FREÍR CON AIRE
FREÍR CON AIRE 10–12 minutos
Repostería y postres
Bísquets refrigerados 4 galletas HORNEAR 350°F (177°C) 8–10 minutos
Pastel amarillo
1 capa de pastel (8 pulgadas [20 cm])
HORNEAR 350°F (177°C) 24–26 minutos
Cena en la sartén
Lomo de cerdo y verduras
1 libra de lomo de cerdo; 2
zanahorias grandes en rodajas de
1/2 pulgada (12 mm) de grosor; 2
papas grandes cortadas en cubos;
1/2 cebolla dulce pequeña cortada
en gajos finos; 1 cucharadita de
sazonador para bistec; 1 cucharada
de aceite de oliva; sal y pimienta
al gusto; 1/2 taza de mermelada
de albaricoque (chabacano); 1
cucharada de vinagre balsámico
FREÍR CON AIRE
FREÍR CON AIRE 30 minutos
*Los tiempos son una guía para diferentes tipos de alimentos que varían en el tiempo de cocción. Cocine los
alimentos hasta que estén tan crujientes como se desee.
NOTA: Los tiempos de cocción se basan en un horno precalentado.
Sure-Crisp
®
consejos para freír con aire de nuestra cocina de prueba
• El modo FREÍR CON AIRE de Sure-Crisp
®
puede requerir más tiempo de cocción que las freidoras sin aceite independientes.
• Use siempre la bandeja para hornear/asar sobre la rejilla debajo de la cesta para freír con aire para atrapar el goteo.
• Coloque los alimentos en una sola capa uniforme en la cesta para freír con aire.
• La mayoría de los alimentos (de mayor tamaño/espesor) deban voltearse, agitarse o girarse durante la cocción.
• Las migas de pan hacen que el recubrimiento de los alimentos freídos sin aceite sean más crujientes. Evitar las salsas o los
rebozados.
• La posición de la rejilla utilizada para freír con aire depende del tamaño de los alimentos que se van a cocinar. Use la
posición superior de la rejilla para la mayoría de los alimentos. Mantenga al menos 1 pulgada (2.5 cm) de separación entre
los alimentos y los elementos calefactores.
• No forre la cesta para freír con aire; eso obstruye el flujo de aire. Forre la bandeja para hornear/asar debajo de la canasta
para facilitar la limpieza.
• Precaliente el horno para obtener tiempos de cocción más cortos/mejor textura crujiente.
• Corte piezas de tamaño uniforme para obtener resultados de cocción uniformes
• Un ligero rocío de aceite de cocinar antes de cocinar proporciona una textura más crujiente, especialmente para alimentos
frescos.
• Revise los tiempos de cocción sugeridos en el empaque de los alimentos y ajuste el tiempo para la textura crujiente
deseada.
• Evite abrir la puerta del horno mientras cocina papas fritas o nuggets de pollo congelados hasta que el ciclo de cocción esté
casi terminado.
• Verifique que los alimentos estén bien cocidos antes de terminar el ciclo de cocción. Añada o reduzca tiempo de cocción si
es necesario.
• Para obtener mejores resultados al freír con aire, configure la temperatura a FREÍR CON AIRE ( ).
Modo HORNEAR ( )
Utilice el modo HORNEAR para pasteles, guisos, galletas y carnes asadas, aves o verduras. Coloque la rejilla del horno
en la posición superior, media o inferior. Es necesario precalentar el horno durante 5 minutos para el modo HORNEAR.
1. Enchufe en el tomacorriente. Gire el cuadrante de
temperatura a la temperatura deseada, luego gire el
cuadrante de función a HORNEAR ( ).
2. Gire el temporizador en sentido horario más allá de
10, después regrese a “dark toast” ( /tostado oscuro)
para precalentar el horno por 5 minutos antes de
comenzar a cocinar.
3. Después de precalentar el horno, ajuste el
temporizador al tiempo deseado girando en el sentido
de las agujas del reloj más allá de 10, luego al tiempo
de hornear deseado. O bien, gire el temporizador a
Stay On (permanecer encendido) mientras mantiene
presionados los botones en el costado del selector.
4. Gire el temporizador a OFF ( /apagado) para finalizar
el ciclo en cualquier momento.
5. Desenchufe.
Función Stay On (dejar encendido)
El horno se puede configurar para que permanezca encendido girando el temporizador a Stay On (permanecer
encendido) mientras se mantienen presionados los botones del lado del cuadrante.
Modo ASAR ( )
Coloque la rejilla del horno en el horno. Use la posición alta de la rejilla para tiempos de asado más rápidos. Posición
media de la rejilla para dorar la superficie superior de los asados, tostar sándwiches o derretir queso sobre el pan.
Posición baja de la rejilla para alimentos que necesitan tiempos de asado más largos, como pollo y cortes gruesos
de carne. Coloque la bandeja para hornear/asar sobre la rejilla del horno. Coloque en el horno. No es necesario
precalentar. Los alimentos deben estar separados un mínimo de 1 pulgada (2.5 cm) de los elementos de calefacción.
1. Enchufe en un tomacorriente. Gire el cuadrante de
temperatura a FREÍR CON AIRE/TOSTAR/ASAR y el
cuadrante de función a ASAR ( ).
2. Gire el temporizador en el sentido horario más allá de
10, luego al tiempo de asar deseado. O bien, gire el
temporizador a Stay On (dejar encendido) mientras
presiona y sostiene los botones del lado del cuadrante.
Voltee los alimentos cuando estén dorados o a la mitad
del tiempo de cocción. El horno asa a alta temperatura
y no se puede ajustar.
3. Gire el temporizador a OFF ( /apagado) para finalizar
el ciclo en cualquier momento.
4. Desenchufe.
Modo TOSTAR ( )
Úselo para dorar y tostar panes, rosquillas y magdalenas. Coloque los alimentos con el lado cortado/partido hacia
arriba. La rejilla debe estar en la posición media.
1. Enchufe en un tomacorriente. Gire el cuadrante de
temperatura a FREÍR
CON
AIRE/TOSTAR/ASAR y el
cuadrante de función a TOSTAR ( ).
2. Seleccione el tono de tostado girando el temporizador
en el sentido horario más allá de 10, y luego vuelva al
color de tostado deseado. Sonará una campana cuando
se complete el ciclo de tostado.
3. Gire el temporizador a OFF ( /apagado) para finalizar el
ciclo en cualquier momento.
4. Desenchufe.
CONSEJO: La cantidad de rebanadas de pan y la
frescura del pan afectará el color del tostado. Por
ejemplo, para tostar 4 rebanadas de pan se requiere
un ajuste del color de tostado más oscuro que para 2
rebanadas de pan. Ajuste el modo TOSTAR según el
color deseado y la cantidad de rebanadas.
Cuidado y limpieza
w ADVERTENCIA
Riesgo de descarga eléctrica. No limpie con estropajos metálicos. Las piezas pueden romper
la almohadilla y tocar partes eléctricas.
Su horno tostador debe limpiarse regularmente para un mejor rendimiento y una larga vida útil. La limpieza
regular también reducirá el riesgo de incendio.
1. Desenchufe y deje enfriar completamente.
2. Para limpiar el interior del horno tostador, limpie las
paredes, el fondo del horno y el vidrio con un paño
húmedo y jabonoso. Repita con un paño limpio
húmedo. Para manchas difíciles, use un estropajo de
plástico.
3. Limpie el exterior del horno tostador con un
paño húmedo. No utilice limpiadores abrasivos ni
estropajos metálicos.
4. Lave la bandeja para migas extraíble, la bandeja para
hornear/asar, la cesta para freír con aire y la rejilla del
horno en agua jabonosa caliente. Enjuague y seque.
Resolviendo problemas
El horno no calienta.
• Revise para asegurarse que la toma eléctrica esté
funcionando y el horno esté conectado. Gire el
cuadrante de temperatura a 350°F (177°C). Gire
el cuadrante de función a HORNEAR; luego gire
el cuadrante del temporizador a Stay On (dejar
encendido) mientras presiona y sostiene los
botones del lado del cuadrante.
Se forma humedad en el interior de la puerta del
horno cuando tuesta.
• Esto es normal al tostar en un horno tostador. La
humedad escapa más lentamente de un horno
tostador que de un tostador. Se forma humedad en
el interior de la puerta del horno cuando tuesta.
Sale un olor o humo del horno.
• El humo y olor es normal durante el primer uso
de la mayoría de los aparatos con calor. Esto no
estará presente después del periodo inicial de
calentamiento.
El horno no tuesta.
• Revise para asegurarse que la toma esté
funcionando y el horno esté conectado. Gire el
cuadrante de temperatura a FREÍR CON AIRE/
TOSTAR/ASAR. Gire el cuadrante de función a
TOSTAR, gire el temporizador en el sentido horario
más de 10, y luego vuelva al color de tostado
deseado.
Algunos alimentos se queman y algunas no se
cocinan.
• Ajuste la posición de la rejilla del horno para centrar
el alimento en el horno.
• Ajuste la temperatura del horno o tiempo de cocción
para mejores resultados con sus recetas.
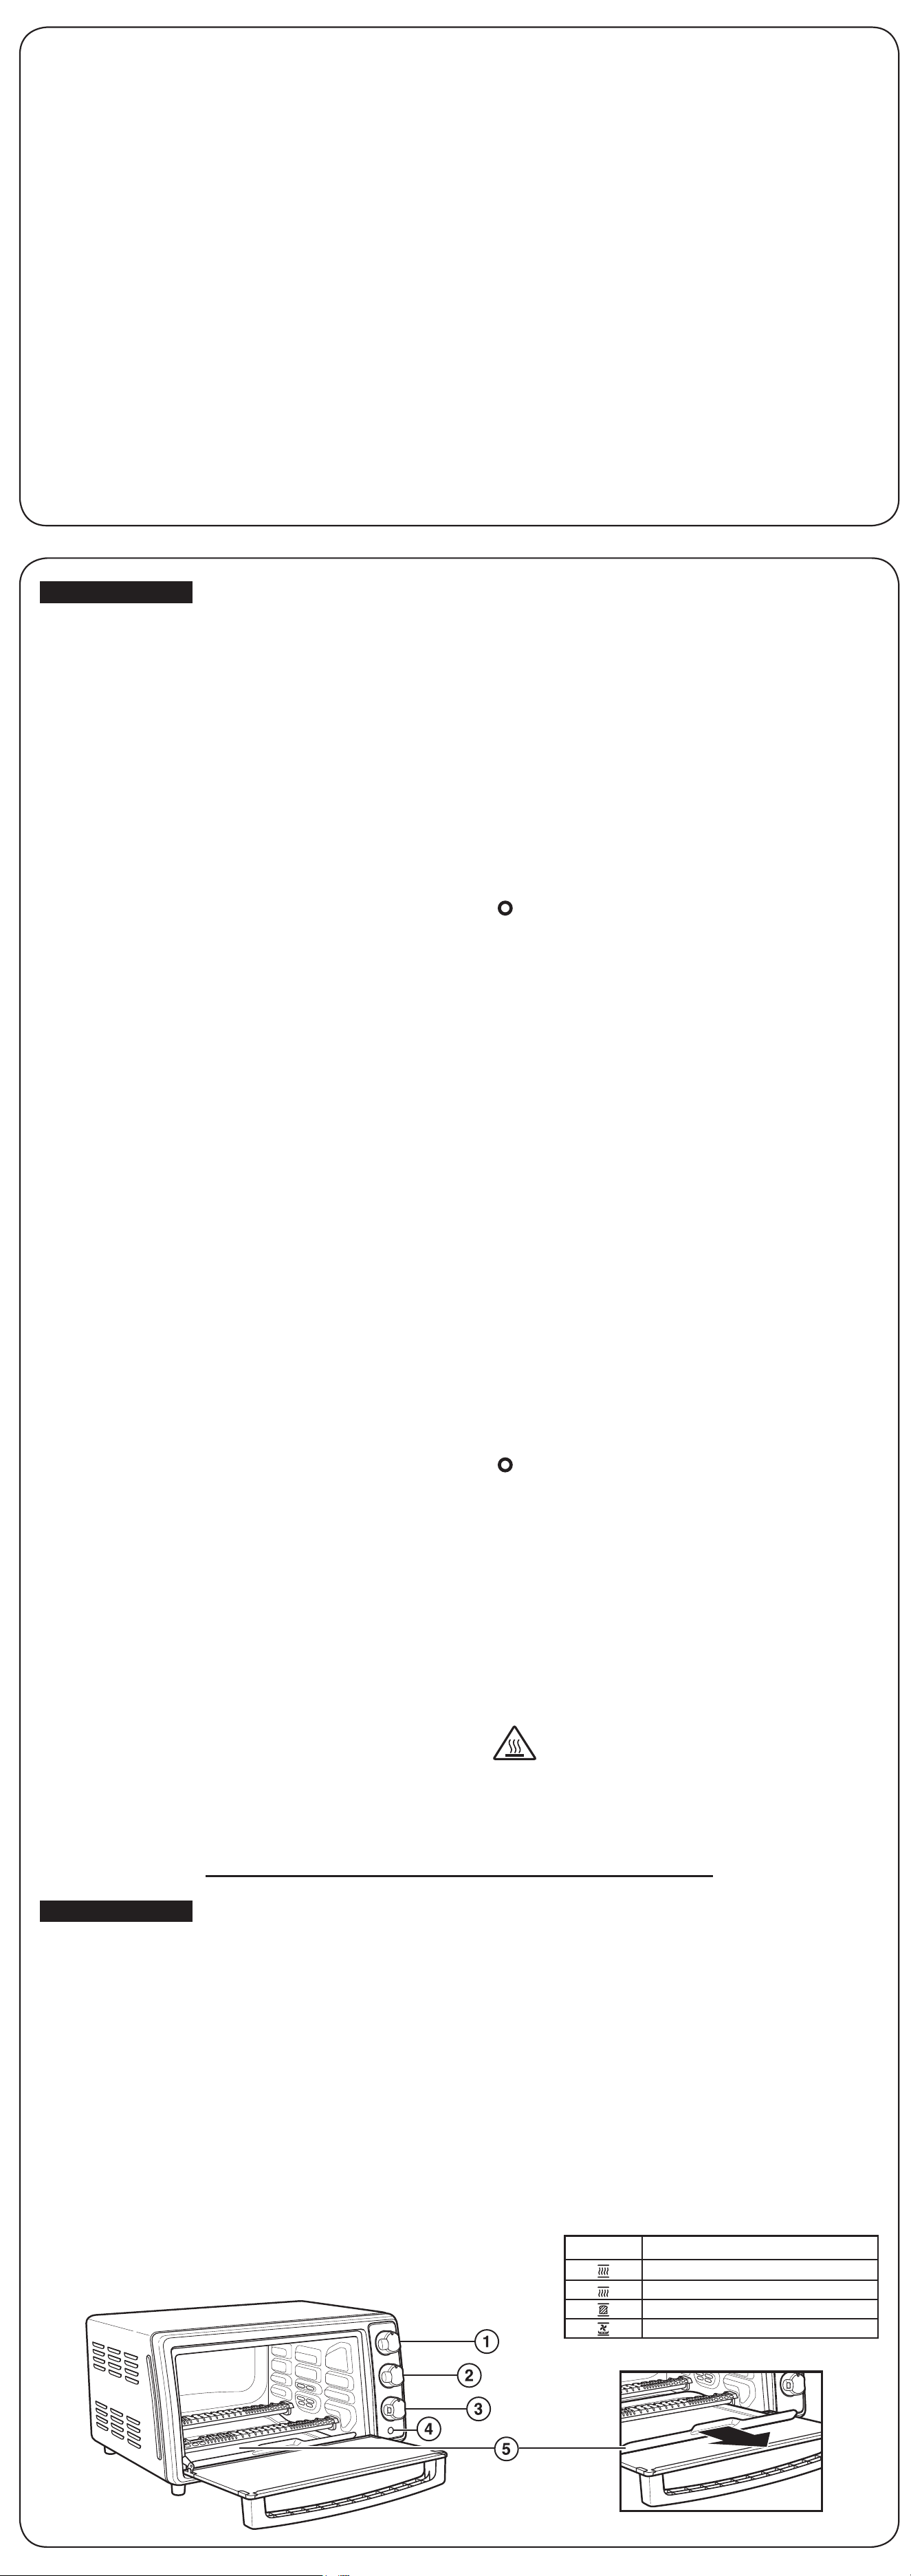
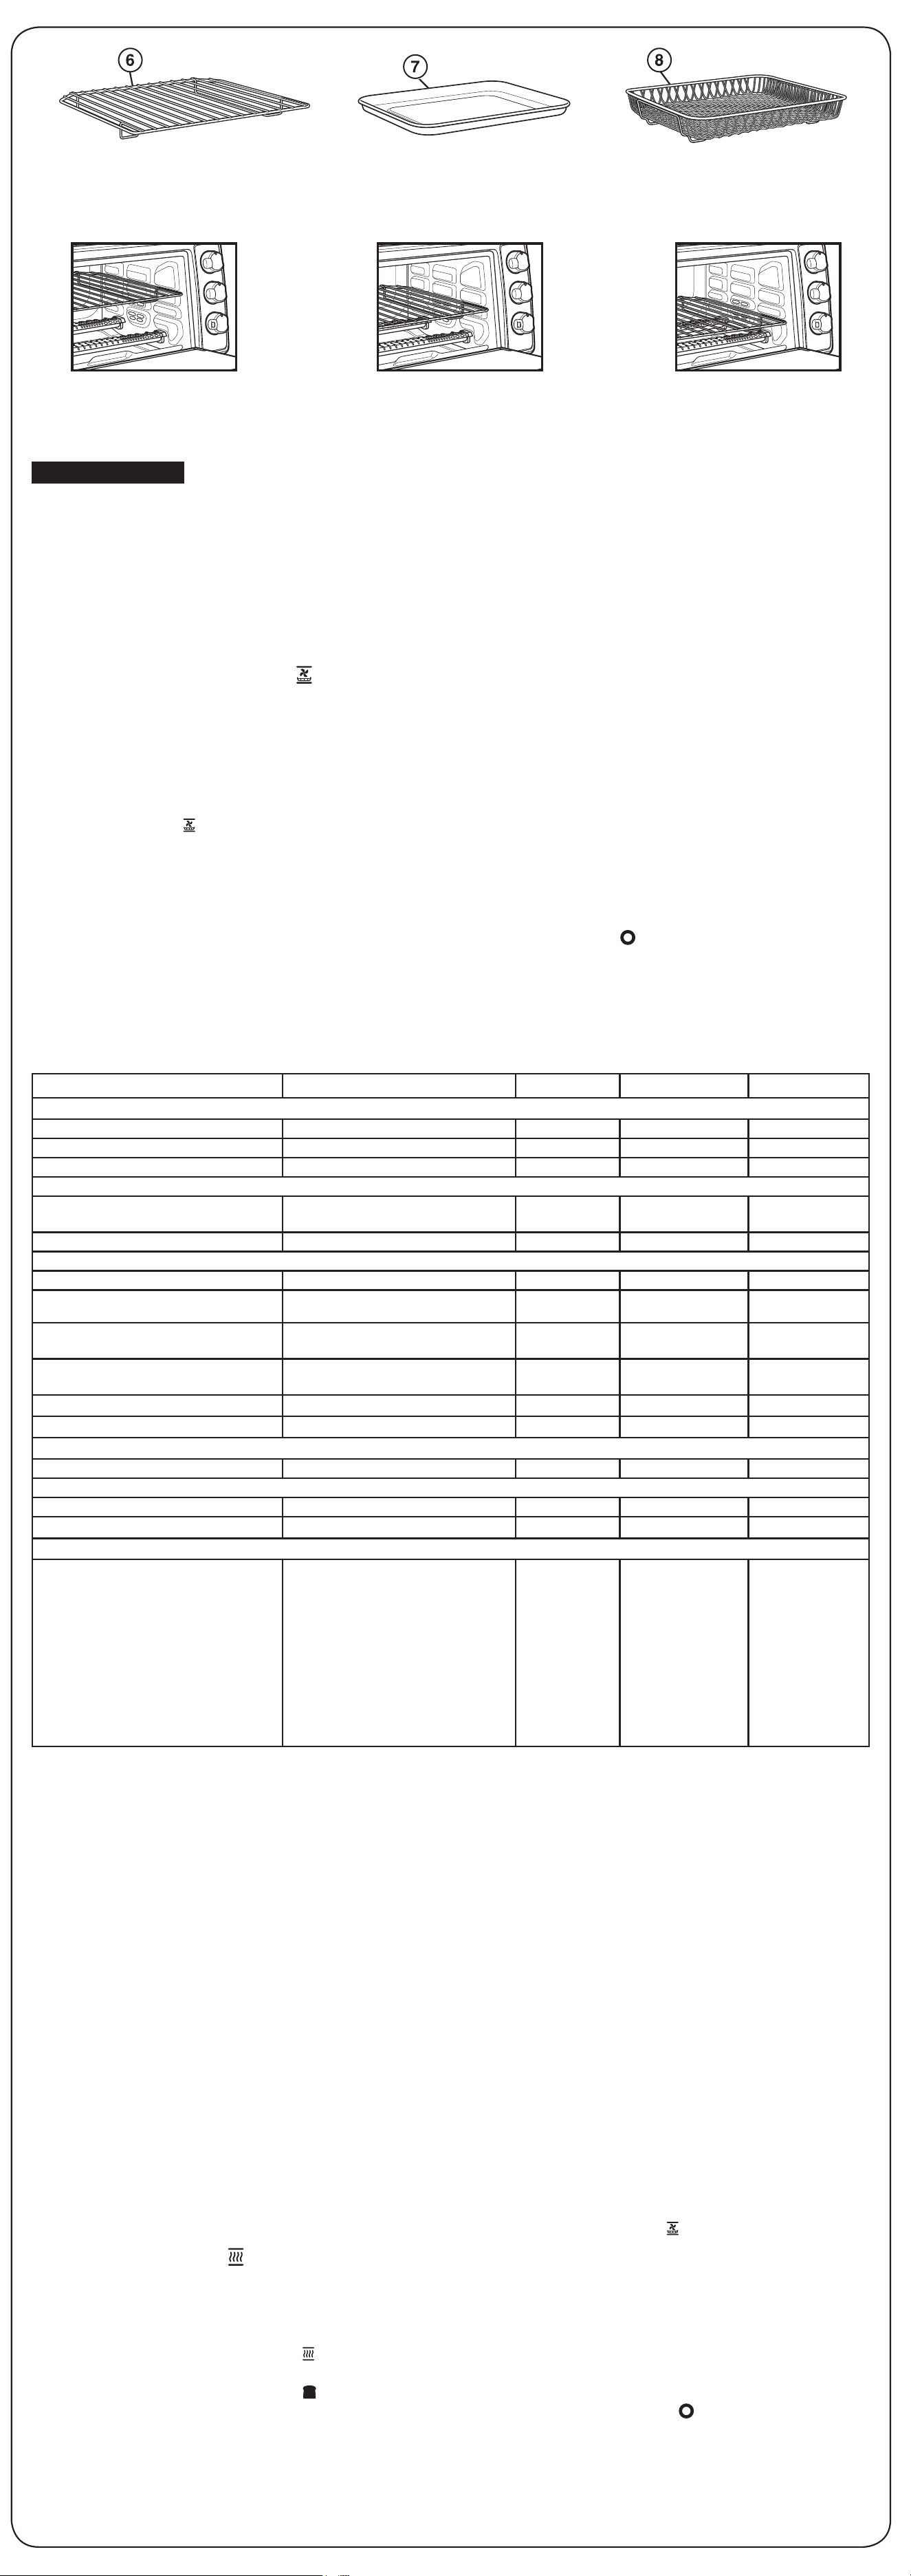