DE
!
.
HWC90UC
User Manual
Wine Cabinet
Safety information
WAR
N
I
N
G
:
R
i
s
k
of
r
e
/
a
mm
able
m
a
t
e
r
i
al.
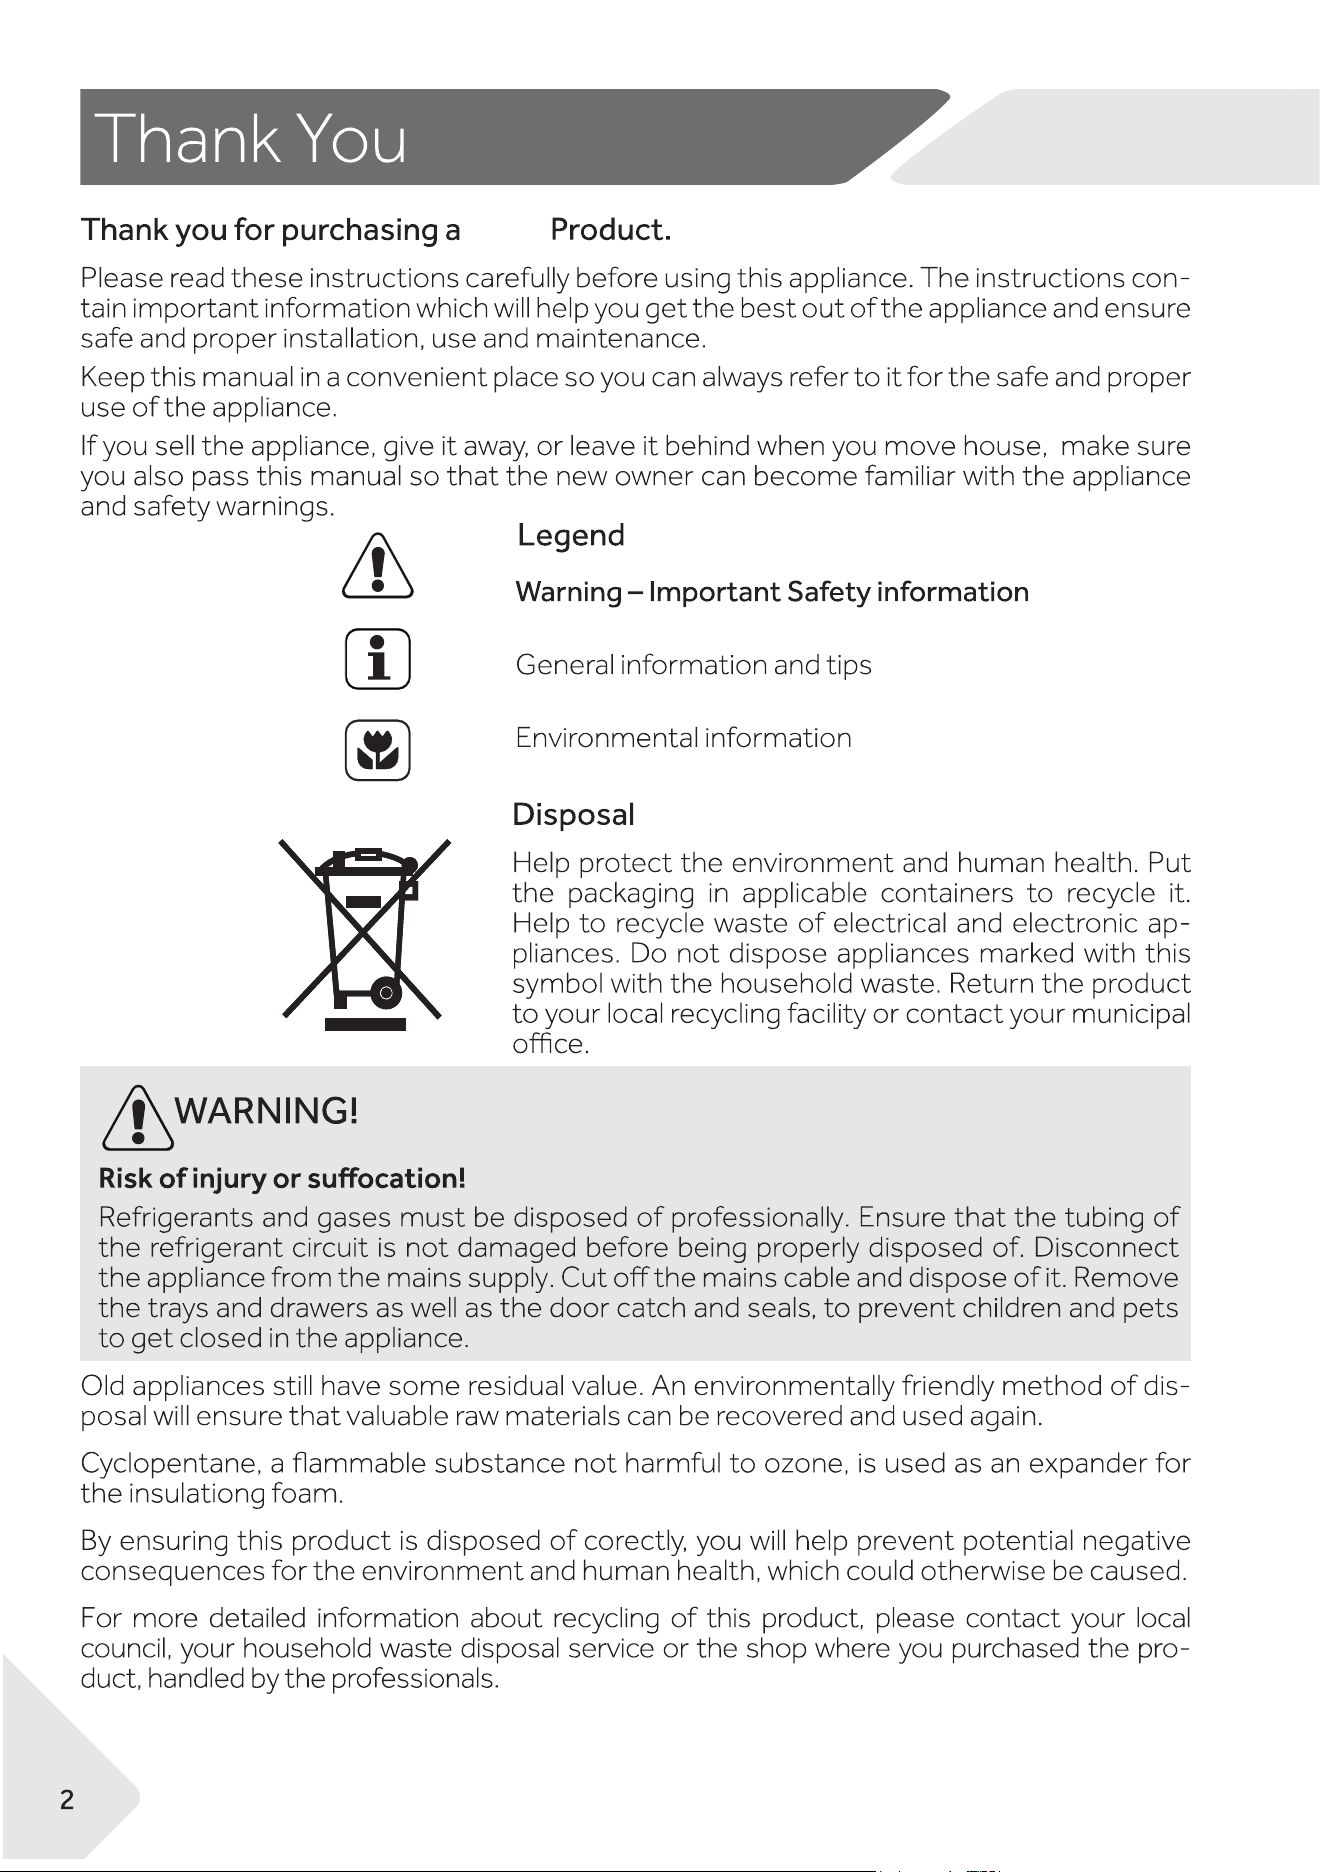
Thesymbolindicatesthereisariskoffiresince
flammable materials are used. Take care to avoid
causingafirebyingitingflammablematerial.
Wine Cabinet
Haier
19
21
22
23
24
27
29
28
▶
▶
▶
▶
▶
▶
▶
▶
▶
▶
▶
▶
▶
50mm
0.5
10
220V-240 V/50
EN
▶
▶
▶
▶
▶
▶
▶
▶
▶
▶
▶
▶
▶
▶
▶
EN
▶
▶
▶
▶
▶
▶
▶
▶
▶
▶
▶
▶
▶
10 43
EN
▶
▶
▶
▶
▶
▶
▶
▶
▶
soapy water
EN
▶
▶
▶
▶
not
EN
▶
▶
EN
▶
▶
▶
▶
▶
▶
▶
▶
▶
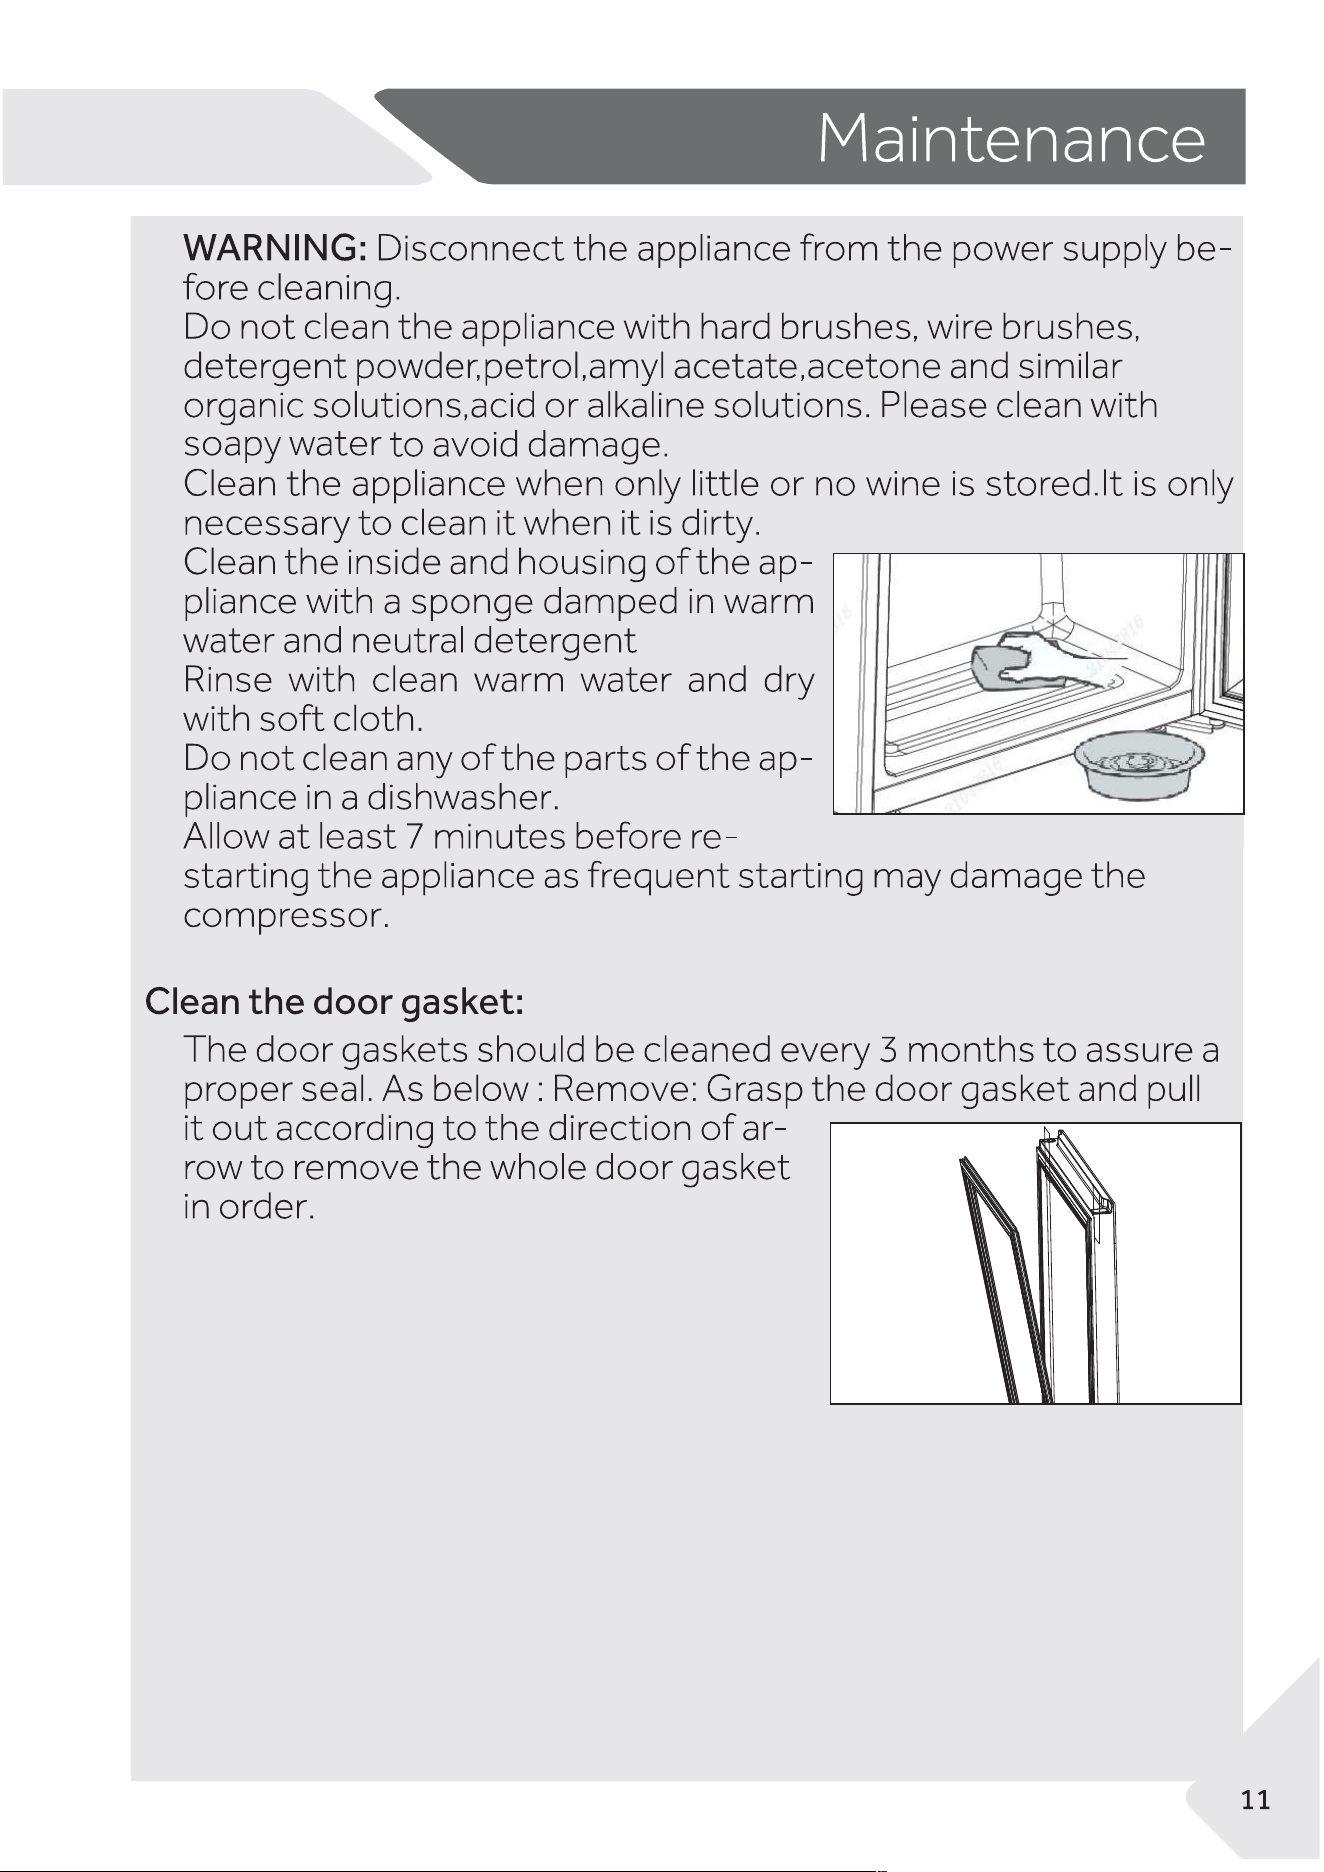
First use a brush to clean the gasket
grooves, then wipe the sealing surface
with a soft damp cloth. Finally, dry the
gasket with a clean towel.
EN
▶
▶
▶
▶
▶
of
damp cloth.

Accessories
Check the accessories and literature in accordance with this list:
HWC90UC
1141 1
Top shelf
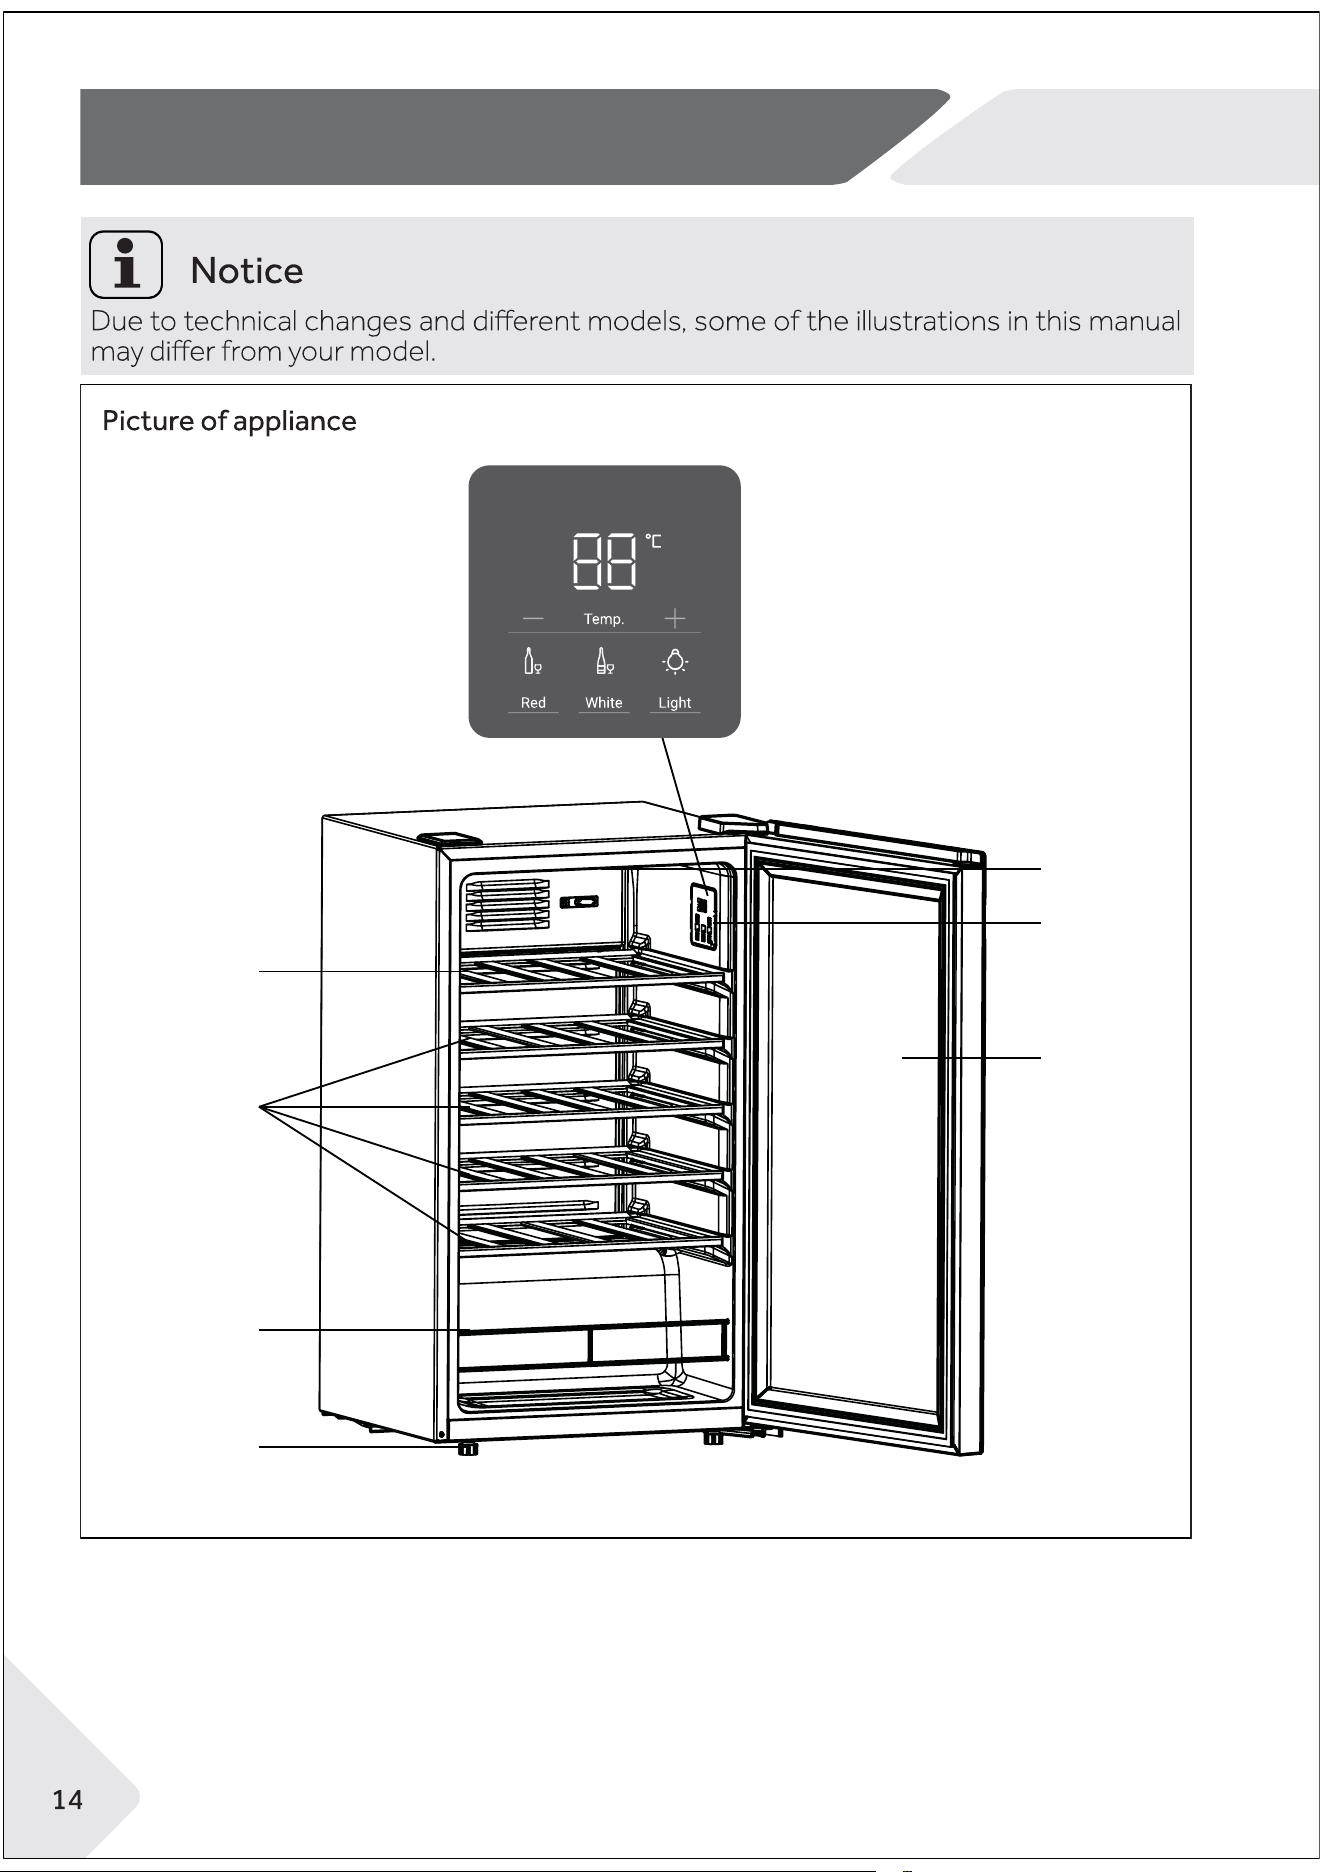
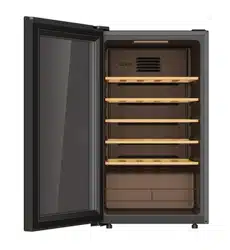
Product description
2
3
1
4
5
6
7
1. Top Shelf
2. Shelf
3. Wire barrier
4.Adjustable feet
5.LED Lamp
6.Display
7.Glass door
Installation
R
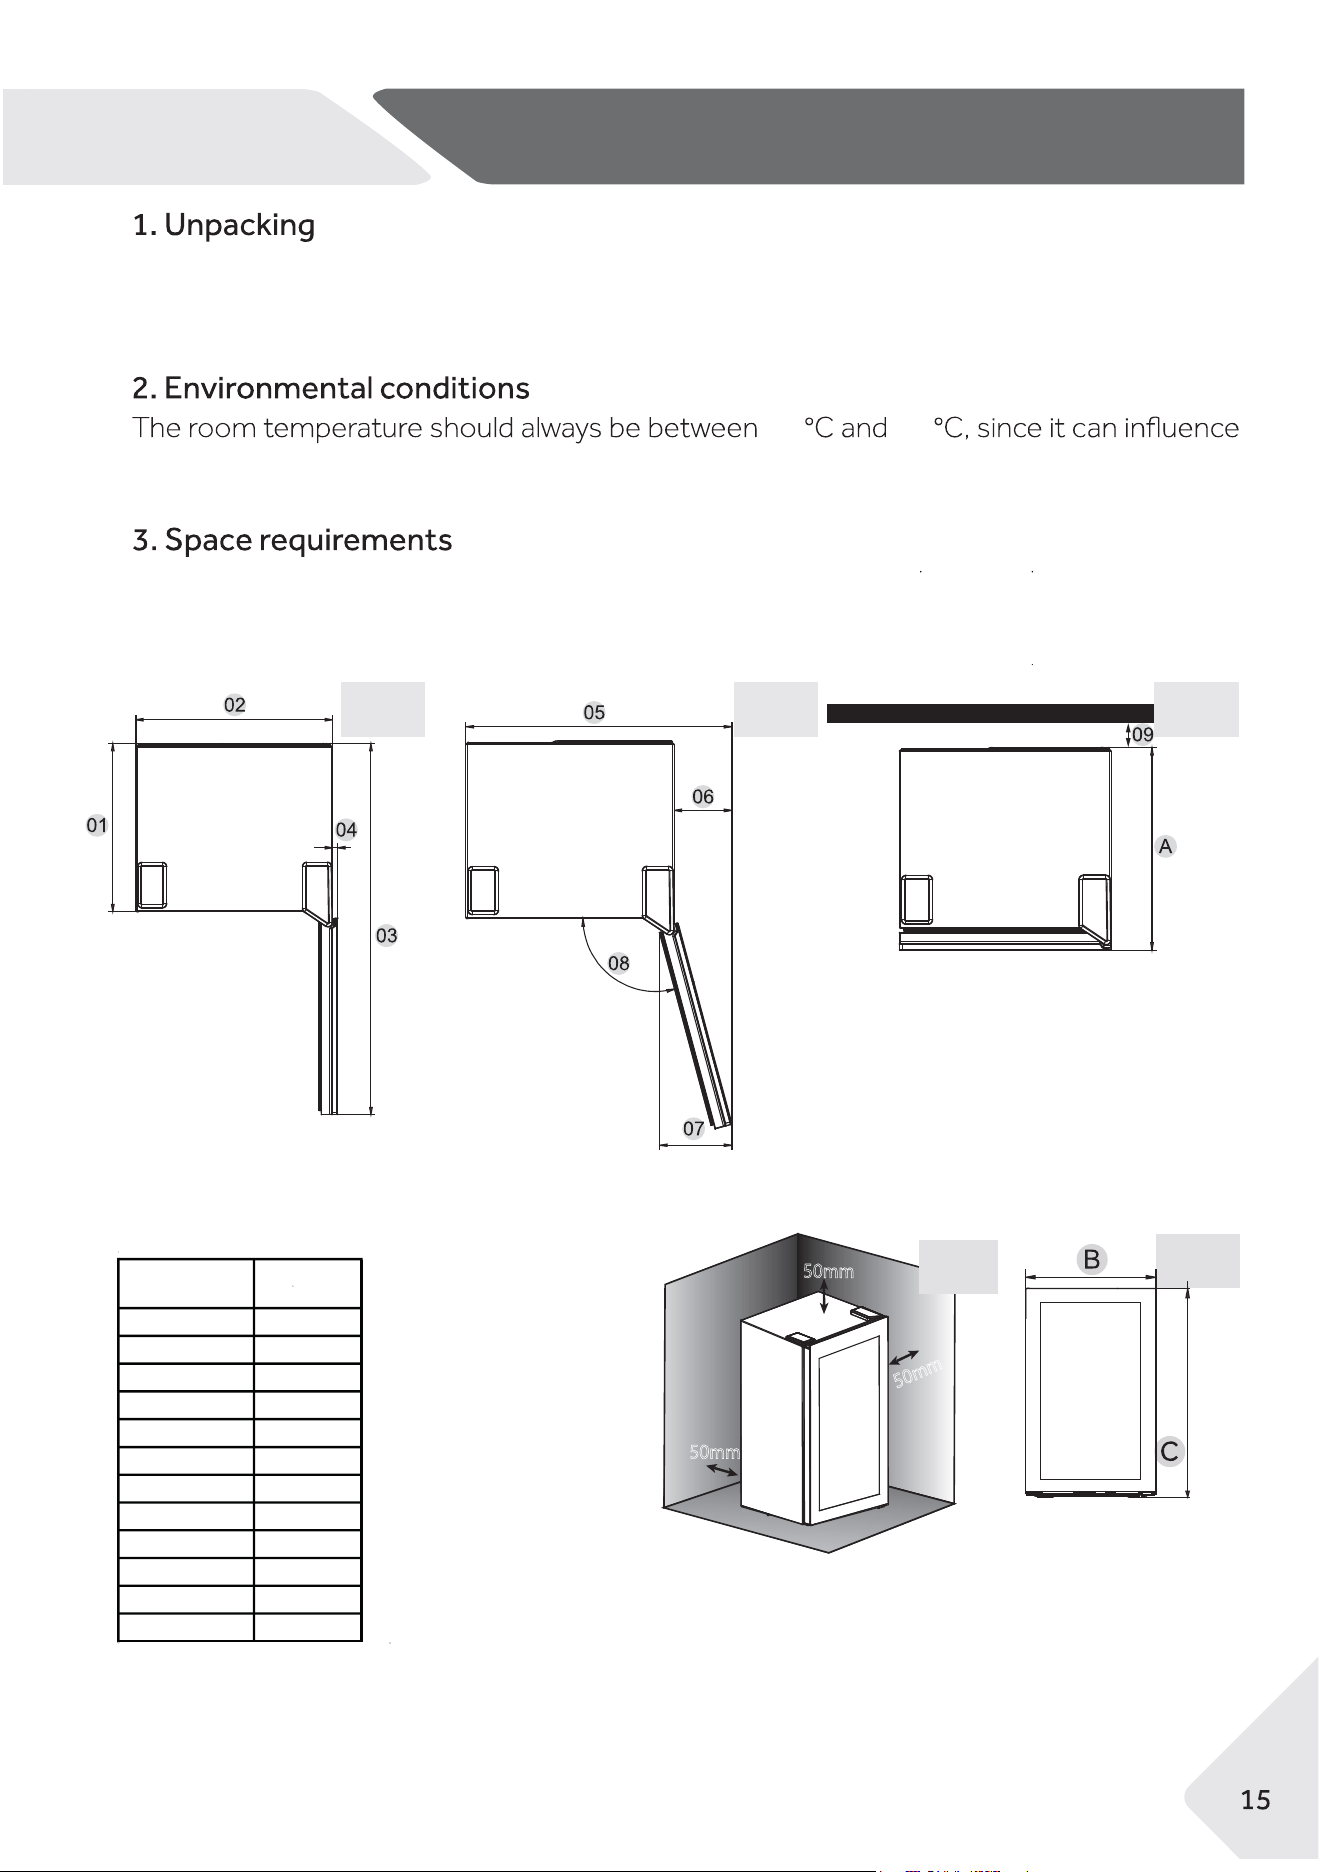
ventilation distance of 50 mm in all directions must be observed(Fig.5).
equired space to open the door (Fig. 1,2,3,4);For safety and energy reasons,the required
▶ Take the appliance out of the packaging.
▶ Remove all packaging materials including the foam base and all adhesive tape hold-
ing the accessories.
the temperature inside the appliance and its energy consumption. Do not install the appli-
ance near other heat-emitting appliances (ovens, refrigerators) without isolation.
1 2 3
Measurement:
mm
Depth A
HWC90UC
456
475
850
406
475
897
13
608
133
166
105°
50
Width B
Overall Height
C
01
02
03
04
05
06
07
08
09
10 43
4
5
50mm
50mm
50m
m
EN
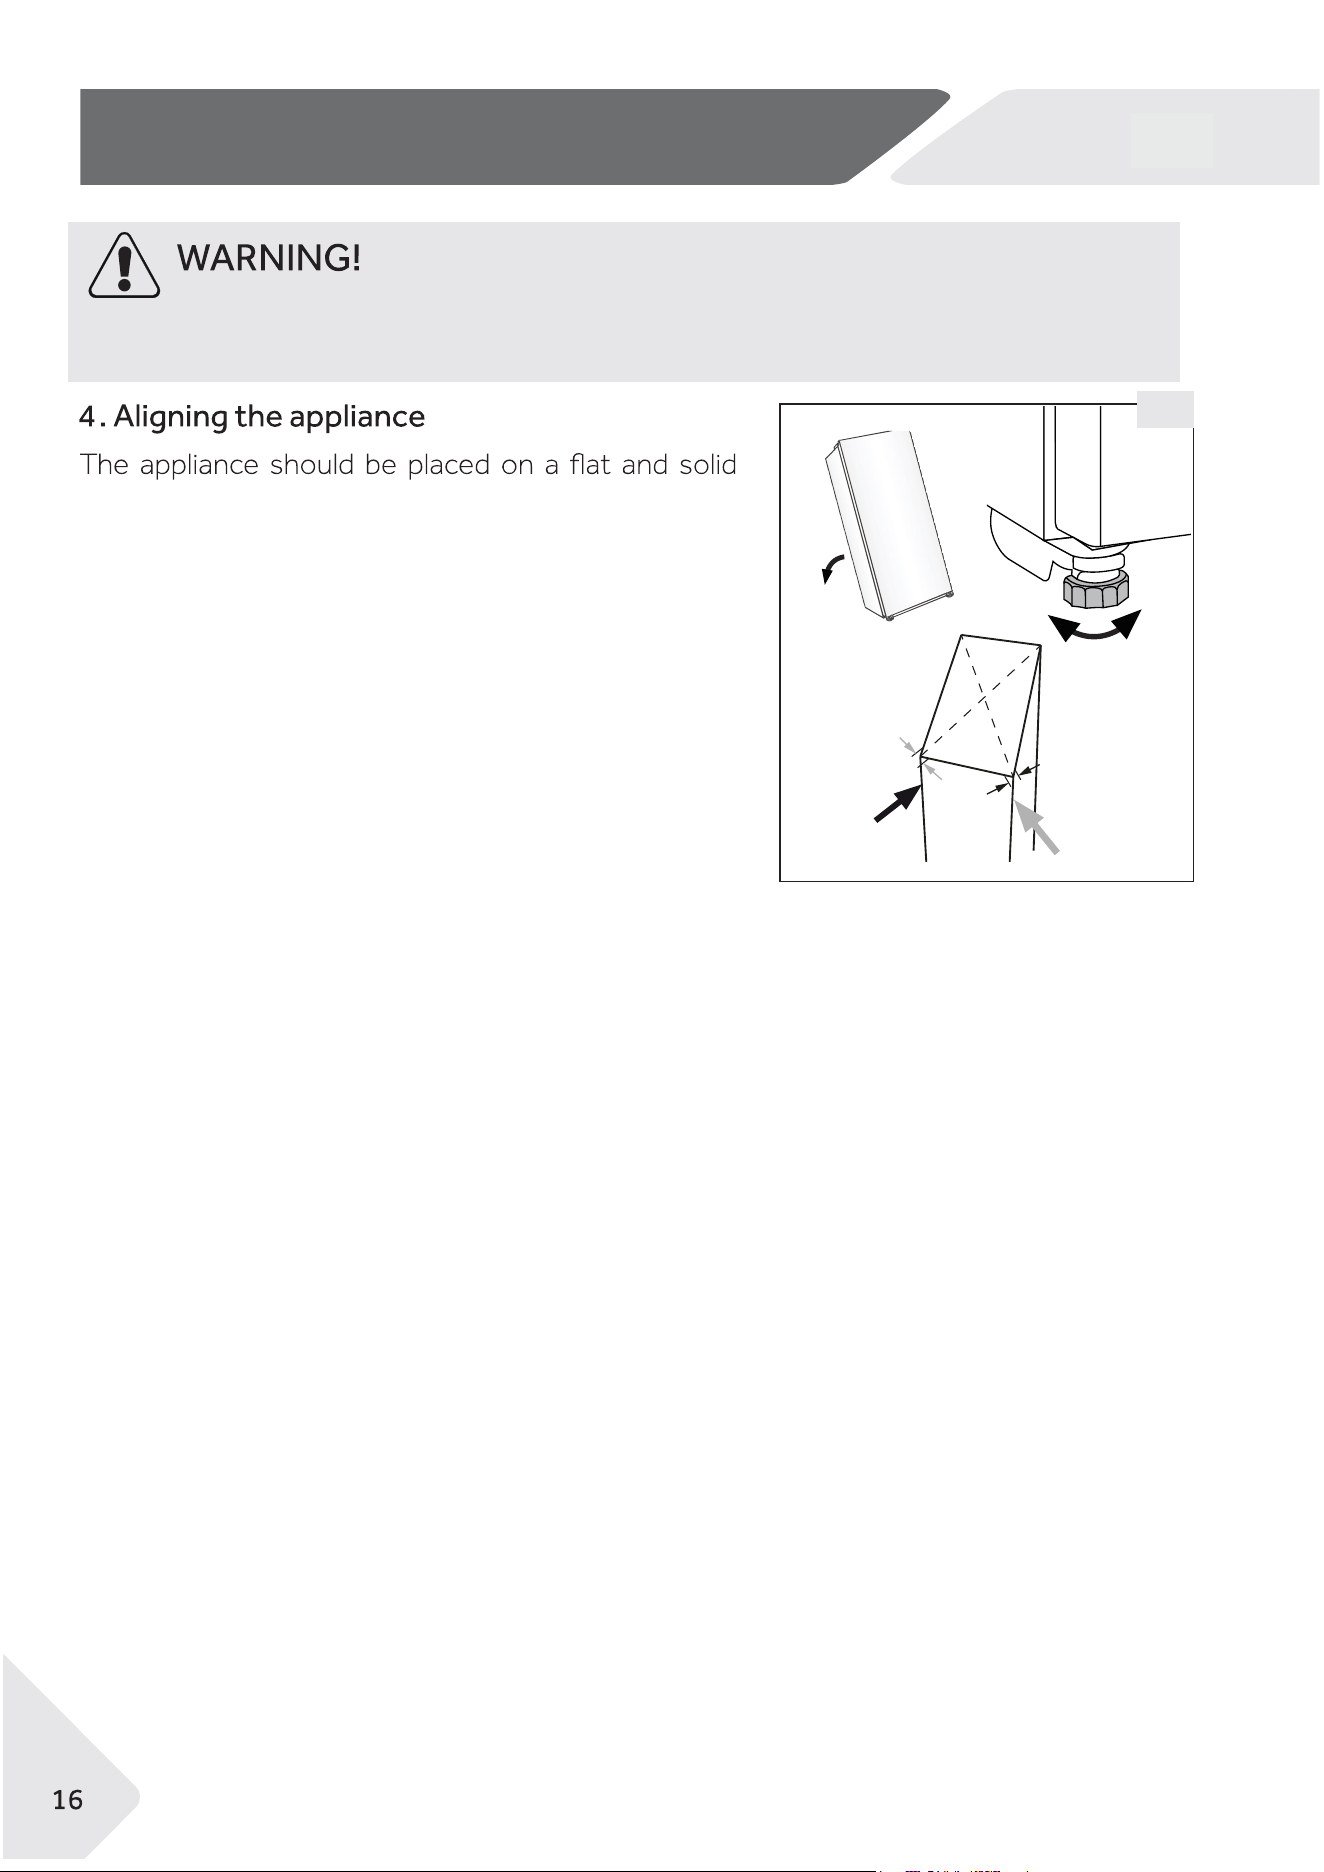
Installation
surface.
1. Tilt the appliance slightly backwards (Fig. 7).
2. Set the adjustable front feet to the desired level
by turning them.
3. Check the stability by pushing on the corners and
adjust as required to balance the product. If the
product is not balanced the door seals may leak.
Raising the front of the product slightly helps the
closing of the door.
max 45°
1.
2.
3.
7
▶ Keep ventilation openings in the appliance or in the in-built structure clear of ob-
struction. This refrigerating appliance is not intended to be used as a built-in appliance
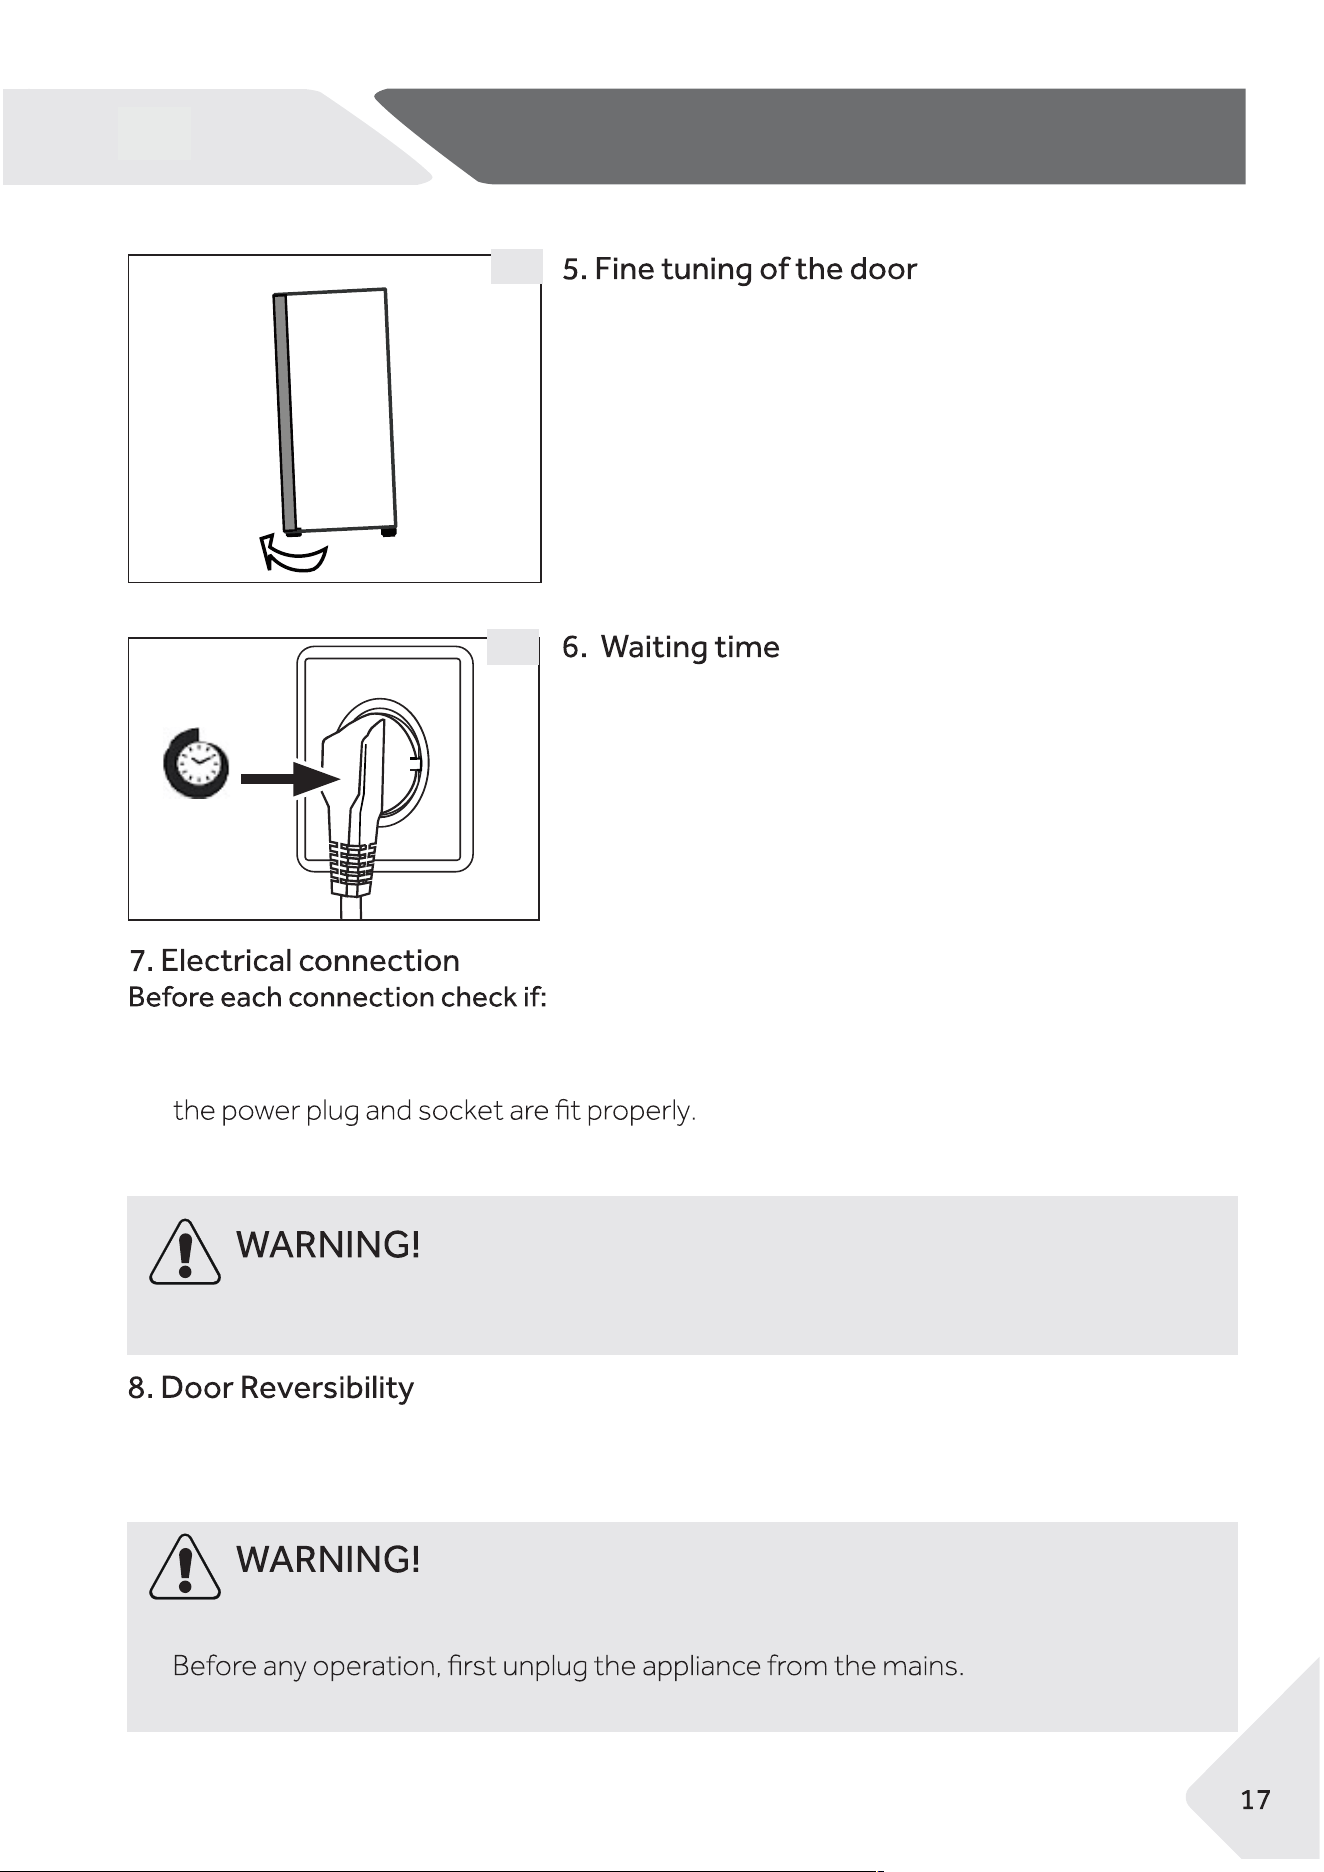
The appliance closes more easily if the levelling feet on
the front are used:
Rotate the adjustable feet (Fig. 8) to turn them up or
down:
▶ Turning the feet clockwise raises the appliance.
▶ Turning the feet counterclockwise lower the appli-
ance.
To avoid risks a damaged power cord must be replaced by the customer service (see
warranty card).
▶ The appliance is heavy. You need two persons to carry out the door reversibility.
▶
▶ Do not tilt the appliance more than 45 ° to prevent damage of the cooling system.
▶ power supply, socket and fusing are appropriate to the rating plate.
▶ the power socket is earthed and no multi-plug or extension.
▶
Connect the plug to a properly installed household socket.
The maintenance-free lubrication oil is located
capsule of the compressor. This oil can get
the closed pipe system during transport if the
ance is tilted. Before connecting the applianc
power supply, wait 0.5 hours (Fig. 9) so that the
in the
through
appli-
e to the
oil runs
back into the capsule.
Before connecting the appliance to the power supply you should check, whether the door
swing must changed from right (as delivered) to left, if this is required by the installation
location and the usability
8
0.5 h
9
EN
Installation
Installation
EN
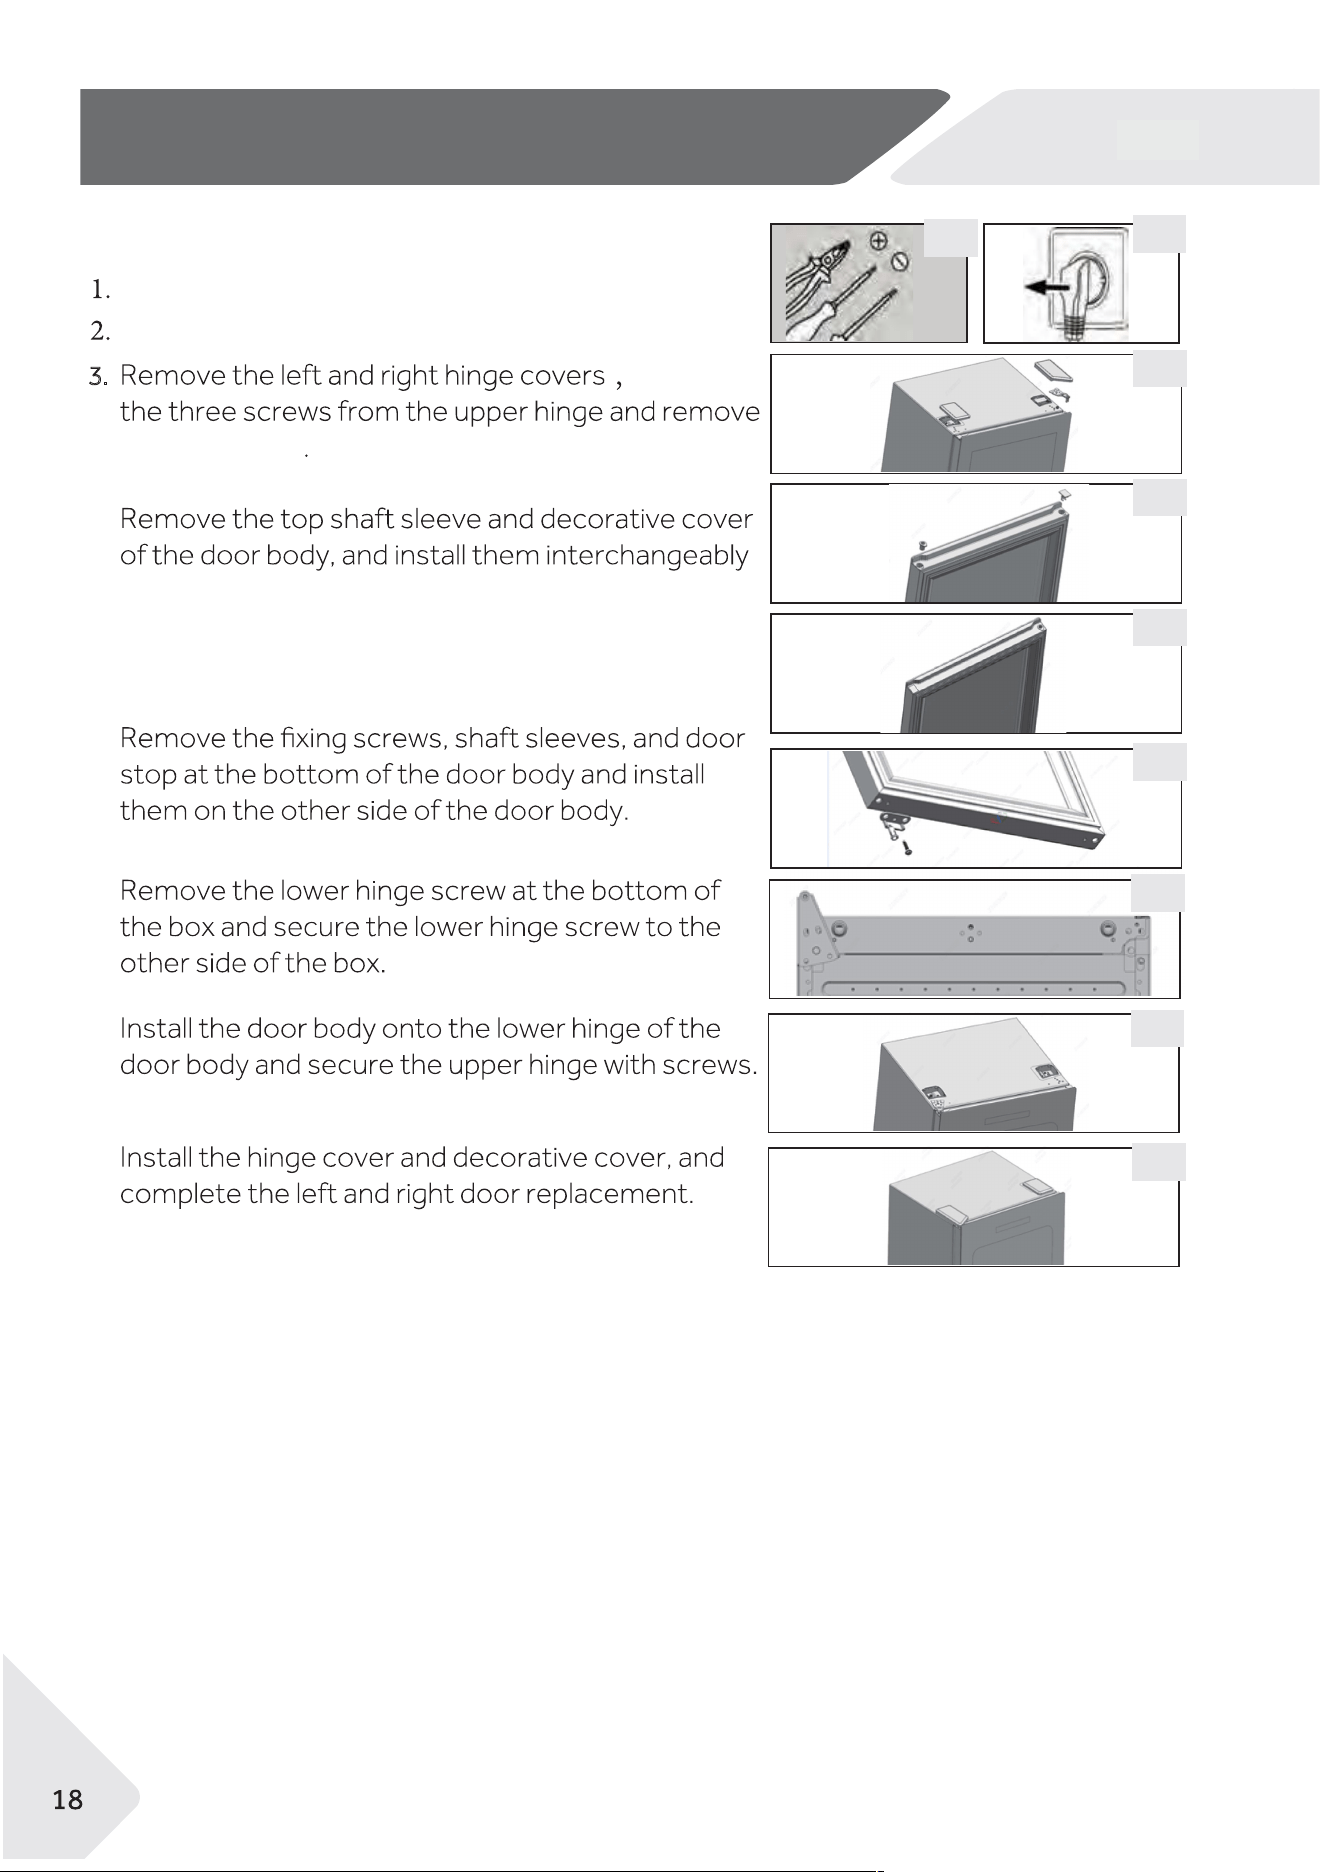
Provide necessary tool.
Unplug the appliance.
1
2
4
7
8
4.
5.
6.
7.
8.
3.
remove
the door body
on the door body.
4.1
5
6
1
3
Instructions to Reverse the Door Hinge
EN
▶ Remove all packaging materials. This includes the foam base and all adhesive tape
holding the wine cellar accessories inside and outside. Keep them out of children’s
reach and dispose them in an environmentally friendly manner.
▶ Clean the inside and outside of the appliance with water and a mild detergent before
putting any wine in it.
▶ After the appliance has been levelled and cleaned, wait for at least 30 minutes before
connecting it to the power supply. If your wine cellar has been tilted for any reason,
wait 24 hours before plugging it in. See section INSTALLATION.
▶ Once you have plugged the unit into an electrical outlet, let the unit run for at least
30 minutes to acclimatize itself before making any adjustments.
▶ The temperature is automatically set to 12 °C. If desired, you can change the tem-
perature manually. Please see Temperature Setting.
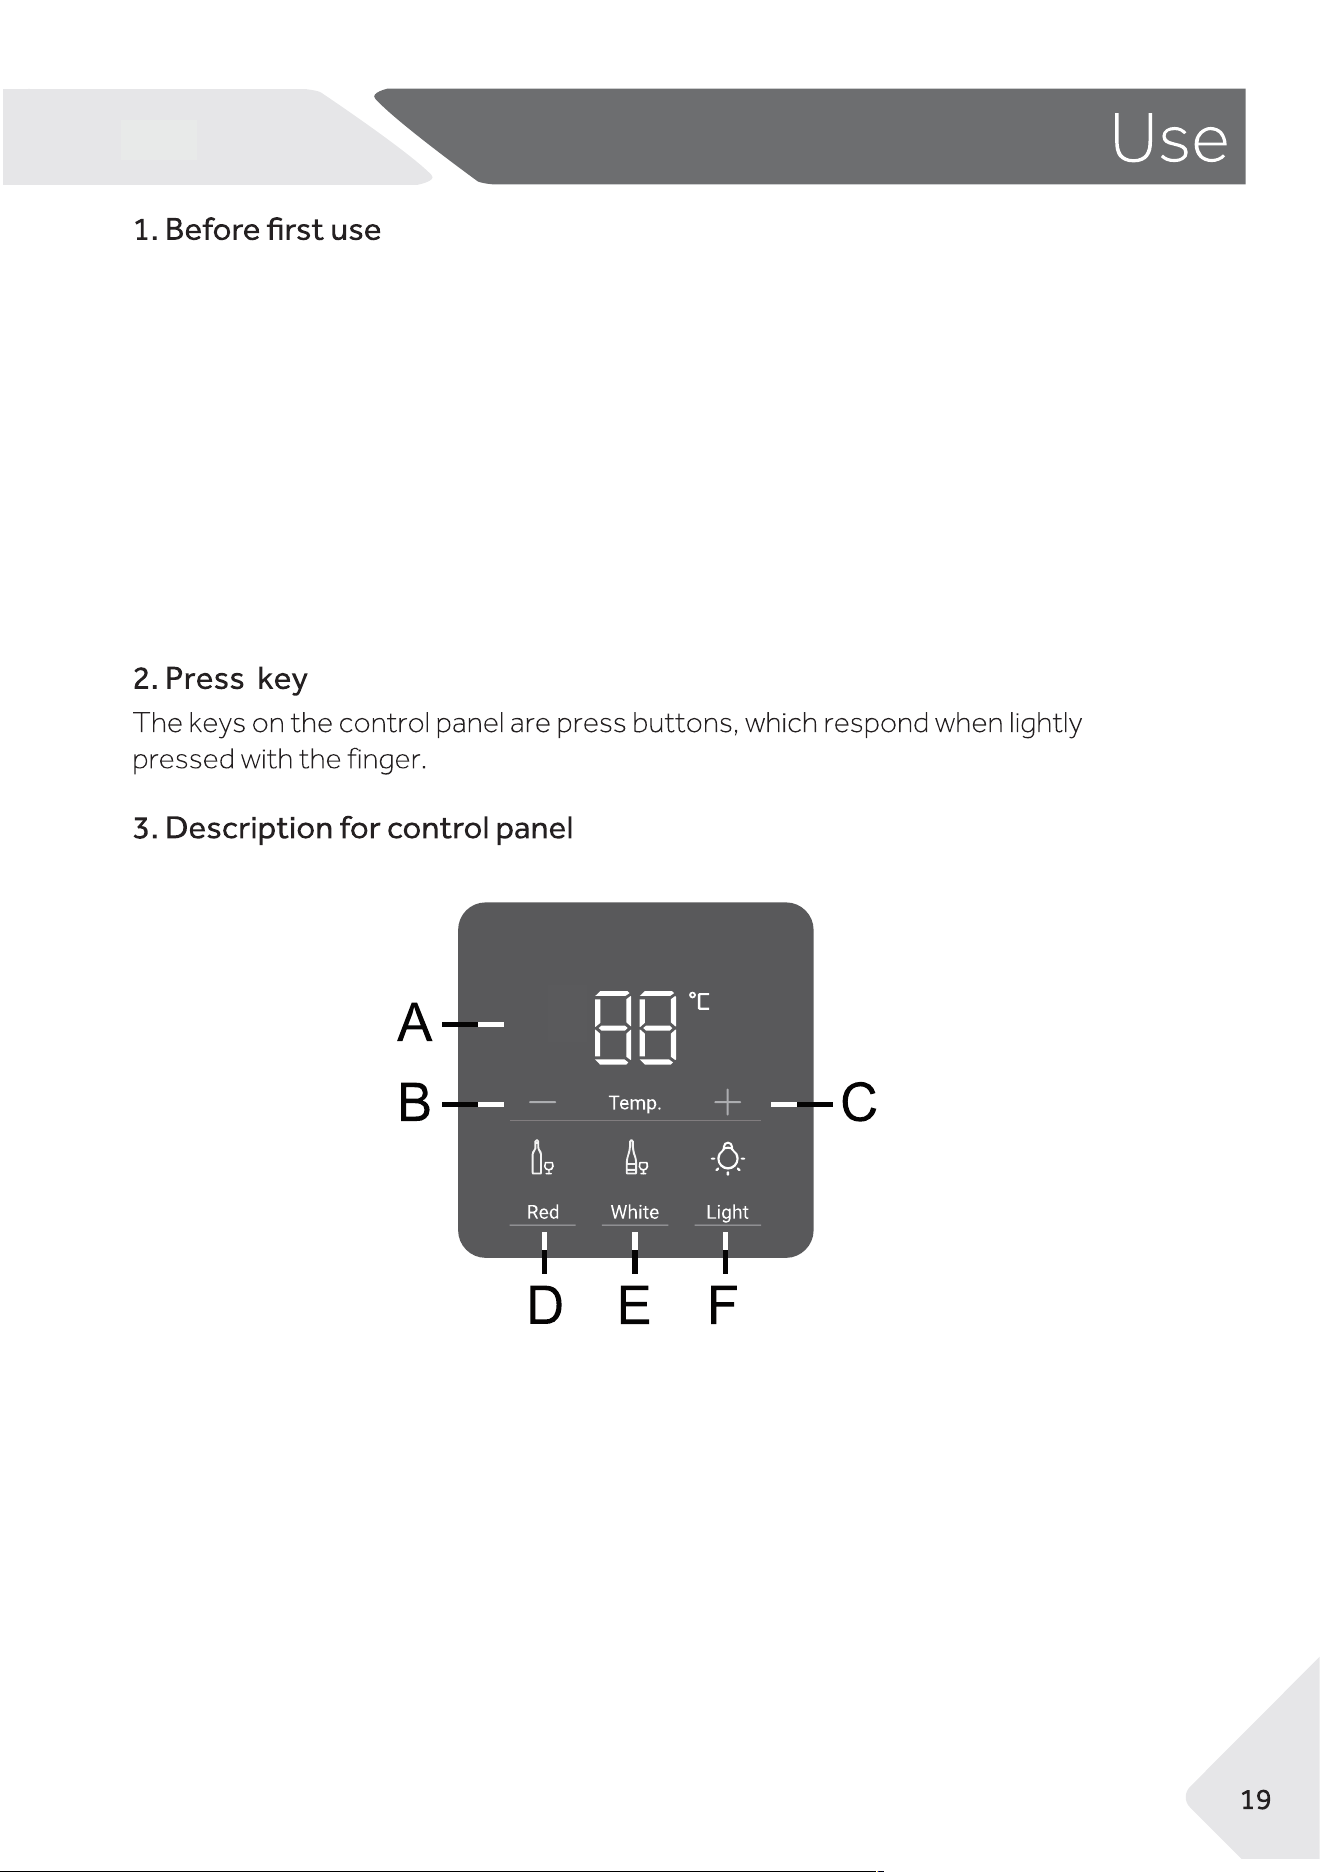
A Display
B Temperature adjust key: down
C Temperature adjust key: up
D Red Wine key
E White Wine key
F Light key
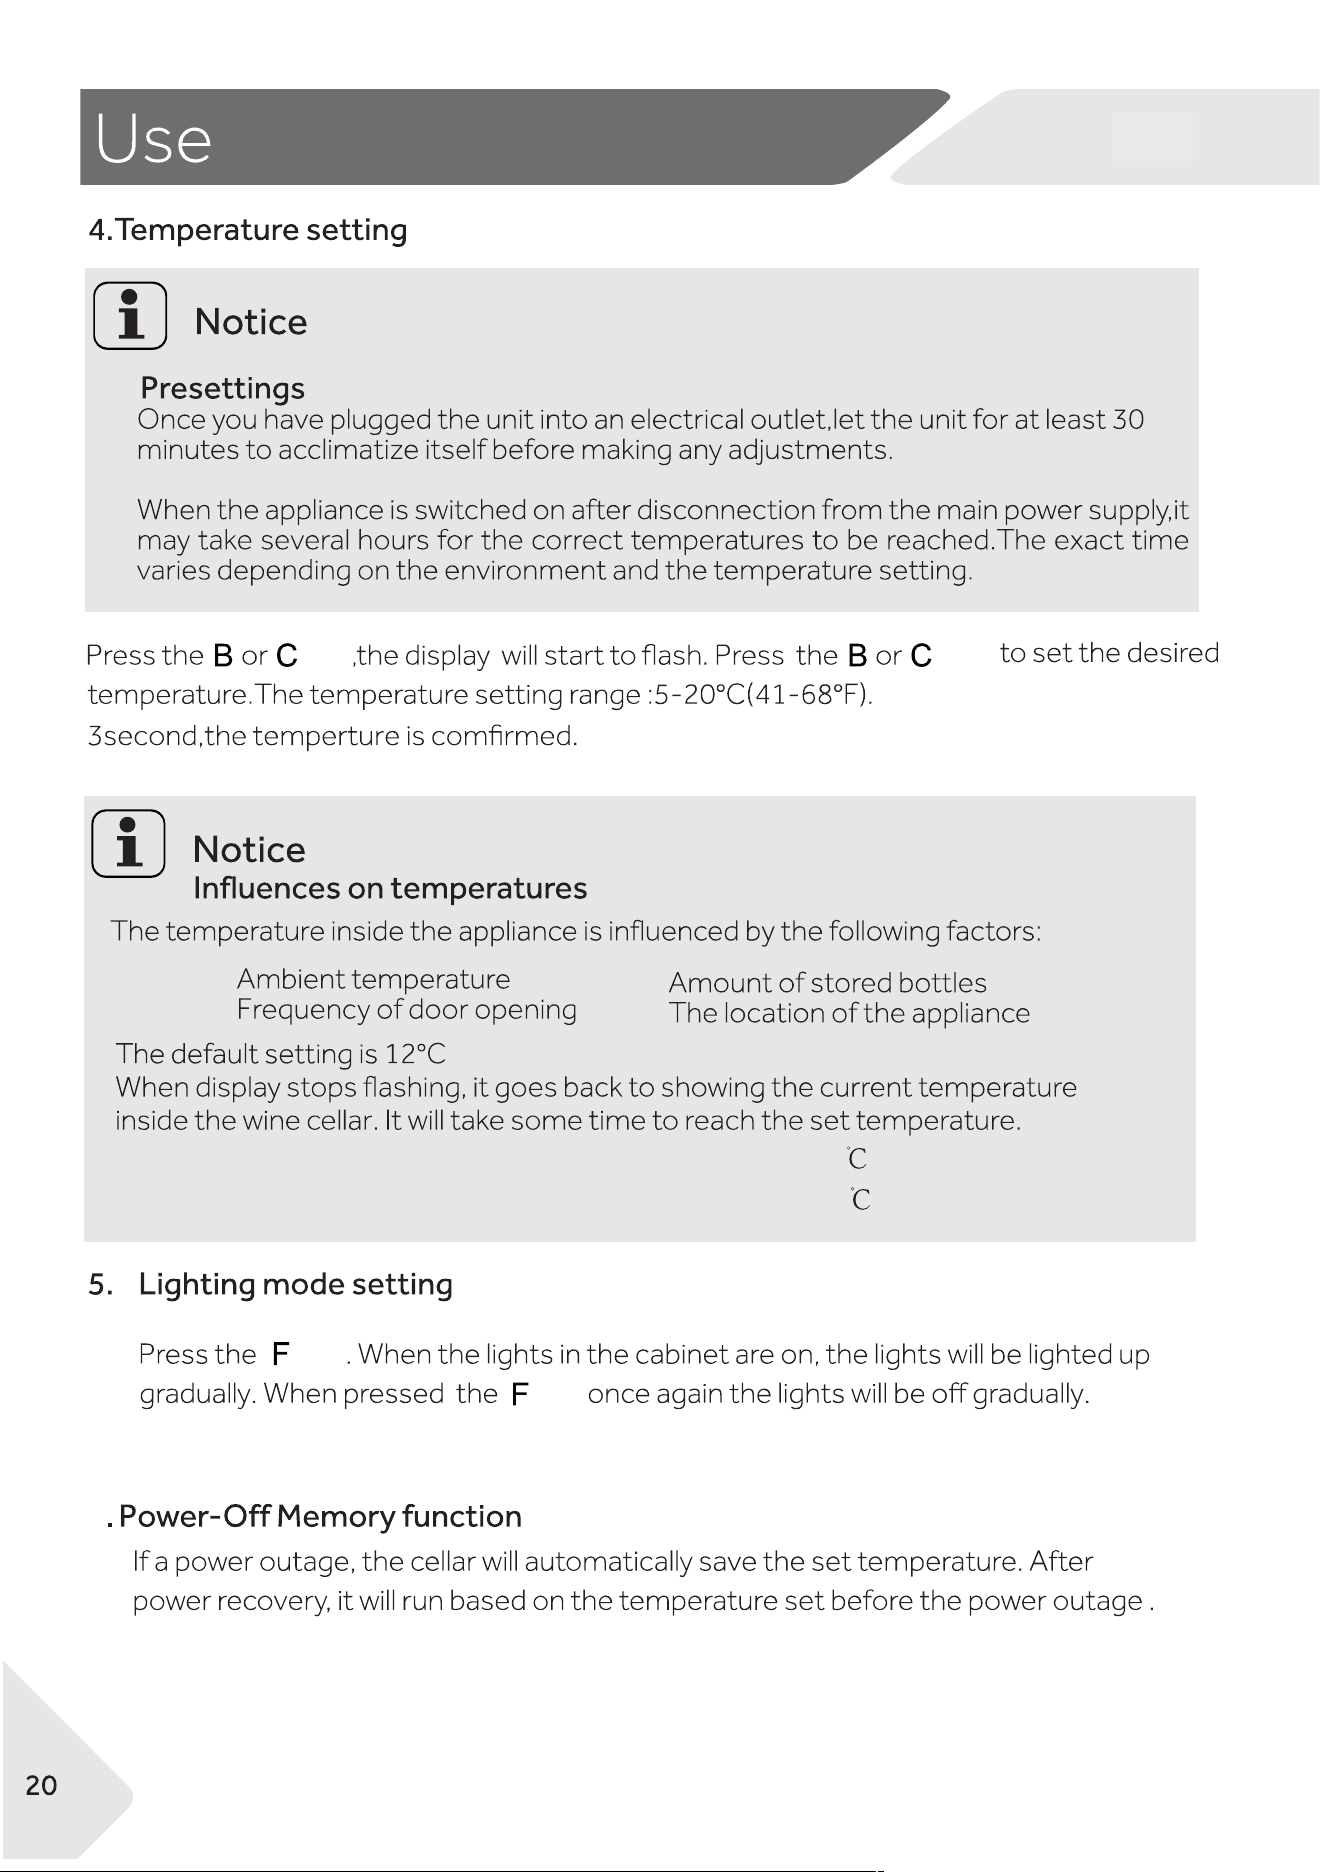
Stop pressing the key for
key
key
key
key
▶
▶
EN
▶
▶
▶
▶
6
When the light is on, it stays on.
Press D key for storing Red Wine (temperature is set to 16 ).
Press E key for storing White Wine (temperature is set to 8 ).
▶ Make sure the appliance is properly ventilated (see INSTALLATION).
▶ Do not install the appliance in direct sunlight or in the near of heat sources (e.g.
stoves, heaters).
▶ Avoid unnecessarily low temperature in the appliance. The energy consumption in-
creases the lower the temperature in the appliance is set.
▶
▶
▶
▶
K
positioned in the appliance on factory-fresh condition, and fo
eep door seals clean so that the door always closes correctly.
Engergy saving tips
21
Equipment
22
two
15
The defrosting of the wine cellar is done automatically; no manual operation is
needed.
Unplug the power cord.
Clean the appliance and door gaskets as described above.
Keep the door open to prevent the creation of bad odours inside.
1. Remove all bottles and unplug the appliance.
2. Secure shelves and other moveable parts in the wine cellar with adhesive tape.
3. Do not tilt the wine cellar more than 45° to avoid damaging the refrigerating system.
DC 12V max Power 2W.We recommend contacting a service person to replace the LED lamp.
Care and cleaning
23

of a problem please check all shown possibilities and follow below instructions before y
contact an after sales service. See CUSTOMER SERVICE.
▶ Before maintenance, deactivate the appliance and disconnect the mains plug from
the mains socket.
▶
improper repairs can cause considerable consequential damages.
▶ A damaged supply should only be replaced by the manufacturer, its service agent or
ou
Troubleshooting
24
Error Code Cause Solution
L2
Low temperature alarm when the
temperature of the control sensor
is too low;
Please contact our customer service.
E6
The fan in the cabinet has
malfunctioned.
Please contact our customer service.
i
I
The door has been opened
frequently or for long time.
The door has been opened
frequently or for long time.
Troubleshooting
25
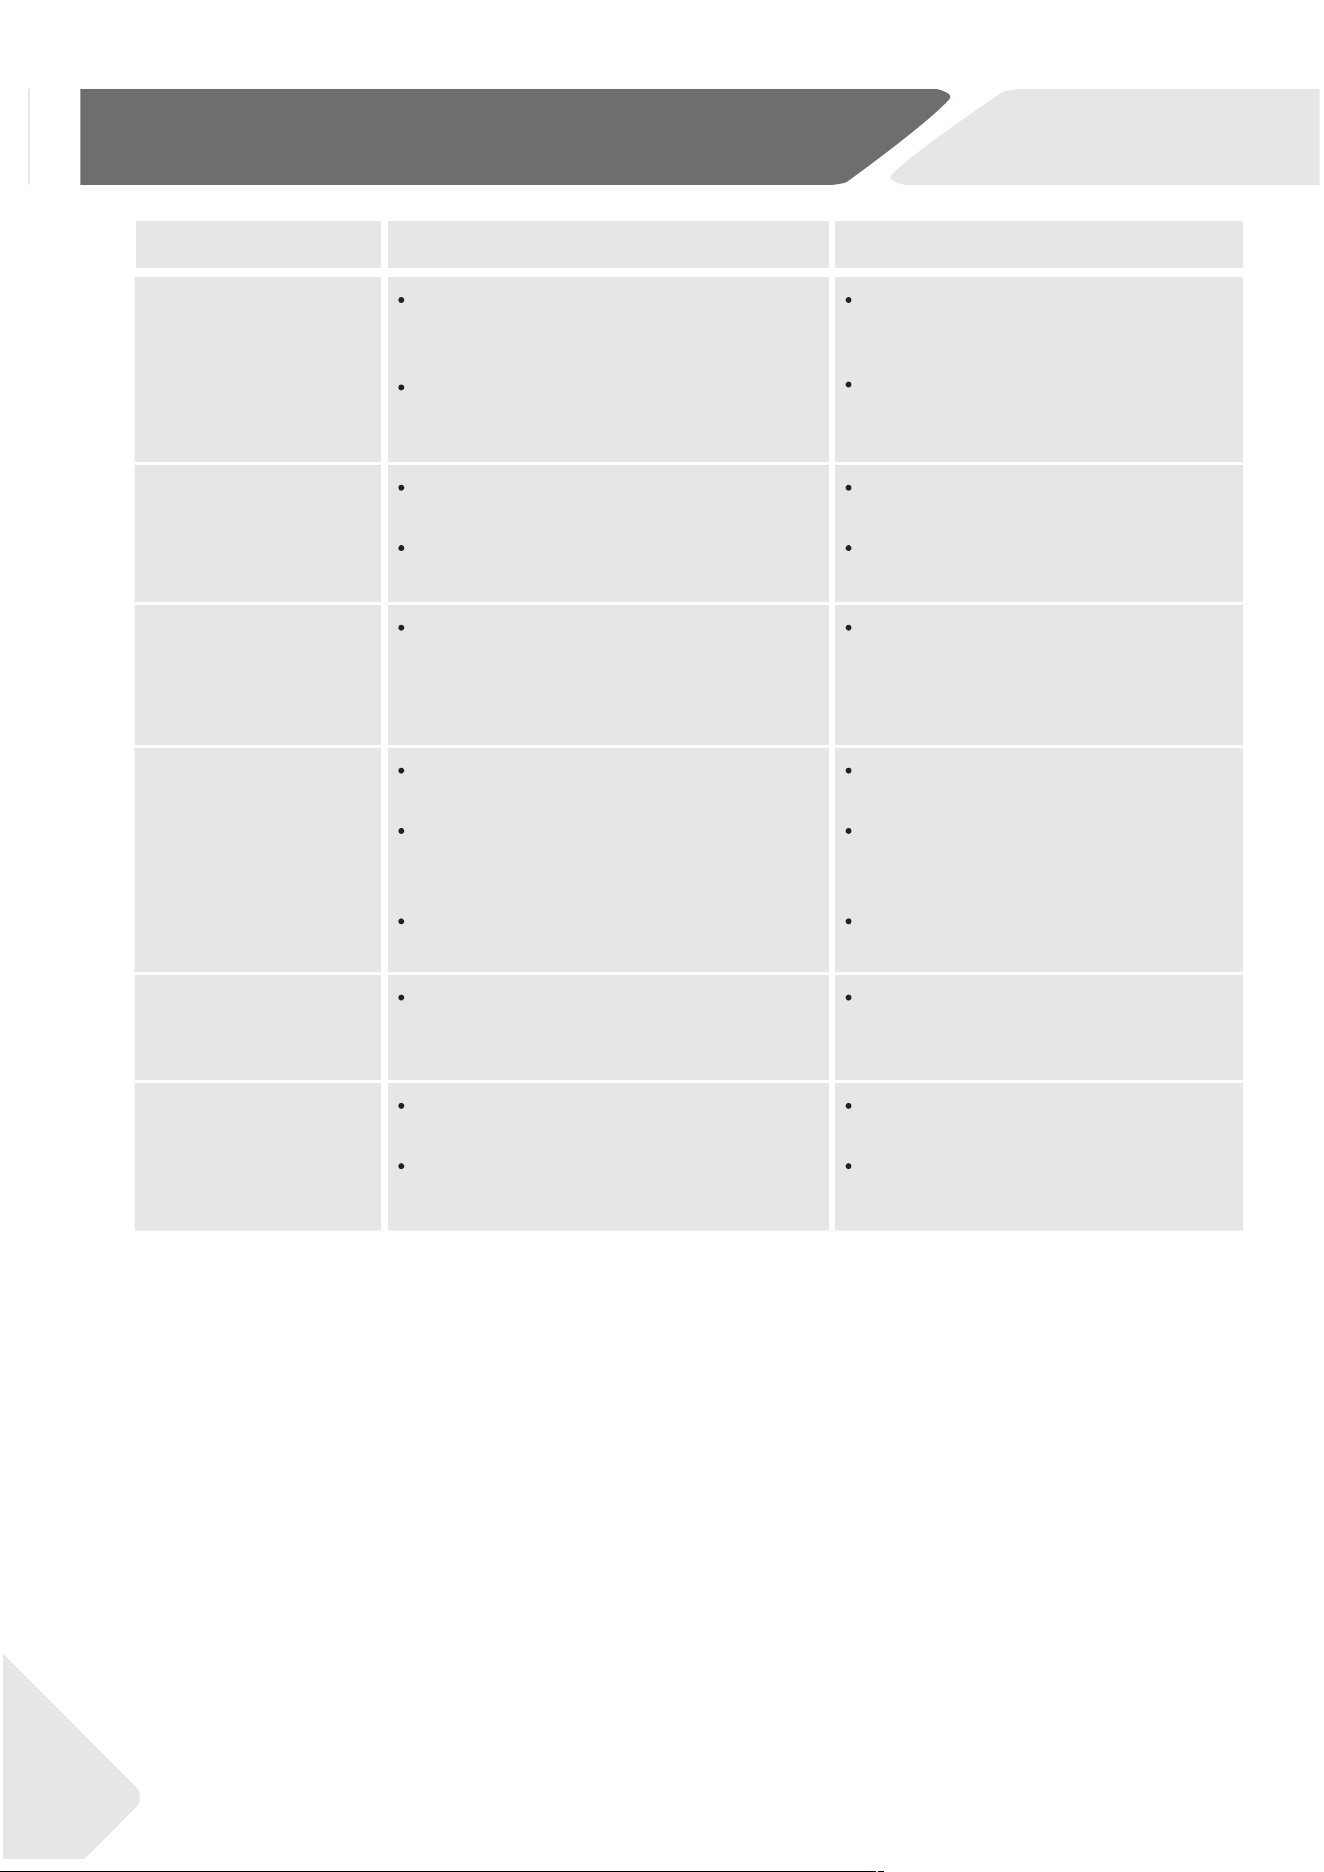
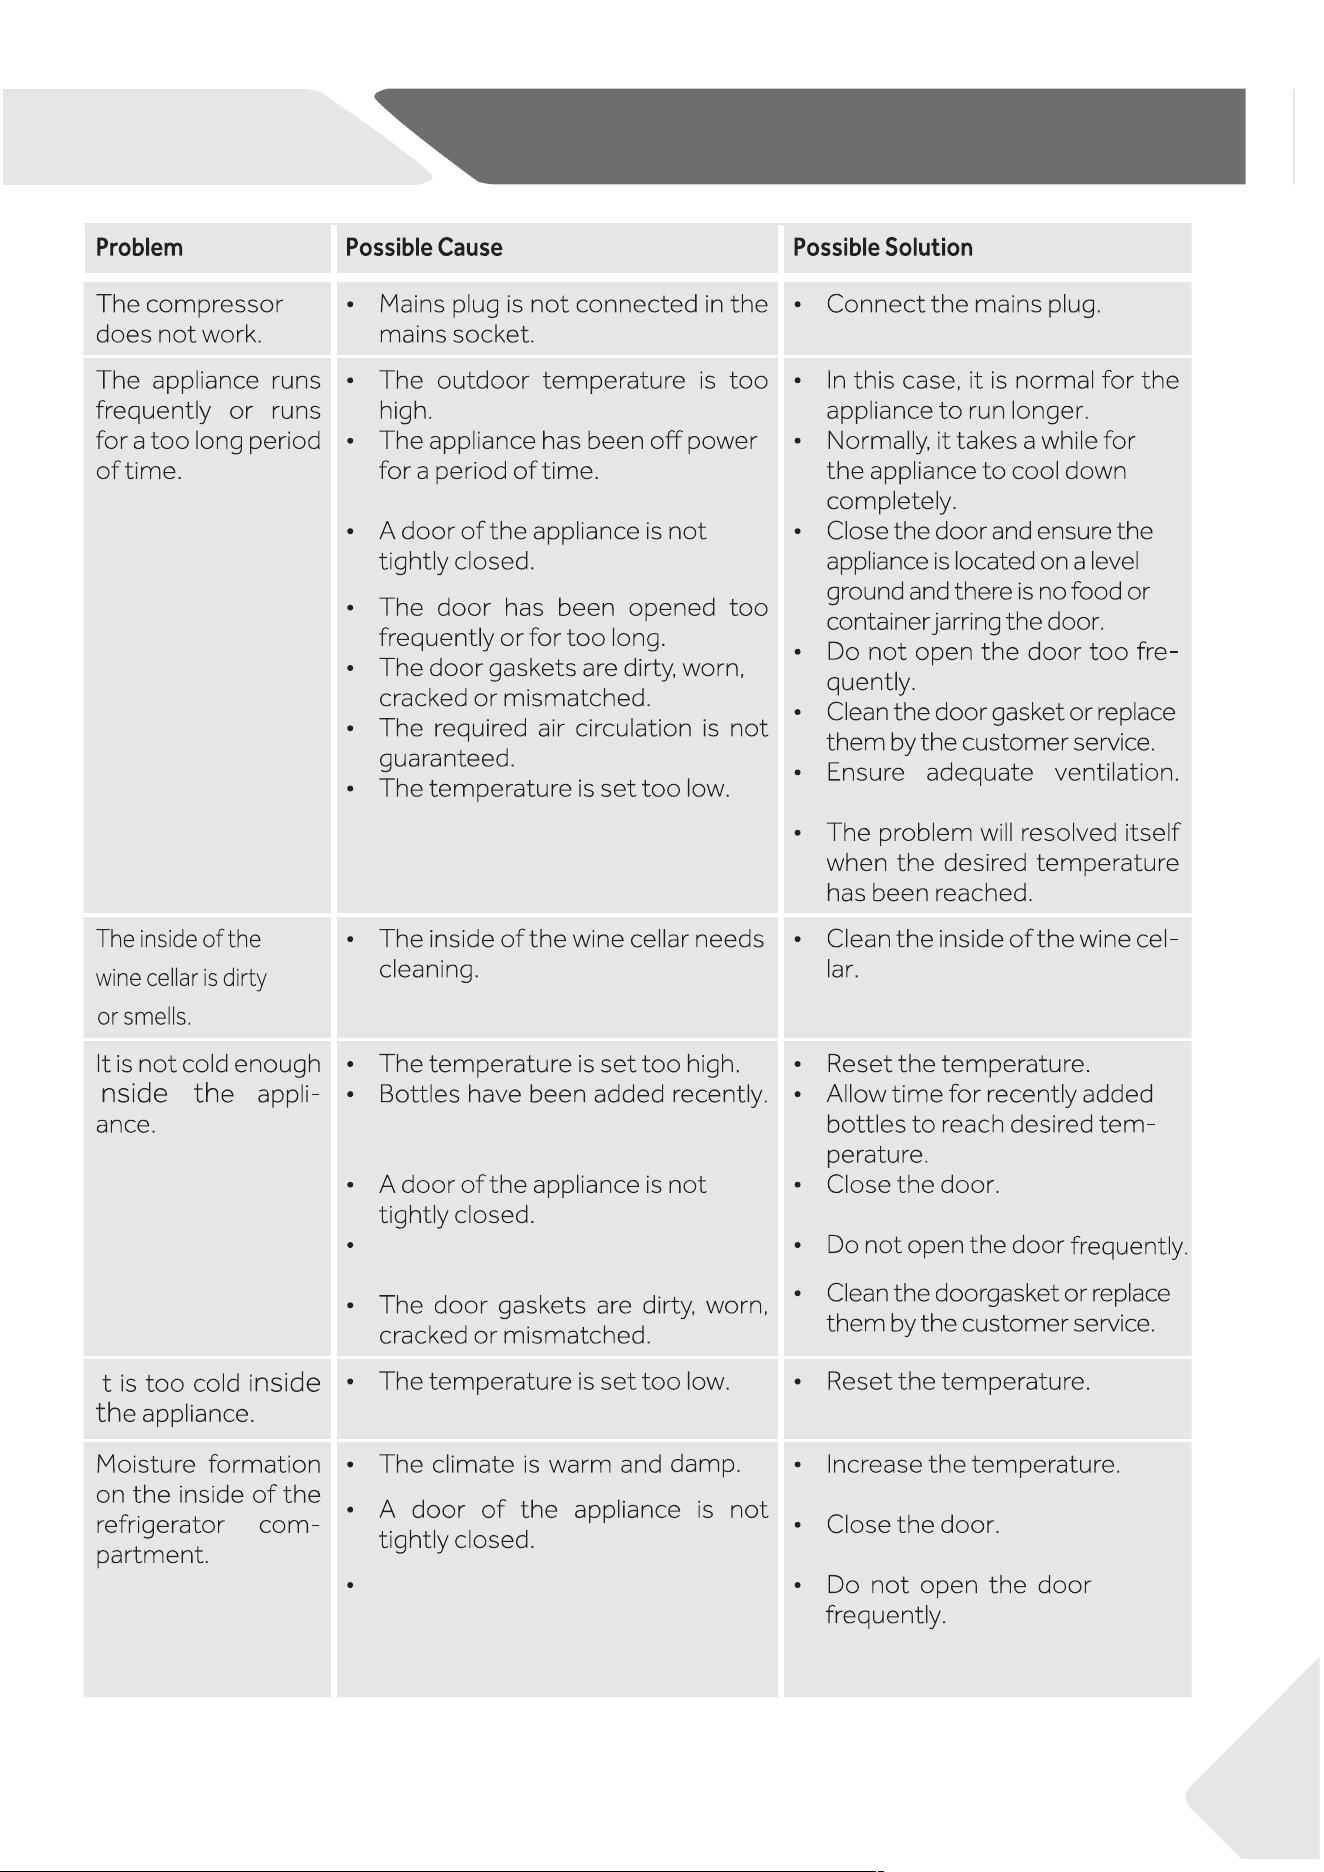
Problem Possible Cause Possible Solution
Moisture
accumulates on
the wine cellar’s
outside surface
.
The climate is too warm and too
damp
The door is not closed tightly.The
cold air in the appliance and the
warm air outside it condensates.
This is normal in damp climate
and will change when the hu-
midity decreases.
Ensure that the door is shut
tightly and that the gaskets seal
properly.
The appliance
makes abnormal
sounds
The appliance is not located on
level ground.
The appliance touches some ob-
ject around it.
Ajust the feet to level the appli-
ance.
Remove objects around the
appliance.
The appliance is
occasionally mak-
ing a quiet hissing
sound
This is normal -
The interior light-
ing or cooling
system does not
work.
Mains plug is not connected to the
mains socket.
The power supply is not intact.
The LED-lamp is out of order.
Connect the mains plug.
Check the electrical supply to-
the room.Call the local electric-
ity company.
Please call the service for
changing
The sides of the
cooler get warm.
This is normal. -
The door does
not shut properly
The appliance is not level.
The door is blocked.
Level the appliance with the
leveling feet.
Check for blockages like bottles
or shelves.
Troubleshooting
26
Explanations:
- extended temperate: ‘this refrigerating appliance is intended to be used at ambient
temperatures ranging from 10 °C to 32 °C’;
- temperate: ‘this refrigerating appliance is intended to be used at ambient
temperatures ranging from 16 °C to 32 °C’;
- subtropical: ‘this refrigerating appliance is intended to be used at ambient
temperatures ranging from 16 °C to 38 °C’;
- tropical: ‘this refrigerating appliance is intended to be used at ambient temperatures
ranging from 16 °C to 43 °C’;
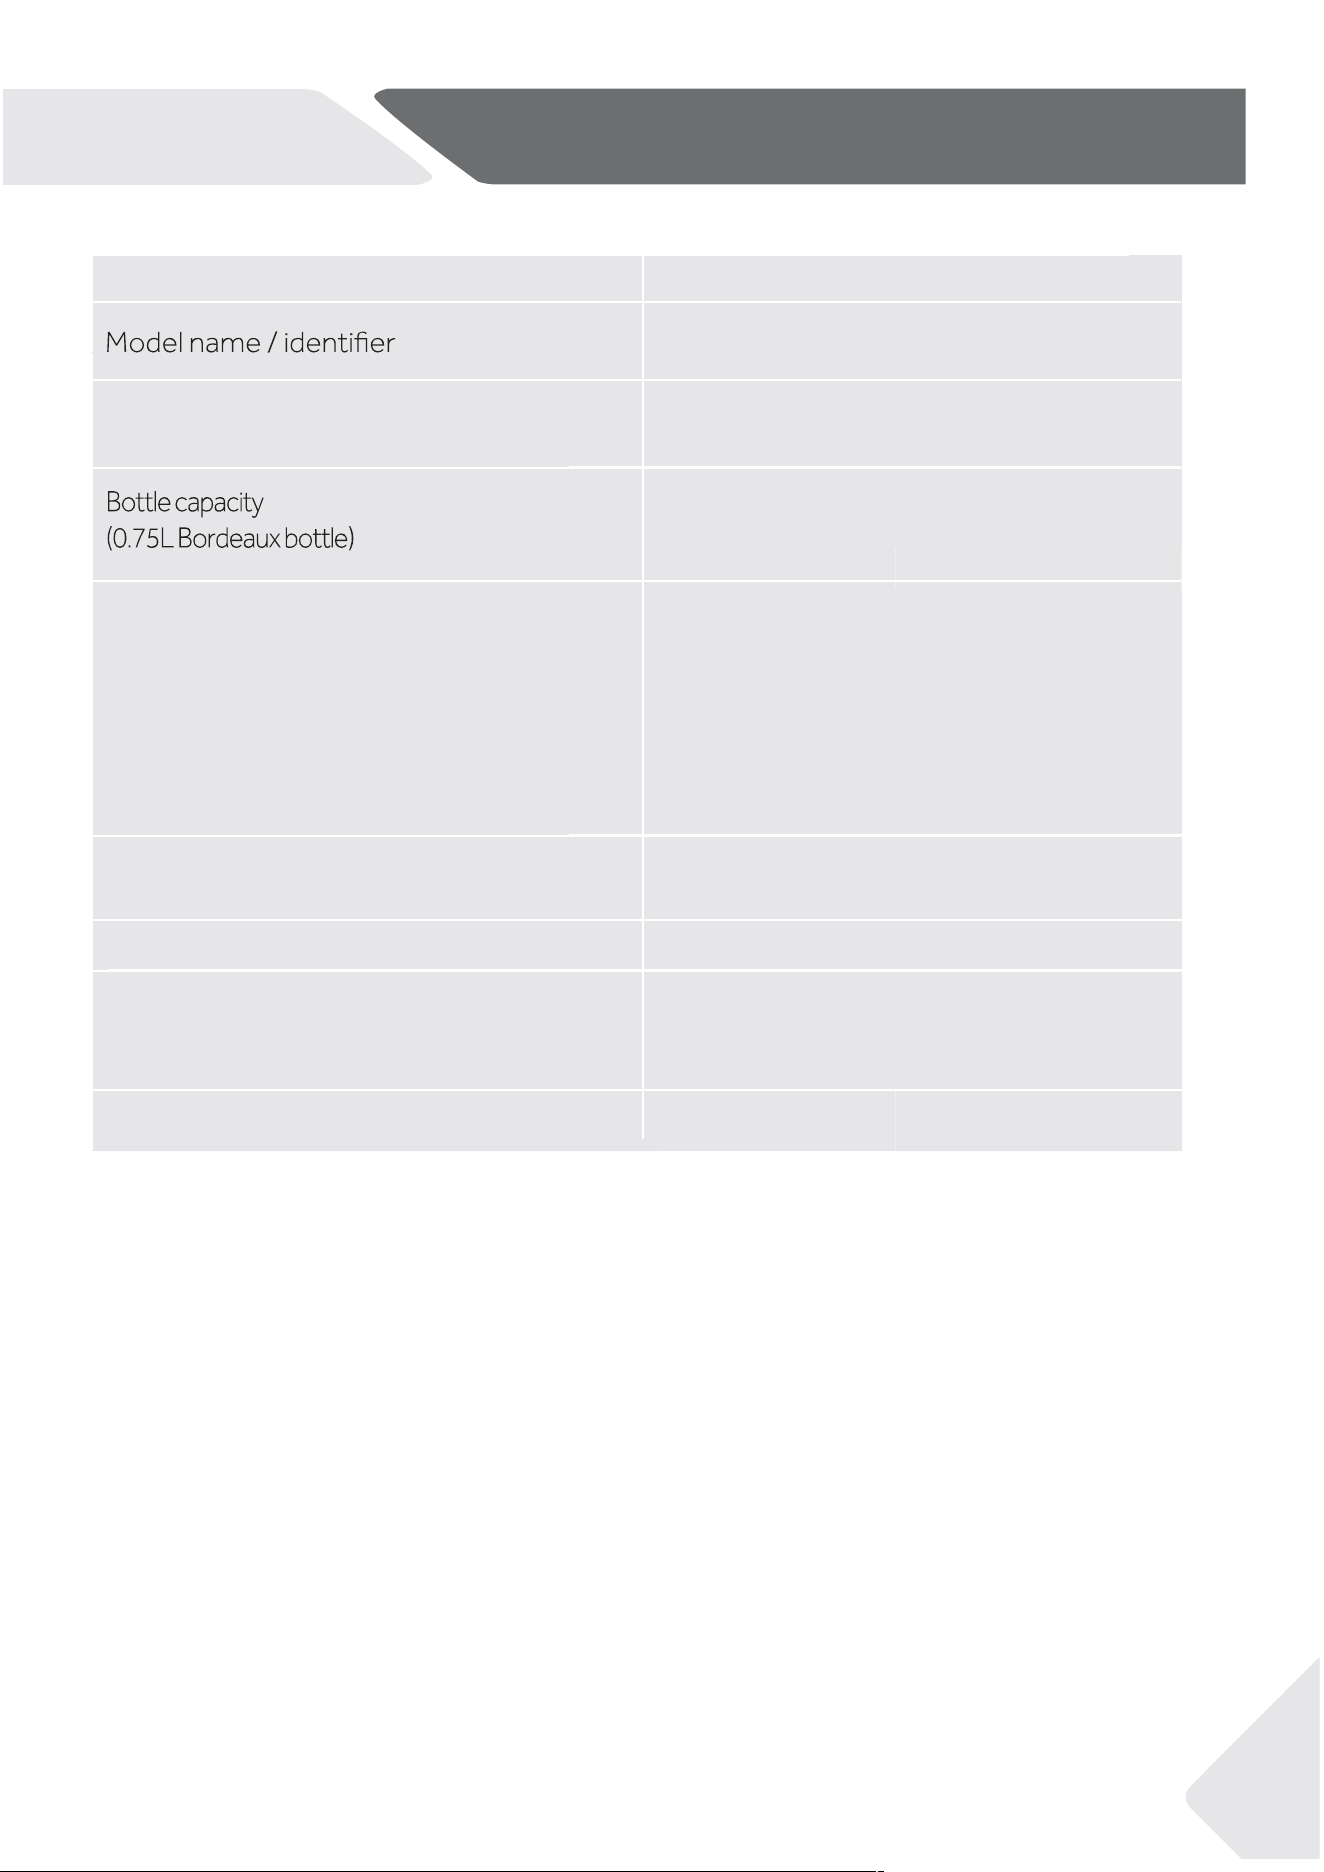
Brand
Category
G
Annual energy consumption
184
Climate class:
This appliance is intended to be
used
at an ambient temperatur
e
between 10 °C and 38 °C
.
Airborne acoustical noise emissions
(db(A) re 1pW)
Type of appliance
Freestanding
This appliance is intended to be
used exclusively
for the storage of wine.
Yes
Dimensions (W/D/H in mm)
C(37)
SN N ST
Haier
HWS236GDGU1
G
184
Freestanding
Yes
Wine Cellar
C(37)
SN N ST
Brand
Category
Climate class:
This appliance is intended to be
used
at an ambient temperatur
e
between 10 °C and 43 °C
.
Airborne acoustical noise emissions
(db(A) re 1pW)
Type of appliance
This appliance is intended to be
used exclusively
for the storage of wine.
Dimensions (W/D/H in mm)
Haier
HWC90UC
Freestanding
Yes
475/456/850
Wine Cabinet
37
SN N ST T
33
Technical data
27

We recommend our Haier Customer Service and the use of original spare parts.
your local dealer.
Customer Service
28
(33)
HWC90UC
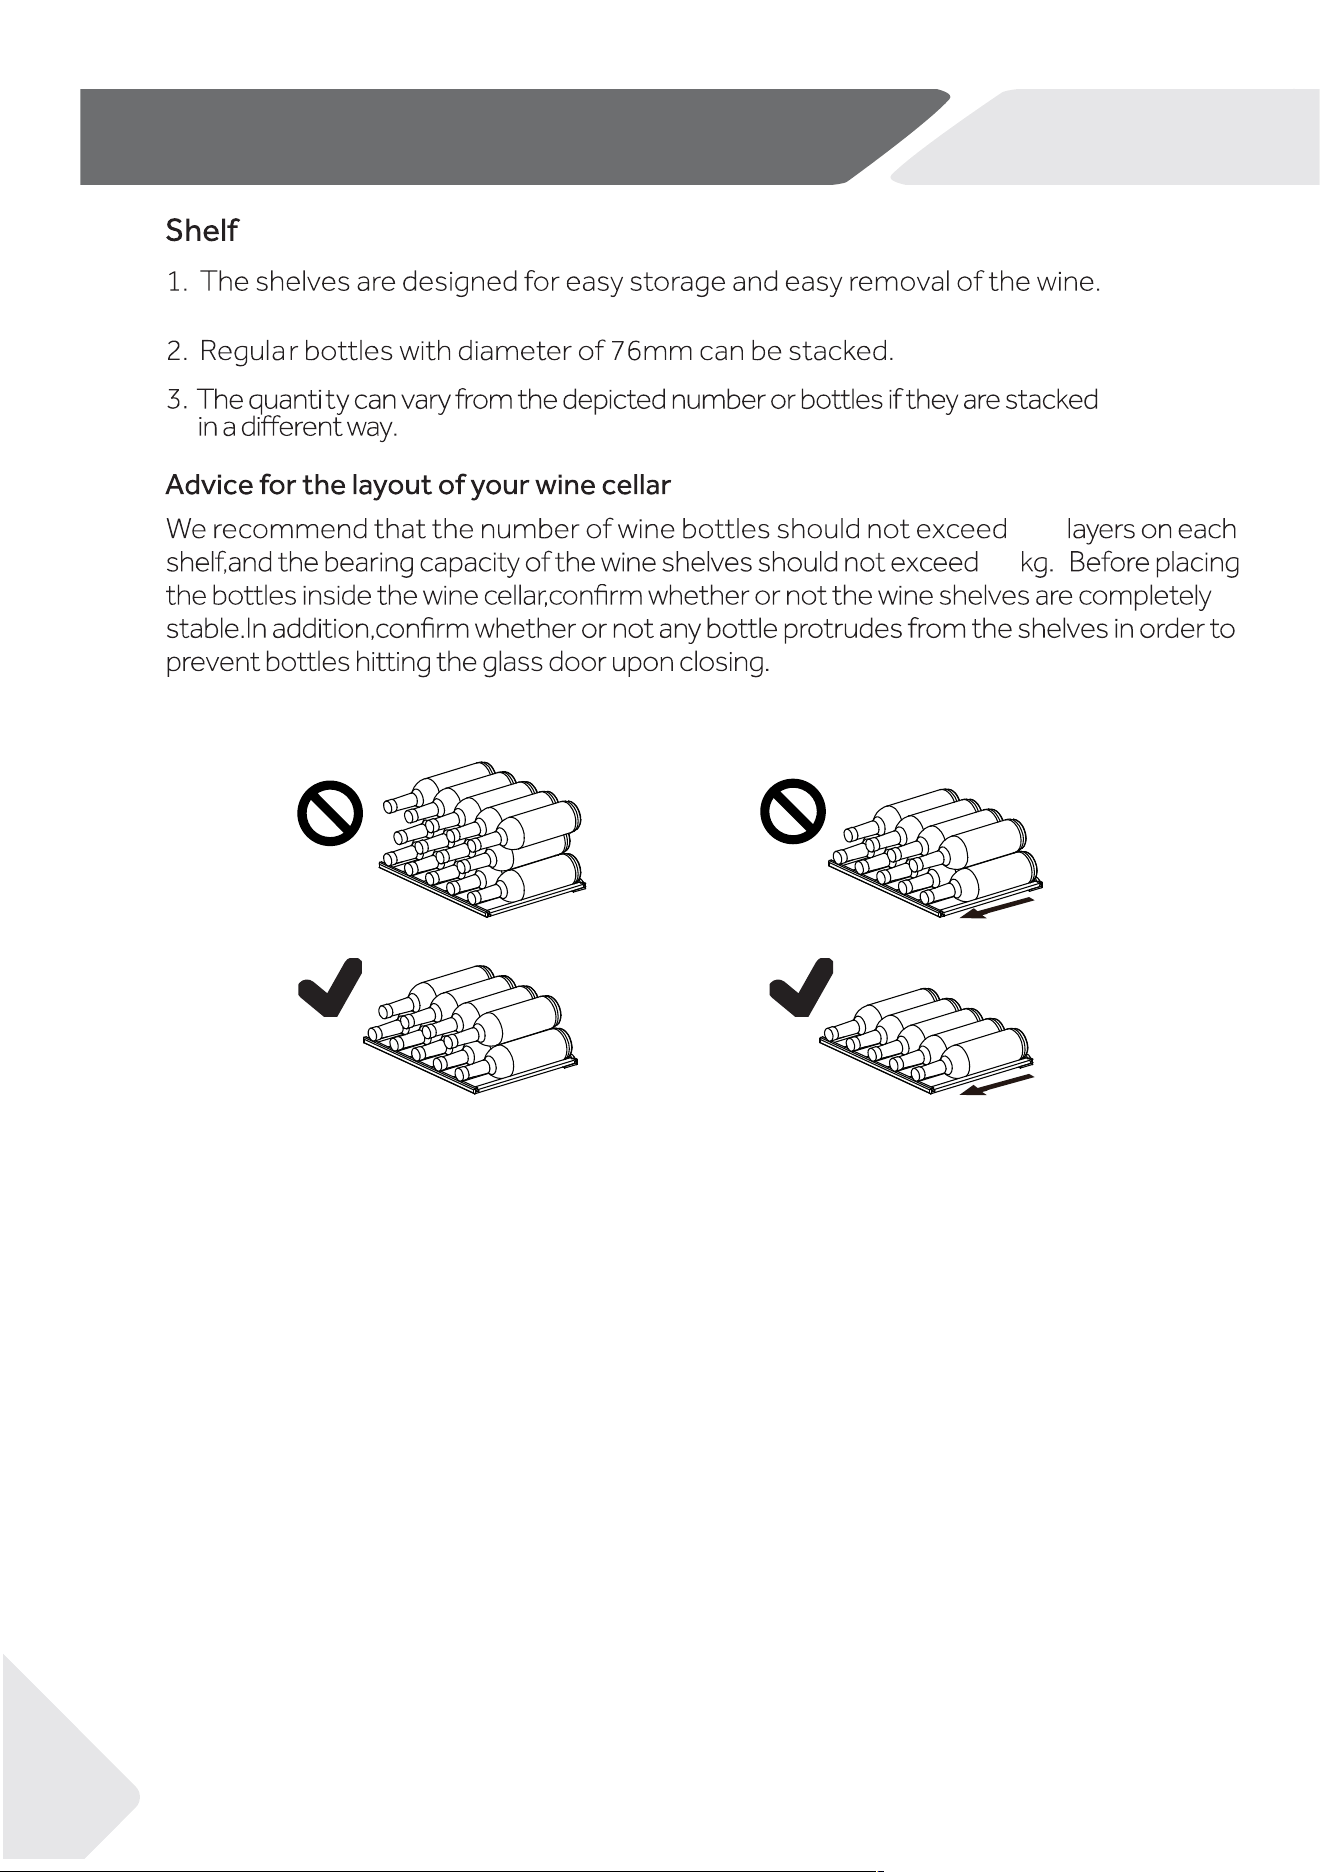
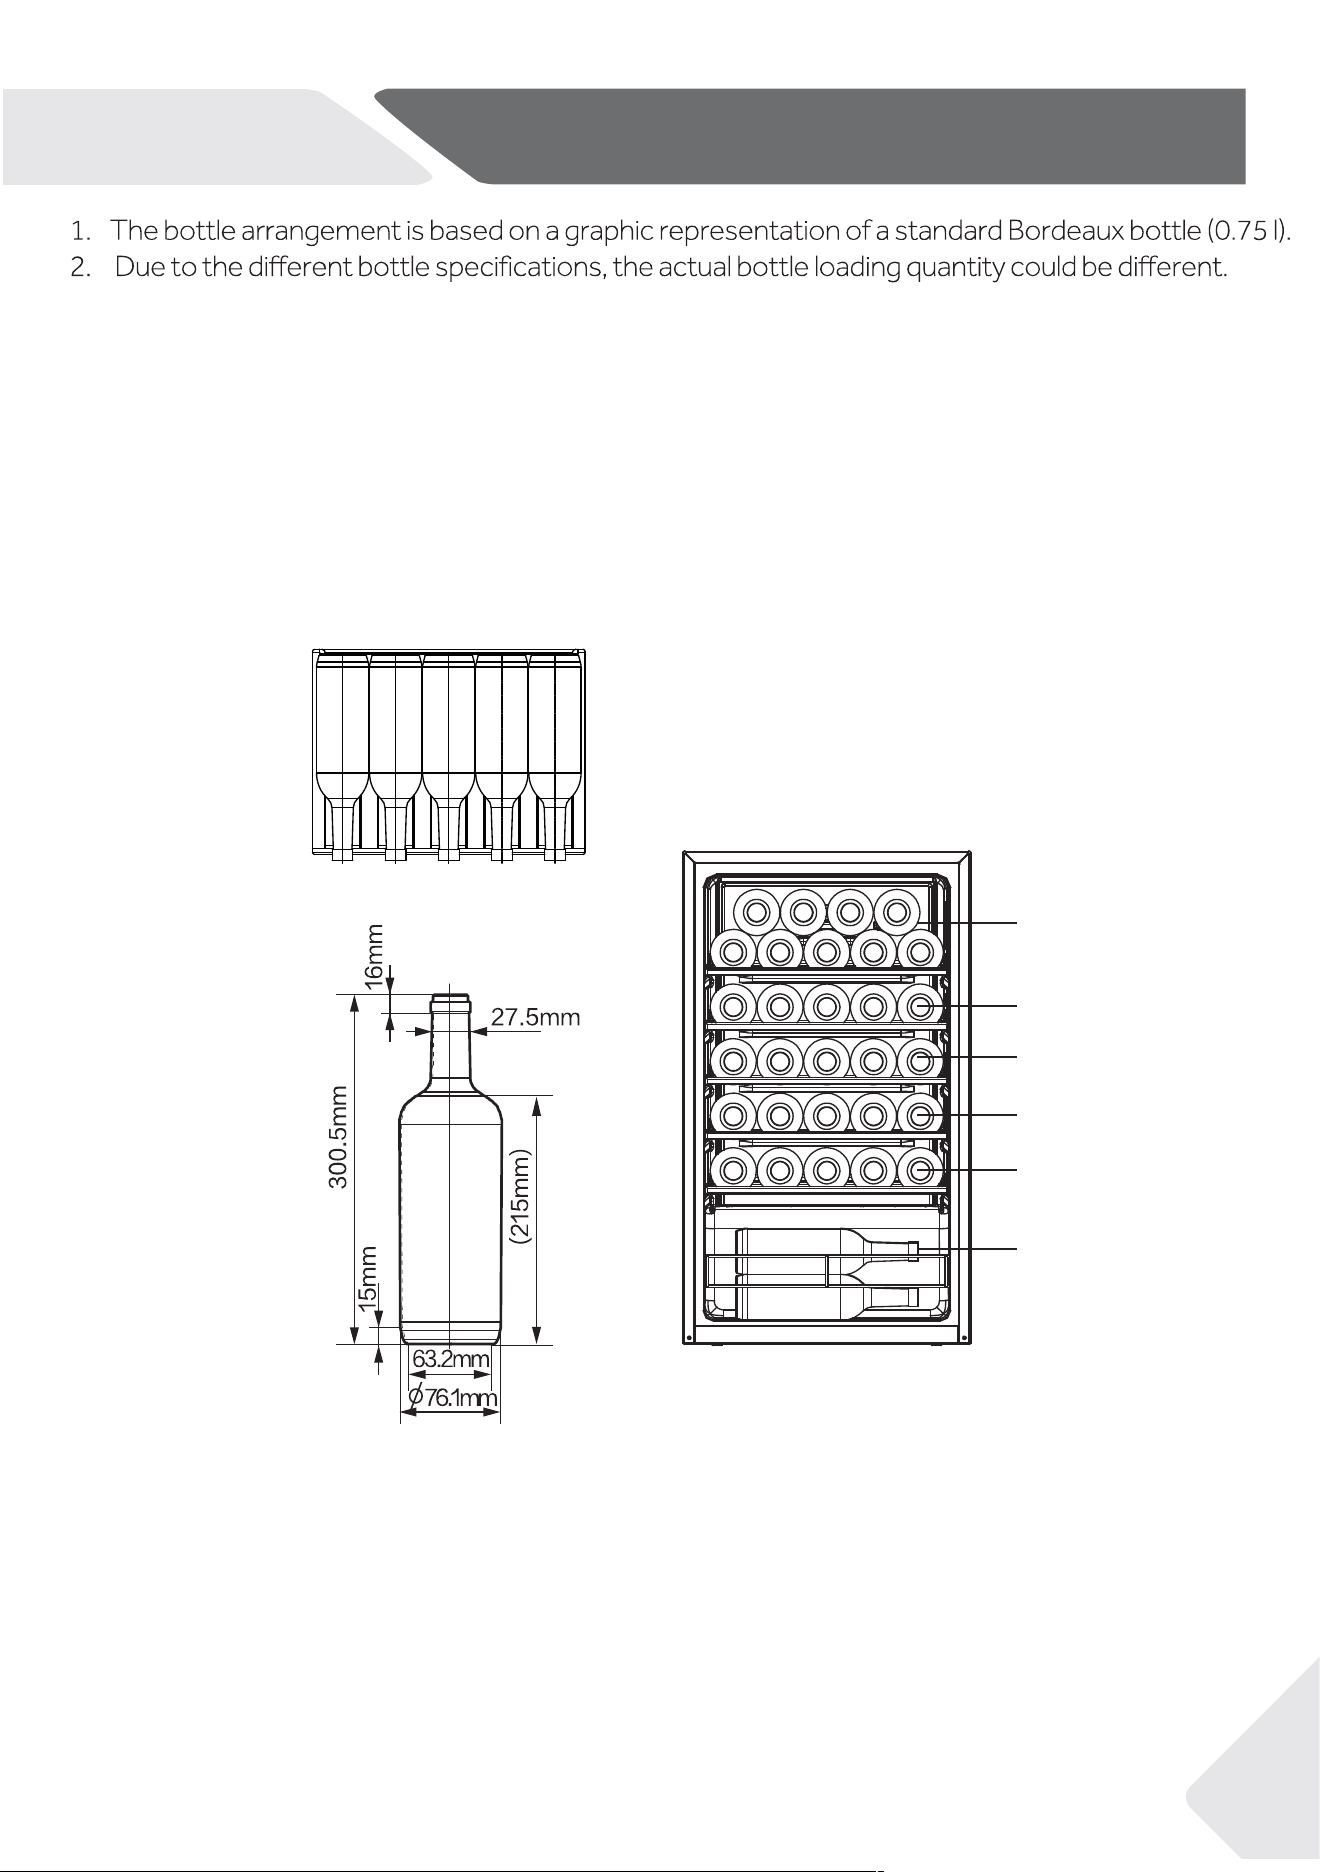
Wine bottle stacking
29
9
5
5
5
5
4


HWC90UC-EN
