Loading ...
Loading ...
Loading ...
IMPORTANT: Avoid damage! Do not operate machine with hood
open. Hood must be closed for proper engine cooling and
exhaust.
1. Park machine safely. (See Parking Safely in the Safety section.)
2. Let engine cool.
APY36182—UN—10JUL20
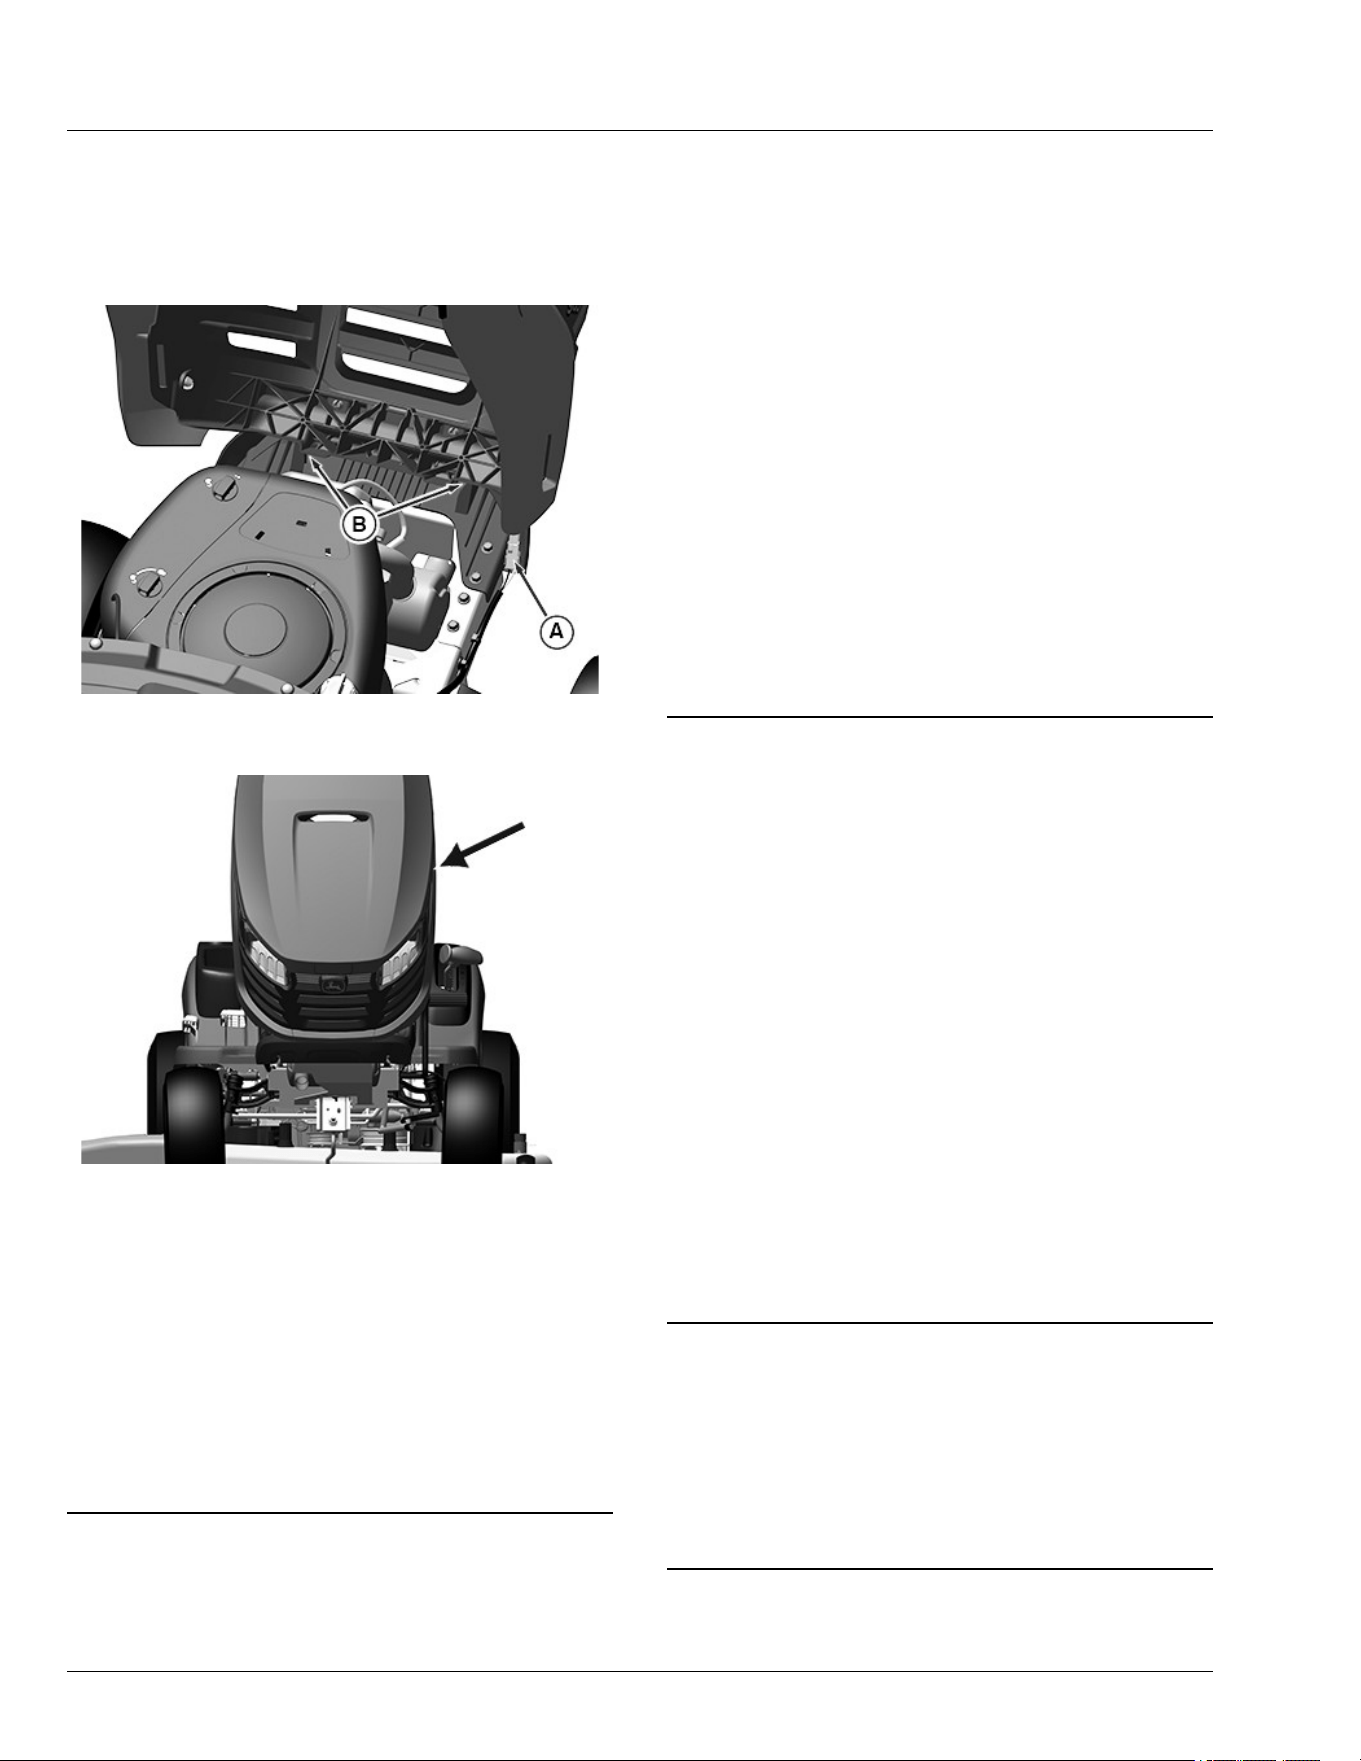
3. Open hood.
4. Disconnect wiring harness (A).
APY36183—UN—10JUL20
5. Apply pressure to the pointed position on the left side of hood and
slowly lower hood. Left side pivot will release after rotating closed
approximately 45°. Once left side pivot releases, slide out right side
pivot. Lower hood slightly and lift hood from brackets (B).
Installing
1. Slide right side hood pivot into the tractor bracket with hood in open
position (left side pivot slides into place as hood closes) and slowly
close hood.
2. Open hood.
3. Connect wiring harness. Verify that wiring harness is properly
retained.
4. Close hood.
MG39705,00004EF-19-28JUL20
Cleaning Plastic Surfaces
IMPORTANT: Avoid damage! Improper care of machine plastic
surfaces can damage that surface:
● Do not wipe plastic surfaces when they are dry. Dry
wiping results in minor surface scratches.
● Use a soft, clean cloth (bath towel, diaper, automotive
mitt.)
● Do not use abrasive materials, such as polishing
compounds, on plastic surfaces.
1. Rinse hood and entire machine with clean water to remove dirt and
dust that may scratch the surface.
2. Wash surface with clean water and a mild liquid automotive
washing soap.
IMPORTANT: Avoid damage! Insect repellent spray may damage
plastic and painted surfaces. Do not spray insect repellent
near machine.
3. Dry thoroughly to avoid water spots.
4. Wax the surface with a liquid automotive wax. Use products that
specically say “contains no abrasives.”
IMPORTANT: Avoid damage! Do not use a power buer to remove
wax.
5. Bu applied wax by hand using a clean, soft cloth.
SR99263,00002B3-19-06APR20
Cleaning and Repairing Metal Surfaces
Cleaning:
Follow automotive practices to care for your vehicle painted metal
surfaces. Use a high-quality automotive wax regularly to maintain the
factory look of your vehicle’s painted surfaces.
Repairing Minor Scratches (surface scratch):
1. Clean area to be repaired thoroughly.
IMPORTANT: Avoid damage! Do not use rubbing compound on
painted surfaces.
2. Use automotive polishing compound to remove surface scratches.
3. Apply wax to entire surface.
Repairing Deep Scratches (bare metal or primer showing):
1. Clean area to be repaired with rubbing alcohol or mineral spirits.
2. Use paint stick with factory-matched colors available from your
authorized dealer to ll scratches. Follow directions included on
paint stick for use and for drying.
3. Smooth out surface using an automotive polishing compound. Do
not use power buer.
4. Apply wax to surface.
MP47322,00F467A-19-26MAY15
Avoid Damage to Plastic and Painted Surfaces
● Do not wipe plastic parts until they are rinsed rst. Using a dry cloth
causes scratches.
● Insect repellent spray damages plastic and painted surfaces. Do
not spray insect repellent near machine.
● Be careful not to spill fuel on the machine. Fuel damages surfaces.
Wipe up spilled fuel immediately.
● Prolonged exposure to sunlight damages some surfaces.
MP47322,00F4630-19-15APR19
Service Miscellaneous
44
Loading ...
Loading ...
Loading ...