Loading ...
Mounting the Astrograph
The RASA 8 has a CGE dovetail mounting bar. This is compatible with mounts that accept a CGE or
Losmandy-D style dovetail. The astrograph itself weighs 17 lbs., so a mount with a load capacity greater
than that is required to ensure good performance when a camera and any accessories are added.
Choosing a Camera
When choosing a camera to use with the RASA 8, there are several things to keep in mind.
1. Sensor size– The optical design is optimized for use with sensors
that have a diagonal size up
to 22 mm. It will still perform well with up to 32 mm diagonal sensors, but field illumination in
the corners will be reduced.
2. Pixel size– The RASA 8 works effectively with a wide range of sensor pixel sizes. Unlike many
telescopes, it can work well with smaller pixels (i.e. less than 5 µm
2
) due to its fast focal ratio
(F/2.0) and short focal length (400 mm).
3. Obstruction– Since it mounts in front of the optics, use a camera
that blocks as little of the
aperture as possible. Best results will be obtained with cameras that have a cylindrical design
and an outer diameter of less than 100 mm. Many astronomical CMOS and “Hyperstar
compatible” CCD cameras are especially well-suited to the RASA 8.
4. Backfocus– For all flat-field astrographs, including the RASA 8, it is important that the
camera’s sensor is positioned at the proper distance from where it mounts to the telescope.
Otherwise, performance at the edge of the sensor, especially larger sensors, may suffer. For
the RASA 8, this location is 29 mm from the top surface of the lens group cell. A camera’s
backfocus, also known as its flange focal distance, is the distance between the camera sensor
and where the camera body mechanically connects to a camera lens or telescope. Therefore,
cameras with sensors deeply recessed within their body having more than 29 mm of backfocus
cannot be used with the RASA 8 as the sensor cannot be placed at the proper location.
DSLR cameras cannot be used with the RASA 8 due to their large obstruction and long backfocus.
Installing a Camera
If using a camera that mounts with M42 threads, the supplied M42 camera adapter can be used.
This will likely require utilizing optional M42 extension rings to place the camera sensor at the
proper location. When using the M42 camera adapter, the required backfocus distance is 25 mm.
So, for example, if the backfocus of a camera is 17 mm, then 8 mm of M42 extension ring(s)
between the camera and M42 camera adapter will be needed. For best results with larger sensors,
get the backfocus within 1 mm of the required distance.
The supplied C-thread camera adapter can be used to attach any camera which mounts with
a standard C-thread. If the camera’s sensor spacing meets the C-thread standard (i.e. 17.5 mm
backfocus), no additional adapters are required.
For use with Canon or Sony mirrorless cameras, Celestron offers optional RASA 8 camera adapters.
These have a bayonet mount, and position the camera sensor at the proper location.
Other cameras will require a custom camera adapter. Also, cameras with relatively large sensors
may benefit from a custom camera adapter to best illuminate the sensor. Refer to the “Camera
Adapter Requirements” drawing at Celestron.com (located on the RASA 8 webpage under the
“Support and Downloads” tab) to determine the custom camera adapter design.
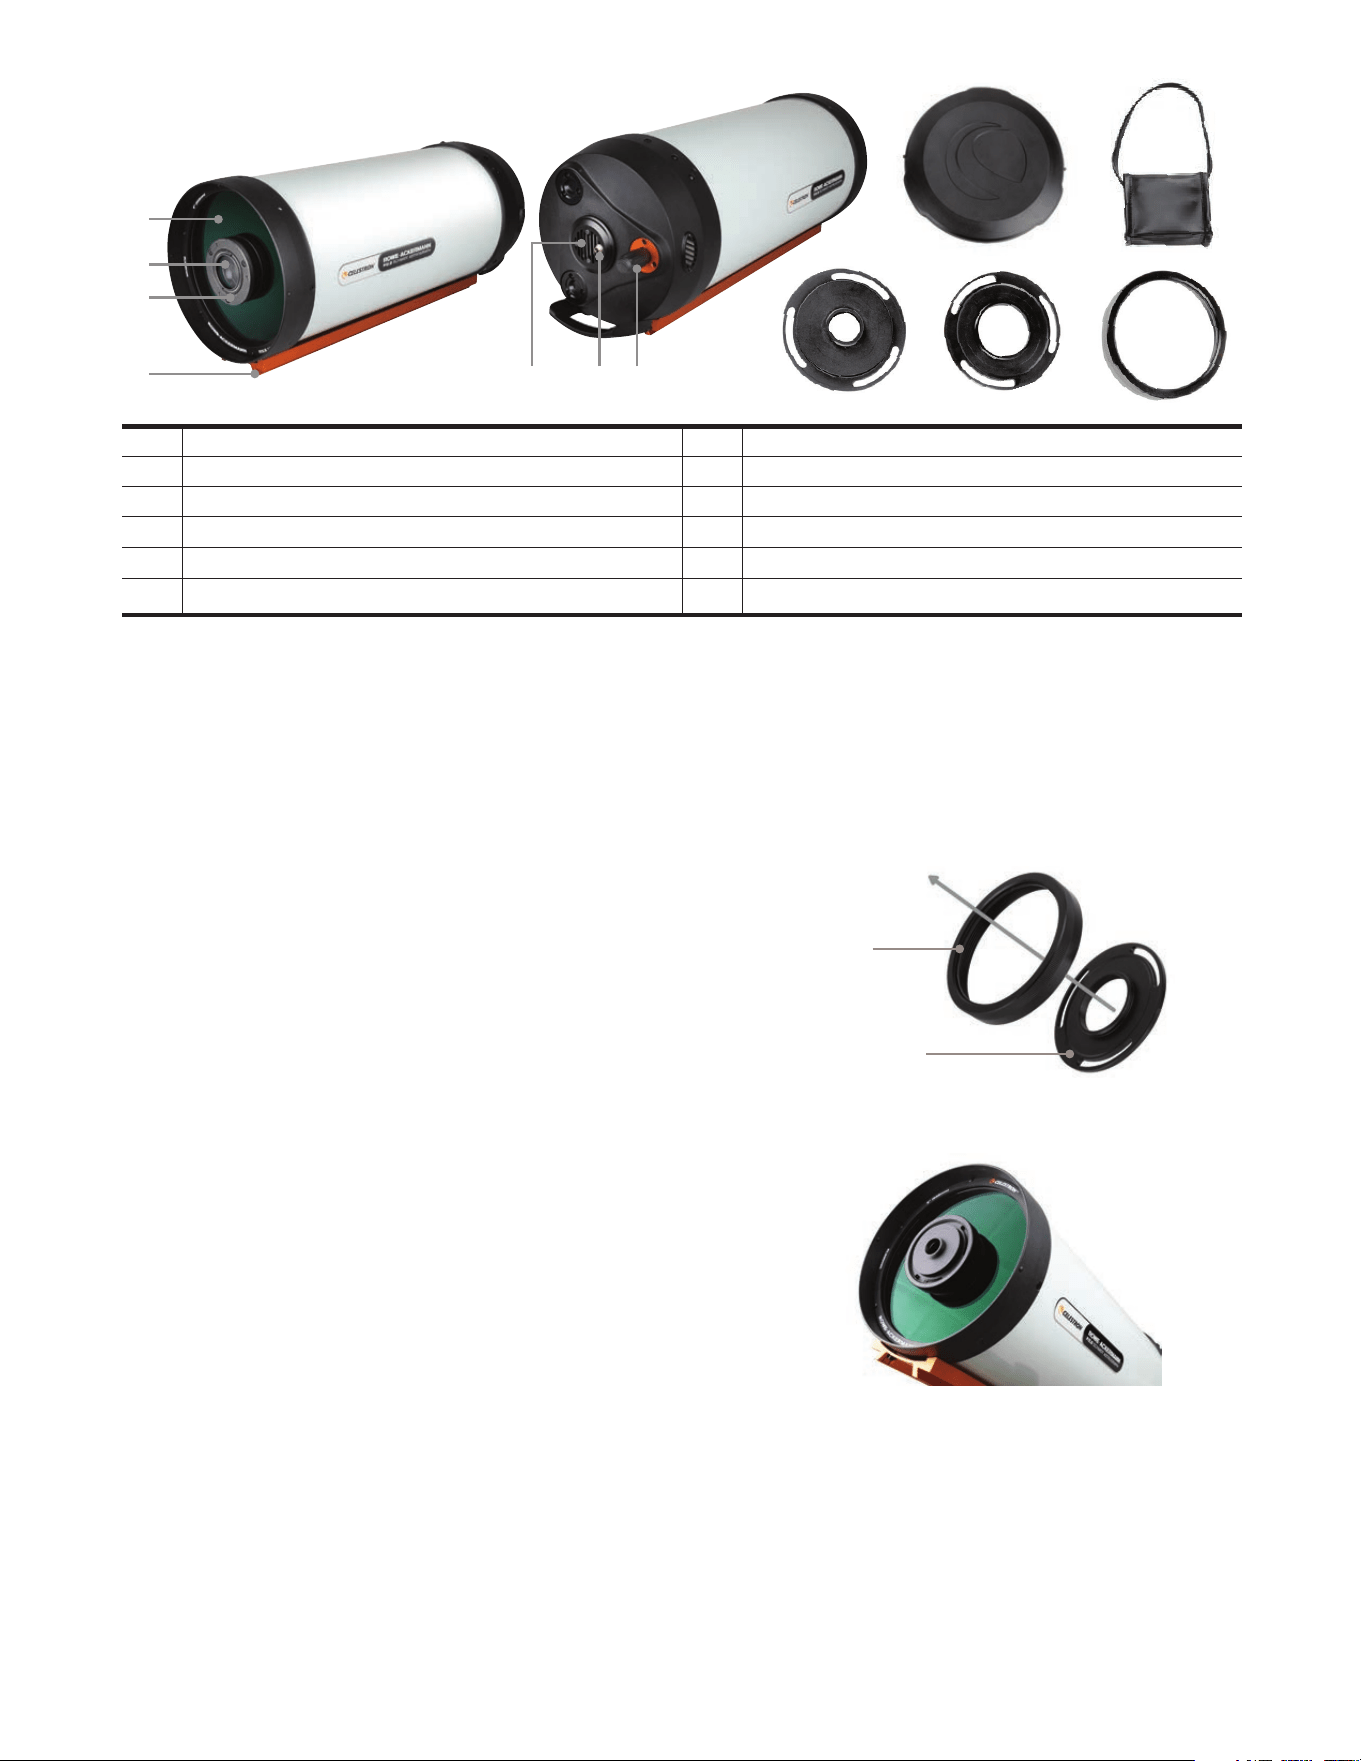
To attach your camera:
1. Place the knurled retaining ring over the camera adapter.
2. Thread the retaining ring clockwise onto the lens group cell at the front of the RASA 8.
Make sure the camera adapter seats flatly on the lens cell and tighten the retaining
ring until the camera adapter is snug against the cell. Do not over-tighten the ring.
3. Thread the camera body onto the camera adapter. Camera orientation can be adjusted later.
Alternatively, the camera adapter, with retaining ring attached as in step 1, can be first connected to the
camera. Then, while holding the camera, thread the retaining ring onto the lens group cell.
CAUTION: Over-tightening the retaining ring can cause the lens group cell to rotate
relative to the Schmidt corrector, which may affect optical alignment. Keep the camera
adapter snug against the lens cell, but do not over-tighten the ring.
Adjusting Camera Orientation
Once the camera is installed, you can adjust its orientation by slightly loosening the retaining ring.
Loosen the ring no more than 1/8th turn, rotate the camera as desired, and retighten the ring.
Remember not to over-tighten the ring.
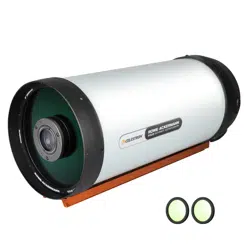
Overview
1 Schmidt Corrector 7 Focus Knob
2 Lens Group 8 Dust Cover
3 Lens Group Cell 9 Battery Pack (Batteries not Included)
4 Dovetail Mounting Bar 10 C-Thread Camera Adapter
5 Cooling Fan 11 M42 Camera Adapter
6 12V DC Jack for Cooling Fan 12 Retaining Ring
The Rowe-Ackermann Schmidt Astrograph 8 (RASA 8) is an incredibly fast (F/2.0) 8” aperture optical system that delivers a flat field without optical aberrations. It is capable of
capturing stunning deep-sky astronomical images without the difficulties presented by slower and longer focal length telescopes. The astrograph can only be used with a camera.
Retaining
Ring
Camera
Adapter
10
11
12
8 9
2
1
3
4
6 7
5
Loading ...
Loading ...
Loading ...