1
Assembly Instructions
SmartRack
®
Models: SRCOLOKIT45U, SRCOLOKIT45UDP
1111 West 35th Street, Chicago, IL 60609 USA • tripplite.com/support
Copyright © 2022 Tripp Lite. All trademarks are the sole property of their respective owners.
2
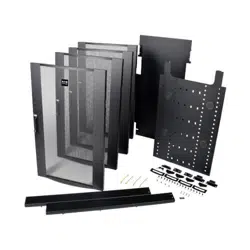
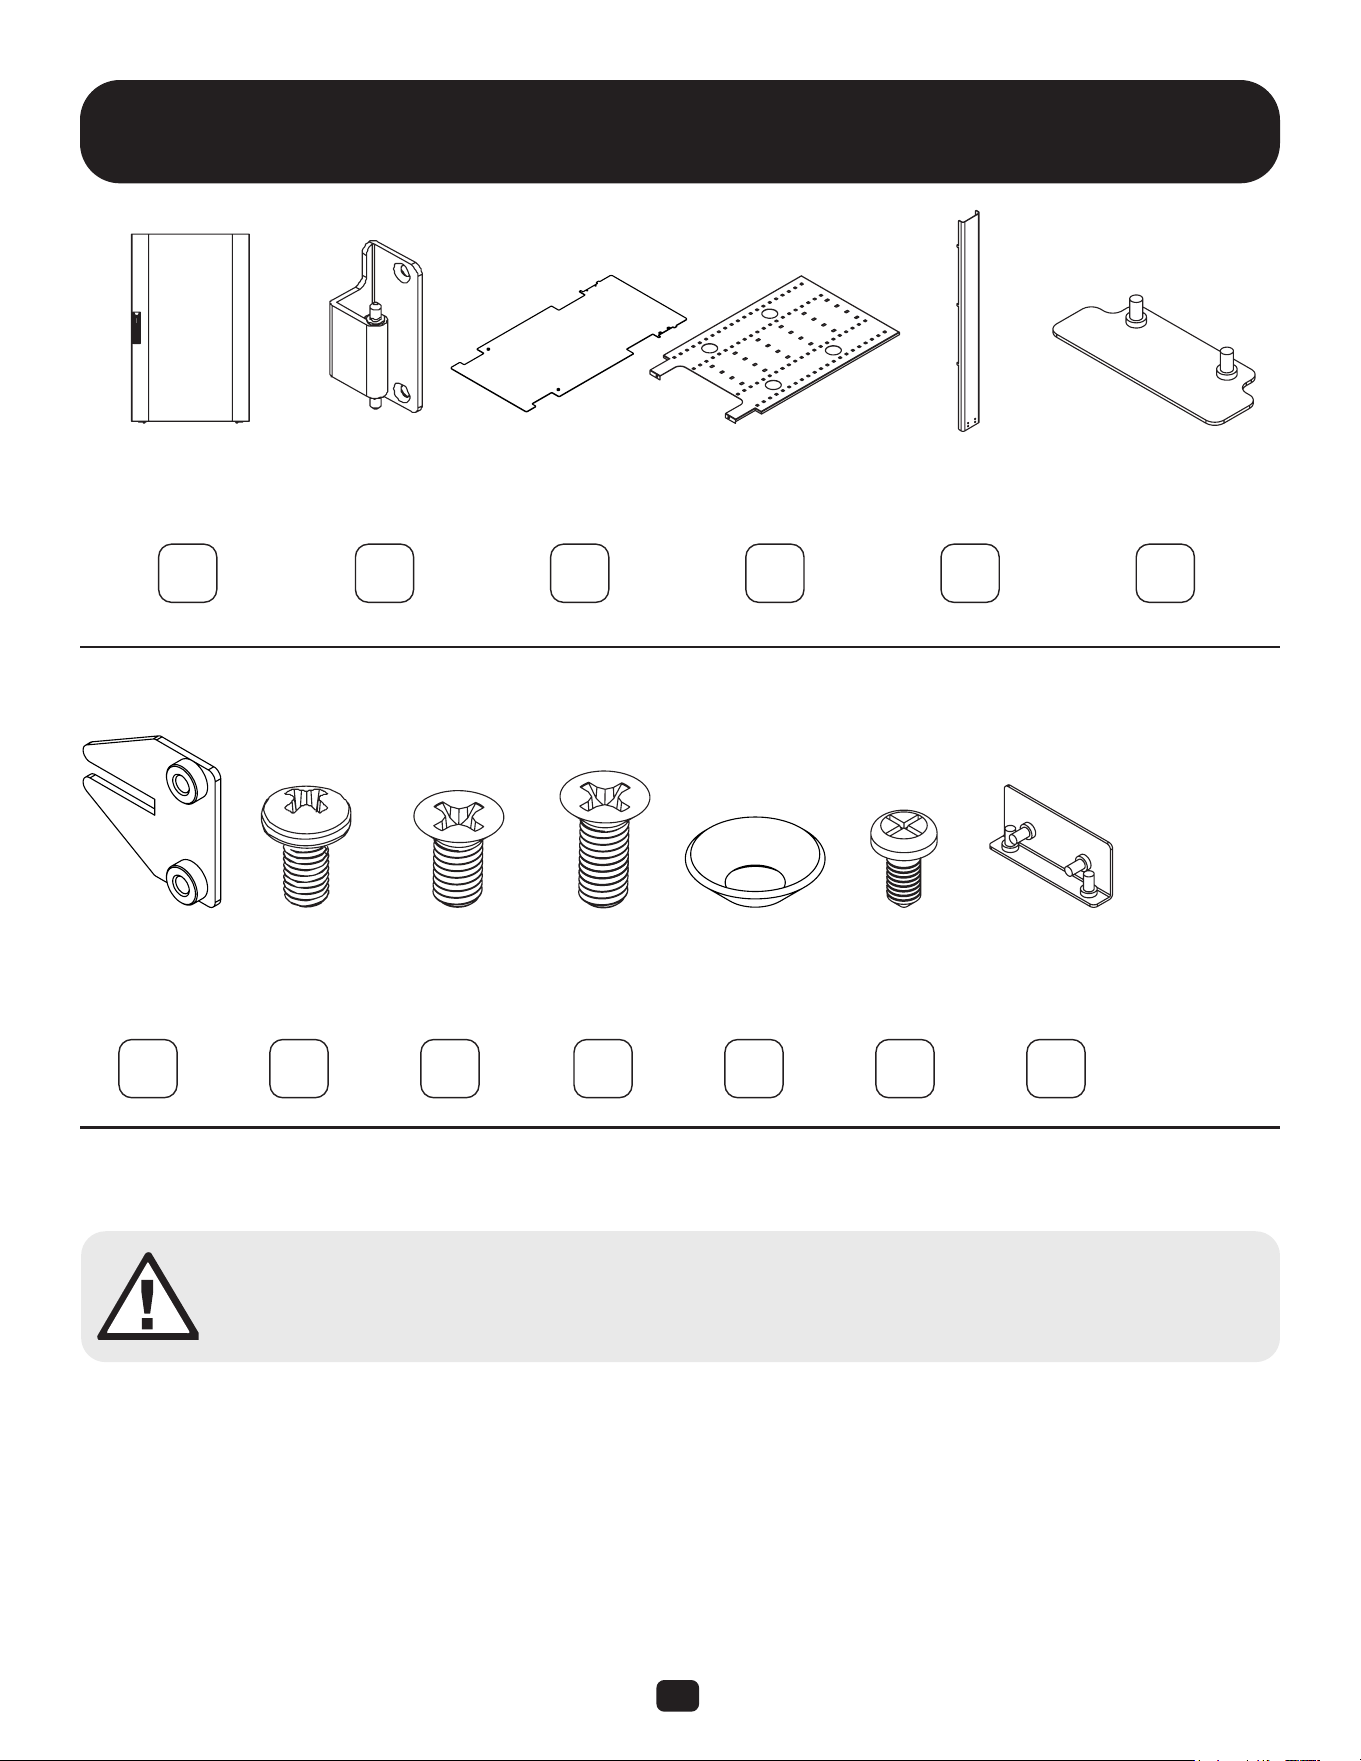
Parts List
Colo Door Hinge
Brackets
Divider
Plate
Roof Cable
Channel
Blocking
Plate
Divider Plate
Bracket
M6 Screw M6 x 10 mm
Flat Head
Screw
M6 x 16mm
Flat Head
Screw, Zinc
Cone Washer M4 Screw Cable
Channel Plate
A B C D E F
G H I J K L M
x4x4 x2
x4 x2 x8x8 x8x8 x2
x1x1 x1
Required tools (User Supplied):
Phillips Head Screwdriver
WARNING: The rack enclosure is extremely heavy. Do not attempt to unpack, move, assemble or install
the enclosure without assistance. Until it has been properly assembled and stabilized, the enclosure is
prone to tipping and could cause property damage and/or personal injury. Use extreme caution when
assembling the enclosure. Do not attempt to install equipment without rst stabilizing the enclosure.
3
1
2
step
step
B
I
Remove front and
rear doors.
For front doors, attach
additional hinge brackets to
door frame on the same side as
the existing hinge brackets.
For rear doors, move two
hinge brackets so that all
brackets are on the same
side of the door frame.
2 4
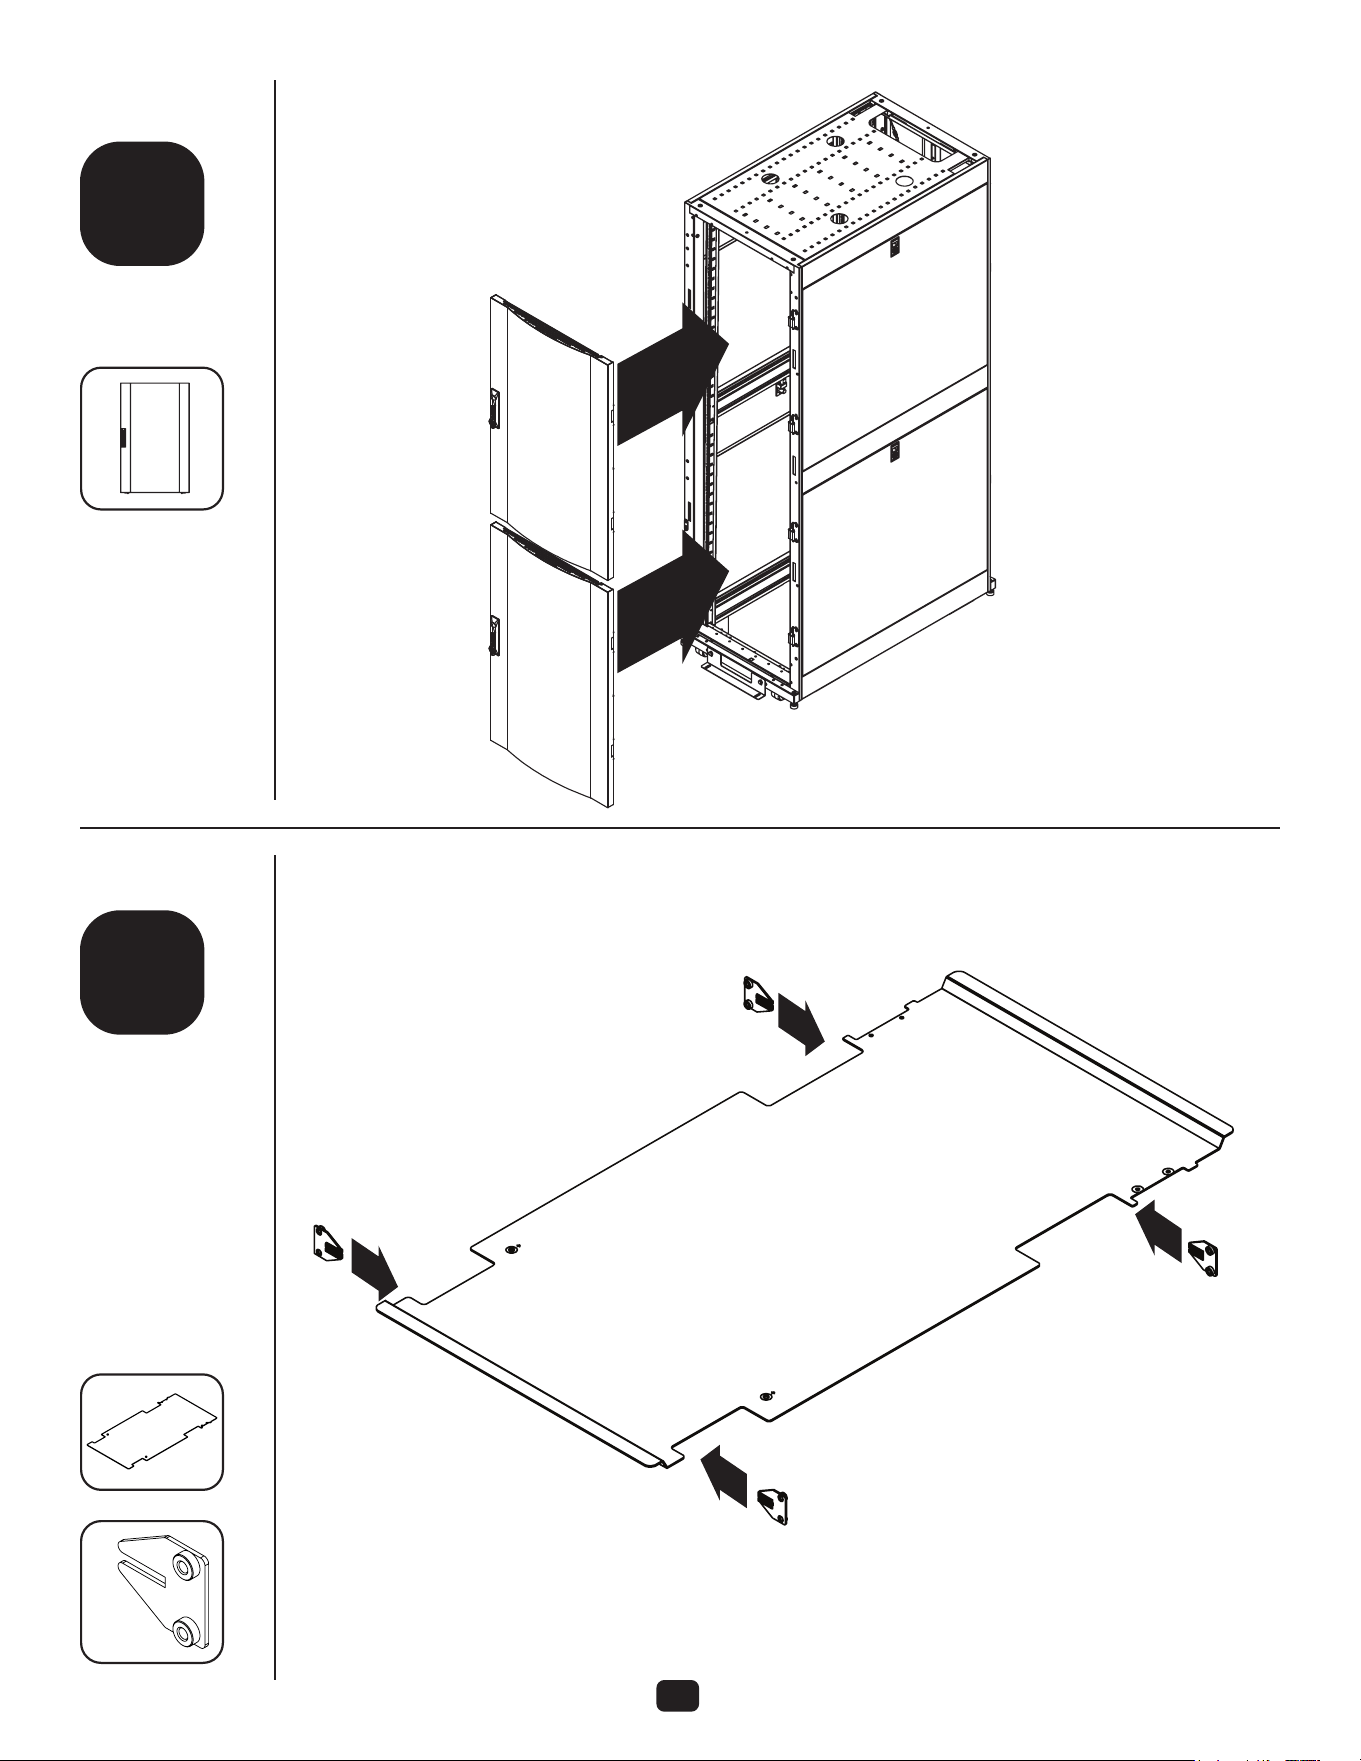
4
3
4
step
step
Attach colo doors
to hinges on
frame.
Assemble divider
plate brackets
onto divider plate.
There are left and
right brackets.
Make sure the
at surface of
the brackets
face away from
each other when
assembled to
divider plate.
A
C
G
4
1
4
Repeat step 3 for
rear doors.
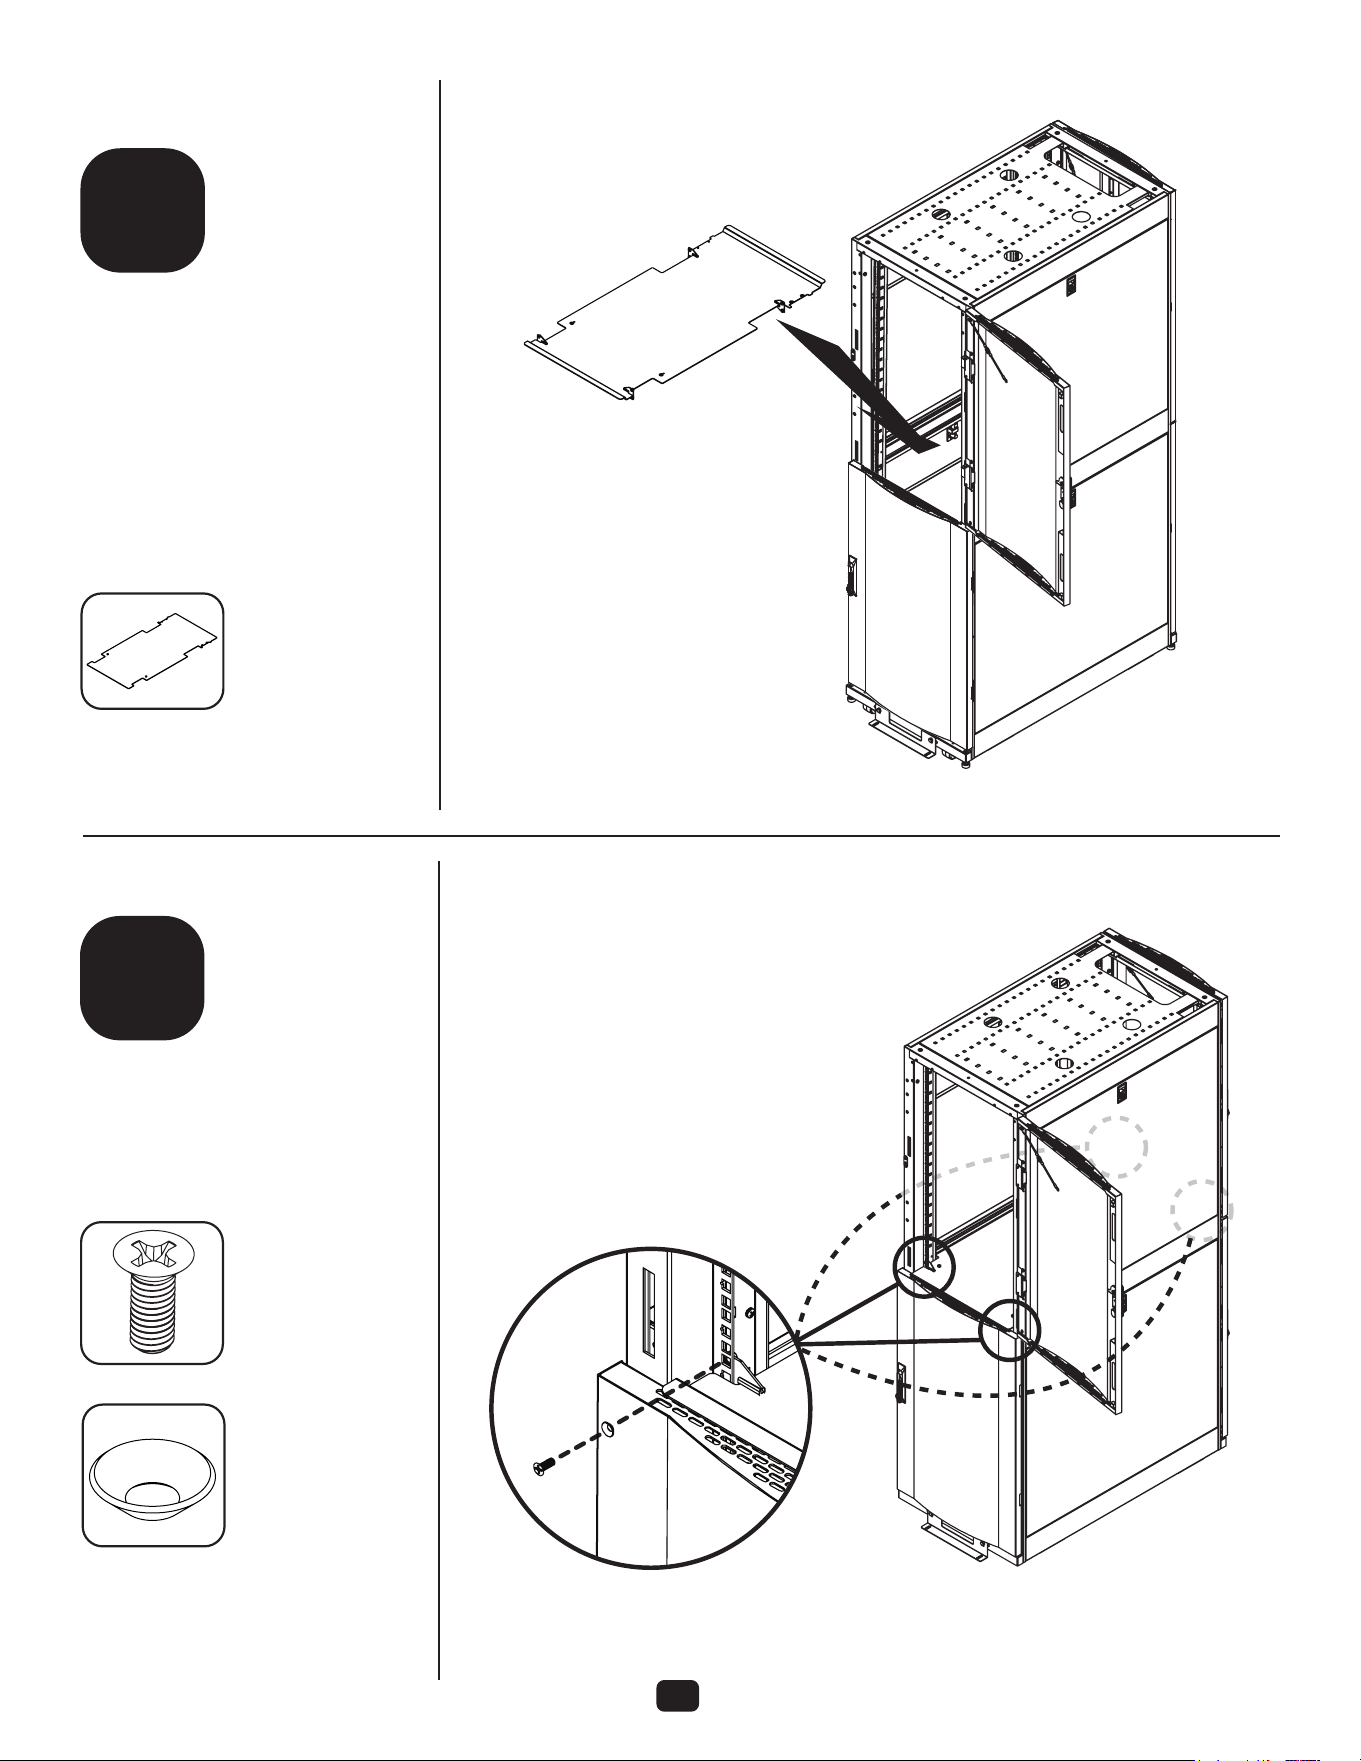
5
5
step
Using an assistant, install divider.
Divider should be installed
with lower doors installed and
completely closed so divider can
rest on the lower doors while
installing M6 washers and screws.
Lock the doors to prevent them
from opening and damaging
the divider. Brackets on divider
should be on the inside of the rack
vertical rails.
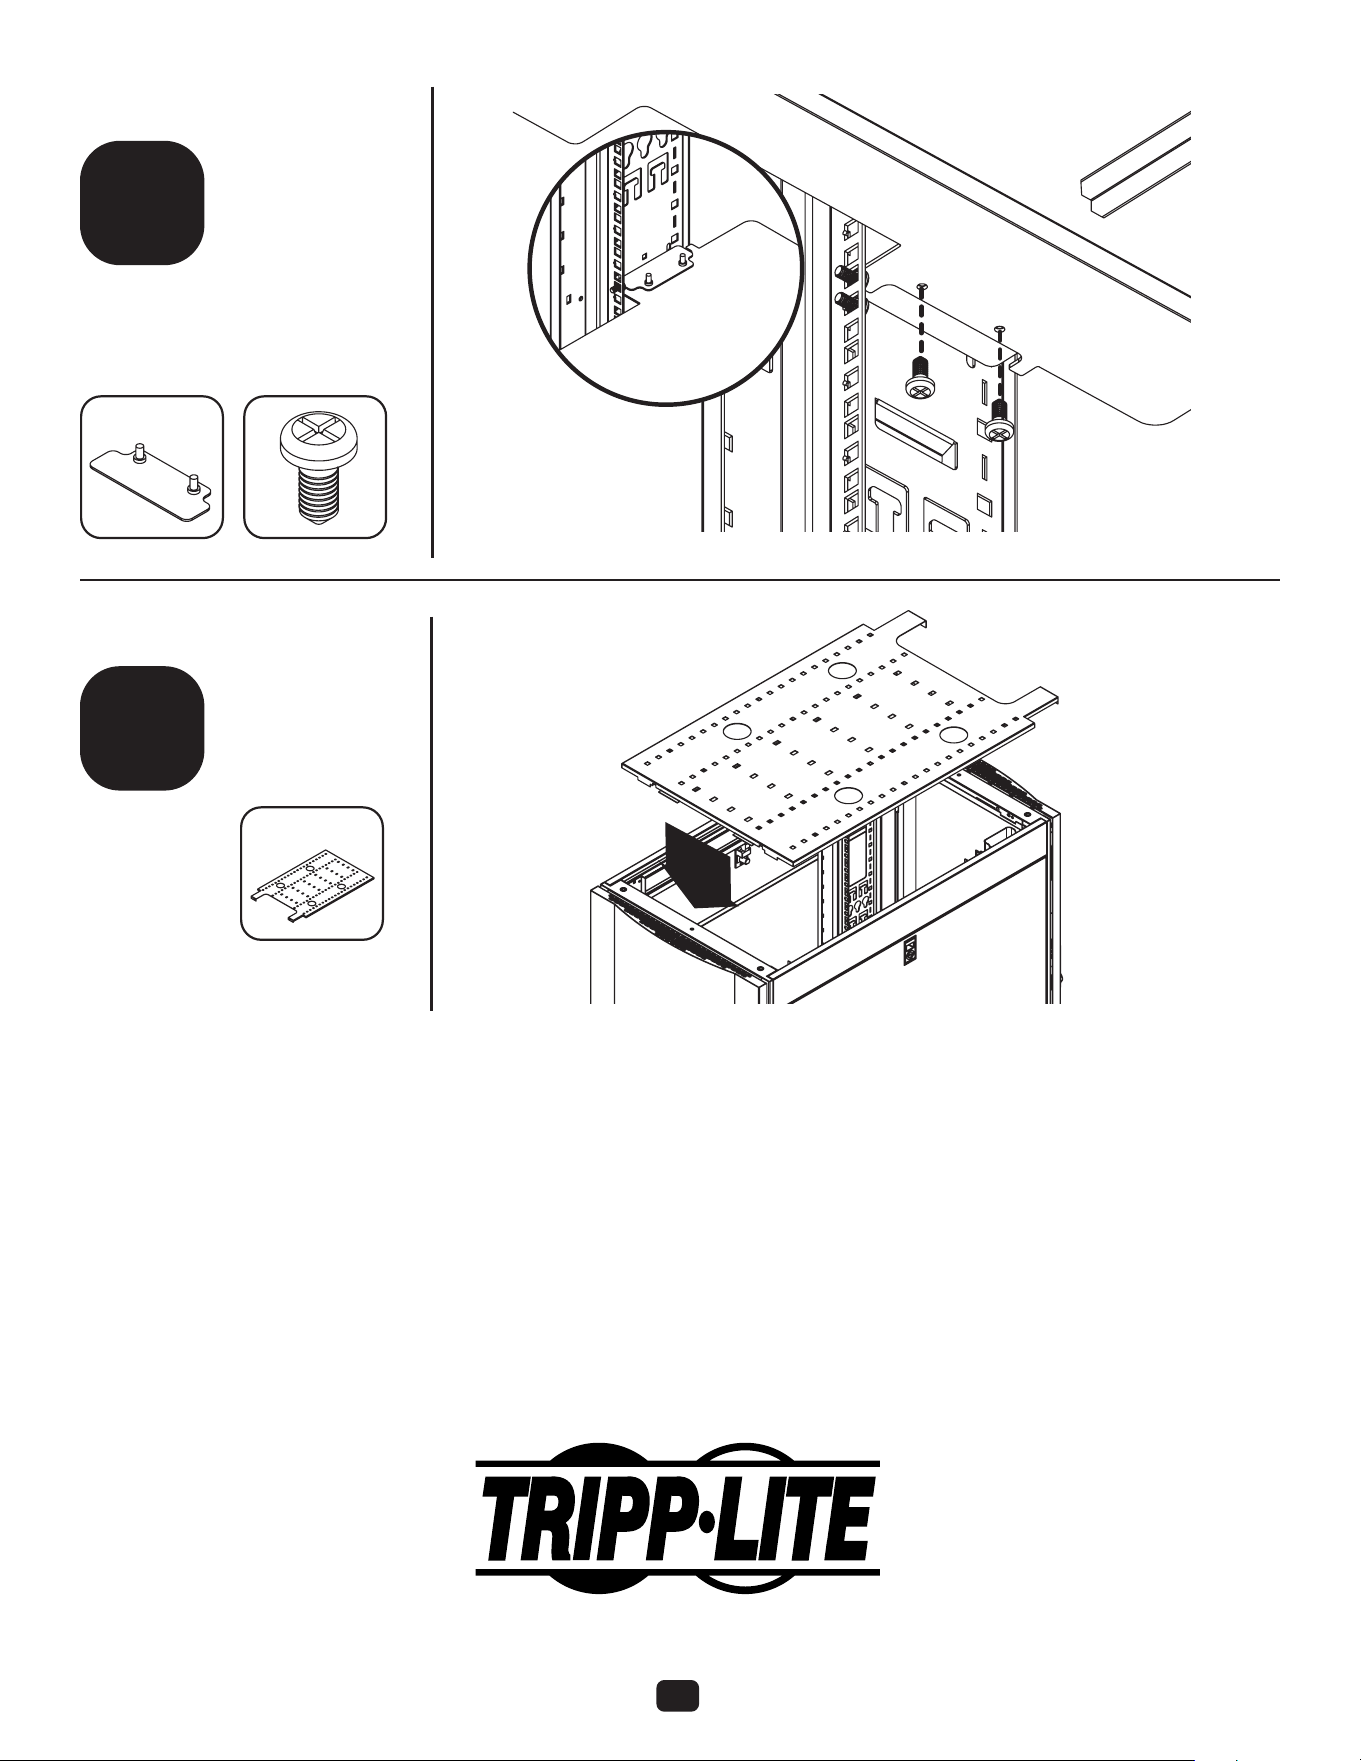
C
1
6
step
Install upper M6 washers and
screws in the topmost hole of “U”
number 23 for a 45U rack. DO
NOT open lower doors until four
of these washers and screws are
installed onto the four vertical rails.
J
K
4
4
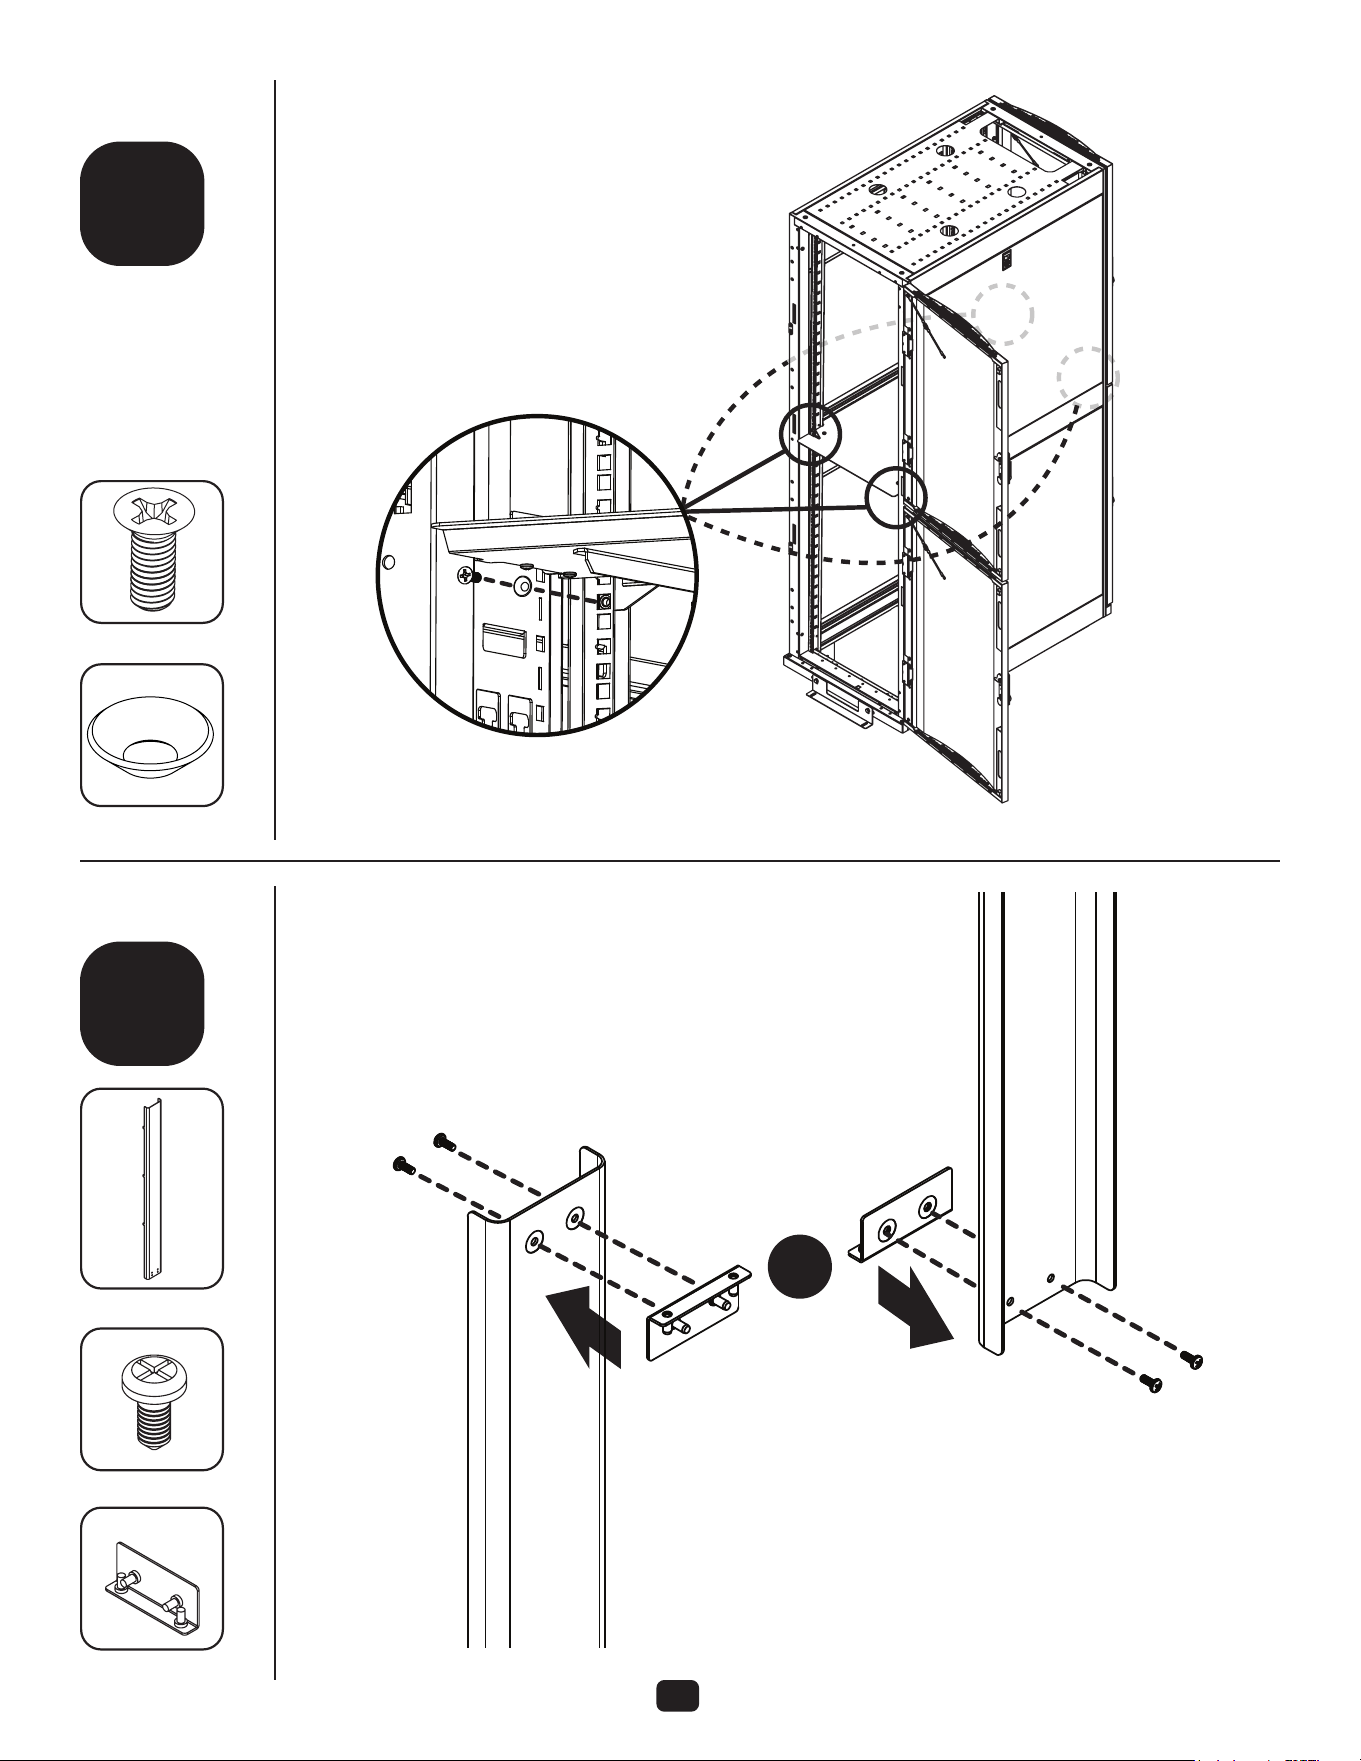
6
7
step
Once upper
M6 hardware
is installed, the
bottom doors can
safely be opened
to install the lower
M6 hardware.
Note: There is an upper channel cover and a lower channel cover.
These can be dierentiated by hole location: the upper cover has
holes closer to bottom edge than the lower cover.
J
L
M
K
8
step
Upper Cover
Lower Cover
E
4
4
2
4
2
and
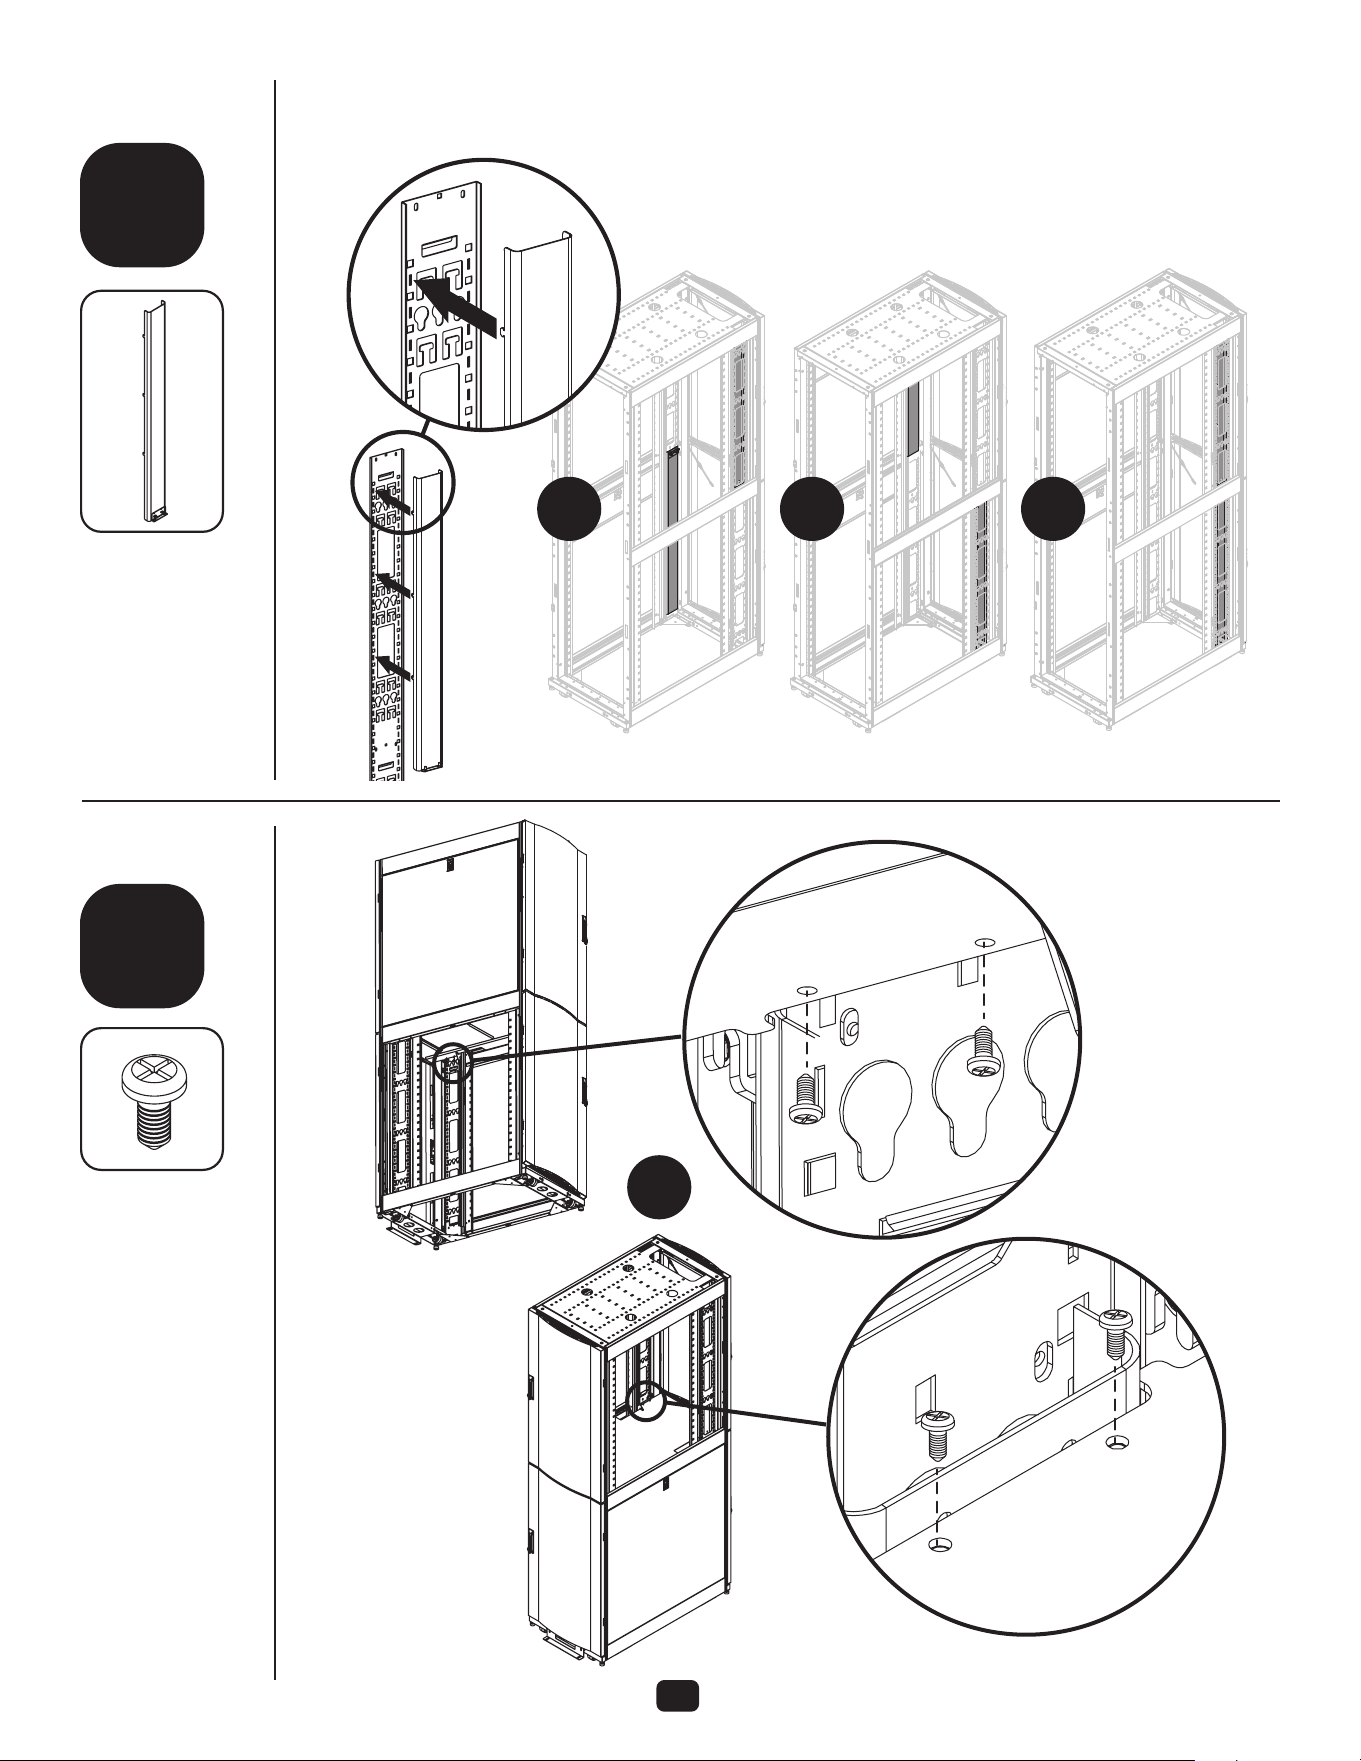
7
9
10
step
step
Install cable channels onto the
cable managers using the tabs.
2
or
X
4 4
L
2
8
Tripp Lite has a policy of continuous improvement. Specications are subject to change without notice.
Photos and illustrations may dier slightly from actual products.
22-04-211 934387_RevA
1111 West 35th Street, Chicago, IL 60609 USA • tripplite.com/support
12
11
step
step
If you only put in one cable channel,
install the blocking plate on the
side opposite the cable channel.
Secure the plate to the divider.
Install roof.
No fasteners
are needed.
D
LF
1
1
2