Loading ...
Loading ...
Loading ...
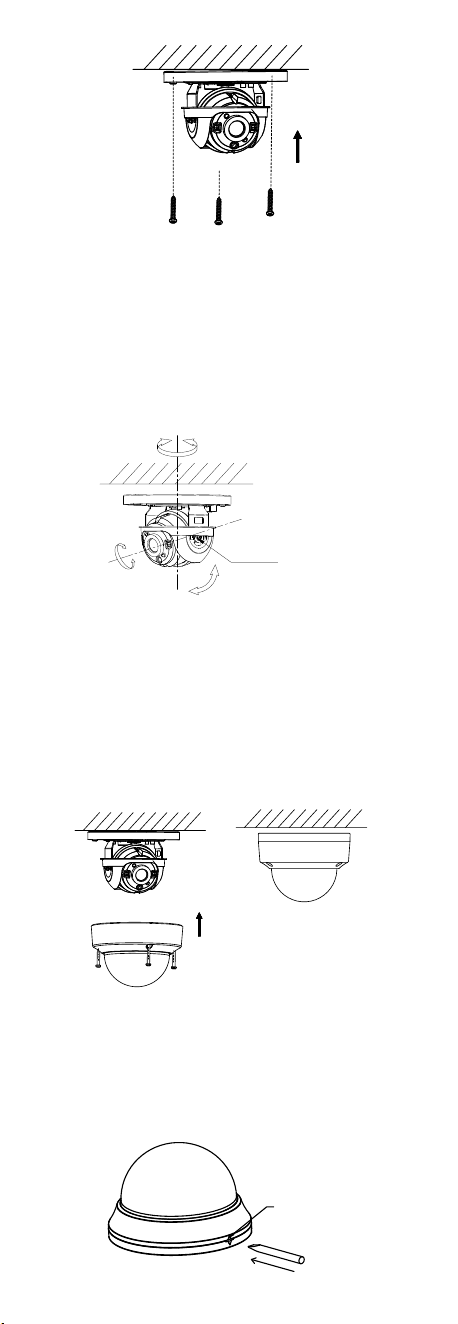
Figure 2-9 Fix the Mounting Base
5. Route the cables through the cable hole, or the side
opening.
6. Connect the corresponding cables, such as power
cord, and video cable.
7. Power on the camera to check whether the image
on the monitor is gotten from the optimum angle. If
not, adjust the camera according to the figure below
to get an optimum angle
Adjusting Screw
0° to 355°
0° to 75°
0° to 355°
Figure 2-10 Type I Camera 2-Axis Adjustment
1). Loosen the tilt adjusting screw to adjust the tilt
position [0° to 75°].
2). Hold the camera to adjust the pan position [0°
to 355°].
3). Hold the camera body to adjust the rotation
position [0° to 355°].
8. Reinstall the bubble, and tighten the screws to finish
the installation.
Figure 2-11 Bubble Reinstallation
2.4 Ceiling Mounting of Type IV Camera
Steps:
1. Align the snap joint, and then insert the screw driver
to the snap joint.
Align the
Snap Joint
Loading ...
Loading ...
Loading ...