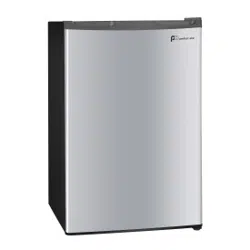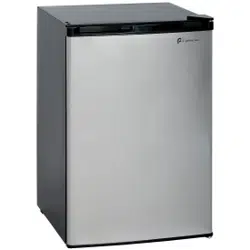
REFRIGERATOR
2.7 AND 4.4 CU. FT. SINGLE DOOR
FOR MODEL:
1P1BF27
1P1SLF44
Before using your refrigerator, please
read this manual carefully and keep it for
future reference, along with your receipt.
USER MANUAL
1
Contents
Important S
afety Instructions_ _ _ __1
Installation_ _
_ _ _ _ _ __ _ _ _ _ __ _3
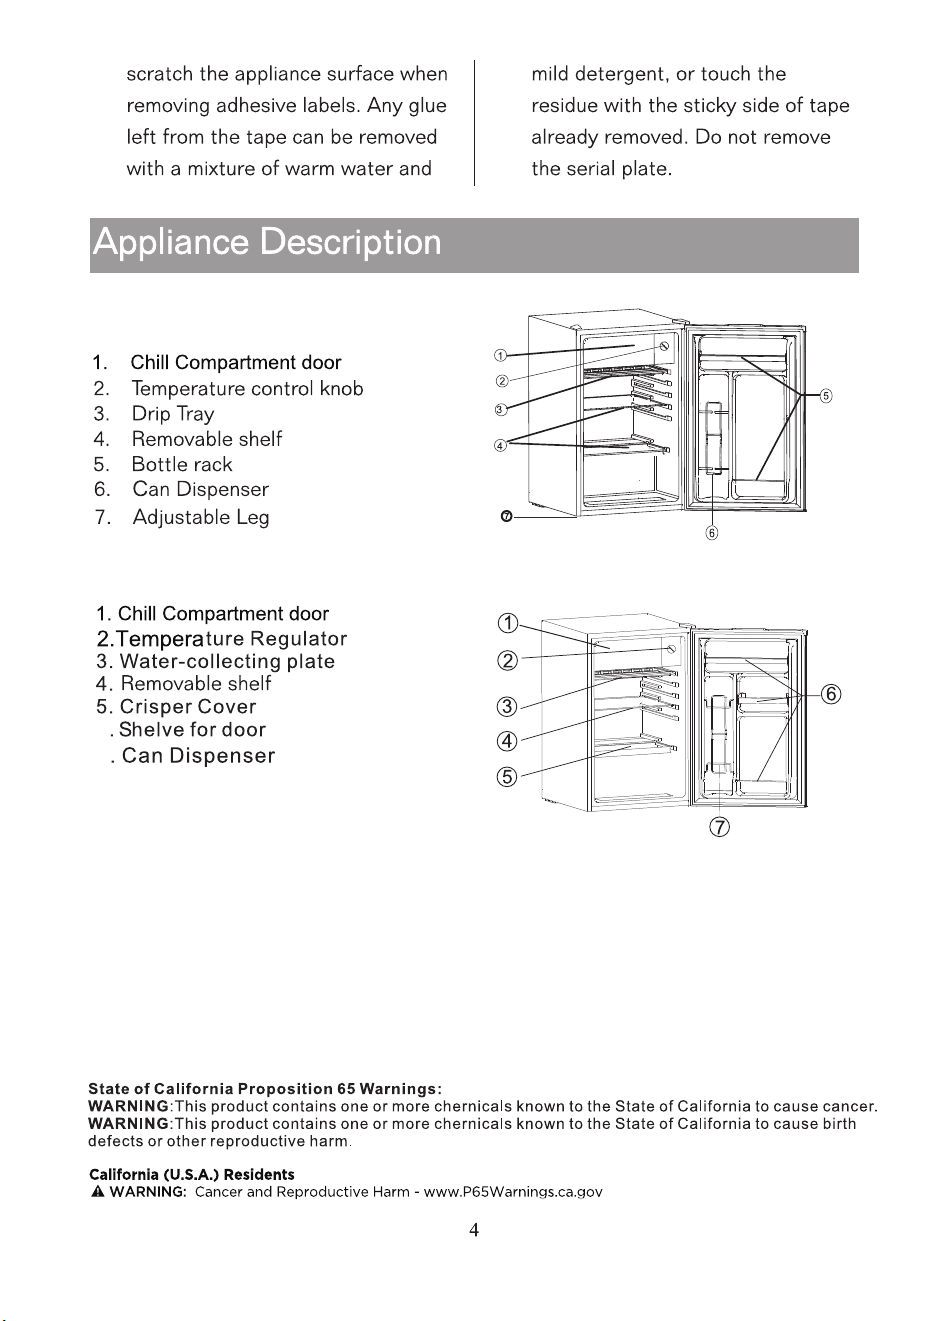
Appliance
Description _ _ __ _ _ _ _ _4
T
emperature Control_ _ _ _ _ _ _ _ __ 6
Cleaning and car
e_ _ _ _ _ _ _ _ _ __ _8
Ener
gy Saving Tips_ _ _ _ _ _ _ _ _ _ _10
T
rouble Shooting_ _ _ _ __ _ _ __ _ _ _10
Important Safety Instructions
For your safety and corr
ect usage,
please read these instructions carefully
before using your new appliance to
avoid unnecessary mistakes and
accidents. Please ensure that all
people using this appliance are familiar
with its operation and safety features.
Keep these instructions in a safe place
for future reference and be sure that
they are kept with the appliance in the
event that it is moved or sold, so that
everyone using it through its life will be
properly informed on its correct
appliance usage and safety. The
manufacturer is not responsible for
damages caused by misuse. The
appliance is for indoor and domestic
use only.
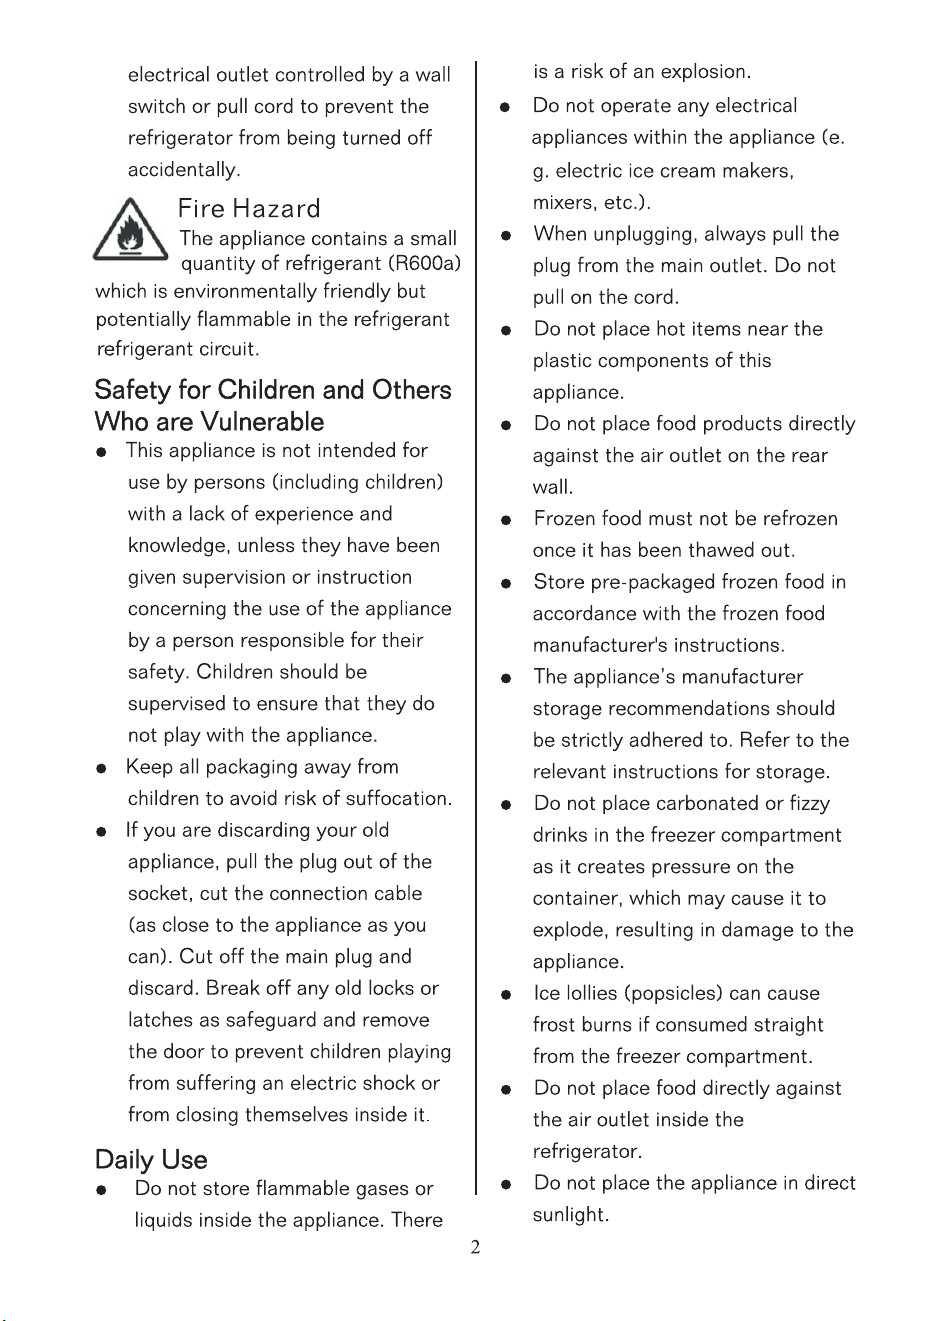
Electrical Info
rmation
● The appliance must be plugged into
its own dedicated 115 Volt,
60 Hz
.,
15 Amp, AC
only electrical outlet.
The power cord of the appliance is
equipped with a three-prong
grounding plu
g
for your protection
against el
ectrical shock haza
rds. It
must be plugg
ed directly into a
properly grounded three prong
receptacle. The receptacle must be
installed in accordance with local
codes and ordinances. Consult a
qualified electrician. Avoid
connecting refrigerator to a Ground
Fault Interruptor (GFI) circuit. Do
not use an extension cord or
adapter plug.
● If the power cord is damaged, it
should be replaced by an
authorized ser
vice technician
to
prevent any ris
k
.
● Never unplug the refrigerator by
pulling on the power cord. Always
grip the plug firmly, and pull
straight out from the receptacle to
prevent damaging the power cord.
● Unplug the refrigerator b
e
fore
cleaning and b
efore replacin
g a
light bulb to av
oid electrical sh
ock.
● Perf
ormance may be affected if
the
voltage varies
by 10% or more
.
Such damag
e is not covered
under
your warranty.
● Do not plu
g the unit into
an

3
Proper Disp
osal of your
Refrigerator
Risk of Child Entrapment
Child entrapme
nt and suffocation are
not only problems of the past. Junked
or abandoned refrigerators are still
dangerous – even if they will sit for
“just a few days”. If you are getting rid
of your old refrigerator, please follow
the instructions below to help prevent
accidents.
Before you throw away your
old refrigerator:
● Remove
doors.
●
Leave shelves in place so children
may not easily climb inside.
●
Have refrigerant removed by a
qualified service technician.
Installation
Before installing, follow these
important first steps.
Location
Position the appliance away from
sources of heat such as stoves,
radiators, direct sunlight etc. Maximum
performance and safety are
guaranteed by maintaining the correct
indoor temperature for the class of unit
concerned, as specified on the rating
plate. This appliance performs well
from 55 to 110℉ (12.8~43.3℃)
. The
Appliance may not work properly if it is
left for a longer period at a
temperature above or below the
indicated range.
△
!
IMPORTANT !
There is a need of good ventilation
around the fridge for easy dissipation
of heat, high efficiency of refrigeration
and low power consumption. For this
purpose, sufficient clear space should
be available around the fridge. It
is advisable for there to be 3 inches
separating the back of the fridge to
the wall, at least 4 inches of space
at its two sides, and a minimum of 4
inches
from its top and a clear
space upfront to allow the doors to
open 160°. Appliances must not be
exposed to rain. Sufficient air must
be allowed to circulate in the lower
rear section of appliances, as poor
air circulation can affect performance.
Cleaning
● Wash any removable parts of the
refrigerator interior, and exterior
with mild detergent and warm
water. Wipe dry. Do not use harsh
cleaners on these surfaces.
● Do not use razor blades or other
sharp instruments,
which can
6
7
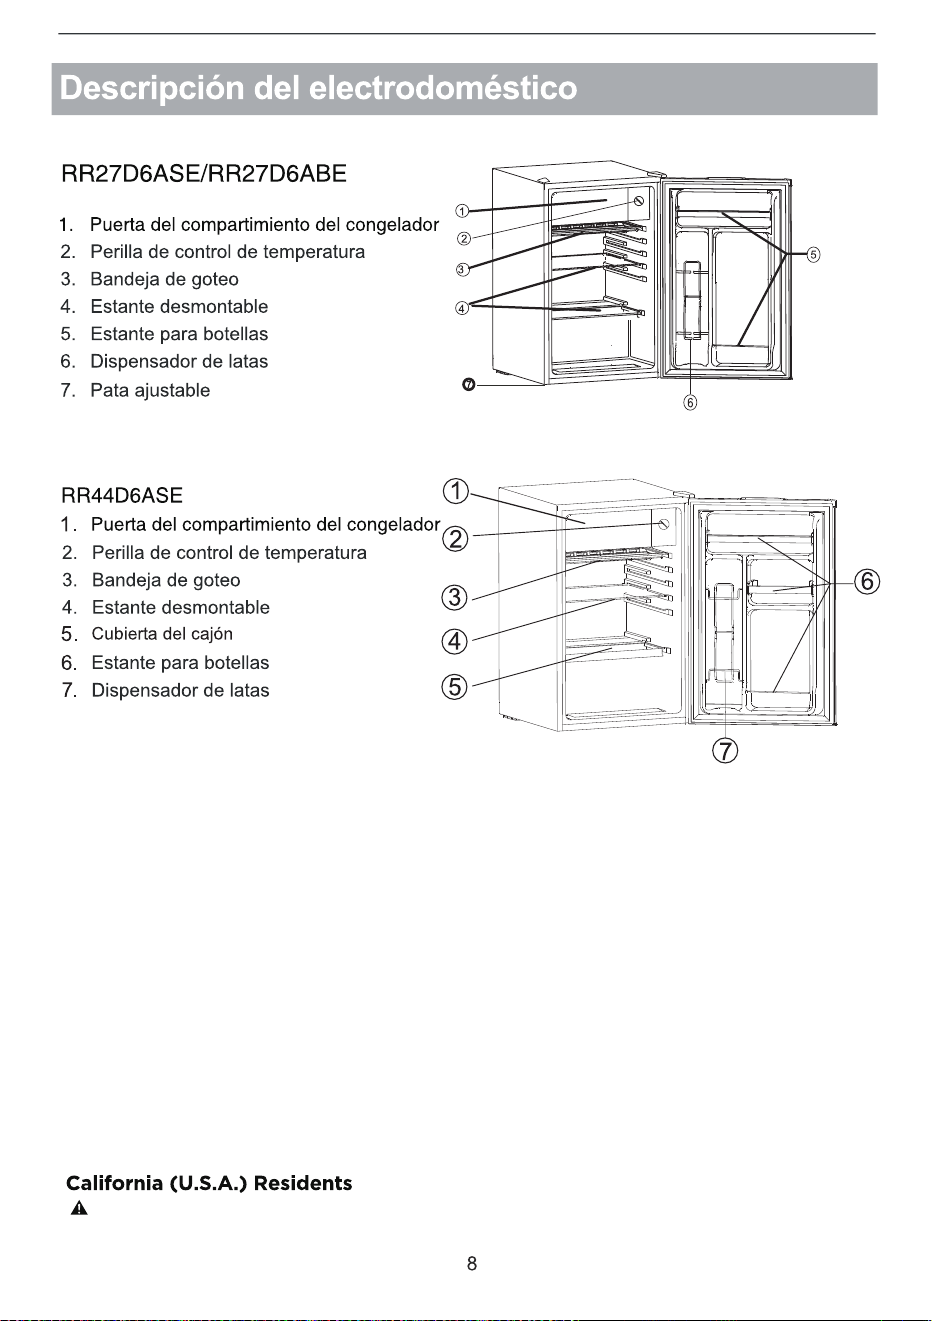
1P1BF27
1P1SLF44
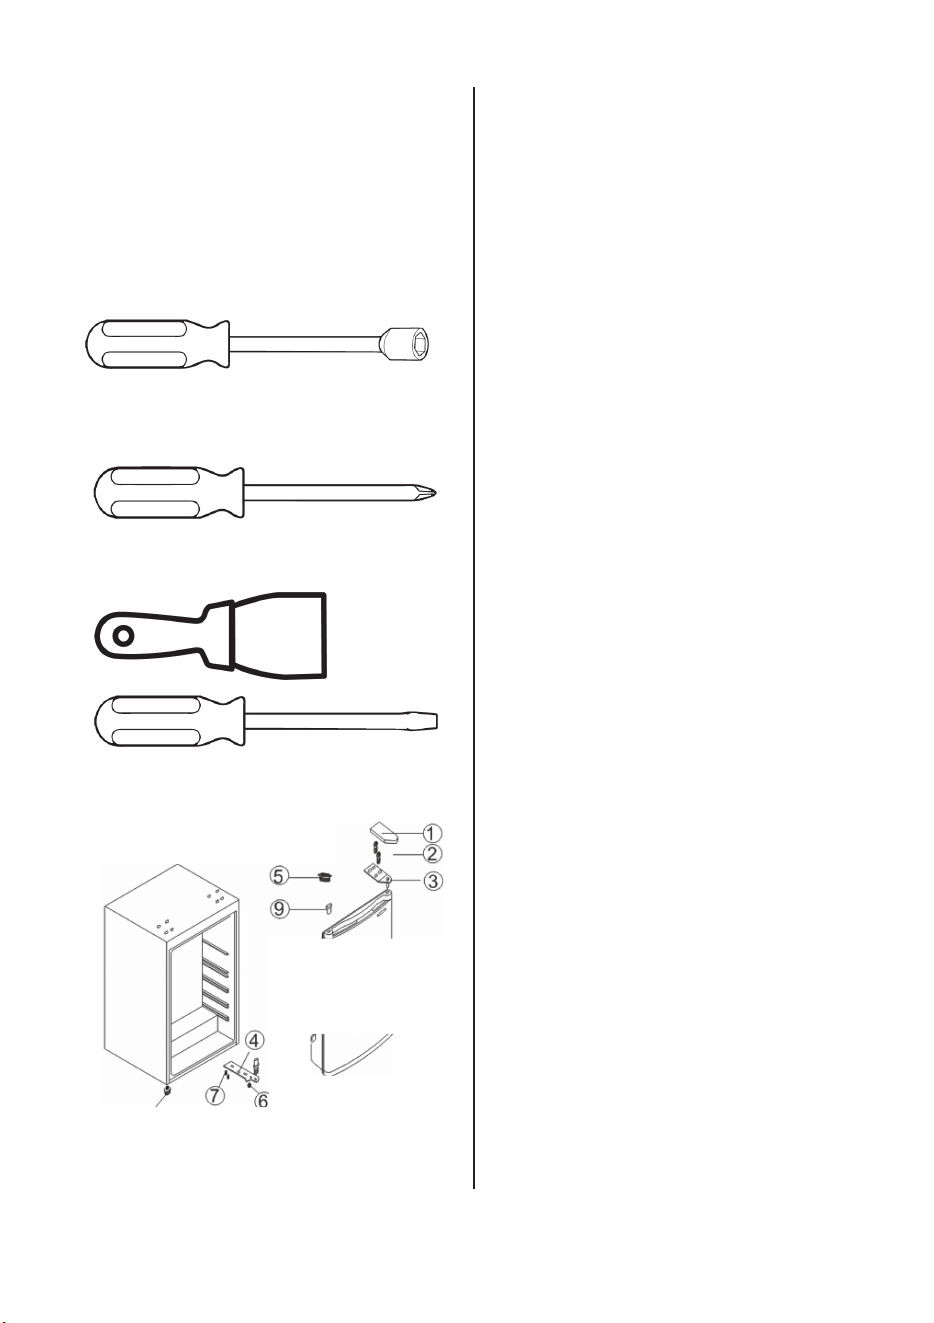
Reversing the Door
The side at which the door opens can
be changed from the right side (as
supplied) to the left side, if the
installation site requires.
ols you will need
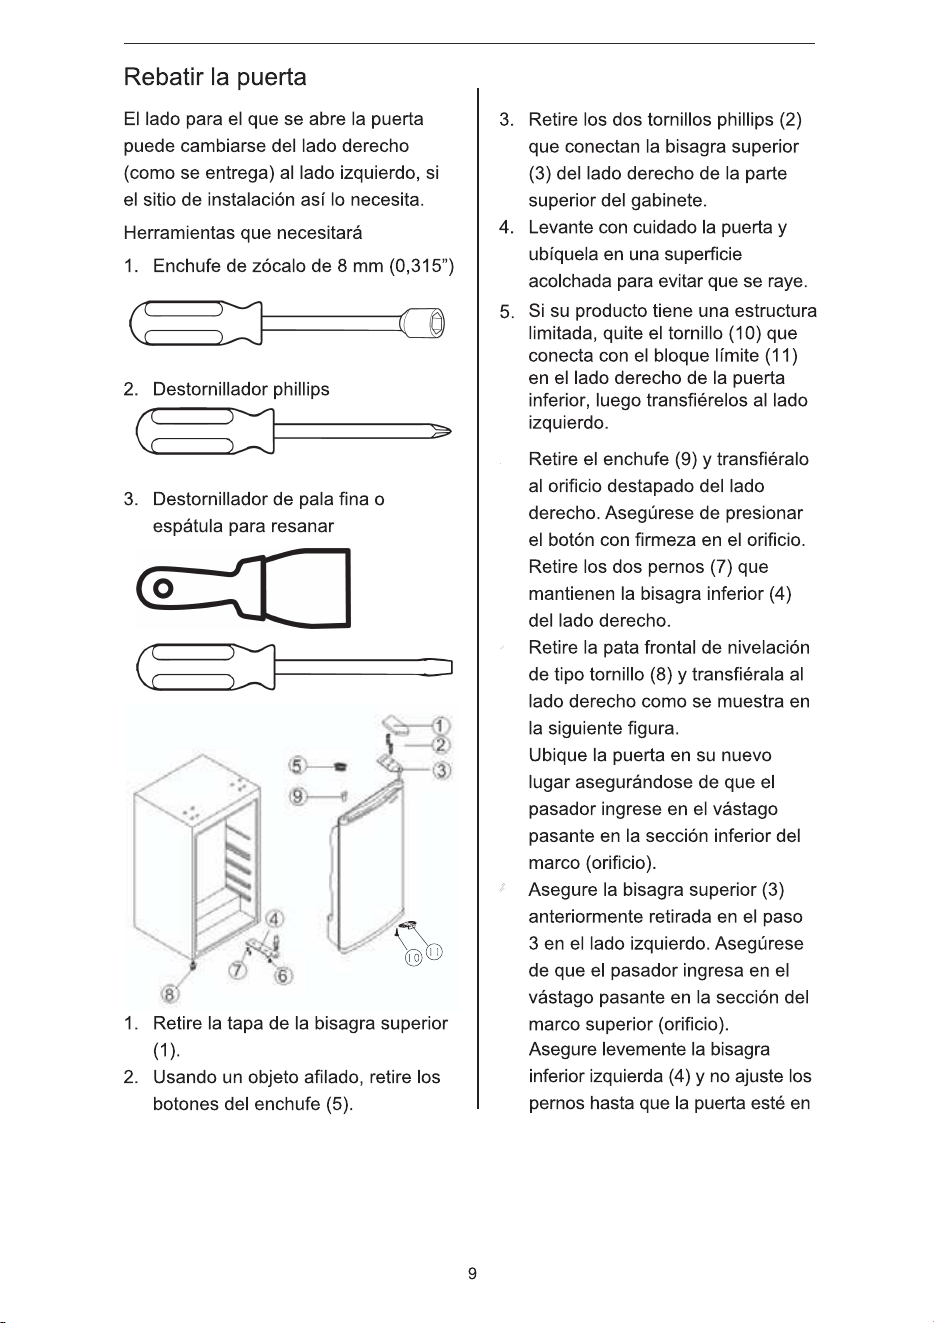
1. 8 mm (0.315 inch) socket driver
2. Philips head screw driver
3.Putty knife or flat head screwdriver
8
5
1.Remove the upper hinge cap (1 ).
2.Using a sharp object, pry out the
plug buttons (5).
3.Remove the two Phillips screws (2)
that connect the upper hinge (3)
on the right side of the cabinet top.
4.Carefully lift the door and place it
on a padded surface to prevent it
from scratching.
5.Remove the plug (9) and transfer it
to the uncovered hole at the right
side. Be sure to press the button
firmly into the hole. Remove the
two bolts (7) that hold the lower
hinge (4) on the right side.
6.Remove the screw-type leveling
front leg (8) and transfer it to the
right side as shown in the figure
below.
7.Set the door into its new place
making sure the pin enters the
bushing at the lower frame section
(hole).
8.Secure the upper hinge (3)
previously removed in step 3 on
the left side. Make sure the pin
enters the bushing at the upper
frame section (hole).
9.Loosely secure the lower left hinge
(4) and do not tighten the bolt until
the door is in the closed position
and leveled.
10.Inset the plug buttons (5) on
the uncovered holes (right side).
11.Replace the upper hinge cap (1)
WARNING!
When changing the side at which the
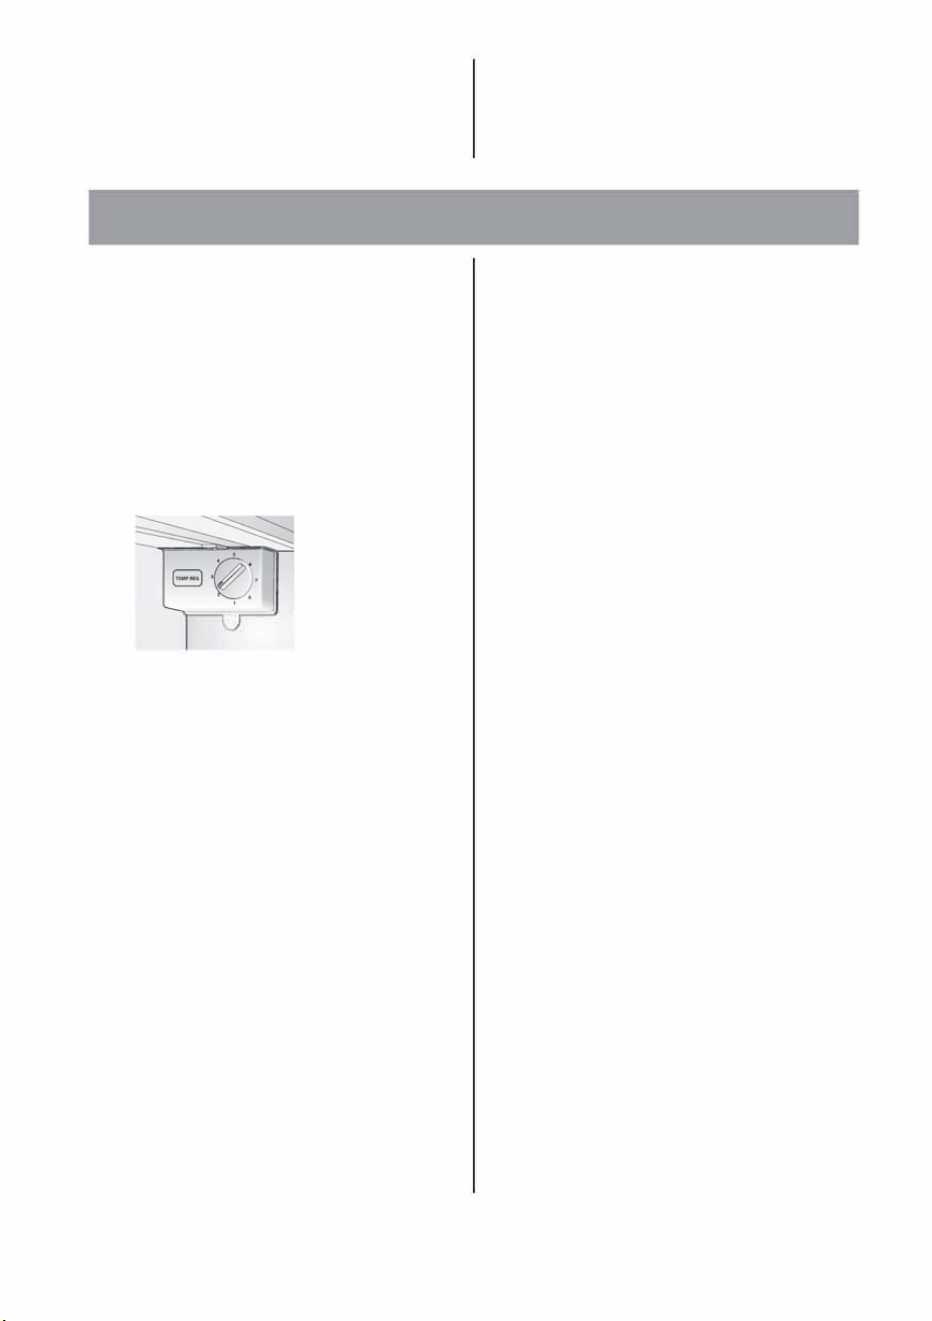
Temperatu Control
Insert the plug of the connection lead
into an outlet with protective earth
contact.
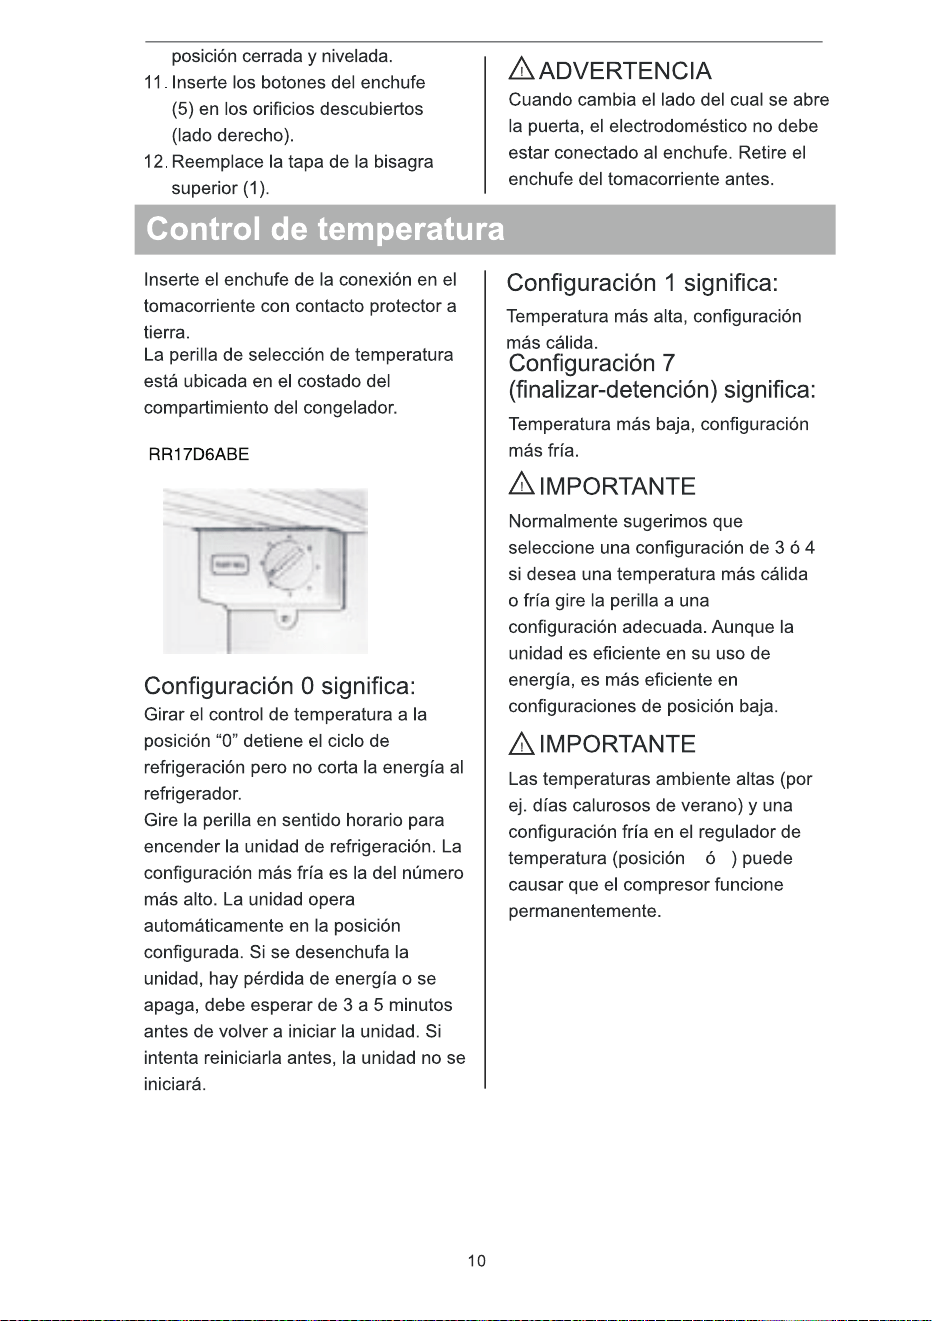
The temperature selector knob is
located on the side of the freezer
compartment.
1
P
1B
F2
7
/
1
P
1
SLF44
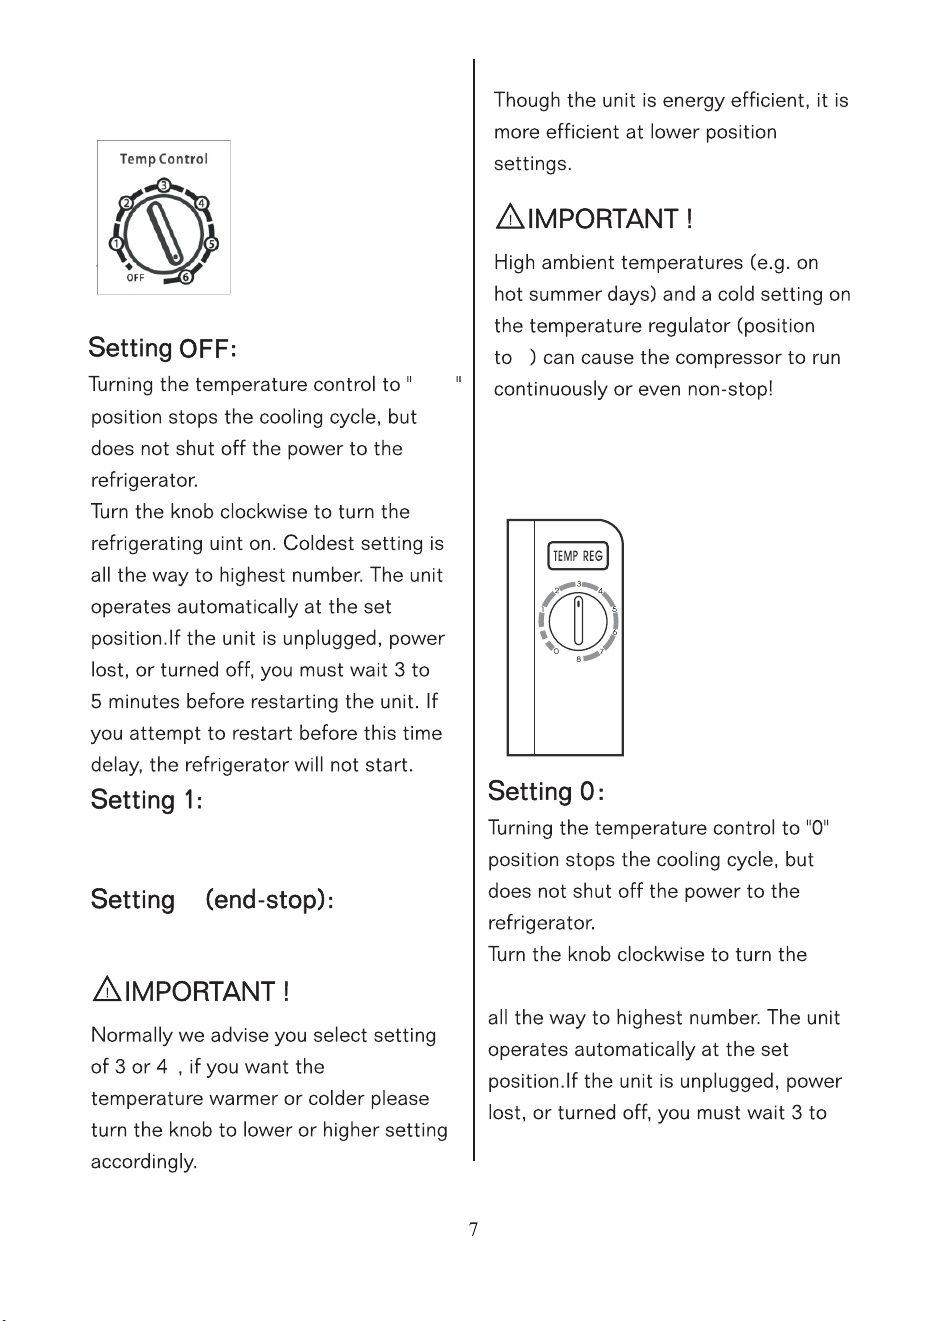
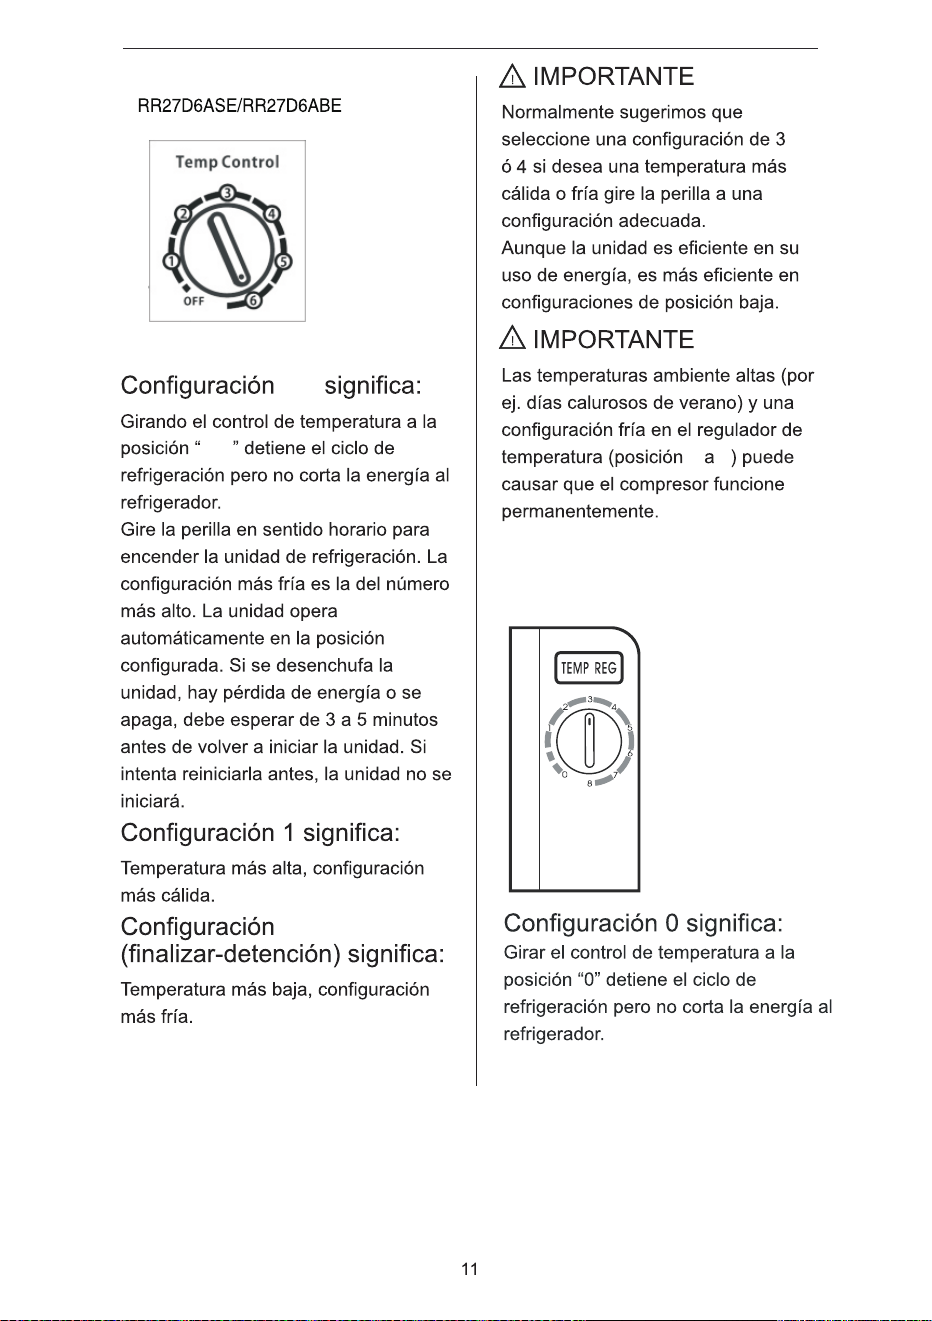
Setting O:
Turning the temperature control to "O"
position stops the cooling cycle, but
does not shut off the power to the
refrigerator.
Turn the knob clockwise to turn the
refrigerating unit on. Coldest setting is
all the way to highest number. The unit
operates automatically at the set
position. If the unit is unplugged,
power lost, or turned off, you must
wait 3 to 5 minutes before restarting
the unit. If you attempt to restart
before this time delay, the refrigerator
will not start.
Setting 1 :
Warmest set temperature applicable.
6
door opens, the appliance must not be
connected to the outlet. Remove plug
from the outlet beforehand.
Setting 7 (end-stop):
Coldest set temperature applicable.
IMPORTANT!
Normally we advise you select setting
of 3 or 4, if you want the temperature
warmer or colder please turn the knob
to lower or higher setting accordingly.
Though the unit is energy efficient, it is
more efficient at lower position
settings .
IMPORTANT!
High ambient temperatures (e.g. on
hot summer days) and a cold setting on
the temperature regulator (position6 to
7)can cause the compressor to run
continuously or even non-stop!
Warmest set temperature
applicable
6
OFF
1P1BF27/1P1SLF44
5
6
refrigerating unit on. Coldest setting is
Coldest set temperature applicable
1P1BF27/1P1SLF44
Warmest set
temperature applicable
8
7
8
8
Coldest set temperature applicable
covered.
●
Never clean the appliance with a
steam cleaner. Moisture could
accumulate in electrical
components.
●
Hot vapors can lead to the damage
of plastic parts.
●
The appliance must be dry before it
is placed back into service.
△
!
IMPORTANT !
● Ethereal oils and organic solvents
can attack plastic parts, e.g. lemon
juice or the juice from orange peel,
butyric acid, and cleansers that
contain acetic acid. Do not allow
such substances to come into
contact with appliance parts.
● Do not use any abrasive cleansers.
● Clean the appliance and the interior
accessories with a cloth and
lukewarm water. Commercially
available dish washing detergents
may also be used.
● After cleaning, wipe with fresh
water and a clean dish cloth.
● Accumulation of dust at the
condenser increases energy
consumption. For this reason
carefully clean the condenser at the
back of the appliance once a year
with a soft brush or a vacuum
cleaner.
● Check the water drain hole on the
rear wall of the refrigerator
compartment.
●
Clear a blocked drain hole with the
aid of something like a soft peg. Be
careful not to create any damage to
the cabinet by sharp objects.
●
After everything is dry, place
appliance back into service.
Defrosting Your Refrigerator
●
To defrost the refrigerator, remove
all food and objects from the
refrigerator. Ensure the drip pan is
in place under the freezer
compartment. Unplug the unit and
ensure the cord is in safe dry
location. The defrost process may
take a few hours. To speed up the
defrost time, keep the door open
and place a bowl of warm water in
the refrigerator. Never use sharp
objects to remove the frost.
●
During the defrost cycle, water will
accumulate in the drip tray. The
drip tray may need to be emptied
during the defrost cycle. Do not
leave unattended.
●
After defrosting is complete, empty
and wipe down the drip tray, as
well as the interior of the
refrigerator. You may now reset
the refrigerator to the desired
temperature and put the food back
in.
9
Energy Saving Tips
●
Do not place warm foods into the
appliance. Allow warm foods to cool
first. Do not install the appliance
near cookers, radiators or other
sources of warmth. High ambient
temperatures cause longer, more
frequent operation of the
compressor
●
In order to make the cooling system
work efficiently, please make sure
the side plates and back plate of the
product are with some distance from
the wall. It is strongly re
commended
that its back is
75 mm (2.953 inch)
away from the wall, its sides at least
have a space of 100 mm (3.937 inch)
separately and the height from over
its top is not less than 100 mm
(3.937 inch).
● When the product is operating,
please do not open the door too
often or leave the door open any
longer than necessary.
● Do not set temperature any colder
than necessary.
● The direct cooling refrigerator (with
a freezer) needs to be defrosted
when necessary. This will improve
the cold transfer and reduce energy
consumption.
● The sketch map shows the right
combination of the shelves which
can lead to more energy efficiency. If
users adjust the combination, it may
result in more
energy-consumption.
● Store food logically. Do not exceed
the storage period specified.
Tro
ubl e S hootin g
Co
rrecting Malfunctions
A malfunction may be
caused by only a
minor fault that you can rectify yourself
using the following instructions. Do not
perform any other work on the
appliance if the following information
does not provide assistance in your
specific case.
△
!
IMPORT
ANT !
Repairs to re
frigerators/freezers may
only be performed by qualifiled service
technician. Improper repairs can give
rise to significant hazards for the user.
If your appliance needs repairing,
please contact your specialist dealer or
your local Service Center.
10
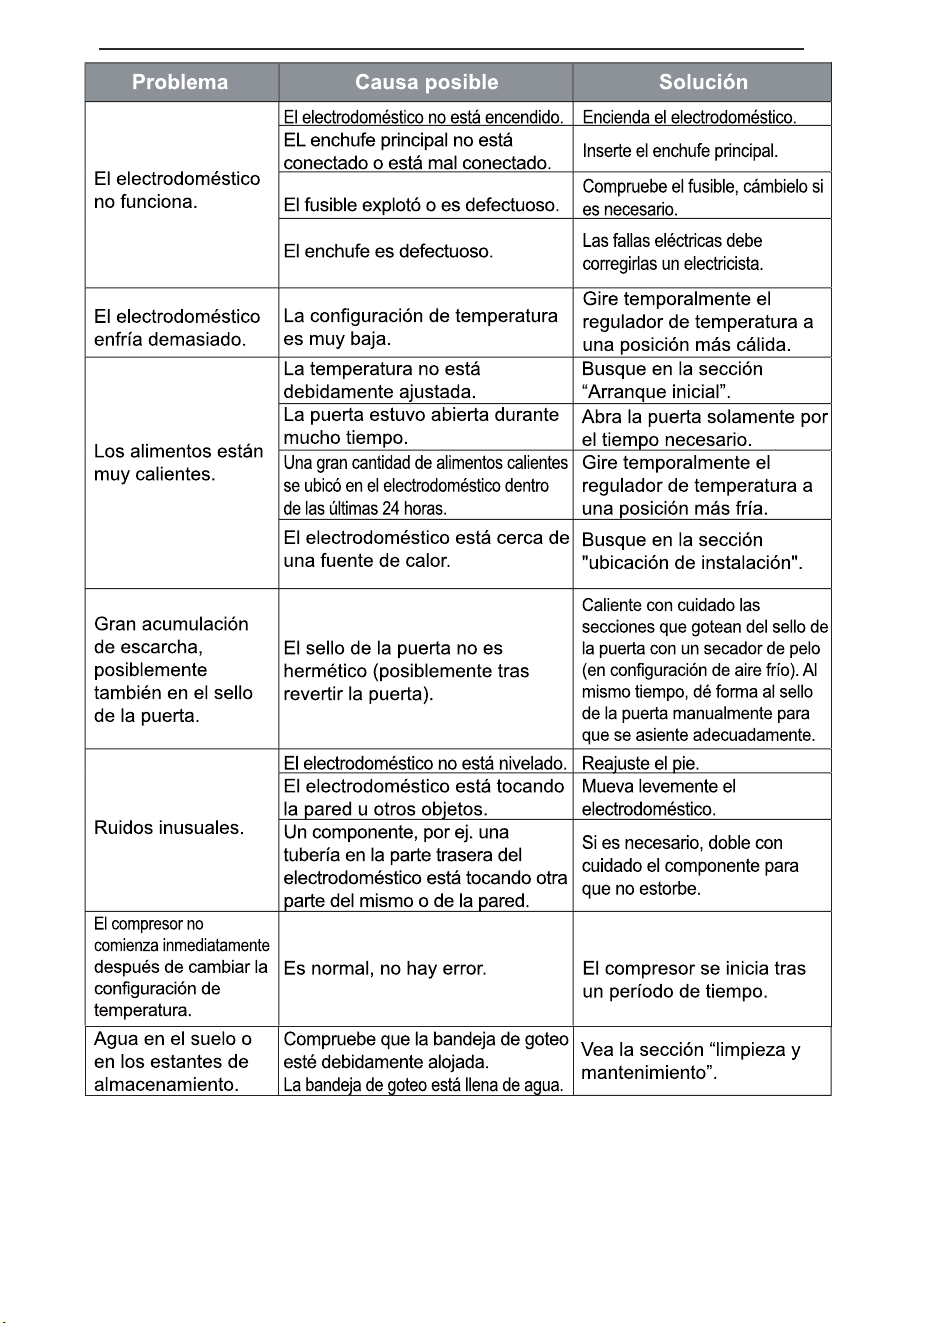
Problem Possible Cause Solution
Appliance is no
t switched on. Switch on the appliance.
Main plu
g is not plugged in or is
loose.
Insert main plug.
F
use has blown or is defective.
Check fuse, replace if
necessary.
Appliance does
not
work.
Socket is defective.
Electrical malfunctions are
to be corrected by an
electrician.
Appliance cools too
much.
T
emperature is set too cold.
Turn the temperature
regulator to a warmer
setting temporarily.
T
emperature is not properly
adjusted.
Please look in the “initial
Start Up” section.
Door was open for an extended
period.
Open the door only as long
as necessary.
A lar
ge quantity of warm food
was placed in the appliance
within the last 24 hours.
Turn the temperature
regulation to a colder setting
temporarily.
The food is too
warm.
The appliance i
s near a heat
source.
Please look in the
“installation location”
section.
Heavy build-u
p of
frost, possibly also
on the door seal.
Door seal is not air-tight
(possibly after reversing the
door).
Carefully warm the leaking
sections of the door seal
with a hair dryer (on a cool
setting). At the same time
shape the warmed door seal
by hand such that it sits
correctly.
Appliance is no
t level. Readjust the feet.
The applianc
e is touching the
wall or other objects.
Move the appliance slightly.
Unusual noises
.
A component, e.g. a pipe, on the
rear of the appliance is touching
another part of the appliance or
the wall.
If necessary, carefully bend
the component out of the
way.
The compr
essor
does not start
immediately after
changing the
temperature setting.
This is normal, no error has
occurred.
The compressor starts after
a period of time.
W
ater on the floor or
storage shelves.
Check that the Drip tray is
housed properly.
Drip tray is full of water
See the “cleaning and care”
section.
11

Distributed by:
Perfect Aire, LLC
5401 Dansher Rd.
Countryside, IL 60525
844-4PA-AIRE | 844-472-2473
www.perfectaire.us
Specification and performance data is subject to change without notice.
PA/User_1P1BF27_1P1SLF44/04202020
REFRIGERADOR
2.7 Y 4.4 CU. PIE. PUERTA SENCILLA
PARA MODELOS :
1P1BF27
1P1SLF44
Antes de usar su refrigerador, lea est manual
cuidadosamente y guárdelo para referencia
en el future, junto con su recibo.
MANUAL DE USUARIO
12
14
14
16
10
CA :Corriente Alterna...
4
DOLPHQWRVGHDSDUDWRDPHQRVTXHVHDQ

•El espacio de la habitaci6n debera ser
por lo menos 1 m 3 por 8 g de
refrigerante (R600a). La cantidad del
refrigerante en su aparato es indicado
en la placa de identificaci6n en el
interior.
lnformaci6n electrica
•
El electrodomestico debe conectarse a
su exclusiva salida electrica de 115 V,
60 Hz, 15A. El cable de
energia del aparato esta equipado con
un enchufe con conexi6n a tierra para
protegerlo contra peligros de choque
electrico. Debe enchufarse
directamente en un tomacorriente
conectado debidamente a tierra. El
receptaculo debe instalarse segun los
c6digos y reglas locales. Consulte a un
electricista calificado. Evite conectar el
refrigerador a un circuito con interruptor
de fallo de toma a tierra (GFI, por su
sigla en ingles). No use cables de
extension o adaptador de enchufe.
•
Si el cable est
á
da
ñ
ado, un t
é
cnico
autorizado debe reemplazarlo para
evitar riesgos.
•
Nunca desenchufe el refrigerador
tirando del cable. Siempre tome el
enchufe firmemente y tire desde el
receptaculo para evitar dariar el cable.
•
Desenchufe el refrigerador antes de
limpiar y de reemplazar la bombilla de
luz para evitar un choque electrico.
5
•Si el voltaje varia, puede afectar el
rendimiento en un 10% o mas. Dicho
dao no esta cubieo por la garantia.
•No conecte la unidad a un enchufe
controlado por un interruptor de pared
o desenchufe para evitar que el
refrigerador se apague
accidentalmente.
Seguridad para nifios y
otras personas vulnerables
•Esta electrodomestico no esta
diseriado para ser usado por
personas (incluyendo nirios) que no
tengan experiencia y conocimiento a
menos que haya habido supervisi6n
o instrucci6n en relaci6n con el uso
del mismo por parte de una persona
responsable por su seguridad. Los
nirios deben supervisarse para
asegurar que no jueguen con el
electrodomestico.
•Mantenga todo el embalaje lejos de
los nirios para evitar riesgo de
sofocamiento.
•Si esta descartando su
electrodomestico anterior,
desenchufelo, corte el cable de
conexi6n (lo mas cerca posible del
electrodomestico). Corte el enchufe
principal y descarte. Rompa
cualquier cerrojo o cerraduras de
seguridad y retire la puerta frontal
para evitar que los ninos que
jueguen sufran un choque electrico
se encierren.

U
so diario
•No almacene gases o lfquidos
i
nflamables dentro del
electrodomestico. Existe riesgo de
explosion.
•No opere ningun electrodomestico
dentro de este (por ej. maquinas
electricas para hacer helado,
mezcladoras, etc.).
•Cuando lo desconecte, siempre
retire el enchufe principal. No tire
del cable.
•No ubique elementos calientes
cerca de los componentes plasticos
de este electrodomestico.
•No ubique alimentos directamente
contra la salida de aire en la pared
trasera.
•Los alimentos congelados no deben
volver a congelarse una vez
descongelados.
•Almacene alimentos congelados
envasados segun las instrucciones
del fabricante.
•Las instrucciones de
almacenamiento del fabricante del
electrodomestico deben seguirse
estrictamente. Consulte las
instrucciones relevantes para
almacenamiento.
•No ubique bebidas espumantes o
carbonatadas en el compaimiento
del congelador pues crea presi6n en
el contenedor y puede explotar,
resultando en danos al
electrodomestico.
6
•Las paletas heladas (helados de
palito) pueden causar quemaduras
por frfo si se consumen
directamente del congelador.
•No ubique alimentos directamente
contra la salida intema de aire del
refrigerador.
•No ubique el electrodomestico bajo
la luz solar directa.
Descarte adecuado de su
refrigerador
P
eligro de
encierro de nino
:
El encierro de un nino y la asfixia no
son los unicos problemas del pasado.
Los refrigeradores abandonados o
desechados como chatarra siguen
siendo peligrosos; incluso si solamente
quedan desechados "por unos pocos
dfas". Si esta desechando su viejo
refrigerador, siga las instrucciones a
continuaci6n para evitar accidentes.
Antes de desechar su viejo
refrigerador
:
•Retire las puertas.
•Deje los estantes en su lugar
para que los ninos no puedan
ingresar facilmente.
•El Hquido refrigerante debe retirarto
un tecnico calificado.
Sujetacables tipo "
Y
"
si el cord6n de alimentaci6n es daiiado,
este debe ser remplazado por el
fabricante o su agente de servicio o por
el personal calificado para evitar riesgo.

Antes de instalar, siga estos
importantes primeros pasos.
Ubicaci6n
Ubique el electrodomestico lejos de
fuentes de calor como cocinas,
radiadores, luz solar directa, etc. Se
garantiza rendimiento y seguridad
mximos manteniendo la temperatura
interna correcta para la clase de unidad
requerida, como se especifica en la
placa de clasificaci6n. Este
electrodomestico funciona bien de
55
°
F a 110 °F (12,8 °C a 43,4 °C). El
electrodomestico puede no funcionar
adecuadamente si se deja durante un
periodo mas largo a una temperatura
mayor o menor a la indicada.
IMPORNTE
Hay necesidad de una buena
ventilaci6n alrededor del refrigerador
para la facil disipaci6n de calor, alta
eficiencia de refrigeraci6n y bajo
consumo. Para ello, debe haber
suficiente espacio libre disponible
alrededor del refrigerador. Se
recomienda que haya 75 mm
(2,953") de separaci6n entre la pae
trasera del refrigerador y la pared, al
menos 100 mm (3,937") de espacio en
ambos lados y un minima de 100 mm
(3,937") desde su parte superior y
suficiente espacio hacia adelante como
para abrir las puertas a un angulo de
160". Los electrodomesticos no deben
exponerse a la lluvia. Debe
permitirse que circule suficiente aire
en la secci6n trasera inferior de los
electrodomesticos, pues la mala
circulaci6n de aire puede afectar su
rendimiento.
Limpieza
•La
v
e c
u
a
lqu
ie
r
pa
rt
e
d
e
s
m
o
n
t
ab
l
e
d
e
l
in
t
e
r
i
or
y
e
xt
e
r
i
or
d
e
l
r
e
fr
i
g
e
r
a
dor
c
o
n
d
e
t
e
rg
en
t
e ne
utro
y
a
gu
a
t
ibia
.
S
e
qu
e
.
No
us
e
l
impia
dor
e
s
a
gr
e
s
i
vos
en
e
st
a
s
su
pe
rf
icie
s.
•
No
us
e
hoj
a
s
a
f
i
l
a
d
a
s
u
otros
in
stru
men
tos
a
f
i
l
a
dos,
qu
e p
u
e
d
an
r
a
y
a
r
l
a
su
pe
rf
icie
d
e
l
e
l
ec
trodo
me
st
ic
o
c
u
an
do
r
e
t
i
r
e
l
a
s
e
t
i
qu
e
t
a
s
a
uto
a
dh
e
s
i
v
a
s.
L
os
r
e
stos
d
e a
dh
e
s
i
vo
p
u
e
d
en
e
l
imina
rs
e c
o
n
u
na mezc
l
a
d
e a
gu
a
t
ibia
y
d
e
t
e
rg
en
t
e
ne
utro,
o
to
can
do
e
l
r
e
s
i
du
a c
o
n
l
a pa
rt
e
pe
g
a
jos
a
d
e
l
a cin
t
a
y
a
r
e
t
i
r
a
d
a
.
No
r
e
t
i
r
e
l
a p
l
aca
d
e
s
e
r
ie
.
I
nstalac
i
ó
n
7
Advertencia:
C ncer y Da o Reproductivo -www.P65Warnings.ca.gov
á
ñ
6.
7.
8.
9.
10.
6
7
OFF
OFF
6
56
1P1SLF44
8
7
8

•Nunca limpie el electrodomestico con
un limpiador a vapor. Puede
acumularse humedad en las
componentes eleclricos.
•Los vapores calientes pueden llevar a
que se daen las paes plasticas.
•El electrodomestico debe secarse
antes de volver a entrar en servicio.
IMPORNTE
•Los aceites etereos y las solventes
organicos pueden atacar a las partes
plaslicas, par ej. jugo de lim6n a de
naranja, acido bulirico y limpiadores
que contienen acido acetico. No
permita que dichas sustancias entren
en contacto con las partes del
electrodomestico.
•No use limpiadores abrasivos.
•Limpie el electrodomeslico y las
accesorios interiores con un trapo y
agua tibia. Los detergentes disponibles
comercialmente tambien pueden
usarse.
•Tras limpiar, enjuague con agua fresca
y un trapo limpio.
•La acumulaci6n de polvo en el
condensador incremenla el consumo
de energia. Par esta raz6n, limpie con
cuidado el condensador en la parte
trasera del electrodomestico una vez al
aa con un cepillo suave a una
aspiradora.
•Compruebe el orificio de drenaje en la
pared trasera del compaimiento del
refrigerador.
13
•Limpie el orificio de drenaje bloqueado
con auxilio de alga coma una clavija
suave. nga cuidado de no daar el
gabinete con objetos afilados.
•Despues de secar todo, vuelva a poner
en funcionamiento el electrodomestico.
Descongelar su refrigerador
•Para descongelar el refrigerador, retire !
ados las alimentos y objetos del
refrigerador. Asegurese de que la
bandeja de goteo este ubicada debajo del
compartimienlo del congelador.
Desenchufe la unidad y asegurese de
que el cable este en una posici6n seca y
segura. El proceso de descongelaci6n
puede llevar unas horas. Para acelerar el
proceso, mantenga abierta la puerta y
ubique un pate de agua caliente en el
refrigerador. Nunca use objetos afilados
para retirar el hielo.
•Durante el ciclo de descongelaci6n, se
acumulara agua en la bandeja de goteo.
La bandeja de goteo puede necesitar
vaciarse duranle el ciclo de
descongelaci6n. No deje sin atender.
•Despues de terminar de descongelar,
vacie y limpie la bandeja de goteo y el
interior del refrigerador. Puede ahora
reiniciar el refrigerador a la temperatura
deseada y volver a llenarlo de alimentos.
14
15
16

Distribuido por:
Perfect Aire, LLC
5401 Dansher Rd.
Countryside, IL 60525
844-4PA-AIRE | 844-472-2473
www.perfectaire.us
Las especificaciones y datos de rendimiento están sujetos a cambios sin previo aviso.
PA/User_1P1BF27_1P1SLF44/04202020