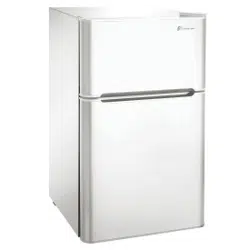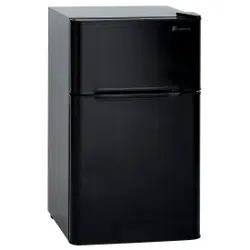
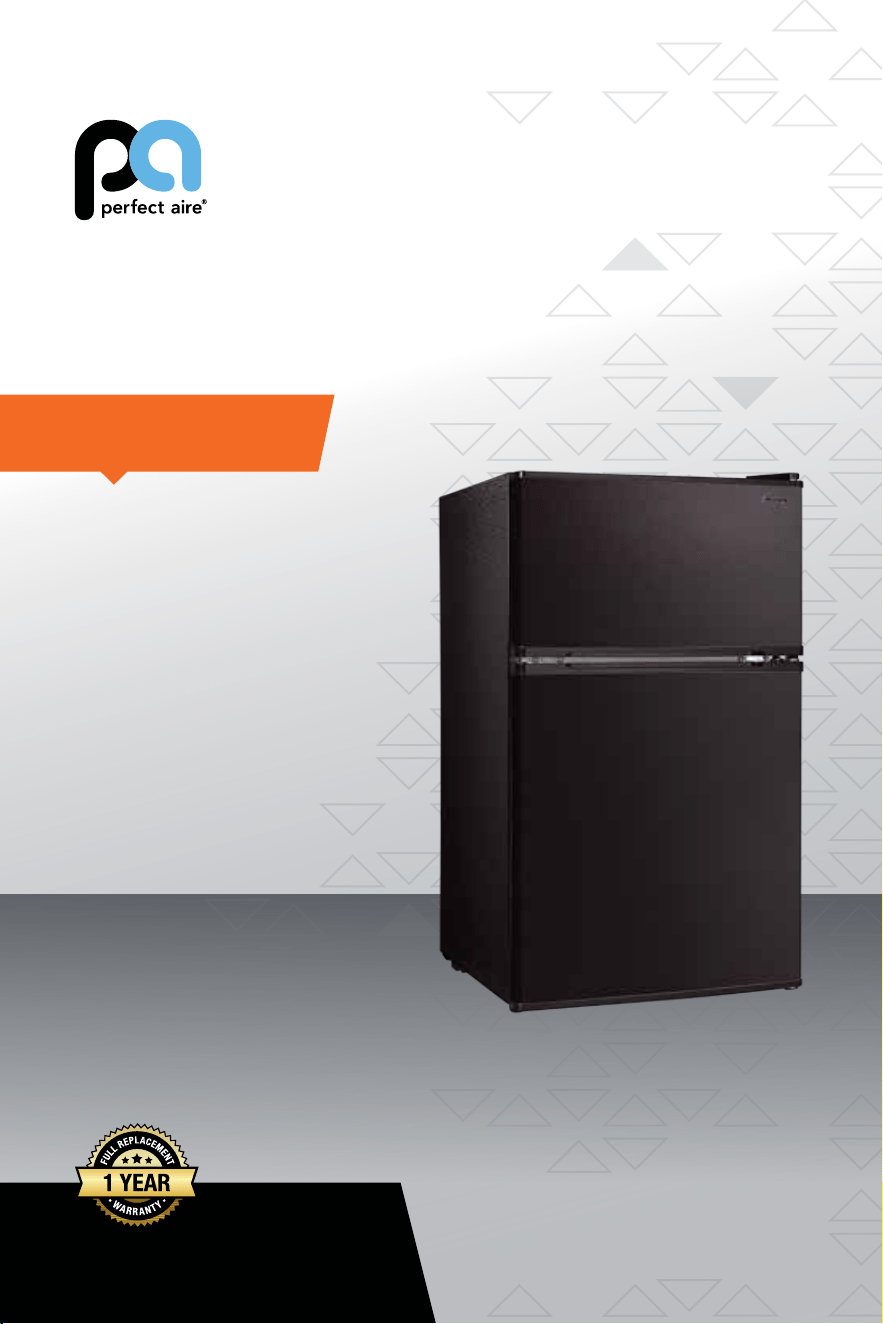
REFRIGERATOR
3.1 CU. FT. DOUBLE DOOR
FOR MODELS:
3W2BF32
3W2WF32
3W2SLF32
Before using your refrigerator, please
read this manual carefully and keep it for
future reference, along with your receipt.
USER MANUAL

For your own records, please attach a copy of your sales receipt to this manual and complete the
following:
Model Number: ________________________ Serial Number: ____________________________
Purchase Date: _________________________ Store Purchased: __________________________
Installation Date: _______________________ Installation Co.: ___________________________
Installer Name: _________________________ Installer Phone No.: ________________________
CONSUMER PRODUCT INFORMATION
CONTENTS

CONTENTS
1. SAFETY WARNINGS .................................................................. 1
2. INSTALLATION ........................................................................... 2
2.1 Location ........................................................................................................................ 2
2.2 Reversing the Door Swing ............................................................................................ 2
2.3 Door Space Requirements ........................................................................................... 3
2.4 Leveling the Unit ........................................................................................................... 4
2.5 Cleaning Before Use .................................................................................................... 4
2.6 Before Using Your Unit ................................................................................................. 4
2.7 Interior Accessories ...................................................................................................... 4
3. PRODUCT OVERVIEW .............................................................. 5
4. TROUBLESHOOTING ................................................................ 5
4.1 Adjusting the Temperature ............................................................................................ 5
4.2 Noise Inside the Unit .................................................................................................... 5
4.3 Tips for Keeping Food in the Unit ................................................................................. 5
5. CLEANING .................................................................................. 6
5.1 Defrosting ..................................................................................................................... 6
5.2 Cleaning the Interior and Exterior of the Unit ............................................................... 6
5.3 Cleaning Tips ................................................................................................................ 6
6. MAINTENANCE ......................................................................... 6
6.1 Changing the Internal Light .......................................................................................... 6
6.2 Care When Handling/Moving Your Unit ........................................................................ 6
6.3 Servicing ....................................................................................................................... 6
6.4 Switching Off for Long Periods of Time ........................................................................ 6
7. TROUBLESHOOTING ................................................................ 7
7.1 Warm Tips .................................................................................................................... 8
8. TIPS FOR ENERGY SAVING ...................................................... 8
9. DISPOSAL ................................................................................... 8
To ensure that you get the best results from your new refrigerator/freezer, please take time to
read through the simple instructions in this booklet. Please ensure that the packing material
is disposed of in accordance with the current environmental requirements. When disposing
of any refrigerator/freezer equipment, please contact your local waste disposal department
for advice on safe disposal. This appliance must be only used for its intended purpose.
This manual provides the information needed for proper use and maintenance of this unit.
Basic preventative care can help extend the life of this unit. The “Troubleshooting” section in
this manual contains a chart with solutions to the most common problems. Referring to this
section may save time and prevent the need for a service call in the event of a problem.

1. SAFETY WARNINGS
1. WARNING―Keep ventilation openings, in the appliance enclosure or in the built-in
structure, clear of obstruction.
2. WARNING―Do not use mechanical devices or other means to accelerate the defrost-
ing process, other than those recommended by the manufacturer.
3. WARNING―Do not damage the refrigerant circuit.
4. WARNING―Do not use electrical appliances inside the food storage compartments
of the appliance, unless they are of the type recommended by the manufacturer.
5. WARNING―DANGER: Risk of child entrapment. Before you throw away your old
refrigerator or freezer;
•Take o the doors
•Leave the shelves in place so that children may not easily climb inside.
6. The appliance has to be unplugged after use and before carrying out user mainte-
nance on the appliance.
7. This appliance can be used by children aged from 8 years and above and per-
sons with reduce physical sensory or mental capabilities or lack of experience and
knowledge if they have been given supervision or instruction concerning use of the
appliance in a safe way and understand the hazards involved. Children shall not play
with the appliance. Cleaning and user maintenance shall not be made by children
without supervision.
8. If the supply cord is damaged, it must be replaced by the manufacturer, its service
agent or similarly qualied persons in order to avoid a hazard.
9. Please abandon the refrigerator according to local regulators for it use ammable
blowing gas and refrigerant.
10. Please dispose the appliance according to local regulations for its ammable refrig-
erant and blowing gas. Before you scrap the appliance, please take o the doors to
prevent children trapped.
11. This appliance is intended to be used in household and similar applications such as
– sta kitchen areas in shops, oces and other working environments;
– farm houses and by clients in hotels, motels and other residential
type environments;
– bed and breakfast type environments;
– catering and similar non-retail applications.
12. Do not store explosive substances such as aerosol cans with a ammable propellant
in this appliance.
IT IS HAZARDOUS FOR ANYONE OTHER THAN AUTHORIZED SERVICE
PERSONNEL TO CARRY OUT SERVICING OF REPAIRS WHICH INVOLVE
THE REMOVAL OF COVERS.
TO AVOID THE RISK OF AN ELECTRICAL SHOCK, DO NOT ATTEMPT
REPAIRS YOURSELF.
1
2. INSTALLATION
2.1 DE FROS T ING
When selecting a location for your unit you should make sure the oor is at and rm,
and the room is well ventilated with an average room temperature between 60.8°F (16°C)
and 100.4°F (38°C). Avoid locating your unit near a heat source, e.g. cooker, boiler or
radiator. Also avoid direct sunlight as it may increase electrical consumption. Extreme
cold ambient temperatures may also cause the unit not to perform properly. This unit is
not designed for use in a garage or outdoor installation. DO NOT drape the unit with
any covering.
When installing the unit, ensure that 16 in. (40 cm) of free space is left at both sides,
6 in. (15 cm) at the rear and 8 in. (20 cm) at the top of the unit. This will allow cold air to
circulate around the refrigerator and improve the eciency of the cooling process. The
door can be opened to the right or the left, depending on what better suits the location.
Please ensure there is adequate space for the door to fully open.
2.2 REVERSING THE DOOR SWING
TOOLS REQUIRED: Phillips style screwdriver / Flat bladed screwdriver / Hexagonal spanner
• If you want to reverse the door swing, we recommend that you contact a qualied
technician. You should only try to reverse the door yourself if you believe that you are
qualied to do so.
• Ensure the unit is turned o, unplugged and empty.
• Adjust the two leveling feet to their highest position.
• Remove door; if it is necessary, tilt the unit back. You should rest the unit on
something solid so that it will not slip during the door reversing process.
• All removed parts must be saved to properly reinstall the door.
• DO NOT lay the unit at as this may damage the coolant system.
• We recommend that 2 people handle the unit during assembly.
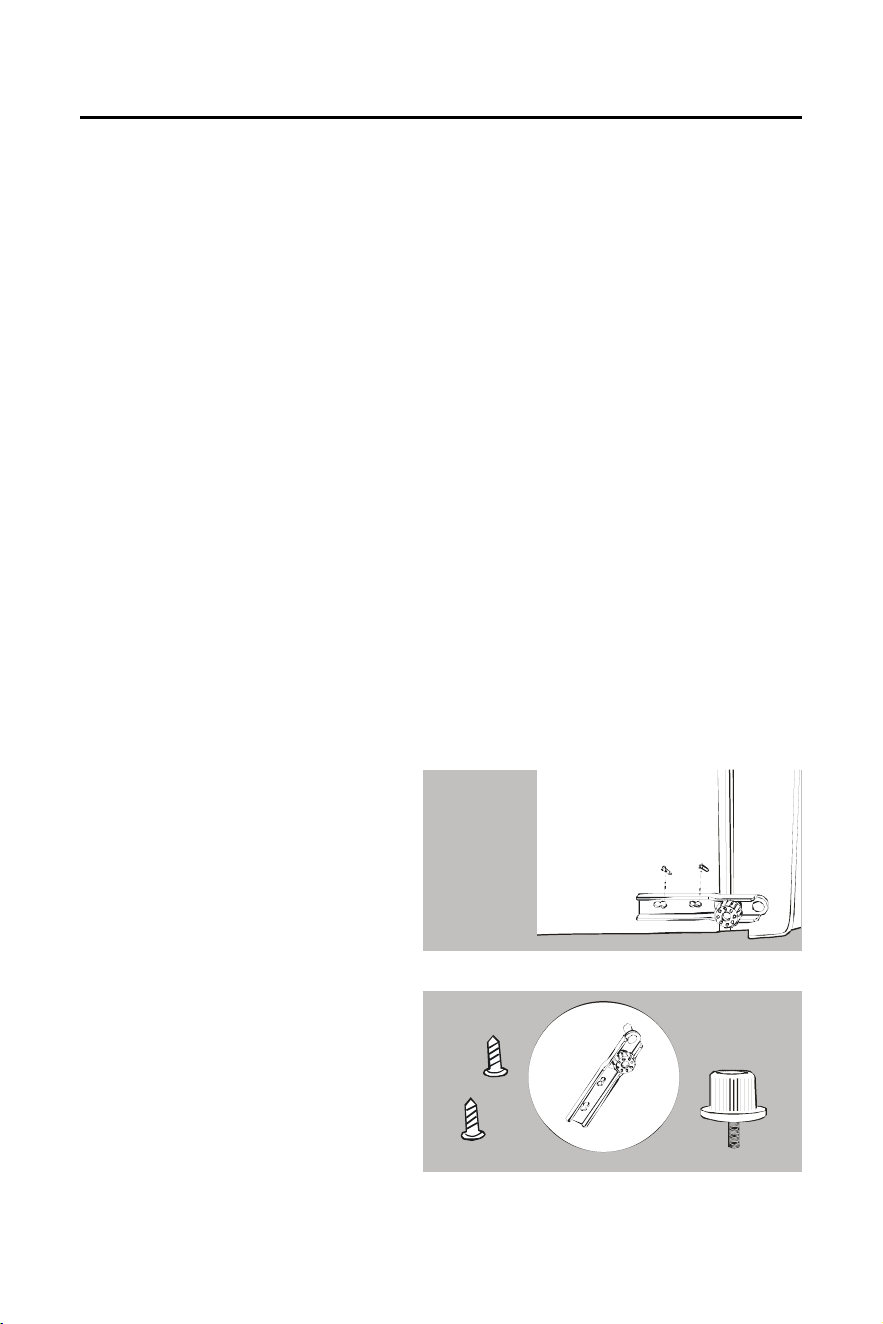
1. Start by removing the bracket
from the bottom of the refrigerator.
Remove the two screws from the
bottom bracket. Remove the foot
from opposite side.
Self-Tapping Screws/Bottom
Bracket/Foot
2
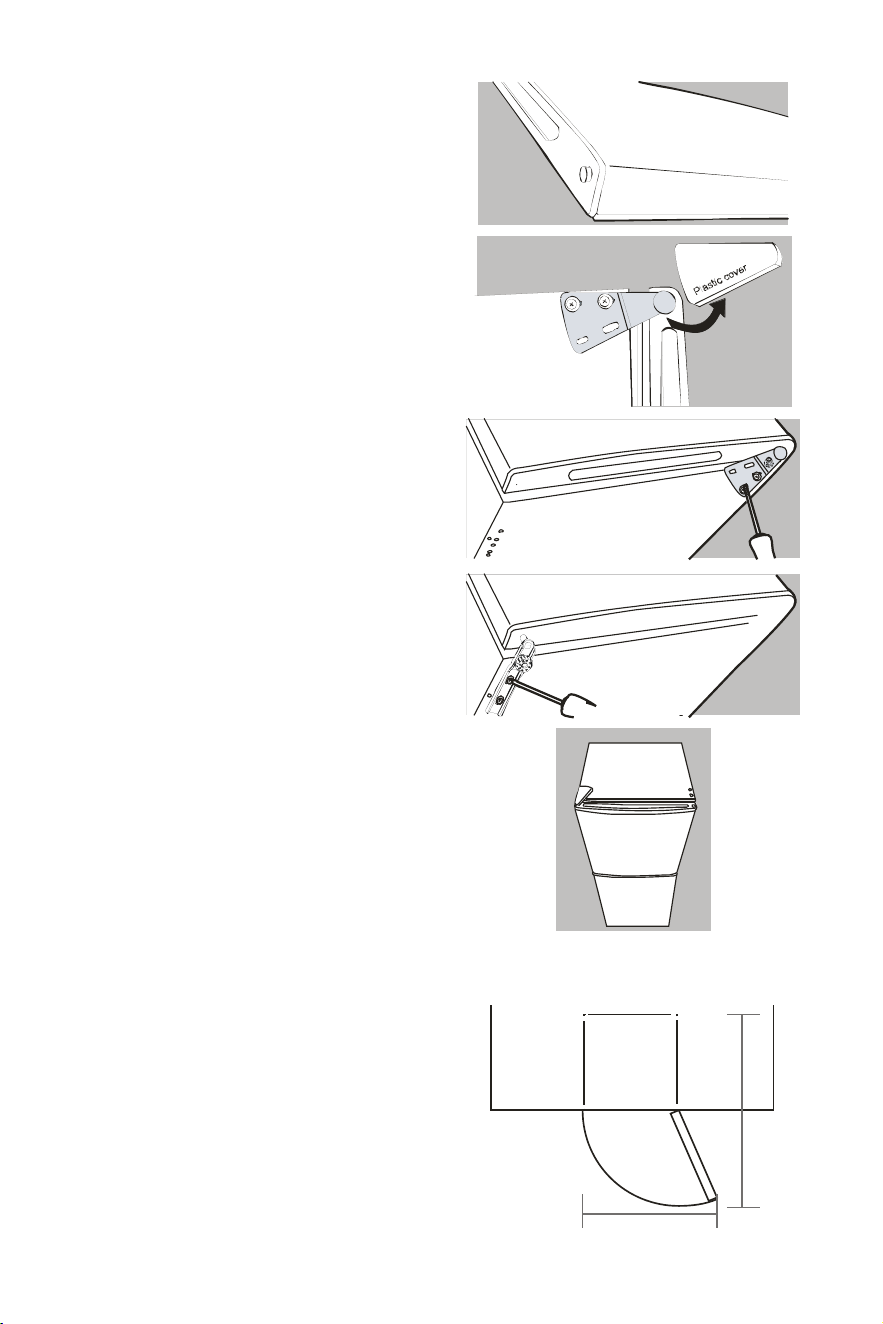
2. Slide the door down and away from the
hinge pin located on the top of the door.
3. Remove the plastic cover from door
hinge rst. Then unscrew the two screws
from top bracket and replace on the
other side.
5. Screw the bottom hinge into place on
the new side. Replace the foot on the
other side.
6. Check that the door is aligned
horizontally and vertically and that the
seals are closed on all sides before
tightening the bottom hinge. Readjust
the leveling feet.
4. To install the bracket on the opposite
side of the appliance, screw the two
screws through the bracket and into the
top of the appliance. Slide the door back
onto the top hinge. Ensure the door is
face up. Replace the plastic cover on
the top bracket by pressing down until it
clicks into position.
W
D
2.3 DOOR SPACE REQUIREMENTS
The unit’s door must be able to open fully
as shown.
W x D ≥ 31.5 in. x 30.75 in.
(W x D ≥ 800mm x 780 mm)
3
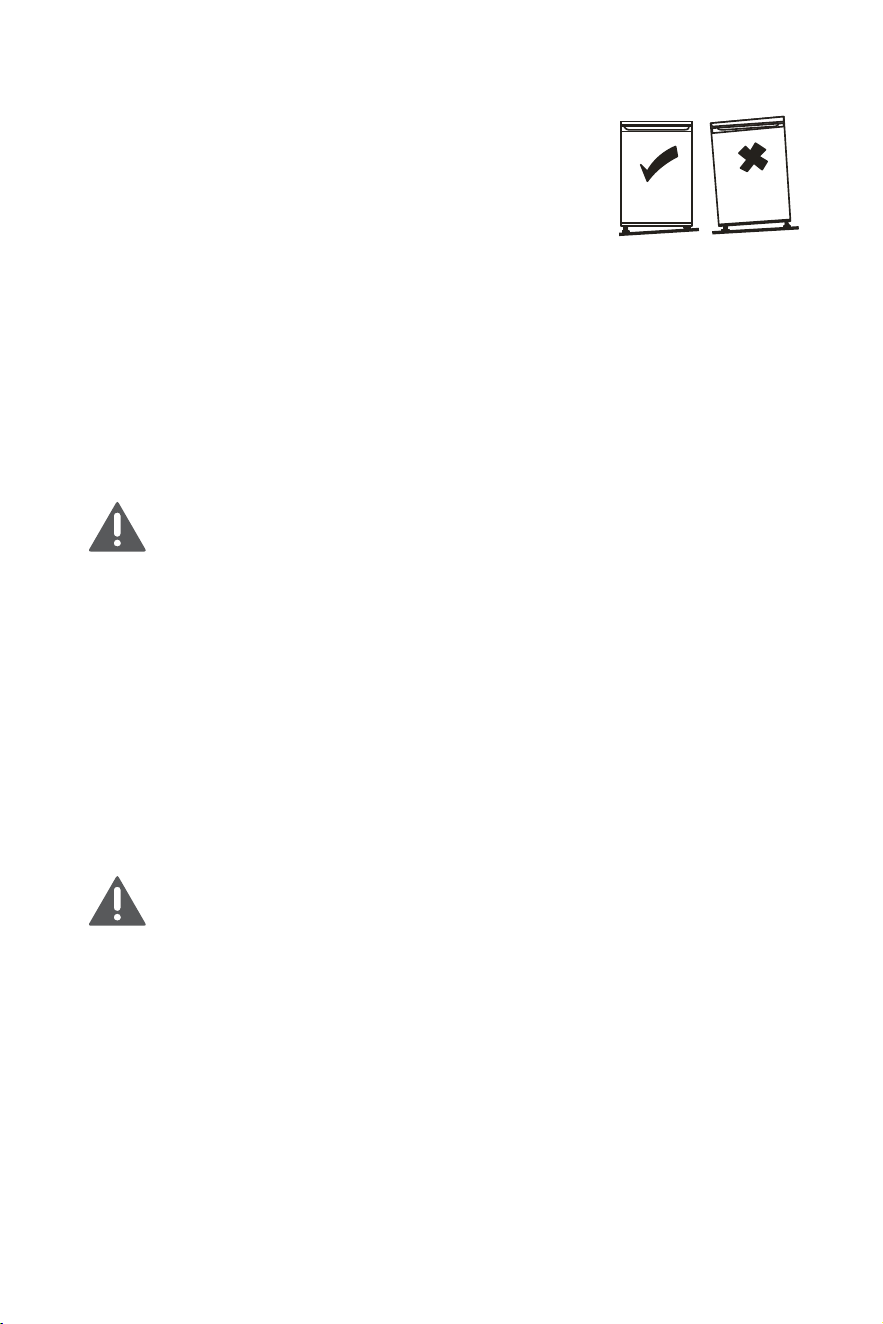
2.4 LEVELING THE UNIT
To do this, adjust the two leveling feet at the front of the unit. If
the unit is not level, the door and magnetic seal alignments will
not be covered properly.
2.5 CLEANING BEFORE USE
Wipe the inside of the unit with a weak solution of bicarbonate soda. Then rinse with warm
water using a ‘Wrung-out’ sponge or cloth. Wash the shelves and drawer in warm soapy
water and dry completely before replacing in the unit. Clean the exterior of the unit with a
damp cloth. If you require more information refer to the Cleaning section.
2.6 BEFORE USING YOUR UNIT
Before placing any food in your unit, turn it on and wait for 24 hours to make sure it is
working properly and to allow it time to reach the correct temperature. DO NOT overll
the refrigerator.
BEFORE PLUGGING IN
You must check that you have a socket which is compatible with the plug
supplied with the unit.
BEFORE TURNING ON
DO NOT turn on for two hours after moving the unit. The coolant uid needs
time to settle.
2.7 INTERIOR ACCESSORIES
Various glass or plastic storage shelves are included with your appliance - dierent models
have dierent combinations.
You should always slide one of the full-size glass storage shelves into the lowest set of
guides, above the fruit and vegetable containers, and keep it in this position. To do this,
pull the storage shelf forward until it can be swiveled upwards or downwards and removed.
Please do the same in reverse to insert the shelf at a dierent height.
In order to make the most of the fresh food storage compartment and fro-
zen-food storage compartment, you can remove one or more shelves/
drawers, out of the appliance, according to your daily use.
4
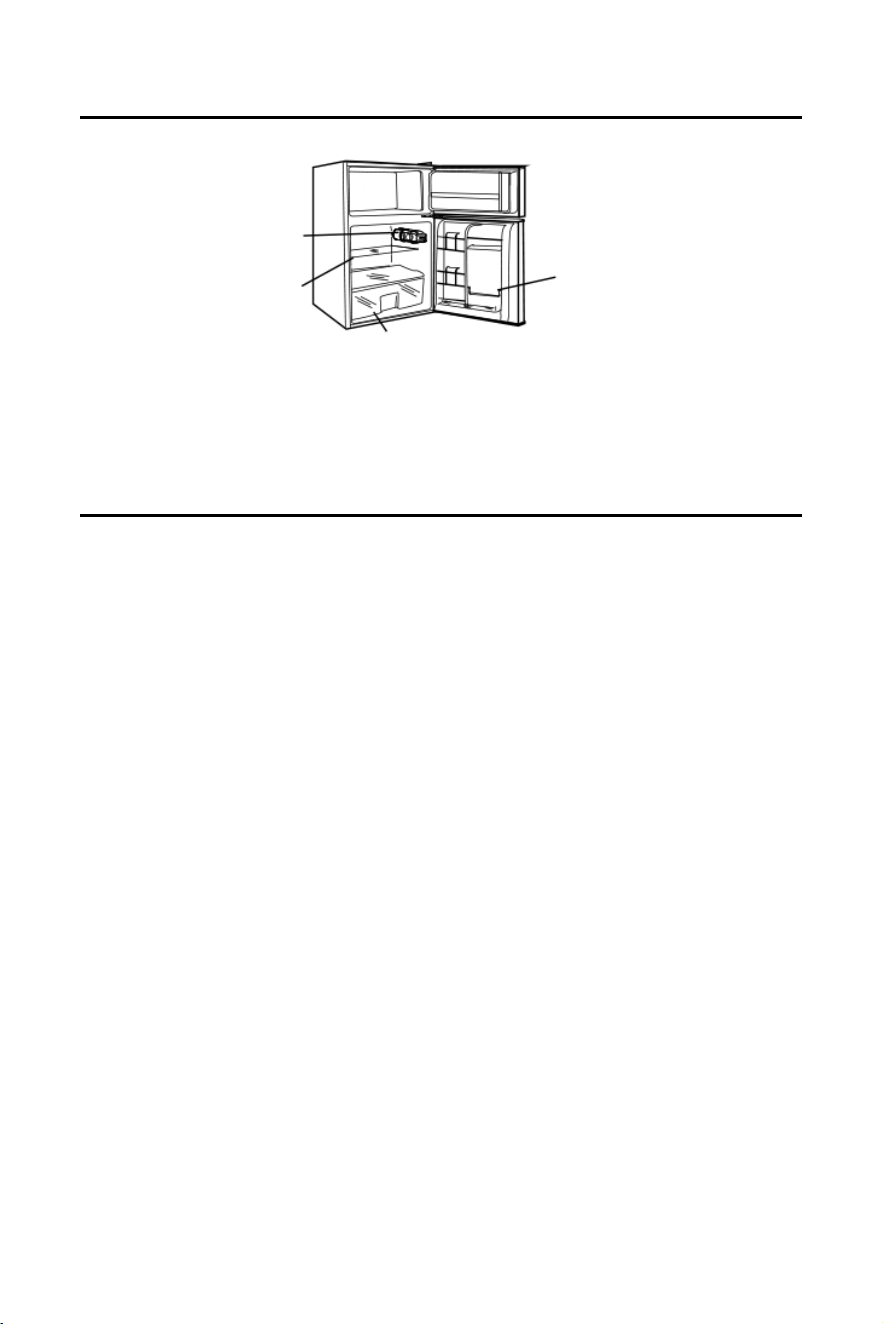
3. PRODUCT OVERVIEW
Bottle Rack
Glass Shelves
NOTE: All images in this instruction manual are for reference only; please refer to your
individual unit for details.
Temperature Control
Vegetable and Fruit Crisper
4. OPERATION
4.1 ADJUSTING THE TEMPERATURE
When using the refrigerator-freezer for the rst time or after defrosting, turn the tempera-
ture control to “MAX” setting for at least two hours before introducing the food to be
stored. All frozen food products you purchase should be placed in the freezer compart-
ment as soon as possible to avoid the frozen food from defrosting.
In winter or low temperature conditions, please switch the temperature controller to higher
settings, like: MAX.
Always follow storage recommendation printed on the packaging of frozen food by the
manufacturer.
Be careful that the drawer mustn’t mangle the refrigeration pipeline.
4.2 NOISE INSIDE THE UNIT
You may notice that your unit makes some unusual noises. Most of these are perfectly
normal, but you should be aware of them.
These noises are caused by the circulation of the refrigerant liquid in the cooling system. It
has become more pronounced since the introduction of CFC free gases. This is not a fault
and will not aect the performance of your unit. This is the compressor motor working, as
it pumps the refrigerant around the system.
4.3 TIPS FOR KEEPING FOOD IN THE UNIT
• Cooked meats/shes should always be stored on a shelf above raw meats/shes to
avoid bacterial transfer. Keep raw meats/shes in a container which is large enough to
collect juices and cover it properly. Place the container on the lowest shelf.
• Leave space around your food, to allow air to circulate inside the unit. Ensure all parts of
the unit are kept cool.
• To prevent transfer of favors and drying out, pack or cover the food separately. Fruit and
vegetables do not need to be wrapped.
• Always let pre-cooked food cool down to room temperature before you put it in the unit.
This will help to maintain the internal temperature of the unit.
• To prevent cold air escaping from the unit, try to limit the number of times you open the
door. We recommend that you only open the door when you need to put food in or take
food out.
5
5. CLEANING
6. MAINTENANCE
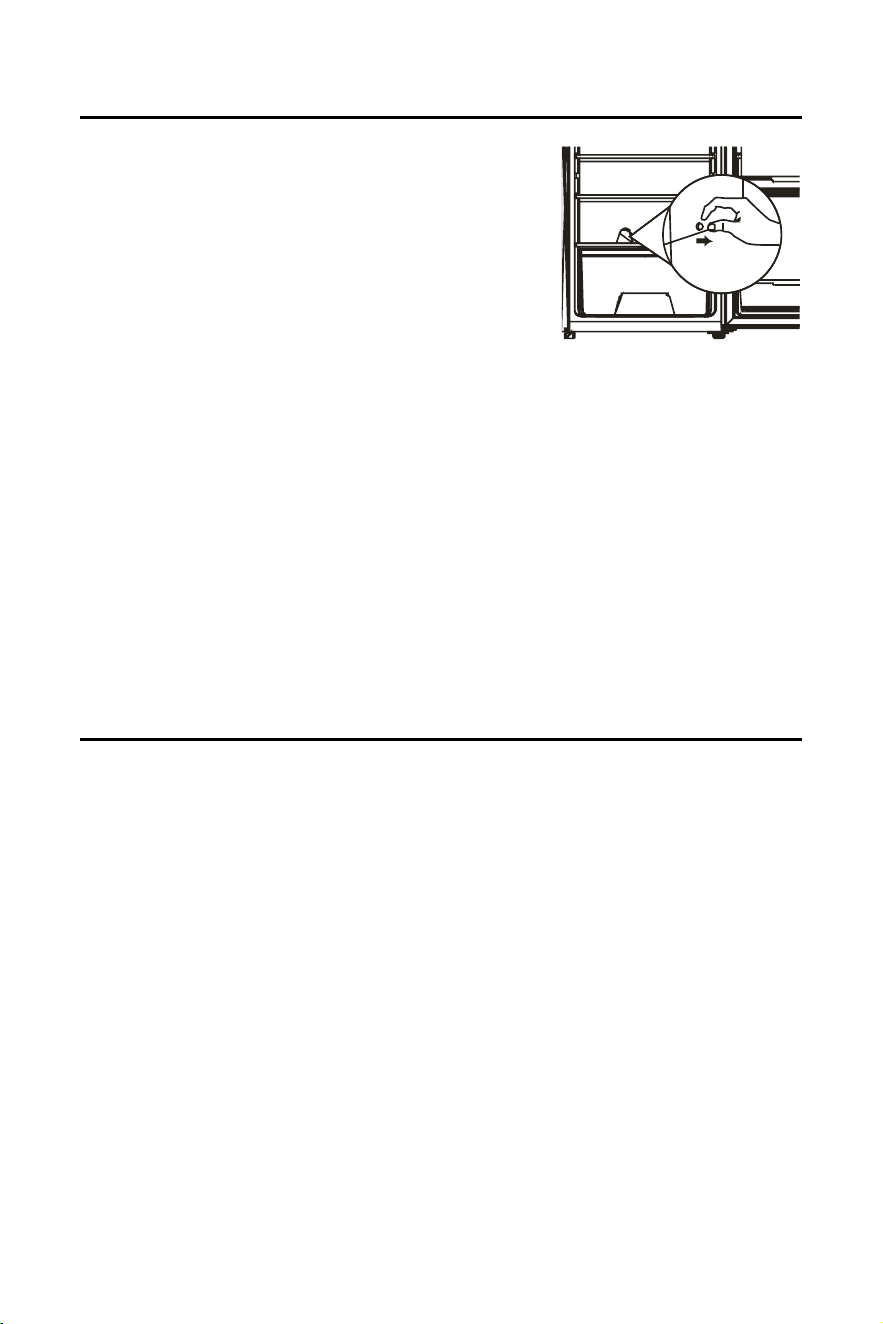
5.1 DEFROSTING
Frost may accumulate on the inner rear surface of the
appliance which will automatically defrost during the o
cycle of the compressor.
Water is channeled via the drain hole to the collection tray
above the compressor where it will evaporate.
Please ensure the drain hole is checked and cleaned on a
regular basis so water can exit the storage compartment.
5.2 CLEANING THE INTERIOR & EXTERIOR OF THE UNIT
• Remove all the shelves and the fresh food storage bin. To remove the salad bin, rst
remove the lower door shelf.
• Wipe the inside of the unit with a weak solution of bicarbonate soda and then rinse with
warm water using a “wrung-out” sponge or cloth. Wipe completely dry before replacing
the shelves and fresh food storage bin.
• Use a damp cloth to clean the exterior and then wipe dry with a cloth.
• Vacuum the grille of the condenser at the back of the unit and the adjacent components
using a soft brush attachment.
5.3 CLEANING TIPS
Condensation may appear on the outside of the unit. This may be due to a change in room
temperature. Wipe o any moisture residue. If the problem continues, please contact a
qualied technician for assistance.
6.1 CHANGING THE INTERNAL LIGHT
Lamp replacement by professionals.
6.2 CARE WHEN HANDLING/MOVING YOUR UNIT
Hold the unit around its sides or base when moving it. Under no circumstances should it
be lifted by holding the edges of the top surface.
6.3 SERVICING
The unit should be serviced by an authorized technician and only genuine spare parts
should be used. Under no circumstances should you attempt to repair the unit yourself.
Repairs carried out by inexperienced persons may cause injury or serious malfunction and
void the warranty. Contact a qualied technician.
6.4 SWITCHING OFF FOR LONG PERIODS OF TIME
When the unit is not in use for a long period of time, disconnect it from the main supply,
empty all food and clean the appliance, leaving the door ajar to prevent unpleasant smells.
6

7. TROUBLESHOOTING
BEFORE CALLING FOR SERVICE, PLEASE REVIEW THE CHART BELOW
ISSUE CAUSES/SOLUTIONS
NOT OPERATING
• Check that the unit is plugged in and connected to power
• Low voltage; check the outlet
• Check that the temperature control (power) knob is turned ON
• Check whether or not there is a power failure or partial circuits
have tripped
ODOR
• Odorous foods should be properly wrapped
• Food has been in the unit too long (rotten food)
• Defrost and clean the unit
• Keep an open box of baking soda inside the refrigerator to help
eliminate odors
LONG-TIME
OPERATION OF THE
COMPRESSOR
• It is normal for the unit to operate for a long time in summer when
the ambient temperature is higher
• It is not suggested to store too much food in the unit at the
same time
• Let food cool before storing in the unit
• The doors are opened too frequently
LIGHT FAILS TO
ILLUMINATE
• Check whether the unit is connected to power supply and whether
the illuminating light needs to be replaced
DOOR CANNOT BE
PROPERLY CLOSED
• The door is obstructed by food packages
• Too much food is placed in the refrigerator or freezer
• The unit is tilted/unbalanced (tilt unit)
LOUD NOISES
• Check that the unit is sitting on a at and stable surface
• Check that accessories are properly placed inside the unit
DOOR SEAL FAILS
TO BE TIGHT
• Remove foreign matters from the door seal
• Heat the door seal and then cool it for restoration (or blow it with
an electrical drier or use a hot towel for heating)
WATER PAN
OVERFLOWS
• There is too much food in the chamber or stored food contains too
much water, resulting in heavy defrosting
• The doors are not closed properly, resulting in frosting due to entry
of air and increased water due to defrosting
HOT HOUSING
• Heat dissipation of the built-in condenser via the housing is normal
• When housing becomes hot due to high ambient temperature,
storage of too much food or shutdown of the compressor is shut
down, provide sound ventilation to facilitate heat dissipation
SURFACE
CONDENSATION
• Condensation on the exterior surface and door seals of the
refrigerator is normal when the ambient humidity is too high. Wipe
the condensation with a clean towel.
ABNORMAL NOISE
• Buzz: The compressor may produce buzzing during operation
and the buzzing noise is particularly loud upon start or stop. This
is normal.
• Creak: Refrigerant owing inside of the appliance may produce
creaking, which is normal.
7
For further assistance, contact Consumer Services at 844-4PA-AIRE (844-472-2473).

9. DISPOSAL
8. TIPS FOR ENERGY SAVING
Old units still have some residual value. An environmentally friendly method of disposal will
ensure that valuable raw materials can be recovered and used again. The refrigerant used
in your unit and insulation materials require special disposal procedures. Ensure that none
of the pipes on the back of the unit are damaged prior to disposal. Up to date information
concerning options of disposing of your old unit and packaging from the new one can be
obtained from your local council oce.
When disposing of an old unit break o any old locks or latches and remove the door as
a safeguard.
CORRECT DISPOSAL OF THIS PRODUCT
This marking indicates that this product should not be disposed with other
household wastes throughout the US. To prevent possible harm to the
environment or human health from uncontrolled waste disposal, recycle
it responsibly to promote the sustainable reuse of material resources. To
return your used device, please use the return and collection systems or
contact the retailer where the product was purchased. They can take this
product for environmental safe recycling.
For more information, please contact the local authority or your retailer where you
purchased the product.
8
• Try not to open the door too often, especially when the weather is wet and hot. When
you open the door, close it as soon as possible.
• Every now and then check if the appliance is suciently ventilated (adequate air
circulation behind the appliance).
• In normal temperature conditions, please arrange the thermostat to the middle setting.
• Before loading the appliance with packages of fresh food, make sure they are cooled to
ambient temperature.
• Ice and frost layer increase energy consumption, so clean the appliance as soon as the
layer is 1/8 – 1/4 inch (3 – 5 mm) thick.
• If it is the outer condenser, the rear wall should always be clean, free of dust or
any impurities.
• Always consider instructions stated in the Positioning and Energy Saving Tips sections;
otherwise the energy consumption might be substantially higher.
7.1 WARM TIPS
• The refrigerator enclosure may emit heat during operation, especially in summer. This is
caused by the radiation of the condenser and is normal.
• Condensation: Condensation will occur on the exterior surface and door seals of the
freezer when the ambient humidity is high; this is normal. The condensation can be
wiped away with a dry towel.
• Buzz: Buzz will be generated when the compressor is running, especially when starting
up or shutting down.
The design and specifications are subject to change without prior notice for
product improvement. Consult with the sales agency or manufacturer for details.

Distributed by:
Perfect Aire, LLC
5401 Dansher Rd.
Countryside, IL 60525
844-4PA-AIRE | 844-472-2473
www.perfectaire.us
Specification and performance data is subject to change without notice.
Printed in China
PA/User_3W2-F32_Mid/06062018