Loading ...
Loading ...
Loading ...
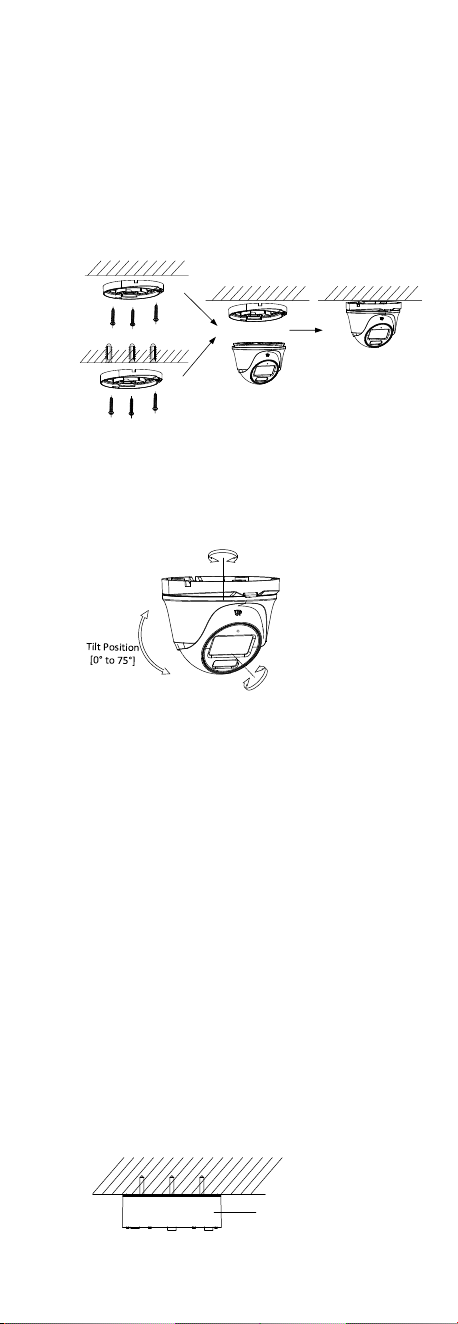
i. Method 1:
Secure the installation plate to the ceiling with
three PA4 × 25 screws (supplied).
Method 2:
Drill the screw holes with a 5.5 mm drill and
insert the supplied wall plugs, and secure the
installation plate to the ceiling with three PA3 ×
25 screws.
ii. Fit the camera onto the installation plate.
iii. Turn the camera as the figure below until it snaps
into the installation plate.
Or
Base Installation
Method 1
Method 2
Figure 2-18 Install the Camera to Ceiling
5. Connect the cables.
6. Power on the camera to adjust the view angle
according to the figure below.
Rotation Postion
[0° to 360°]
Pan Position
[0° to 360°]
Figure 2-19 3-Axis Adjustment
4). Rotate the enclosure to adjust the pan position
[0° to 360°].
5). Move the main body up and down to adjust the
tilt position [0° to 75°].
6). Rotate the main body to adjust the rotation
position [0° to 360°].
2.3.7 Ceiling Mounting with Junction Box
Before you start:
You need to purchase a junction box in advance.
Steps:
1. Loosen screws to take apart the junction box.
2. Paste the drill template for junction box to the
installation location.
3. (Optional) For cement ceiling, drill the screw holes
with a 5.5 mm drill and insert the supplied wall
plugs.
4. (Optional) Drill the cable hole, when the cables are
routed through the ceiling.
5. Secure the junction box body on the ceiling with
four PA4 × 25 screws according to the actual object.
Junction Box Body
Figure 2-20 Secure the Junction Box Body
Loading ...
Loading ...
Loading ...