REFERENCE
INSTALLATION & OPERATIONS MANUAL
MOBILE ROOM AIR CONDITIONER
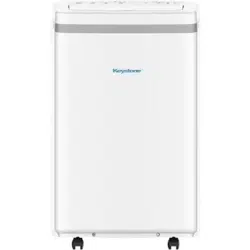
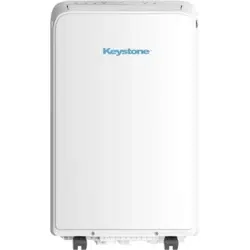
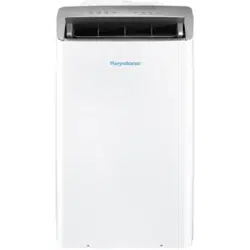
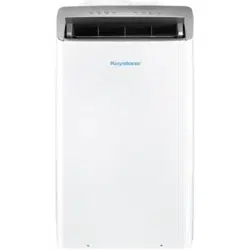
KSTAP08MFC
KSTAP10MFC
KSTAP13MFC
KSTAP13MFHC

CONTENTS
Air Conditioner Safety .................................................................. 2
- 1 -
Parts Description .......................................................................... 6
Control Panel ............................................................................... 7
Operation ..................................................................................... 10
Accessories ................................................................................. 11
Installation ................................................................................... 12
Maintenance ................................................................................ 17
Troubleshooting ........................................................................... 18
Note: The descriptions in this user manual (text and
figures) may vary slightly from the model you purchased.

We have provided many important safety messages in this manual
and on your appliance. Always read and obey all safety messages
to avoid harm or damage to people, properties, etc.
⚠ WARNING
⚠ WARNING
This symbol indicates
the possibility of death
or serious injury.
⚠ CAUTION
This symbol indicates
the possibility of injury or
damage to properties
• This appliance is not intended for use by persons (including
children) with reduced physical, sensory, or mental capabilities or
lack experience and knowledge, unless they have been given
supervision or instruction concerning the use of appliance by a
person responsible for their safety.
• This unit is designed for indoor use only.
• The air conditioner must be grounded. Incomplete grounding may
result in electric shocks.
• The unit must be placed on the horizontal ground to prevent tilting
and sliding.
• A grounded breaker (check the product rating) time-delay fuse or
circuit breaker with rated capacity must be installed to avoid
possible electric shocks.
• Do not install the air conditioner in a place where there is
flammable gas or liquid.
• If the power supply cord is damaged, it must be replaced by the
manufacturer or its service agent or a similar qualified person.
• The specification of the fuse are printed on the circuit board,
115V/Hz.
• Do not touch the louvers.
• Do not attempt to repair the air conditioner by yourself.
• In a lightning storm, please cut off the primary power supply
switch in order to prevent the machine from damage.
- 2 -
AIR CONDITIONER SAFETY

• Do not use a liquid or corrosive detergent to clean the appliance
and do not splash water or other liquids onto it, otherwise it may
damage the plastic components, even causing electric shocks.
• Do not operate the unit in a wet room such as the bathroom or
laundry rooms.
• Do not touch the unit with wet or damp hands or when barefoot.
• If your air conditioner is not fitted with a supply cord and a plug,
an all-pole switch must be installed in the fixed wiring, and the
distance between contact should be no less than 3.0 mm (do not
use an extension cord.)
• Do not pull the unit by the cord.
• Do not remove any part of the unit unless instructed by an
authorized technician.
• Do not move the unit until the power has been cut off.
• Do not operate the unit with a damaged plug or a loose socket.
• Reset your power supply cord by pressing RESET button on the
LCDI plug.
- 3 -
AIR CONDITIONER SAFETY

⚠ WARNING
Failure to follow the below precaution could result in electrical
shock, fire, or personal injury.
1. The plug must be plugged into an outlet that is properly
installed and grounded to a 3 prong outlet.
2. Do not use an extension cord.
3. Do not use an adapter.
4. Do not remove the ground prong.
Notice for R410A Models
Refrigerant leakage contributes to climate change. Refrigerant
with lower global warming potential (GWP) would contribute less
to global warming than a refrigerant with higher GWP, if leaked
to the atmosphere. This appliance contains a refrigerant fluid
with a GWP equal to [2088]. This means that if a 1 kg of this
refrigerant fluid would be leaks to the atmosphere, the impact on
global warming would be [2088] times higher than 1 kg of CO2,
over a period of 100 years. Never try to interfere with the
refrigerant circuit or disassemble the product by yourself,
always ask a professional.
⚠ CAUTION
• Do not block the air inlet or air outlet, otherwise the cooling capacity
will be weakened, which could cause the system to stop operating.
• Close the windows and doors, otherwise the cooling capacity will
be weakened.
• If the air filter is very dirty, the cooling capacity will be weakened.
Please be sure to clean the air filter regularly.
- 4 -
AIR CONDITIONER SAFETY

⚠ WARNING
1. When you need to dispose of the unit,
consult with your local dealer or local
recycling center for information on
how to dispose of the unit in an
environmentally responsible manner.
2. Please recycle or dispose of the
packing material for product in an
environmentally responsible manner.
The oil of compressor used as below table:
Compressor Manufacturer
or Trade mark
Highly
Meizhi
Rechi
Refrigerant
R410A
R22
R410A
R22
R410A
The name of oil
α68HES-H or equivalent
DIAMOND MS-56 or NM56EP or
equivalent
ESTER OIL Vg68
SUNISO 4GSD or NM56EP or
equivalent
NMOC Ze-Gles RB68EP or equivalent
- 5 -
AIR CONDITIONER SAFETY

FRONT VIEW
PARTS DESCRIPTION
NOTE:
* The descriptions in this user manual are text and figures,
and may be slightly different to the promotion information
and actual appliance. Please refer to the real appliance
purchased. Thank you.
* The working temperature range of the air conditioner is
16~35ºC (60~95ºF) under cooling mode; 5~27ºC (41~80ºF)
under heating mode.
- 6 -
REAR VIEW
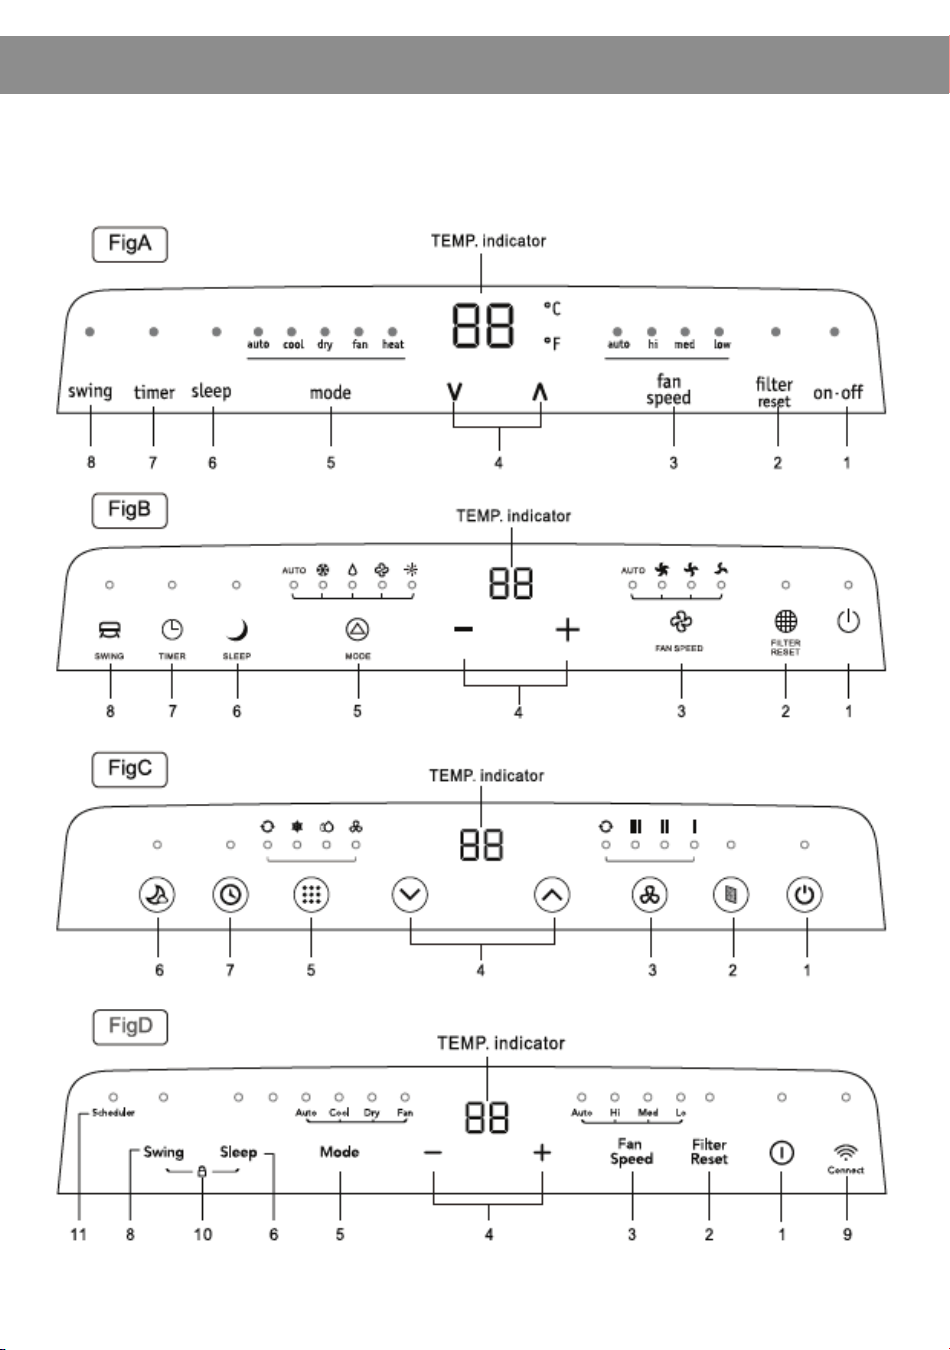
There are four kinds of control panels, Fig A, Fig B, Fig C, and Fig D.
The actual shape shall prevail.
CONTROL PANEL
- 7 -
CONTROL PANEL
- 8 -
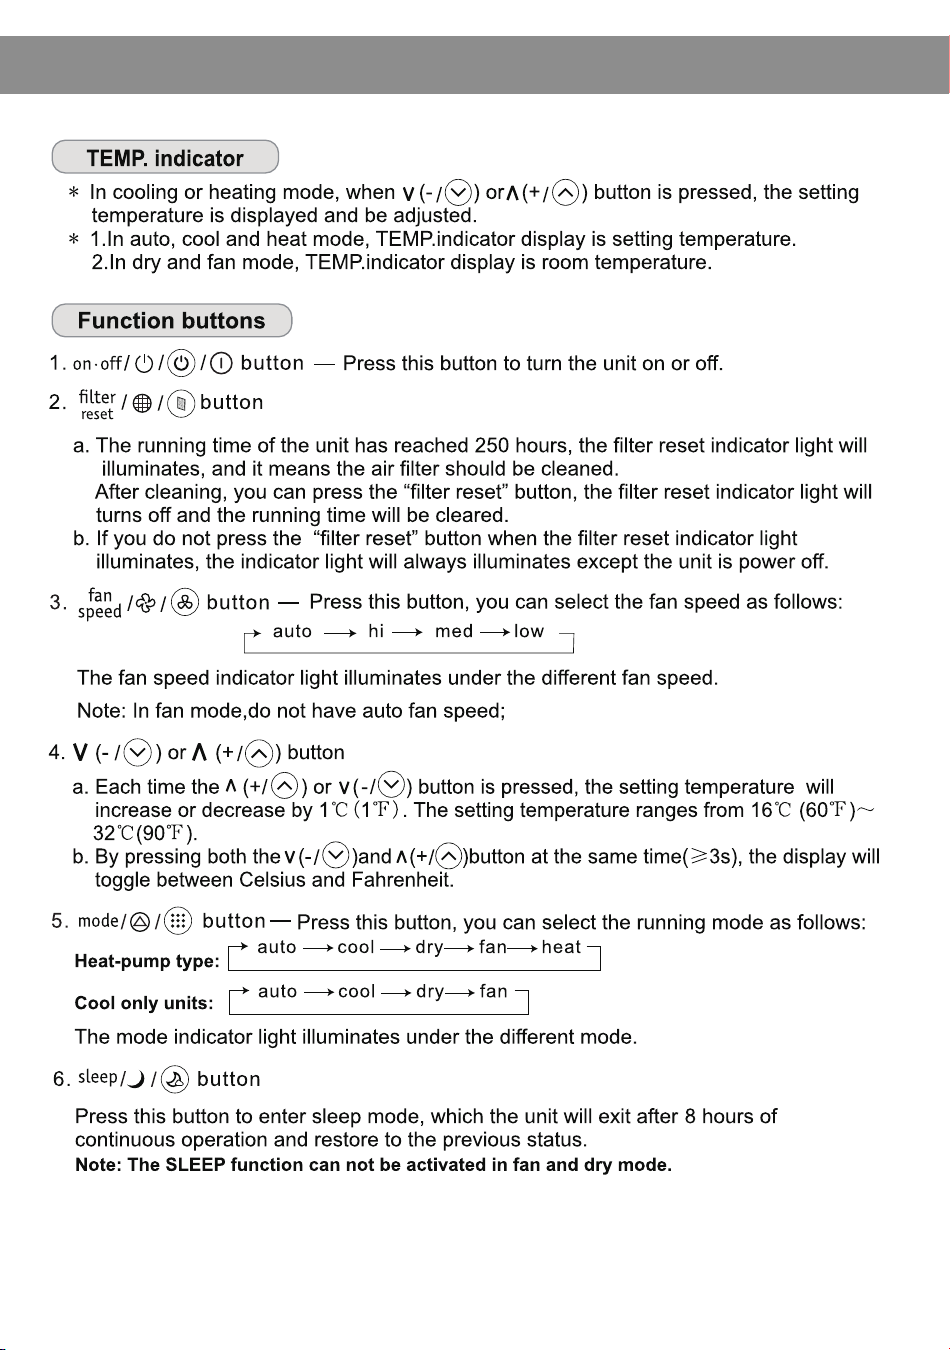
Control Panel
button
the
button,
the timer
b. button to the time.
time other the be
press the timer button, there no
or time is
the
be
When the is
the
unit
the time
press
the
button the
press
it
Note: With the unit on, press this button to set off timer.
With the unit off, press this button to set on timer.
button
this button, the
-8-
- 9 -
CONTROL PANEL

OPERATION
Observe all governing codes and ordinances.
Check the location where the air conditioner will be installed. Make sure you have everything
necessary for correct installation.
The location should provide:
1. Ground electrical outlet located near the product. The power cord length is 4.3' (131cm).
2. Free movement of air in room to be cooled.
3. A large enough opening for the air conditioner, installation parts are supplied for
double-hung windows.
4. Allow at least 23.6" (60cm) clearance from walls and furniture.
Failure to follow the below precaution could result in electrical shock, fire, or
personal injury.
1. Plug into a ground 3 prong outlet.
2. Do not remove ground prong
3. Do not use an extension cord
4. Do not user an adapter.
⚠ WARNING
Before starting the unit
1. Press the MODE button in a sequence until the heat indicator is lighted.
2. Press the “+” and “-” buttons to set your desired temperature.
3. Press the FAN button to select the fan speed.
Heating operation mode (Cooling only model has no heating function)
1. Press the MODE button in a sequence until the cool indicator is lighted.
2. Press the “+” and “-” buttons to set your desired temperature.
3. Press the FAN button to select the fan speed.
Cooling operation mode
1. Press the MODE button in a sequence until the dry indicator is lighted.
2. The fan will run at a fixed speed at this operation mode.
3. Close any windows and doors for the best dehumidifying effect.
Note: The setting temperature and fan speed can not be adjusted. The setting
temperature is 25º (77º F) and the fan speed is low.
Note: Cabinet louvers mush not be obstructed. Do not place the unit in front of
drapes or curtains; they may block the air intake.
Note: The setting temperature can not be adjusted.
Drying operation mode
1. Press the MODE button in a sequence until the fan indicator is lighted.
2. Press the FAN button to select the fan speed.
Fan operation mode
If power to the unit is interrupted, the unit will restart itself in its last used mode/ settings once
power is restored. The compressor will restart after 4 minutes.
1. To set the “Auto-restart function”: Press the sleep button 10 times within 5 seconds, a
buzzer will sound 4 times.
2. To cancel the “Auto-restart function”: Press the sleep button 10 times within 5 seconds, a
buzzer will sound 2 times.
Auto-restart function:
- 10 -
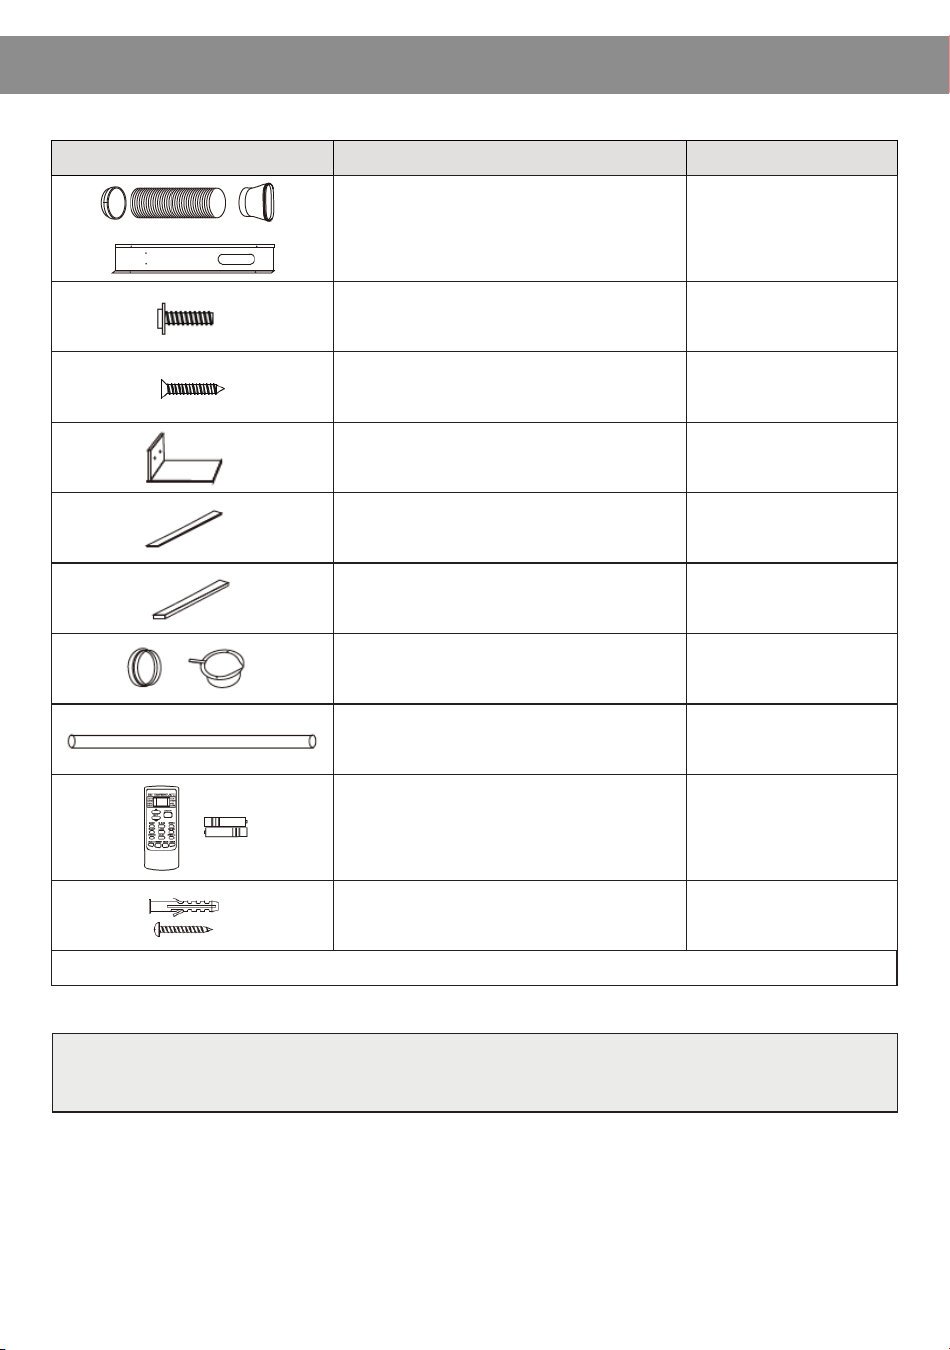
ACCESSORIES
Parts Parts Name Quantity
1 set
Adapter A, Exhaust duct, Adapter B
(flat mouth), Window Slider Kit
2pc
1/2” screws 4pc
3/4” screws 2pc
1pc
2pc
1pc
1 set
1pc
1pc
4pc
4pc
Type A Screws (#)
Type B Screws (#)
Security Bracket (#)
Type A foam seal (adhesive) (#)
Type B foam seal (non-adhesive) (#)
Adapter B (round mouth) (#),
Wall exhaust Adapter (#)
Drain hose
Remote controller and Battery
Expansion screw sleeve (#),
Type C Screws (#)
NOTE: Optional parts (#), some models without.
Note: The descriptions in this manual (text and figures) may vary slightly
from the model you purchased.
- 11 -
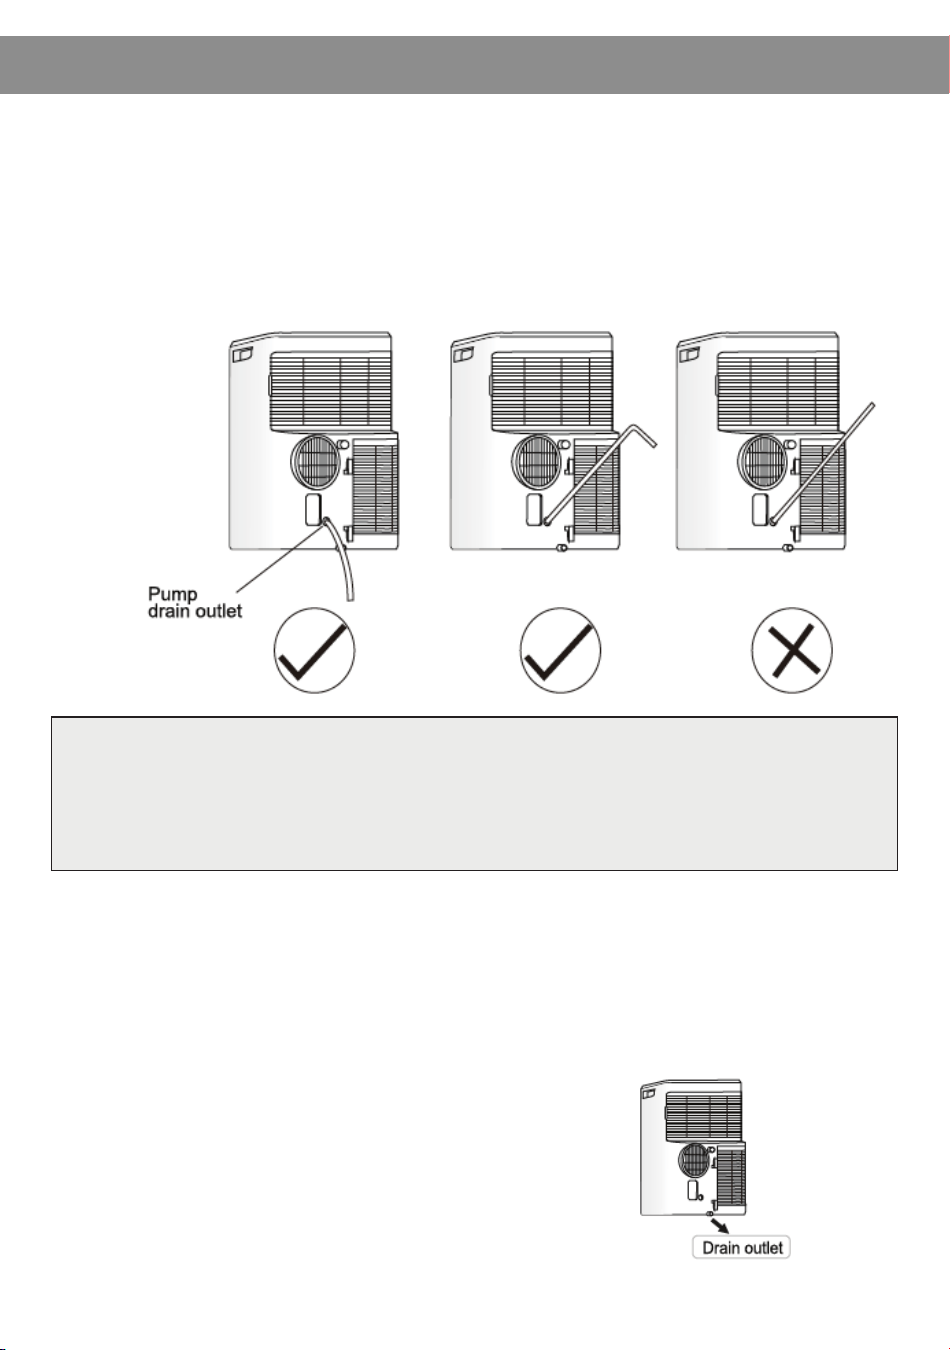
INSTALLATION
*If the unit you have bought has the pump drain outlet, as shown below,
please drain in this way:
* When the water level of the bottom tray reaches predetermined level,
the digital display area shows “P1” and the WATER FULL indicator light
illuminates. Carefully move the unit to a drain location, remove the
bottom drain plug, and restart the machine until the P1 symbol
disappears. If the error repeats, call for service.
Note: Be sure to reinstall the bottom
drain plug before using the unit.
Remove the pump drain from the back of the unit, attach the drain hose
to the hole. Place the other end of the hose in the drainage way, or
other drainage area such as a window.
Note: Make sure the hose is secure and there are no leaks. Direct the hose
towards the drain, making sure that there are no kinks that will stop the
water flow. Place the end of the hose into the drain, and make sure that
the end of the hose is down to let the water flow smoothly.
- 12 -
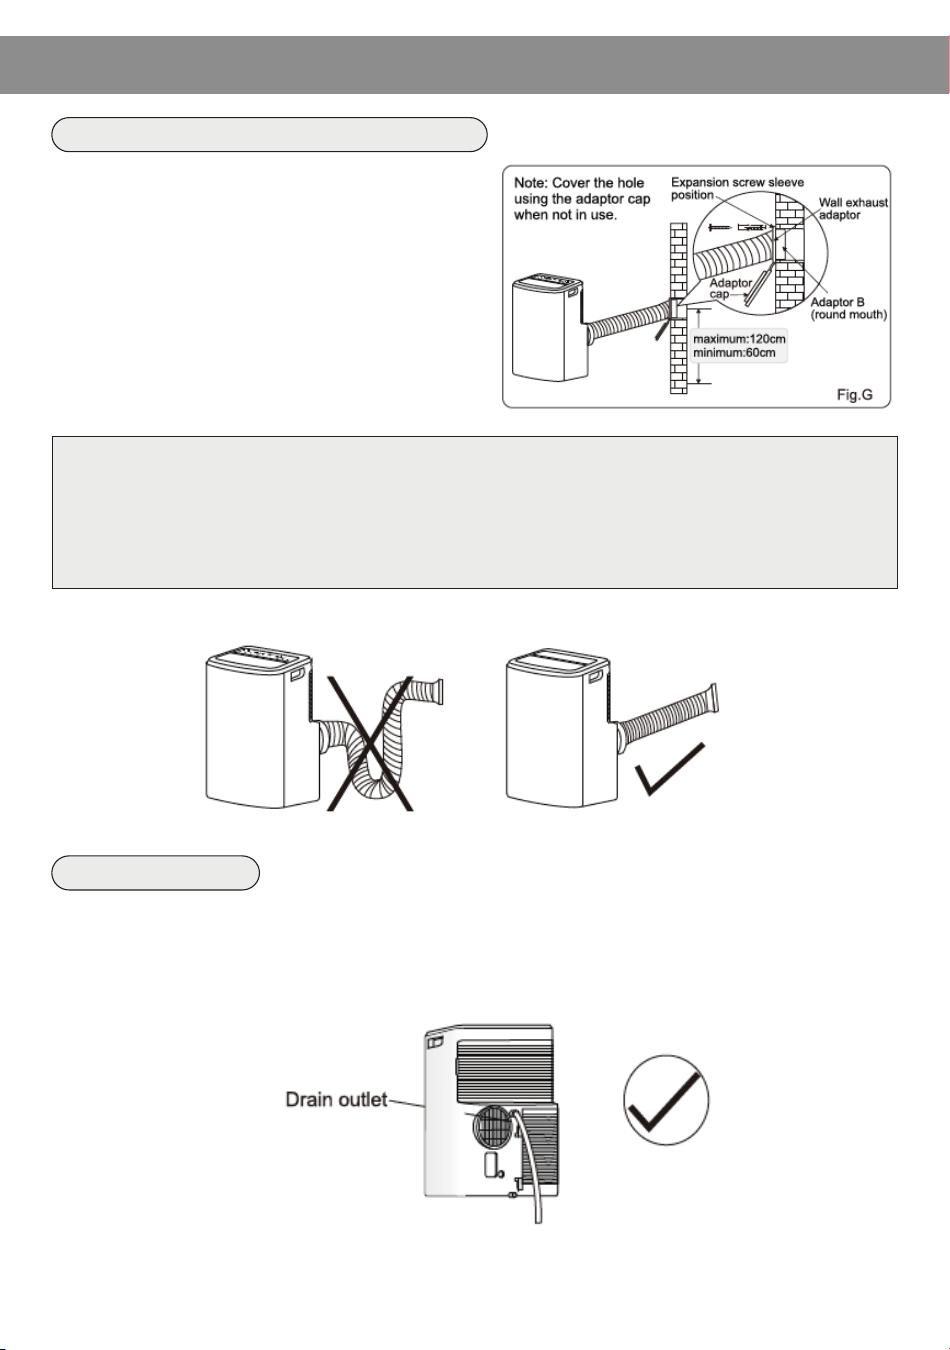
1. Prepare a hole in the wall. Install the wall
exhaust adapter onto the wall by using 4
expansion screw sleeves and type C
screws, be sure to fix thoroughly.
2. Connect the exhaust duct to the wall
exhaust adapter. (Fig. G)
INSTALLATION
Install the exhaust duct into the wall
* During dehumidifying mode, remove the upper drain plug from the back of the unit.
Attach the drain hose to the hole. Place the other end of the hose in the drain or other
drain location.
Water drainage
Note: 1. The duct can be compressed to 27cm minimum and extended to 150cm
maximum. It is better to keep the duct length to a minimum length.
2. Stretching or bending the duct excessively will affect the cooling
efficiency. (As the following fig. shows)
No! Yes!
- 13 -
INSTALLATION
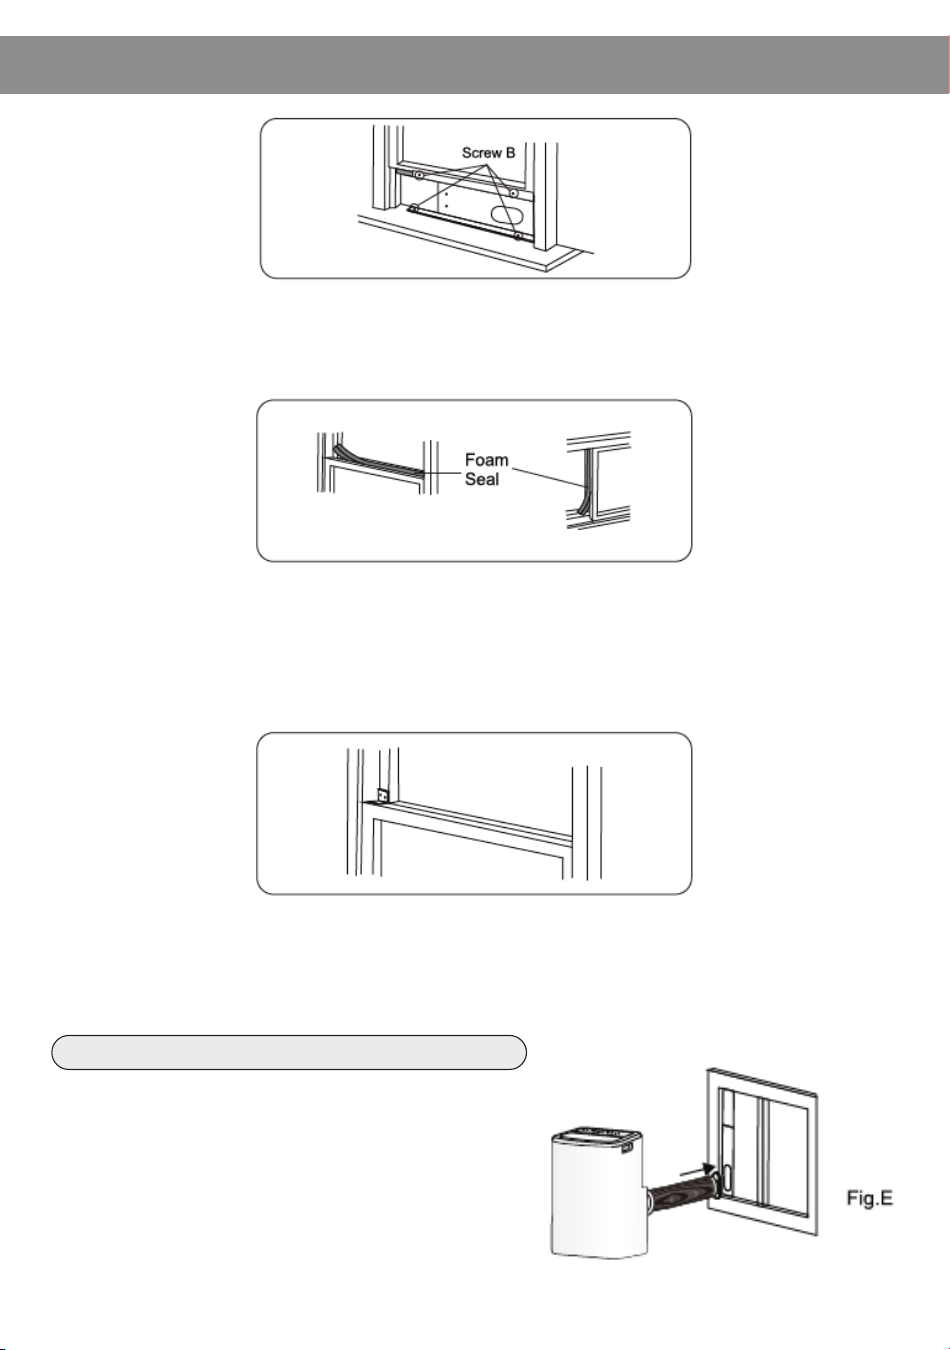
3. Carefully lower the window. Secure the vent panel in place with 4
type B screws, plus one screw for each extension.
4. Cut the foam seal B (non-adhesive) to the window width. Stuff the
foam seal B between the glass and the window to prevent air and
insects from getting into the room.
5. Install the security bracket with a type B screw as shown.
Remove the unit with the packed exhaust
duct next to the window and then connect the
adapter B (flat mouth) of the exhaust duct
with the window. (Fig. E)
Install the exhaust duct into the window
- 14 -
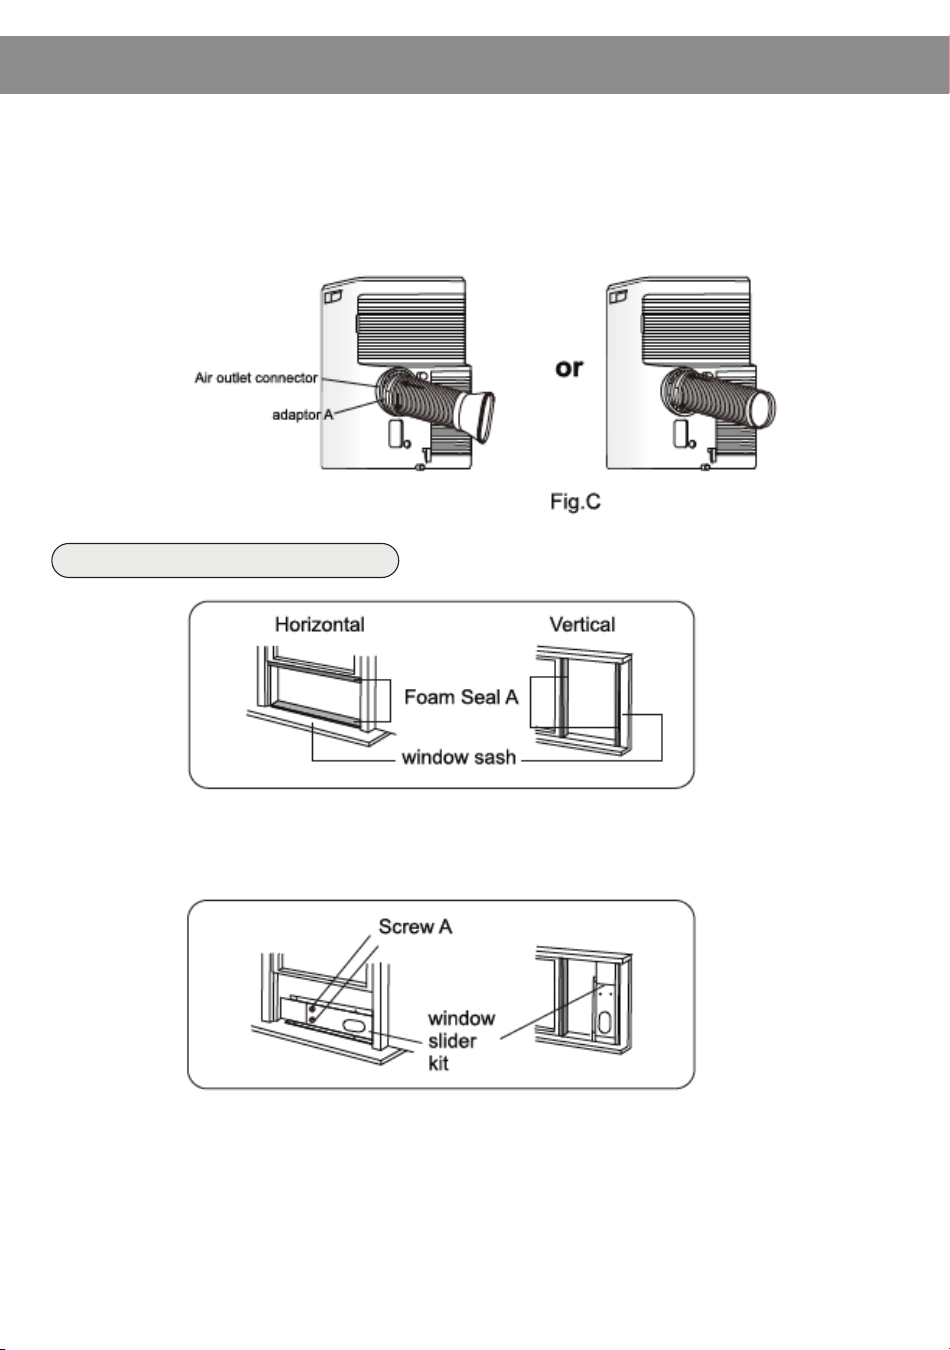
2. Connect the exhaust duct to the Air outlet connector on the back of
the unit. Slide in the adapter A downwards until it is locked in place.
(Fig. C)
1. Cut the foam seal (adhesive type) to the proper length and attach it
to the window sash.
INSTALLATION
Install the Window Slider Kit
2. Attach the Window Slider Kit to the window sash. Adjust the length of
the Window Slider Kit: loosen screw A to adjust the length of the
Window Slider Kit, then tighten the screw when the length is suitable.
Note: the length of the Window Slider Kit is 67.5 cm to 120 cm.
- 15 -
INSTALLATION
Observe all governing codes and ordinances. Check the location where the air
conditioner will be installed. Ensure everything necessary for the correct installation
is available.
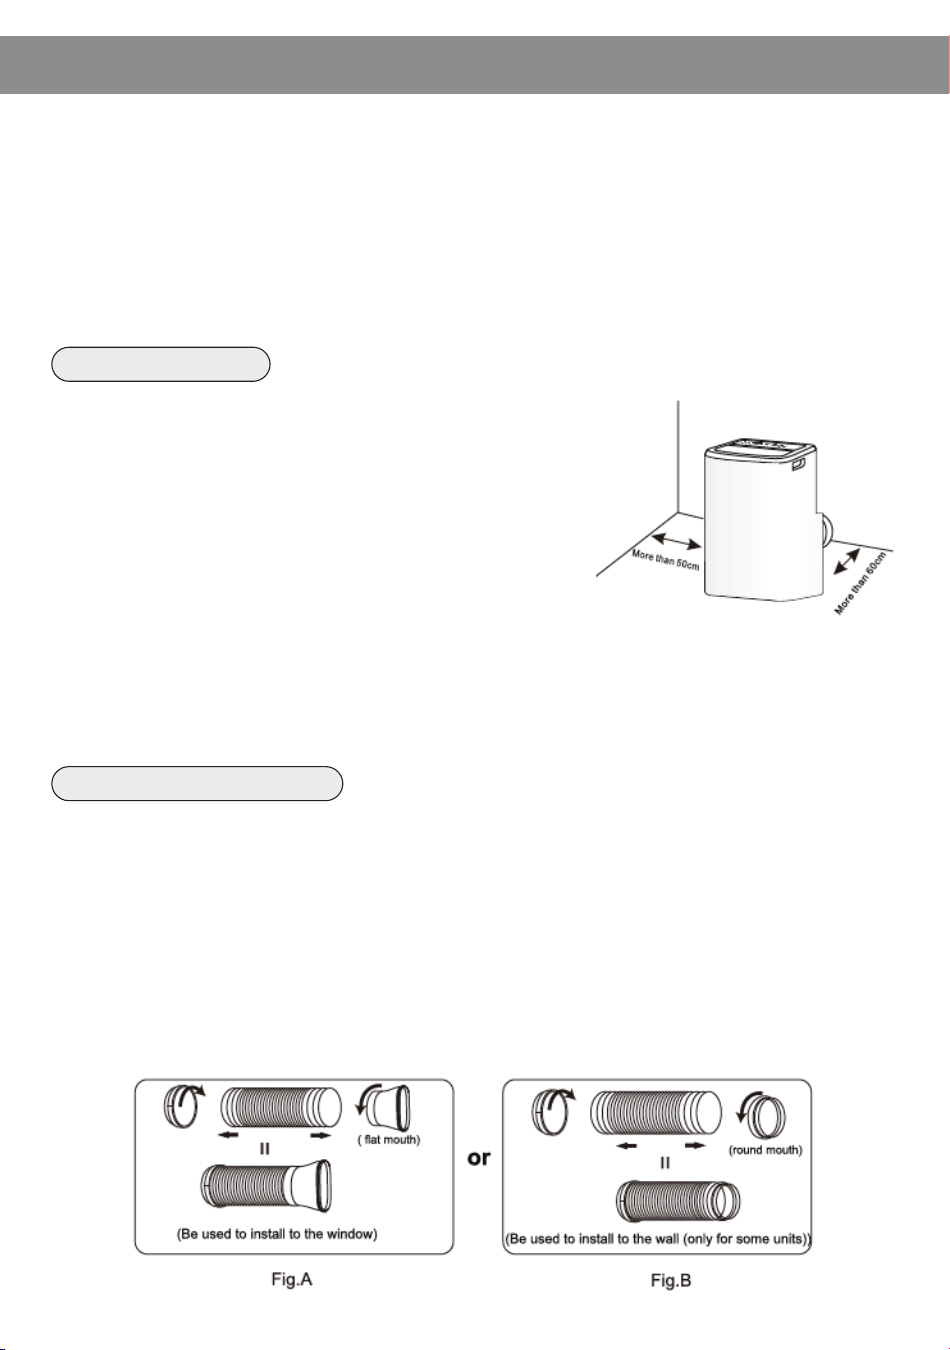
1. Install the portable air conditioner in a flat and open location where the air outlets
will not be obstructed.
2. Keep the minimum clearance from walls or other obstacles, as shown.
3. A level floor is required with maximum gradient of 10 degrees with the horizontal
plane is require to place the unit.
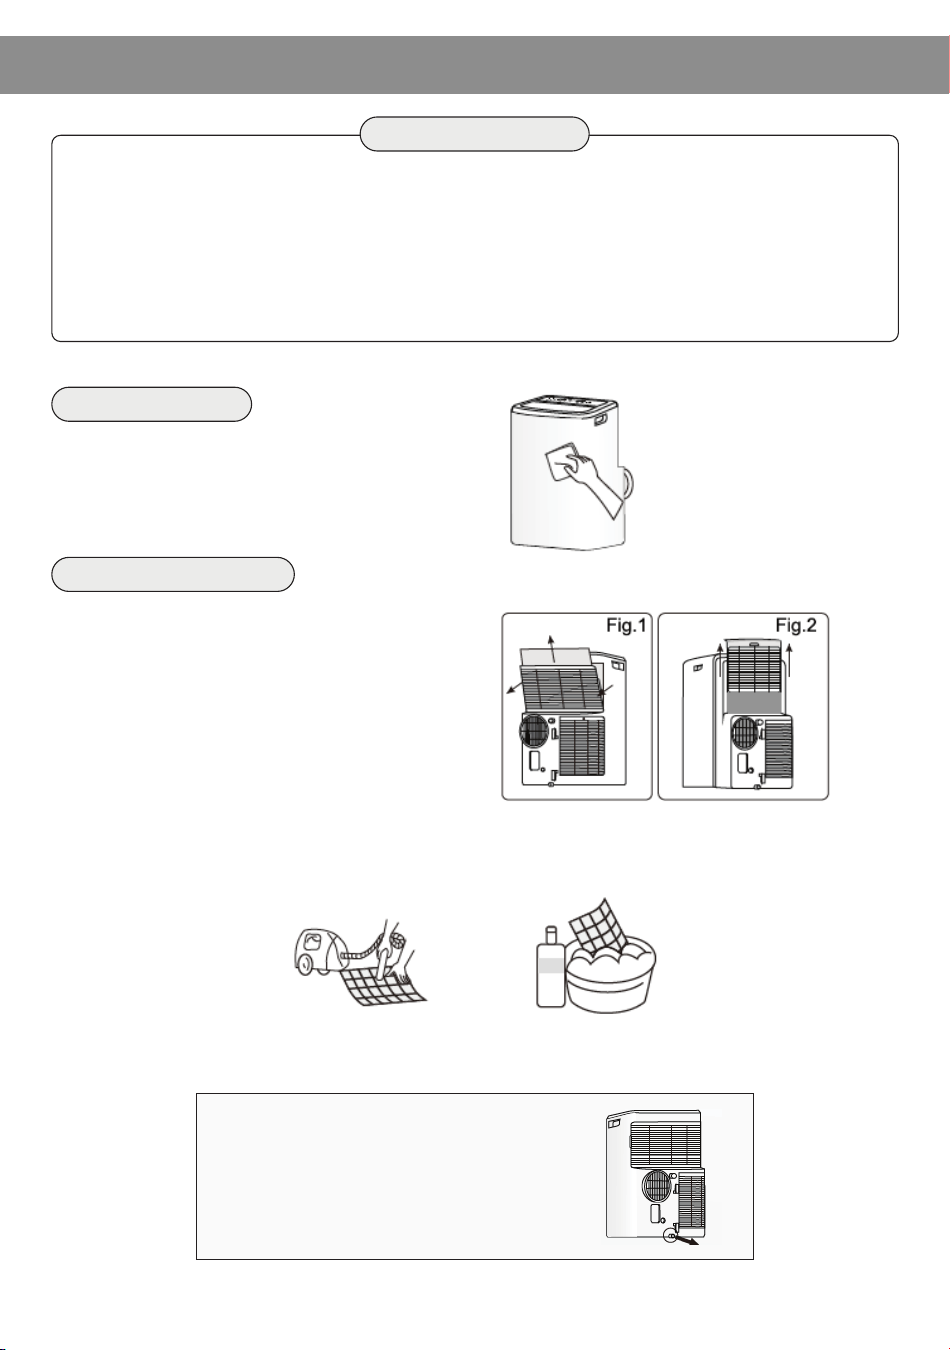
1. Install the adapter A and adapter B (flat mouth or round mouth) into the exhaust
duct as shown in Fig. A or Fig. B.
Unit Placement
• In cooling, heating, and drying mode, the exhaust duct needs to be installed.
While in fan mode, the exhaust duct is not needed.
• According to the actual needs, the exhaust duct can be moderately compressed
and tensed, but cannot be arbitrarily stretched and bent.
• The exhaust duct can be connected with Windows or installed into the wall. With
the actual needs, you can make the installation with accessories of the unit.
Duct mount instruction
Note:
1. The air conditioner should not be used in the laundry
room or other confined space.
2. The plug should be accessible after the unit is positioned.
1. Install the mobile air conditioner in a flat and
open location where the air outlets will not
be obstructed.
2. Keep the minimum clearance from walls or other
obstacles, as shown.
3. A level floor is required with maximum gradient
of 10 degrees with the horizontal plane is
required to place the unit.
- 16 -
When cleaning the exterior of the unit,
use a warm, damp towel.
3. Reinstall the dried filer in reverse order of removal. Put the filter cover back to its place.
◦ Before cleaning the air conditioner, it must be shut down and the electricity must be
cut off for more than 5 minutes, otherwise there might be the risk of electric shocks.
◦ Do not use gasoline, benzene, thinner, liquid insecticide, or any other chemicals on
the air conditioner, as these substances may adversely impact the unit and may form
cracks, or result deformation of plastic parts.
◦ Never attempt to clean the unit by pouring water directly over any of the surface areas,
as this will cause deterioration of electrical components and wiring insulation.
MAINTENANCE
WARNING
Clean the Unit
1. Remove the air filter
Take out the upper air filter and the
lower air filter.
Note: There are two types about the
low air intake grille, please refer to Fig.
1 or Fig. 2. If the low air intake with a
screw, please remove the screw at first.
2. Clean the air filter
Use a vacuum cleaner to clean the air filter. If the air filter is very dirty, wash it in warm
water (below 104F (40C) with a mild detergent, and then dry the filter in a shaded area.
Clean the Air Filter
Note: If you do not use the unit for a
long time, please pull out the rubber
plug to drain the inside water out
referring to the right figure.
- 17 -
Air Condition Will Not Operate
Causes
• The power switch is released.
• Power supply failure
• The fuse is burnt.
• It doesn’t reach the setting time for
starting up.
• Switch on the power.
• Wait for the recovery of power supply.
• Replace the fuse by a professional.
• Wait or reset the original setting.
Solutions
Air Condition Will Not Operate
Causes Solutions
• The ground is not level or flat enough. • Place the unit on a flat, level ground if
possible.
There is Air Flow But No Cooling Effect
Causes
• Mistakes in temperature setting.
• The air filter is blocked by dust.
• The air inlet or outlet of machine is
blocked.
• Turn the air conditioner on in a very
hot room.
• Cooling capacity is insufficient.
• The doors or windows are open.
• Set a proper temperature, setting
temperature should be lower than
ambient temperature.
• Clean the air filter.
• Remove the obstruction.
• Allow additional time to remove stored
heat from walls, ceiling, floor, and
furniture.
• Reconfirm that the cooling capacity
purchased is the correct size for the
room square footage.
• Close the doors and windows.
Solutions
Unit Doesn’t Start When Pressing ON/OFF Button
Causes
• It has not been four minutes after switch
off.
• Room temperature is lower than the setting
temperature under cooling mode or higher
than setting temperature under heating
mode (if applicable).
• Wait four minutes.
• Reset the setting temperature.
Solutions
TROUBLESHOOTING
First, try the solutions suggested here to possibly avoid the cost of
a service call.
- 18 -