Air conditioner
User manual
AR**BXEC****
• Thank you for purchasing this Samsung air conditioner.
• Before operating this unit, please read this user manual carefully and retain it for future
reference.

2
English
Contents
Safety Information 4
Safety Information 4
At a Glance 12
Indoor Unit Overview 12
Display 13
Remote Control Overview 14
Replacing the remote control batteries 14
Remote Control Operation 15
Selecting an operation mode 15
To set the temperature
• To adjust the fan speed • To adjust the airflow direction 16
Smart Features 17
Power Smart Features 17
WindFree Cooling function 17
AI Auto mode 18
Auto mode
• Cool mode 19
Dry mode
• Fan mode 20
Heat mode
• Automatic defrost 21
Variety Smart Features 22
Fast function 22
Eco function 23
Quiet function 24
Electricity consumption check • Beep function 25
Auto clean function 26
Freeze Wash function 28
Display lighting function • Wi-Fi function (SmartThings app) 29
Time scheduling 30
Timed on/ Timed off function 30
good'sleep function 31
3
English
Cleaning and Maintenance 32
Schedule 32
Cleaning 33
Appendix 37
Troubleshooting 37
SmartThings app 39
Correct Disposal of This Product
(Waste Electrical & Electronic Equipment)
(Applicable in countries with separate collection systems)
This marking on the product, accessories or literature indicates that the product and its electronic
accessories (e.g. charger, headset, USB cable) should not be disposed of with other household waste
at the end of their working life. To prevent possible harm to the environment or human health from
uncontrolled waste disposal, please separate these items from other types of waste and recycle them
responsibly to promote the sustainable reuse of material resources.
Household users should contact either the retailer where they purchased this product, or their local
government office, for details of where and how they can take these items for environmentally safe
recycling.
Business users should contact their supplier and check the terms and conditions of the purchase
contract. This product and its electronic accessories should not be mixed with other commercial wastes
for disposal.
Correct disposal of batteries in this product
This marking on the battery, manual or packaging indicates that the batteries in this product should not
be disposed of with other household waste at the end of their working life. Where marked, the chemical
symbols Hg, Cd or Pb indicate that the battery contains mercury, cadmium or lead above the reference
levels in EC Directive 2006/66.
4
Safety Information
English
Safety Information Safety Information
Safety Information
WARNING: Read This Manual
Read and follow all safety information and instructions before installation, use, or maintenance of this appliance.
Incorrect installation, use, or maintenance of this appliance can result in death, serious injury, or property damage.
Keep these instructions with this appliance. This manual is subject to change. For the latest version, visit www.
samsung.com.
Because the instructions in this manual cover various models, the characteristics of your air conditioner may
differ slightly from those described. If you have any questions, please contact your service provider or visit
www.samsung.com.
Notices and notes
To make you aware of safety messages and highlighted information, we use the following notices and notes
throughout this manual:
WARNING
Hazards or unsafe practices that may result in severe personal injury or death.
CAUTION
Hazards or unsafe practices that may result in minor personal injury or property damage.
IMPORTANT
Information of special interest
NOTE
Supplementary information that may be useful
Safety Information
5
English
Safety Information Safety Information
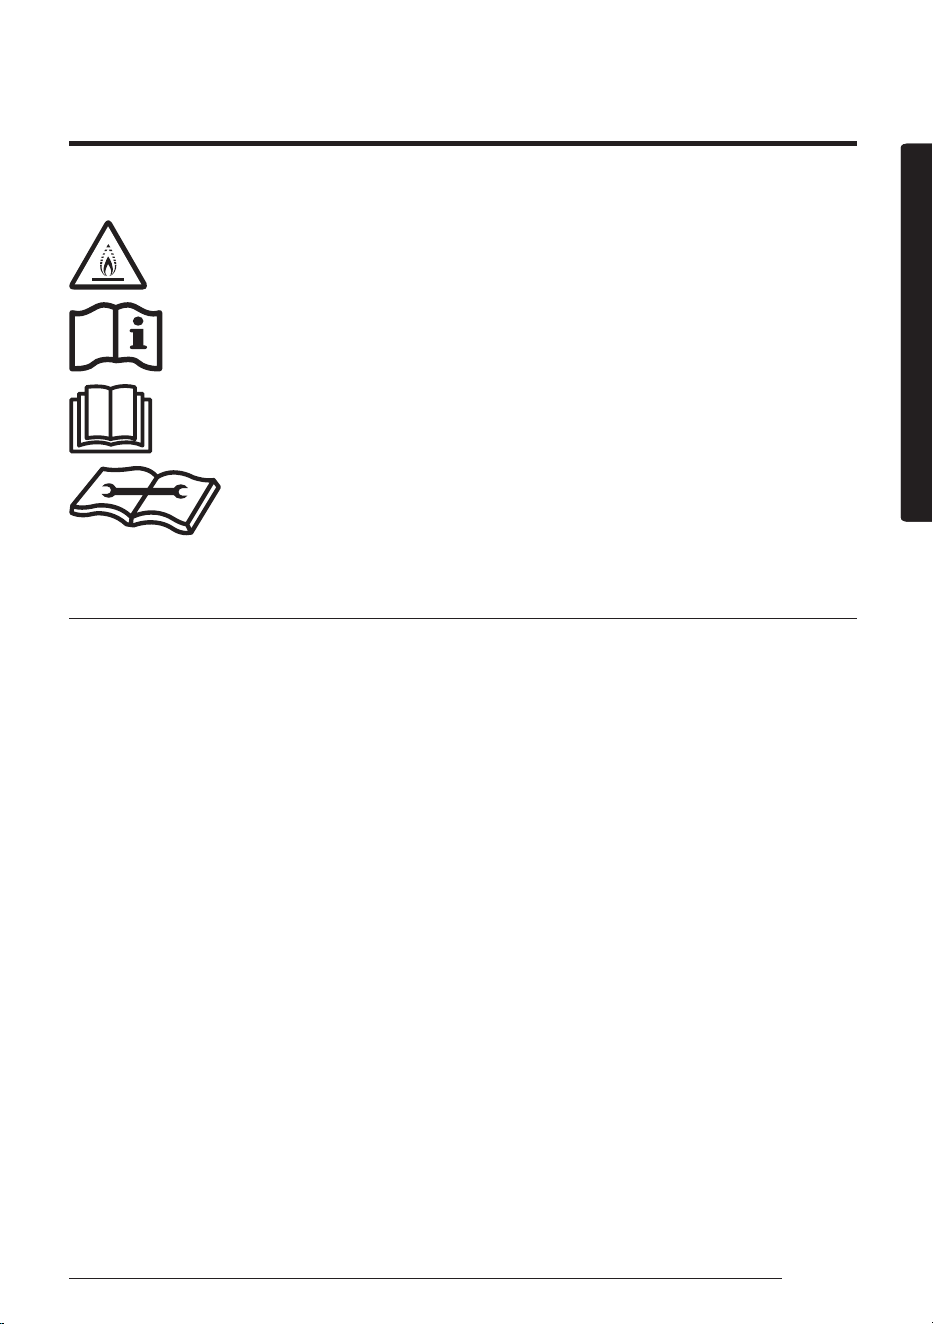
WARNING: Low burning velocity material (This appliance is filled with R-32.)
The user and installer guides should be read carefully.
The user and installer guides should be read carefully.
The service guide should be read carefully.
FOR GENERAL
This appliance is not intended for use by persons (including children) with reduced physical, sensory
or mental capabilities, or lack of experience and knowledge, without supervision or instruction
concerning use of the appliance by a person responsible for their safety. Children should be
supervised to ensure that they do not play with the appliance.
Safety Information

6
Safety Information
English
Safety Information Safety Information
FOR INSTALLATION
WARNING
Use a power cord with this product's power specifications or higher and use the power cord for this
appliance only. In addition, do not use an extension cord.
• Extending the power cord may result in electric shock or fire.
• Do not use an electric transformer. This may result in electric shock or fire.
• If the voltage/frequency/rated current condition is different, it may cause fire.
The installation of this appliance must be performed by a qualified technician or service company.
• Failing to do so may result in electric shock, fire, explosion, problems with the product, or injury
and may also void warranty on the installed product.
Install an Isolation Switch next to the Air Conditioner (but not on the panels of the Air Conditioner)
and circuit breaker dedicated to the air conditioner.
• Failing to do so may result in electric shock or fire.
Fix the outdoor unit firmly so that the electric part of the outdoor unit is not exposed.
• Failing to do so may result in electric shock, fire, explosion, or problems with the product.
Do not install this appliance near a heater, or inflammable material. Do not install this appliance in a
humid, oily or dusty location, in a location exposed to direct sunlight and water (or rain). Do not install
this appliance in a location where gas may leak.
• This may result in electric shock or fire.
Never install the outdoor unit in a location such as on a high external wall where it could fall.
• If the outdoor unit falls, it may result in injury, death or property damage.
This appliance must be properly grounded. Do not ground the appliance to a gas pipe, plastic, water
pipe, or telephone line.
• Failing to do so may result in electric shock, fire, and explosion.
• Make sure to use a socket-outlet with ground.
7
English
Safety Information Safety Information
CAUTION
Install your appliance on a level and hard floor that can support its weight.
• Failing to do so may result in abnormal vibrations, noise, or problems with the product.
Install the drain hose properly so that water drains correctly.
• Failing to do so may result in water overflowing and property damage. Avoid adding drain to
waste pipes as odours may arise in the future.
When installing the outdoor unit, make sure to connect the drain hose so that draining is performed
correctly.
• The water generated during heating by the outdoor unit may overflow and result in property
damage.
In particular, in winter, if a block of ice falls, it may result in injury, death or property damage.
Do not install the product in a place where thermo-hygrostat is needed (such as server room, machinery
room, computer room, etc.)
• Those places do not provide guaranteed operation condition of the product therefore
performance can be poor in these places.
FOR POWER SUPPLY
WARNING
When the circuit breaker is damaged, contact your nearest service centre.
Do not pull or excessively bend the power line. Do not twist or tie the power line. Do not hook the
power line over a metal object, place a heavy object on the power line, insert the power line between
objects, or push the power line into the space behind the appliance.
• This may result in electric shock or fire.
If the supply cord is damaged, it must be replaced by the manufacturer, its service agent or similarly
qualified persons in order to avoid a hazard.
CAUTION
When not using the air conditioner for a long period of time or during a thunder/lightning storm, cut
the power at the circuit breaker.
• Failing to do so may result in electric shock or fire.
8
Safety Information
English
Safety Information Safety Information
FOR USING
WARNING
If the appliance is flooded, please contact your nearest service centre.
• Failing to do so may result in electric shock or fire.
If the appliance generates a strange noise, a burning smell or smoke, cut off the power supply
immediately and contact the nearest service centre.
• Failing to do so may result in electric shock or fire.
In the event of a gas leak (such as propane gas, LP gas, etc.), ventilate immediately without touching
the power line. Do not touch the appliance or power line.
• Do not use a ventilating fan.
• A spark may result in an explosion or fire.
To reinstall the air conditioner, please contact your nearest service centre.
• Failing to do so may result in problems with the product, water leakage, electric shock, or fire.
• Delivery service for the product is not provided. If you reinstall the product in another location,
additional construction expenses and an installation fee will be charged.
• Especially, when you wish to install the product in an unusual location such as in an industrial
area or near the seaside where it is exposed to salt in the air, please contact your nearest service
centre.
Do not touch the circuit breaker with wet hands.
• This may result in electric shock.
Do not turn the air conditioner off with the circuit breaker while it is operating.
• Turning the air conditioner off and then on again with the circuit breaker may cause a spark and
result in electric shock or fire.
After unpacking the air conditioner, keep all packaging materials well out of the reach of children, as
packaging materials can be dangerous to children.
• If a child places a bag over its head, it may result in suffocation.
Do not touch the air-flow blade with your hands or fingers during heating.
• This may result in electric shock or burns.
Do not insert your fingers or foreign substances into the air inlet/outlet of the air conditioner.
• Take special care that children do not injure themselves by inserting their fingers into the
product.
Do not strike or pull the air conditioner with excessive force.
• This may result in fire, injury, or problems with the product.
Do not place an object near the outdoor unit that allows children to climb onto the machine.
• This may result in children seriously injuring themselves.
9
English
Safety Information Safety Information
Do not use this air conditioner for long periods of time in badly ventilated locations or near infirm
people.
• Since this may be dangerous due to a lack of oxygen, open a window at least once an hour.
If any foreign substance such as water has entered the appliance, cut off the power supply and contact
the nearest service centre.
• Failing to do so may result in electric shock or fire.
Do not attempt to repair, disassemble, or modify the appliance yourself.
• Do not use any fuse (such as copper, steel wire, etc.) other than the standard fuse.
• Failing to do so may result in electric shock, fire, problems with the product, or injury.
CAUTION
Do not place objects or devices under the indoor unit.
• Water dripping from the indoor unit may result in fire or property damage.
Check that the installation frame of the outdoor unit is not broken at least once a year.
• Failing to do so may result in injury, death or property damage.
To prevent personal injury, make sure that you change the directions of the horizontal air flow blades
after stopping the movements of the vertical air flow blade. (In case of adjusting the horizontal air-
flow manually)
Do not install the product in a ship or a vehicle (such as a campervan).
• Salt, vibration or other environmental factor may cause the product malfunction, electric shock or
fire.
Do not stand on top of the appliance or place objects (such as laundry, lighted candles, lighted
cigarettes, dishes, chemicals, metal objects, etc.) on the appliance.
• This may result in electric shock, fire, problems with the product, or injury.
Do not operate the appliance with wet hands.
• This may result in electric shock.
Do not spray volatile material such as insecticide onto the surface of the appliance.
• As well as being harmful to humans, it may also result in electric shock, fire or problems with the
product.
Do not drink the water from the air conditioner.
• The water may be harmful to humans.
Do not hit, shake, drop, or attempt to disassemble the remote control.
When replacing the remote control batteries, keep them out of the reach of infants.
• If an infant eats batteries, contact a doctor immediately.
When replacing the remote control batteries, be careful not to get the battery fluid on your skin.
• Battery fluid is harmful to humans.
Do not touch the pipes connected with the product.
• This may result in burns or injury.
10
Safety Information
English
Safety Information Safety Information
Do not use this air conditioner to preserve precision equipment, food, animals, plants or cosmetics, or for
any other unusual purposes.
• This may result in property damage.
Avoid directly exposing humans, animals or plants to the air flow from the air conditioner for long
periods of time.
• This may result in harm to humans, animals or plants.
FOR CLEANING
WARNING
Do not clean the appliance by spraying water directly onto it. Do not use benzene, thinner or alcohol
to clean the appliance.
• This may result in discolouration, deformation, damage, electric shock or fire.
Before cleaning or performing maintenance, cut off the power supply and wait until the fan stops.
• Failing to do so may result in electric shock or fire.
CAUTION
Take care when cleaning the surface of the heat exchanger of the outdoor unit since it has sharp
edges.
• This should be done by a qualified technician. Please contact your installer or service centre.
Do not clean the inside of the air conditioner by yourself.
• For cleaning inside the appliance, contact your nearest service centre.
• When cleaning the filter, refer to the descriptions in the 'Cleaning' section of the Quick Guide.
• Failing to do so may result in damage, electric shock or fire.
• Make sure to prevent any injury from sharp edges of the surface when handling the heat
exchanger.
11
English
Safety Information Safety Information
FOR R-32 REFRIGERANT
WARNING
In case of a malfunction, immediately stop operation of the air conditioner and disconnect the entire
power system. Then consult the authorized service personnel.
Do not use means to accelerate the defrost operation or to clean, other than those recommended by
Samsung.
Do not pierce or burn.
Be aware that refrigerants may not contain an odour.
CAUTION
The product shall be stored in a room with no ignition sources (e.g. open flames, gas appliance,
electric heater, etc.).
• Note that the refrigerant has no odour.
When the air conditioner does not operate properly for cooling or heating, there is a possibility of
refrigerant leakage. If any leakage, stop operation, ventilate the room, and consult your dealer
immediately for recharging refrigerant.
The refrigerant is not harmful. However, if it comes in contact with fire, it may generate harmful
gases and there is risk of fire.
During transportation of the indoor unit, the pipe lines shall be covered with brackets for protection.
Do not move the product with holding the pipe lines.
• It may cause gas leakage.
Do not cut or burn the refrigerant container or pipings.
Do not point the air direction to the fireplace or heater.
12
Indoor Unit Overview
English
At a GlanceAt a Glance
Indoor Unit Overview
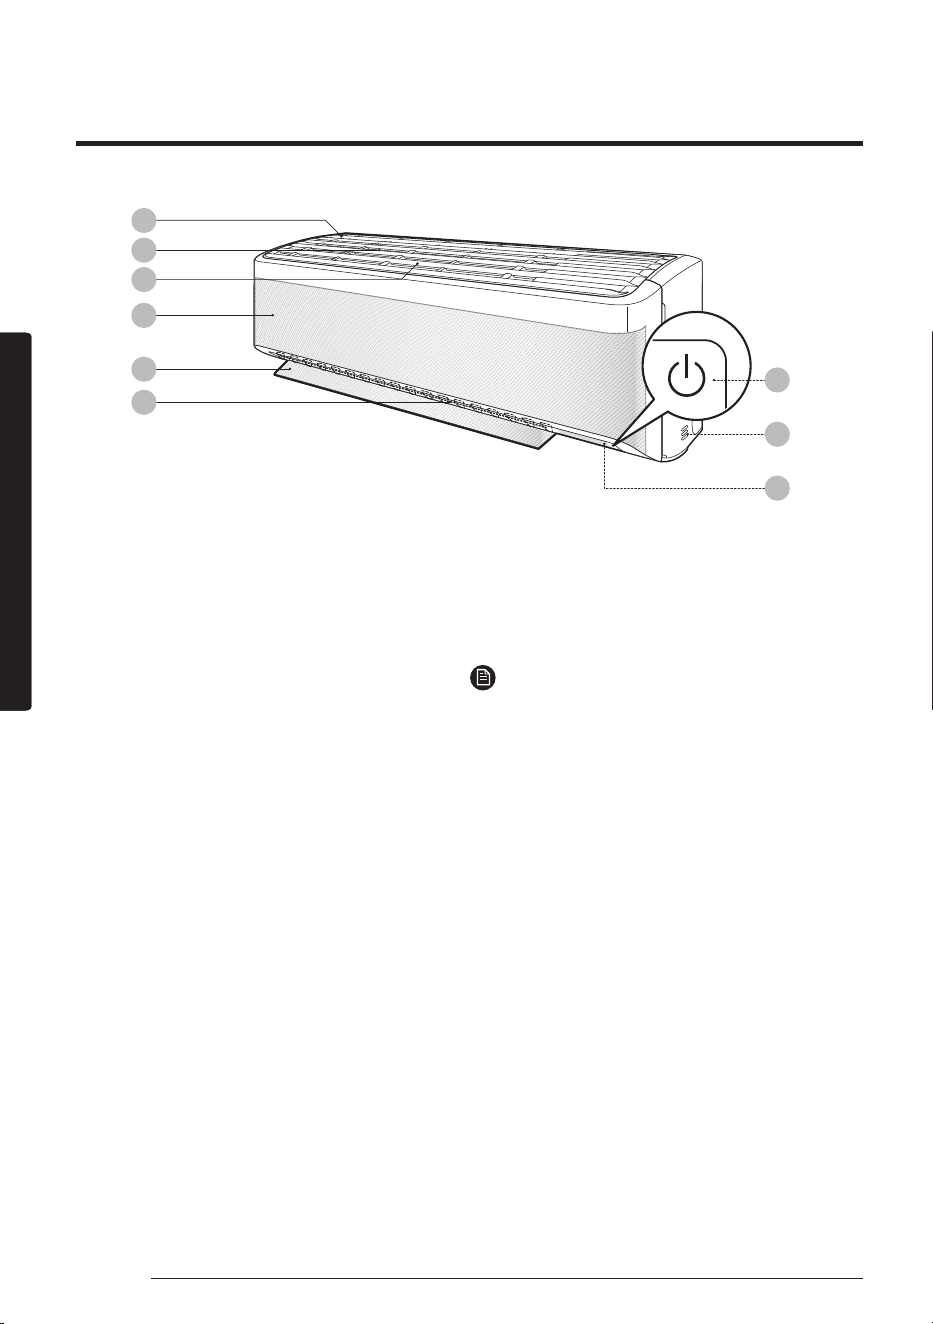
The appearance of the actual product may differ slightly from the image below.
01
02
03
04
09
05
06
08
07
01 Air intake
02 Air filter
03 Tri-care filter
04 WindFree panel
05 Airflow blade (up and down)
06 Airflow blade (left and right)
07 Power button/Remote control receiver
08 Room temperature sensor
09 Display
NOTE
• The product ships with two Tri-care filters and the
manual included.
At a Glance
13
English
At a GlanceAt a Glance
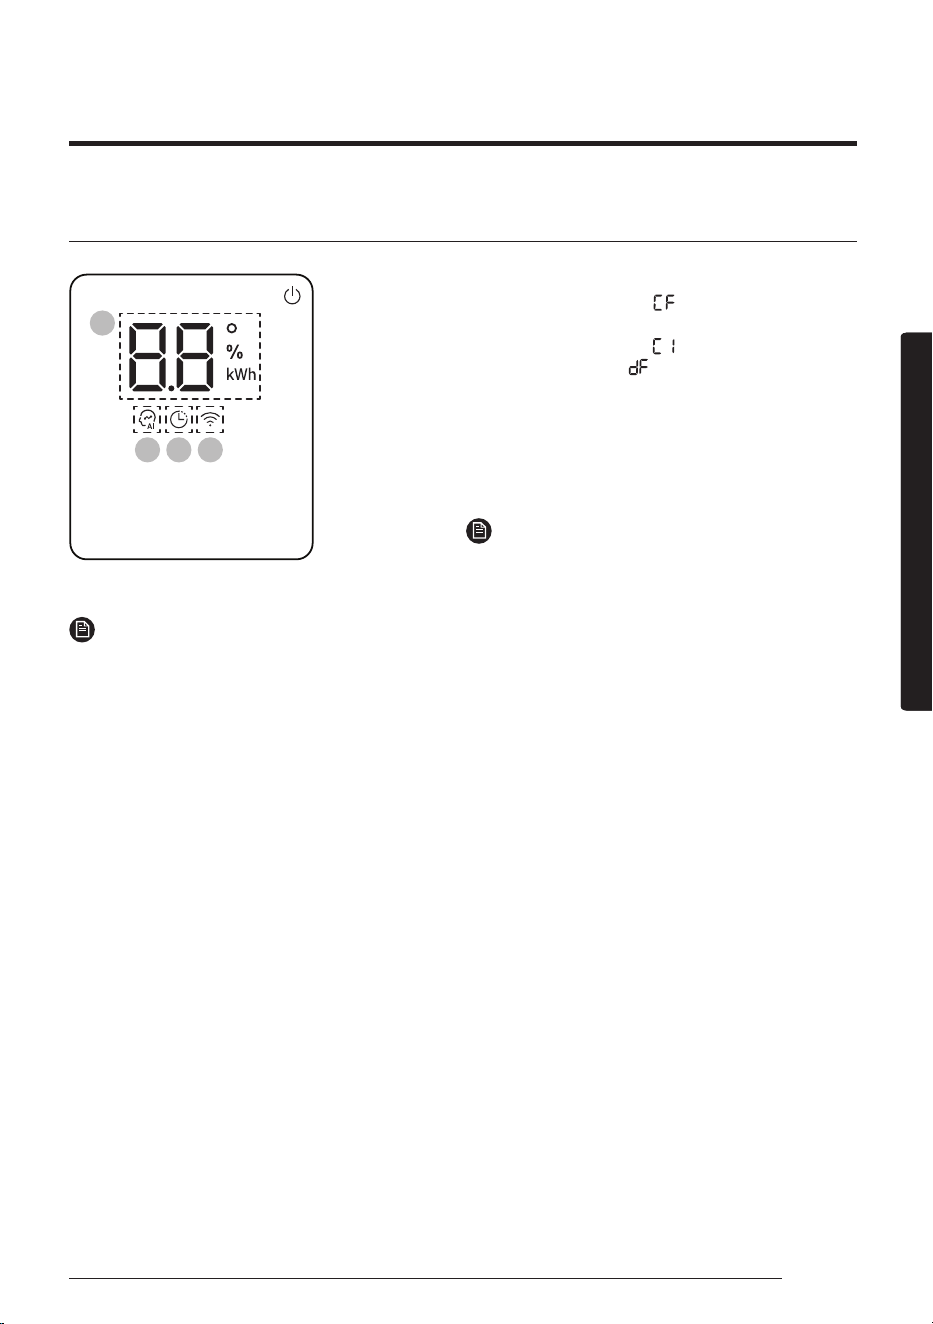
Display
01
02 03 04
01 Temperature indicator (numeric)
Filter reset indicator ( )
Electricity consumption indicator (numeric)
Auto clean indicator ( )
Defrost indicator ( )
02 AI Auto indicator
03 Timer indicator
good’sleep indicator
04 Wi-Fi indicator
NOTE
• When the Wi-Fi is turned on, the indicator blinks
three times and then turns on.
NOTE
• If the Wi-Fi indicator blinks for 10 seconds when operation starts, it means that the air conditioner is not
connected to Wi-Fi. See "SmartThings app" on page 39 and connect the air conditioner to Wi-Fi.
• When connected to Wi-Fi, the air conditioner can gather and learn your user patterns so that it can run in
AI Auto mode.
14
Remote Control Overview
English
At a GlanceAt a Glance
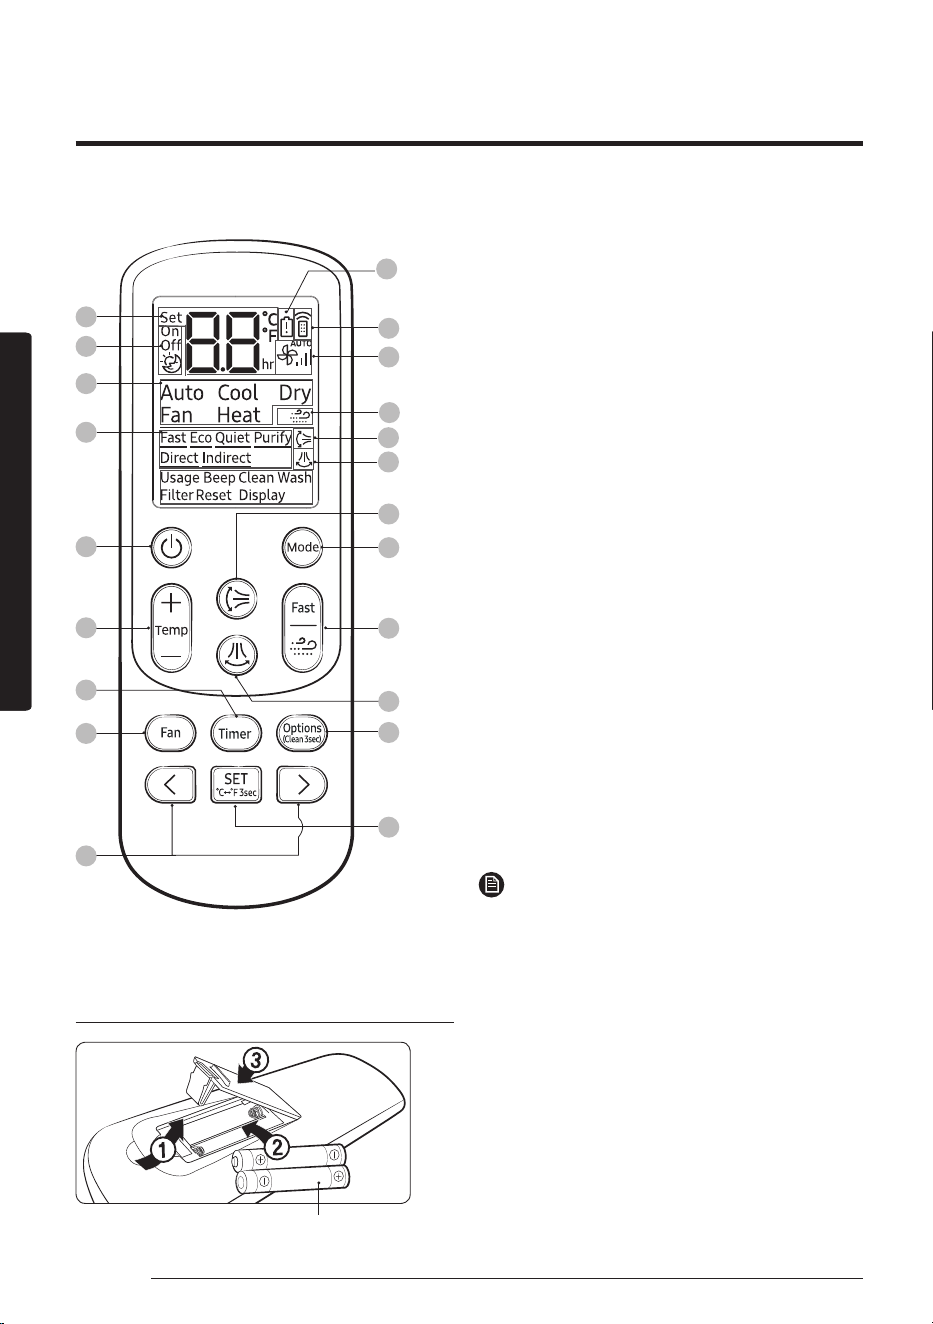
Remote Control Overview
08
09
10
07
01
05
06
16
17
18
20
21
02
03
04
11
12
13
19
14
15
01 Set temperature indicator
02 Timer option indicator
03 Operation mode indicator
04 Options indicator
05 Low battery indicator
06 Transmit indicator
07 Fan speed indicator
08 WindFree indicator
09 Vertical air swing indicator
10 Horizontal air swing indicator
11 Power button
12 Temperature button
13 Timer button
14 Fan speed button
15 Direction button/Selection button
16 Vertical air swing button
17 Mode button
18 Fast/WindFree button
19 Horizontal air swing button
20 Options/Clean button
21 SET button/Temperature type button(℃
↔
℉)
NOTE
• Although Heat(AR**BYEA***), Purify, Direct and
Indirect appear on the remote control display,
they are not available on this model.
Replacing the remote control batteries
Two 1.5V AAA batteries
Most operating instructions in this manual require using the remote control.
15
English
At a GlanceAt a Glance
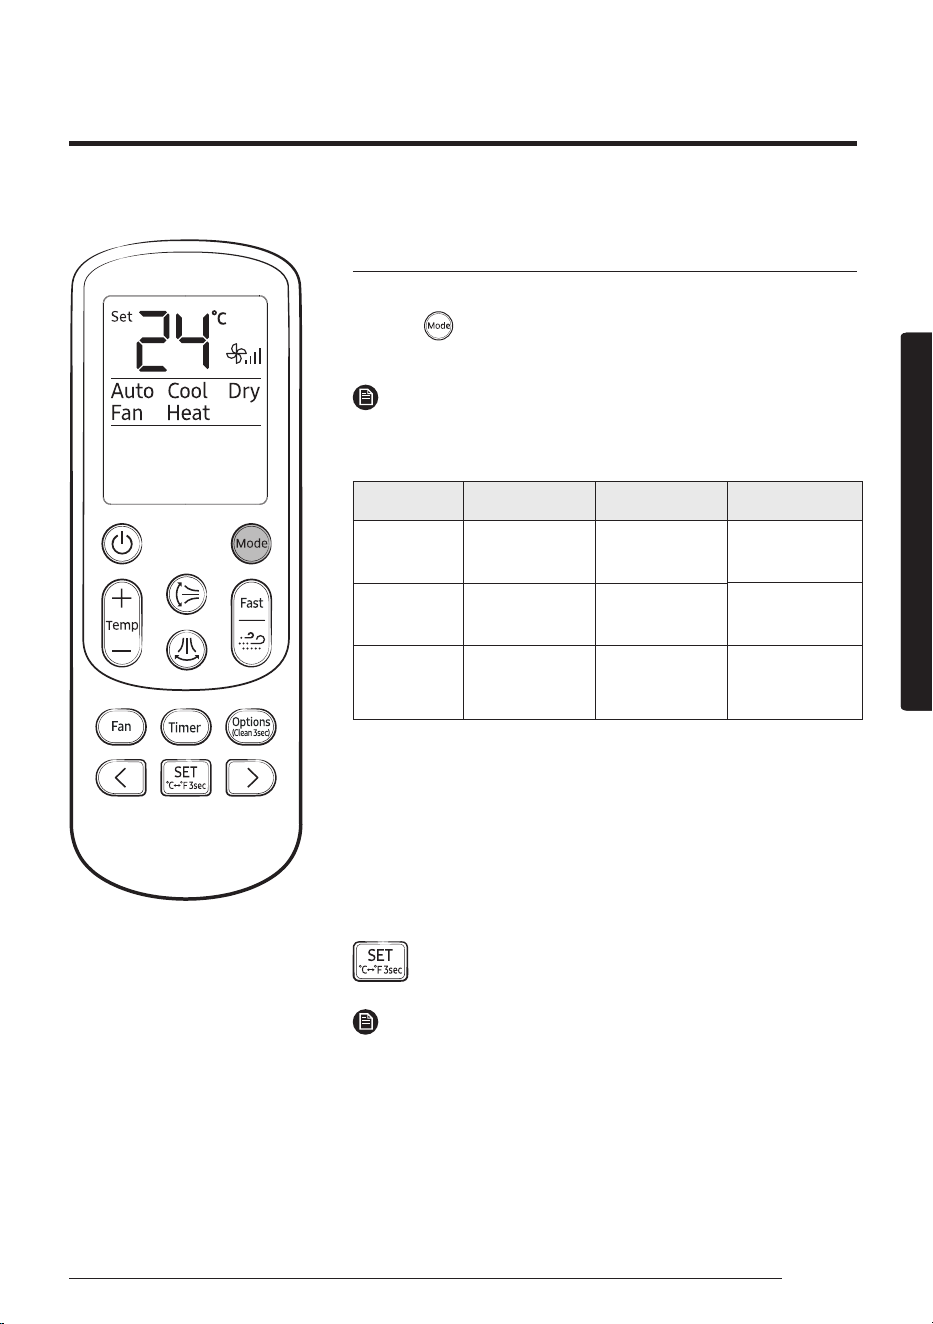
Selecting an operation mode
To change the current mode between Auto, Cool, Dry, Fan, and Heat,
press the (Mode) button.
You can use AI Auto mode after Wi-Fi is connected.
NOTE
You can use the Cool, Dry, and Heat modes in the following operation
range.
Mode Cool Dry Heat
Indoor
temperature
16 °C to 32 °C 18 °C to 32 °C 27 °C or less
Outdoor
temperature
-10 °C to 46 °C -10 °C to 46 °C −15 ℃ to 24 ℃¹⁾
Indoor
humidity
Relative humidity
of 80% or less²⁾
_ _
¹⁾ If the outdoor temperature drops to −15℃, the heating capacity
may decrease by as much as 60-70 %.
²⁾ If the air conditioner operates in Cool mode in a high-humidity
environment for an extended period of time, condensation may
occur.
You can switch between Celsius and Fahrenheit indications on the
remote control.
▶ Press and hold for 3 or more seconds.
NOTE
• The temperature indications on the indoor unit are not switched.
• This function is canceled when the remote control batteries are
replaced. In this case, run this function again.
You can use the air conditioner easily by selecting a mode and then by controlling the temperature, fan
speed, and air direction.
Remote Control Operation

16
Remote Control Operation
English
At a GlanceAt a Glance
To set the temperature
To control the temperature in each mode, press the (Temperature)
button:
Mode Temperature control
AI Auto/Auto/
Cool/Heat
Adjust by 1 ℃ from 16 ℃ to 30 ℃.
Dry Adjust by 1 ℃ from 18 ℃ to 30 ℃.
Fan No temperature control.
To adjust the fan speed
Select from the following fan speeds in each mode:
Mode Available fan speeds
AI Auto/Auto/
Dry
(Auto)
Cool/Fan/Heat
(Auto), (Low), (Med), (High),
(Turbo)
To adjust the airflow direction
Keep the airflow in a constant direction by stopping the movements
of the vertical and horizontal airflow blades.
In operation ▶
or
NOTE
• If you adjust the vertical airflow blade manually, it may not close
completely when you turn off the air conditioner.
• Always use the remote control to adjust the airflow blades. Do
not move the blades by hand. They may not operate normally.
• You cannot control the vertical airflow direction in Cool mode
when the good'sleep function is on.
17
English
Smart FeaturesSmart Features
Power Smart Features
WindFree Cooling function
Use the WindFree Cooling function to enjoy a mild breeze coming
through fine holes in the WindFree panel instead of air coming
directly through the airflow blades.
In Cool/Dry/Fan mode ▶
NOTE
• To cancel this function, press the (WindFree) button again.
• When the WindFree Cooling function is on, the air conditioner
automatically controls the temperature and fan speed to keep
your room mild and comfortable.
• When the WindFree Cooling function is canceled, the air
conditioner returns to the original fan speed and air comes out of
the airflow blades.
• In Cool mode, the recommended set temperature during the
WindFree Cooling operation is 24℃ to 26℃.
• You can use the WindFree Cooling function in Cool, Dry, or Fan
mode.
• You cannot select the Quiet function during the WindFree Cooling
operation.
• Selecting the WindFree Cooling function cancels the Fast, Eco
,
and
airflow
direction ( , ) functions.
Smart Features
18
Power Smart Features
English
Smart FeaturesSmart Features
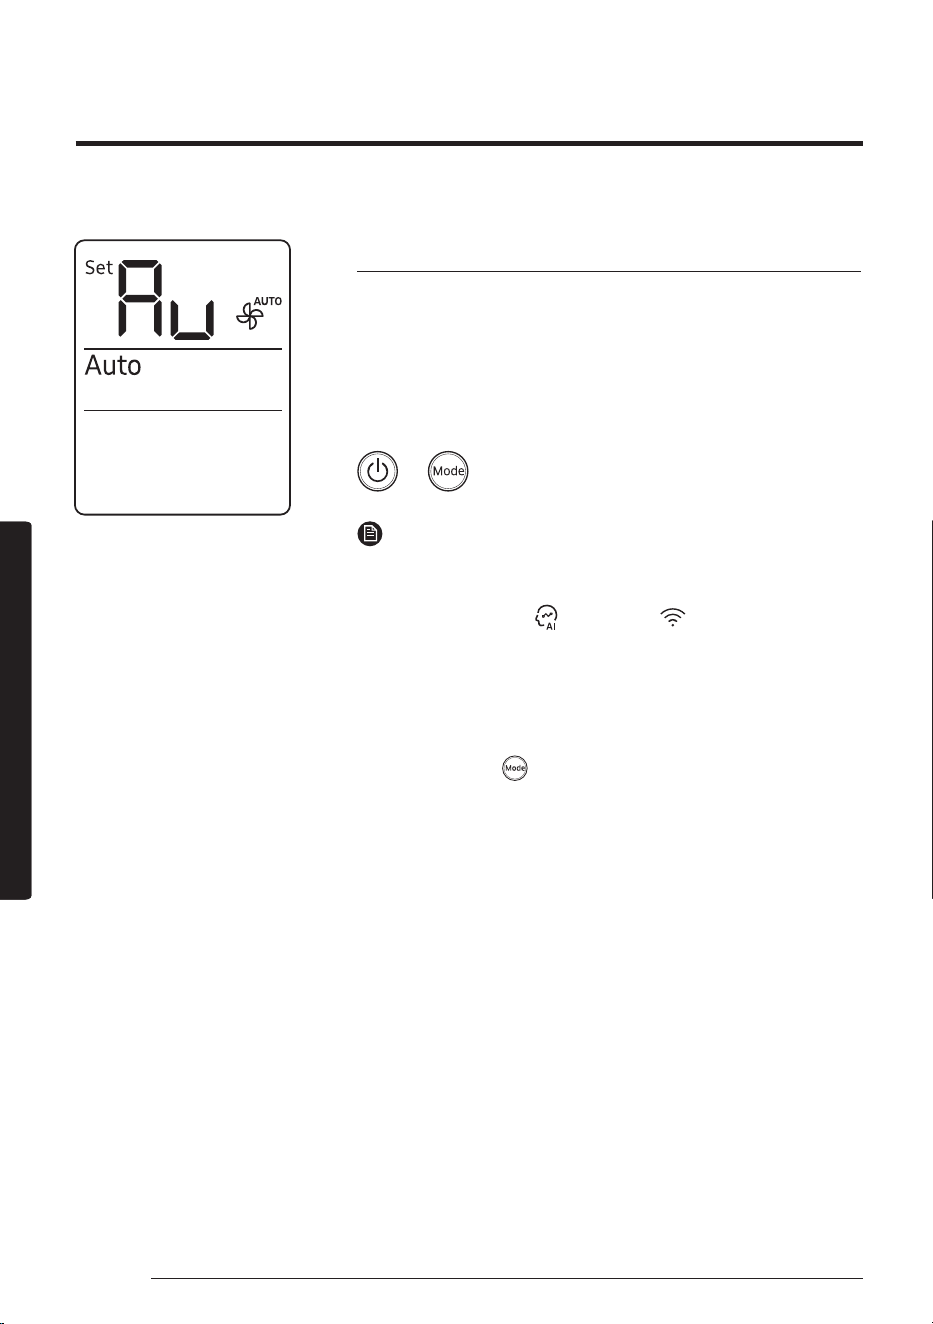
AI Auto mode
Use AI Auto mode to automatically operate any of Cool, Dry, Heat,
and WindFree Cooling modes depending on the learned user
patterns gathered from an external server via Wi-Fi module. The
favourite temperature and operation mode are also set based on
the current temperatures (indoor/outdoor) and the gathered user
patterns.
▶ ▶ Select Auto.
NOTE
• You can use this mode after Wi-Fi is connected. Otherwise, Auto
mode is activated.
• In AI Auto mode, the
(AI Auto) and (Wi-Fi) indicators
appears on the display of the indoor unit.
• If the gathered user patterns are not sufficient, the set
temperature is set to 24℃.
• The set temperature is controlled within the range of 22℃ to
26℃ in AI Auto mode. You can also change it manually.
• When you press
(Mode) in AI Auto mode, the mode is
cancelled.
• If you change the set temperature in AI Auto mode, it
automatically changes back to the AI comfort temperature after
1 hour.
19
English
Smart FeaturesSmart Features
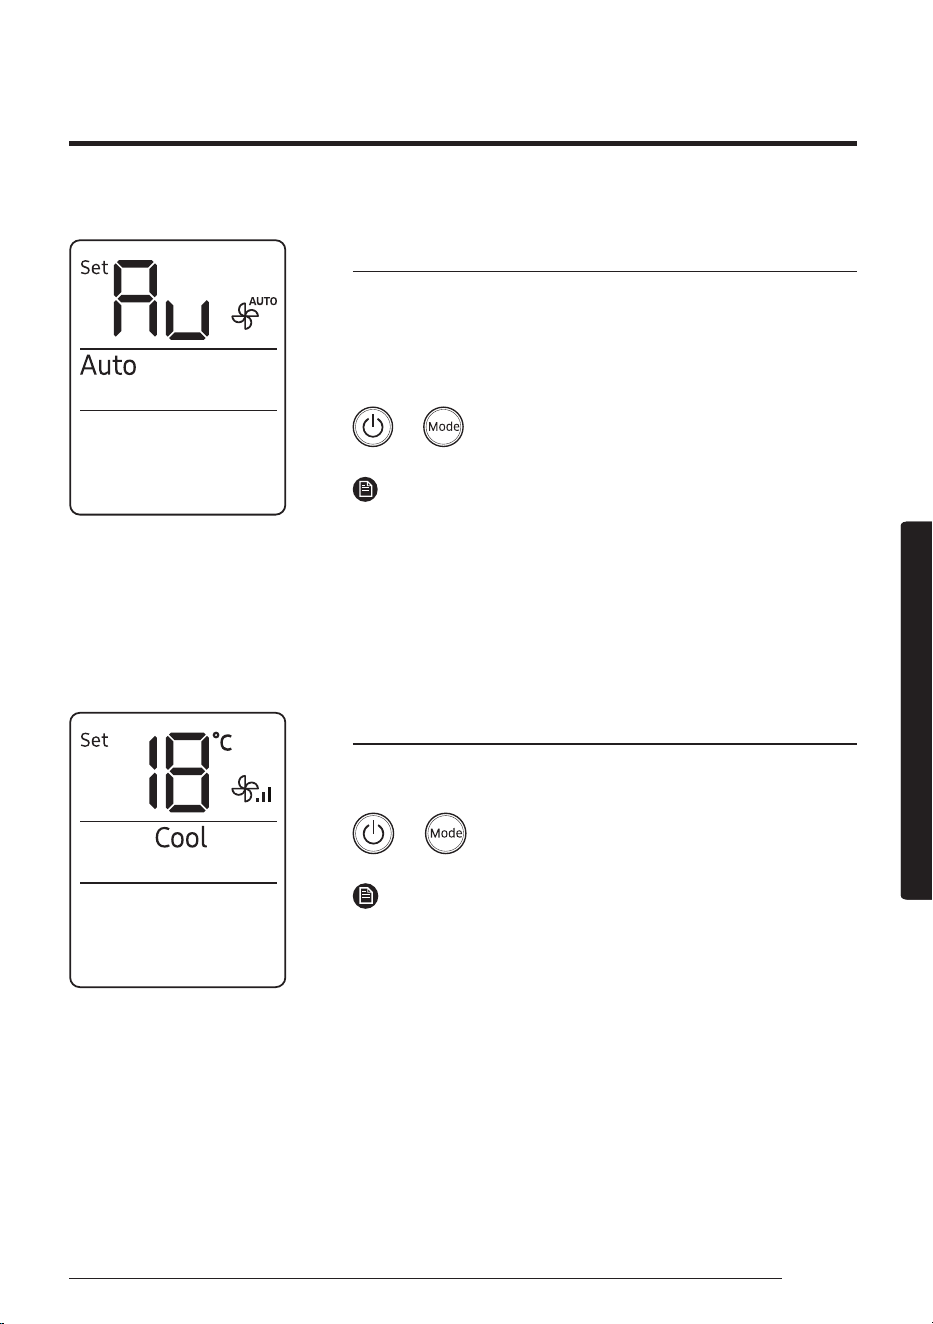
Auto mode
Use Auto mode to perform the powerful cooling or heating function
to automatically reach the desired temperature. When the difference
between the room temperature and the set temperature decreases,
the air conditioner controls the fan speed and airflow direction.
▶ ▶ Select Auto.
NOTE
• If Wi-Fi cannot be connected or the Wi-Fi function is not
supported, this Auto mode is automatically activated instead of
AI Auto mode.
• When the room temperature is higher than the set temperature,
the air conditioner automatically produces cool air.
• When the room temperature is lower than the set temperature,
the air conditioner automatically produces warm air.
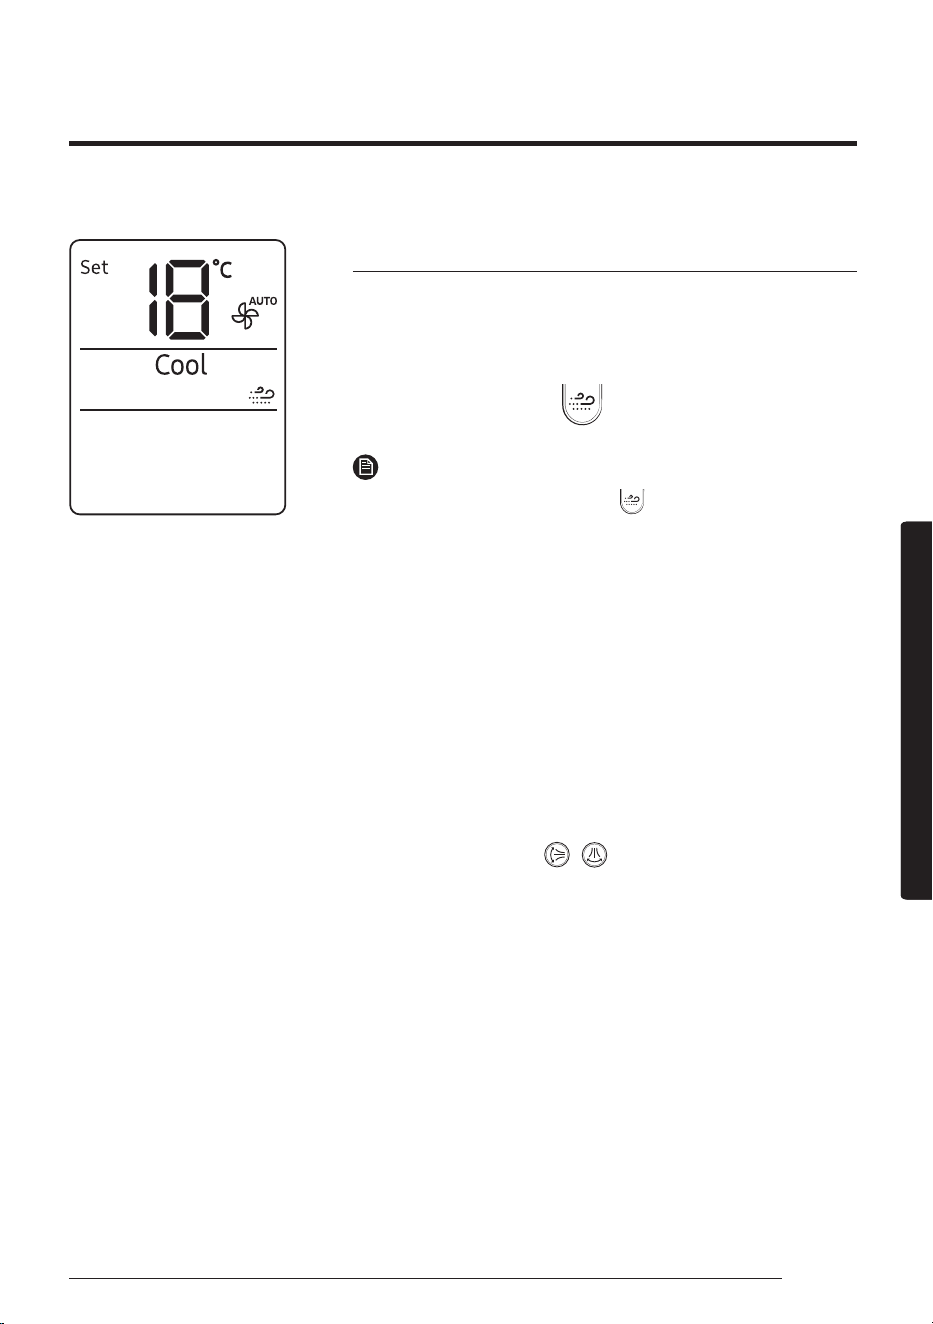
Cool mode
Use Cool mode to stay cool in hot weather.
▶ ▶ Select Cool.
NOTE
• For comfort, keep the temperature difference between the indoor
and outdoor air within 5℃.
• After selecting Cool mode, select the desired function,
temperature, and fan speed.
‒ To cool more quickly, select a lower temperature and a faster
fan speed.
‒ To save energy, select a higher temperature and a slower fan
speed.
‒ As the room temperature nears the set temperature, the
compressor motor will slow down to save energy.
20
Power Smart Features
English
Smart FeaturesSmart Features
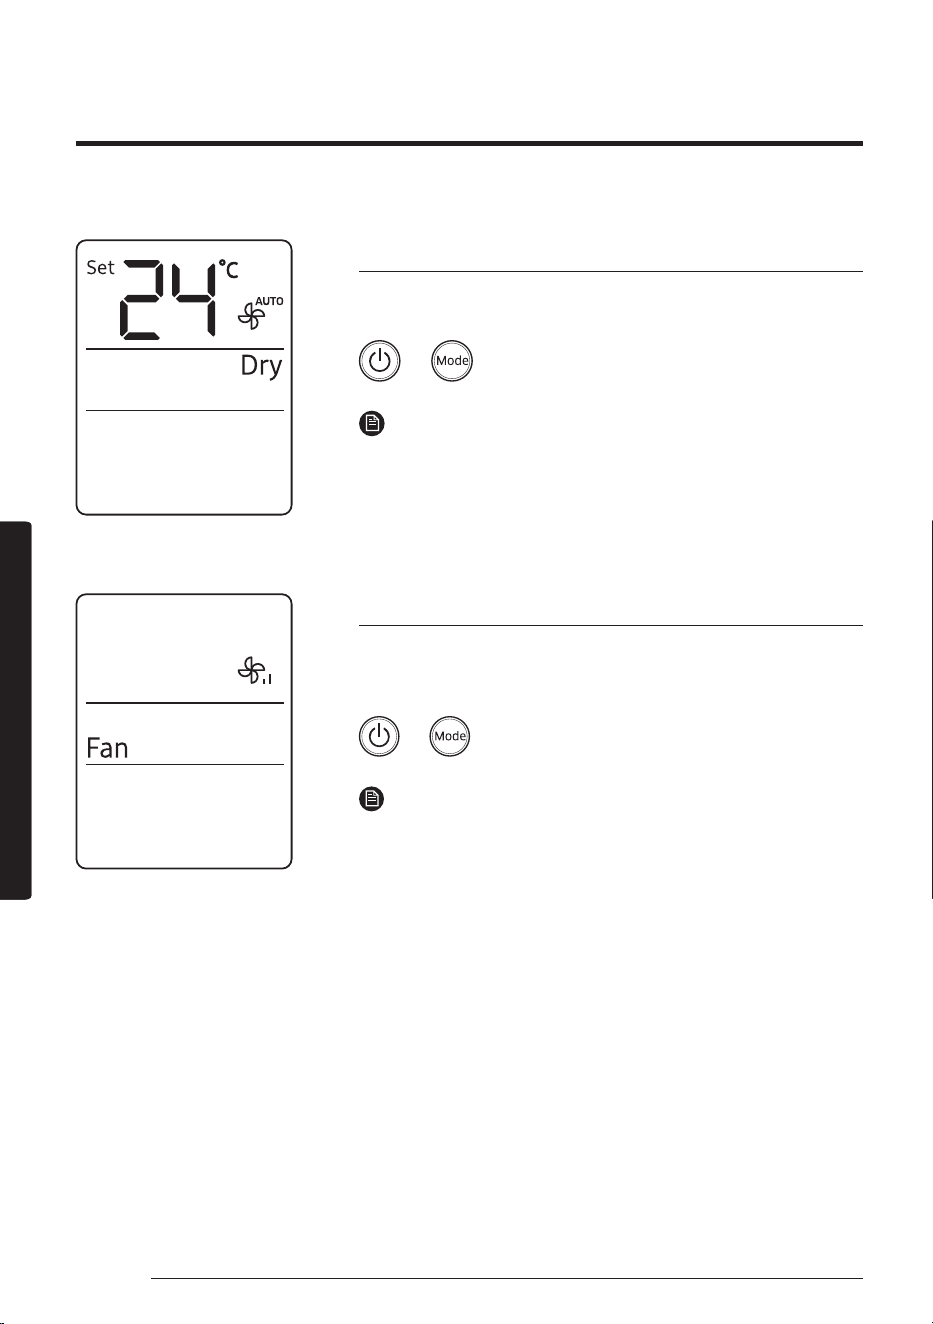
Dry mode
Use Dry mode in rainy or humid weather.
▶ ▶ Select Dry.
NOTE
• The proper set temperature range for dehumidifying operation is
24 to 26 ℃. If you feel that the current humidity seems high, use
a lower set temperature.
• You cannot use Dry mode for heating. Dry mode is designed to
produce a cooling side-effect.
Fan mode
Use Fan mode to run the air conditioner like a floor fan, providing a
breeze without heating or cooling.
▶ ▶ Select Fan.
NOTE
• If the air conditioner will not be used for an extended period
of time, run it in Fan mode for 3 to 4 hours to dry the internal
components.
• The outdoor unit does not operate in Fan mode. This is normal
and not a fault with the air conditioner.
21
English
Smart FeaturesSmart Features
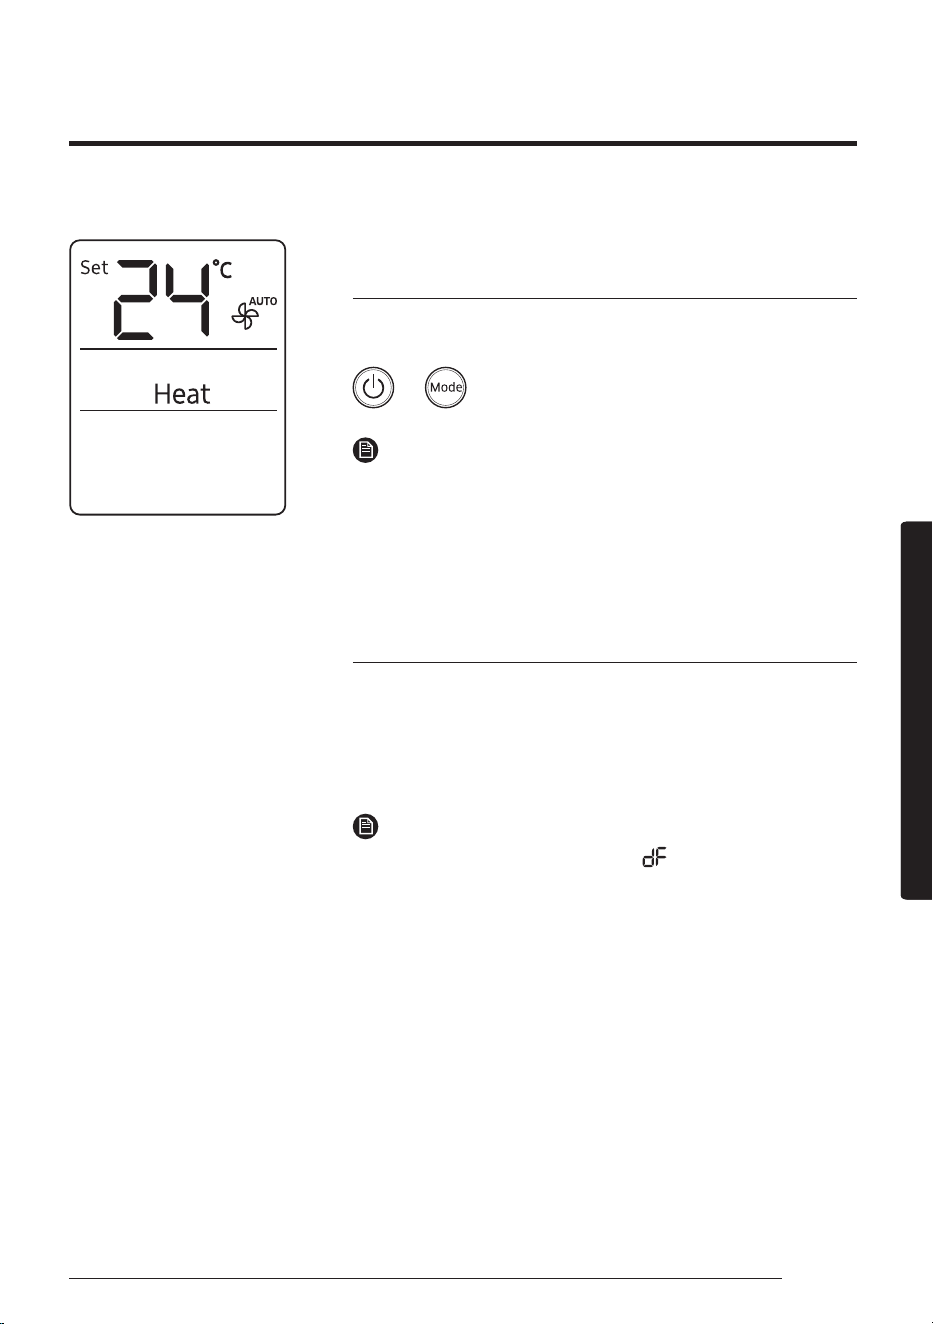
Heat mode (For AR**BXEA**** / AR**BXFC****
models)
Use Heat mode to stay warm.
▶ ▶ Select Heat.
NOTE
• While the air conditioner warms up, the fan may not operate for
about 3 to 5 minutes at the beginning to prevent cold blasts.
• If the air conditioner heats insufficiently, use an additional
heating appliance in combination with the air conditioner.
Automatic defrost (For AR**BXEA**** /
AR**BXFC**** models)
When the outdoor temperature is low and the humidity is high, frost
may develop on the outdoor heat exchanger, which may decrease
heating efficiency. When these conditions are met while Heat mode
is on, the air conditioner runs the Defrost function for 5 to 12 minutes
to remove frost from the outdoor heat exchanger.
NOTE
• When the Defrost function is on, the (Defrost) indicator
appears
on
the indoor unit display, steam is produced on the
outdoor unit, the air conditioner moves the airflow blades to the
lowest position to prevent cold air from coming out from the
indoor unit.
• You cannot select other functions with the remote control until
the Defrost function is finished.

22
Variety Smart Features
English
Smart FeaturesSmart Features
Variety Smart Features
Fast function
Use the Fast function to quickly cool or heat your room. This function
is the most powerful cooling and heating function provided by the
air conditioner. You can select this function in Cool or Heat mode.
In Cool or Heat mode ▶
NOTE
• You can change the airflow direction, but you cannot change the
set temperature and the fan speed.
• When you select the Fast function in Heat mode, you may not be
able to increase the fan speed for 3 to 5 minutes while the unit
heats up.
• Selecting the Fast function cancels the WindFree Cooling, Eco,
good'sleep, and Quiet functions.
• You can also start the Fast function from the Options menu:
In Cool or Heat mode ▶
▶ ▶
Select Fast. ▶
23
English
Smart FeaturesSmart Features
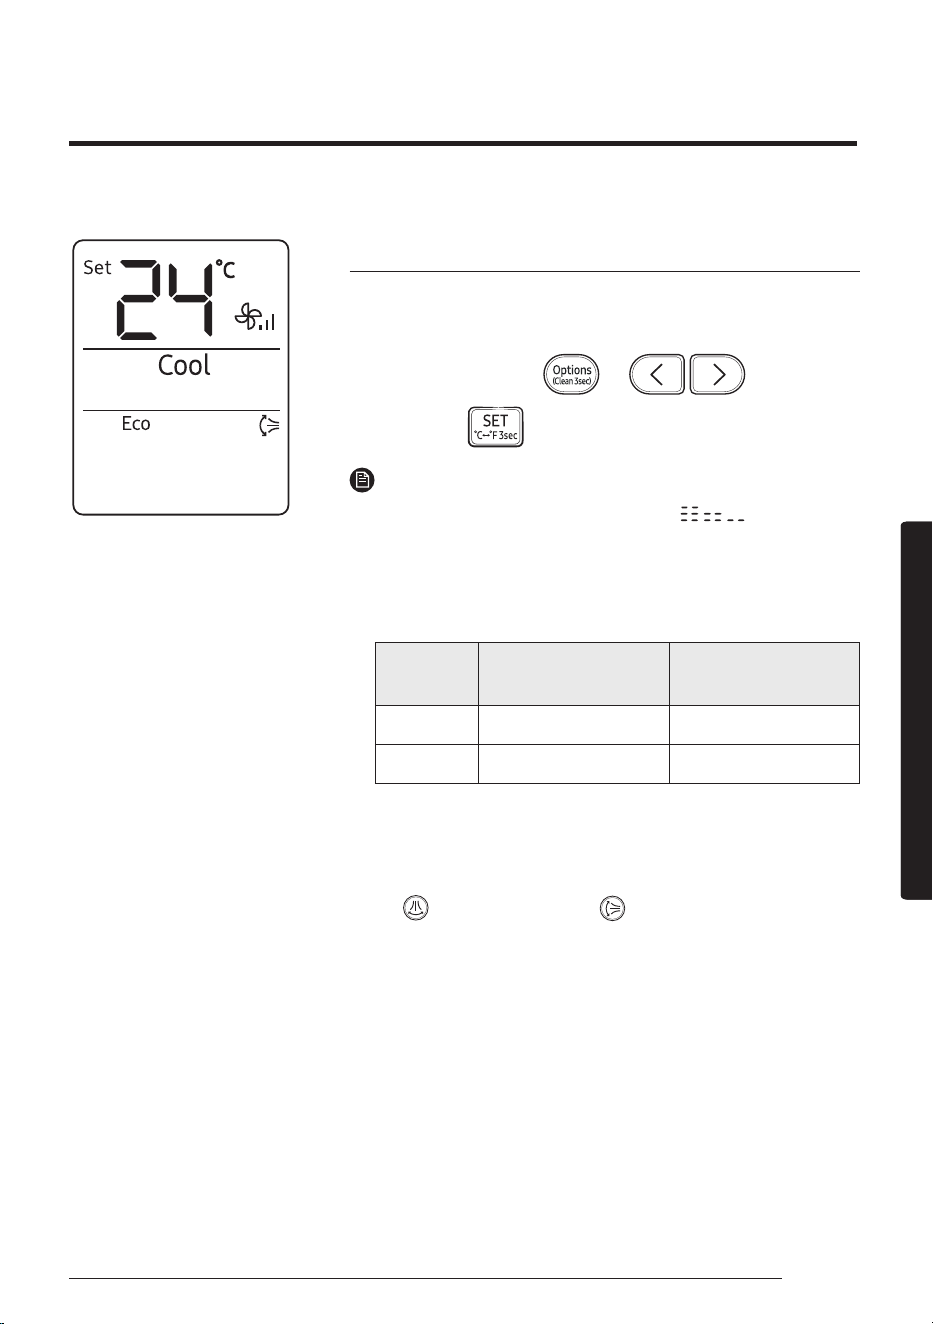
Eco function
Use the Eco function to reduce electricity consumption while staying
cool or warm. You can select this function in Cool or Heat mode.
In Cool or Heat mode ▶
▶ ▶
Select Eco. ▶
NOTE
• When the Eco function starts, the pattern appears on the
remote control for a few seconds and vertical air swing begins.
• You can change the set temperature, airflow direction, and fan
speed.
• The allowed set temperatures while the Eco function is on are:
Mode
Minumum set
temperature
Maximum set
temperature
Cool 24 ℃ 30 ℃
Heat 16 ℃ 30 ℃
• If you change the set temperature to be outside the allowed range
for the current mode, the set temperature is automatically reset to
be within the range.
• When you turn off the Eco function, the air swing continues. Use
the
(Vertical air swing) or (Horizontal air swing) button
to turn it off.
• Selecting the Eco function cancels the WindFree Cooling,
good'sleep, Fast, and Quiet functions.
24
Variety Smart Features
English
Smart FeaturesSmart Features
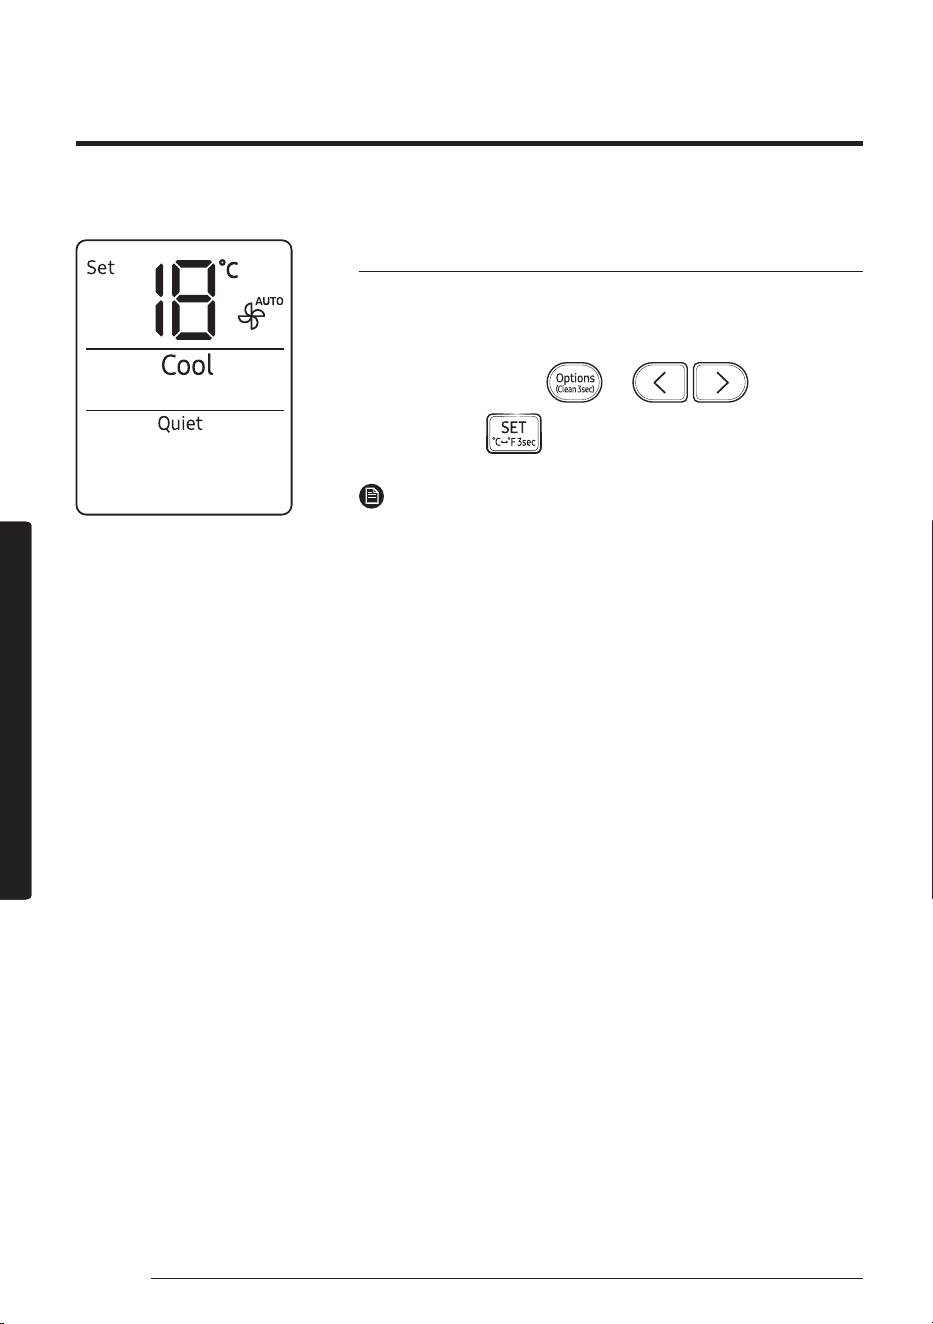
Quiet function
Use the Quiet function to reduce the unit’s operating noise. You can
select this function in Cool or Heat mode.
In Cool or Heat mode ▶
▶ ▶
Select Quiet. ▶
NOTE
• You can change the set temperature and the airflow direction,
but you cannot change the fan speed.
• Selecting the Quiet function cancels the WindFree Cooling, Eco,
good'sleep, and Fast functions.
25
English
Smart FeaturesSmart Features
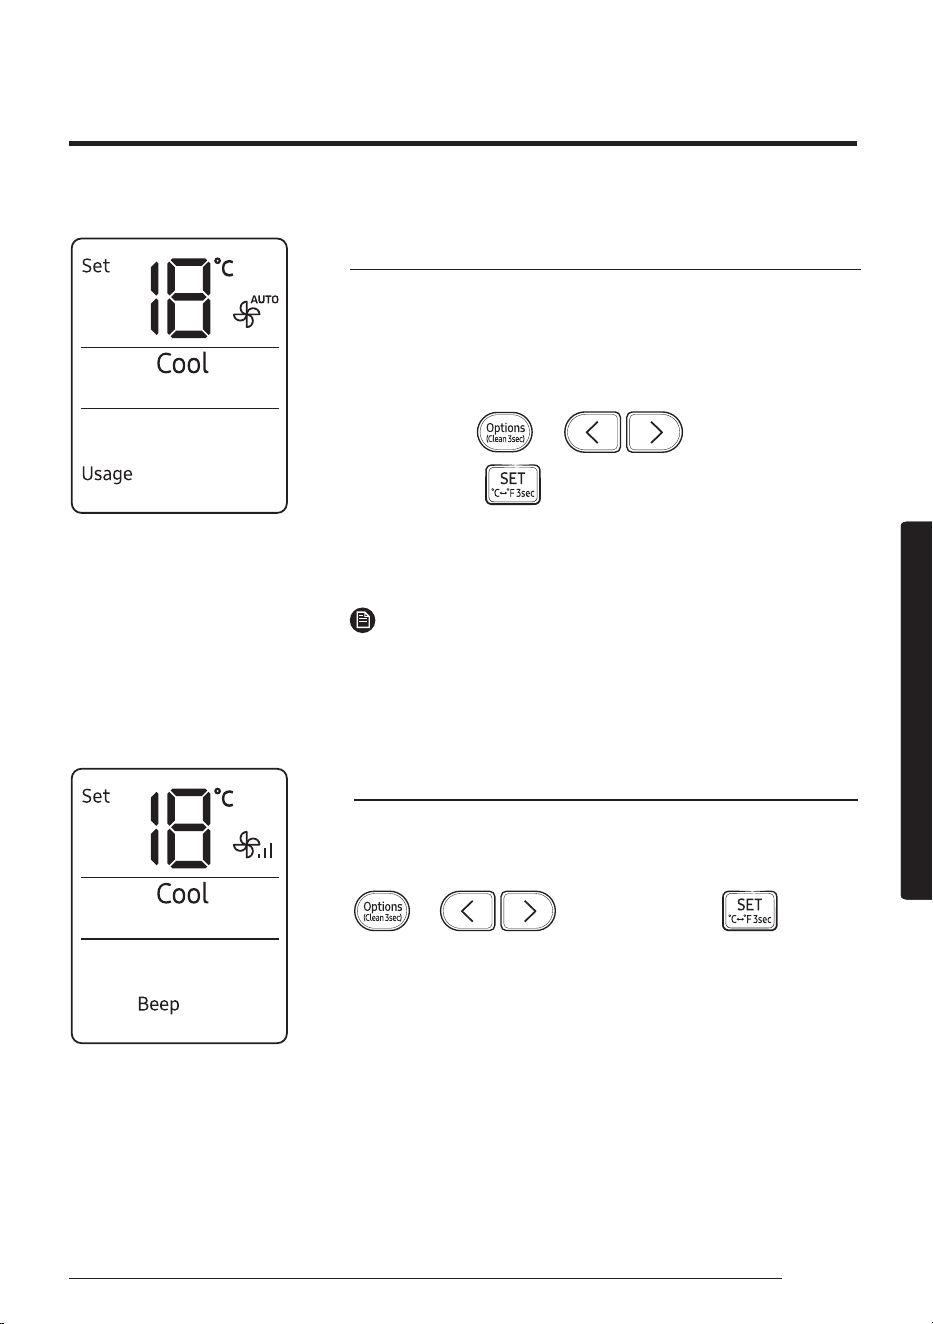
Electricity consumption check
Use the Usage function to check the amount of electricity consumed
by using the air conditioner. The amount consumed is displayed on
the indoor unit display for a few seconds, and the set temperature
appears.
In operation ▶
▶ ▶
Select Usage. ▶
The value range displayed is between 0.1 kWh and 99 kWh. Electricity
consumption is calculated from the moment the air conditioner turns
on. The value is reset when the air conditioner turns off.
NOTE
• The usage shown on the indoor unit display may slightly differ
from the amount of electricity actually consumed.
• You can view electricity consumption only when the air conditioner
is operating.
Beep function
Use the Beep function to turn on or off the beep that sounds when
you press a button on the remote control.
▶ ▶ Select Beep. ▶
26
Variety Smart Features
English
Smart FeaturesSmart Features
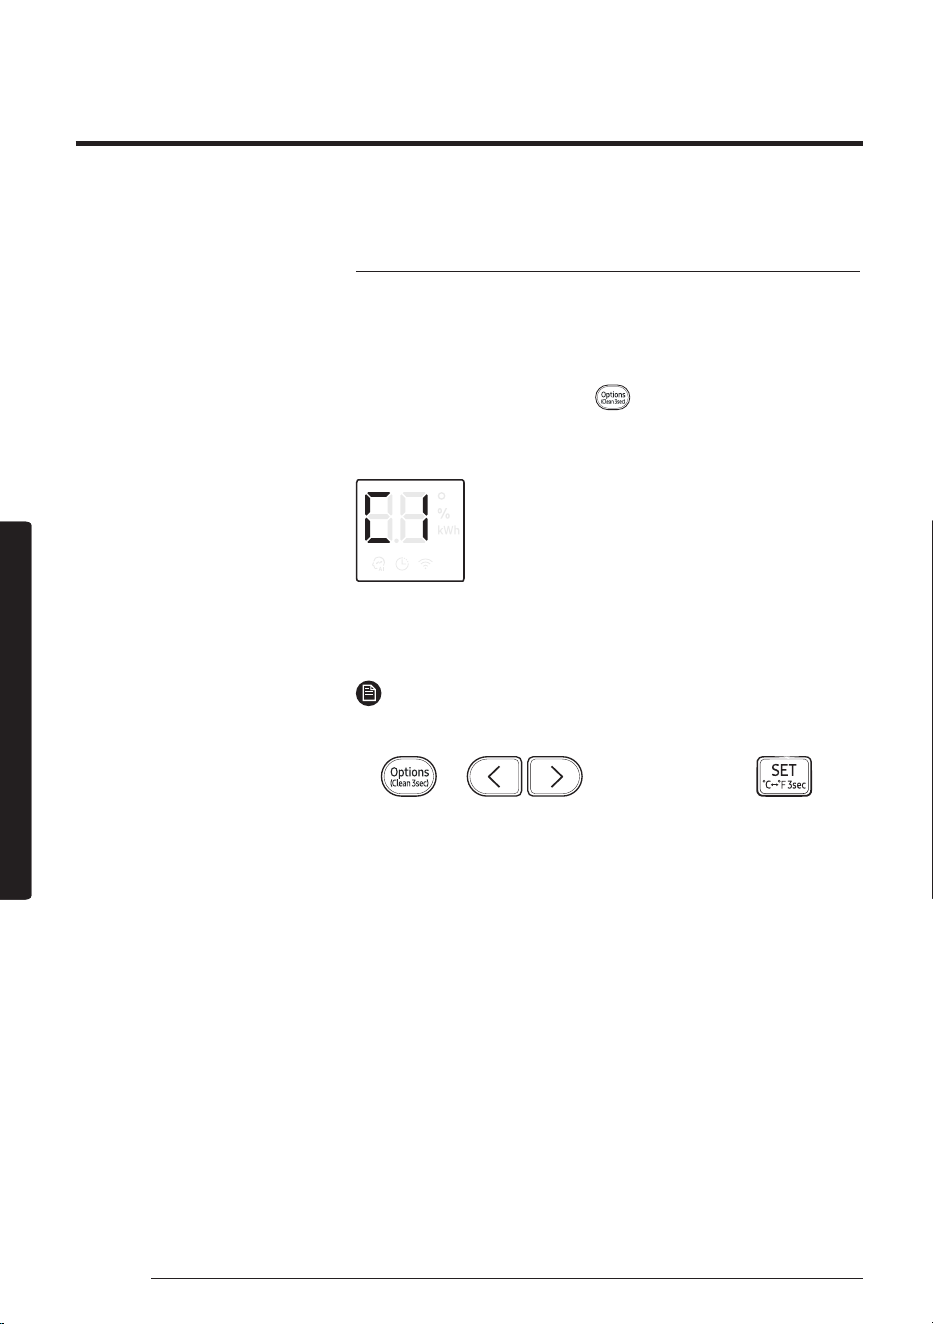
Auto clean function
Use the Auto clean function if the indoor unit produces odors.
Activating Auto clean
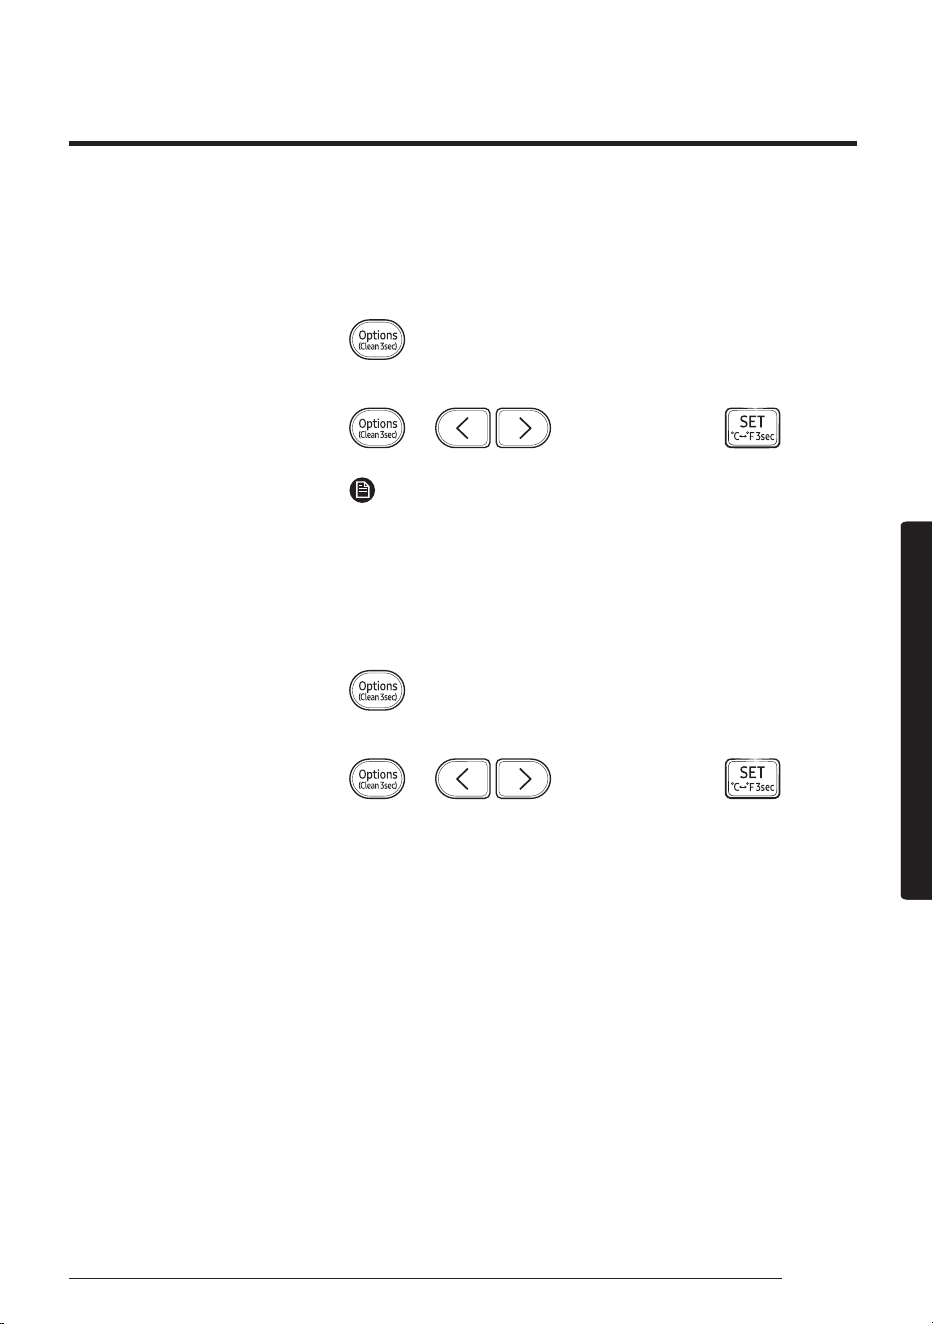
To activate Auto clean, press the (Options) button for at least 3
seconds.
The indoor unit display shows:
If the air conditioner is off, Auto clean starts immediately. If the
air conditioner is running, Auto clean starts as soon as the air
conditioner turns off.
NOTE
• You can also activate Auto clean from the Options menu:
▶ ▶ Select Clean. ▶
• Once Auto clean is selected, it is always activated whenever the
air conditioner turns off.
• Auto clean runs for 10 to up to 30 minutes depending on internal
dry conditions. The indoor unit display shows the cleaning
progress from 1% to 99%.
• If you start another function while Auto clean is progressing, Auto
clean pauses and will resume when the other function stops.
• When Auto clean completes, the air conditioner turns off.
• Auto clean does not run after Fan and Heat mode.
27
English
Smart FeaturesSmart Features
Canceling Auto clean
To cancel Auto clean while it is running, follow the procedure below:
▶ Press and hold for 3 or more seconds.
or
▶ ▶ Select Clean. ▶
NOTE
• Canceling Auto clean does not deactivate it.
Deactivating Auto clean
To deactivate Auto clean, follow the procedure below while the air
conditioner is in operation or turned off:
▶ Press and hold for 3 or more seconds.
or
▶ ▶ Select Clean. ▶
28
Variety Smart Features
English
Smart FeaturesSmart Features
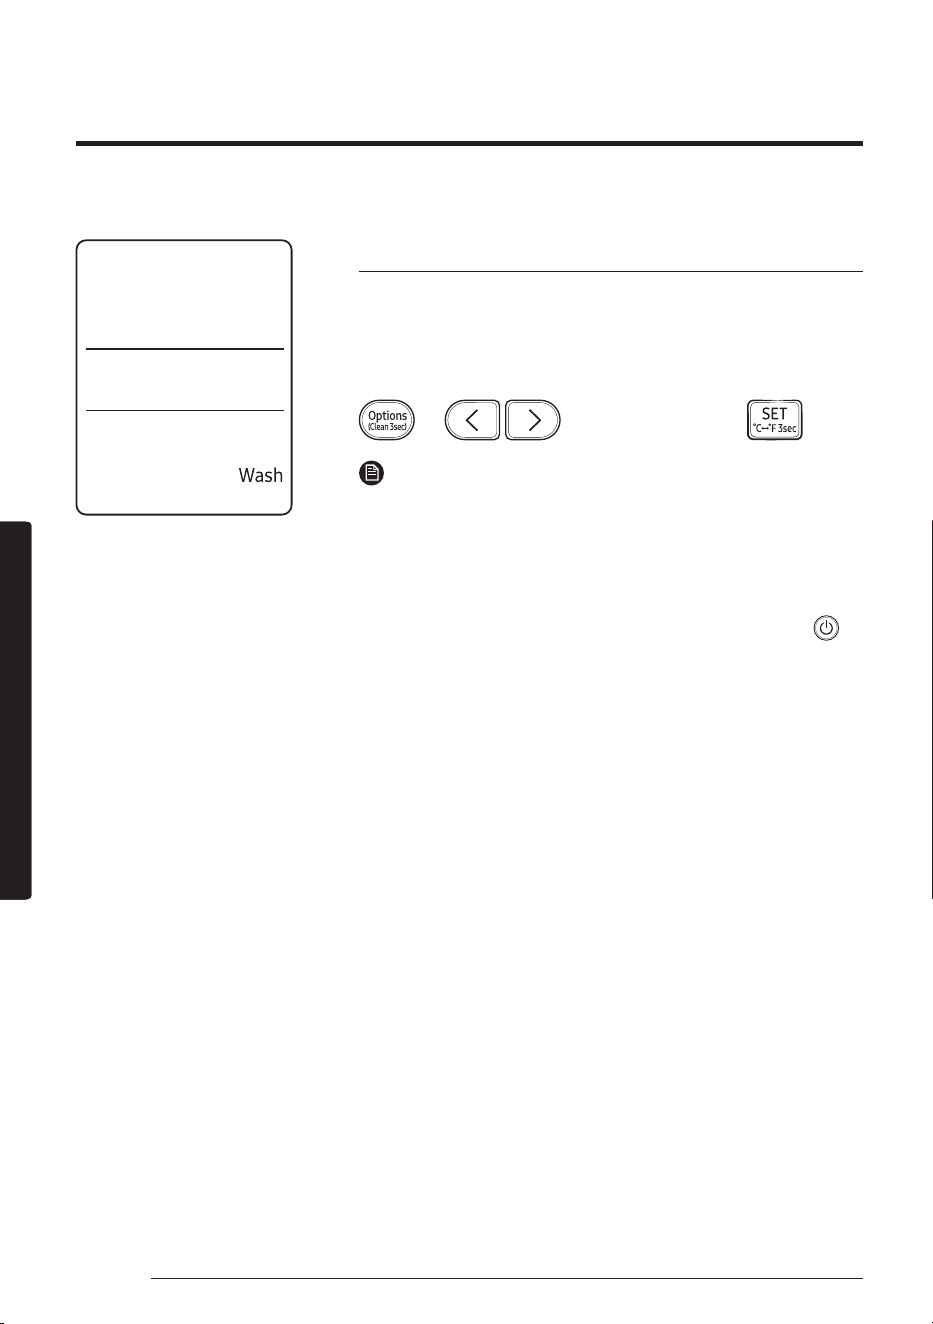
Freeze Wash function
Use the Freeze Wash function to wash away microorganisms or dust
on the surface of the indoor heat exchanger by freezing and thawing
operation.
In operation stop condition,
▶ ▶ Select Wash. ▶
NOTE
• The Freeze Wash function runs from 30 to 80 minutes (running
the outdoor unit) depending on either temperature or humidity
in the room, through the following cycle: freezing → defrosting →
drying of the indoor unit heat exchanger.
• The indoor unit display shows the cleaning progress (1-99 %).
• To use another function while in Wash operation, press the
(Power) button on the remote control to stop operation.
• When the room temperature is low or its humidity is high, the
Freeze Wash function may not work.
• Before finishing the Freeze Wash function, the airflow blade is
closed and then the drying operation starts.
• During the Freeze Wash cycle, when you hear a creaking noise
from the indoor unit: DON’T worry because it is normal and it can
happen! it will disappear at the end of the cycle.
• The area around the indoor unit may appear blurred or
condensation may form while the Freeze Wash function is in
operation.
• You may see frost or water on the surface of the outdoor unit's
valve while the Freeze Wash function is in operation.
• It is recommended to use the Wash function once every 2 weeks.
Otherwise, dust or dirt that is difficult to be removed may
accumulate in the heat exchanger.
29
English
Smart FeaturesSmart Features
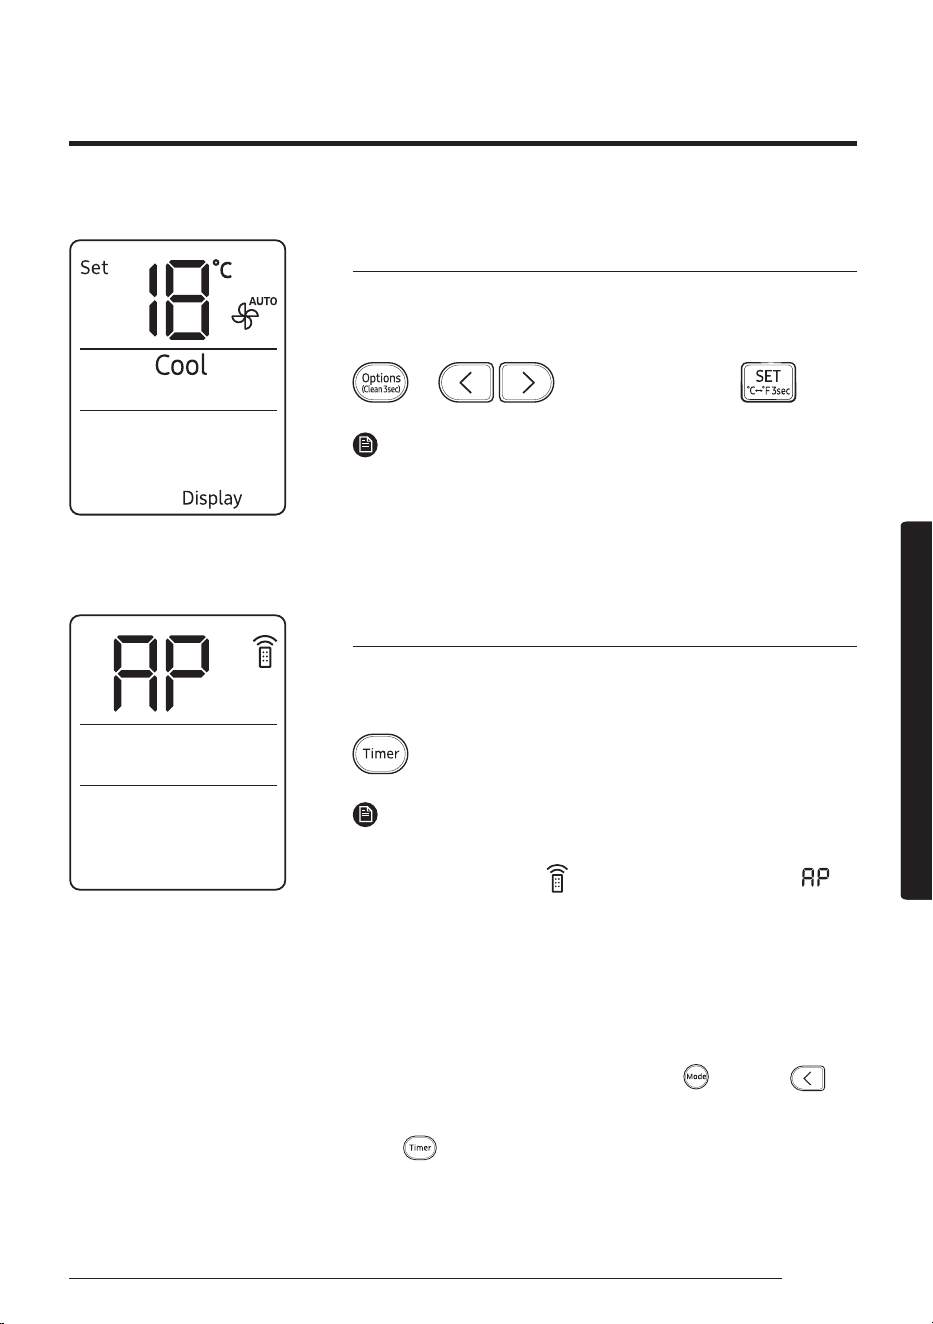
Display lighting function
Use the Display lighting function to turn on or off the lighting of the
indoor unit display.
▶ ▶ Select Display. ▶
NOTE
• If you change the current mode or function when the Display
lighting function is on, the display lighting turns on for 5 seconds
and then turns off again.
• To turn off the Display lighting function, run the method above
again or turn the product off and on.
Wi-Fi function (SmartThings app)
Turn on the Wi-Fi function to pair your smartphone with the air
conditioner.
▶ Press and hold for 5 or more seconds.
NOTE
• When you turn on the Wi-Fi function, your smartphone pairs with
the air conditioner, the
(Transmit) indicator blinks, and
appears on the remote control display for a few seconds.
• Once your smarphone is connected with the air conditioner, you
can control it via the wireless Internet using the SmartThings app
installed on your smartphone.
• For more information about how to prepare your smartphone
for connection and how to control the air conditioner using the
SmartThings app, see "SmartThings app" on page 39.
• To turn on or off the Wi-Fi, press and hold
(Mode) and
for
5 seconds.
– In order to launch the SmartThings app, press and hold the
(Timer) button for 5 seconds, which enables to connect
the air conditioner.
30
Time scheduling
English
Smart FeaturesSmart Features
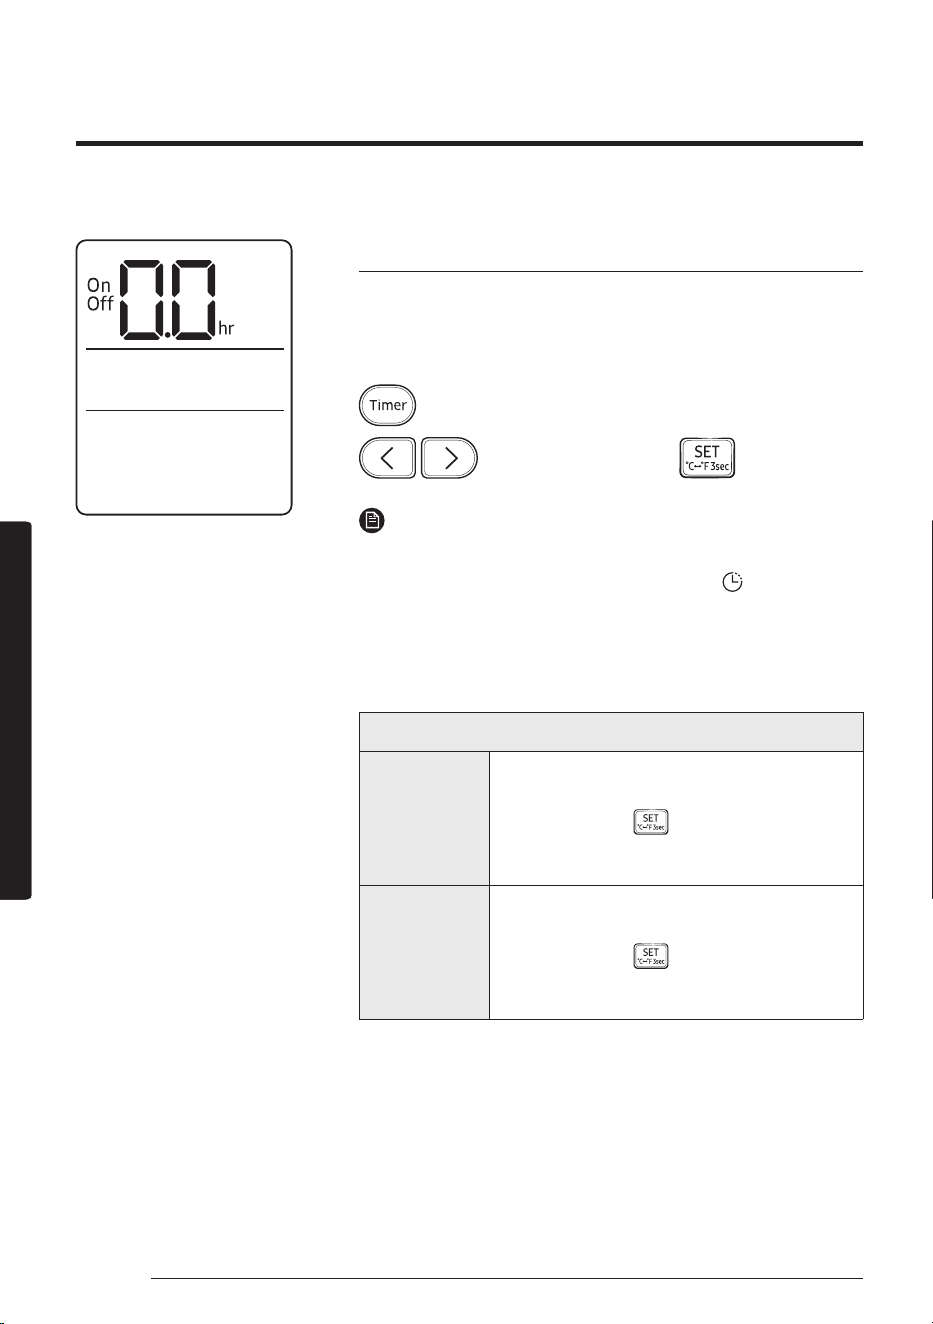
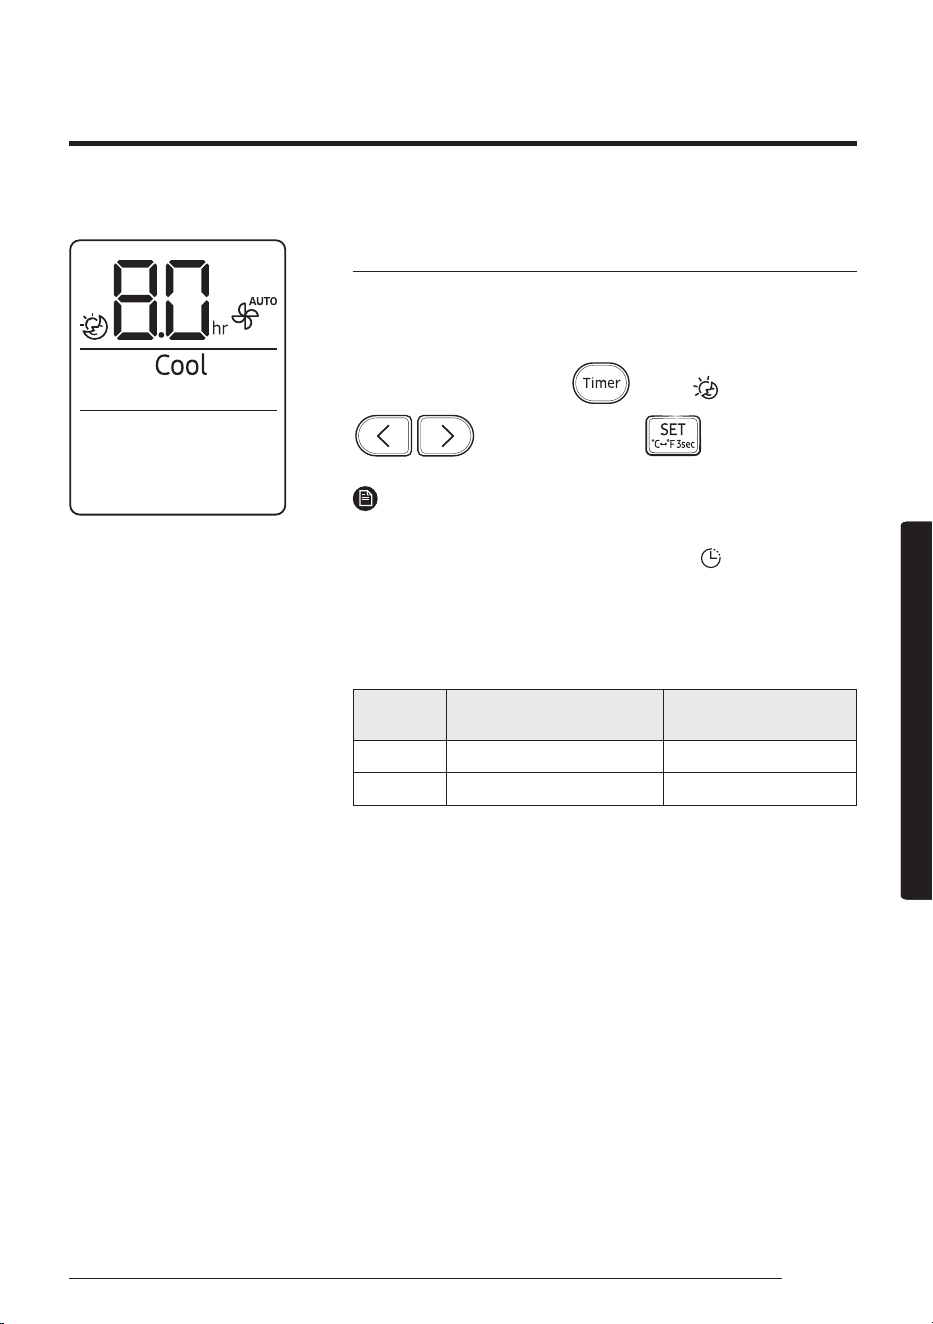
Timed on/ Timed off function
Use the Timed on/off function to turn the air conditioner on or off
after a duration. Scheduling durations before the air conditioner
turns on or off helps use the air conditioner economically.
▶ Select On or Off ▶
(Set the duration.) ▶
NOTE
• To cancel the Timed on/off function, set the duration to 0.0.
• When you start the Timed on/off function, the
(Timer)
indicator appears on the indoor unit display.
• You can set the duration to from 0.5 hours to 24 hours.
• You cannot set the same duration for both Timed on and Timed
off functions.
Combining Timed on and Timed off
When the air
conditioner
is off
Example: Timed on 3 hours, Timed off 5 hours
The air conditioner turns on 3 hours after the last
time you press the
(SET) button to start the
Timed on/off function, remains on for 2 hours,
then turns off again.
When the air
conditioner
is on
Example: Timed on 3 hours, Timed off 1 hour
The air conditioner turns off 1 hour after the last
time you press the
(SET) button to start the
Timed on/off function, remains off for 2 hours,
then turns on again.
Time scheduling
31
English
Smart FeaturesSmart Features
good'sleep function
Use the good'sleep function to save energy while you are sleeping.
You can select this function in Cool or Heat mode.
In Cool or Heat mode ▶
(Select
.
)
▶
(Set the duration.) ▶
NOTE
• To cancel the good'sleep function, set the duration to 0.0.
• When you start the good'sleep function, the
(Timer) indicator
appears on the indoor unit display.
• You can set the duration to from 0.5 hours to 24 hours.
• The recommended set temperatures while the good'sleep
function is on are:
Mode
Recommended set
temperature
Optimal set
temperature
Cool 25 ℃ to 27 ℃ 26 ℃
Heat 21 ℃ to 23 ℃ 22 ℃
• The good'sleep function can operate while the WindFree Cooling
function is on.
• Selecting the good'sleep function cancels Eco, Fast, and Quiet
functions.
32
Schedule
English
Cleaning and MaintenanceCleaning and Maintenance
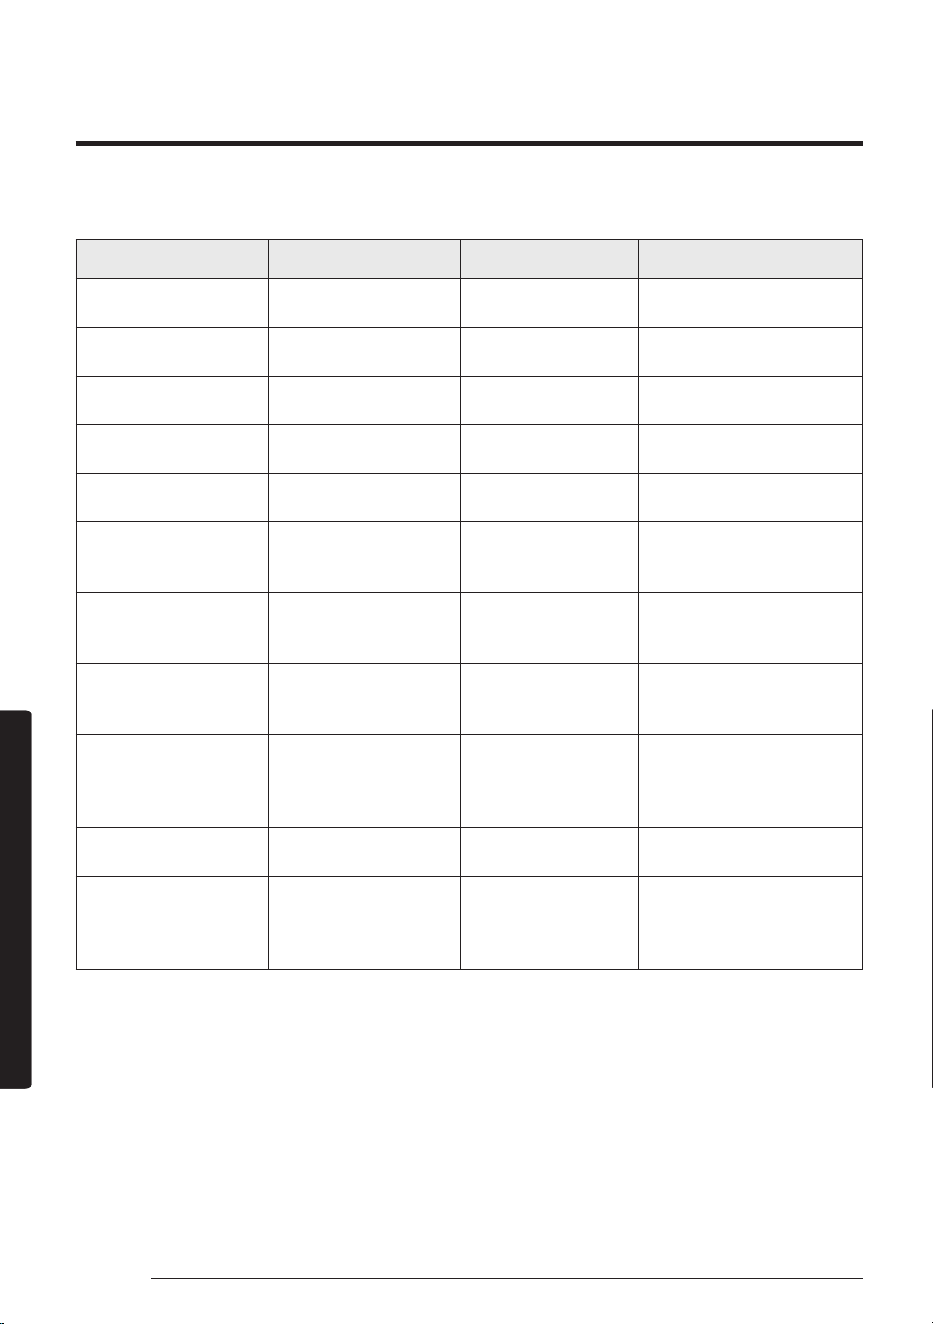
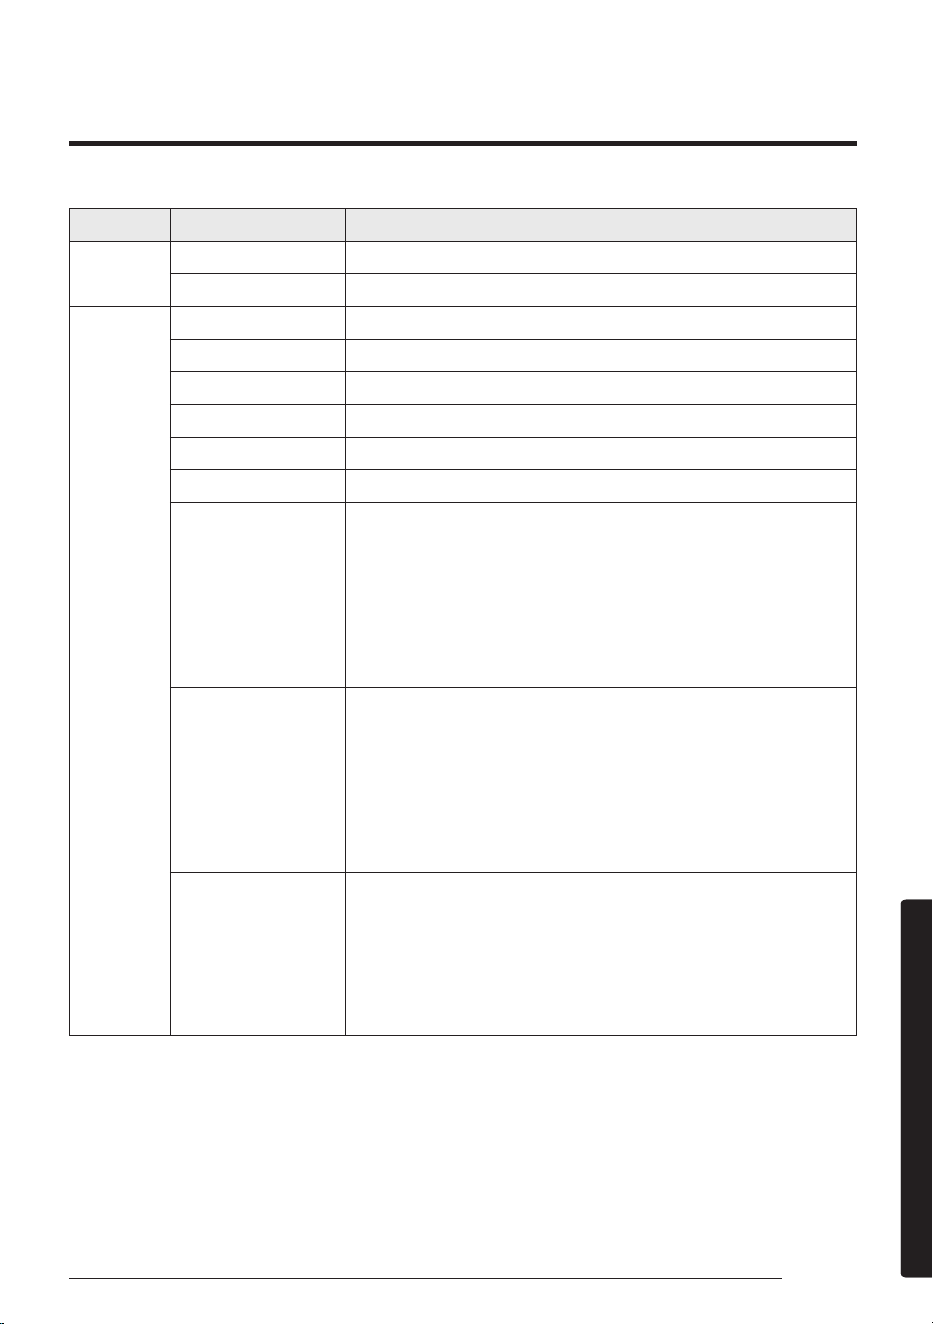
Schedule
Task How often By whom Instruction
Run the Auto clean
function.
As needed Owner
"Auto clean function" on
page 26.
Run the Freeze Wash
function.
Once every two weeks Owner
"Freeze Wash function" on
page 28.
Clean the filter. Once every two weeks Owner
"Cleaning the filter" on page
34.
Replace the Tri-care
filter.
Once every 3 years Owner
"Replacing the Tri-care filter"
on page 35.
Clean the WindFree
panel
At least once a month Owner
"Cleaning the WindFree
panel" on page 36.
Clean the exterior of the
indoor unit.
As needed Owner
"Cleaning the outside of the
indoor unit" on page 33.
Clean the exterior of the
outdoor unit.
At least once a year Owner
"Cleaning the heat
exchanger on the outdoor
unit" on page 33.
Replace the remote
control batteries
As needed Owner
"Replacing the remote
control batteries" on page
14.
Apply corrosion inhibitor
on outdoor unit. (Only if
installed near salt water
such as an ocean)
At least once a year Qualified technician
Contact your service
provider.
Clean inside the indoor
or outdoor unit.
Once a year Qualified technician
Contact your service
provider.
Inspect the units,
electrical connections,
refrigerant tubes, and
protections.
Once a year Qualified technician
Contact your service
provider.
Cleaning and Maintenance
33
English
Cleaning and MaintenanceCleaning and Maintenance
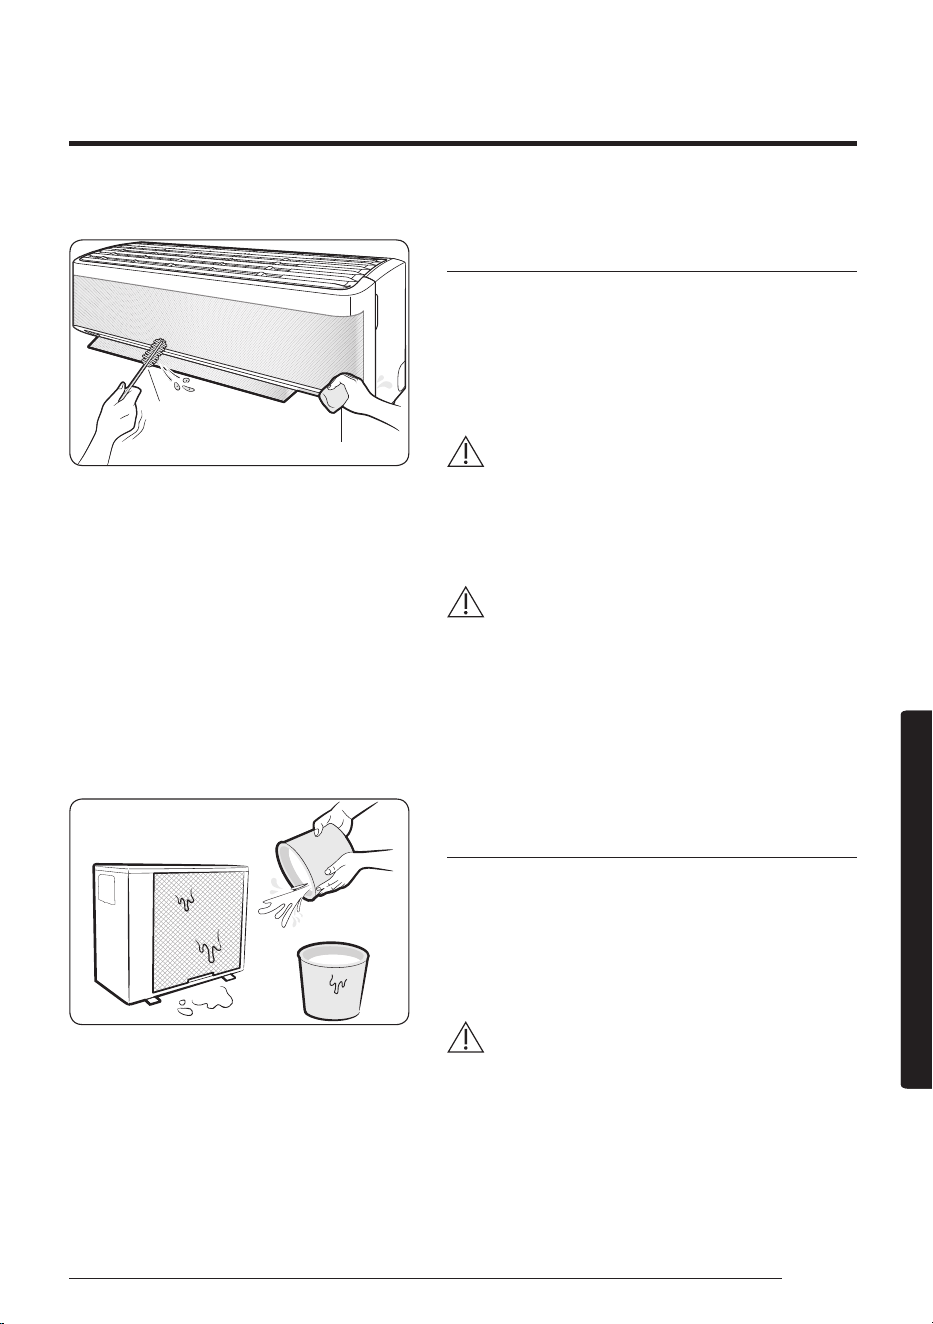
Tepid damp cloth
Soft brush
Cleaning the outside of the indoor unit
1 Turn off the air conditioner and wait until the fan
stops.
2 Disconnect the power supply.
3 Use a soft brush or tepid damp cloth to clean the
exterior.
WARNING
• Do not clean the appliance by spraying water
directly onto it. Water entering the unit may result in
electric shock or fire that could cause death, serious
injury, or property damage:
CAUTION
• Do not use an alkaline detergent to clean the indoor
unit display.
• Do not use sulphuric acid, hydrochloric acid, or
organic solvents such as paint thinner, kerosene,
acetone, benzene, or alcohol to clean the unit
surfaces.
Cleaning the heat exchanger on the
outdoor unit
1 Turn off the air conditioner and wait until the fan
stops.
2 Disconnect the power supply.
3 Spray water on the heat exchanger to remove dust
and other debris.
CAUTION
• Do not use sulphuric acid, hydrochloric acid, or
organic solvents such as paint thinner, kerosene,
acetone, benzene, or alcohol to clean the unit
surfaces.
• If you need to inspect or clean the inside of the
heat exchanger on the outdoor unit, contact a local
service centre for help.
Cleaning
34
Cleaning
English
Cleaning and MaintenanceCleaning and Maintenance
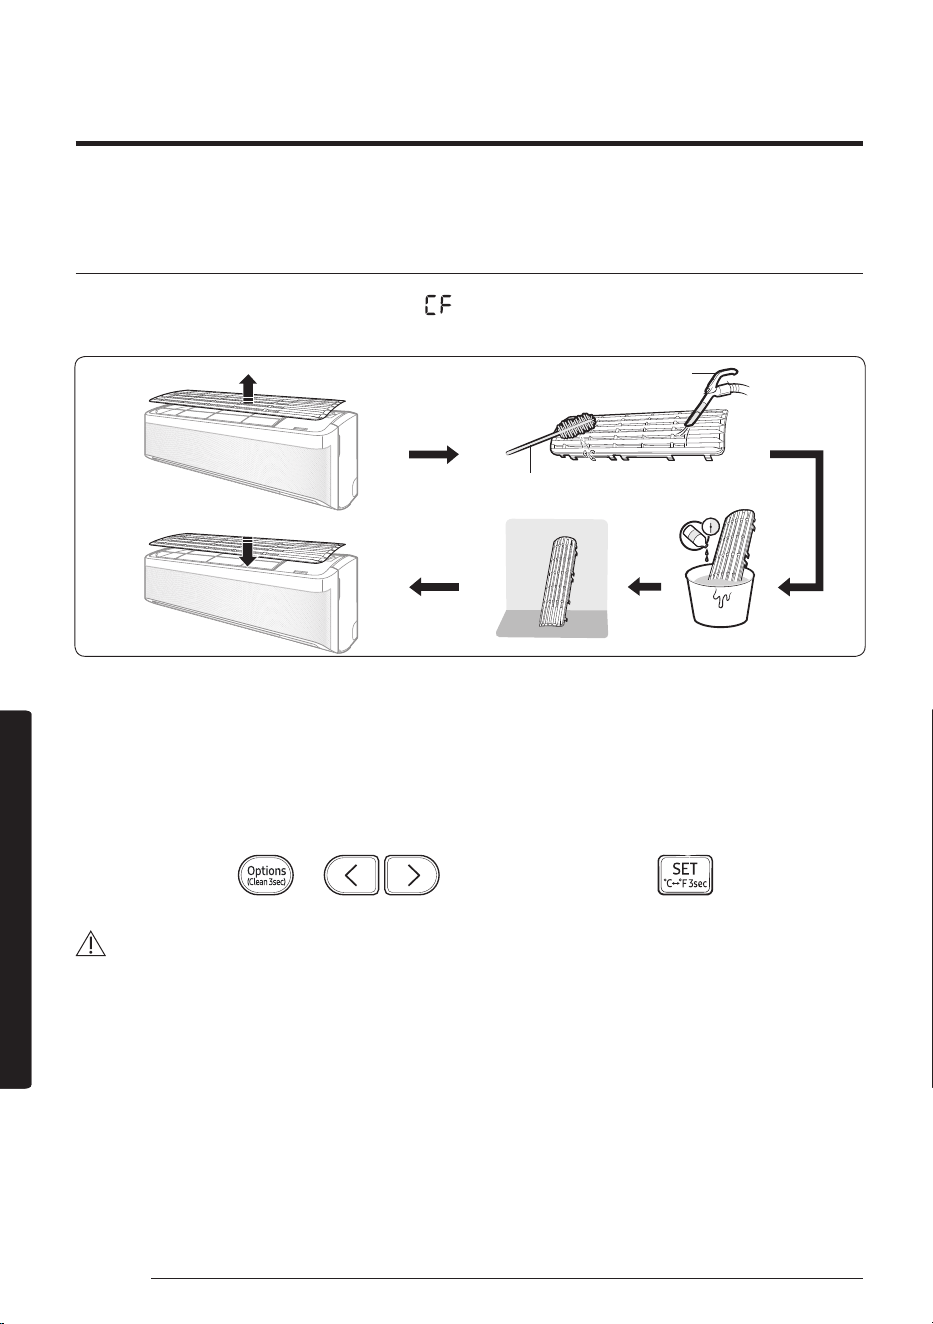
Cleaning the filter
Clean the air filter every two weeks or when the (filter-cleaning reminder) appears on the indoor unit
display. The time between cleanings may vary, depending on the usage and environmental conditions.
Vacuum cleaner
Soft brush
30 minutes
Mild detergent
1 Slide the filter off of the unit.
2 Use a soft brush or vacuum cleaner to remove any dust or debris on the filter.
3 Soak the filter in a solution of water and mild detergent for 30 minutes.
4 Rinse the filter and let it air dry in a well-ventilated area that is out of direct sunlight.
5 Reinstall the filter.
6 Reset the filter-cleaning reminder:
In operation ▶
▶ ▶ Select Filter Reset. ▶
CAUTION
• Take care not to damage the filter during cleaning.
• Do not scrub the air filter with a hard-bristle brush or another cleaning utensil.
• Do not expose the air filter to direct sunlight when drying it.
35
English
Cleaning and MaintenanceCleaning and Maintenance
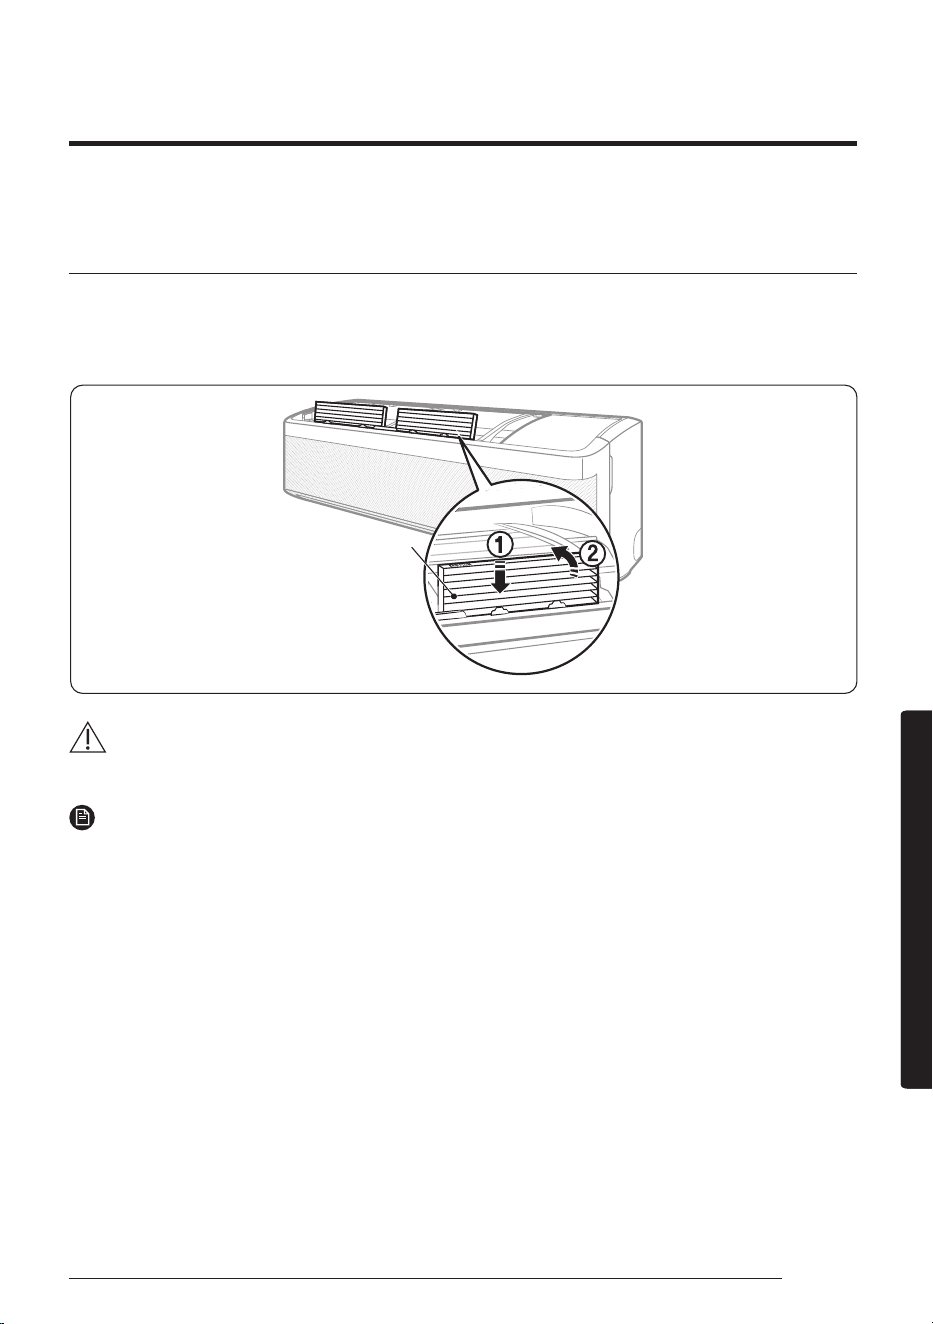
Replacing the Tri-care filter (For AR**B*EA****models)
Slide a new Tri-care filter in the direction of arrow 2.
Replace Tri-care filters once every three years. Replacement cycle may differ depending on the environment
and usage time.
Tri-care filter
CAUTION
• Do not clean the Tri-care filter with water. Failing to do so may result in damage to the filter.
NOTE
• To replace a Tri-care filter, purchase a new one at a service centre.
• To use the Tri-care filter for a long time in an environment where fish cooking and smoking cause odour,
ventilate the place by opening a window.
36
Cleaning
English
Cleaning and MaintenanceCleaning and Maintenance
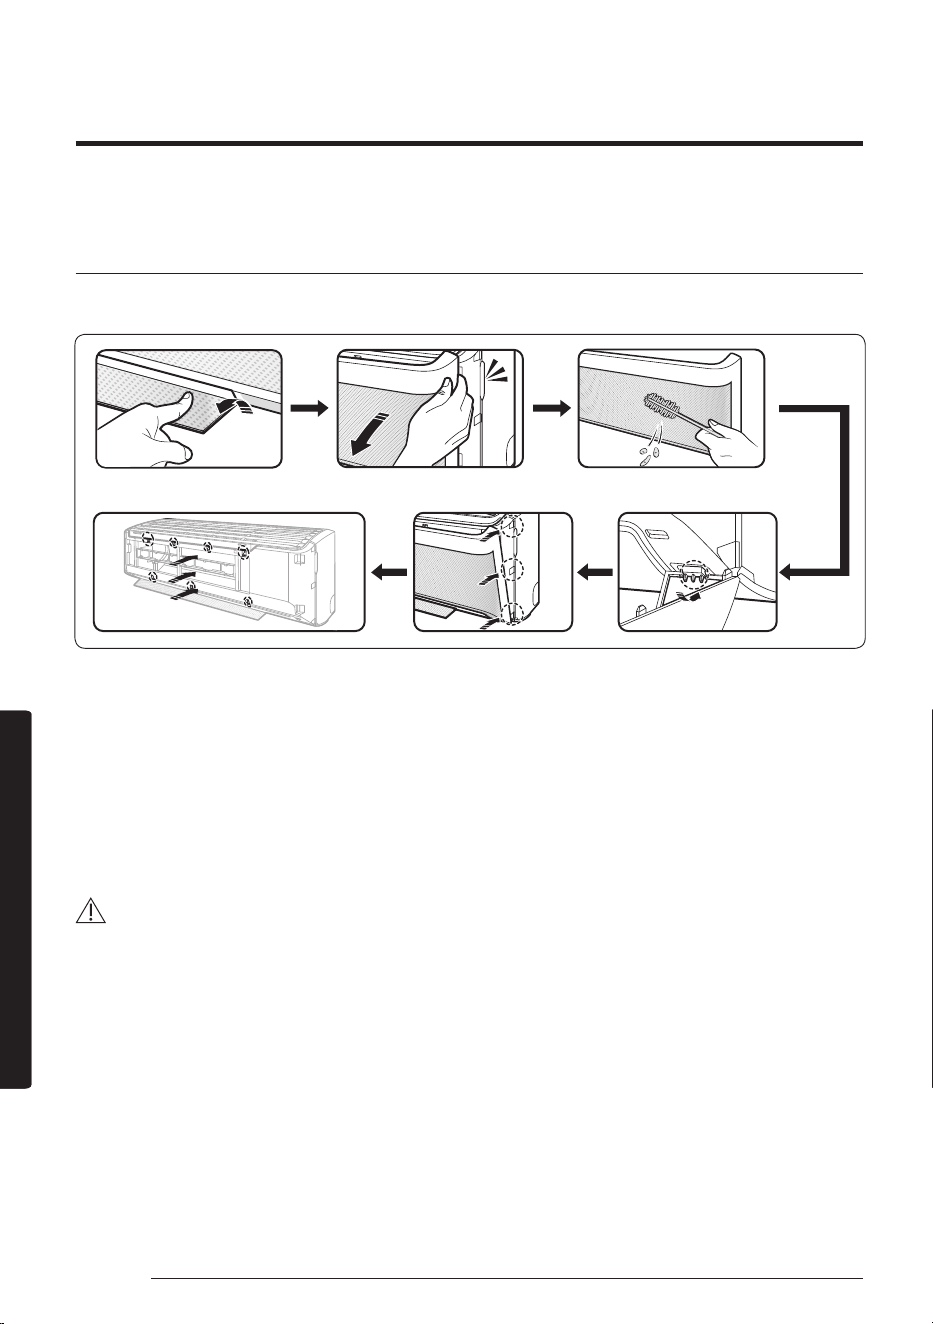
Cleaning the WindFree panel
Clean the WindFree panel at least once a month.
1 Pull the airflow blade open.
2 Hold and pull both sides of the WindFree panel until it comes free from the air conditioner.
3 Use a soft brush or vacuum cleaner to remove any dust.
4 Hang the WindFree panel in the grooves at the bottom left and right.
5 Align the projections of the WindFree panel with the grooves at the top, middle, and bottom of the front
panel.
6 After inserting the WindFree panel, press the top 4 places and the bottom 3 places by hand so that there
is no gap to the panel.
CAUTION
• If you attach the WindFree panel without the airflow blade being open, it may become obstructed by the
WindFree panel and may not open properly.
37
English
AppendixAppendix
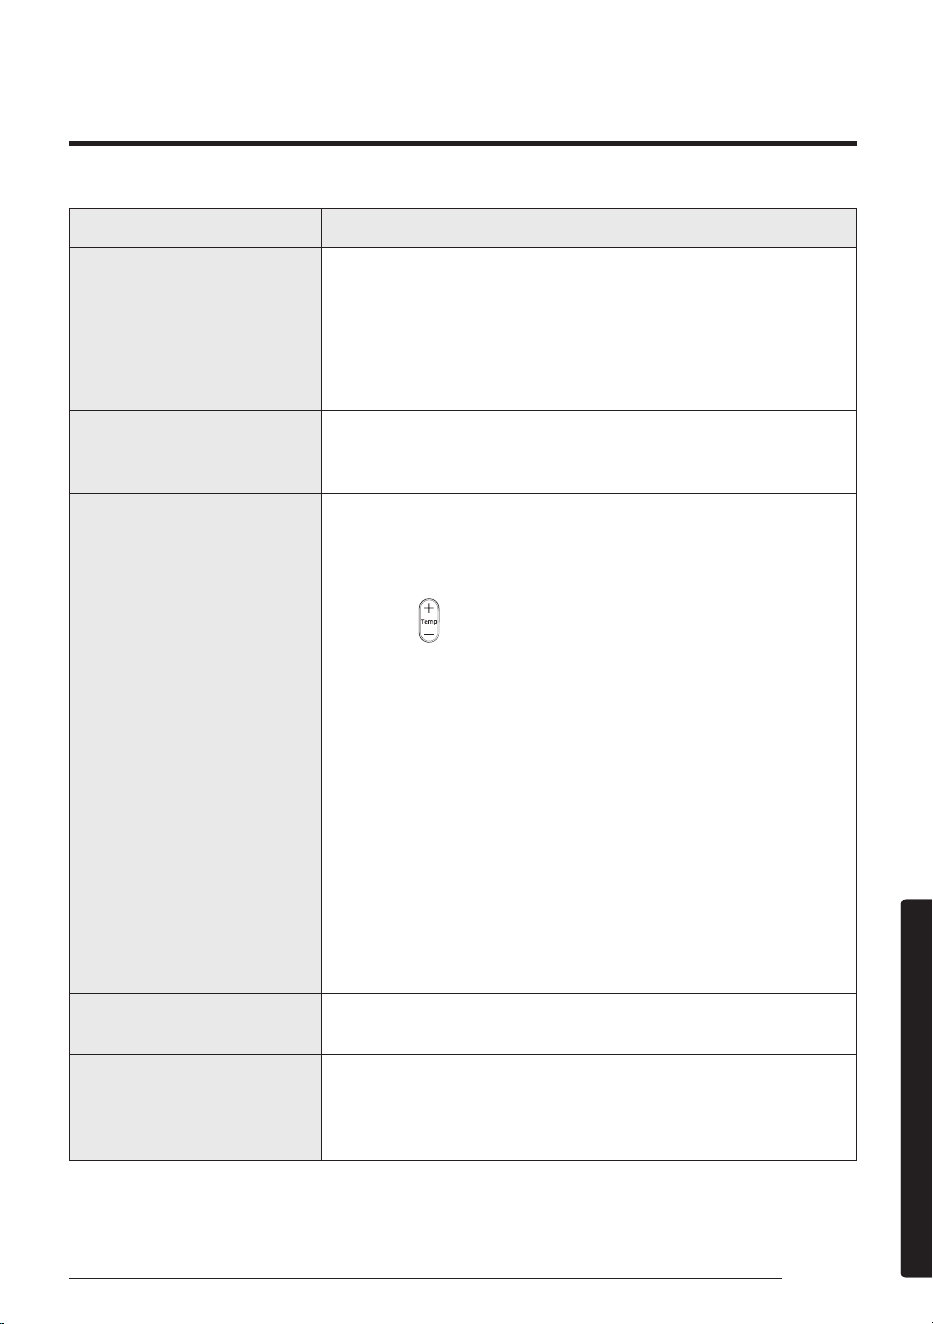
Problem Solution
The air conditioner stops
working.
• Make sure the unit is receiving power.
• Check the circuit breaker. If it is flipped off, flip it on again and
restart the unit. If the problem persists, contact your service
provider.
• The Timed off function may have turned off the unit. Turn on the
unit again.
Cannot change the
temperature.
• Check if the unit is in Fan or Fast mode. If so, you cannot change
the set temperature; the unit automatically controls the set
temperature.
Improper airflow temperature.
• Check the set temperature. In Cool mode, cooling occurs only
when the set temperature is lower than the current temperature.
In Heat mode, heating occurs only when the set temperature is
higher than the current temperature.
• Use
the (Temperature) button
on the remote control to change
the set temperature.
• Check if the air filter is blocked with dirt or debris. If the air filter
is blocked, the cooling and heating performance may decrease.
Clean the air filter regularly (page 34).
• Check if the outdoor unit is covered or is installed near obstacles.
Remove the coverings and obstacles.
• Check if the Defrost function is on (page 21). During defrost,
the fan stops and warm air does not come out.
• Check if doors or windows are open. This may cause poor
circulation or performance. Close all doors and windows.
• Check if the pipe length between the units exceeds the maximum
pipe length (see “Typical installation” in the Installation manual). If
so, the cooling and heating performance may decrease.
Cannot change the airflow
direction.
• Check if the good'sleep function is on in Cool mode. If so, you
cannot control the airflow direction.
Cannot change the fan speed.
• Check if the unit is in Auto, Dry, or Fast mode or the good'sleep
function is on in Cool mode. In these conditions, you cannot
control the fan speed; the unit automatically controls the fan
speed.
If the air conditioner is not operating normally, refer to the troubleshooting guide below.
Troubleshooting
Appendix
38
Troubleshooting
English
AppendixAppendix
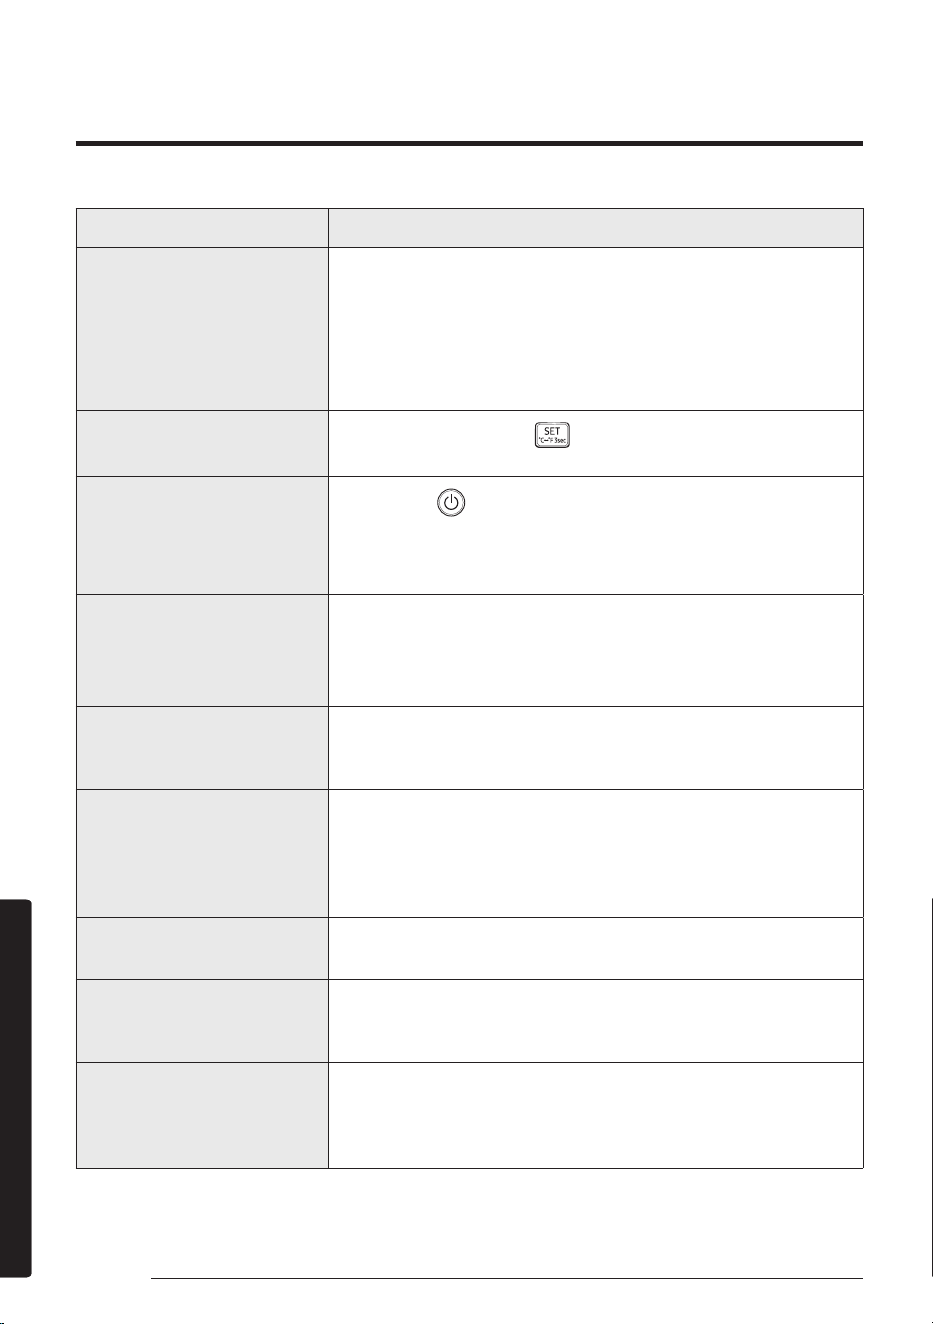
Problem Solution
The remote control does not
work.
• Replace the batteries in the remote control.
• Make sure the remote control can send an unobstructed signal to
the unit.
• Keep bright lights away from the unit. Light from fluorescent
bulbs or neon signs may interrupt the signal from the remote
control.
The Timed on/off function
does not work.
• Make sure to press the
(SET) button on the remote control
when setting the timer.
The indicator on the remote
control blinks continuously.
• Press the
(Power) button to turn off the unit, or disconnect
the power plug.
• If the indicator light on the remote control continues blinking,
contact your service provider.
Odors are coming from the
unit during regular operation.
• If the unit is operating in a smoky area, ventilate the room or
operate the unit in Fan mode for 3 to 4 hours. There are no
components in the unit that produce a strong odor.
• Check if the drain lines are clean. Clean them regularly.
The remote control display
shows an error message.
• If the indoor unit indicator blinks, write down the error code.
Contact your service provider and provide them with the error
code.
The unit is generating noise.
• It is normal for the unit to generate some noise while operating.
If the pipe length between the units is less than 3 m and no coil
was used (see “Typical installation” in the Installation manual),
additional noise may be transmitted from the outdoor unit to the
indoor unit via the piping.
Smoke is coming from the
outdoor unit.
• In winter, most likely this is steam coming from the outdoor heat
exchanger while the Defrost function is on.
Water drips from the pipe
connections on the outdoor
unit.
• Condensation may develop when the ambient temperature or
humidity changes significantly. This is normal.
Condensation forms on the
surface of the indoor unit.
• If the humidity is higher in the room in Cool mode, or the
difference between the desired temperature and indoor
temperature is great, condensation may form on the surface of
the indoor unit.

39
English
AppendixAppendix
Step 1. Checking the requirements
for connection
Before connecting your smartphone with the
air conditioner, make sure that the following
requirements are met:
• Wi-Fi access point: 2.4 GHz Wi-Fi access point
only
• The air conditioner and you smartphone must
be within the coverage of the same Wi-Fi access
point and connected to it. After the connection,
you can control the air conditioner from any
place via various wireless networks such as Wi-
Fi, 3G, LTE and 5G.
• The SmartThings app supports Android OS 7.0
or later (with at least 2 GB RAM) and iOS 12.0
or later. The app is optimized for iPhone 6s or
later and Samsung smartphones (Galaxy S and
Note series). The updates of the SmartThings
app or the functions supported by it may be
discontinued for the previously supported OS
versions due to the reasons such as usability
and security.
Step 2. Connecting your
smartphone to the Wi-Fi network
1 Turn on the Wi-Fi access point.
2
Tap Settings → Wi-Fi on your smartphone.
3
Tap the Wi-Fi switch to activate it, and then
select the 2.4 GHz Wi-Fi access point to connect
to.
4
If needed, enter the password for the access point.
5
Tap Advanced.
6
Top the Switch to mobile data switch to
deactivate it.
Step3. Installing the SmartThings
app
If the SmartThings app is not installed on
your smartphone, follow the procedure below.
If installed, skip to "Step 4. Configuring the
SmartThings app" on page 39.
1
Launch Play Store or App Store.
2
Tap the search field, and then search for
"SmartThings".
3
Tap INSTALL for the found SmartThings app
item.
4
Select Agree.
Step 4. Configuring the
SmartThings app
After the SmartThings app is installed, follow
the procedure below to configure it. If already
configured, skip to "Step 5. Connecting your
smartphone to the air conditioner" on page 40.
1
Launch the SmartThings app.
2
When you see pop-up windows asking for
location, Wi-Fi, Bluetooth permissions, tap
Start.
3
Tap Log In.
4
If you have no Samsung account, tap Add
account to create your Samsung account.
5
Log in to your Samsung account.
6
Consent to TERMS AND CONDITIONS.
7
When you see a pop-up window asking for
access permission to location information, tap
ALLOW.
The SmartThings app may change without prior notice to improve product usability and performance.
Use the SmartThings app on your smartphone to control the air conditioner via the wireless Internet.
To remotely control the air conditioner, you need to connect your smartphone to the air conditioner. If
already connected, skip to "Step 6. Controlling the air conditioner with your smartphone" on page 40.
SmartThings app
40
SmartThings app
English
AppendixAppendix
Step 5. Connecting your
smartphone to the air conditioner
1
Plug in the power cord of the air conditioner,
and then turn on the power.
2
Launch the SmartThings app.
3
Tap Add device on the home screen of the
SmartThings app.
4
Tap ADD DEVICE MANUALLY.
5
Tap Air conditioner > Room air conditioner.
6
Press the (Timer) button on the remote
control for at least 4 seconds.
To notify that registration of the selected air
conditioner to your Samsung account is in progress,
the
(Transmit) indicator blinks for several
seconds and appears on the remote control
display. When the connection is finished, the
(Transmit) indicator turns off and disappears.
A new device card for the selected air conditioner is
added to the home screen of the SmartThings app.
Step 6. Controlling the air
conditioner with your smartphone
1
Launch the SmartThings app.
2
On the home screen of the SmartThings app,
tap the device card for the air conditioner,
which was added when you proceeded with
"Step 5. Connecting your smartphone to the air
conditioner" on page 40.
3
Refer to the table on the next page and remotely
control the air conditioner with your smartphone.
WARNING
• RF exposure warning statement – for keeping
20cm distance when installing this module.
• Warning that this module should not be installed
and operating simultaneously with other radio
without additional evaluation or FCC filing.
• Your device uses non-harmonised frequency
and is intended for use in all European
countries. The WLAN can be operated in the
EU without restriction indoors, but cannot be
operated outdoors in France.
Specifications
Wi-Fi
Frequency Range Transmitter Power(Max)
2412 - 2472 MHz 20 dBm
Open Source Announcement
The software included in this product contains
open source software. You may obtain the complete
corresponding source code for a period of three years
after the last shipment of this product by sending an
email to mailto:oss.request@samsung.com.
It is also possible to obtain the complete
corresponding source code in a physical medium
such as a CD-ROM; a minimal charge will be
required.
The following URL http://opensource.samsung.
com/opensource/SMART_AT_051/seq/0 leads
to the download page of the source code made
available and open source license information as
related to this product. This offer is valid to anyone
in receipt of this information.
41
English
AppendixAppendix
Category Function Description
Monitoring
Set temperature Displays the set temperature.
Current temperature Displays the current temperature.
Control
Power Turns the air conditioner on or off.
Mode Selects the desired operation.
Temperature Adjusts the indoor set temperature.
Fan Speed Sets the fan speed of operation mode.
Wind direction Sets the fan directions of operation mode.
WindFree Cooling Turns the WindFree Cooling function on or off.
Schedule
Sets the Timed on/off function.
• The maximum number of schedules you can set using the Timed
on/off function is 10.
• The set times for the Timed on and Timed off functions must be
different.
• Once the Timed on/off function is set, the setting remains even if
you unplug the air conditioner and plug in it again.
Options
Selects an option function of operation mode.
• The available options might be different depending on the air
conditioner model.
• The fan speed and airflow direction are set automatically
according to the selected options.
• For detailed information on the options of the product, see page
17 ~ 29.
Settings
Sets additional functions.
• Press the Settings button on the control screen to check or set
detailed information of air conditioner.
• The functions of Clean, Filter, and Beep can be set.
‒ When the Beep function is off, the beep sound from the
device will be mute.
QUESTIONS OR COMMENTS?
COUNTRY CALL OR VISIT US ONLINE AT
AUSTRALIA
1300 362 603 (Other)
1300 425 299 (HHP)
www.samsung.com/au/support