Loading ...
Loading ...
Loading ...

8
2.3.1 Checking Appearance
Although the protective materials used for the packaging should be able to protect the unit from most accidents during
transportation, check the unit and its accessories for any visible damage. Remove the protective film to check items in
accordance with the list in 2.1 Unpacking Everything.
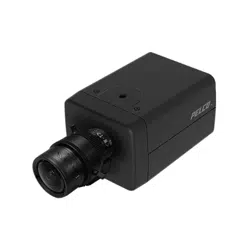
2.3.2 Installing the Lens
Attach your lens onto the camera’s lens mounting ring. Screw the lens onto the lens mount. Be careful to prevent dust from
entering the space between the lens and the imager. If necessary, use clean, compressed air to remove any foreign matter
(refer to the instructions shipped with the lens).
NOTE: Make sure the lens does not touch the camera imager when installed.
FIGURE 2-1: INSTALLING THE LENS
2.3.3 Mounting the Camera
1. Select a bracket or housing (sold separately) which has a standard thumbscrew matching the mount screw hole as shown
below and fasten the camera with bracket / housing securely by the mounting screw hole. Depending on different
applications, mount your selected bracket / housing onto the wall or ceiling to complete mounting procedure.
2. Connect a safety wire (fall prevention wire, sold separately) with one end to the wall / ceiling and the other end to the
safety-cord screw on the camera.
NOTE:
When installing inside an enclosure, mount the camera in an inverted position to allow easy access to the service port.
Use the camera software to reconfigure the camera orientation for normal operation.
The mounting height above ground level shall be more than 3 meters for wall mount height.
Lens Mounting Ring
Loading ...
Loading ...
Loading ...