Loading ...
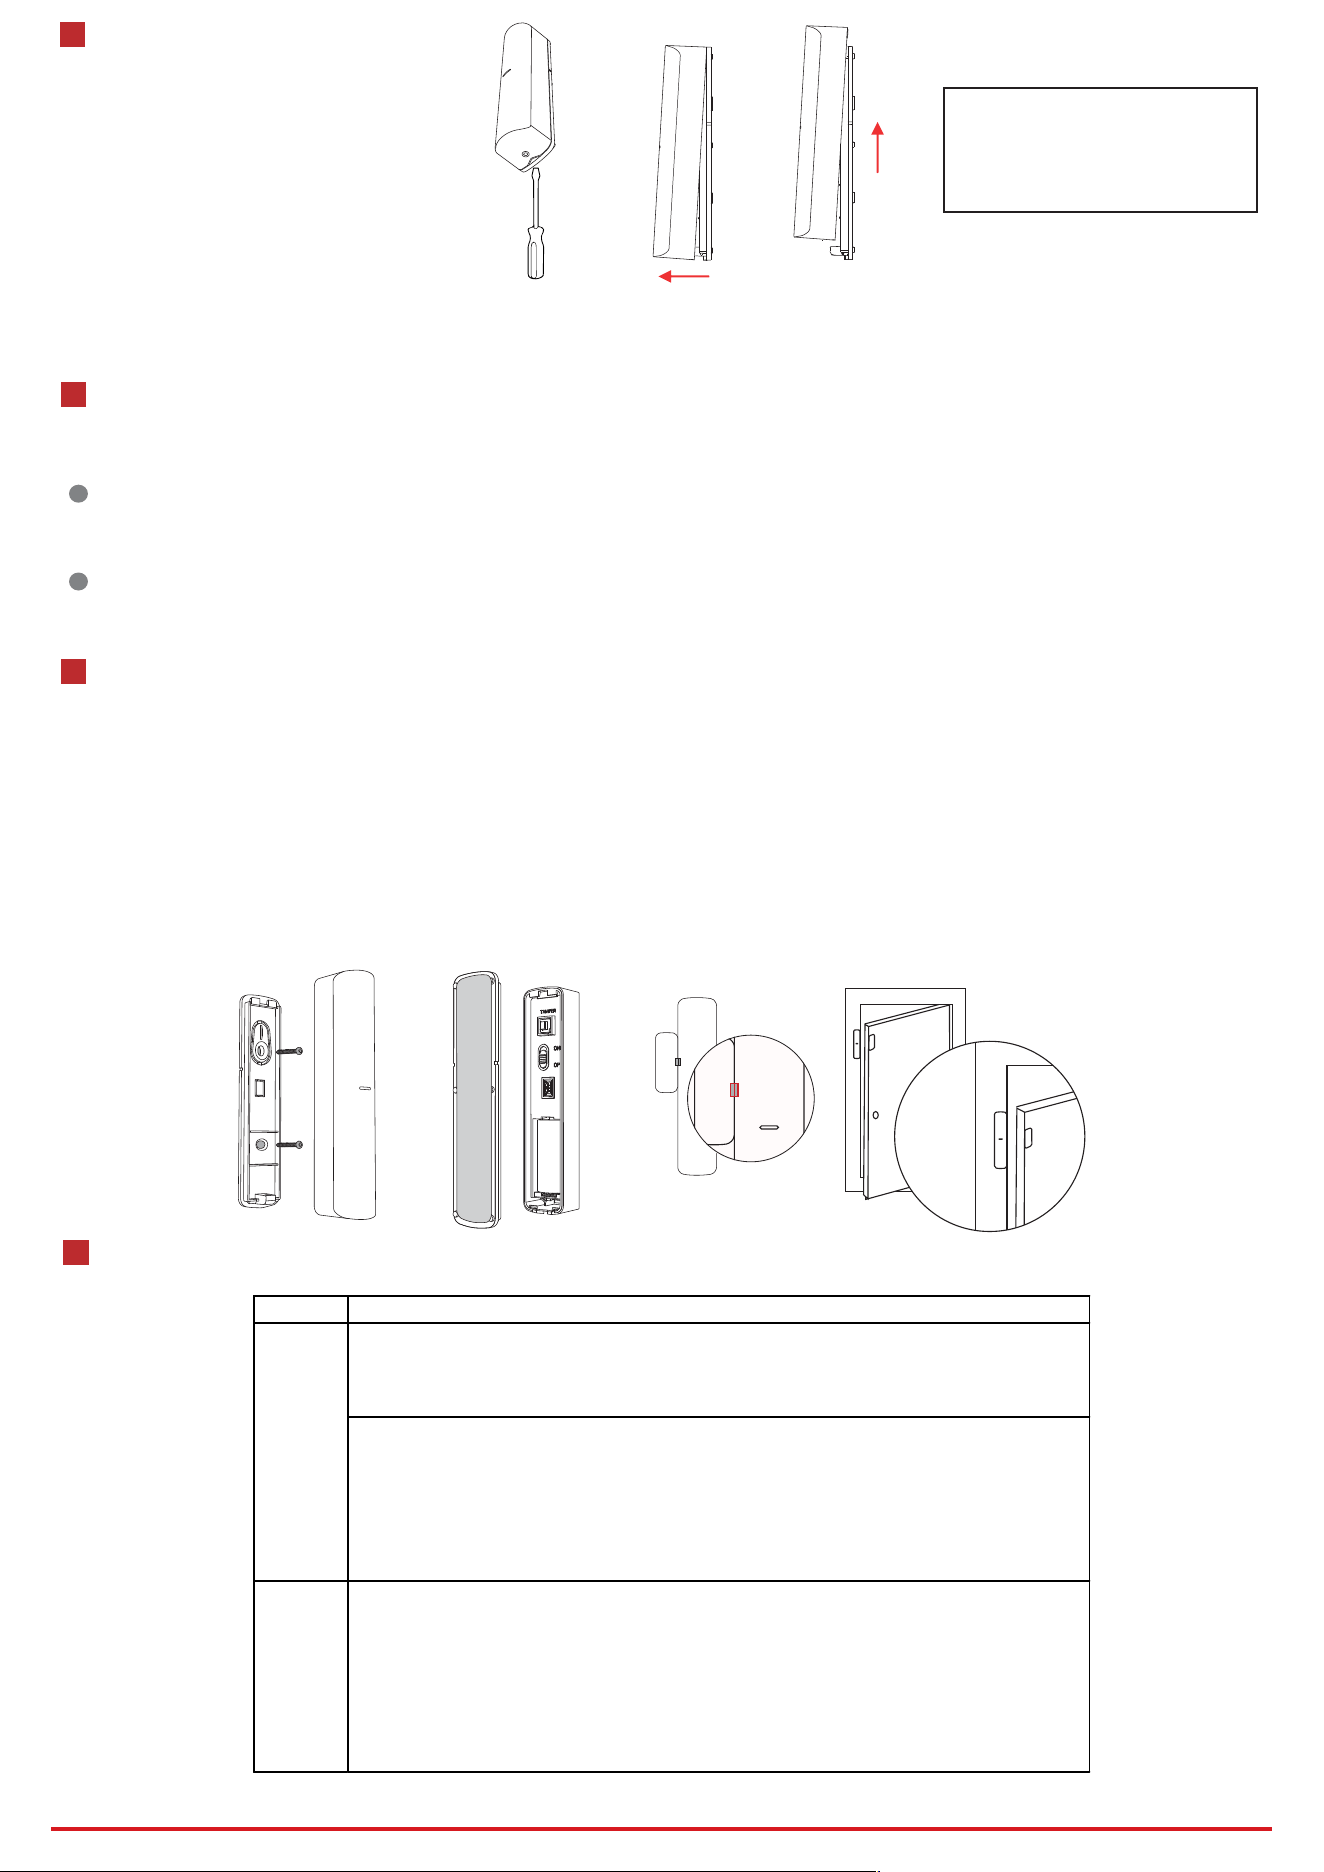
Dig the groove to disassemble the device. Remove the front and rear panel. Turn the power switch to ON to power on the device.
Note: Do not disassemble the device with sharps.
3
Power On
4
Enrollment
Figure 3-1 Power On
1. Check Signal Strength
Enter the signal checking mode by operating on the control panel. Trigger the detector.
Solid Green for 3 s - Strong Signal
Solid Orange for 3 s - Medium Signal
Solid Red for 3 s - Weak Signal
Red light ashes for 3S, interval 250 ms - Failure
2. Install the Detector
Dig the groove to disassemble the device.
Method 1: Secure the rear panel to the wall with two screws.
Method 2: Paste rear panel on the wall with the sponge tape.
Note: To make the TAMPER work properly, the thickness of the sponge tape should be no more than 1mm.
Close the front and the rear panel.
Note: You should install the sensor and the magnetic stick at the door or window’s edge. Make sure they are aligned with the door or window’s edge.
5
Installation
6
Functions
OR
Figure 5-1 Installation
1
Enroll the Peripheral Locally
2
Enroll the Peripheral with QR and serial No.
1. Log in to the APP Store, download and install Hik-Connect.
2. Power on the security control panel.
3. Log in the APP and tap the icon "+" . Scan the QR code or input the control panel serial No. to add the control panel.
1. In the APP, tap the "Enrollment Mode" button on the control panel page to make the control
panel enter the enrollemnt status.
2. Power on the peripheral, and it will be automatically enrolled to the control panel.
1. In the APP, tap the icon "+"and scan the QR code or serial No. on the peripheral.
2. Power on the peripheral, and it will be automatically enrolled to the control panel.
Function Description
The alarm will be triggered while the gap between the sensor and magnetic stick is
bigger than that shows in the table. The LED keeps blue for 2 s.
You can add two external inputs (each input can be set as NO\NC\TAMPER\Pulse) via
the AX PRO client.
While Any of the two inputs generates an alarm event, the contact reports the alarm to
the AX PRO. The LED keeps blue for 2 s.
Test
The cotact starts test automatically after being enrolled to the AX PRO. The LED turn
red.
Separate the contact, and make a gap between the sensor and stick. while the LED
turns green, the alarm is triggered by this gap . Adjust the installation position of the
contact to get a satised alarm gap.
Alarm
CAUTION
IF THE BATTERY COMPARTMENT
DOES NOT CLOSE SECURETLY,
STOP USING THE PRODUCT AND
KEEP IT AWAY FROM CHILDREN.
Hangzhou Hikvision Digital Technology CO.,Ltd. No.555 Qianmo Road, Binjiang District, Hangzhou 310052, China
Loading ...