~(E)
120
9
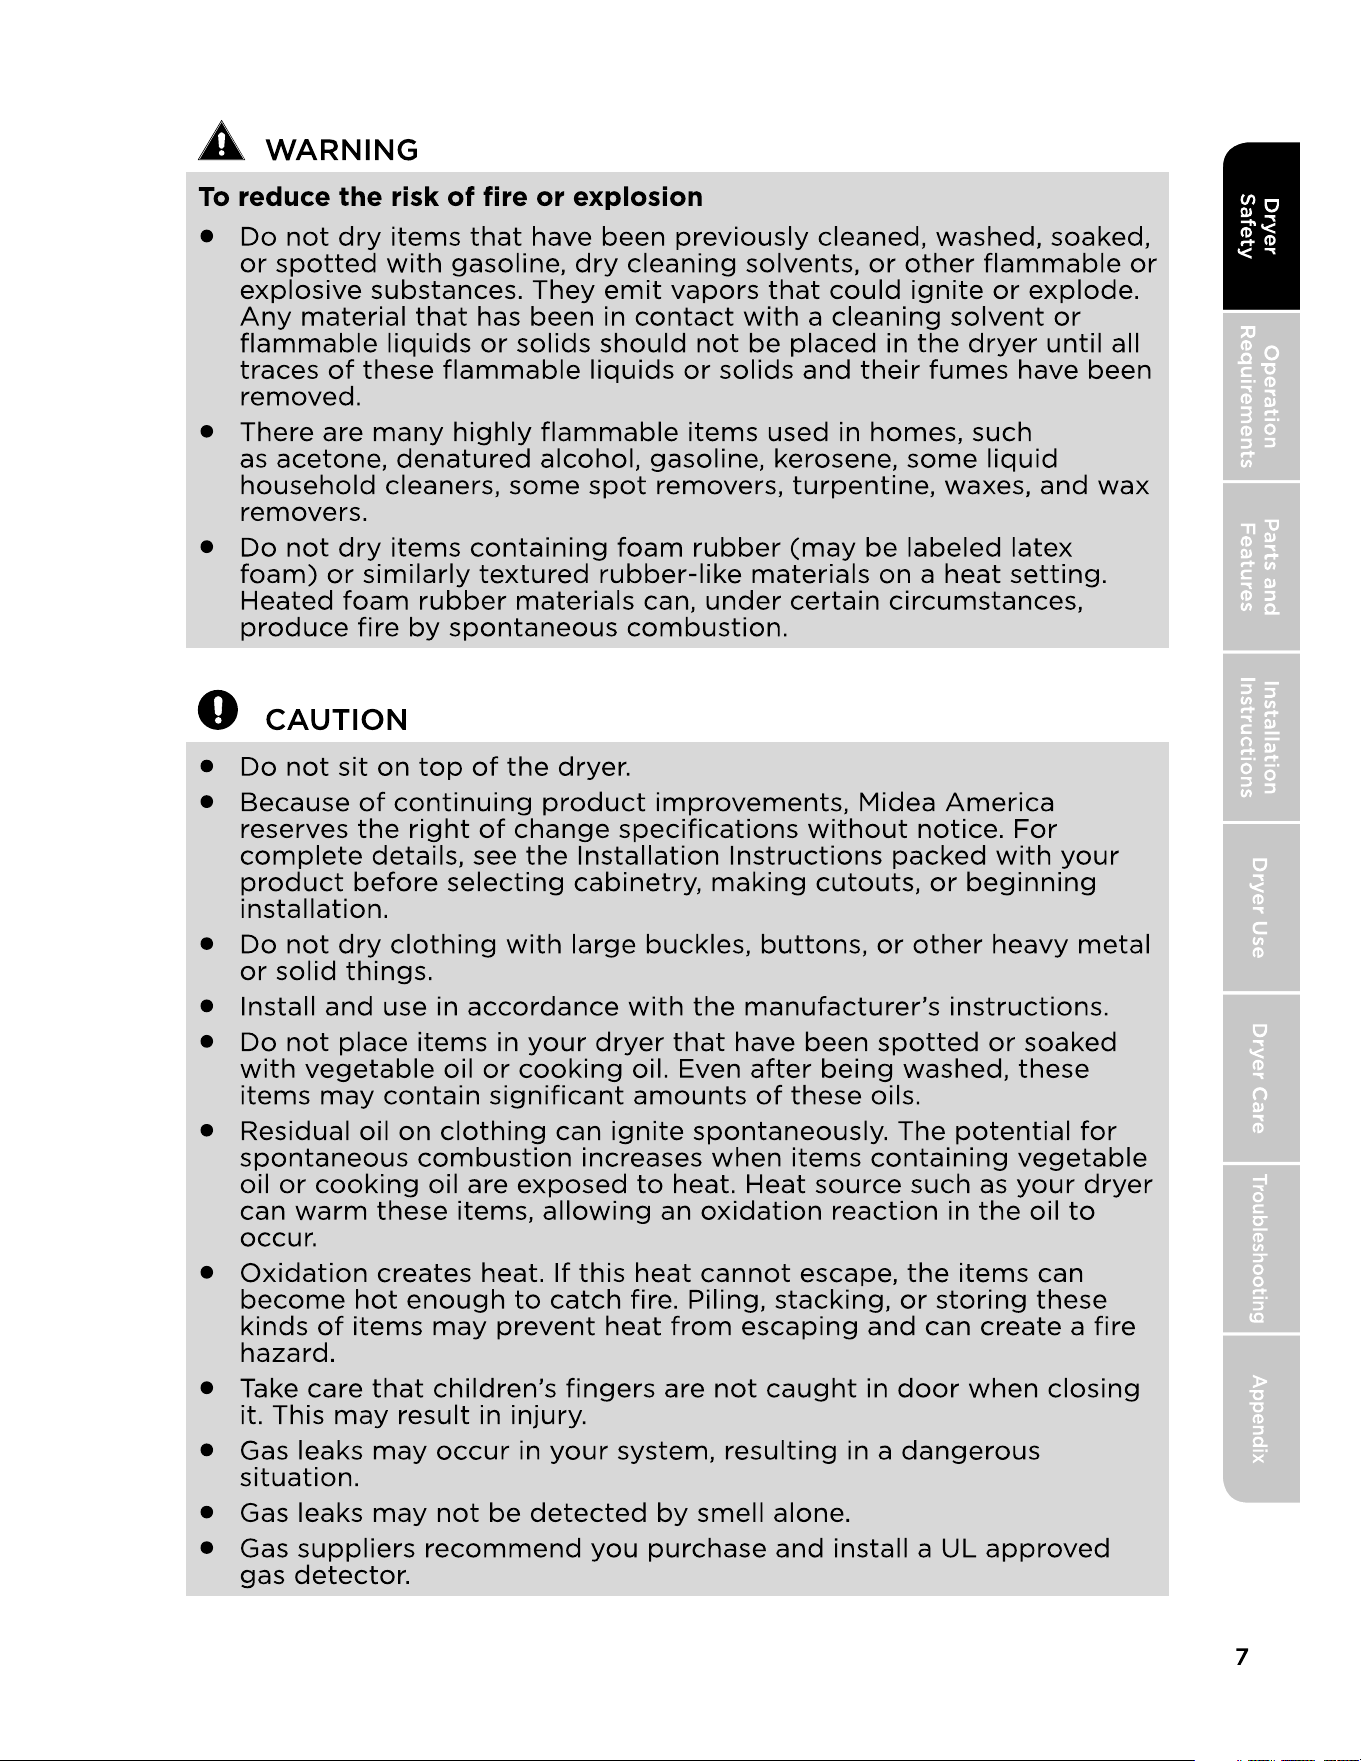
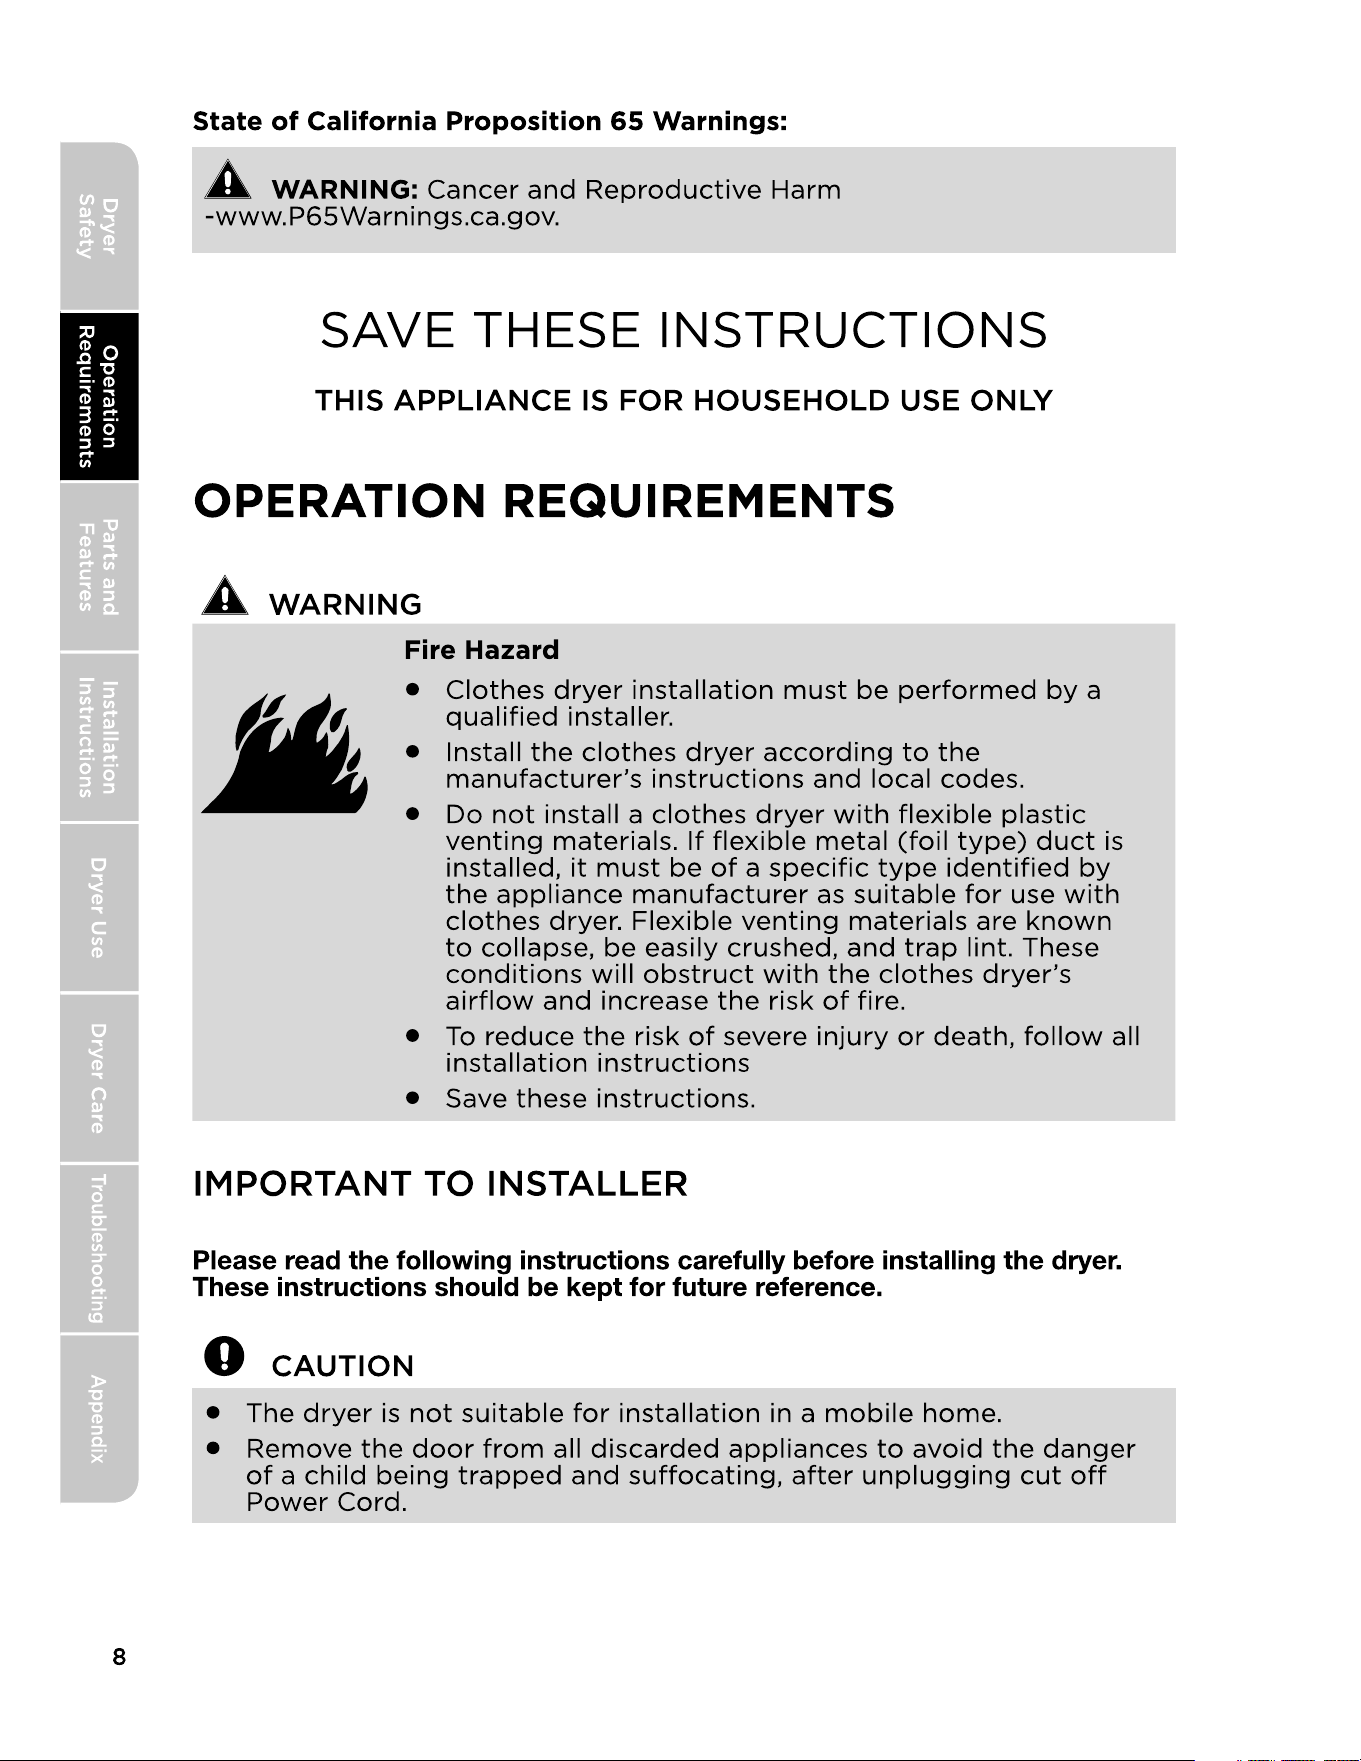
IMPORTANT TO INSTALLER
BASIC REQUIREMENTS
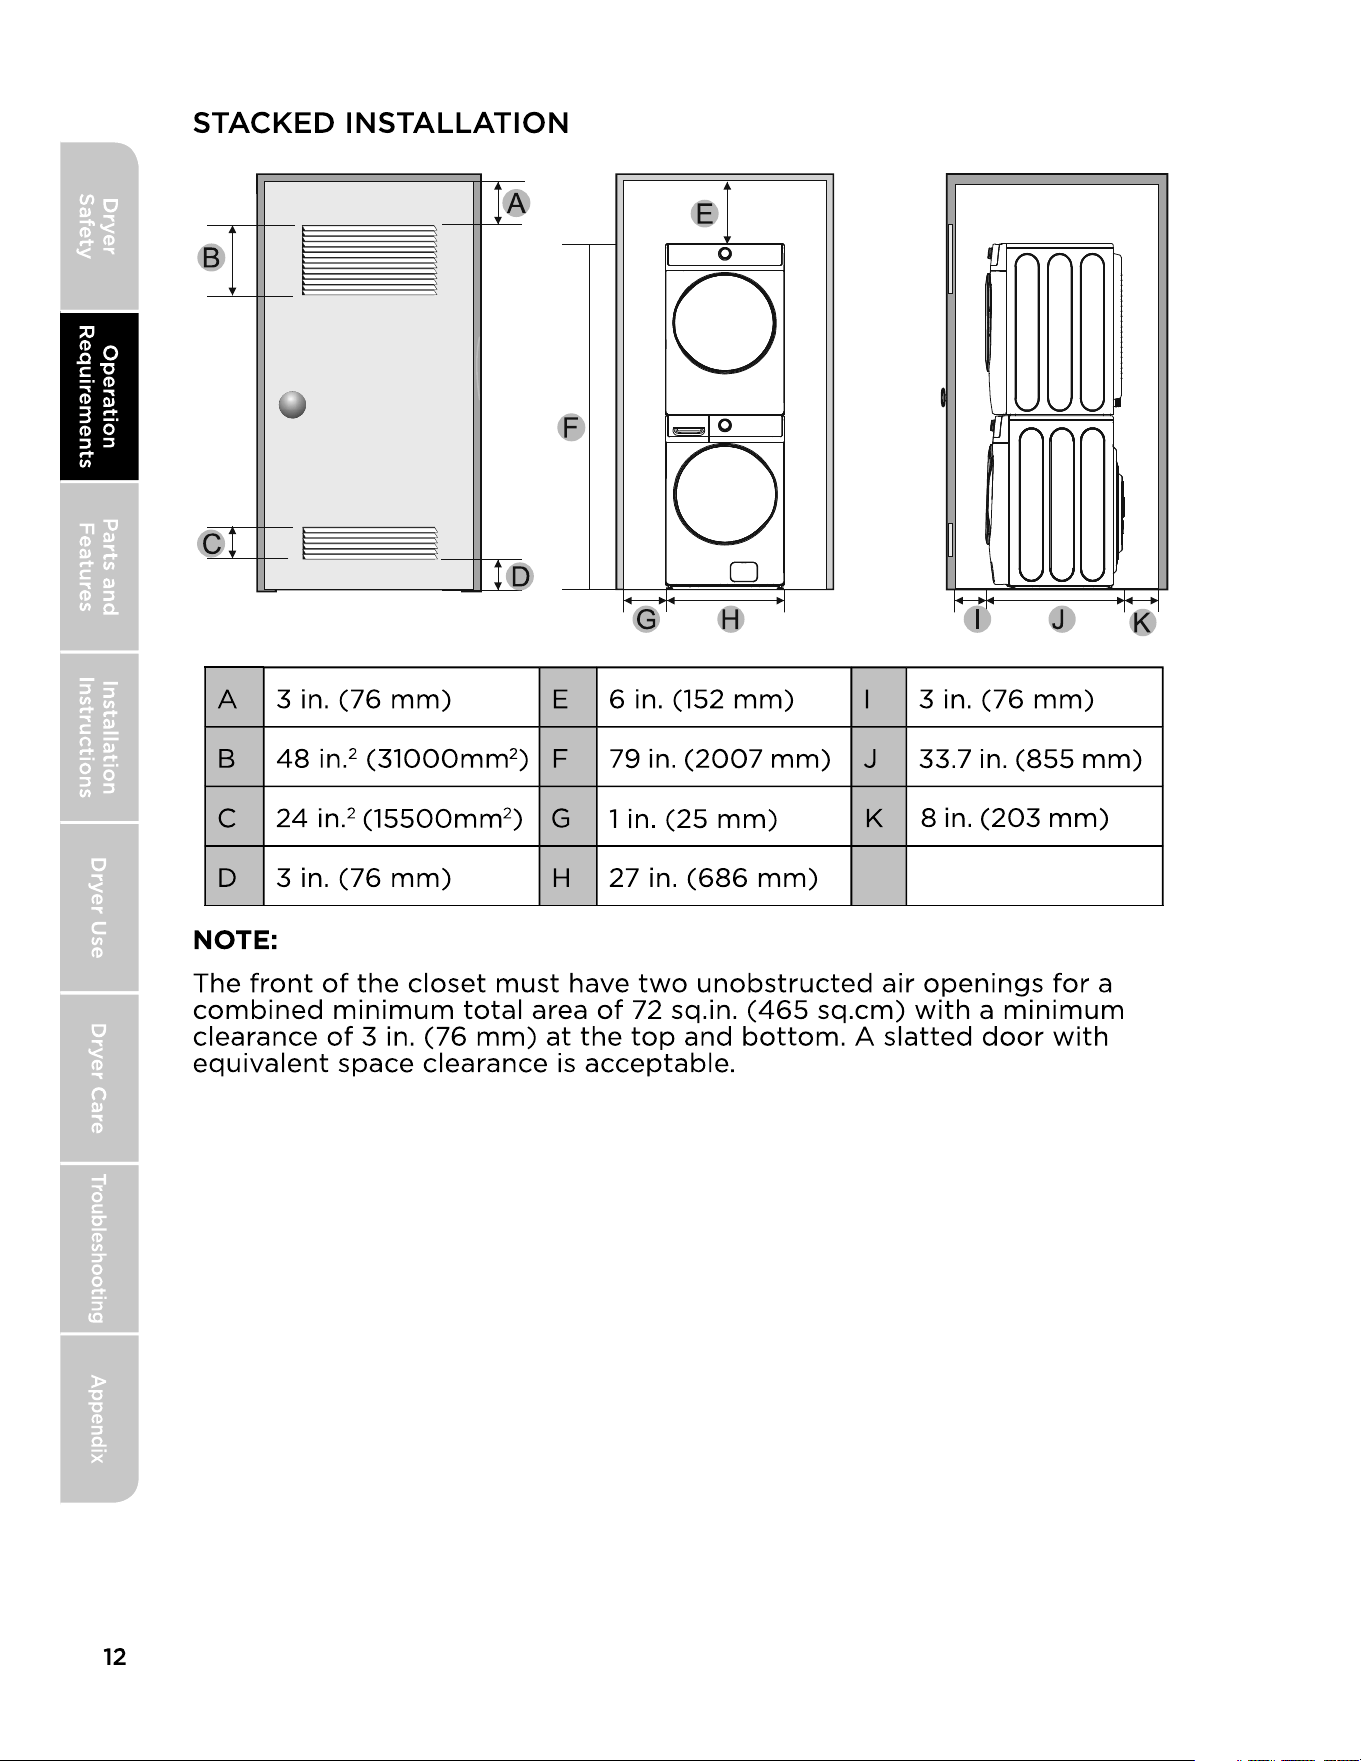
LOCATION REQUIREMENTS
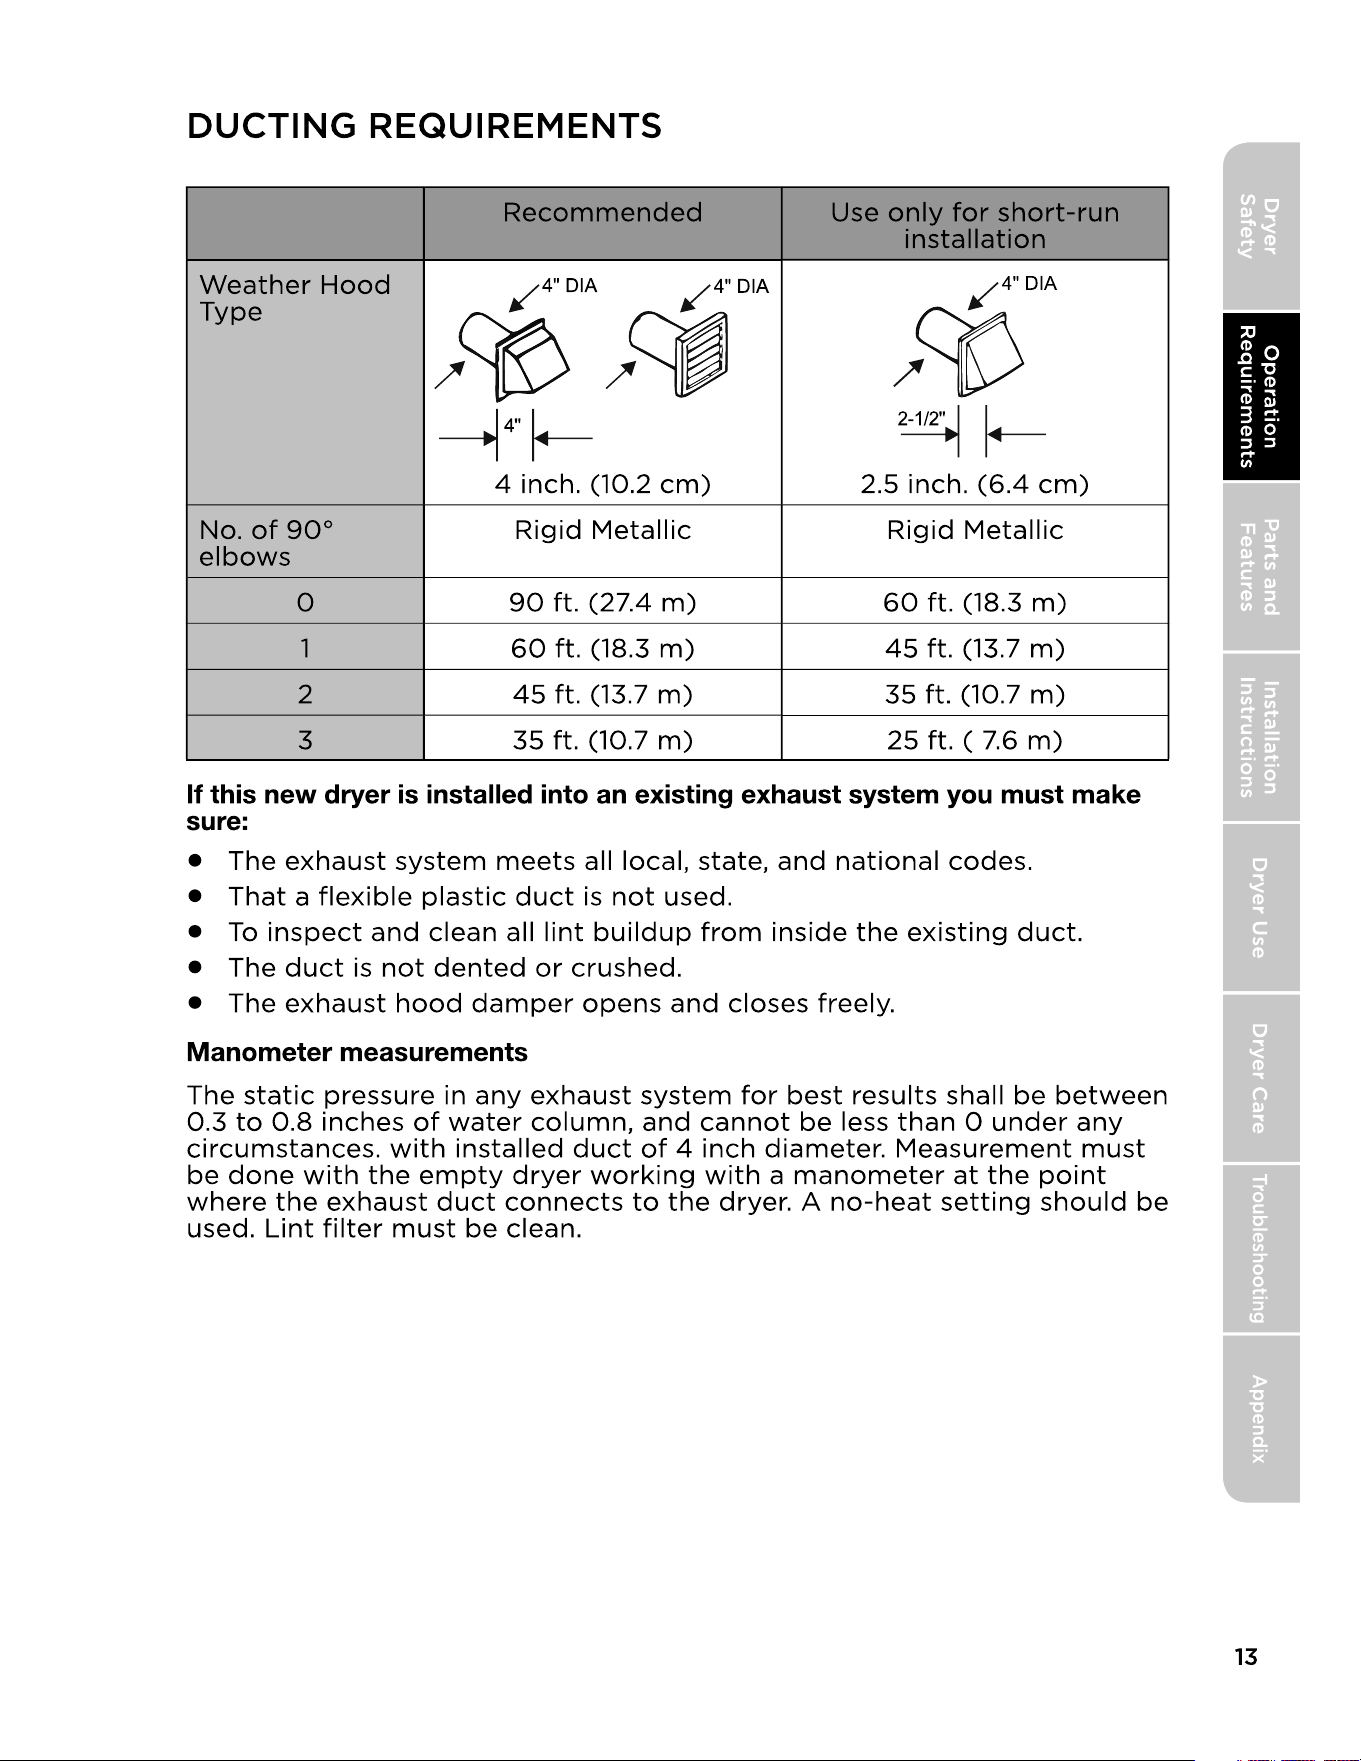
DUCTING REQUIREMENTS
EXHAUSTING REQUIREMENTS
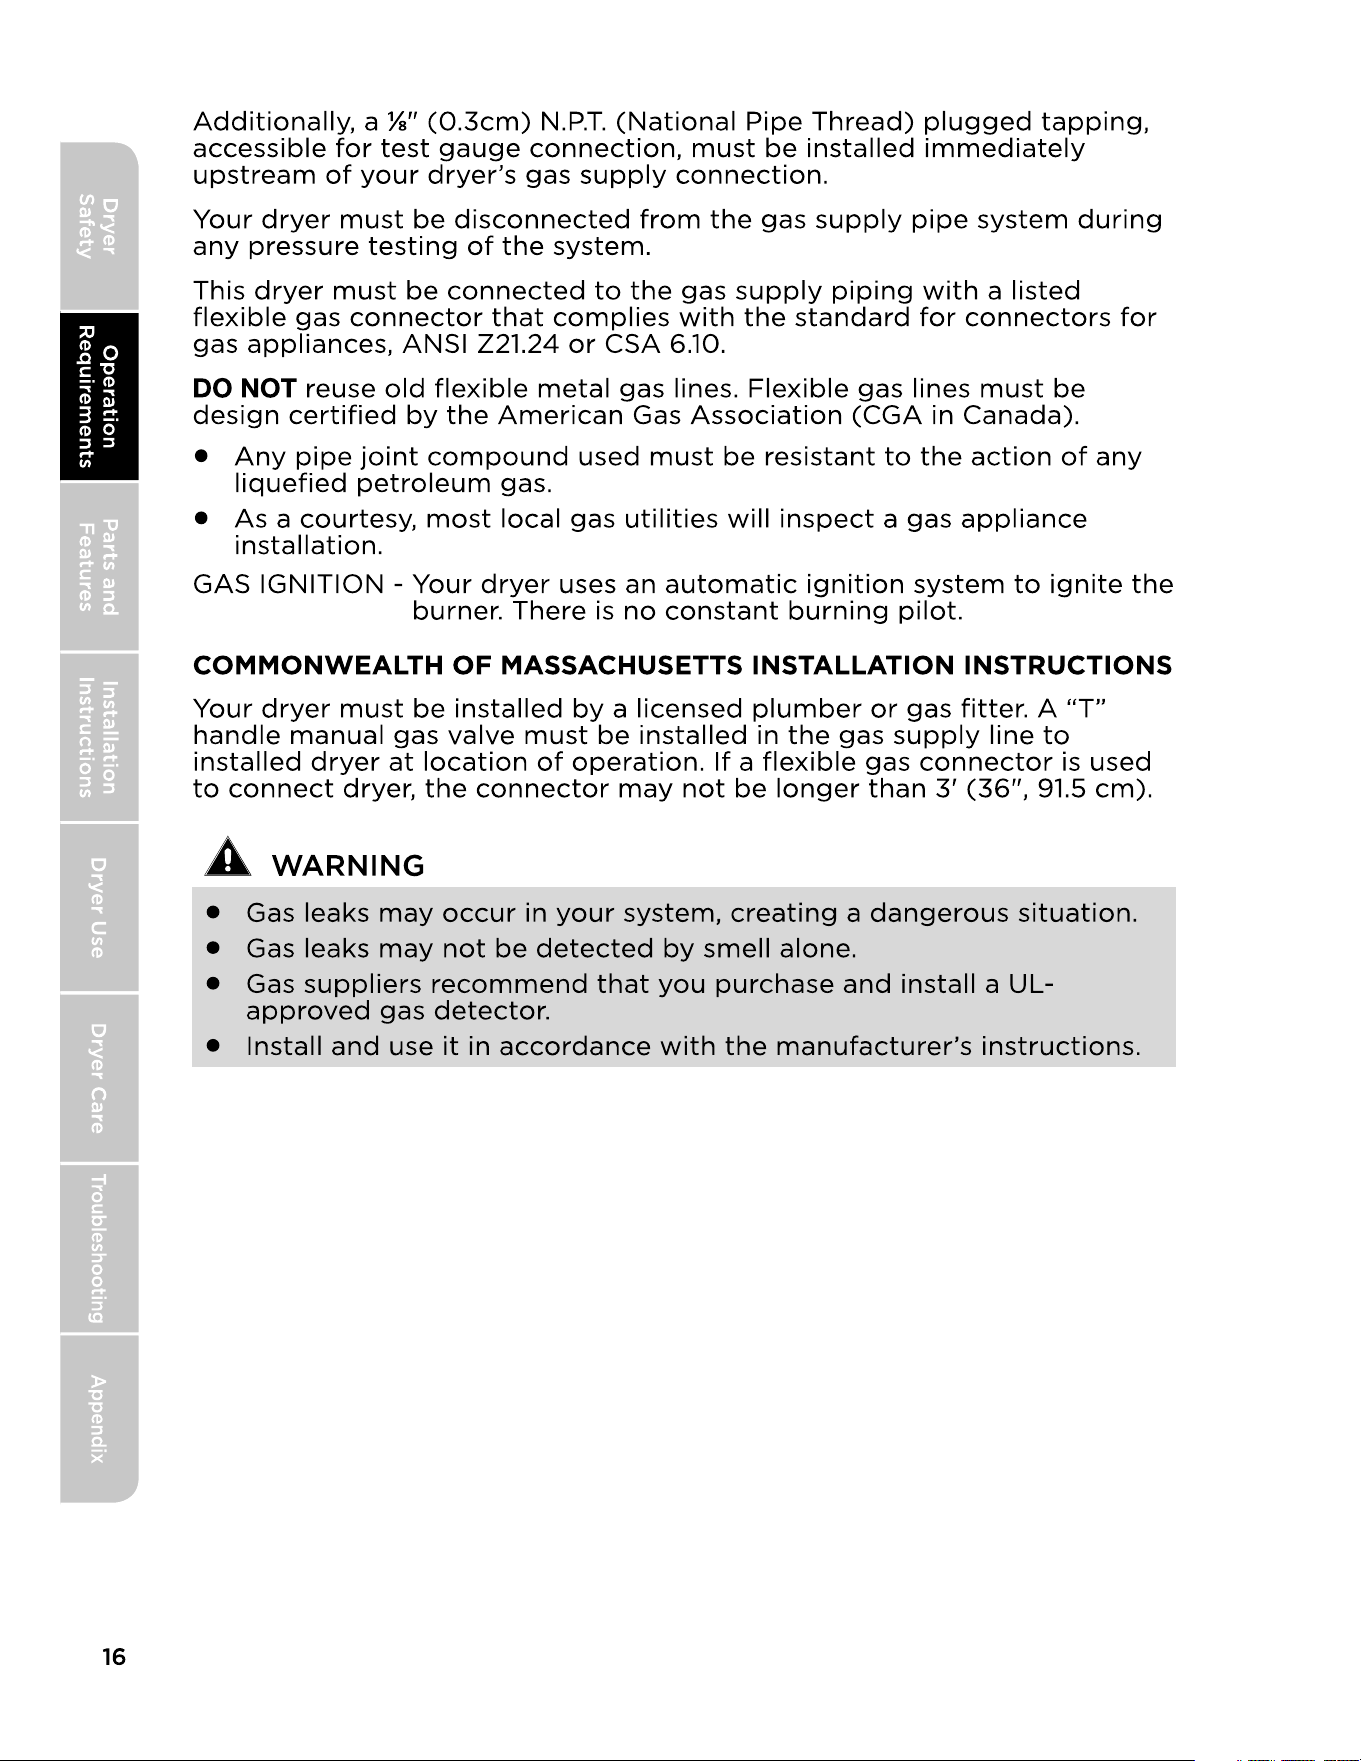
GAS REQUIREMENTS
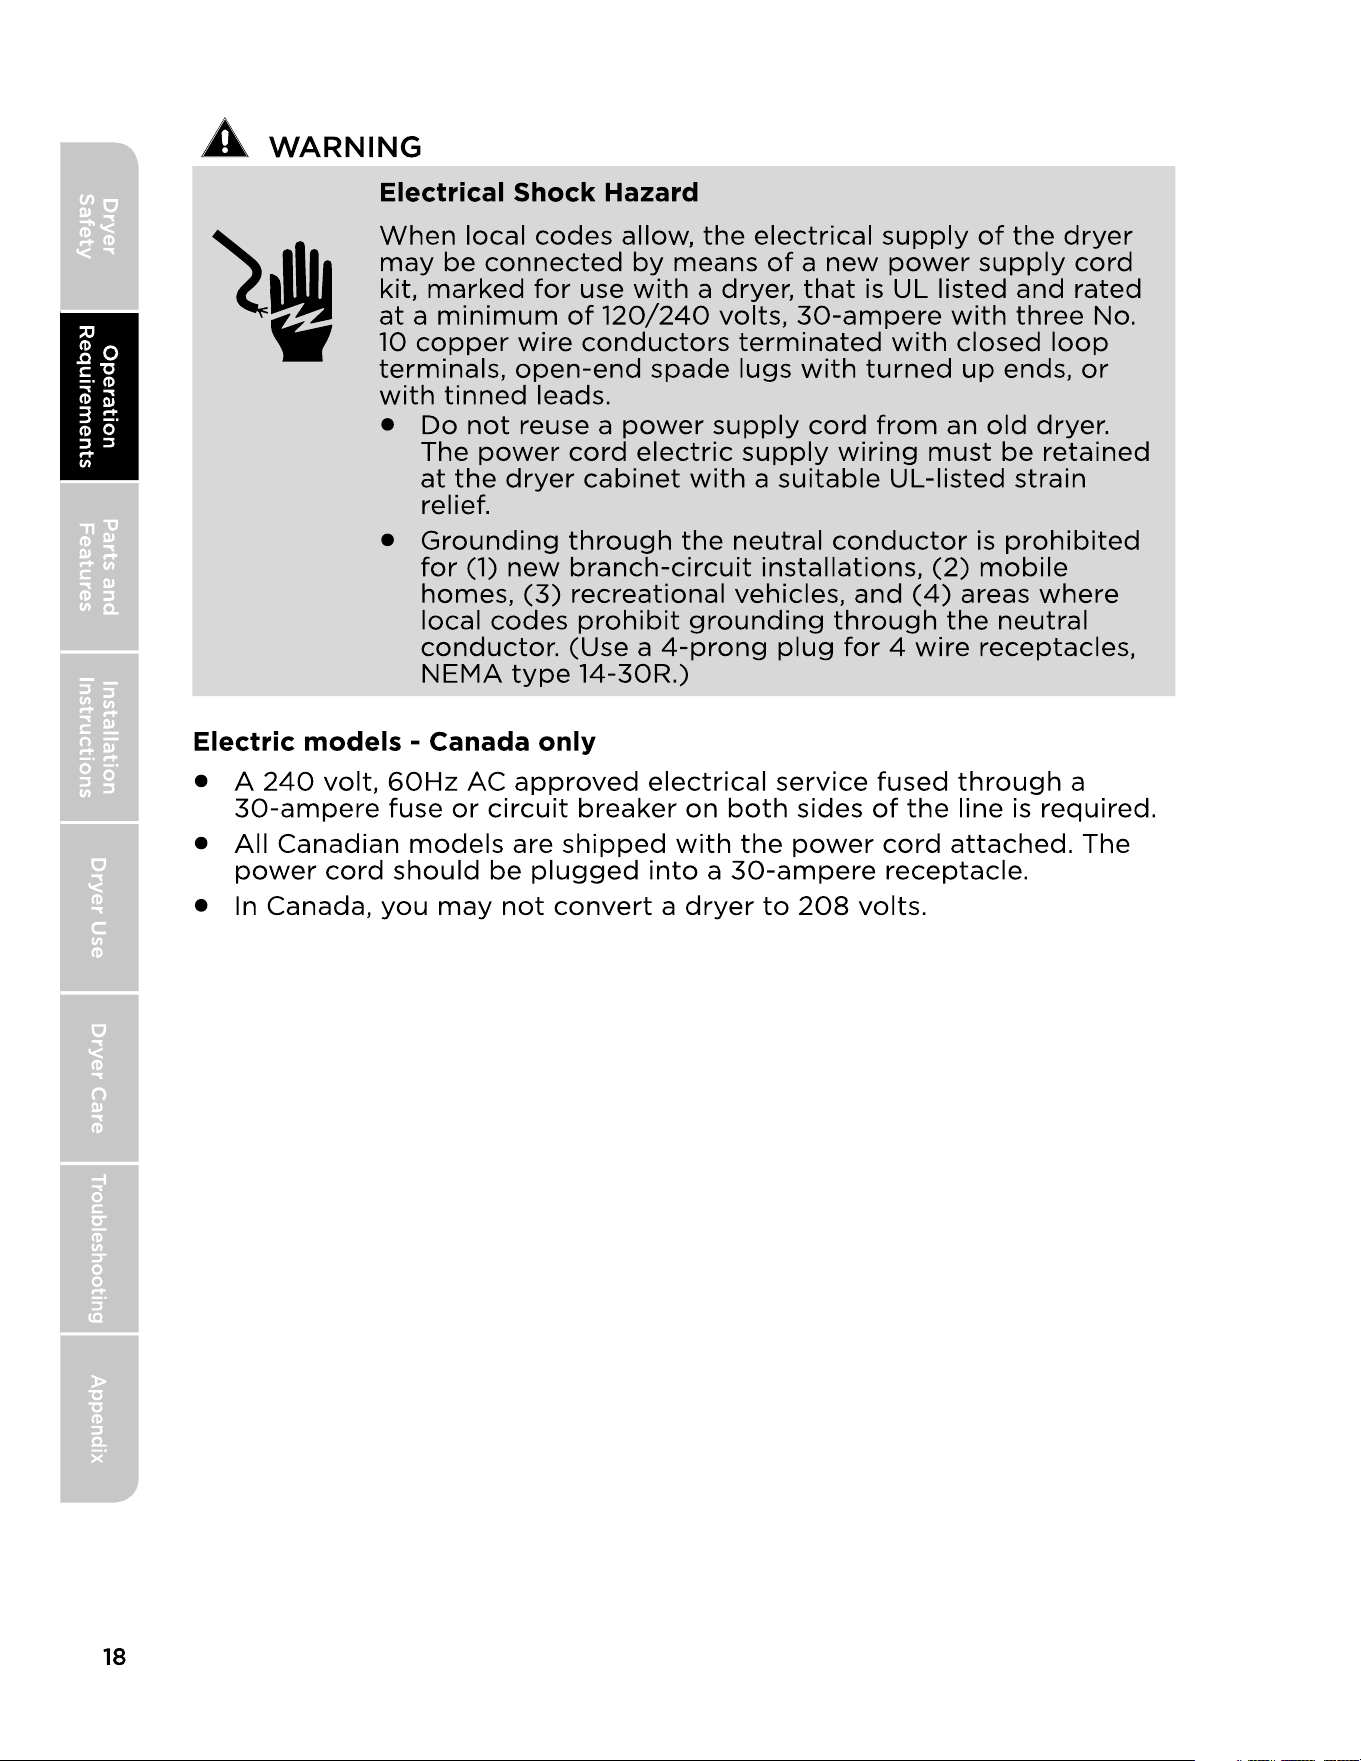
ELECTRIC REQUIREMENTS
GROUNDING
REPLACEMENT PARTS AND ACCESSORIES
REMOVING FROM THE PACKAGE
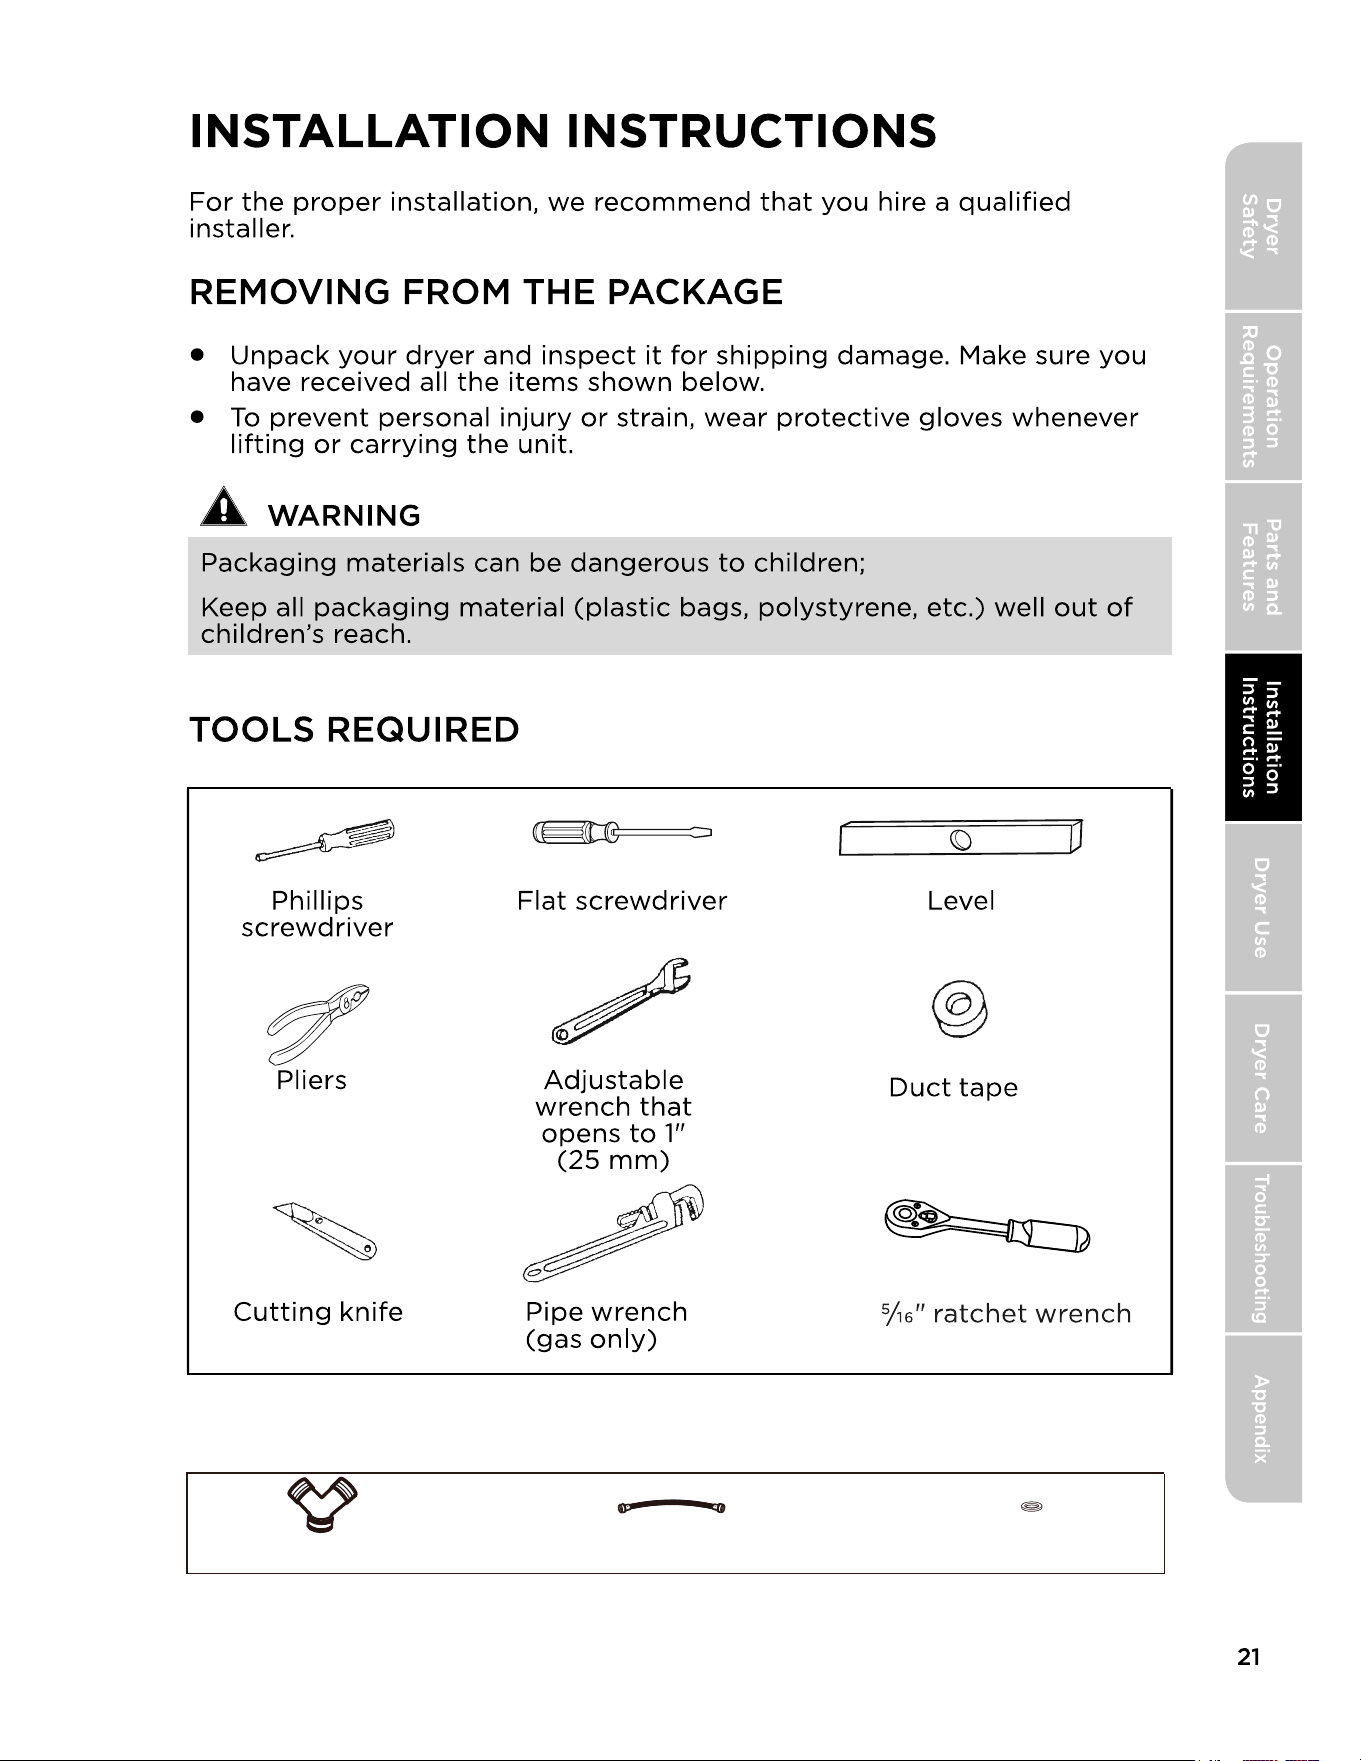
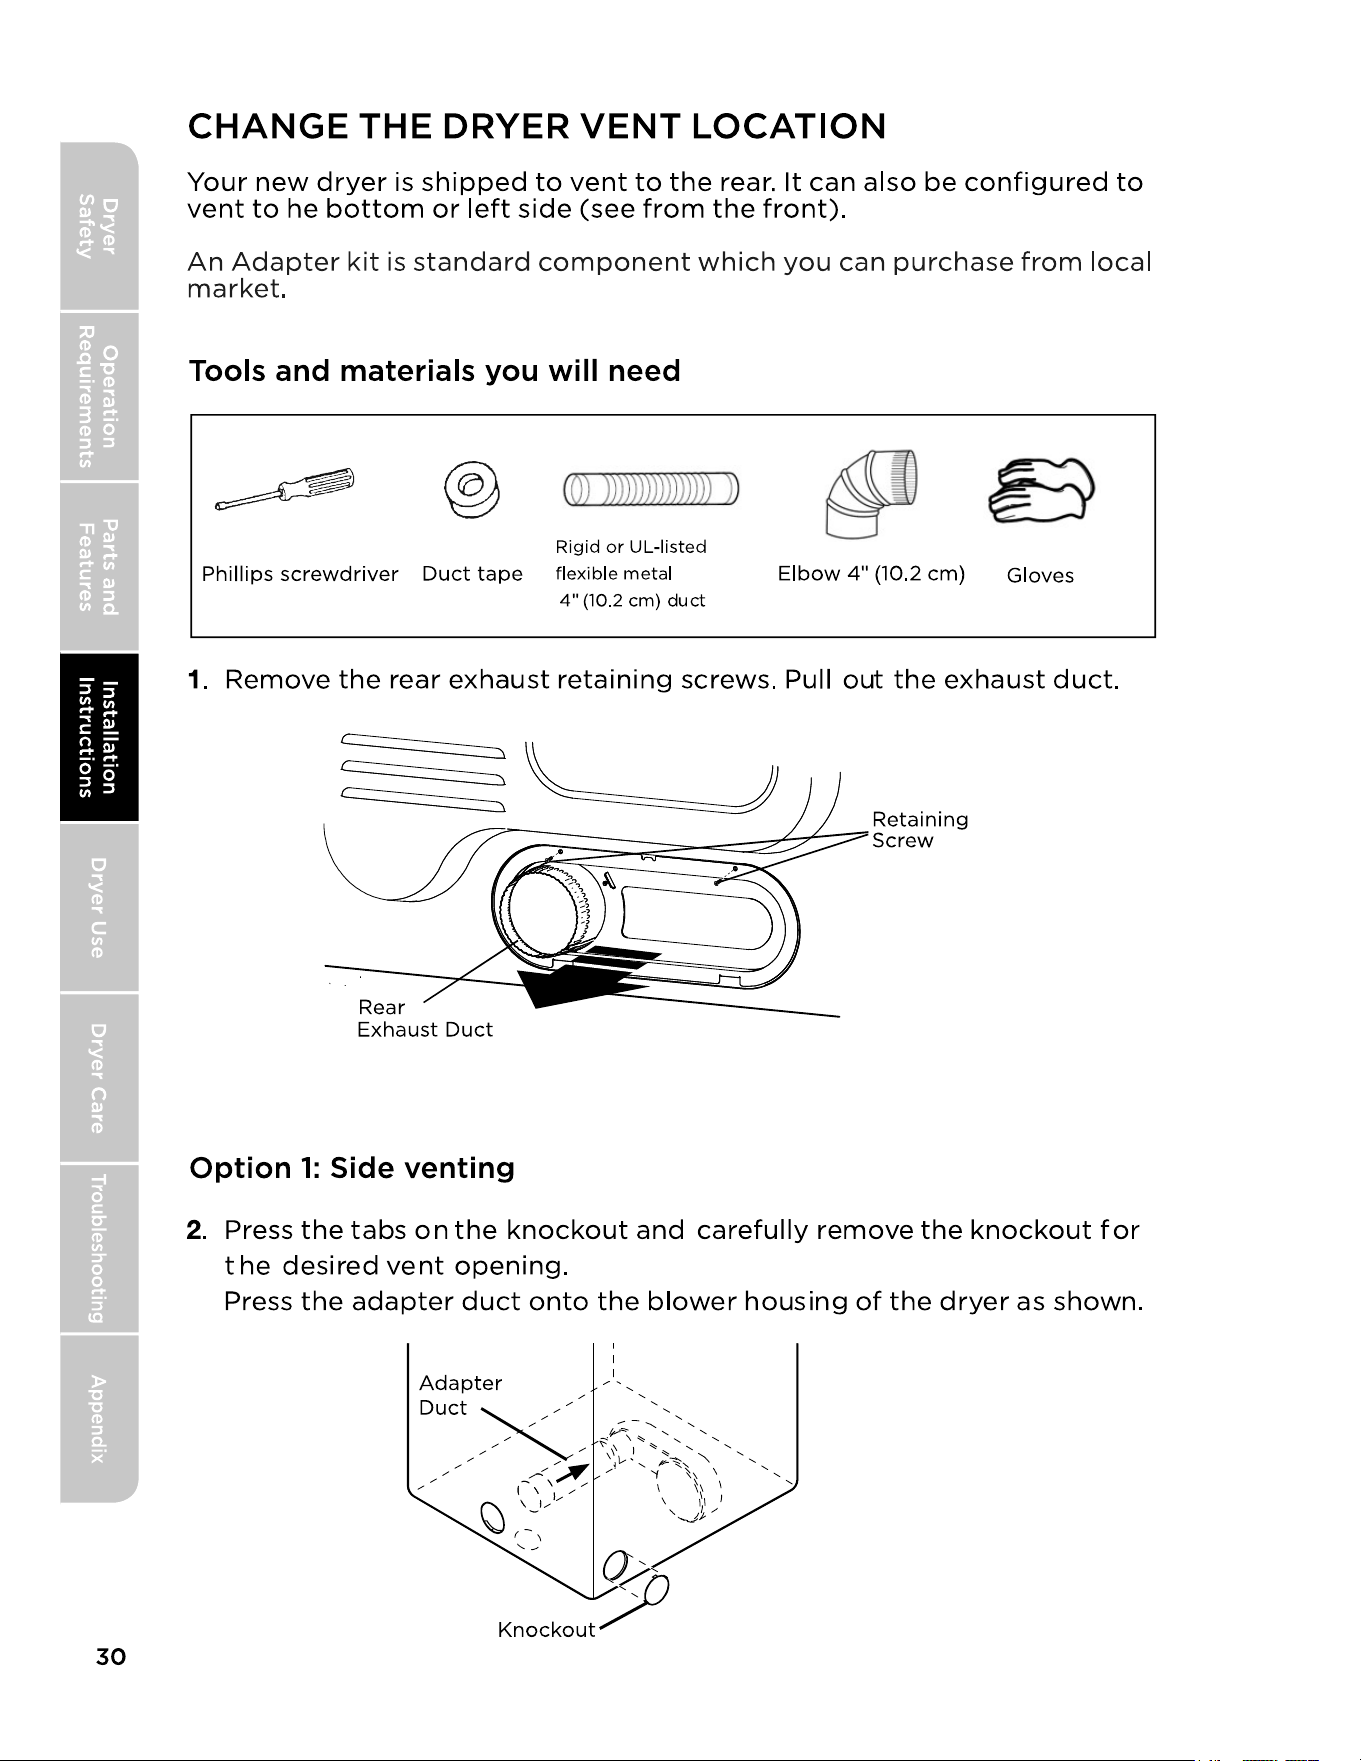
TOOLS REQUIRED
PARTS SUPPLIED
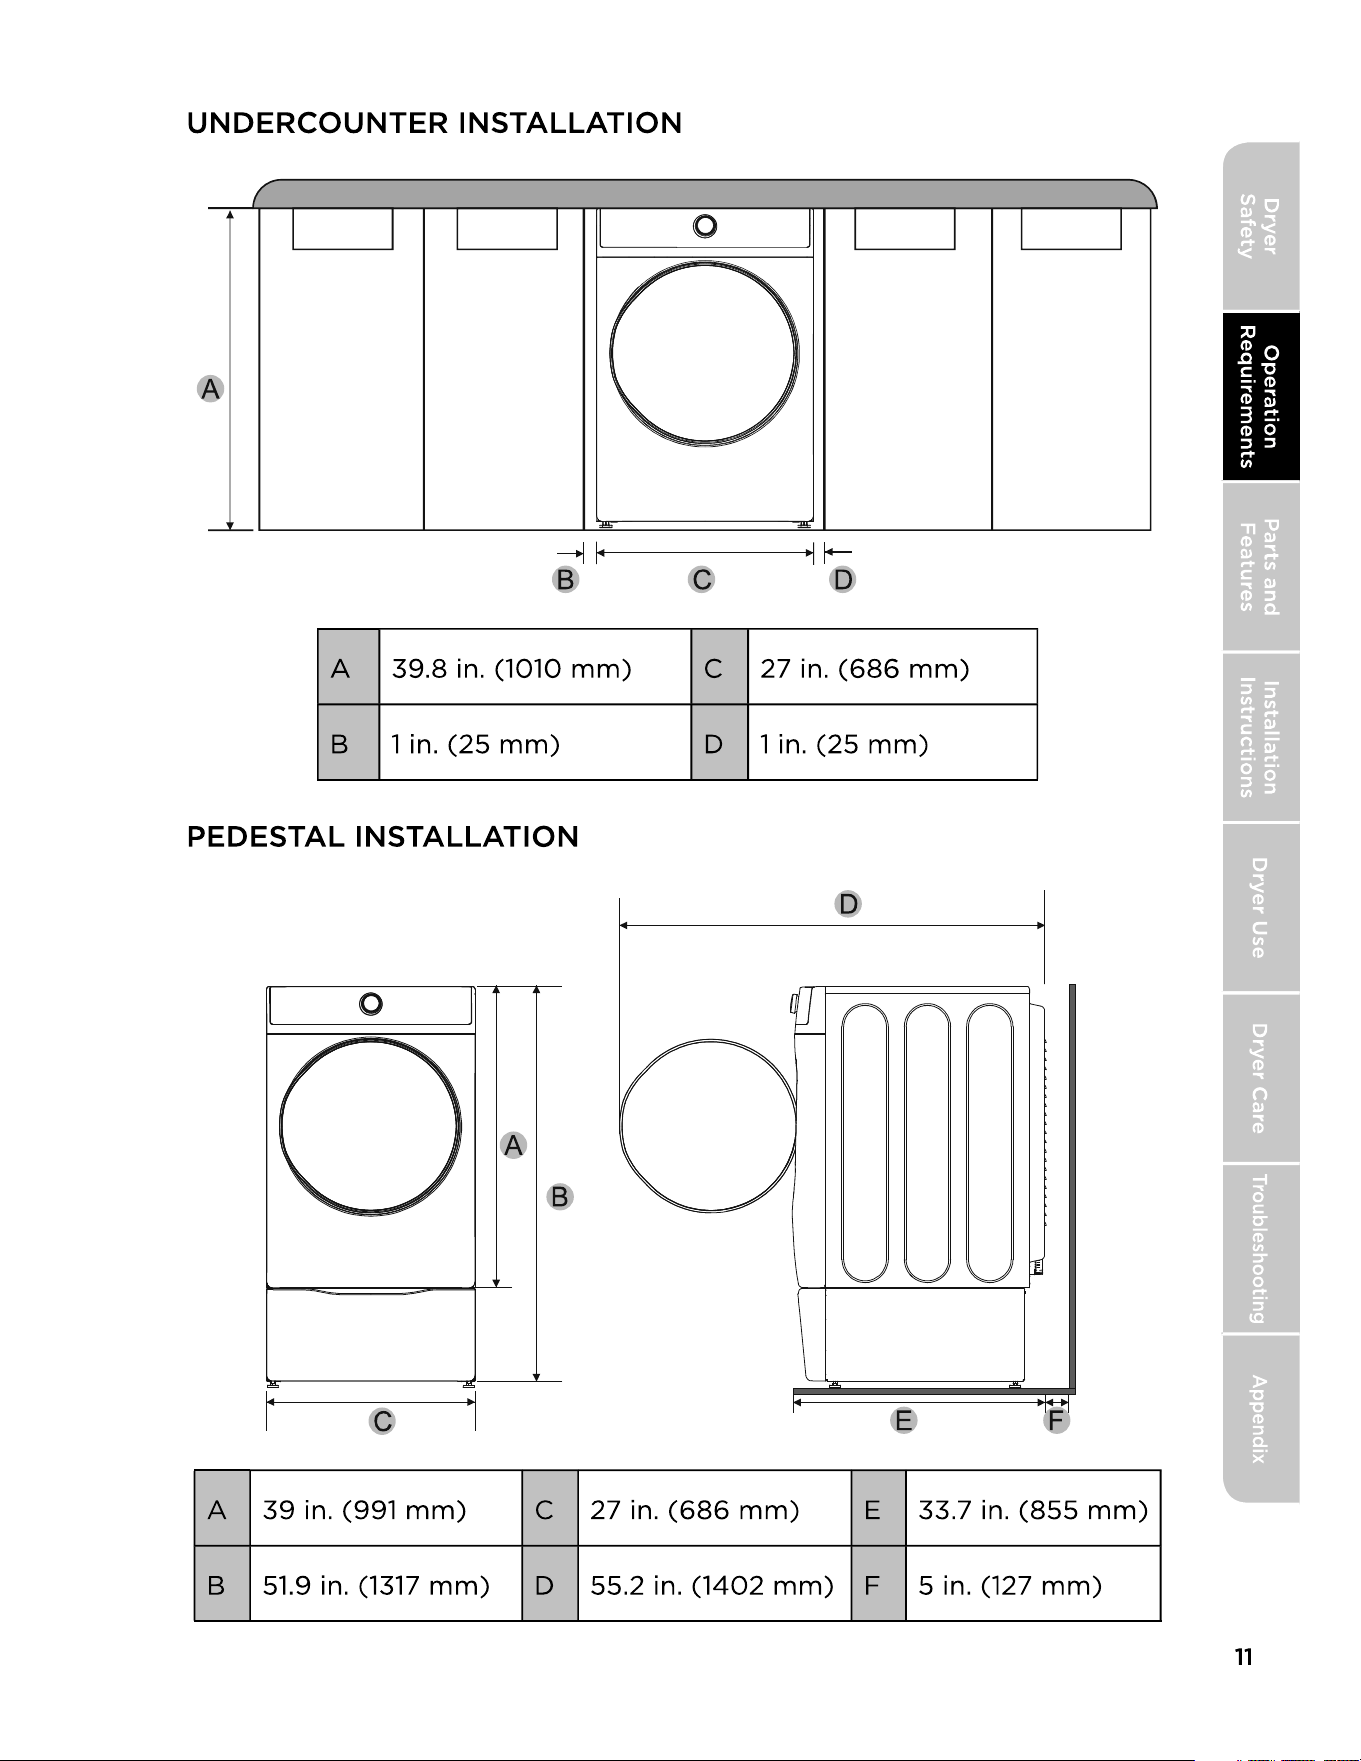
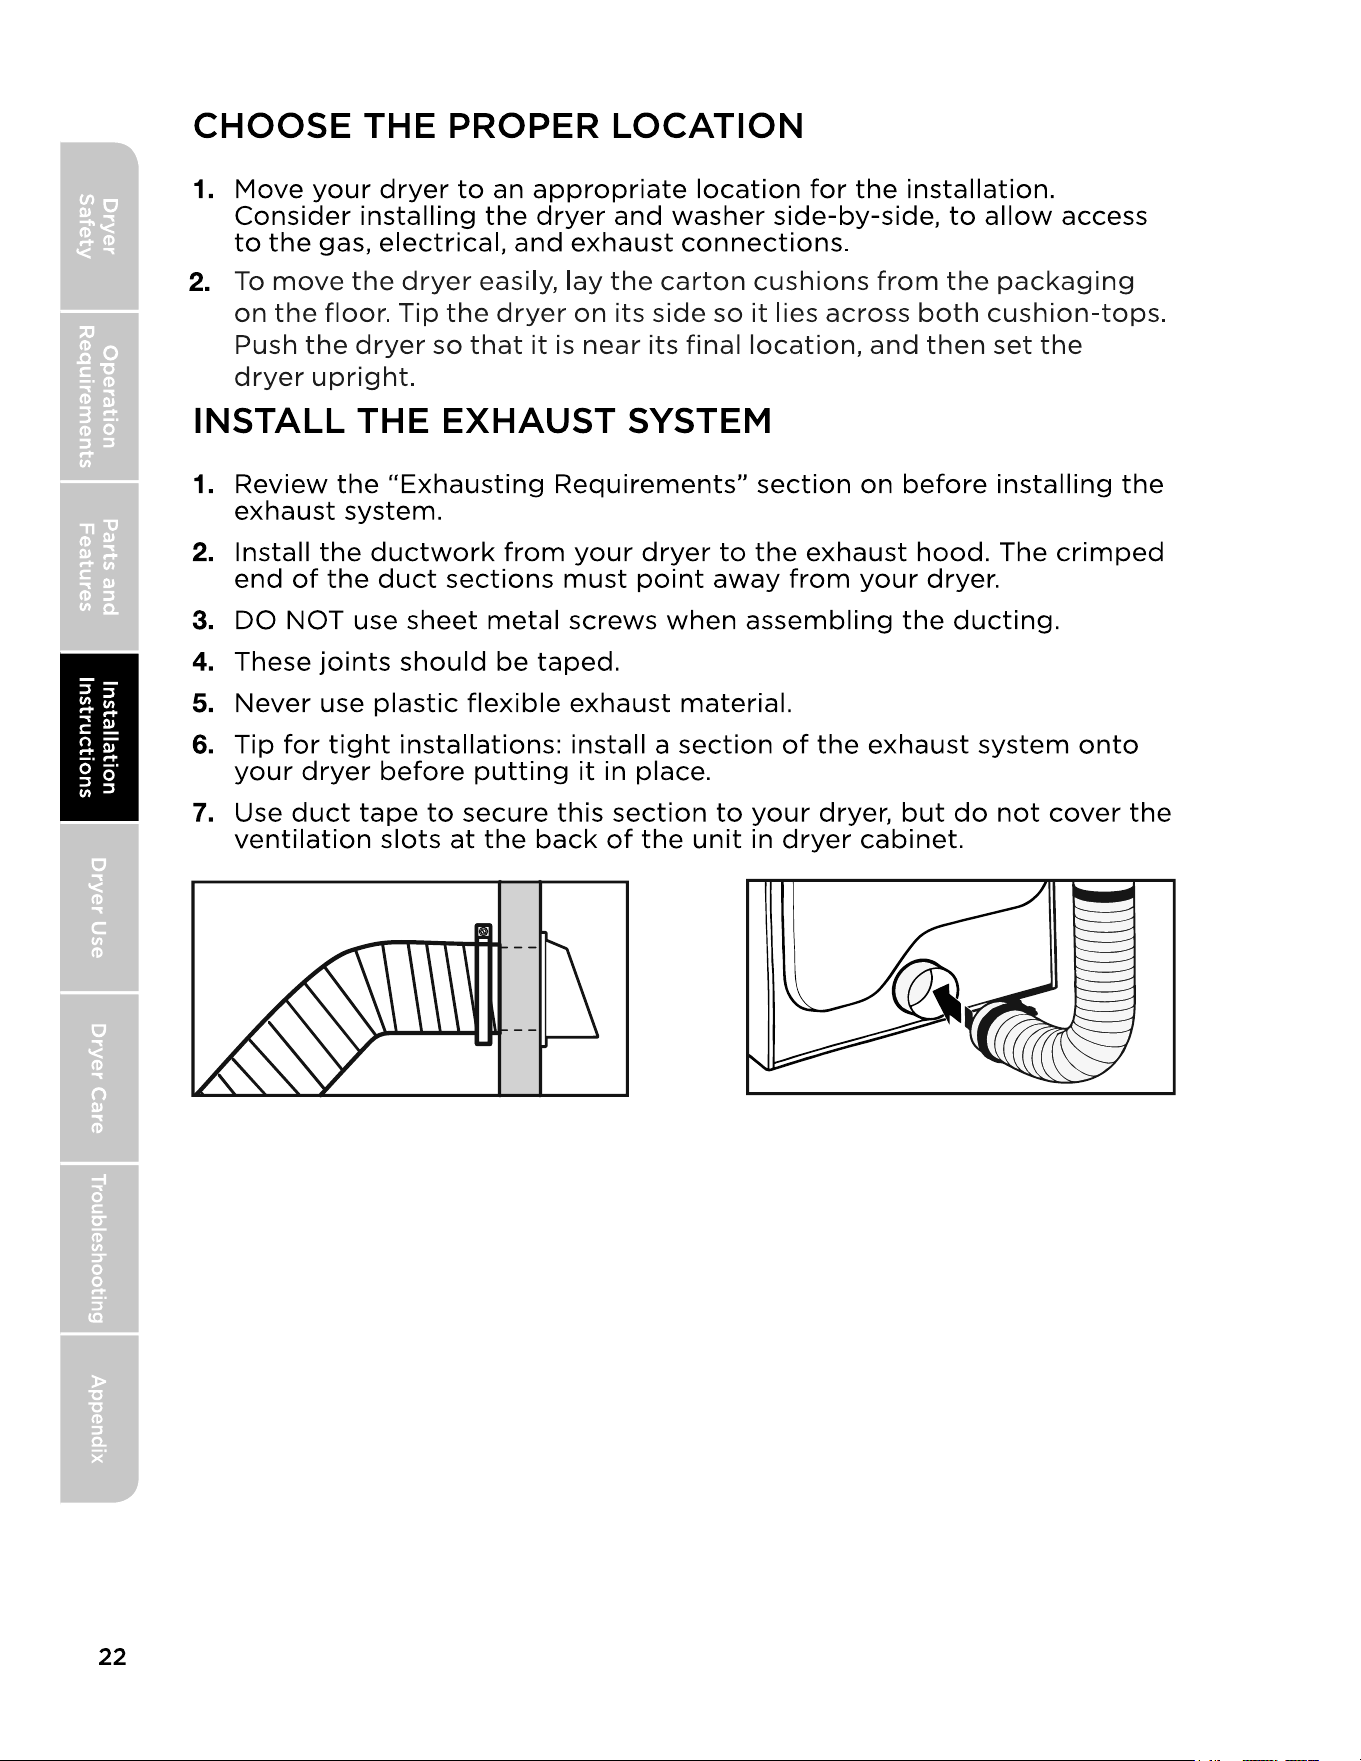
CHOOSE THE PROPER LOCATION
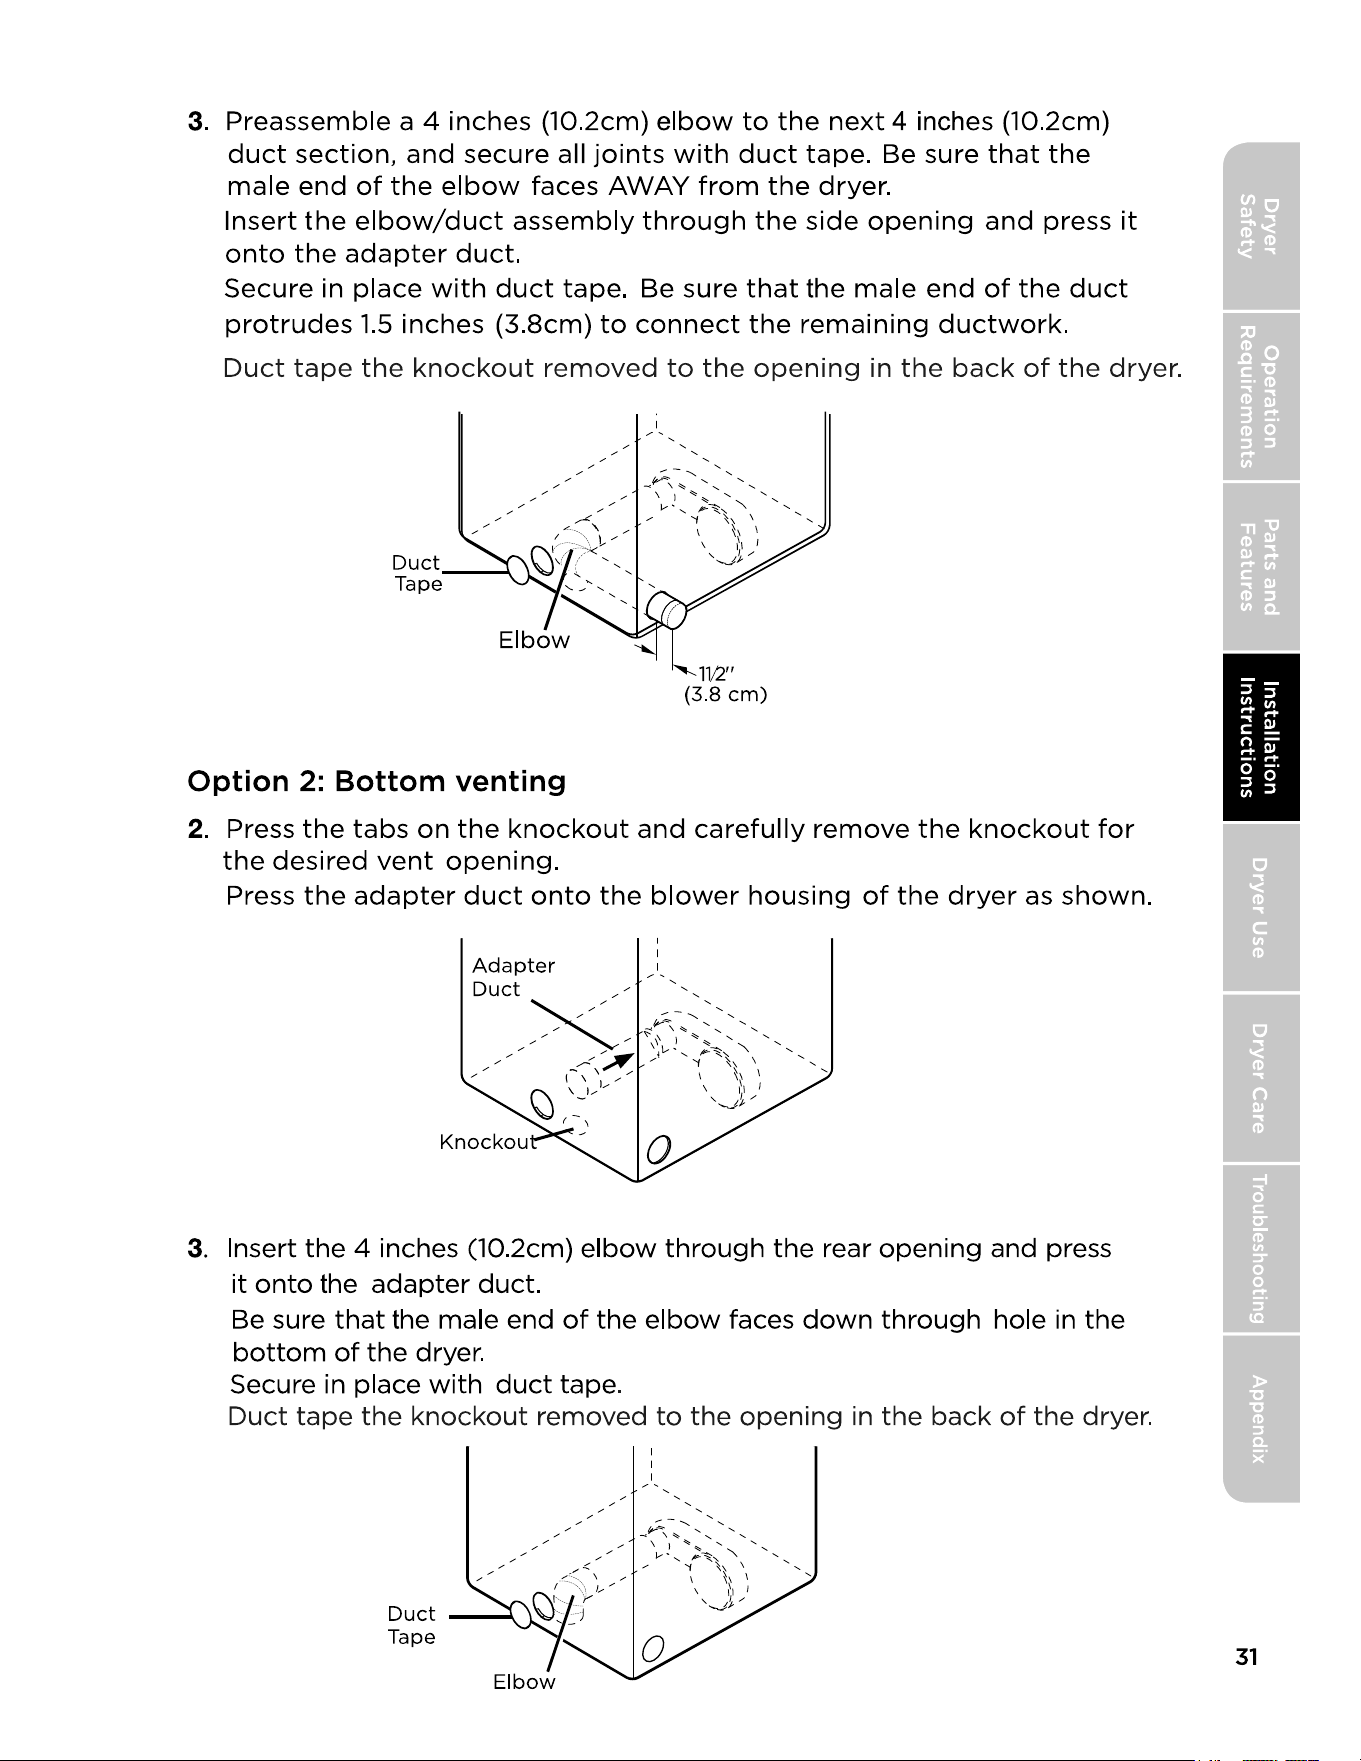
INSTALL THE EXHAUST SYSTEM
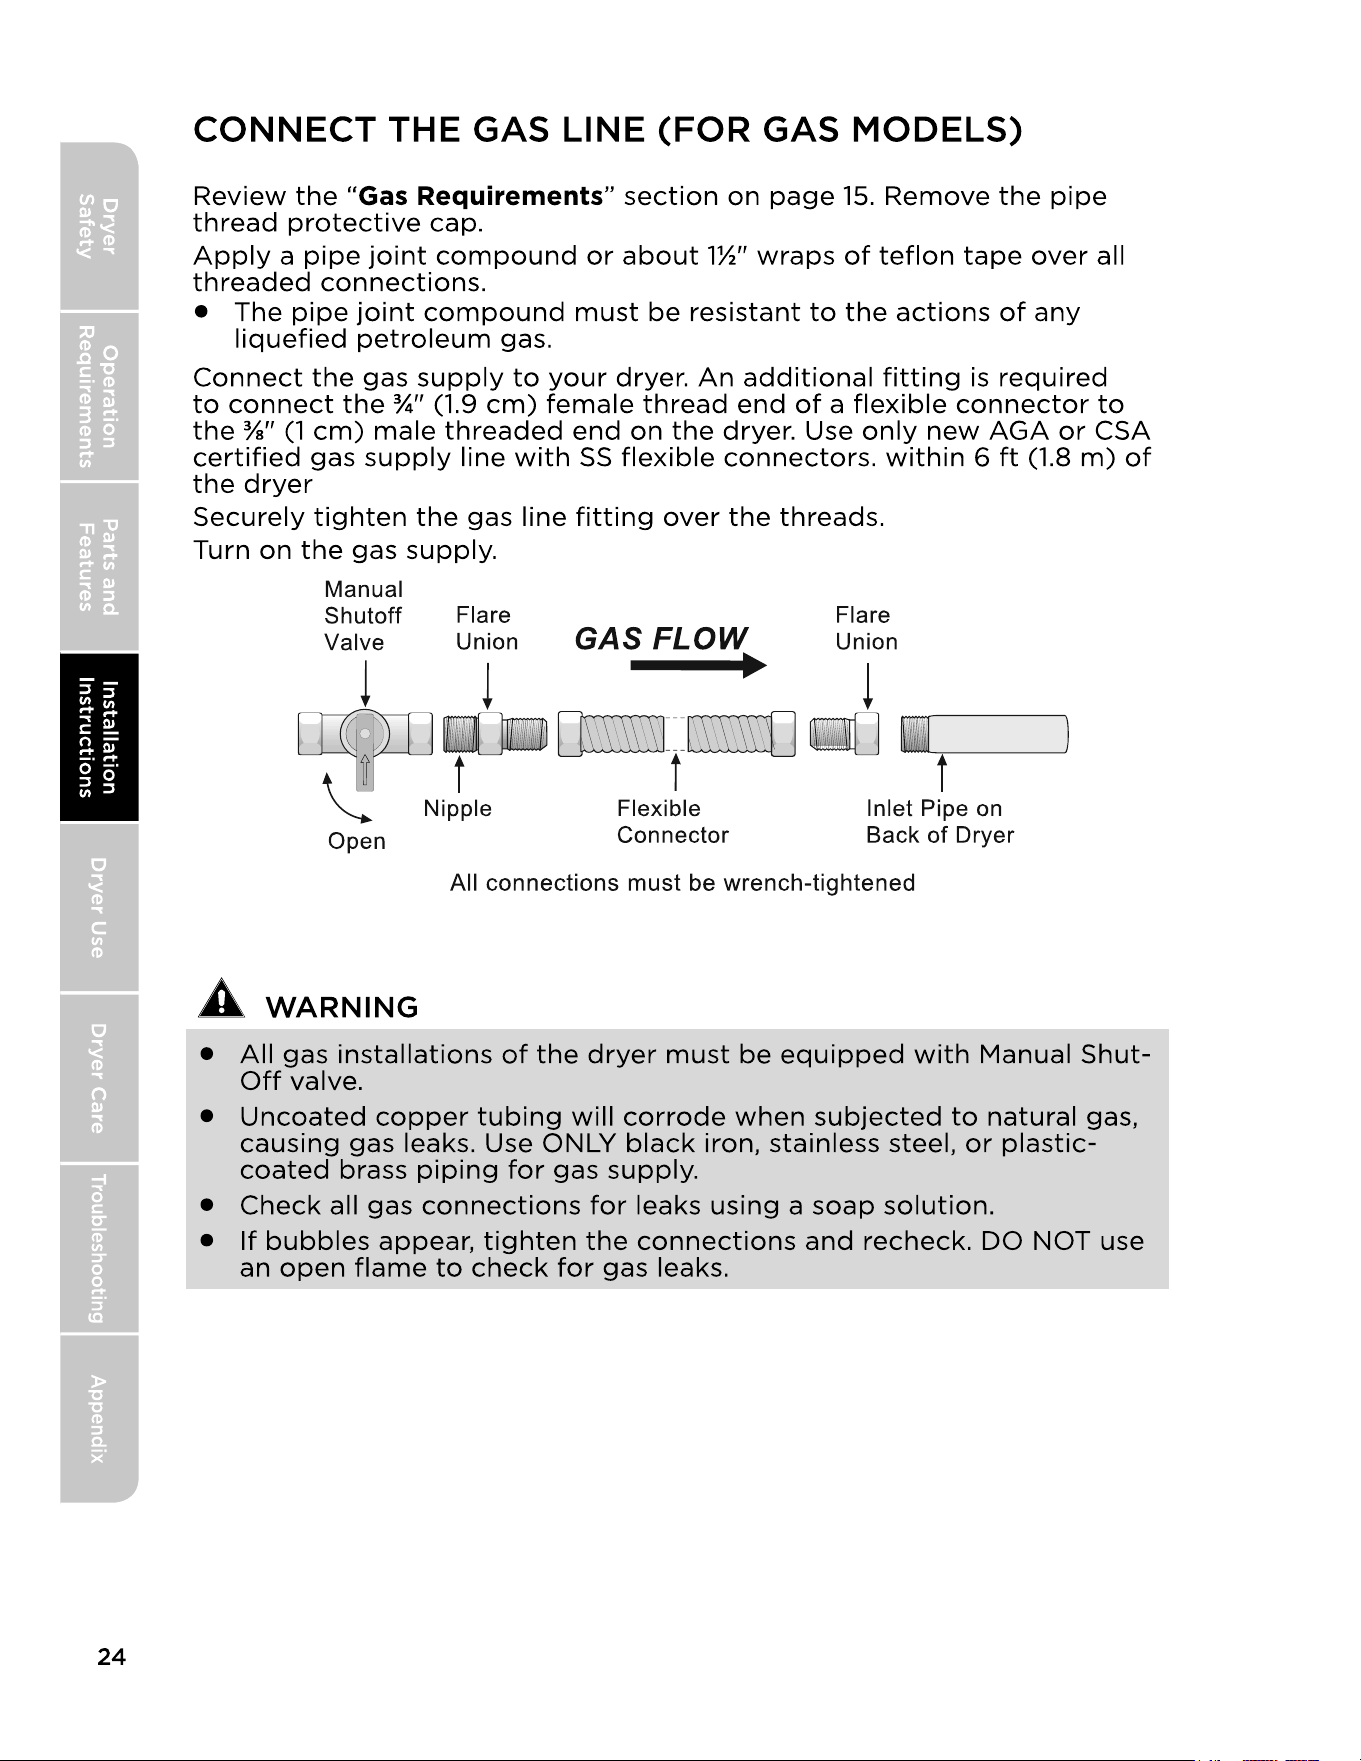
CONNECT THE GAS LINE (FOR GAS MODELS)
CONNECT THE ELECTRICAL WIRING
CONNECT INLET HOSES
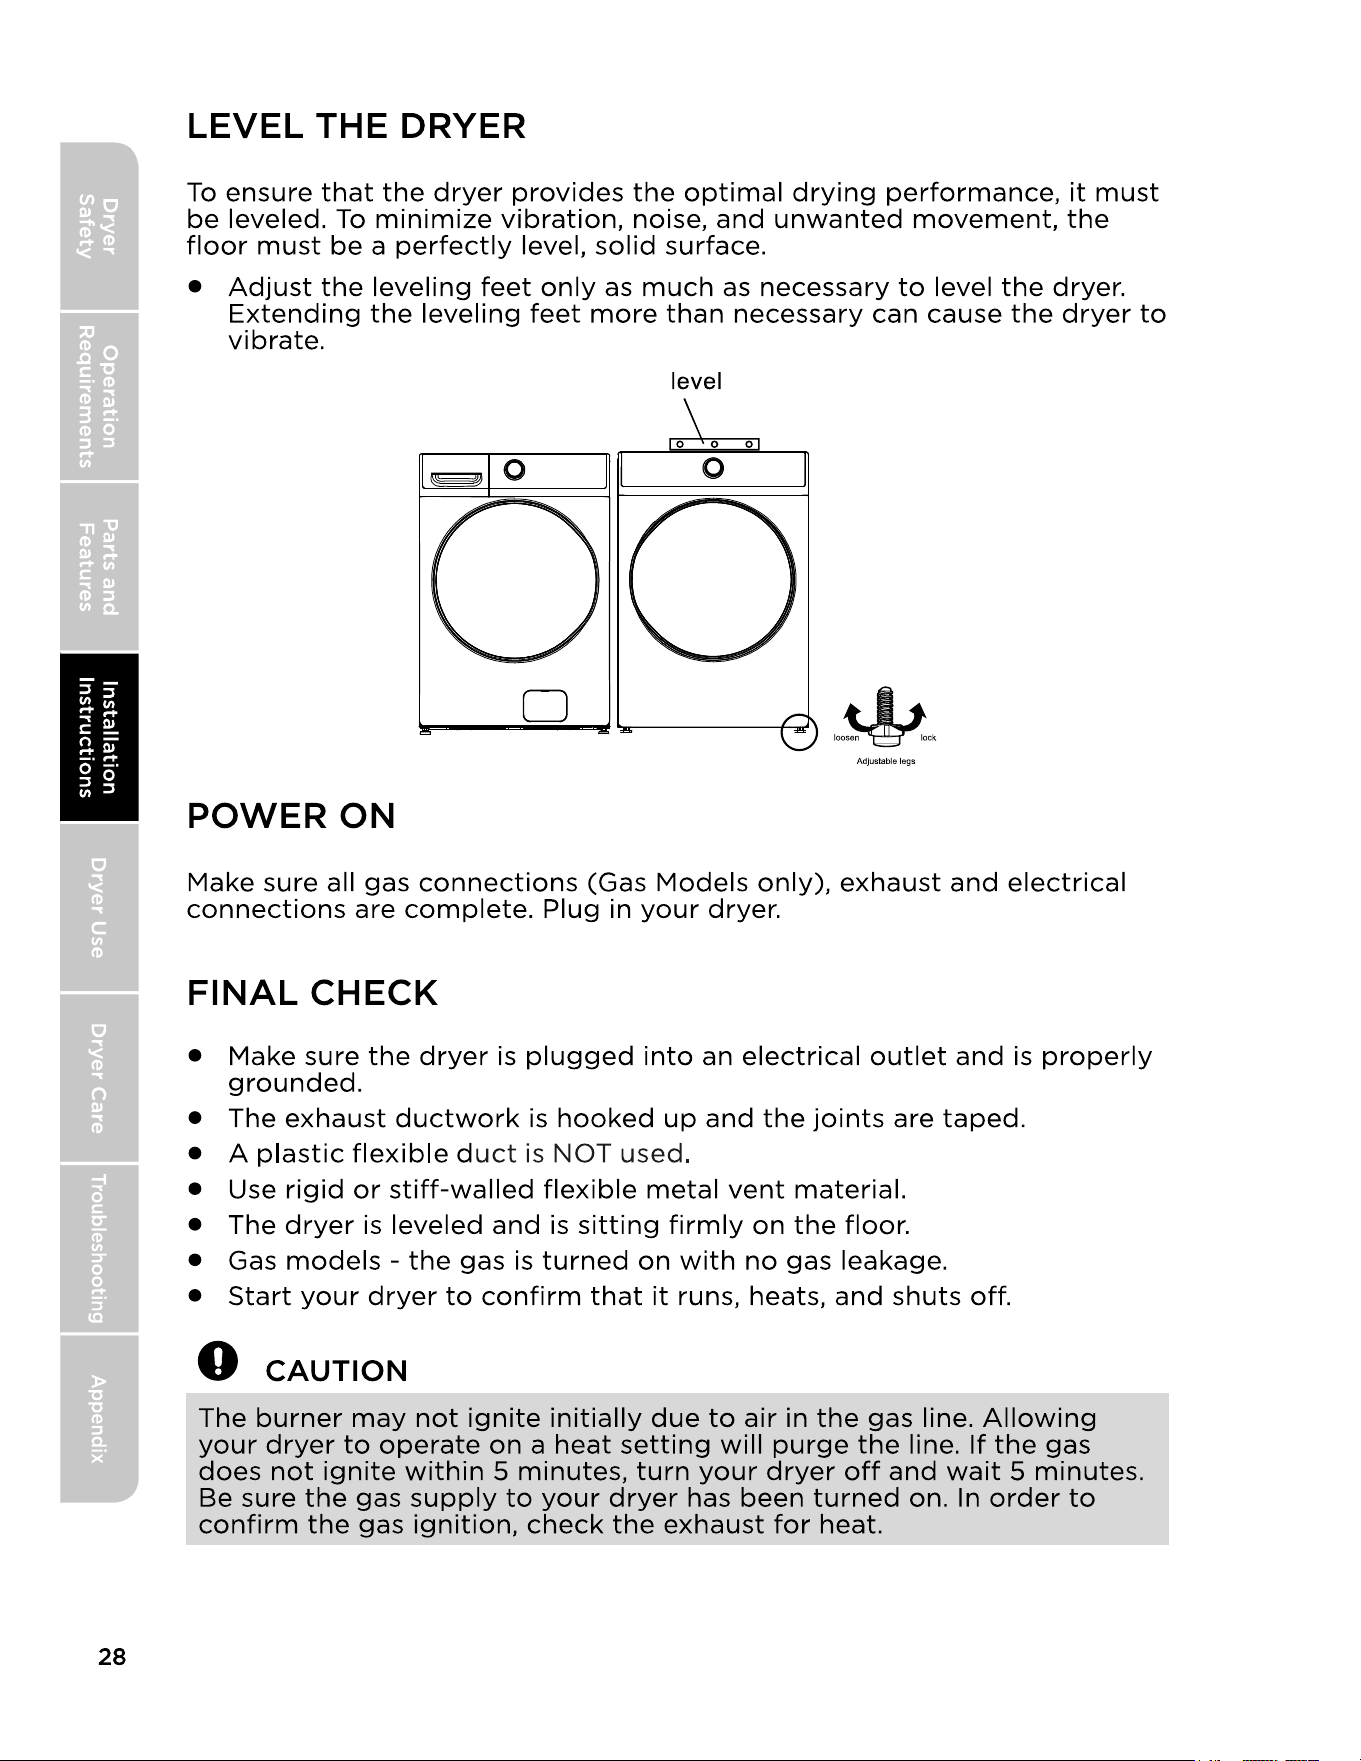
LEVEL THE DRYER
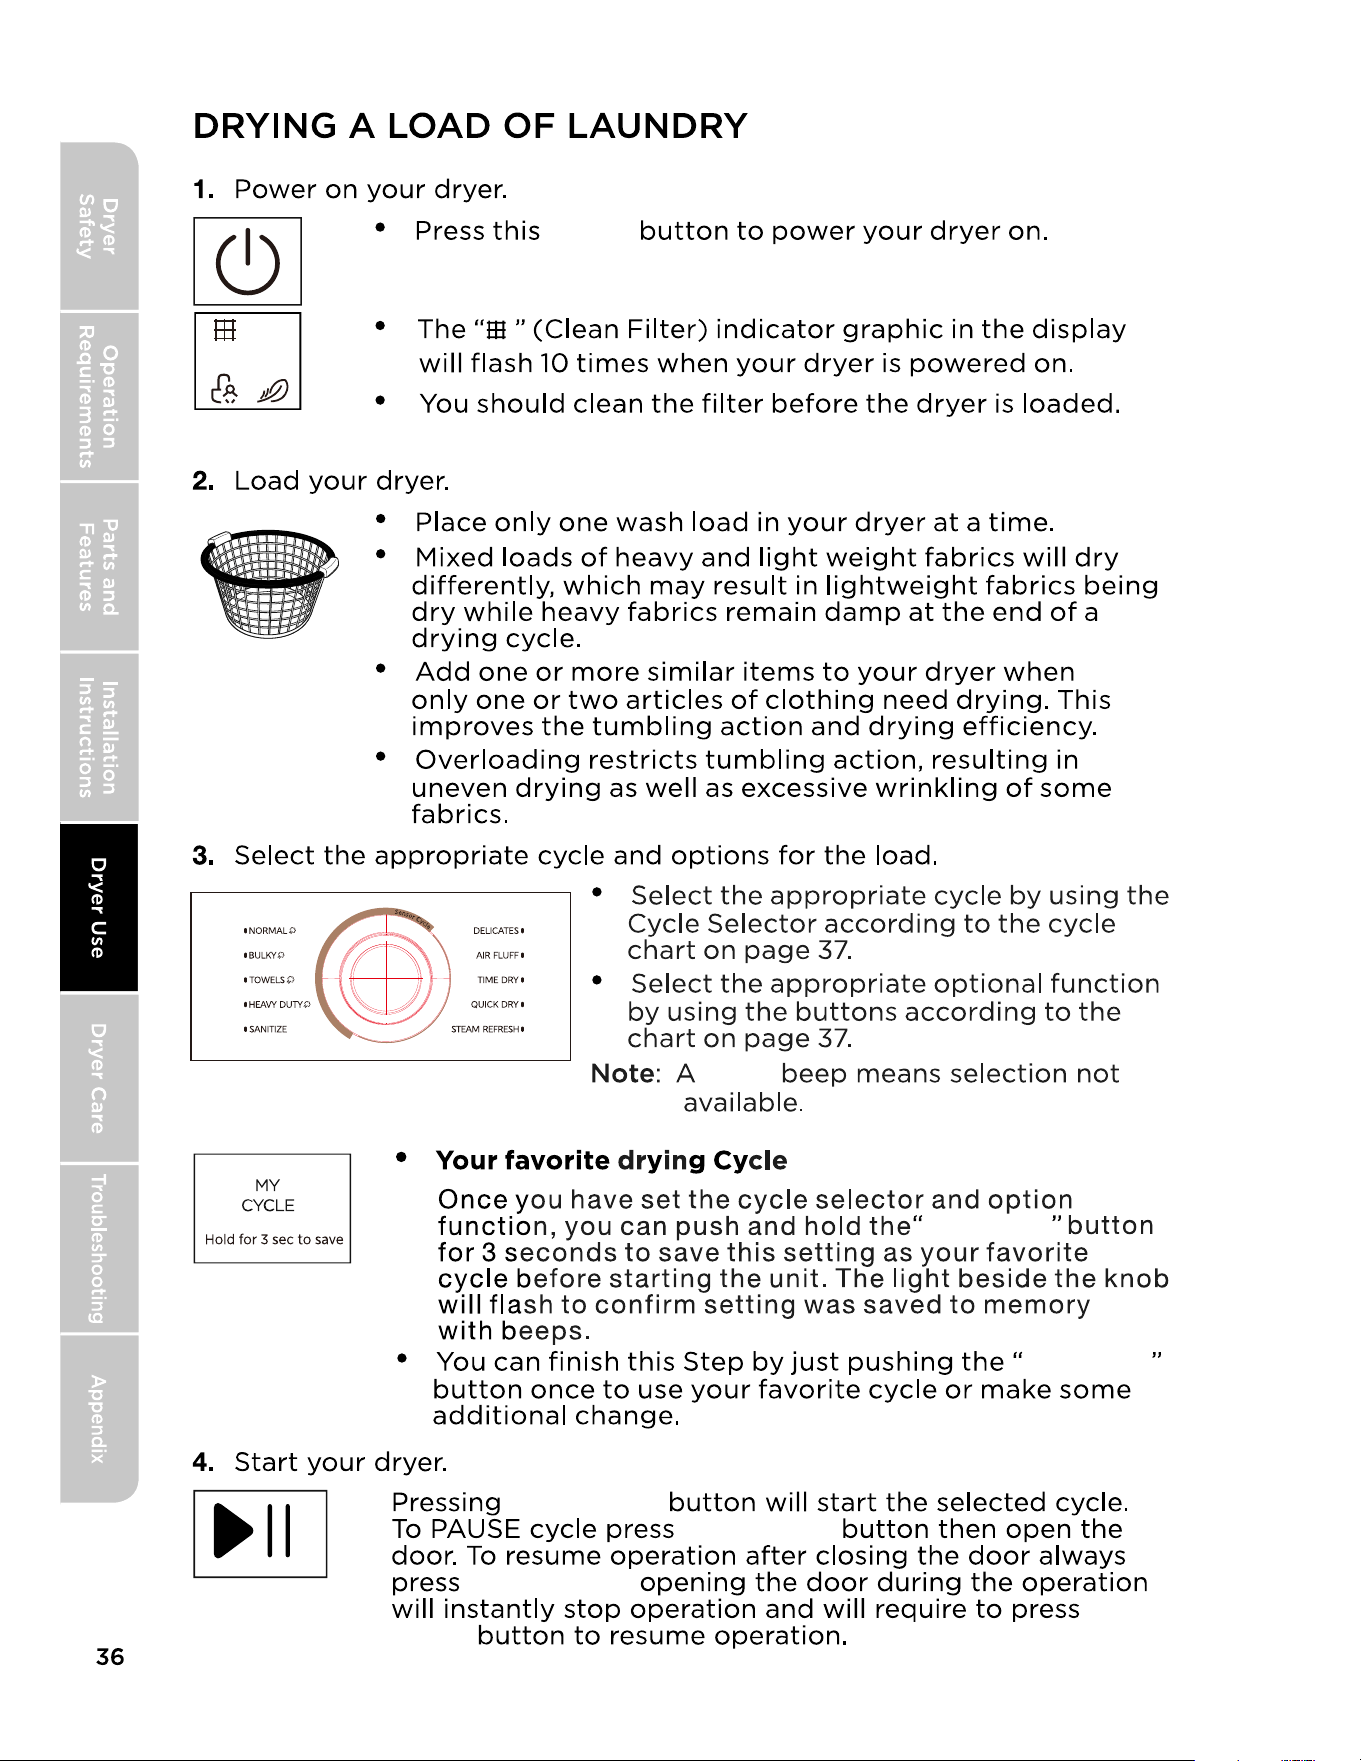
POWER ON
7
FINAL CHECK
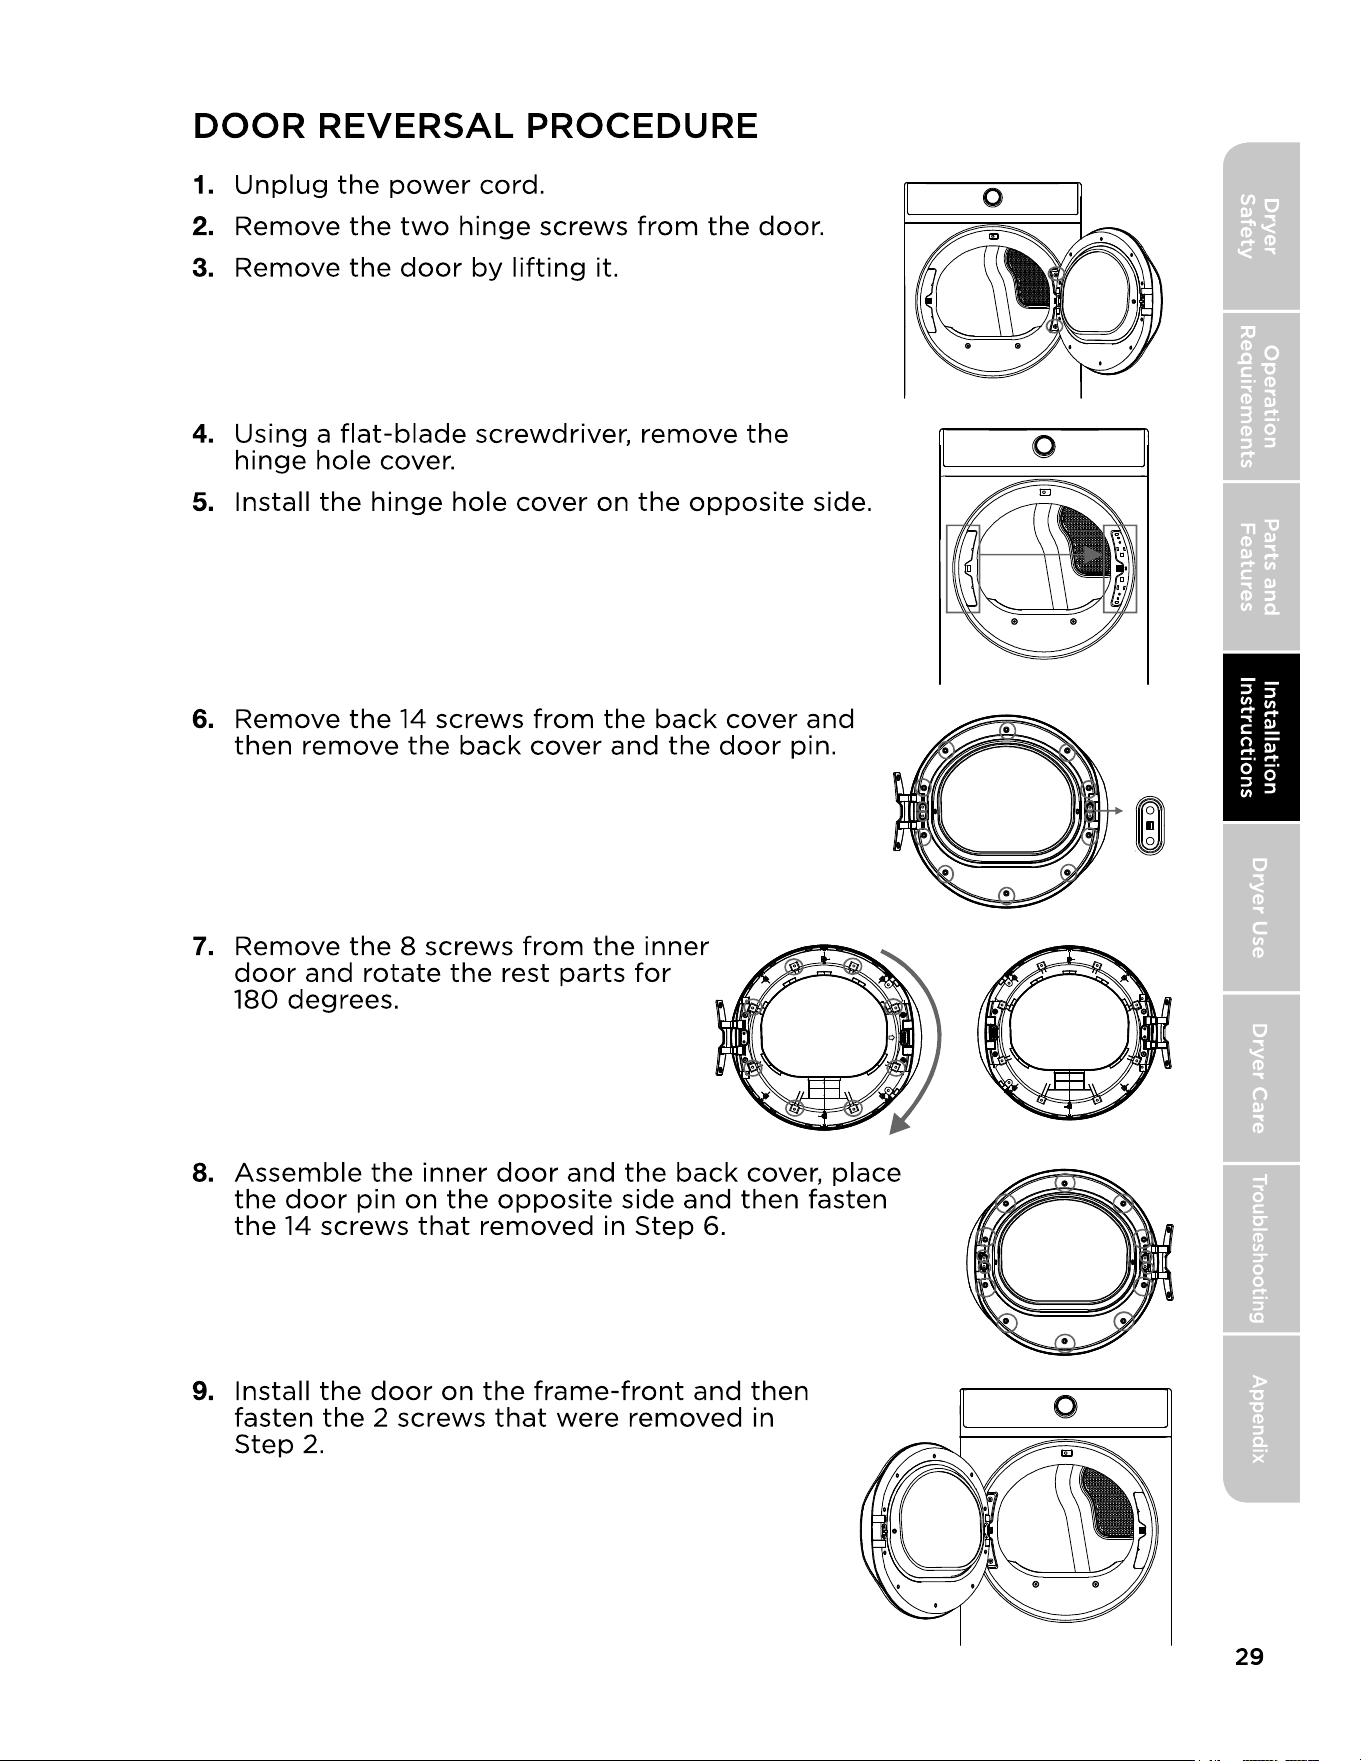
DOOR REVERSAL PROCEDURE
CHANGE THE DRYER VENT LOCATION
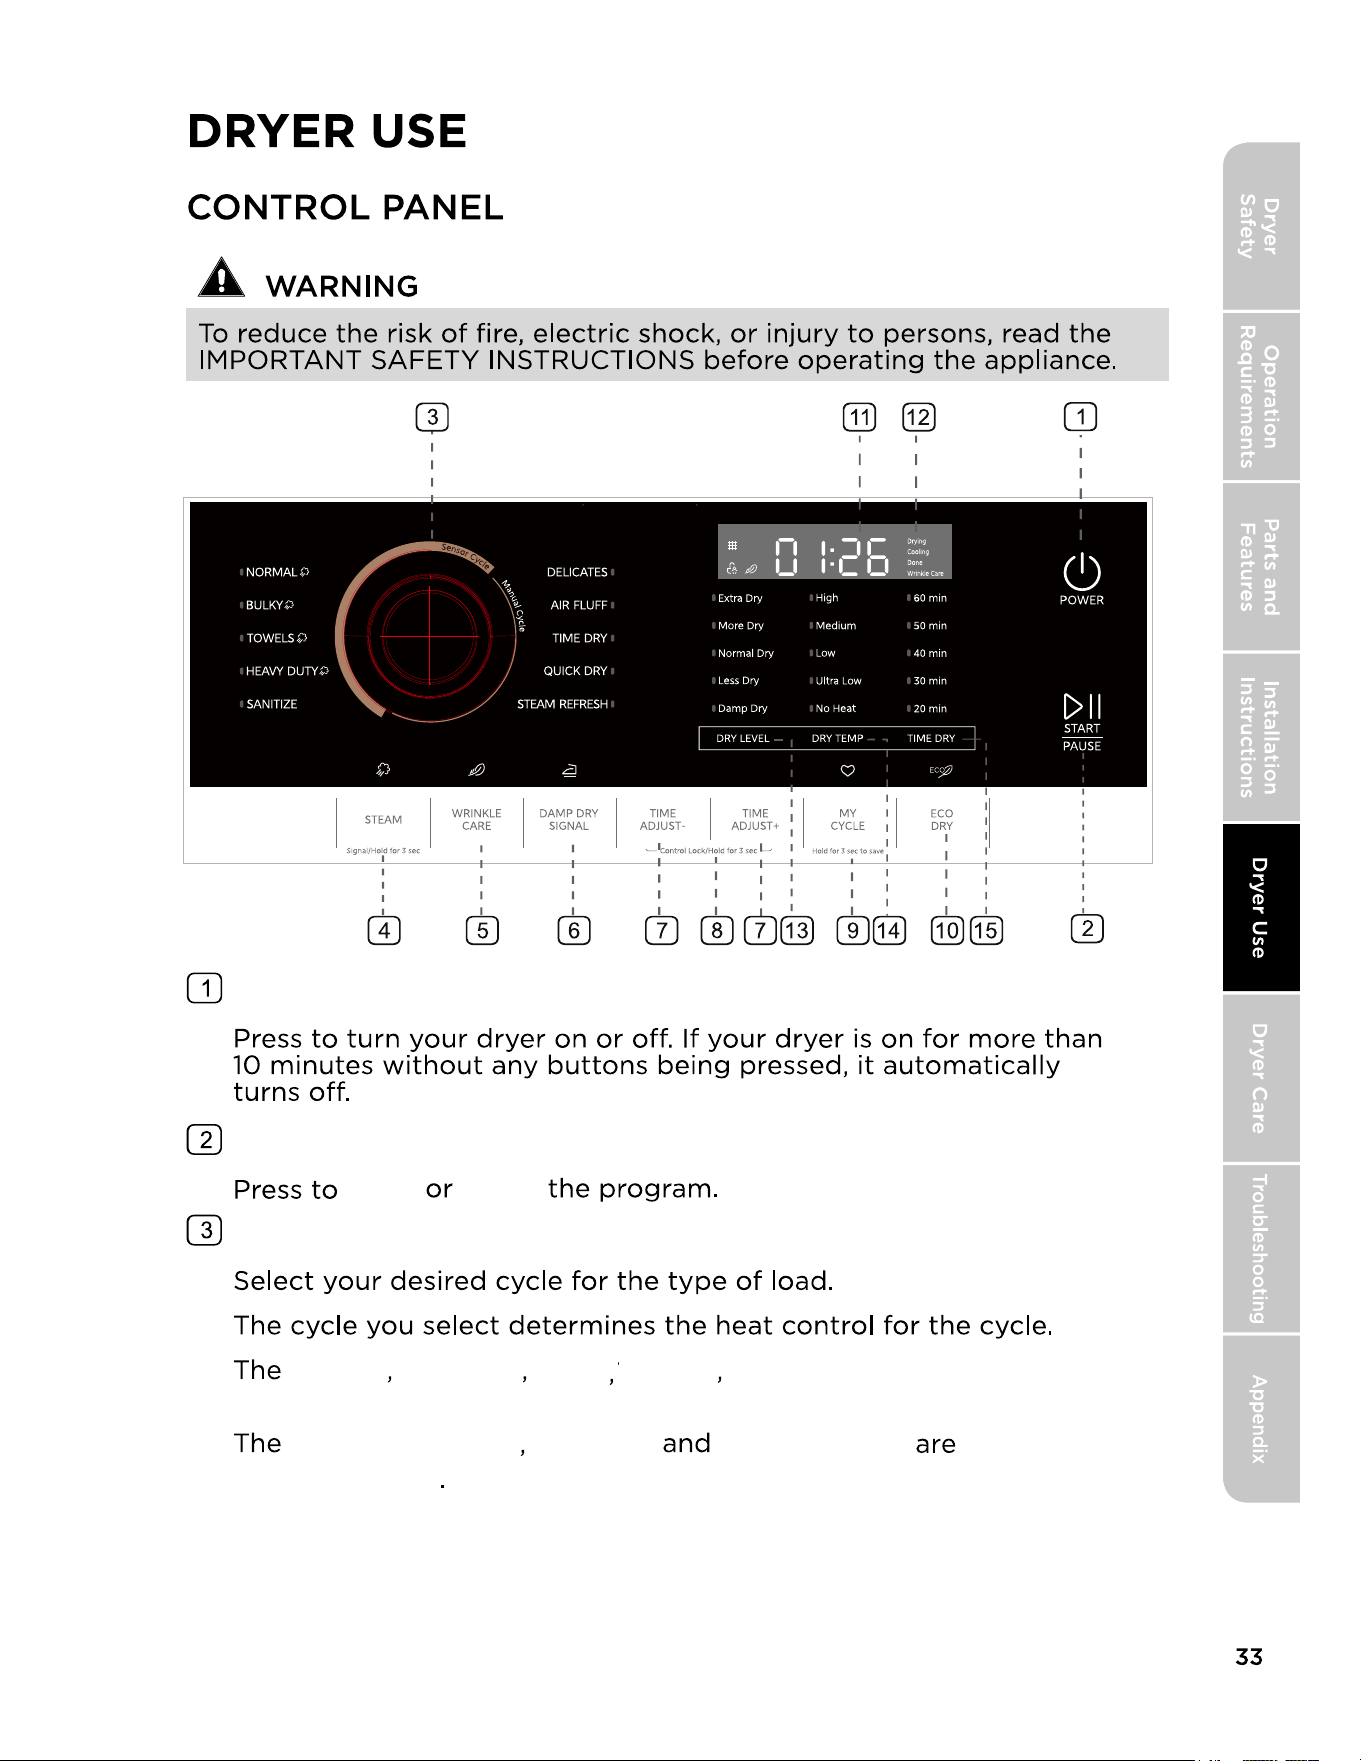
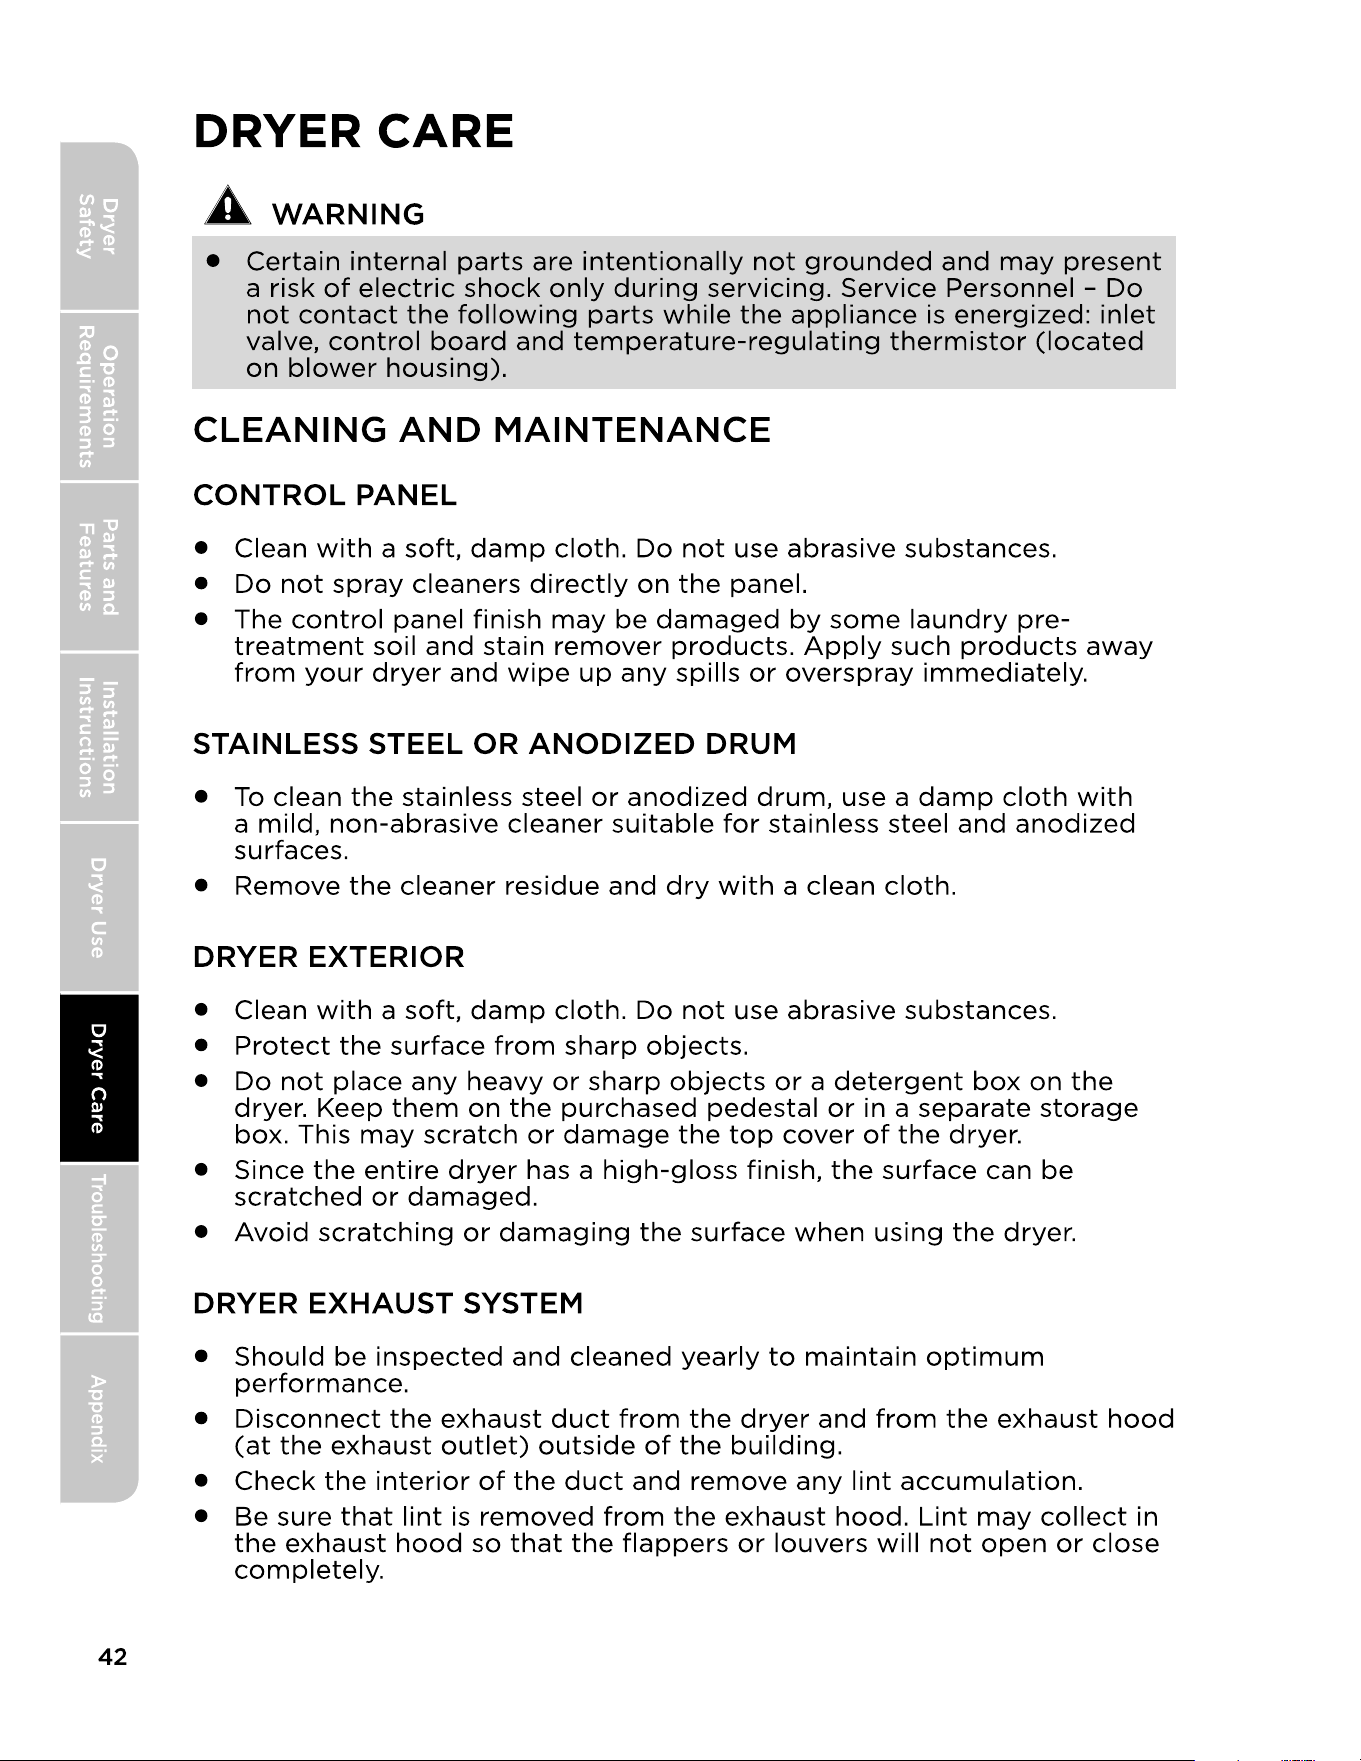
CONTROL PANEL
DRYING A LOAD OF LAUNDRY
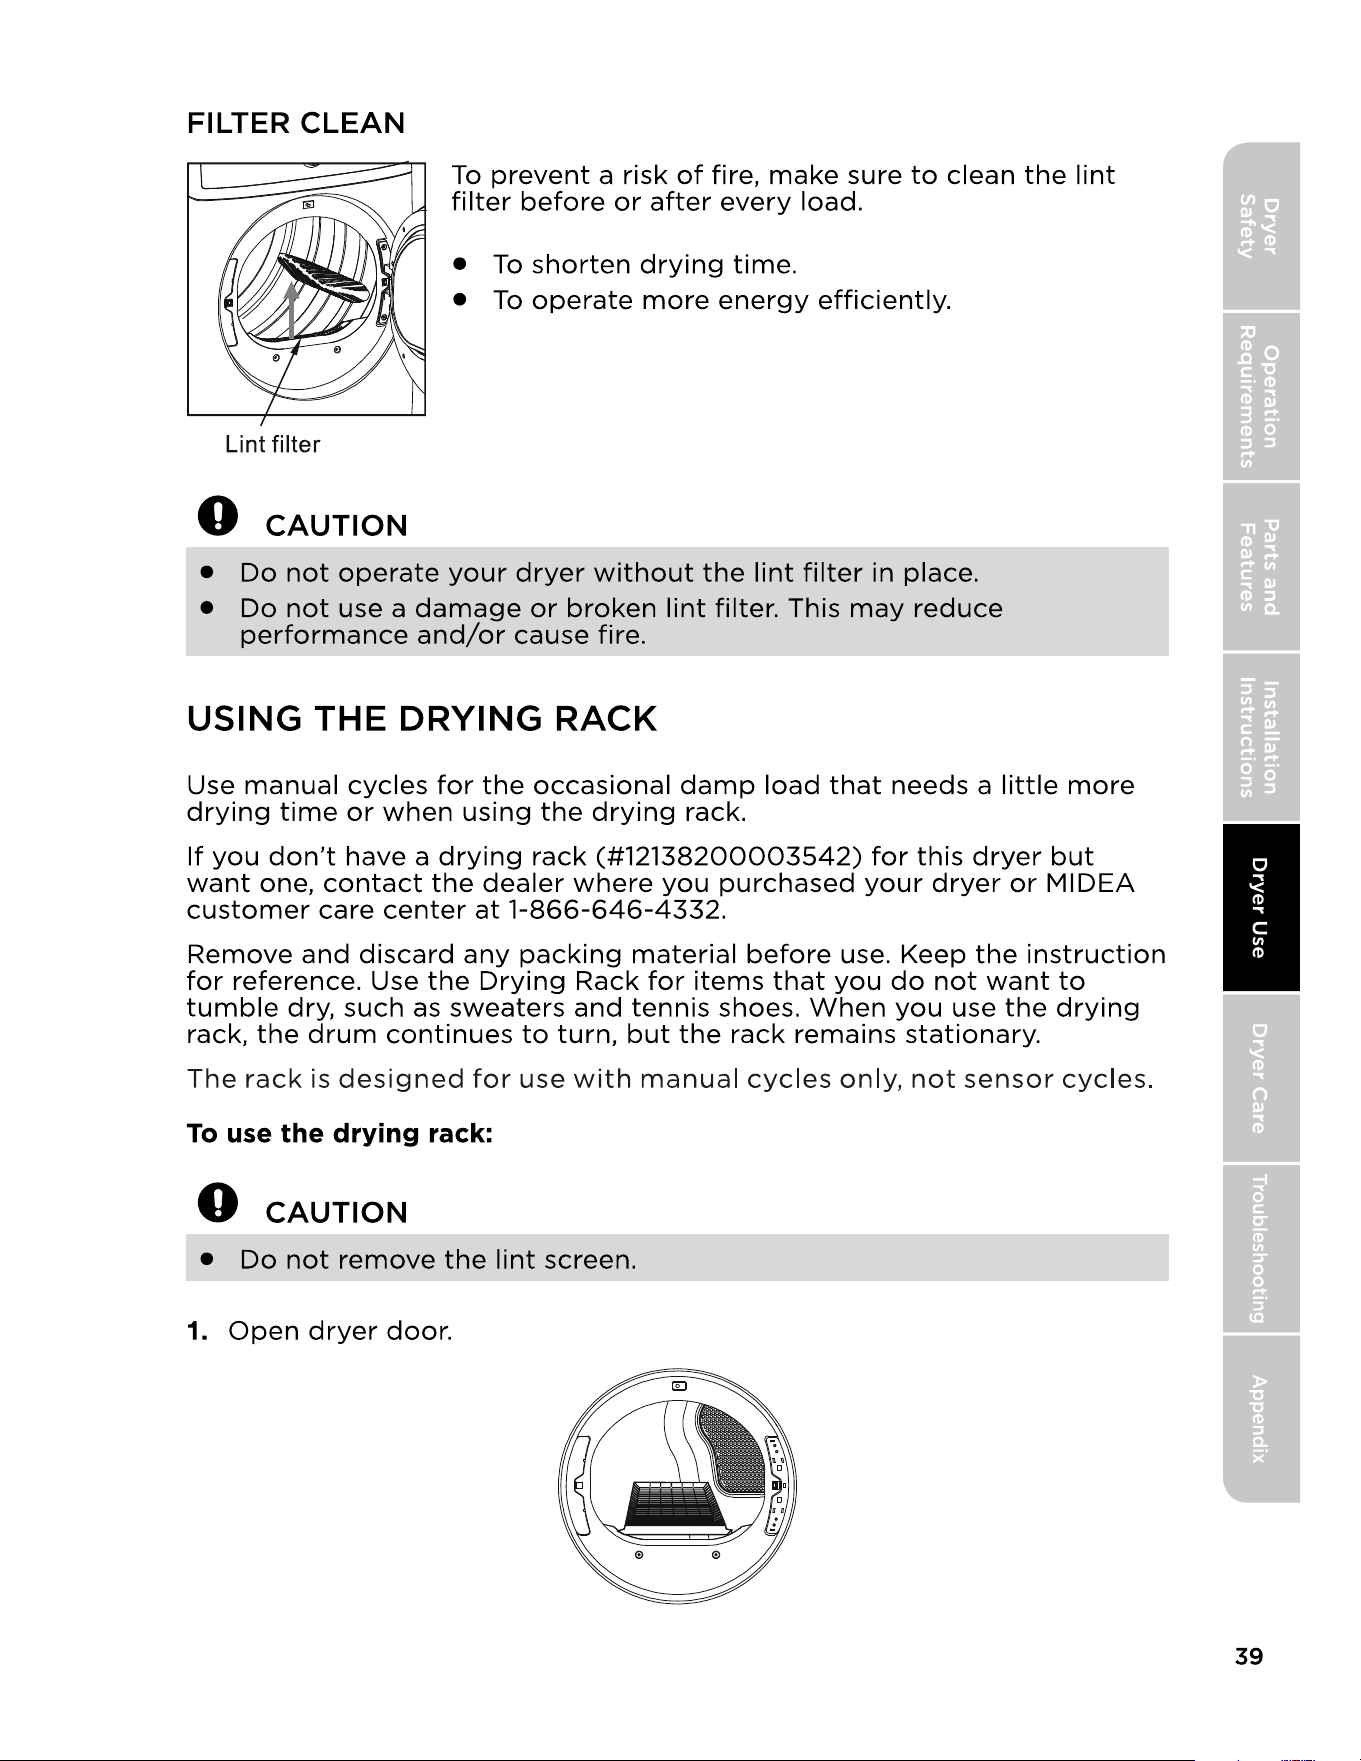
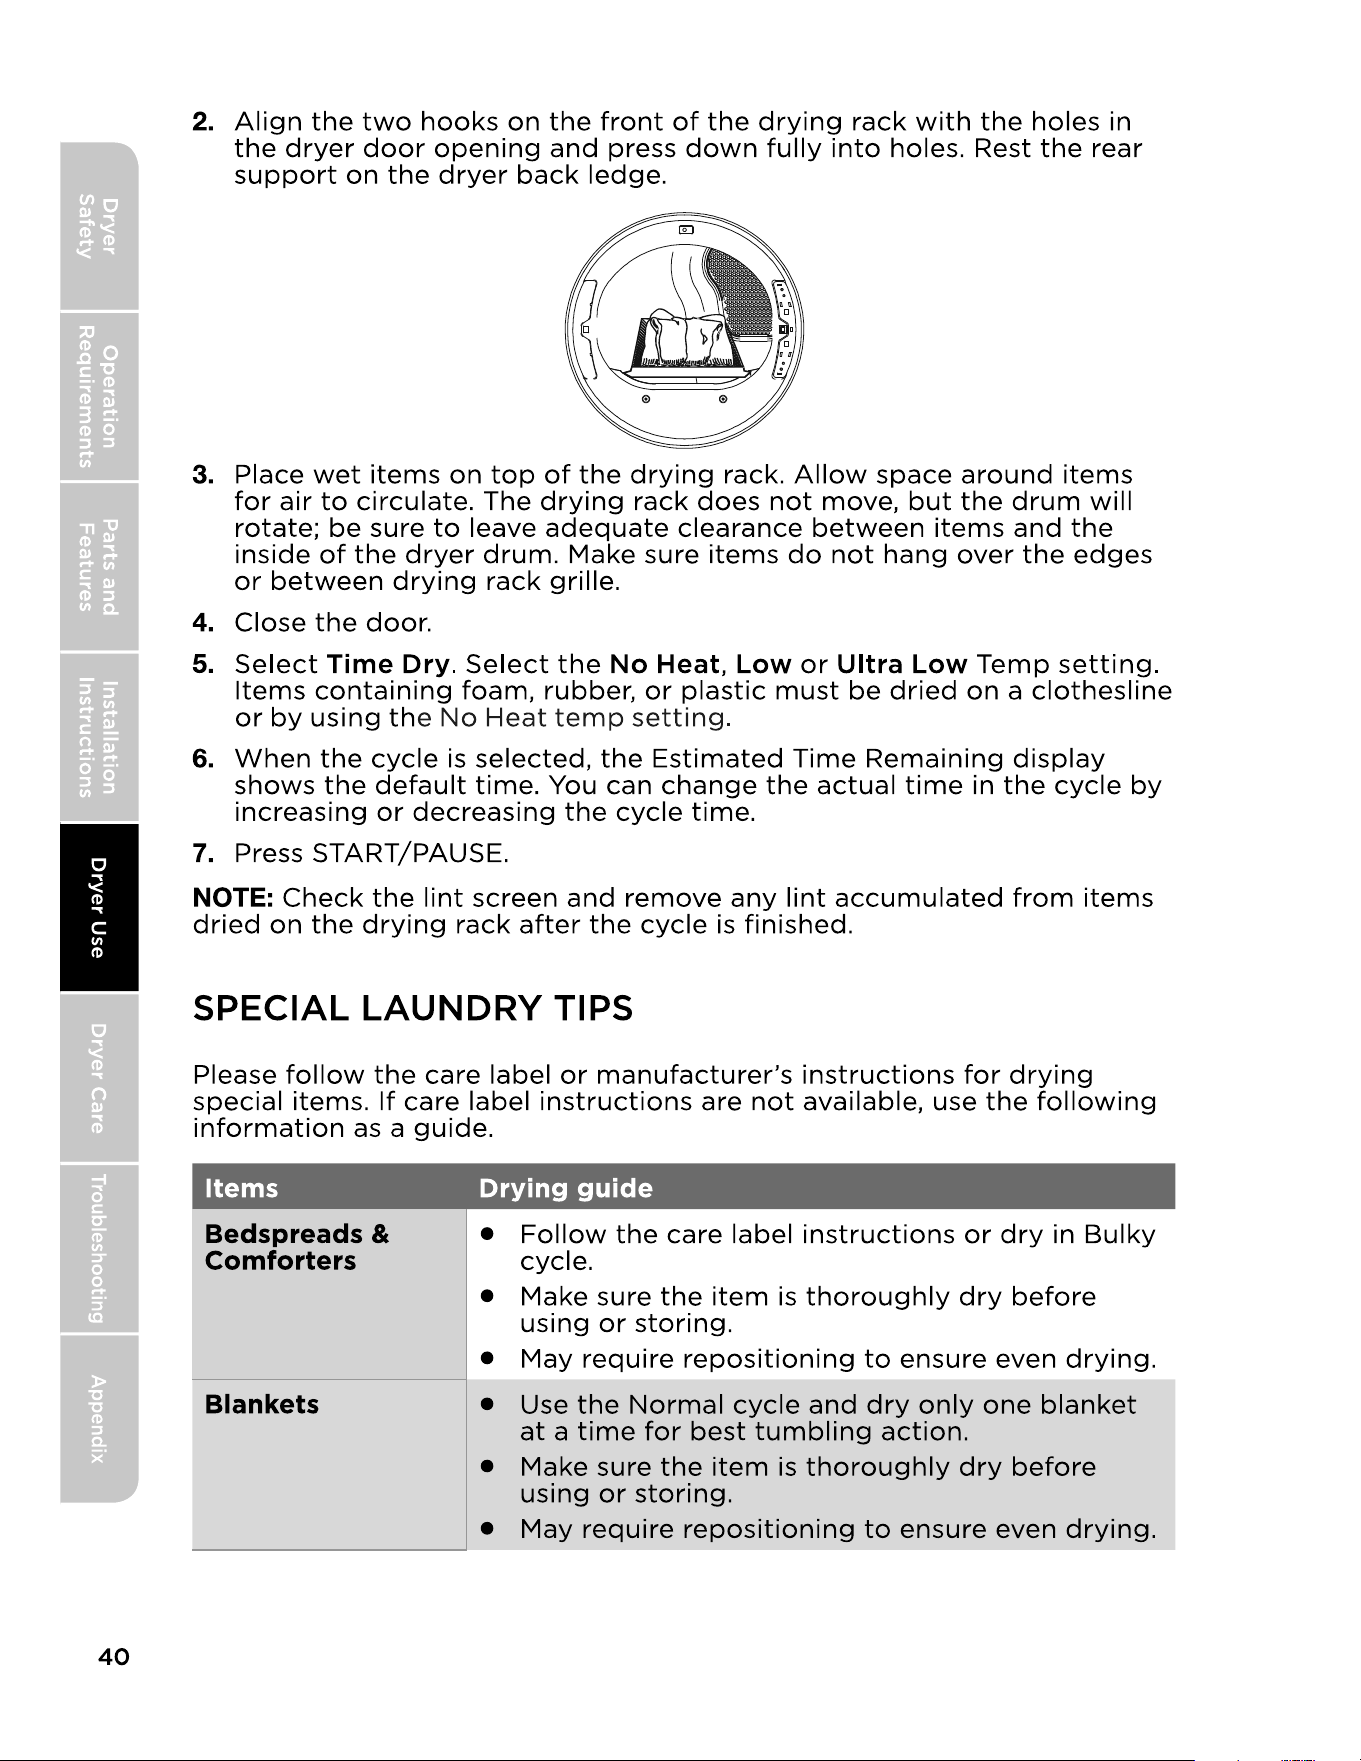
USING THE DRYING RACK
SPECIAL LAUNDRY TIPS
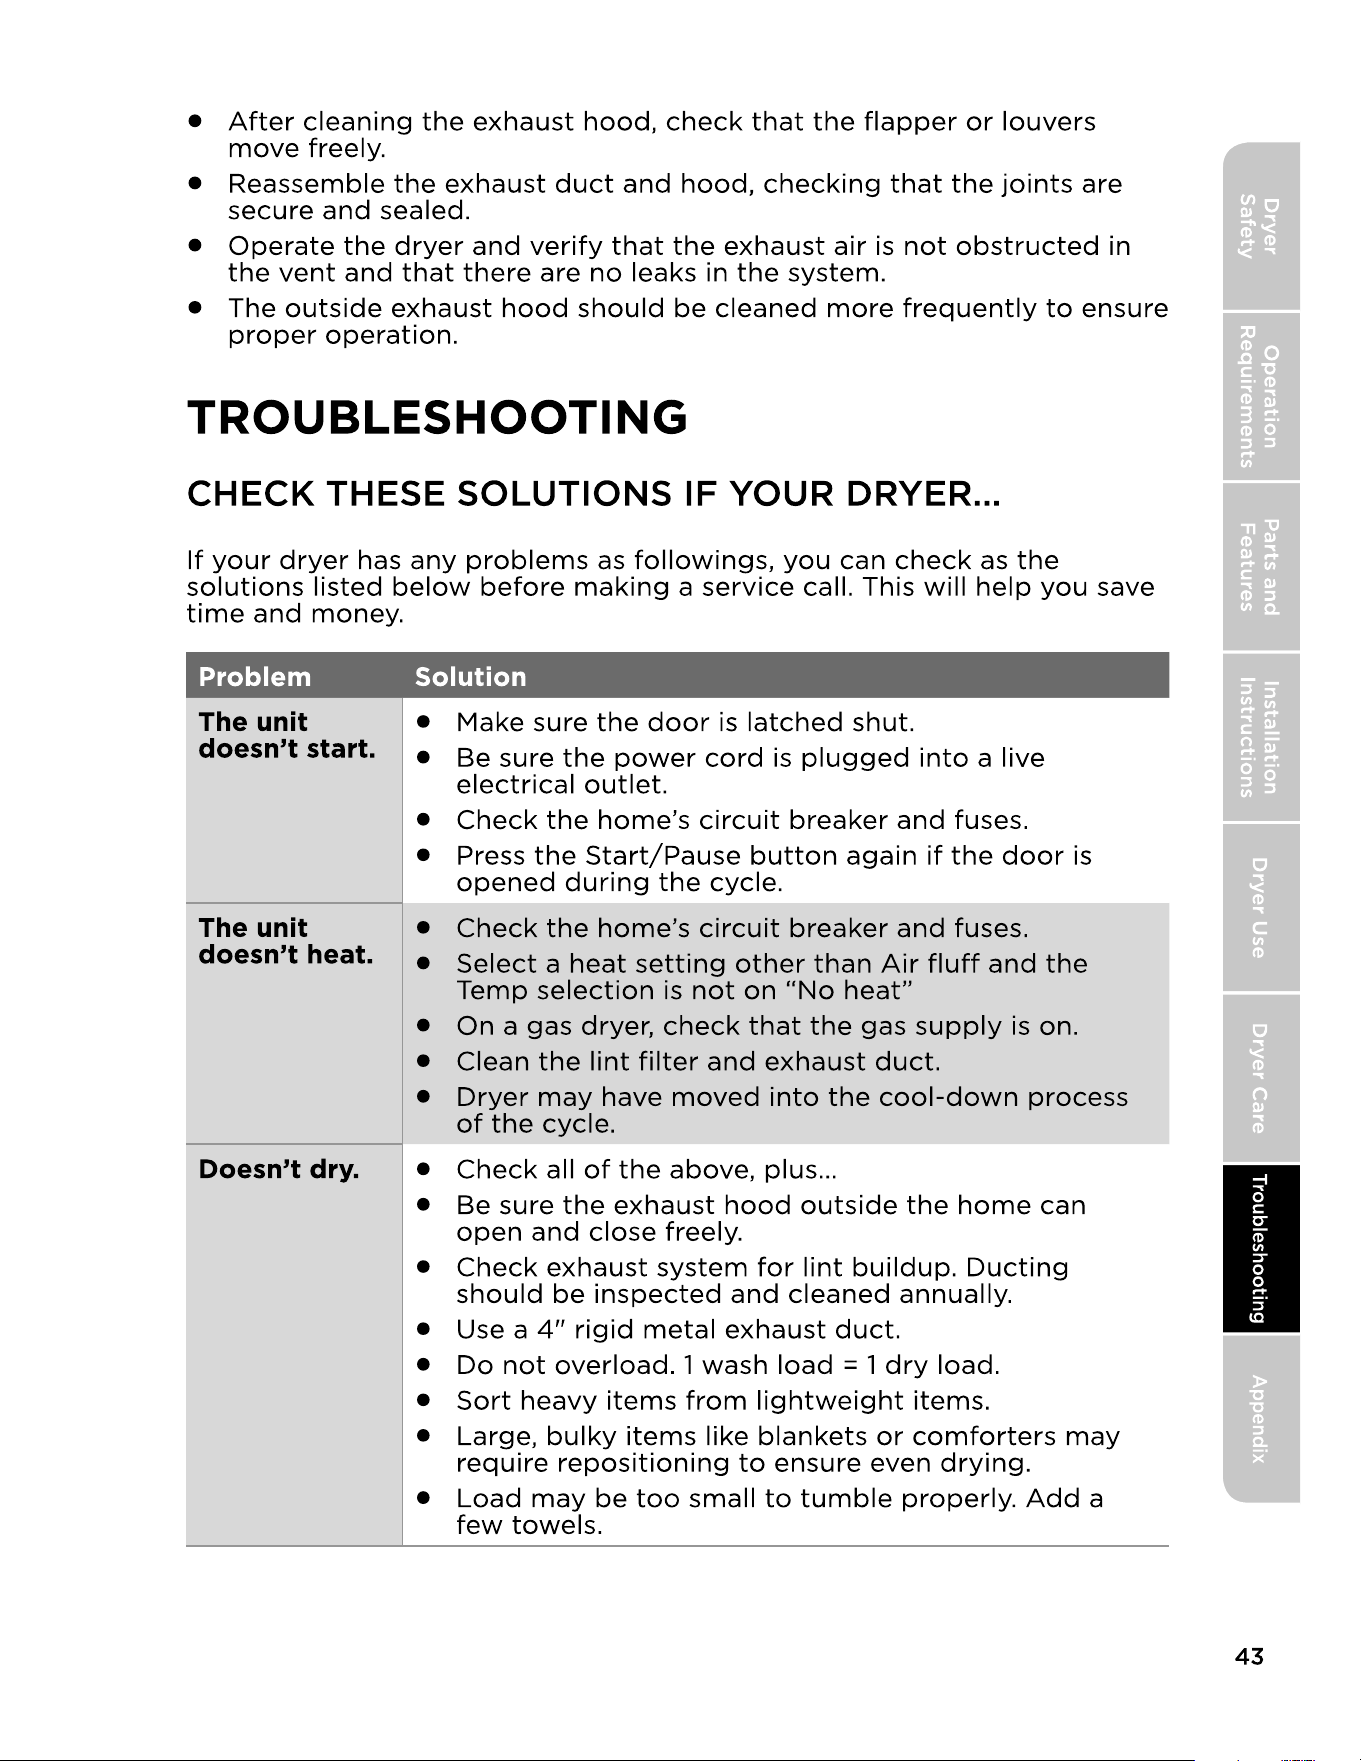
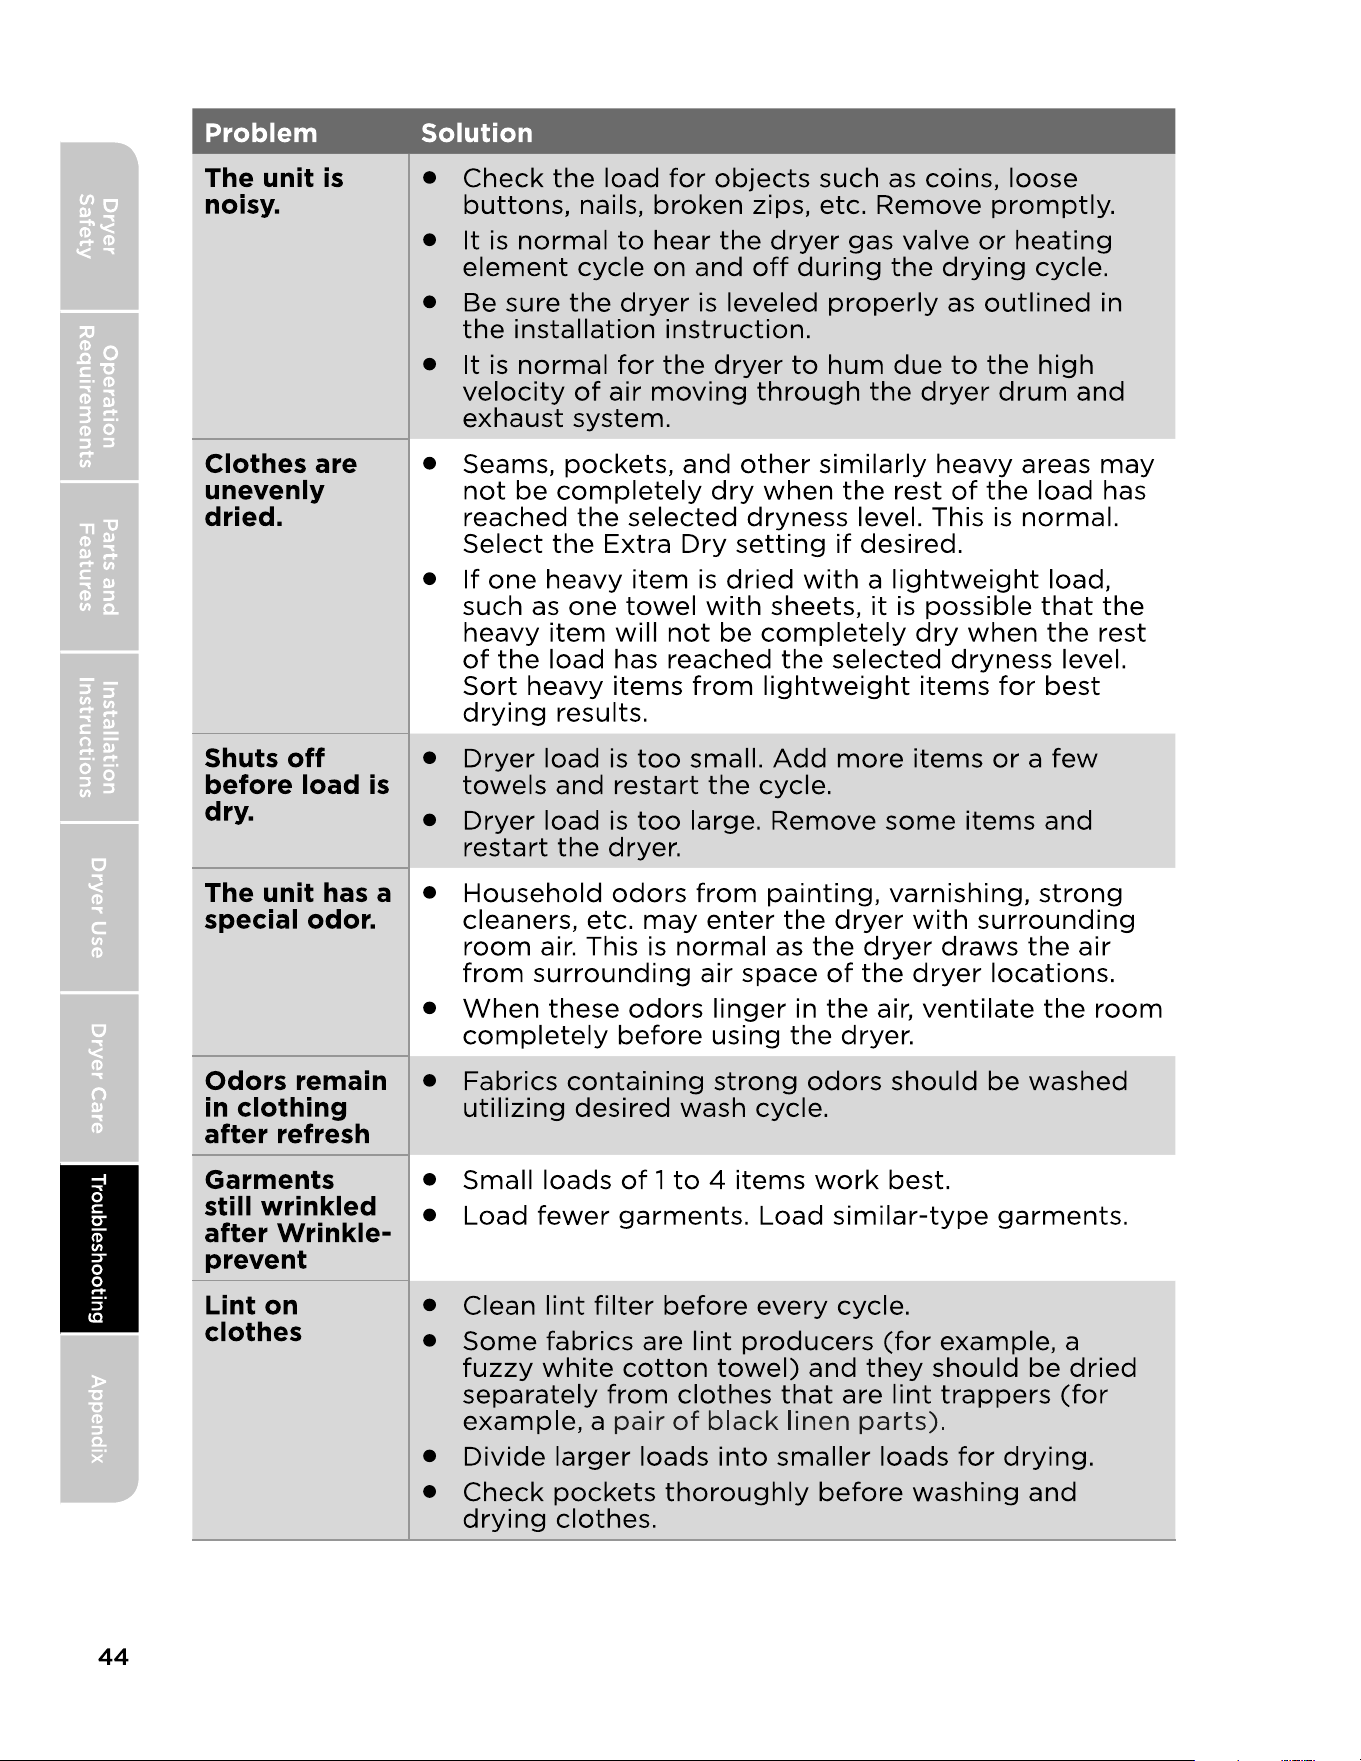
CHECK THESE SOLUTIONS IF YOUR DRYER
CLEANING AND MAINTENANCE
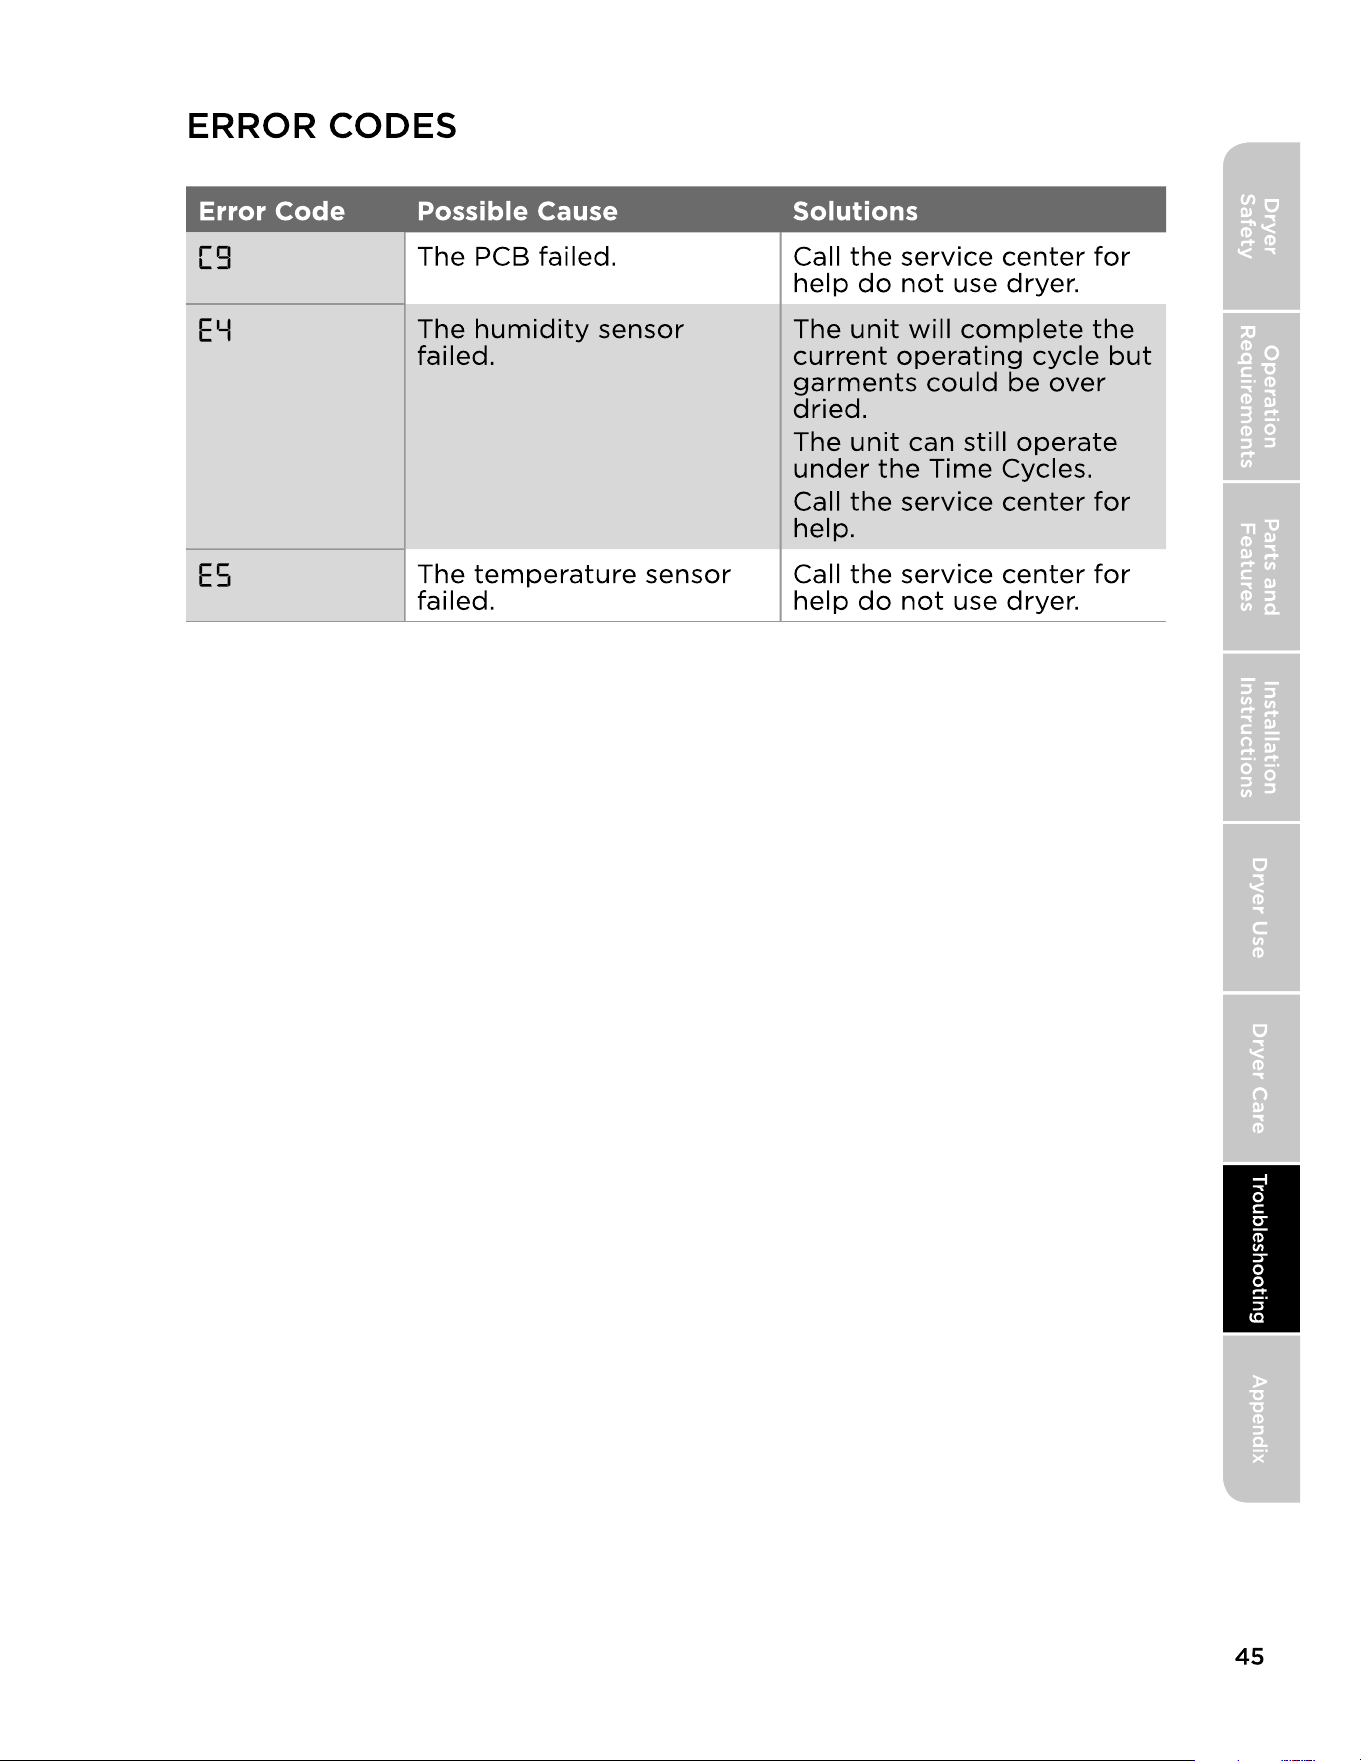
ERROR CODES
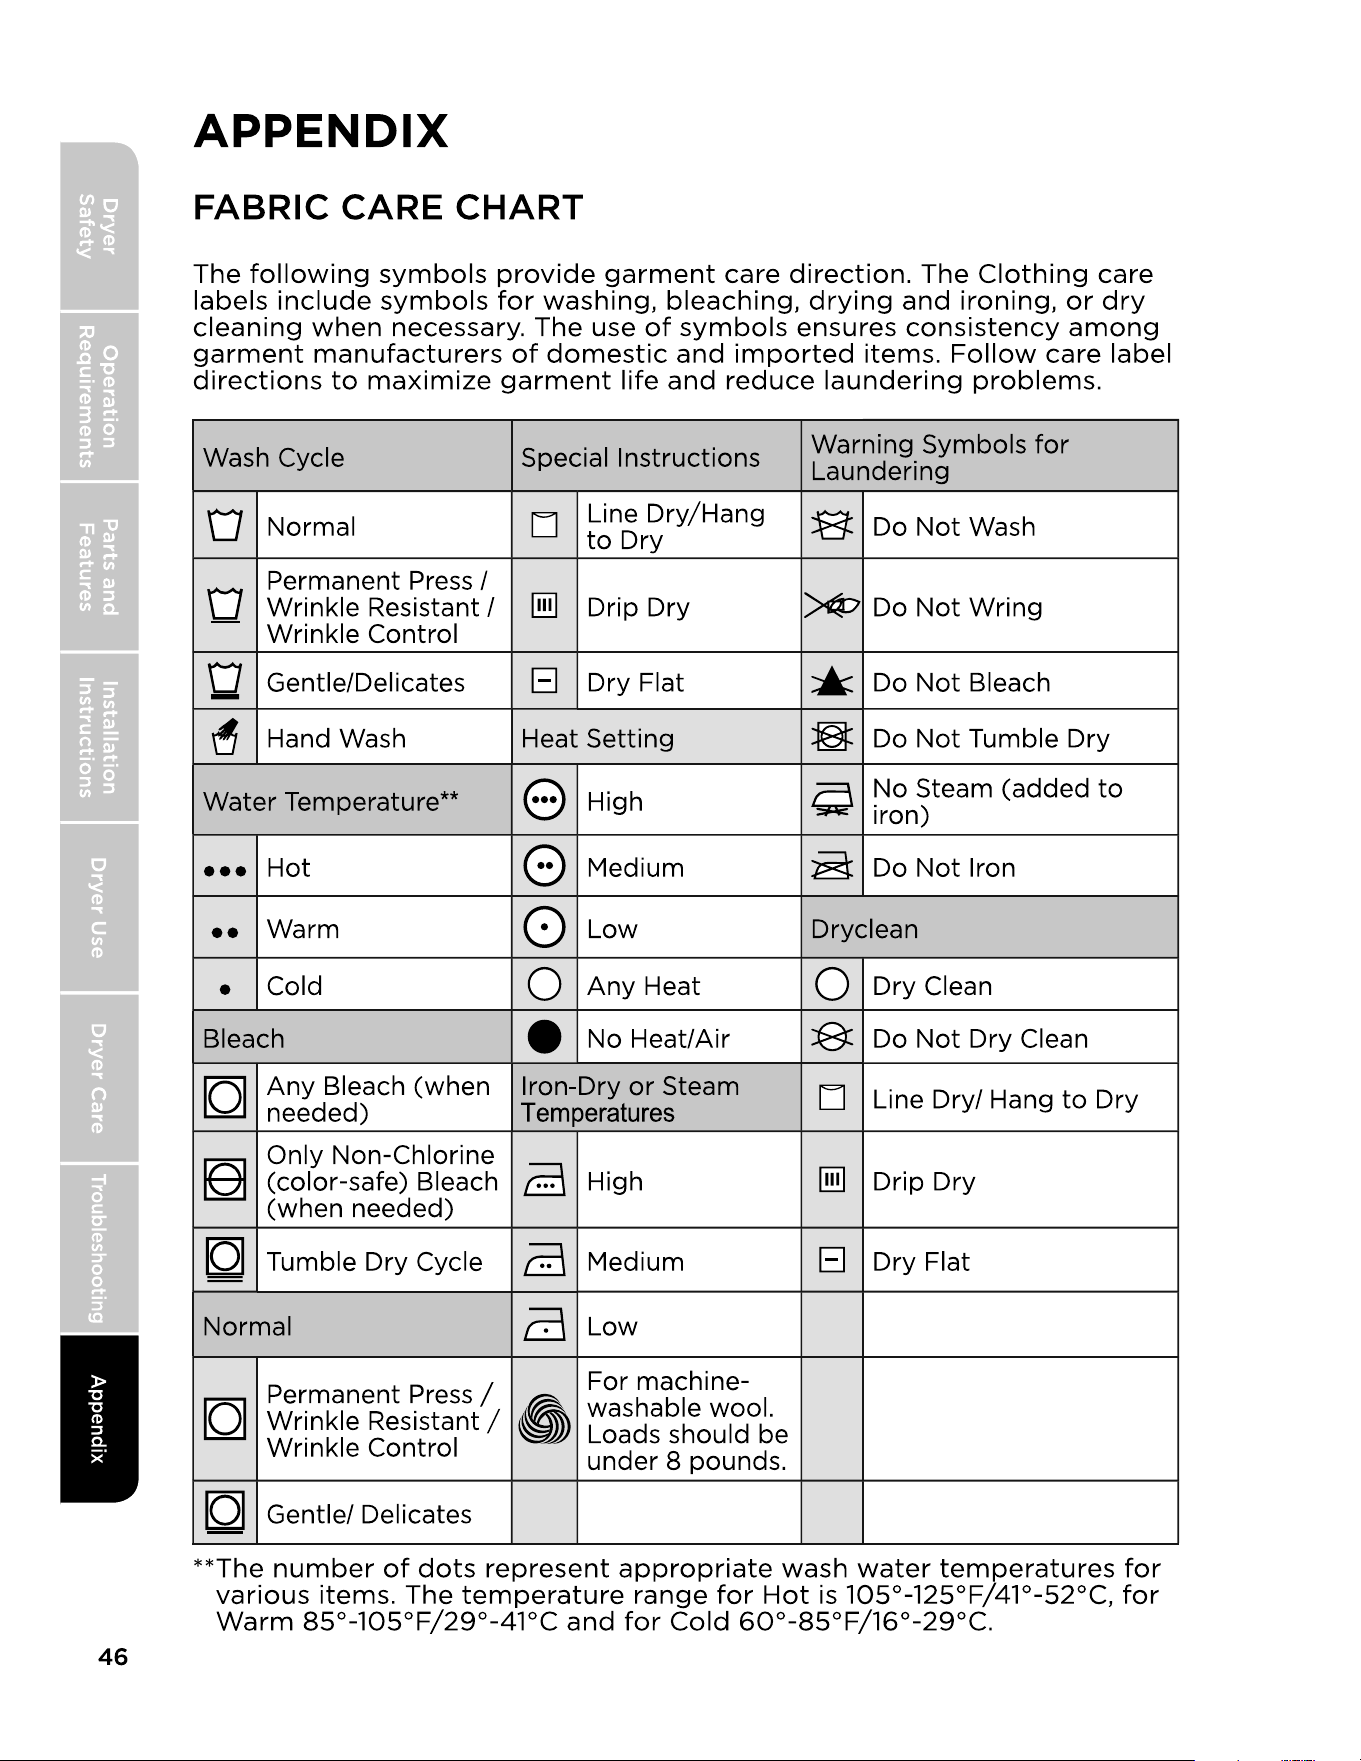
FABRIC CARE CHART


~60Hz
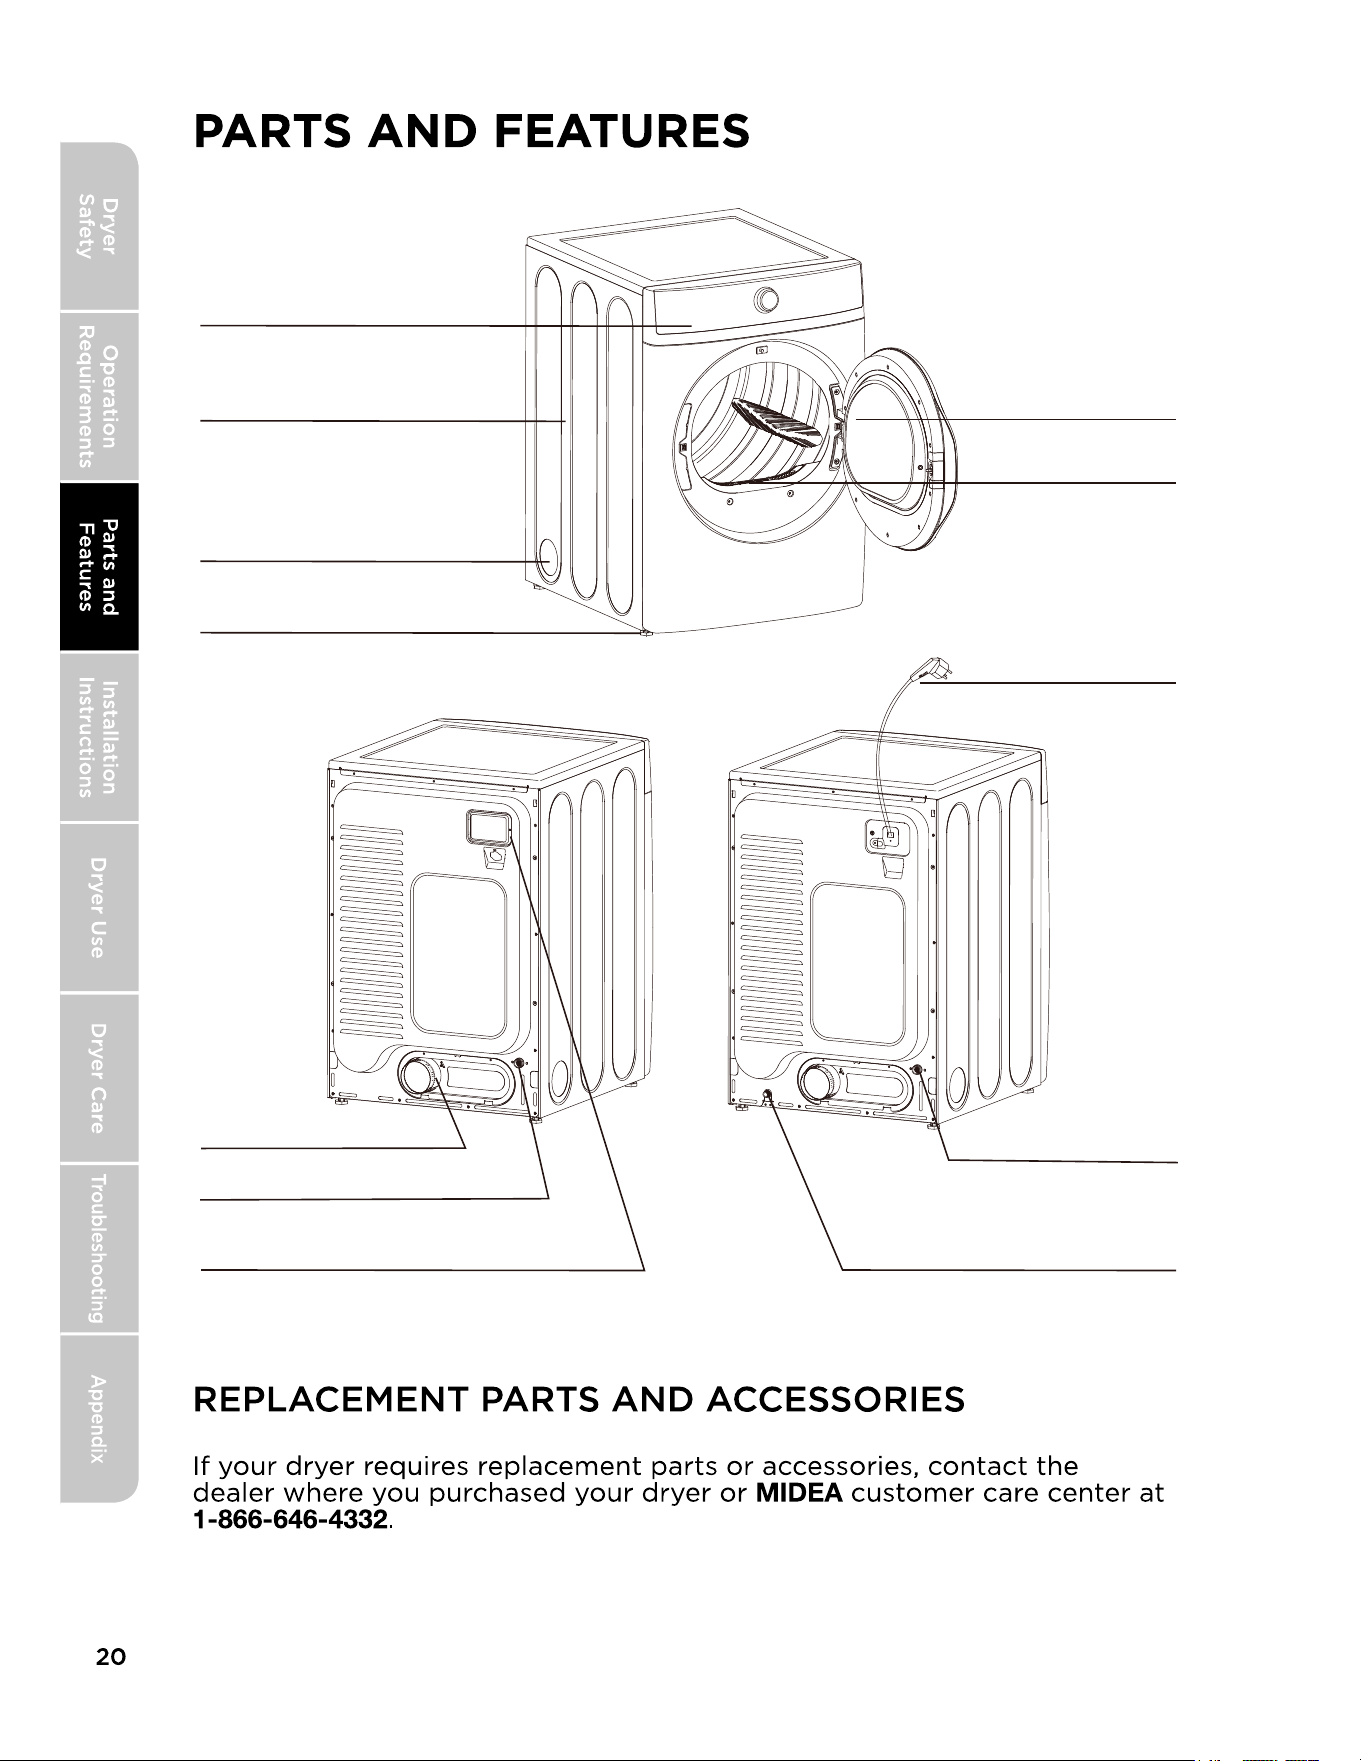
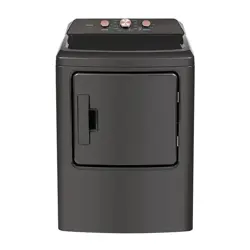
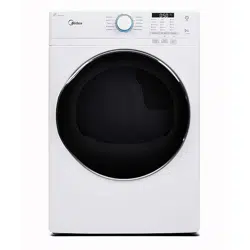
Control panel
Cabinet
Adjustable leg (Four legs)
Left venting hole (for option)
Door
Filter
Power cord
Back venting hole
For gas dryer only
Wiring box
For electric dryer only
Gas inlet
Electric dryer Gas dryer
Water inlet
Water inlet
Y connector Short inlet hose Rubber washer
PARTS SUPPLIED

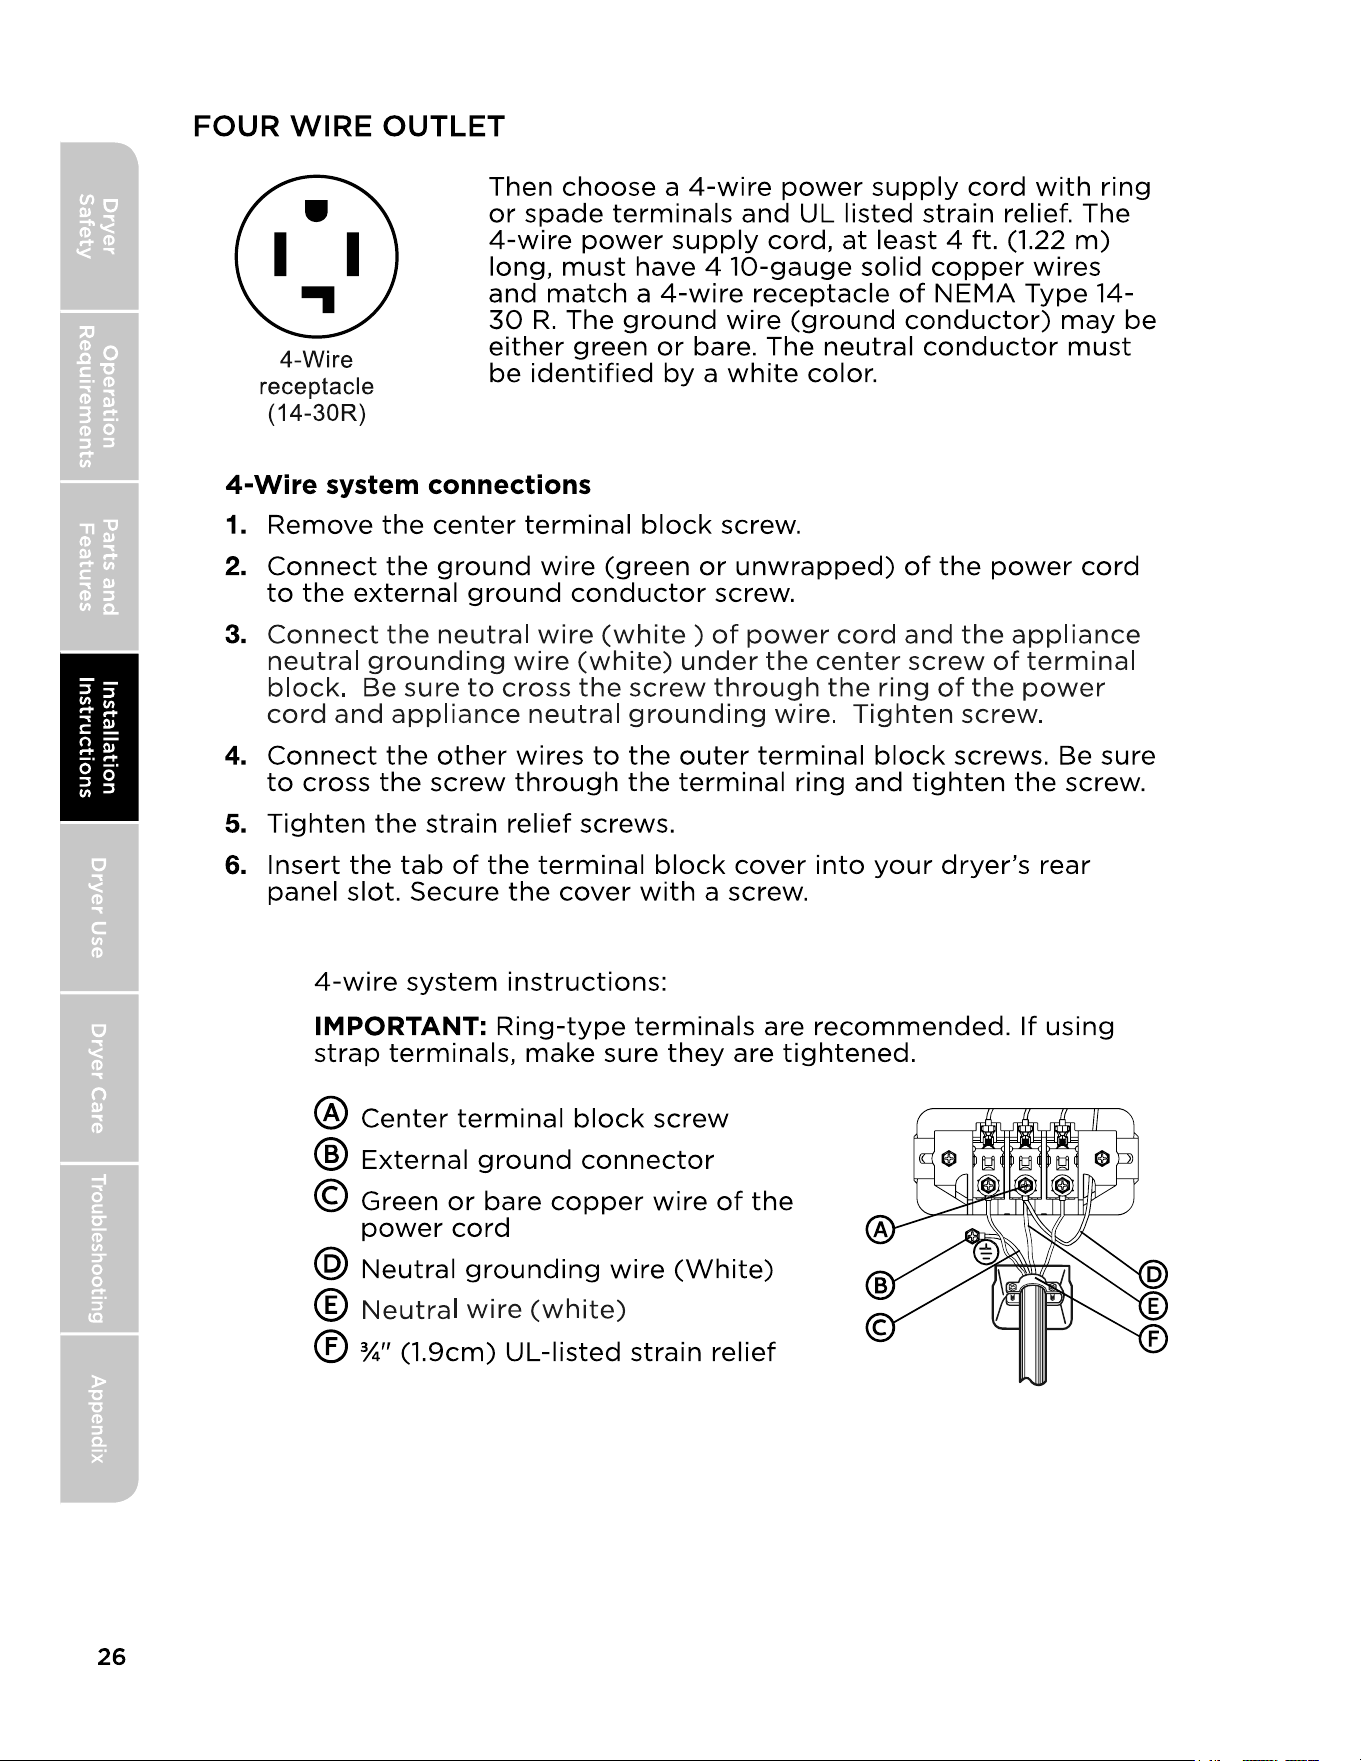
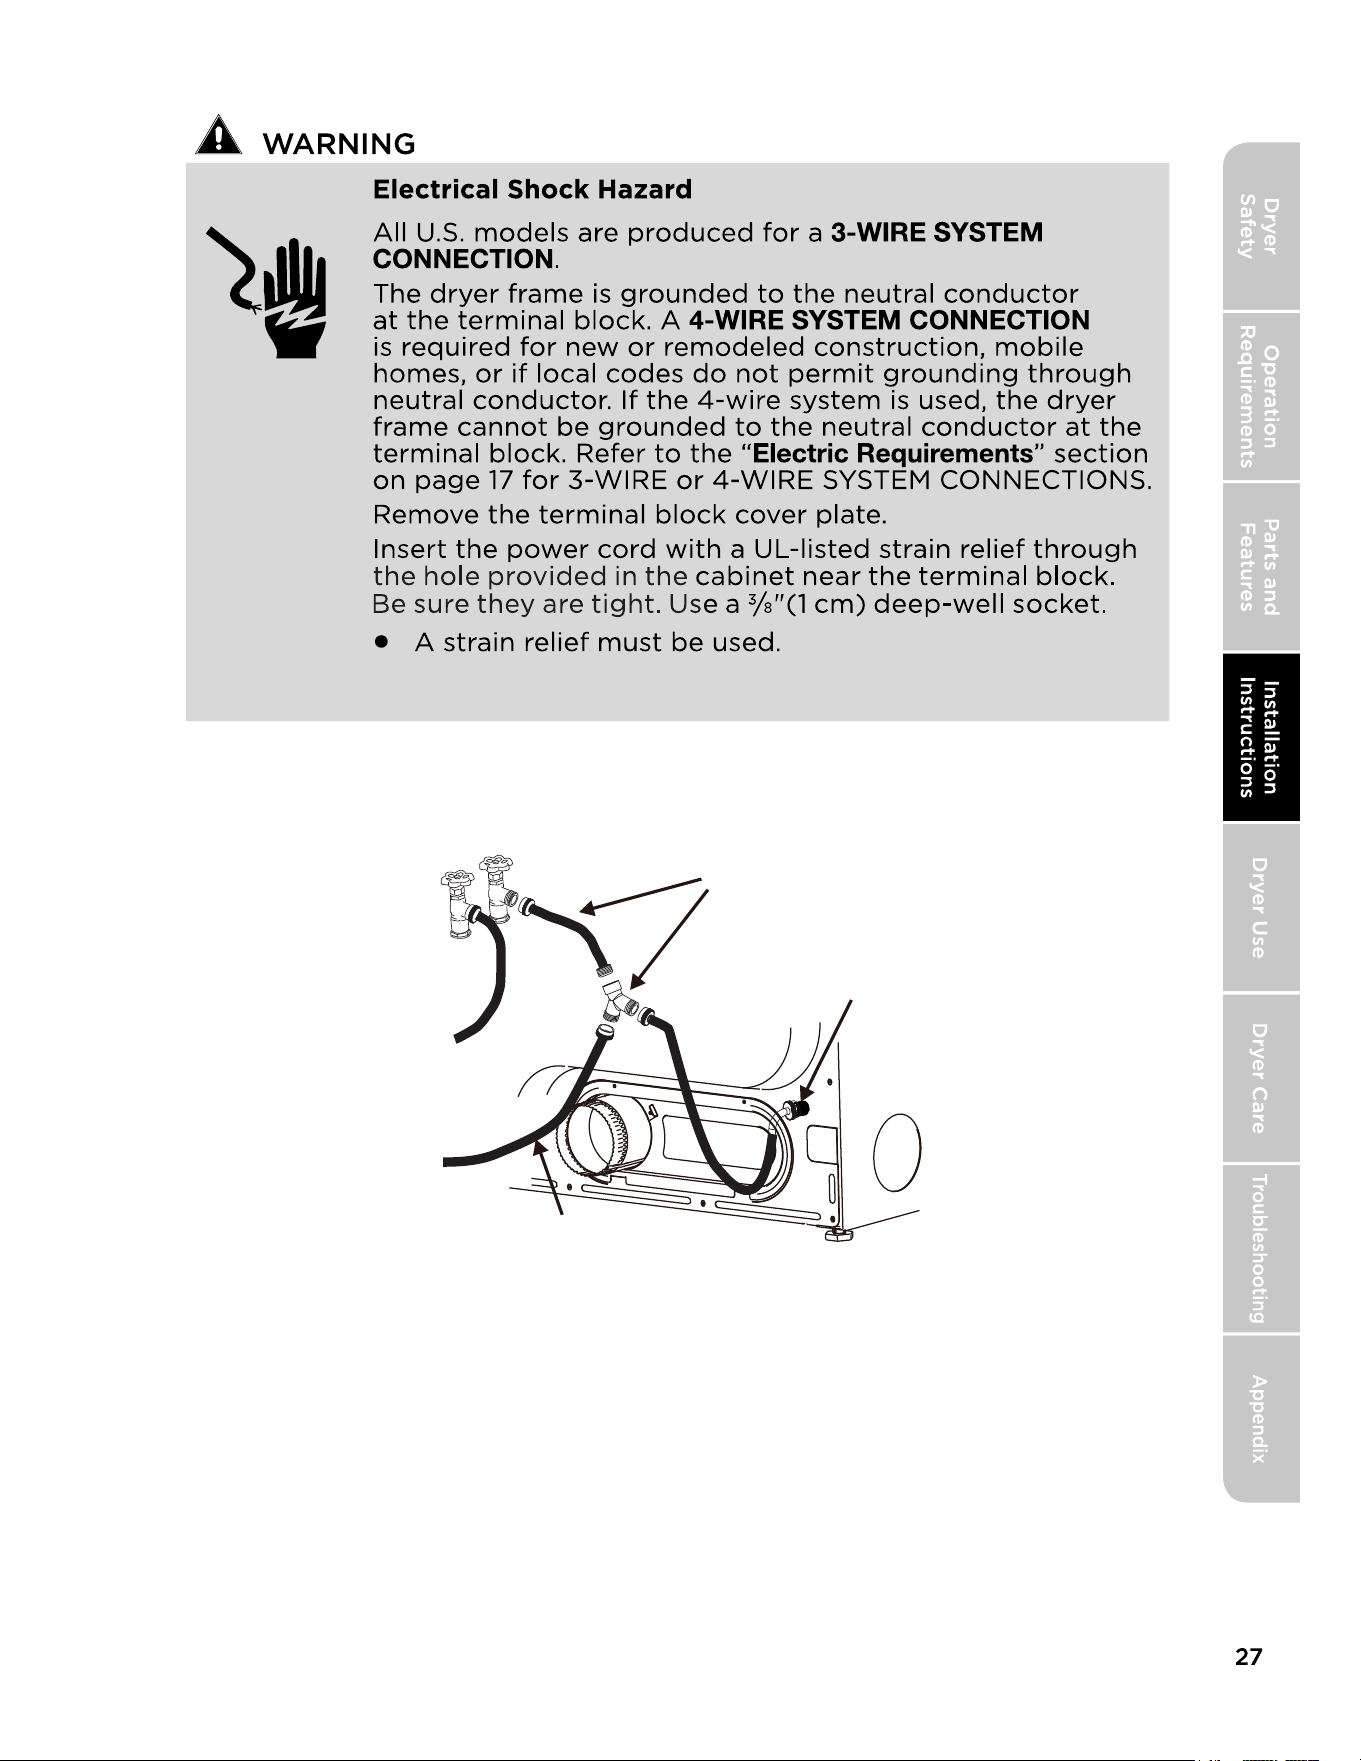
CONNECT INLET HOSES
Cold water
Hot water
Connect directly or use extension
hose with Y connector
Water Inlet
COLD WATER SUPPLY
HOSE TO WASHER
If possible install the “Y” connector directly, thread the short extension
hose on to the COLD water supply and snug it by hand; then tighten it
another 2/3 turn with pliers. Thread the “Y” connector to the short exten-
sion hose and snug it by hand; then tighten it another 2/3 turn with pliers.
Connect the COLD inlet hose for the washer to the “Y” connector and
snug it by hand; then tighten it another 2/3 turn with pliers.
Connect the straight end of a long hose to the other outlet on the “Y”
connector and snug it by hand. Connect the hose’s 90° coupling to the
brass water inlet on the back of the dryer and snug it by hand. Tighten
each connection of the dryer inlet hose another 2/3 turn with pliers. Turn
on the water and check for leaks at all connections.
BULKY
HEAVY DUTY and SANITIZE
TOWELS
QUICK DRY STEAM REFRESH
POWER
AIR FLUFF,
TIME DRY
NORMAL
DELICATES
START
START/PAUSE
Manual Dry cycles
PAUSE
cycles are Sensor Dry cycles.
CYCLE SELECTOR
Control Lock
STEAM
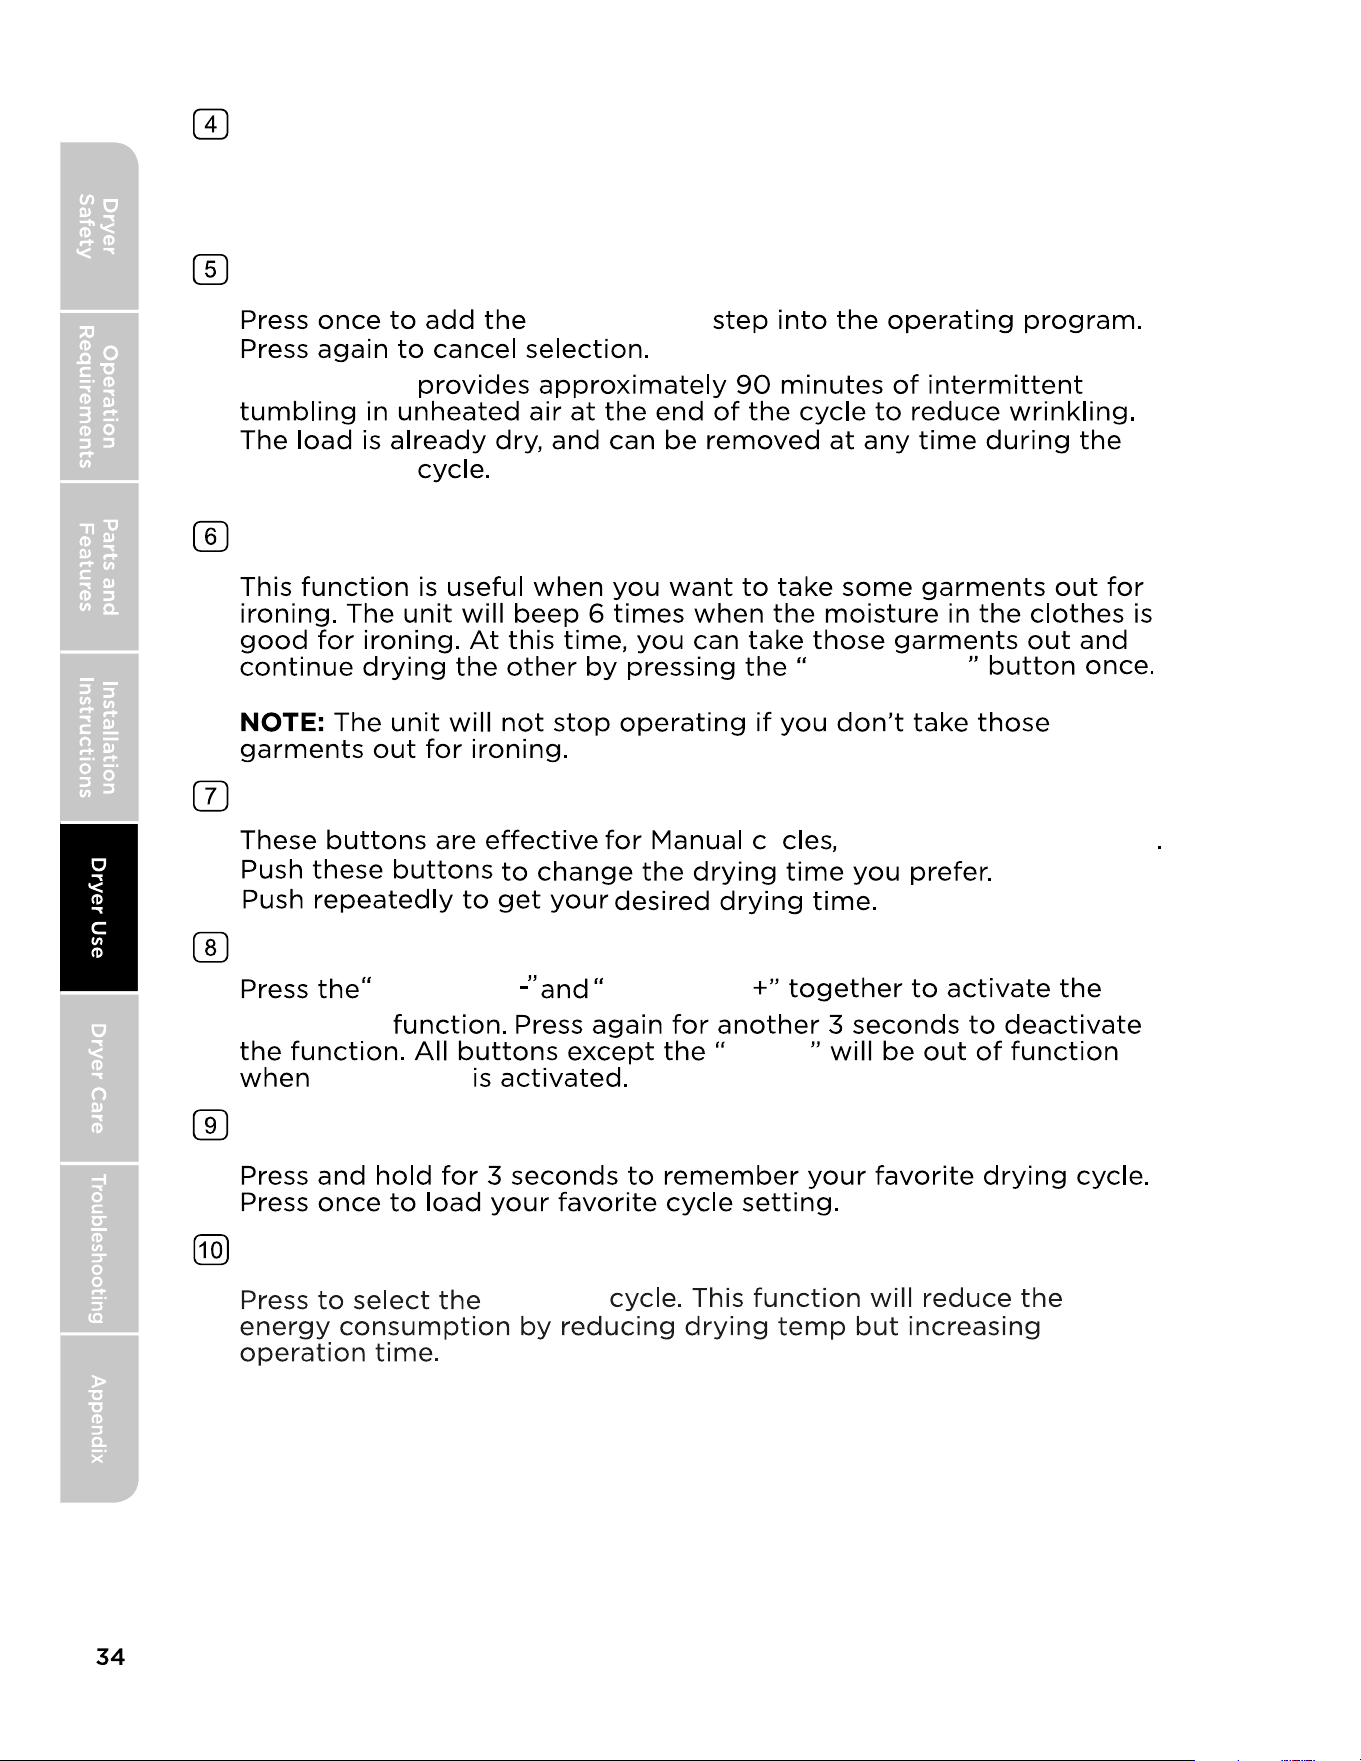
WRINKLE CARE
DAMP DRY SIGNAL
TIME ADJUST
WRINKLE CARE
WRINKLE CARE
except for STEAM REFRESH
TIME ADJUST
TIME ADJUST
Control Lock
Control Lock
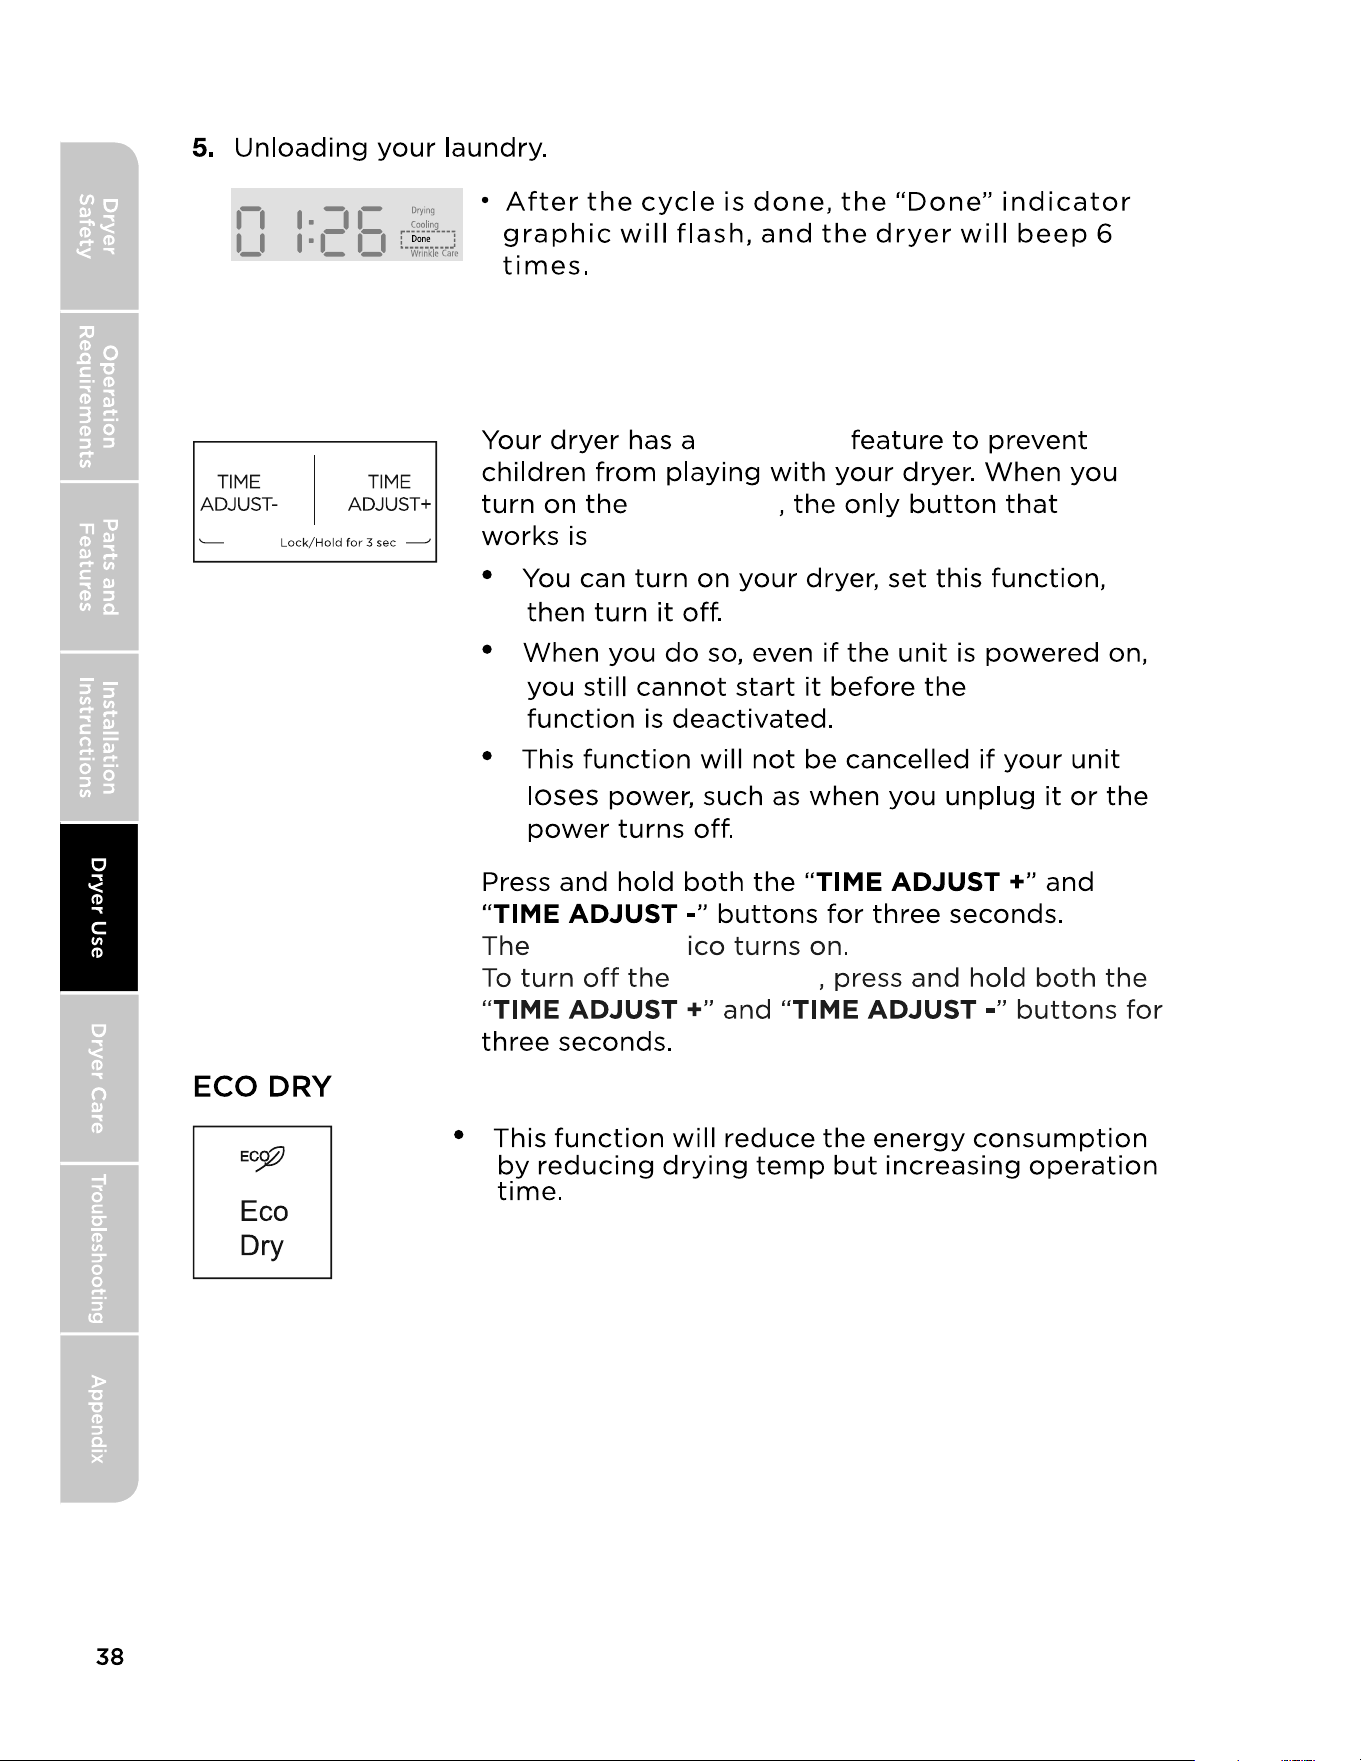
ECO DRY
For STEAM cycles,it functions only after the laundry dryness level
approaches
NORMAL or above deyness.
WRINKLE CARE
MY CYCLE
ECO DRY
POWER
START/PAUSE
y
TIME DRY
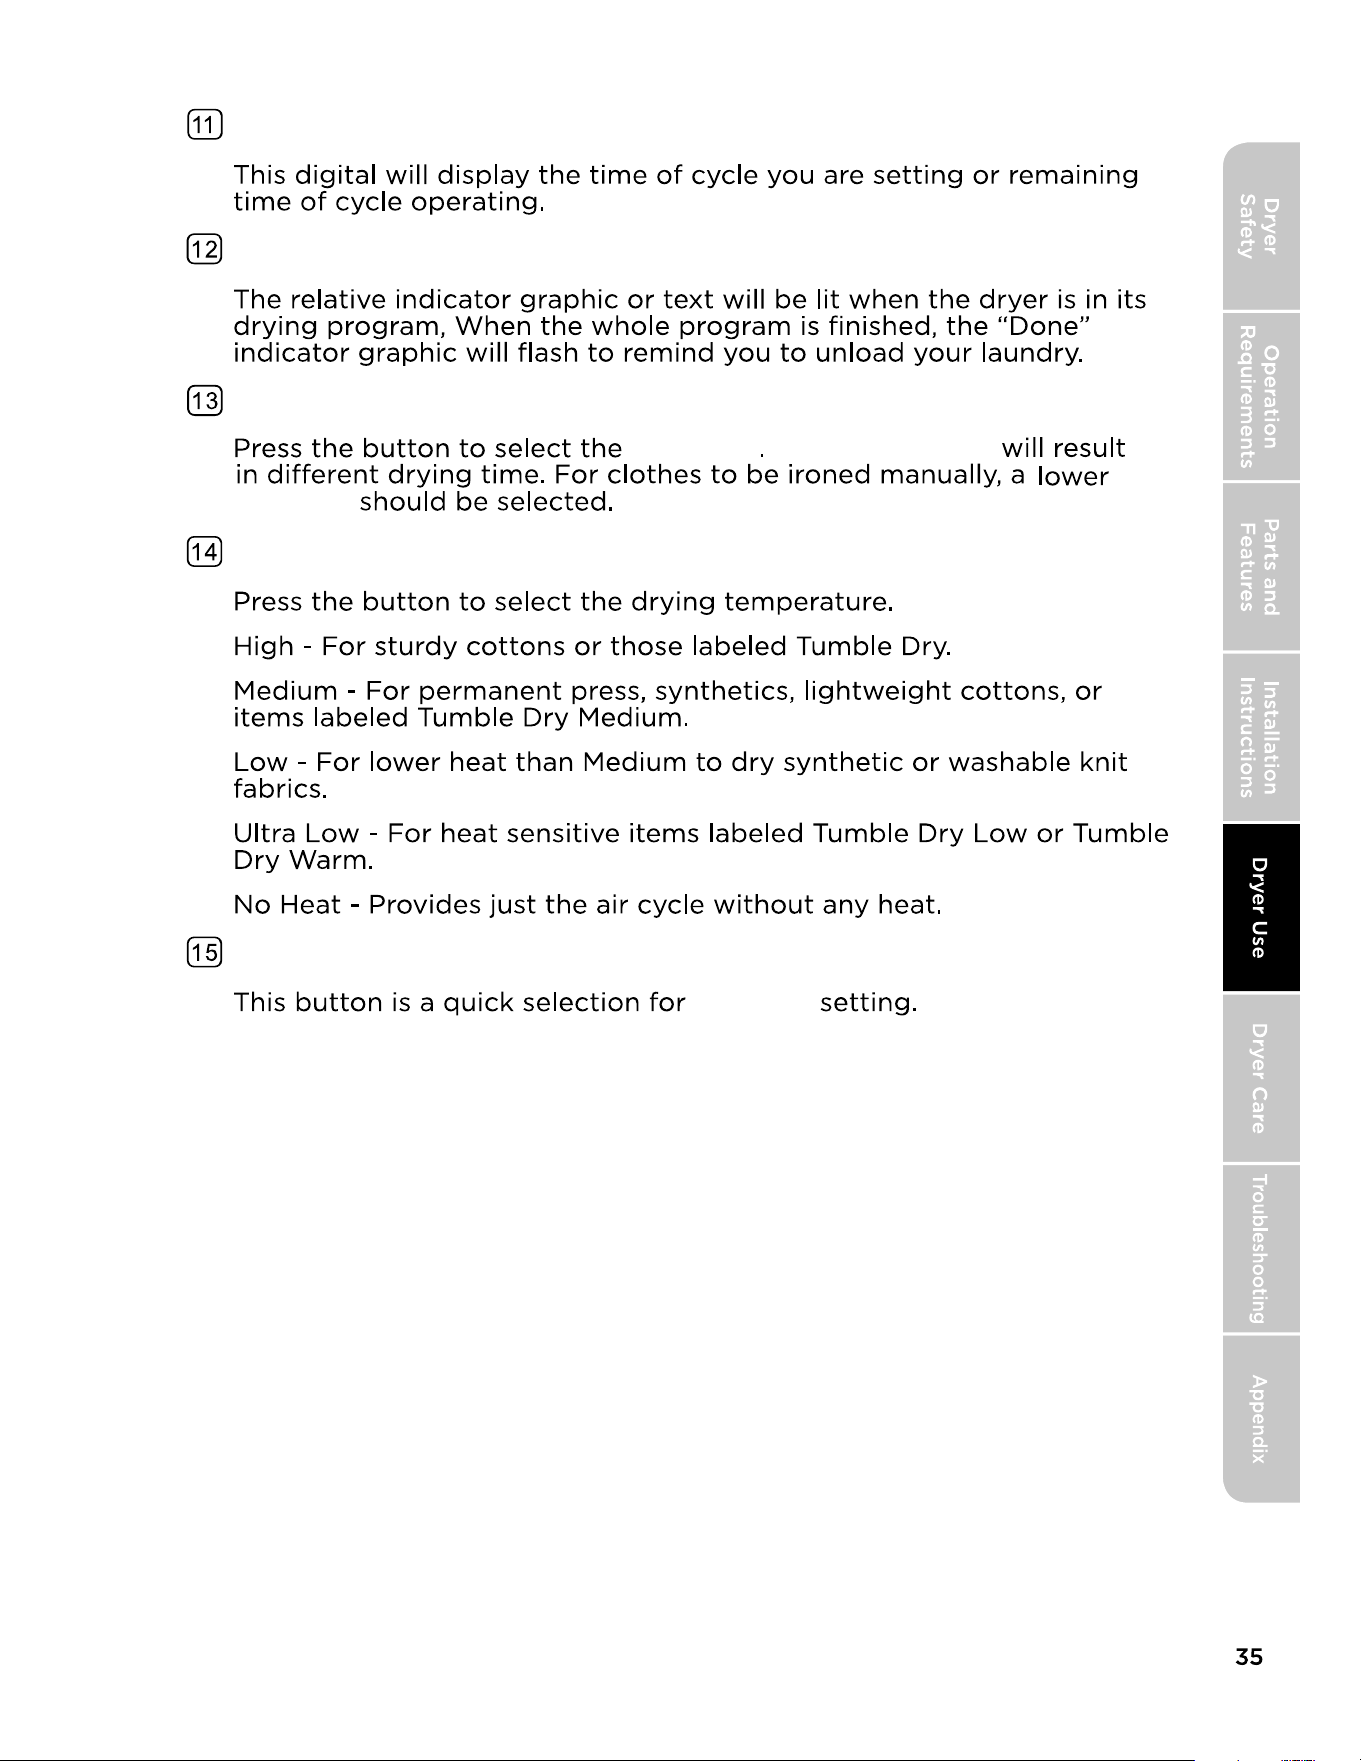
TIME TEMP
DRY LEVEL
DRY LEVEL DRY LEVEL
DRY LEVEL
TIME DRY
DIGITAL DISPLAY
CYCLE STATUS DISPLAY
Different
Three
MY CYCLE
MY CYCLE
POWER
START/PAUSE
START/PAUSE
START/PAUSE
PAUSE
START/
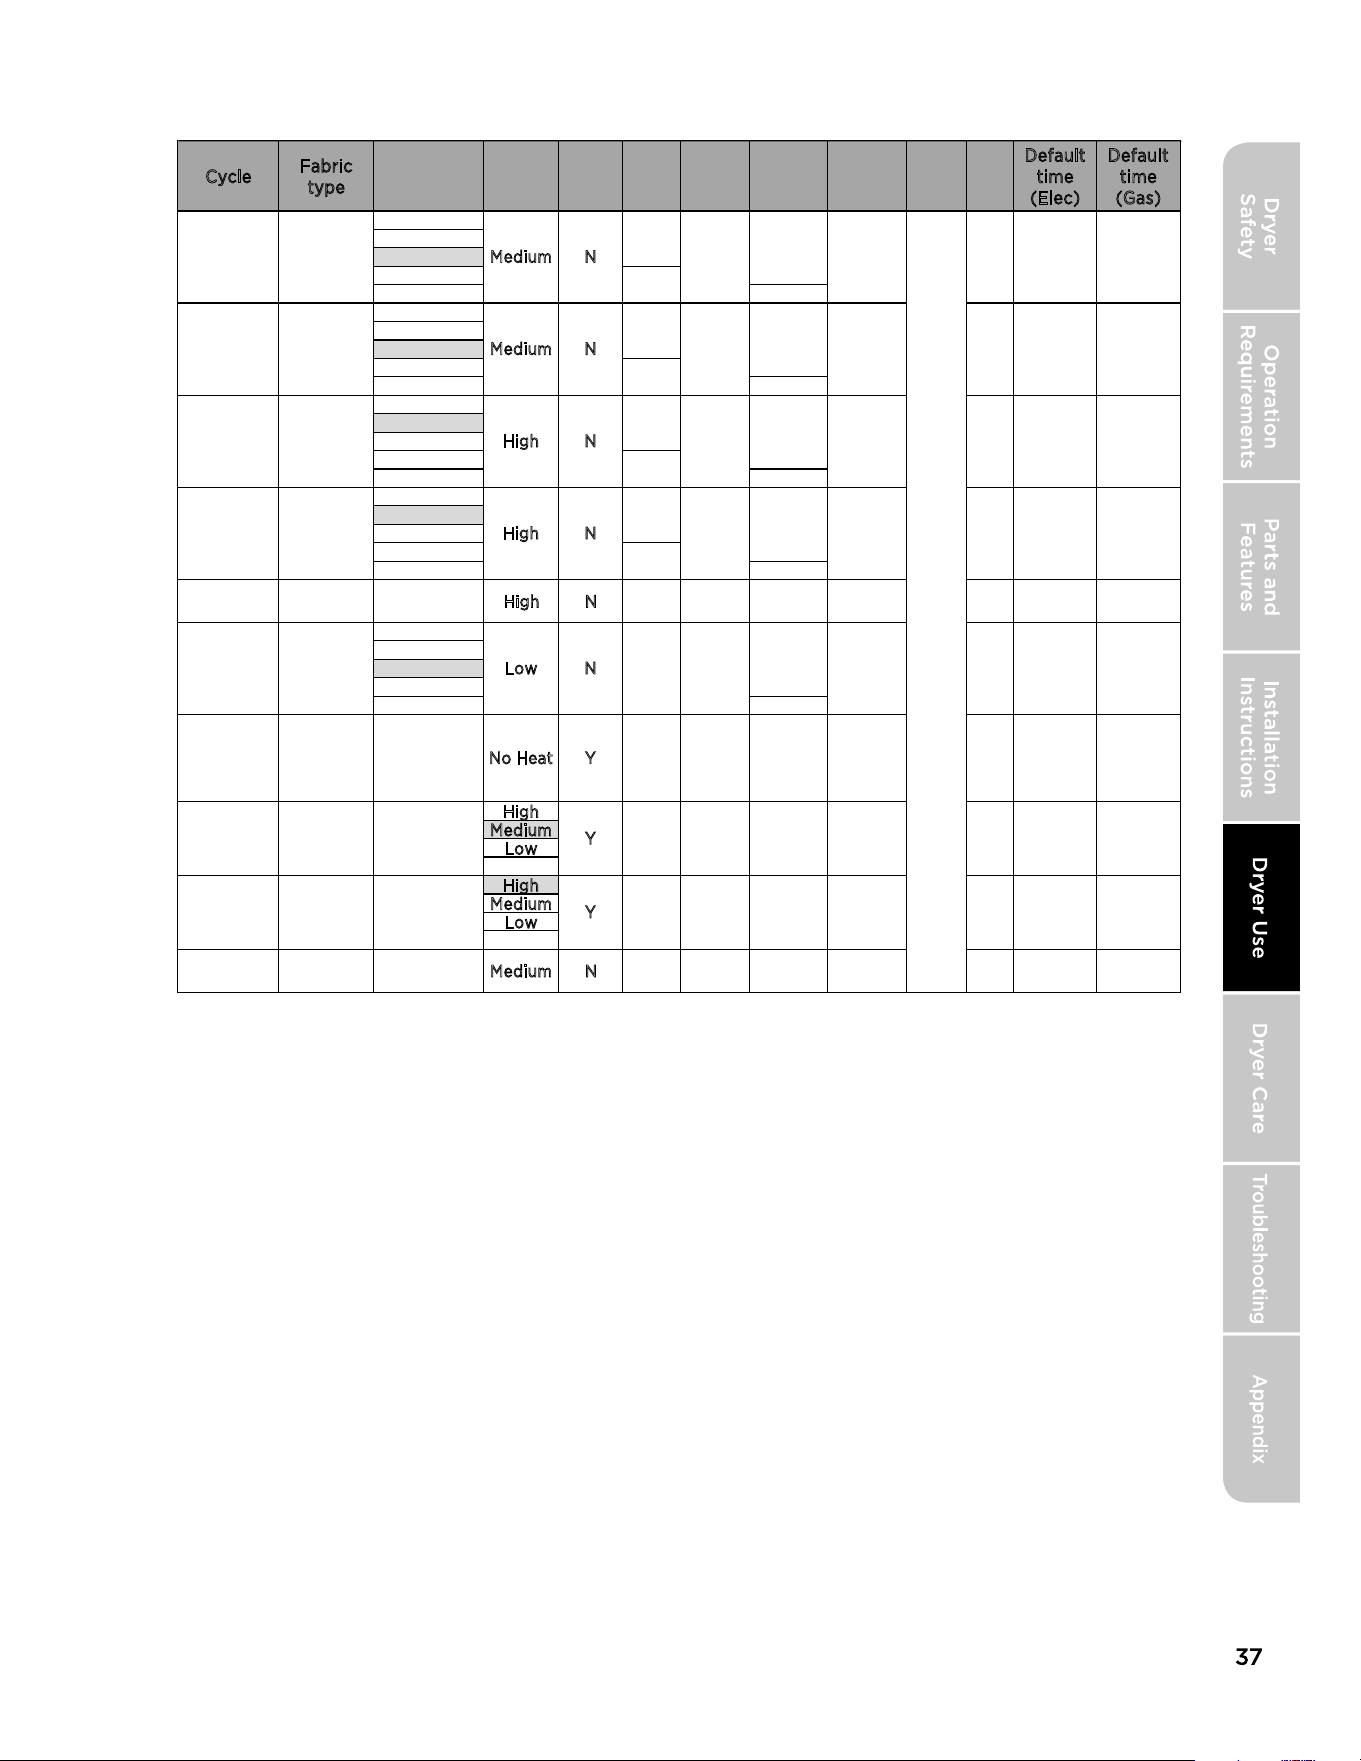
*Table in grey is an initial setting."Y" are all optional functions you can
select.
*For even better drying effect, please select higher dryness level.
*To save energy, the default setting for
NORMAL cycle is NORMAL+Medi-
um+NORMAL Dry+ECO DRY. If you have a large quantity of clothing, and want
a faster drying speed, you can press "
ECO DRY" once to cancel this option.
*FOLLOW GARMENTS LABELS REQUIREMENTS.
Cycle
Fabric
type
Default
time
(Elec)
Default
time
(Gas)
N
N
N
N
Bedding
Curtains
H
igh N N Y N N N 62min 62min
N
H
igh
Medium
Low
High
Medium
Low
/ Medium N Must N N N N 15min 15min
N
N
N
N
Y
Y
Y
Y
N
N
N
Cotton
Under wear
Linen
Biankets
Sheets
Comforters
Towels
Heavy
Cottons
Jeans
Curduroys
Work
clothes
Sensitive
items
/
/
/
M
edium
Medium
High
High
Low
No Heat
N
Y
Y
Y
Y
N
Y
N
Y
N
Y
N
N
N
N
N
Y
N
Y
Y
Y
Y
Y
Y
Y
N
N
N
N
N
Y
Y
Y
To
memo
rize
recent
progra
mme
Y
N
N
N
N
N
N
20min
40min
30min
62min
120min
55min
54min
25min
20min
40min
30min
62min
110min
56min
60min
30min
Normal Dry
Extra Dry
More Dry
Less Dry
Damp Dry
Damp Dry
Less Dry
Normal Dry
More Dry
Extra Dry
Extra Dry
More Dry
Normal Dry
Less Dry
Damp Dry
Damp Dry
Less Dry
Normal Dry
More Dry
Extra Dry
Extra Dry
Extra Dry
More Dry
Normal Dry
Less Dry
Damp Dry
Ultra Low
Ultra Low
N
DRY
LEVEL
DRY
TEMP
TIME
DRY
STEAM
WRINKE
CARE
DAMP
DRY
TIME
ADJUST
NORMAL
BULKY
TOWELS
HEAVY
DUTY
SANITIZE
DELICATES
AIR FLUFF
TIME DRY
QUICK DRY
STEAM
REFRESH
MY
CYCLE
ECO
DRY
Signal (-/+)
CONTROL LOCK
Control
Control Lock
Control Lock
Control Lock
Control Lock
Control Lock
POWER.

MIDEA
LAUNDRY
DER LIMITED
RRANTY
IF YOU NEED SERVICE:
ATCH YOUR RECEIPT HERE. PROOF OF PURCHASE
IS REQUIRED TO OBIN RRANTY SERVICE.
Please have the following information available when
you call the Customer Service Center:
•
Name, address and telephone number
•
Model number and serial number
•
A clear, detailed description of the problem
•
Proof of purchase including dealer or retailer
name and address
1.
Before contacting us to arrange service, please determine whether your product requires
repair. Some questions can be addressed without service. Please take a few minutes to
review the Troubleshooting section of the User Manual, or visit http://us.Midea.com/support
2.All warranty service is provided exclusively by our authorized Midea Service Providers. in the
U.S. and Canada.
Midea Customer Service
In the U.S.A. or Canada, call 1-866-646-4332.
If outside the 50 States of the United States or Canada, contact your authorized Midea dealer to
determine whether another warranty applies.
LIMITED RRANTY
WHAT IS COVERED
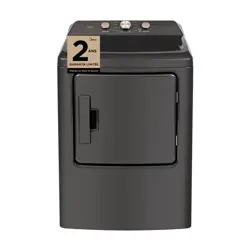
TWO YEAR LIMITED RRANTY (RTS AND LABOR)
For two years from the date of purchase, if this major appliance is installed, operated and
maintained according to instructions attached to or furnished with the product, Midea America
Corporation (hereafter "Midea") will pay for factory specified replacement parts and repair
labor to correct defects in materials or workmanship that existed when this major appliance was
purchased, or at its sole discretion replace the product. In the event of product replacement, your
appliance will be warranted for the remaining term of the original unit's warranty period.
YOUR SOLE AND EXCLUSIVE REMEDY UNDER THIS LIMITED WARRANTY SHALL BE PRODUCT
REPAIR OR REPLACEMENT AS PROVIDED HEREIN. Service must be provided by a Midea
designated service company. This limited warranty is valid only in the 50 States of the United
States or Canada and applies only when the major appliance is used in the country in which it
was purchased. This limited warranty is effective from the date of original consumer purchase.
Proof of original purchase date is required to obtain service under this limited warranty.
47
Gidea
REGISTRATION INFORMION
PROTECT YOUR PRODUCT:
We will keep the model number and date of purchase of your new Midea product
on file to help you refer to this information in the event of an insurance claim such
as fire or theft.
Product registration is not mandatory. Failure to complete and return the card or
form does not diminish the consumer's warranty rights.
Register online at hps:us.midea.com/product-registration
OR
Please fill out and return it to the following address:
Midea America Corp. 300
K
imball
D
rive, Parsippany, NJ 0705
4
-----------------------------------------------
(
detach here
)
----------------------------------------------
Name:
Model#: Serial#:
Card:
Address: Date Purchased:
Store / Dealer Name:
City:
State:
Zip:
E
-
mail Address:
Area Code:
Phone Number:
Occupation:
Did you purchase an additional warranty:
As your Primary Residence:
How did you learn about this product:
Age:
D
Advertising
Marital Status:
D
In Store Demo
D Personal Demo
Inrmation coected or submitted to us only available to company teal employees r
purposes of contacting you or seng you ema based on your request for information and to
company service provide for purposes of provig services relating to our communications with
you. All data w not be shared with other organations r commercial puoses.
Please consider leaving a customer review at www.ma.com.
Midea America Corp.
Parsippany, NJ 07054
Customer Service 1-866-646-4332
Made in China
Vl ENGLISH
49

make yourself at home