Please give us a chance to make it right and do better !
Contact our friendly customer service department for help first.
Replacements for missing or damaged parts will be shipped ASAP !
Contact Us !
Do NOT return this item.
US:cs.us@costway.com
UK:cs.uk@costway.com
US office: Fontana UK office: Ipswich AU office: Truganina
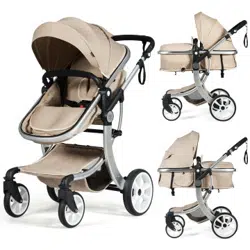
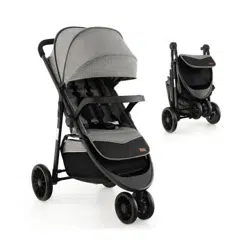
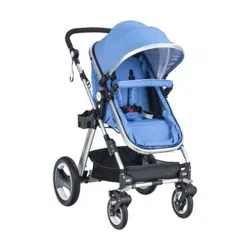
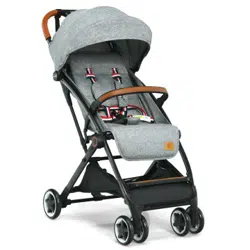
Baby Stroller
BB56
USER’S MANUAL
THIS INSTRUCTION BOOKLET CONTAINS IMPORTANT SAFETY INFORMATION. PLEASE READ AND KEEP FOR FUTURE REFERENCE.
General Warnings:
Danger! Keep all small parts and packaging materials for this product away from babies and
children, otherwise they may pose a choking hazard.
The product must be installed and used under the supervision of an adult.
Read through each step carefully and follow the proper order.
Remove all Packaging, separate and count all parts and hardware before Installation.
Please ensure that all parts are correctly installed, incorrect Installation can lead to a Danger.
We recommend that, where possible, all items are assembled near to the area in which
they will be placed in use, to avoid moving the product unnecessarily once assembled.
Ensure a secure surface during construction, and place the product always on a flat, steady
and stable surface.
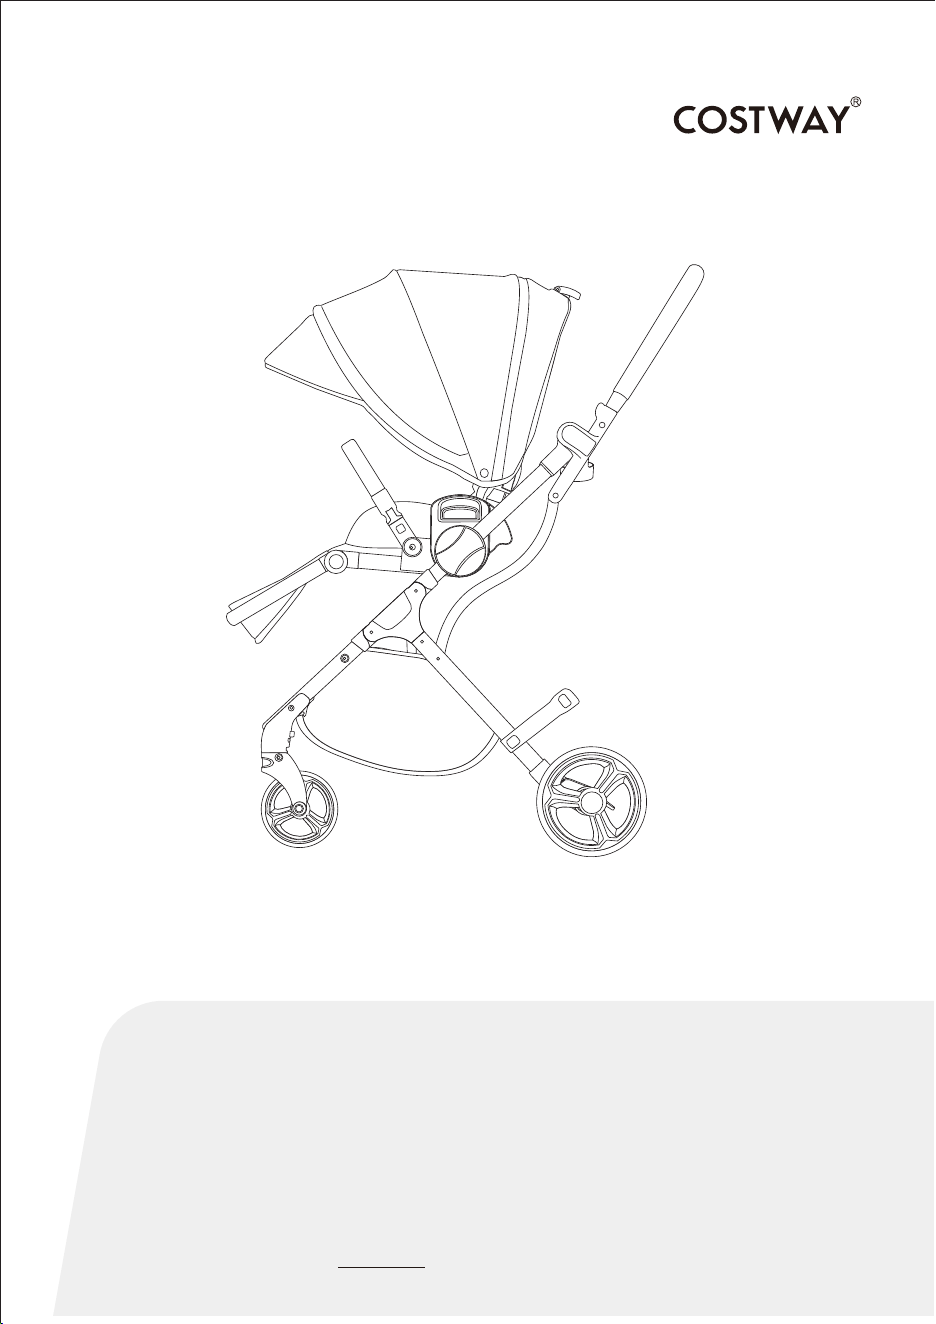
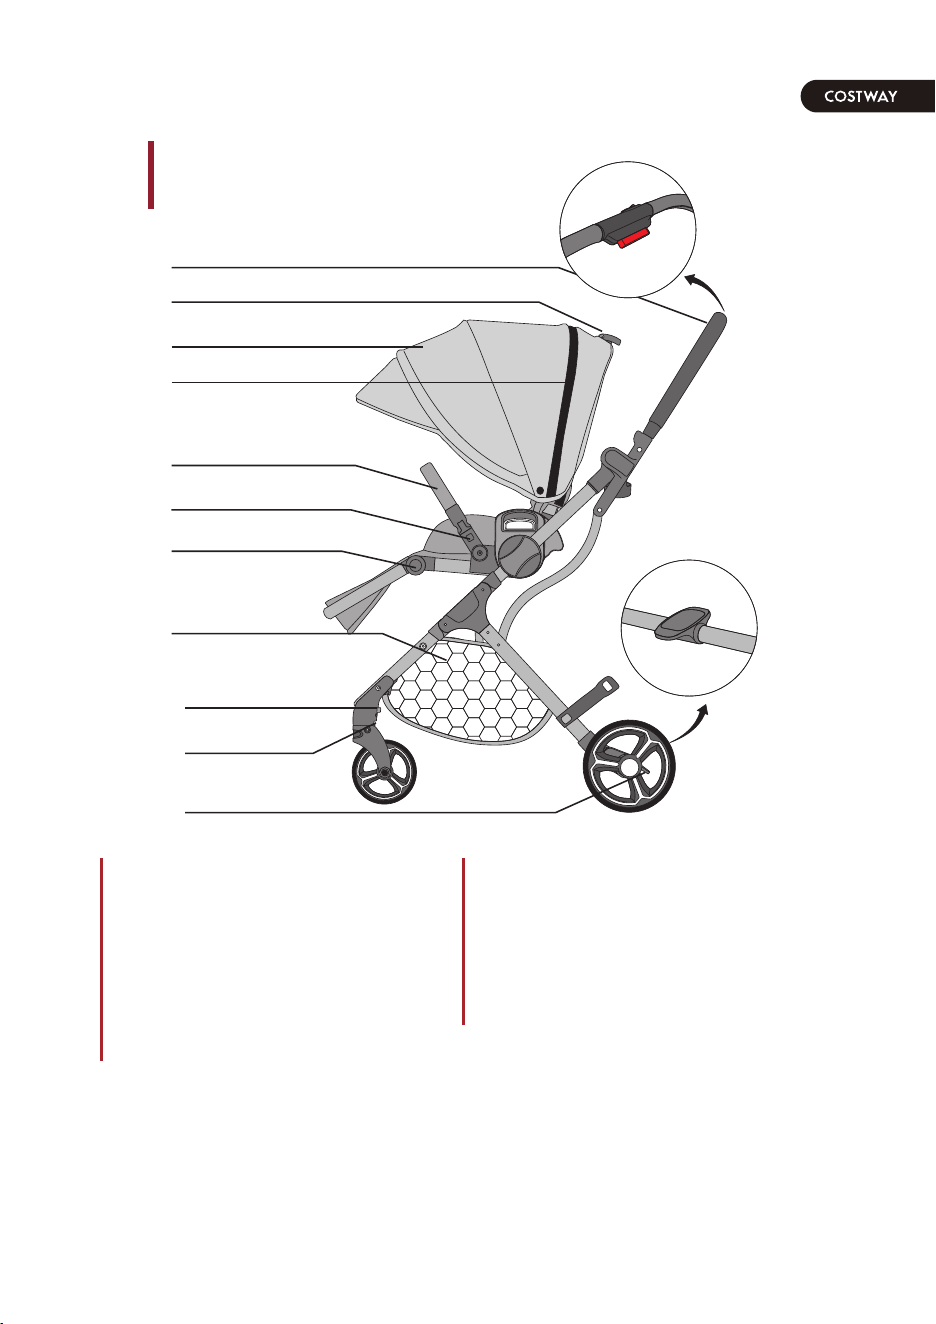
1. Folding Button and 2nd lock
2. Back adjuster
3. Full canopy
4. Canopy zipper
5. Removable front handrail
6. Remove button for front handrail
7. Angle adjustment button
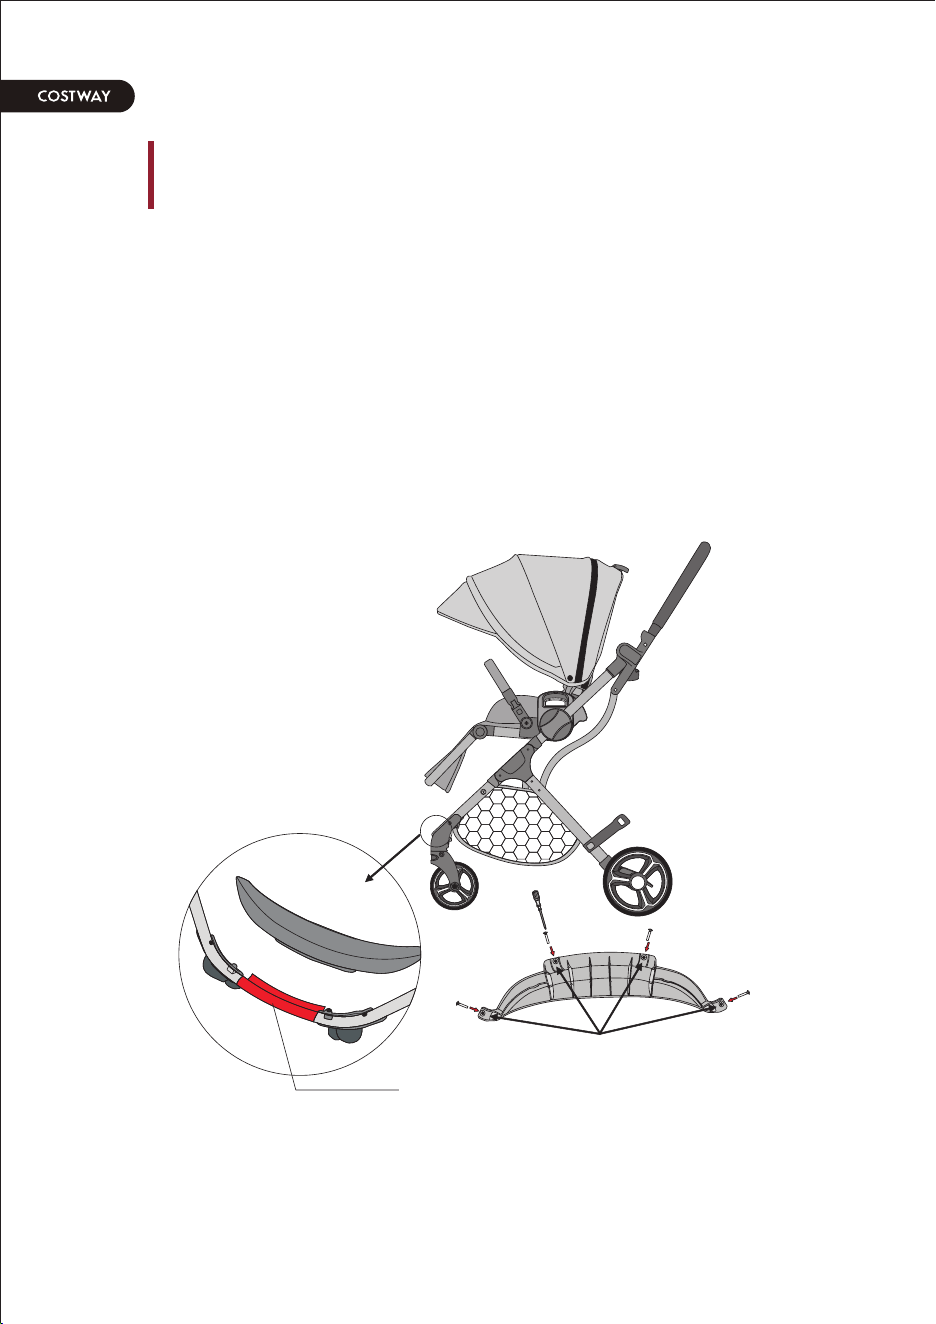
8. Basket
9. Front wheel remove button
10. Front wheel directional wrench
11. The brake pedal
PARTS
1
2
4
5
6
7
8
9
10
11
3
WARNING Never leave child unattended.
WARNING Avoid serious injury from falling or sliding out.
Always use seat belt.
WARNING Parcels or accessory items, or both,
placed on the unit may cause the unit to become unstable.
Before You Start
Please read all instructions carefully and keep it for future reference.
02 03
General Warnings:
Danger! Keep all small parts and packaging materials for this product away from babies and
children, otherwise they may pose a choking hazard.
The product must be installed and used under the supervision of an adult.
Read through each step carefully and follow the proper order.
Remove all Packaging, separate and count all parts and hardware before Installation.
Please ensure that all parts are correctly installed, incorrect Installation can lead to a Danger.
We recommend that, where possible, all items are assembled near to the area in which
they will be placed in use, to avoid moving the product unnecessarily once assembled.
Ensure a secure surface during construction, and place the product always on a flat, steady
and stable surface.
1. Folding Button and 2nd lock
2. Back adjuster
3. Full canopy
4. Canopy zipper
5. Removable front handrail
6. Remove button for front handrail
7. Angle adjustment button
8. Basket
9. Front wheel remove button
10. Front wheel directional wrench
11. The brake pedal
PARTS
1
2
4
5
6
7
8
9
10
11
3
WARNING Never leave child unattended.
WARNING Avoid serious injury from falling or sliding out.
Always use seat belt.
WARNING Parcels or accessory items, or both,
placed on the unit may cause the unit to become unstable.
Before You Start
Please read all instructions carefully and keep it for future reference.
02 03
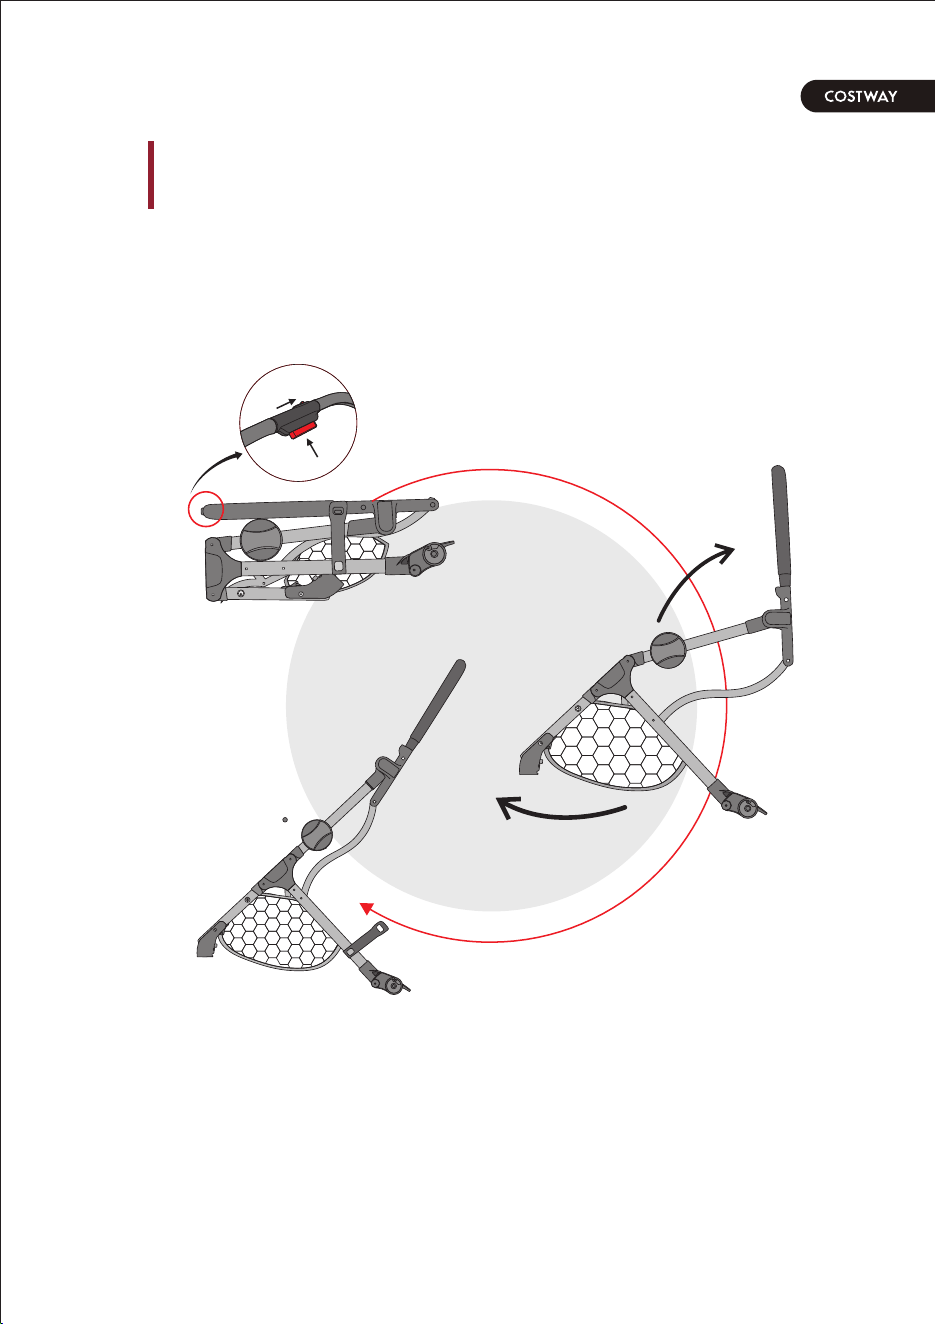
USE Instructions
/ Expansion of the stroller /
Ŝ
Open
Pick up
Off
ş
Complete
Ś
Pinch
Push
ś
ŝ
Ş
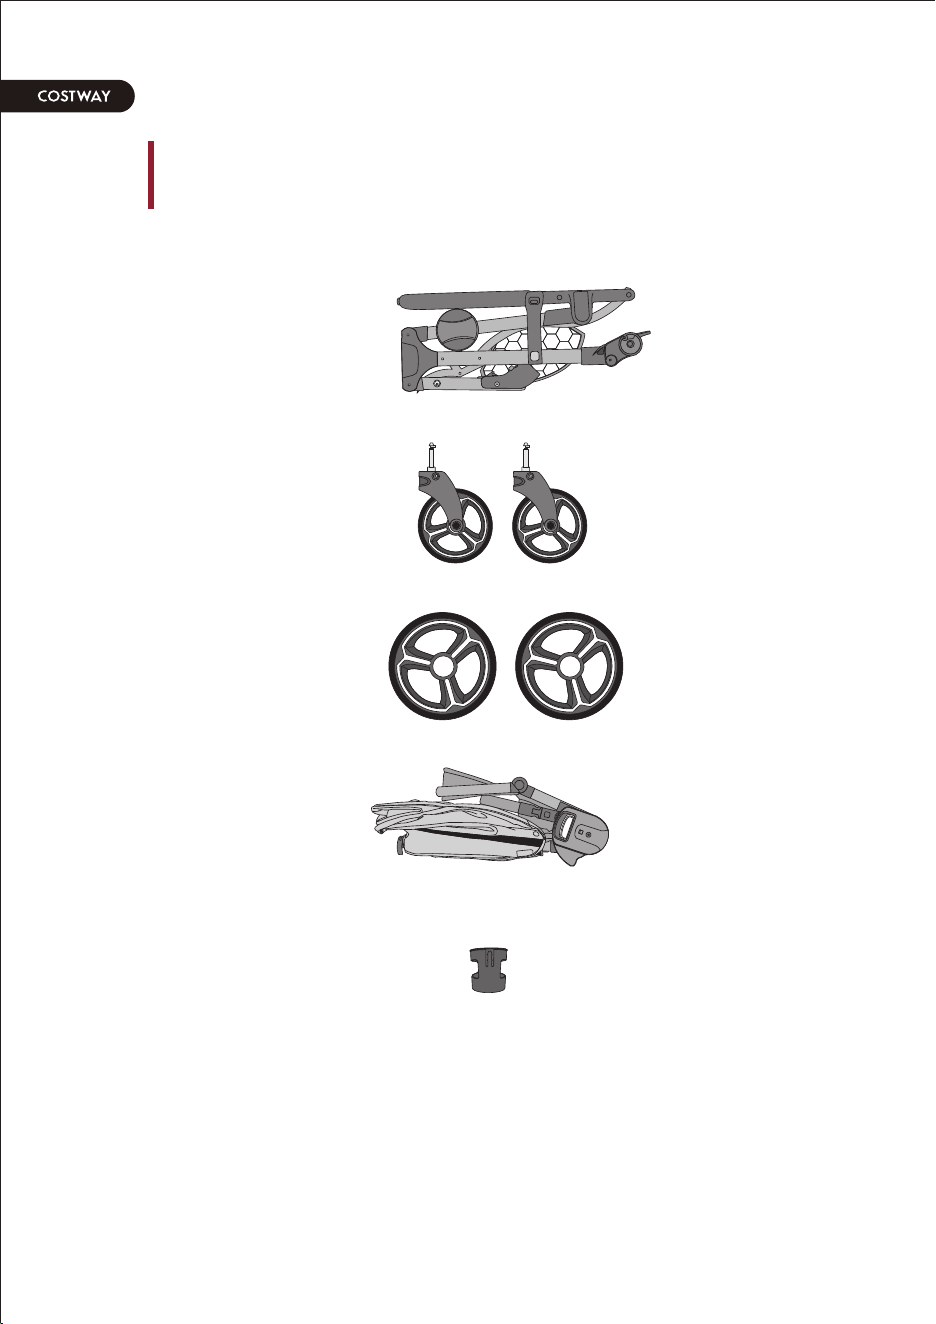
ș Cup Holder*1
ș The Frame
ș Front Wheel*2
ș Rear Wheel*2
PARTS
ș Seat*1
04 05
USE Instructions
/ Expansion of the stroller /
Ŝ
Open
Pick up
Off
ş
Complete
Ś
Pinch
Push
ś
ŝ
Ş
ș Cup Holder*1
ș The Frame
ș Front Wheel*2
ș Rear Wheel*2
PARTS
ș Seat*1
04 05
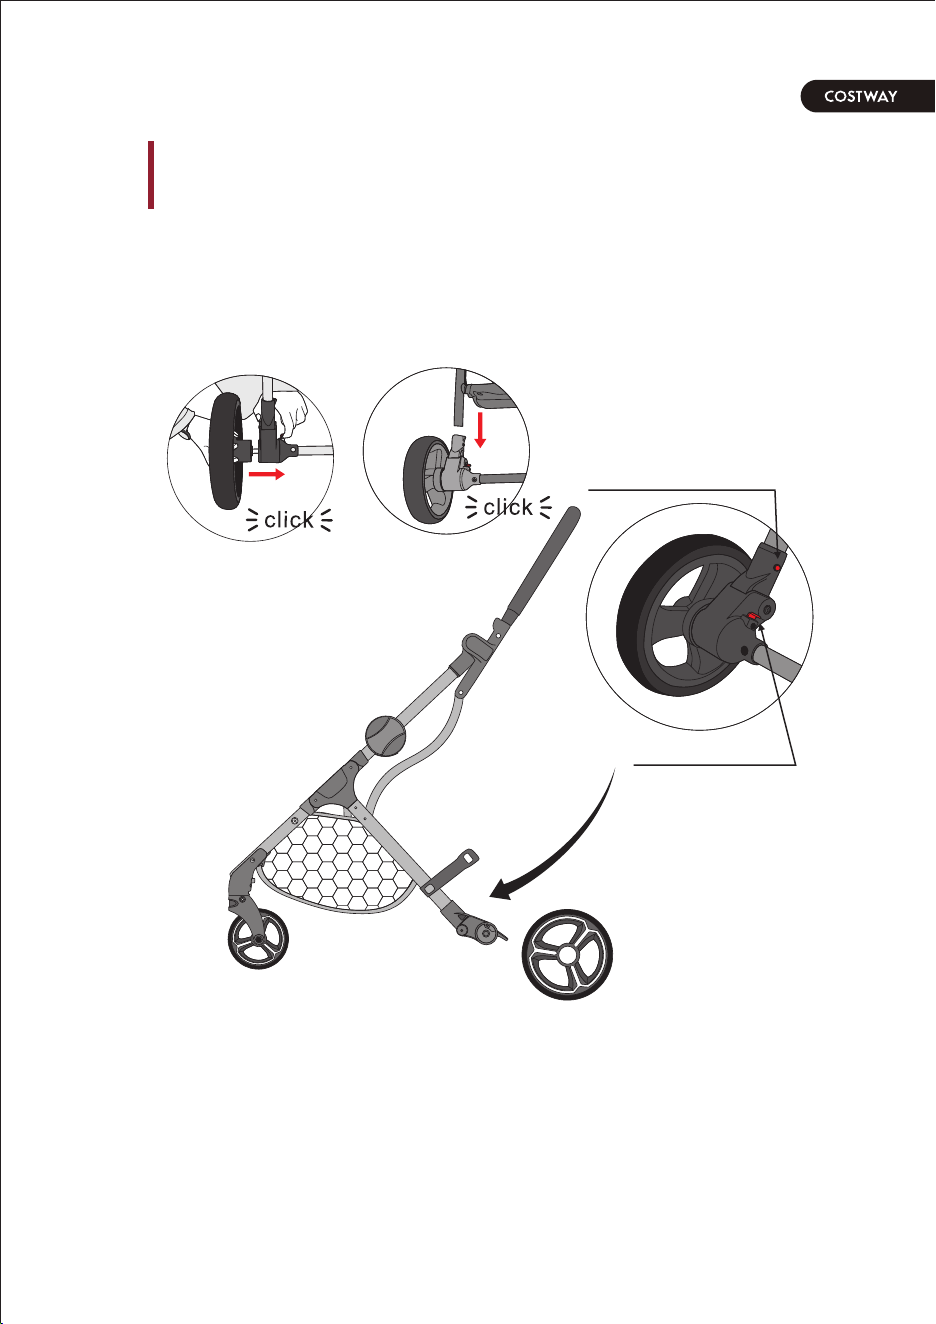
/ Installation and disassembly of rear wheels /
Quick release button
for rear wheel
Quick release button
for rear wheel group
Installation of rear wheel group
Installation of rear wheels
USE Instructions
USE Instructions
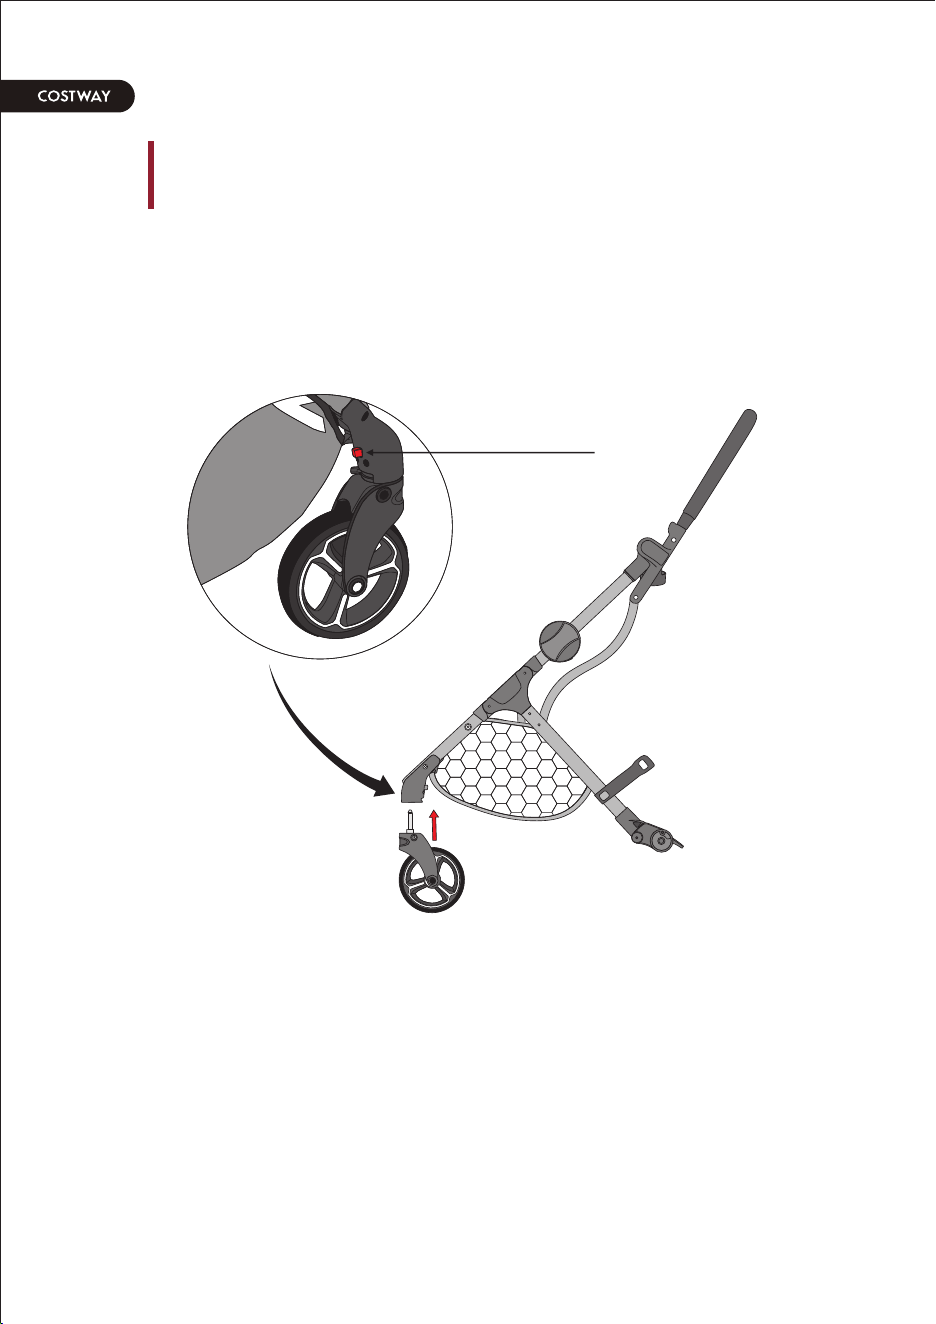
/ Installation and disassembly of front wheels /
Front wheel quick release button
06 07
/ Installation and disassembly of rear wheels /
Quick release button
for rear wheel
Quick release button
for rear wheel group
Installation of rear wheel group
Installation of rear wheels
USE Instructions
USE Instructions
/ Installation and disassembly of front wheels /
Front wheel quick release button
06 07
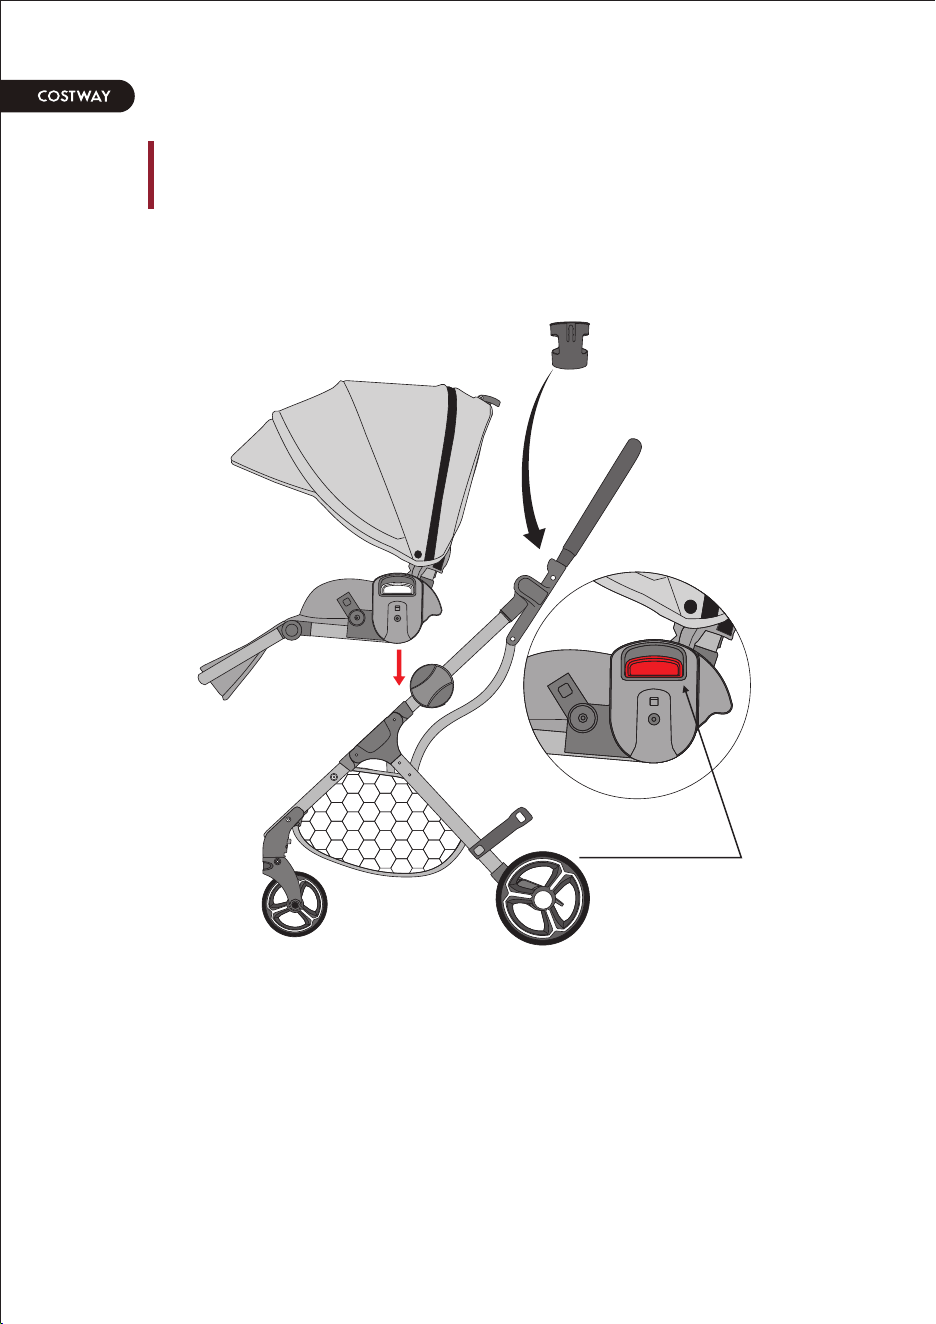
/ Seat installation /
Seat quick release button
USE Instructions
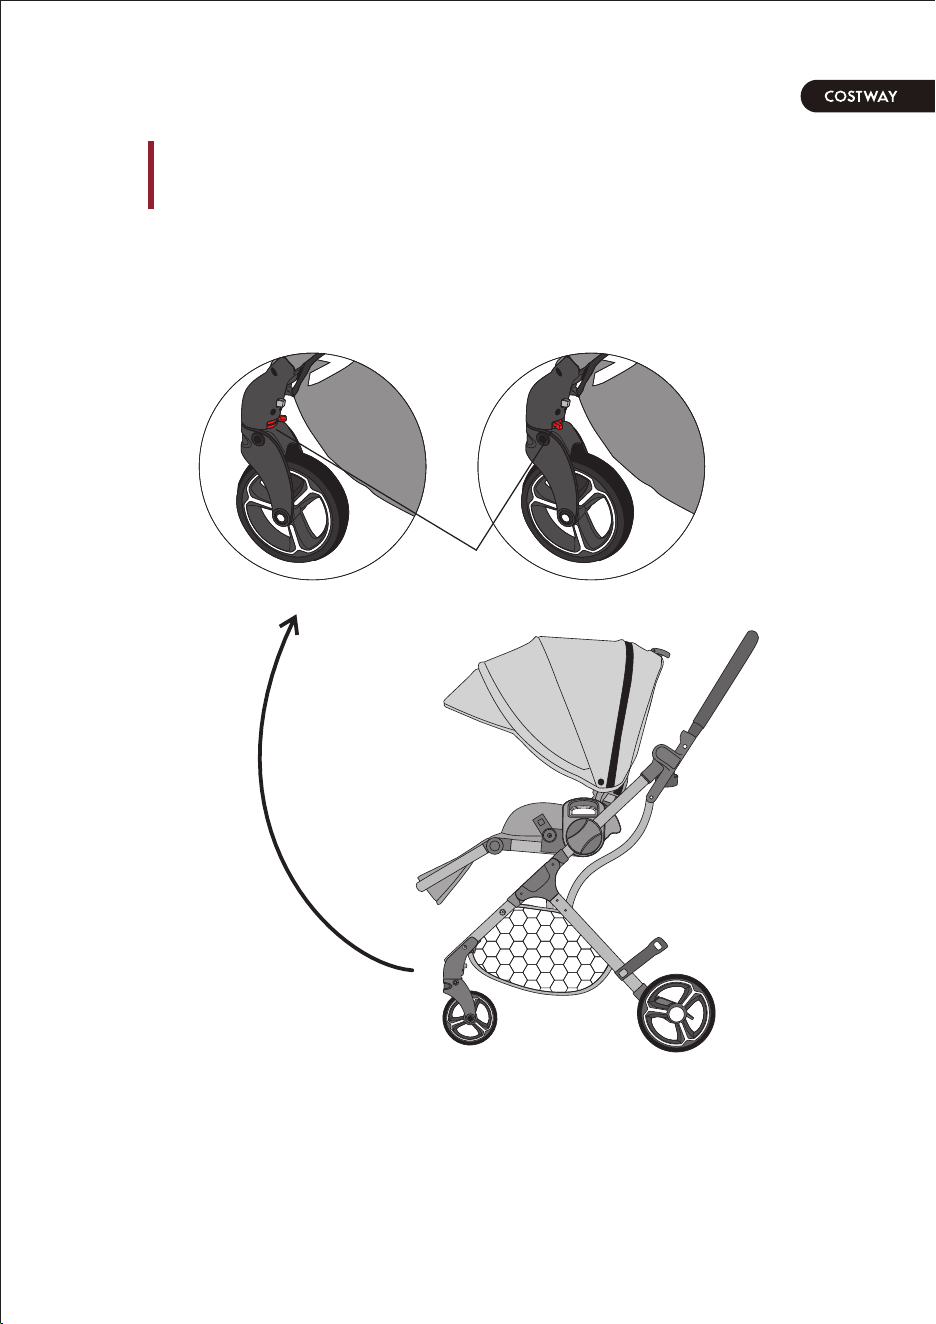
/ Use of front wheel orientation /
The directional
button on the front wheel
USE Instructions
08 09
/ Seat installation /
Seat quick release button
USE Instructions
/ Use of front wheel orientation /
The directional
button on the front wheel
USE Instructions
08 09
/ Use of seat belts /
USE Instructions
Use of seat belts
Fasten the seat belt
insert
fastening
shape buckle
Hold down
Button of the Buckle
Adjust Shoulder straps
Adjust the belt
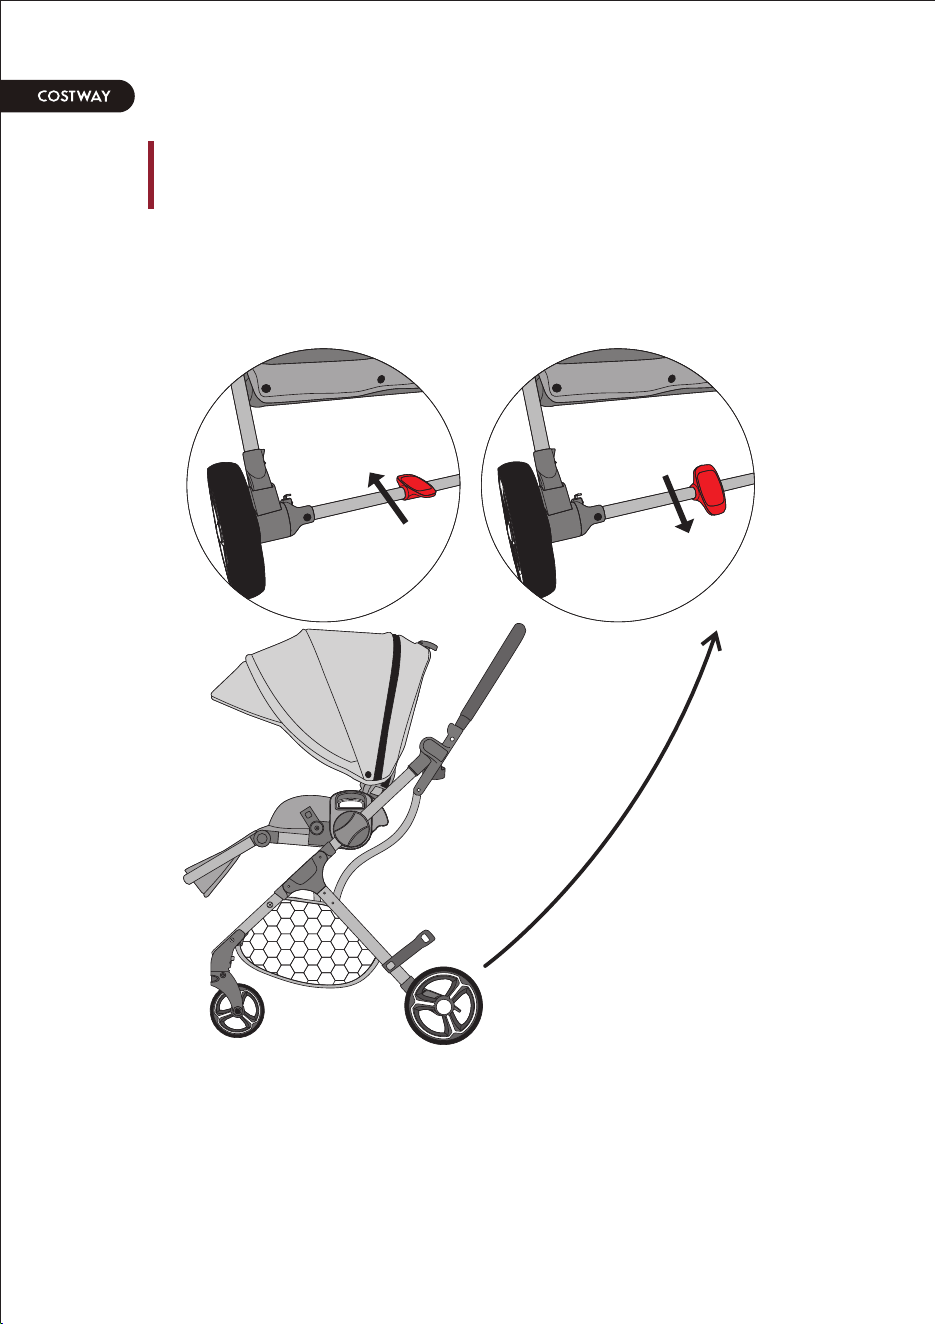
The brake
Solutions of the brake
/ Use of rear wheel brakes /
USE Instructions
10 11

/ Use of seat belts /
USE Instructions
Use of seat belts
Fasten the seat belt
insert
fastening
shape buckle
Hold down
Button of the Buckle
Adjust Shoulder straps
Adjust the belt
The brake
Solutions of the brake
/ Use of rear wheel brakes /
USE Instructions
10 11

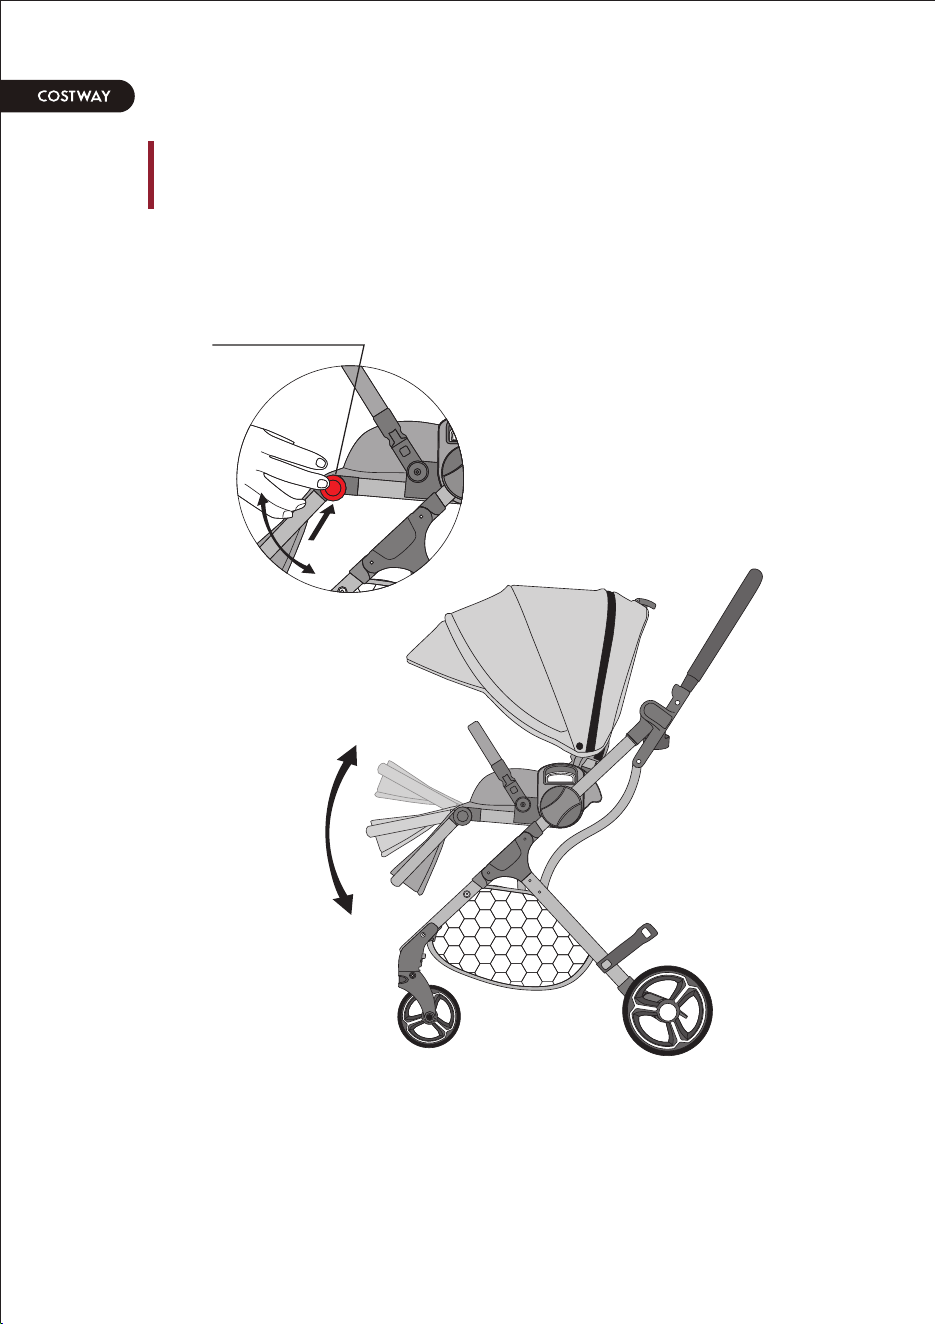
/ Back adjustment /
The adjustment button on the back
The back Angle of this
second gear is for
children to use.
Children are not
allowed to use other
back gear.
Up-down adjustment
USE Instructions
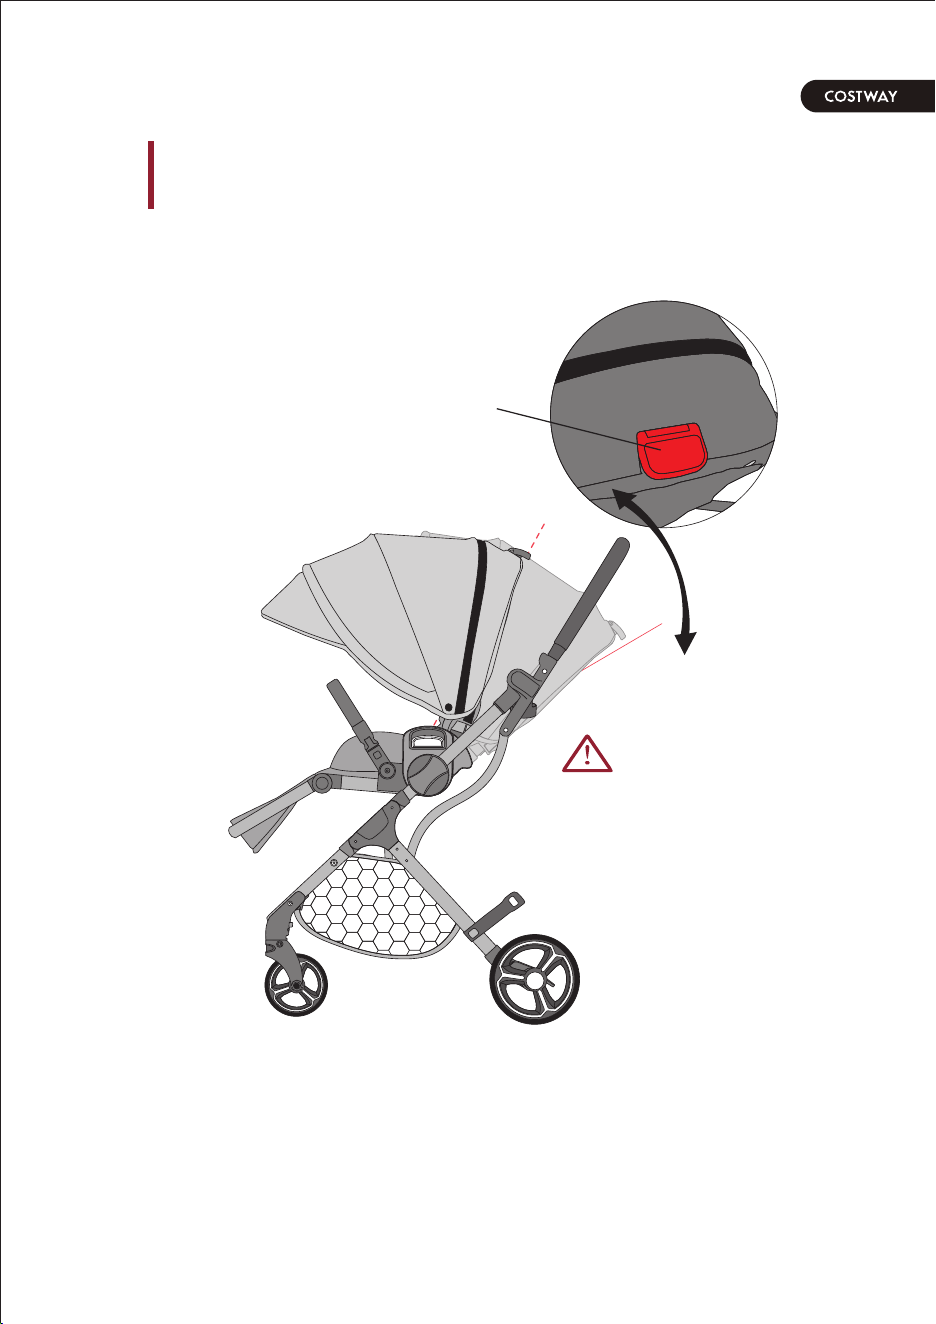
/ Installation and removal of the front handrail /
Disassembly
Installation
clip into
1/ When installing the front handrail, the front handrail socket
shall be rotated. When installing, please rotate the front handrail
to the correct state. The correct state is and the error mode is ×.
The quick release button must be facing outwards, otherwise it
cannot be clamped and fixed.
√
×
Turn the remove button
outward for proper installation.
USE Instructions
Remove button for front handrail
1 Press
2 Pull out
12 13
/ Back adjustment /
The adjustment button on the back
The back Angle of this
second gear is for
children to use.
Children are not
allowed to use other
back gear.
Up-down adjustment
USE Instructions
/ Installation and removal of the front handrail /
Disassembly
Installation
clip into
1/ When installing the front handrail, the front handrail socket
shall be rotated. When installing, please rotate the front handrail
to the correct state. The correct state is and the error mode is ×.
The quick release button must be facing outwards, otherwise it
cannot be clamped and fixed.
√
×
Turn the remove button
outward for proper installation.
USE Instructions
Remove button for front handrail
1 Press
2 Pull out
12 13
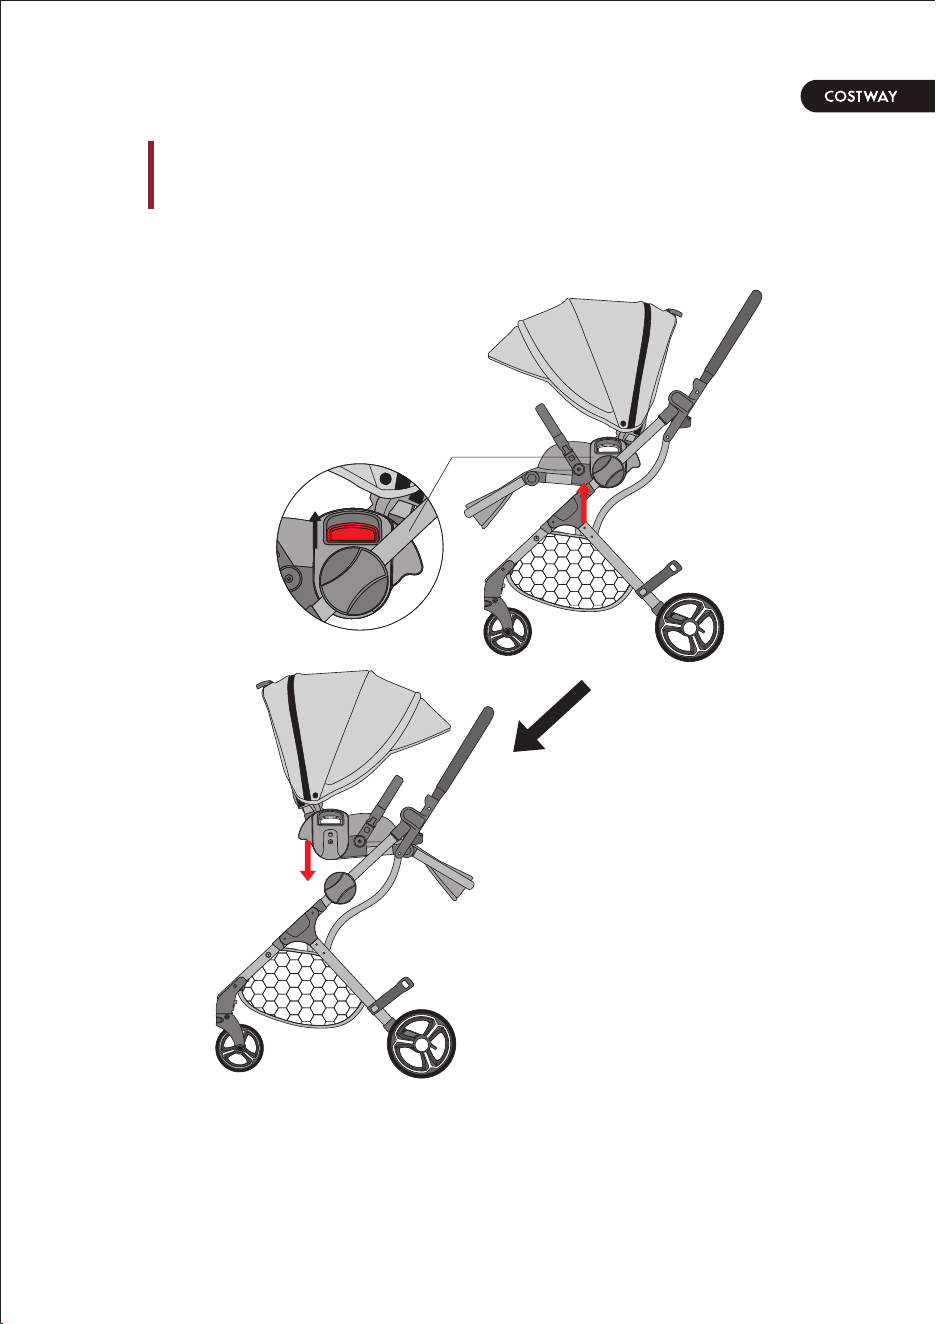
/ Seat reversal /
Seat quick release button
Push
USE Instructions
/ Foot pedal adjustment /
Up-down adjustment
Press
Foot adjustment
USE Instructions
14 15
/ Seat reversal /
Seat quick release button
Push
USE Instructions
/ Foot pedal adjustment /
Up-down adjustment
Press
Foot adjustment
USE Instructions
14 15
/ Foot pedal protective film /
1/The protective film at the front part of the pedal is in a
replaceable mode. If the epidermis is worn and broken, the
protective film can be replaced, and it will not be regarded
as worn.
If you want to replace:
1.First, remove the 1.2.3.4 screws under the foot pedal.
2.Then the pedals are separated from the frame, the old
protective film is torn and peeled off on the frame, the new
protective film is wrapped, and 4 screws are screwed on the
pedals to complete the replacement.
ķ
ĸ
Ĺ
ĺ
Replaceable film protection
Back screw hole of foot pedal
USE Instructions
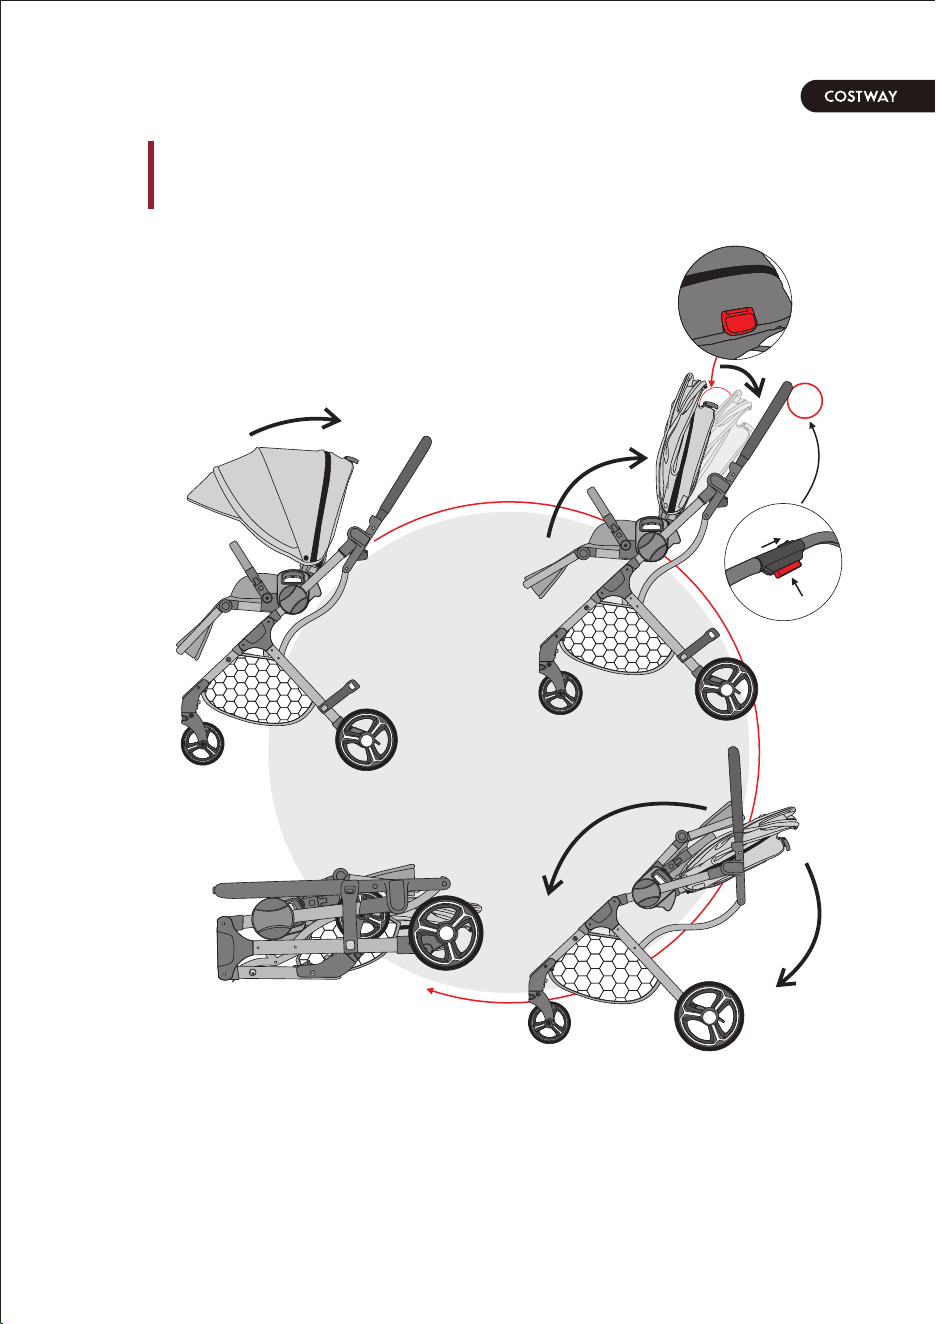
/ Close the stroller in the right direction /
Ś
Ş
ş
ś
Seat up
ŝ
Š
š
Ţ
Ŝ
Warning: Do not close the car when the
seat is upright or the roof is not closed.
Close canopy
Open
Pinch
Push
Backrest adjustment
Press
Complete
Push forward
USE Instructions
1
/ Foot pedal protective film /
1/The protective film at the front part of the pedal is in a
replaceable mode. If the epidermis is worn and broken, the
protective film can be replaced, and it will not be regarded
as worn.
If you want to replace:
1.First, remove the 1.2.3.4 screws under the foot pedal.
2.Then the pedals are separated from the frame, the old
protective film is torn and peeled off on the frame, the new
protective film is wrapped, and 4 screws are screwed on the
pedals to complete the replacement.
ķ
ĸ
Ĺ
ĺ
Replaceable film protection
Back screw hole of foot pedal
USE Instructions
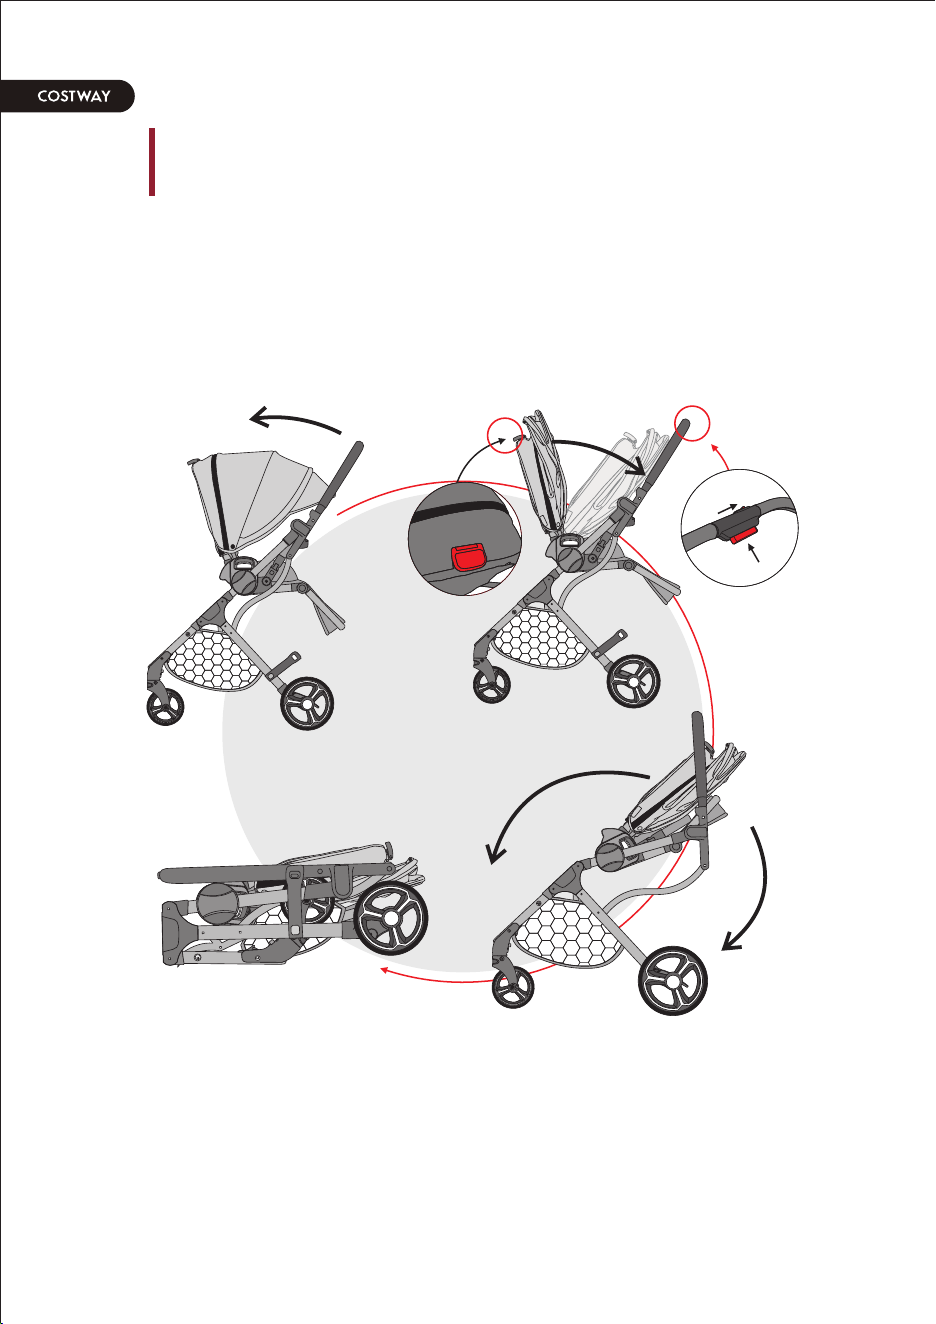
/ Close the stroller in the right direction /
Ś
Ş
ş
ś
Seat up
ŝ
Š
š
Ţ
Ŝ
Warning: Do not close the car when the
seat is upright or the roof is not closed.
Close canopy
Open
Pinch
Push
Backrest adjustment
Press
Complete
Push forward
USE Instructions
1
ș
ș
ș
ș
ș
ș
ș
ș
WARNING
PleasKreaJthiYmanuaRcarefull_beforKusK
anJkeeViZfoXfuturKreferenceFailurKtU
follo]thiYinstructioTmanuaRma_affecZthK
safet_oLchildren.
ThKcaregiveXshoulJnoZleavKwhilKthKchilJ
iYiTthKride.
WheTchildreTarKiTseatthe_musZusK
seaZbelt.
ThiYproducZiYsuitablKfoXchildreTageJ
0-3monthschildreTageJoveXyearYor
weighinMoveXRHs arKnoZallo weJtUuse.
MakKsurKalRlockinMdeviceYarKlocke d
beforKusinMthKstroller.
An_loaJplaceJoTthKhandlebarYwilRaffect
thKstabilit_oLthKvehicle.
DUnoZusKthKfronZhandraiRaYthKhandlKof
thKY
trolleXtUlifZthKplatforSoXchildren,
sUaYtUavoiJunnecessar_injurieYcaused
b_thKfallinMofLoLthKhandrail.
DUnoZleavKthKstrolleXoTthKslope.
ThKmaximuSloaJbearinMoLthKbaskeZOY
4.4 lbs.
ș
Press
ş
)RUYKZNKYZrURRKXOTZNKUVVUYOtKJOrKIZOUT
Ś
)RUYKIGTUV_
Ŝ
BackrKYZGJP[YZSKTZ
ś
Open
Pinch
Push
Ş
ŝ
š
)USVRKte
WGXTOTM *UTUZIRUYKZNKIGX]OZNZNKYKGZ[VXOMNZ
UXZNKrooLTUZIRUYKJ
6[YNLUrward
Š
USE Instructions
1

ș
ș
ș
ș
ș
ș
ș
ș
WARNING
PleasKreaJthiYmanuaRcarefull_beforKusK
anJkeeViZfoXfuturKreferenceFailurKtU
follo]thiYinstructioTmanuaRma_affecZthK
safet_oLchildren.
ThKcaregiveXshoulJnoZleavKwhilKthKchilJ
iYiTthKride.
WheTchildreTarKiTseatthe_musZusK
seaZbelt.
ThiYproducZiYsuitablKfoXchildreTageJ
0-3monthschildreTageJoveXyearYor
weighinMoveXRHs arKnoZallo weJtUuse.
MakKsurKalRlockinMdeviceYarKlocke d
beforKusinMthKstroller.
An_loaJplaceJoTthKhandlebarYwilRaffect
thKstabilit_oLthKvehicle.
DUnoZusKthKfronZhandraiRaYthKhandlKof
thKY
trolleXtUlifZthKplatforSoXchildren,
sUaYtUavoiJunnecessar_injurieYcaused
b_thKfallinMofLoLthKhandrail.
DUnoZleavKthKstrolleXoTthKslope.
ThKmaximuSloaJbearinMoLthKbaskeZOY
4.4 lbs.
ș
Press
ş
)RUYKZNKYZrURRKXOTZNKUVVUYOtKJOrKIZOUT
Ś
)RUYKIGTUV_
Ŝ
BackrKYZGJP[YZSKTZ
ś
Open
Pinch
Push
Ş
ŝ
š
)USVRKte
WGXTOTM *UTUZIRUYKZNKIGX]OZNZNKYKGZ[VXOMNZ
UXZNKrooLTUZIRUYKJ
6[YNLUrward
Š
USE Instructions
1

ș
ș
ThKbrakeYshoulJbKapplieJwheTplacing
GchilJiToXremovinMGchilJfroSGstroller.
DUnoZclosKthKstrolleXwheTchildreTarKin
thKstroller.
WheTchildreTarKiTthKcartdUnoZremove
thKplatforSoXad jusZan_parts.
DUnoZusKaccessorieYthaZarKnoZprovided
b_thKmanufacturer.
WARNING
ș
ș
2 2

ș
ș
ThKbrakeYshoulJbKapplieJwheTplacing
GchilJiToXremovinMGchilJfroSGstroller.
DUnoZclosKthKstrolleXwheTchildreTarKin
thKstroller.
WheTchildreTarKiTthKcartdUnoZremove
thKplatforSoXad jusZan_parts.
DUnoZusKaccessorieYthaZarKnoZprovided
b_thKmanufacturer.
WARNING
ș
ș
2 2

Please give us a chance to make it right and do better !
Contact our friendly customer service department for help first.
Replacements for missing or damaged parts will be shipped ASAP !
Contact Us !
Do NOT return this item.
US:cs.us@costway.com
UK:cs.uk@costway.com
US office: Fontana UK office: Ipswich AU office: Truganina
Baby Stroller
BB56
USER’S MANUAL
THIS INSTRUCTION BOOKLET CONTAINS IMPORTANT SAFETY INFORMATION. PLEASE READ AND KEEP FOR FUTURE REFERENCE.