
UY10052
If you're having difficulty, our friendly
customer team is always here to help.
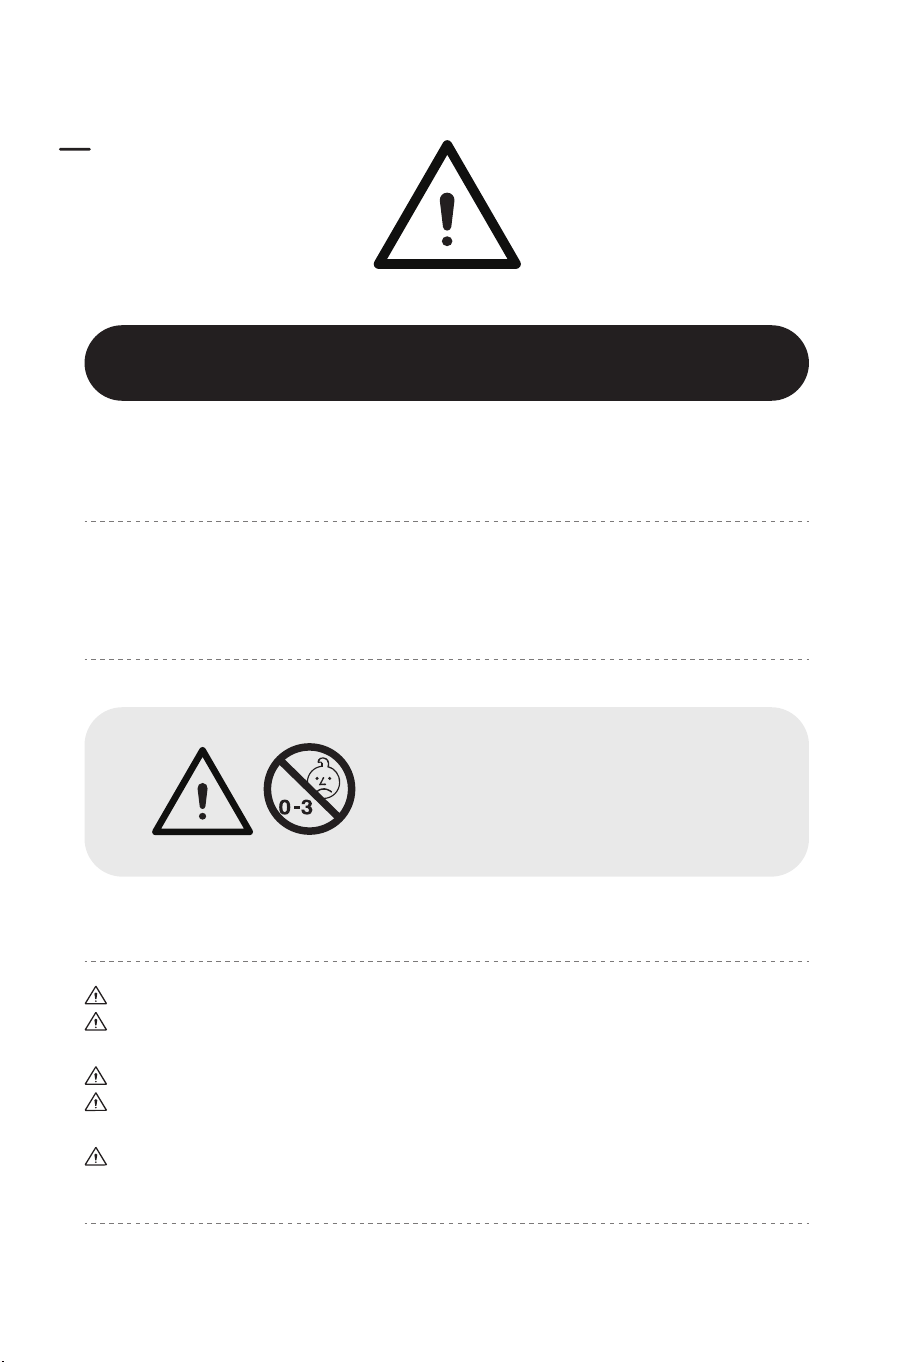
THIS INSTRUCTION BOOKLET CONTAINS IMPORTANT SAFETY INFORMATION. PLEASE READ AND KEEP FOR FUTURE REFERENCE.
AUS:cs.au@costway.com
FRA:cs.fr@costway.com
DEU:cs.de@costway.com
ITA:cs.it@costway.com ESP:cs.es@costway.com
POL:sklep@costway.com
GBR:cs.uk@costway.com
DEU office: FDS GmbH, Neuer Höltigbaum 36, 22143 Hamburg, Deutschland
ITA office: Milano
FRA office: Saint Vigor d'Ymonville
POL office: GdańskGBR office: IpswichAUS office: TruganinaUSA office: Fontana
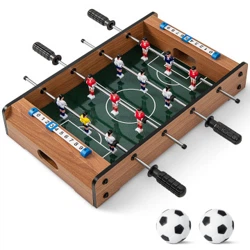
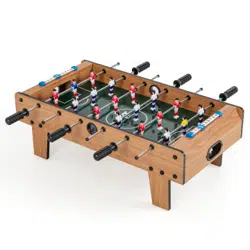
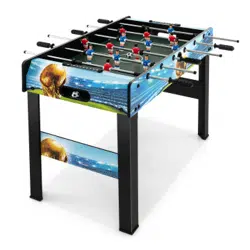
Football Table
Fußballtisch
Table de Football
Futbolín
Tavolo da Calcio
Stół do gry w piłkarzyki
Before You Start
Assembled only by adults
Remove all packaging, separate and count all parts and hardware.
Read through each step carefully and follow the proper order.
We recommend that, where possible, all items are assembled near the area in which
they will be placed in use, to avoid moving the product unnecessarily once assembled.
Ensure a secure surface during installation, and always place the product on a flat,
steady and stable surface.
Caution: Children should use this product under the parental supervision.
Danger: Keep all small parts and packaging materials for this product away from babies
and children, otherwise they may pose a choking hazard.
Danger: Lack of attachment may cause a risk of tipping.
Bevor Sie beginnen
Montage nur durch Erwachsene
Entfernen Sie alle Verpackungen, Überprüfen Sie, ob alle Teile und Zubehörteile
vorhanden sind.
Lesen Sie jeden Montageschritt sorgfältig durch und folgen Sie den Anleitungen.
Wir empfehlen, alle Teile möglichst in der Nähe des Aufstellungsortes zu montieren, um
unnötige Bewegungen nach der Montage zu vermeiden.
Achten Sie bei der Montage auf einen sicheren Untergrund und stellen Sie den Artikel
immer auf eine ebene, feste und stabile Fläche.
Vorsicht: Kinder sollten diesen Artikel unter elterlicher Aufsicht benutzen.
Gefahr: Halten Sie alle Kleinteile und Verpackungsmaterialien, die verschluckt werden
können, von Babys und Kindern fern.
Gefahr: Unsachgemäße Montage kann zu Kippgefahr führen.
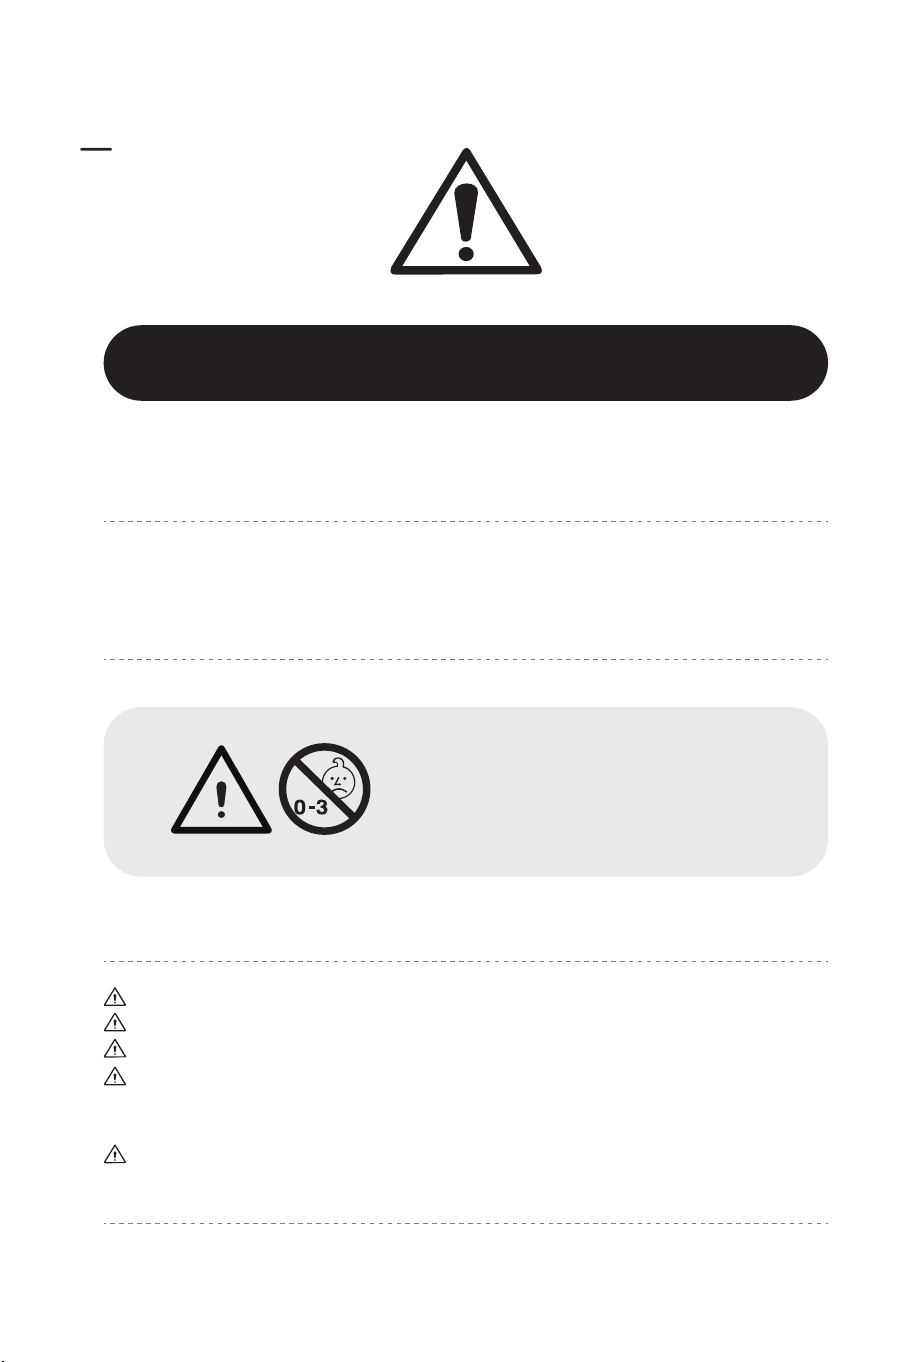
Bitte sorgfältig lesen und zum späteren Nachschlagen aufbewahren.
WARNING:
CHOKING HAZARD
-Small parts.
Not for children under 3 years.
Please read all instructions carefully and keep it for future reference.
EN DE
Warning for Assembly Achtung bei Montage
General Security Warning Allgemeine Sicherheitswarnung
Achtung:
ERSTICKUNGSGEFAHR
-Kleine Teile.
Nicht für Kinder unter 3 Jahren.
02 03
Before You Start
Assembled only by adults
Remove all packaging, separate and count all parts and hardware.
Read through each step carefully and follow the proper order.
We recommend that, where possible, all items are assembled near the area in which
they will be placed in use, to avoid moving the product unnecessarily once assembled.
Ensure a secure surface during installation, and always place the product on a flat,
steady and stable surface.
Caution: Children should use this product under the parental supervision.
Danger: Keep all small parts and packaging materials for this product away from babies
and children, otherwise they may pose a choking hazard.
Danger: Lack of attachment may cause a risk of tipping.
Bevor Sie beginnen
Montage nur durch Erwachsene
Entfernen Sie alle Verpackungen, Überprüfen Sie, ob alle Teile und Zubehörteile
vorhanden sind.
Lesen Sie jeden Montageschritt sorgfältig durch und folgen Sie den Anleitungen.
Wir empfehlen, alle Teile möglichst in der Nähe des Aufstellungsortes zu montieren, um
unnötige Bewegungen nach der Montage zu vermeiden.
Achten Sie bei der Montage auf einen sicheren Untergrund und stellen Sie den Artikel
immer auf eine ebene, feste und stabile Fläche.
Vorsicht: Kinder sollten diesen Artikel unter elterlicher Aufsicht benutzen.
Gefahr: Halten Sie alle Kleinteile und Verpackungsmaterialien, die verschluckt werden
können, von Babys und Kindern fern.
Gefahr: Unsachgemäße Montage kann zu Kippgefahr führen.
Bitte sorgfältig lesen und zum späteren Nachschlagen aufbewahren.
WARNING:
CHOKING HAZARD
-Small parts.
Not for children under 3 years.
Please read all instructions carefully and keep it for future reference.
EN DE
Warning for Assembly Achtung bei Montage
General Security Warning Allgemeine Sicherheitswarnung
Achtung:
ERSTICKUNGSGEFAHR
-Kleine Teile.
Nicht für Kinder unter 3 Jahren.
02 03
Avant de Commencer
Construction seulement par des adultes
Retirez tous les emballages, séparez et comptez toutes les pièces et le matériel.
Lisez attentivement chaque étape et suivez l'ordre correct.
Nous recommandons que, dans la mesure du possible, tous les articles soient
assemblés à proximité de la zone dans laquelle ils seront utilisés, afin d'éviter de
déplacer inutilement le produit une fois assemblé.
Assurez-vous que la surface soit solide pendant la construction et placez toujours le
produit sur une surface plane et stable.
Attention : Les enfants doivent utiliser ce produit sous la surveillance de leurs parents.
Danger : Gardez toutes les petites pièces et les matériaux d'emballage de ce produit hors
de la portée des bébés et des enfants pour éviter un risque d'étouffement.
Danger : Le manque de la fixation pourrait entraîner un risque de basculement.
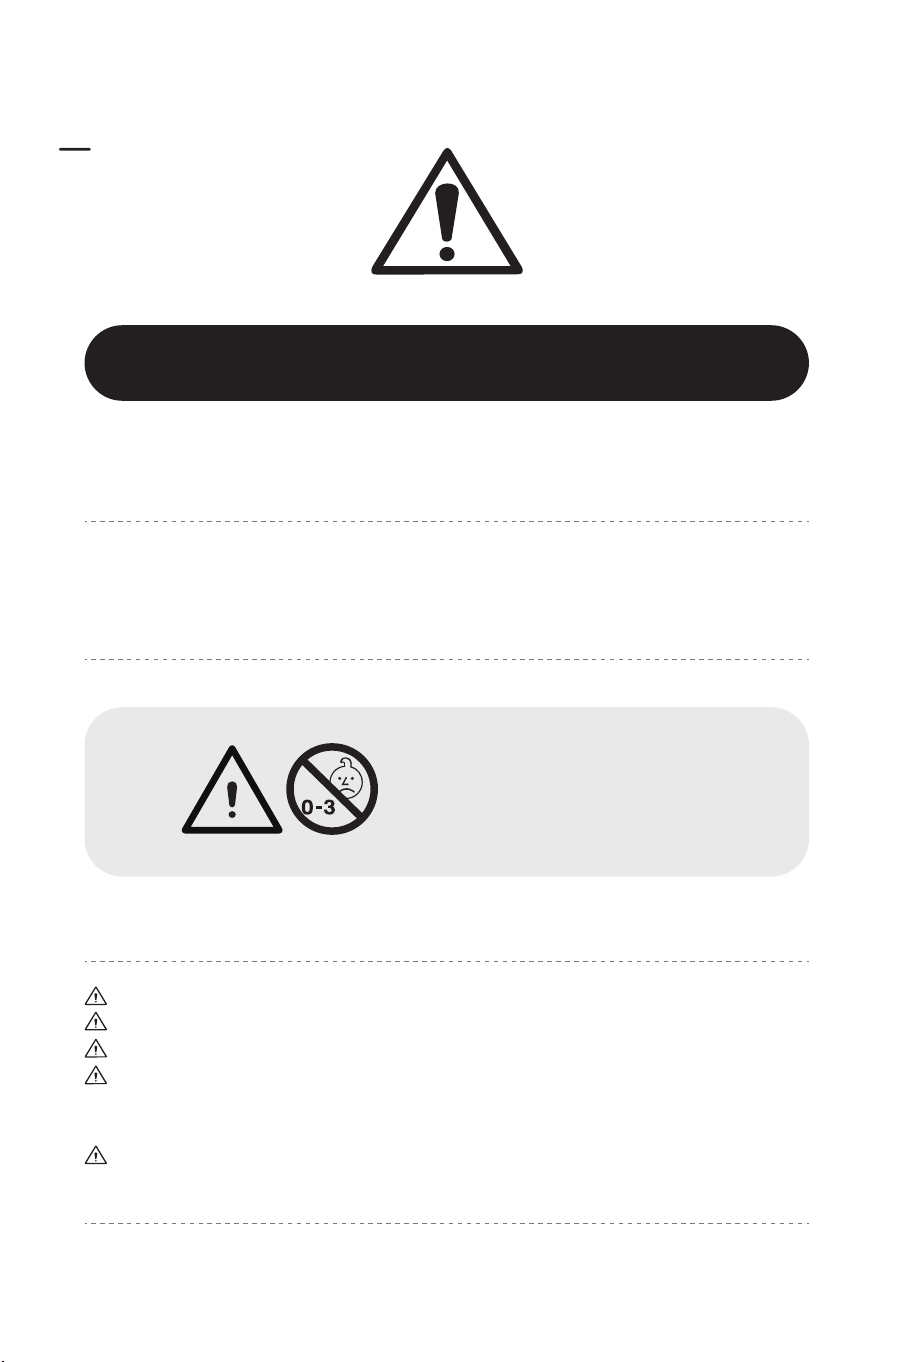
Veuillez lire attentivement toutes les instructions et les conserver pour la référence ultérieure.
Antes de Empezar
El producto solo puede ser ensamblado por adultos.
Retire todo el embalaje, separe y cuente todas las piezas y los accesorios.
Lea detenidamente cada paso y siga el orden correcto.
Recomendamos que, siempre que sea posible, todos los elementos se monten cerca de
la zona en la que se van a utilizar, para evitar mover el producto innecesariamente una
vez montado.
Asegure una superficie segura durante el montaje, y coloque el producto siempre sobre
una superficie plana, firme y estable.
Atención: Los niños deben utilizar este producto bajo la supervisión de sus padres.
Peligro: Mantenga todas las piezas pequeñas y los materiales de empaque de este producto
fuera del alcance de los bebés y los niños, ya que de lo contrario pueden suponer un peligro
de asfixia.
Peligro: La falta de fijación puede provocar un riesgo de vuelco.
Lea atentamente todas las instrucciones y consérvelas para futuras consultas.
AVERTISSEMENT :
RISQUE D'ÉTOUFFEMENT
– Les petites pièces.
Ne convient pas aux enfants de
moins de 3 ans.
FR ES
Avertissement pour l'Assemblage Advertencia para el Montaje
Avertissement de Sécurité Générale Advertencia de Seguridad General
ADVERTENCIA:
PELIGRO DE ASFIXIA
- Piezas pequeñas.
No es adecuado para niños
menores de 3 años.
04 05
Avant de Commencer
Construction seulement par des adultes
Retirez tous les emballages, séparez et comptez toutes les pièces et le matériel.
Lisez attentivement chaque étape et suivez l'ordre correct.
Nous recommandons que, dans la mesure du possible, tous les articles soient
assemblés à proximité de la zone dans laquelle ils seront utilisés, afin d'éviter de
déplacer inutilement le produit une fois assemblé.
Assurez-vous que la surface soit solide pendant la construction et placez toujours le
produit sur une surface plane et stable.
Attention : Les enfants doivent utiliser ce produit sous la surveillance de leurs parents.
Danger : Gardez toutes les petites pièces et les matériaux d'emballage de ce produit hors
de la portée des bébés et des enfants pour éviter un risque d'étouffement.
Danger : Le manque de la fixation pourrait entraîner un risque de basculement.
Veuillez lire attentivement toutes les instructions et les conserver pour la référence ultérieure.
Antes de Empezar
El producto solo puede ser ensamblado por adultos.
Retire todo el embalaje, separe y cuente todas las piezas y los accesorios.
Lea detenidamente cada paso y siga el orden correcto.
Recomendamos que, siempre que sea posible, todos los elementos se monten cerca de
la zona en la que se van a utilizar, para evitar mover el producto innecesariamente una
vez montado.
Asegure una superficie segura durante el montaje, y coloque el producto siempre sobre
una superficie plana, firme y estable.
Atención: Los niños deben utilizar este producto bajo la supervisión de sus padres.
Peligro: Mantenga todas las piezas pequeñas y los materiales de empaque de este producto
fuera del alcance de los bebés y los niños, ya que de lo contrario pueden suponer un peligro
de asfixia.
Peligro: La falta de fijación puede provocar un riesgo de vuelco.
Lea atentamente todas las instrucciones y consérvelas para futuras consultas.
AVERTISSEMENT :
RISQUE D'ÉTOUFFEMENT
– Les petites pièces.
Ne convient pas aux enfants de
moins de 3 ans.
FR ES
Avertissement pour l'Assemblage Advertencia para el Montaje
Avertissement de Sécurité Générale Advertencia de Seguridad General
ADVERTENCIA:
PELIGRO DE ASFIXIA
- Piezas pequeñas.
No es adecuado para niños
menores de 3 años.
04 05
Prima di Iniziare
Questo prodotto è montato dagli adulti.
Rimuovere tutti gli imballaggi, separare e contare tutte le parti e tutti gli accessori.
Leggere attentamente ogni passo e seguire l'ordine corretto.
Si consiglia, ove possibile, di montare tutti gli articoli vicino alla zona in cui verranno
posti in uso, per evitare di spostare inutilmente il prodotto una volta assemblato.
Garantire una superficie sicura durante il montaggio e posizionare il prodotto sempre
su una superficie piana, stabile.
Attenzione: I bambini devono usare questo prodotto sotto la supervisione dei genitori.
Pericolo: Tenere tutte le piccole parti e i materiali di imballaggio di questo prodotto lontano
da neonati e bambini, altrimenti potrebbero rappresentare un rischio di soffocamento.
Pericolo: La mancanza di accessorio può causare un rischio di ribaltamento.
Zanim Zaczniesz
Montażem powinny zająć się wyłącznie osoby dorosłe
Usuń opakowanie i upewnij się, że zestaw zawiera wszystkie części i elementy
montażowe.
Przeczytaj uważnie każdy krok i postępuj we właściwej kolejności.
Zalecamy, aby w miarę możliwości wszystkie elementy były montowane w pobliżu
miejsca, w którym będą używane, aby uniknąć niepotrzebnego przenoszenia produktu
po złożeniu.
Zapewnij bezpieczną powierzchnię podczas montażu i zawsze umieszczaj produkt na
płaskiej i stabilnej powierzchni.
Uwaga: Dzieci moga używać tego produktu jedynie pod nadzorem dorosłych.
Niebezpieczeństwo: Trzymaj wszystkie małe części i materiały opakowaniowe dla tego
produktu z dala od niemowląt i dzieci, w przeciwnym razie mogą stwarzać ryzyko zadławienia.
Niebezpieczeństwo: Brak mocowania może spowodować ryzyko przewrócenia.
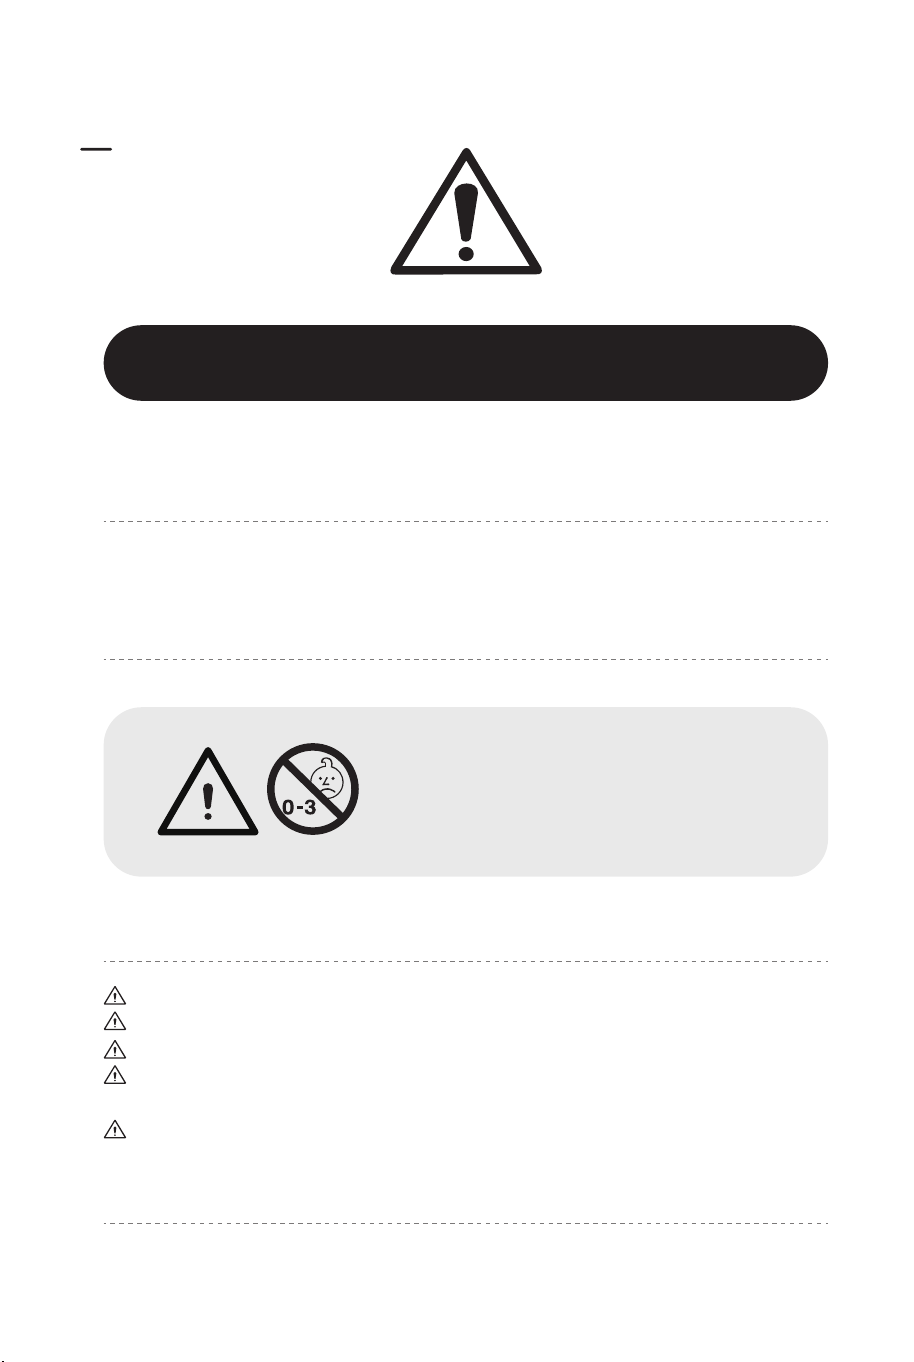
AVVERTENZA:
RISCHIO DI SOFFOCAMENTO
- Piccole parti.
Non per i bambini sotto i 3 anni.
Przeczytaj uważnie wszystkie instrukcje i zachowaj je na przyszłość.Si prega di leggere attentamente tutte le istruzioni e conservarle per riferimento futuro.
PLIT
Avvertenza per il Montaggio Ostrzeżenie
Avvertenza di sicurezza generale Ogólne ostrzeżenia dotyczące bezpieczeństwa
UWAGA:
RYZYKO ZADŁAWIENIA
- Produkt zawiera małe elementy.
Nieodpowiednie dla dzieci poniżej
3 roku życia.
06 07
Prima di Iniziare
Questo prodotto è montato dagli adulti.
Rimuovere tutti gli imballaggi, separare e contare tutte le parti e tutti gli accessori.
Leggere attentamente ogni passo e seguire l'ordine corretto.
Si consiglia, ove possibile, di montare tutti gli articoli vicino alla zona in cui verranno
posti in uso, per evitare di spostare inutilmente il prodotto una volta assemblato.
Garantire una superficie sicura durante il montaggio e posizionare il prodotto sempre
su una superficie piana, stabile.
Attenzione: I bambini devono usare questo prodotto sotto la supervisione dei genitori.
Pericolo: Tenere tutte le piccole parti e i materiali di imballaggio di questo prodotto lontano
da neonati e bambini, altrimenti potrebbero rappresentare un rischio di soffocamento.
Pericolo: La mancanza di accessorio può causare un rischio di ribaltamento.
Zanim Zaczniesz
Montażem powinny zająć się wyłącznie osoby dorosłe
Usuń opakowanie i upewnij się, że zestaw zawiera wszystkie części i elementy
montażowe.
Przeczytaj uważnie każdy krok i postępuj we właściwej kolejności.
Zalecamy, aby w miarę możliwości wszystkie elementy były montowane w pobliżu
miejsca, w którym będą używane, aby uniknąć niepotrzebnego przenoszenia produktu
po złożeniu.
Zapewnij bezpieczną powierzchnię podczas montażu i zawsze umieszczaj produkt na
płaskiej i stabilnej powierzchni.
Uwaga: Dzieci moga używać tego produktu jedynie pod nadzorem dorosłych.
Niebezpieczeństwo: Trzymaj wszystkie małe części i materiały opakowaniowe dla tego
produktu z dala od niemowląt i dzieci, w przeciwnym razie mogą stwarzać ryzyko zadławienia.
Niebezpieczeństwo: Brak mocowania może spowodować ryzyko przewrócenia.
AVVERTENZA:
RISCHIO DI SOFFOCAMENTO
- Piccole parti.
Non per i bambini sotto i 3 anni.
Przeczytaj uważnie wszystkie instrukcje i zachowaj je na przyszłość.Si prega di leggere attentamente tutte le istruzioni e conservarle per riferimento futuro.
PLIT
Avvertenza per il Montaggio Ostrzeżenie
Avvertenza di sicurezza generale Ogólne ostrzeżenia dotyczące bezpieczeństwa
UWAGA:
RYZYKO ZADŁAWIENIA
- Produkt zawiera małe elementy.
Nieodpowiednie dla dzieci poniżej
3 roku życia.
06 07
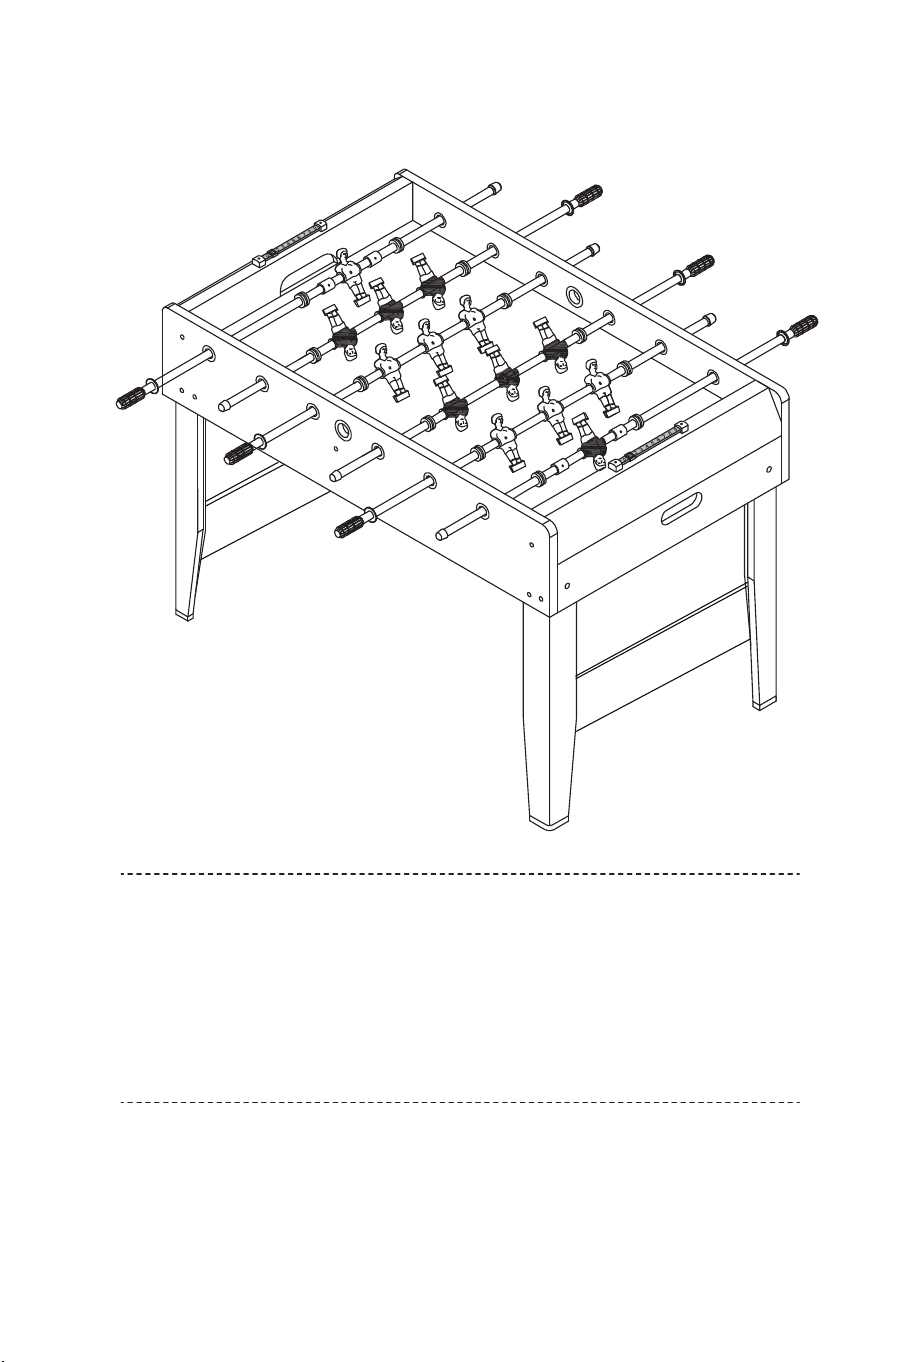
Football Table
Fußballtisch
Table de Football
Futbolín
Tavolo da Calcio
Stół do gry w piłkarzyki
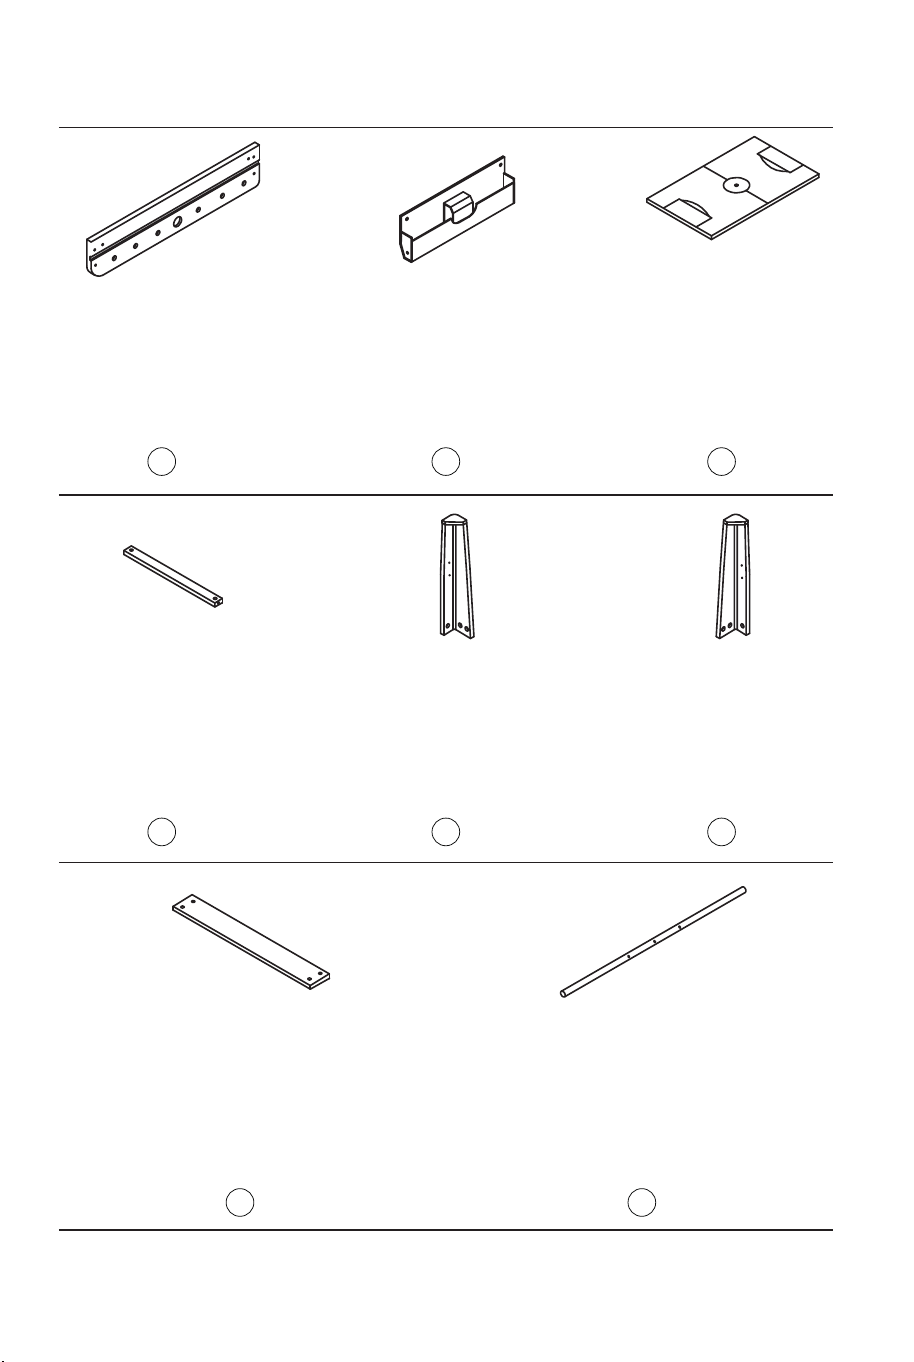
1
x2
2 x2
3
x1
4 x1
5
x2
6 x2
7 x2
8
x6
SIDE APRON
/SEITENSCHÜRZE
/TABLIER LATÉRAL
/PANEL LATERAL
/GREMBIULE LATERALE
/PANEL BOCZNY
END APRON
/ENDSCHÜRZE
/TABLIER D'EXTRÉMITÉ
/PANEL EXTREMO
/GREMBIULE FINALE
/PANEL Z BRAMKĄ
SOCCER PLAYFIELD
/FUßBALL-SPIELFELD
/TERRAIN DE JEU
DE FOOTBALL
/CAMPO DE FÚTBOL
/CAMPO DA CALCIO
/BOISKO
SUPPORT BRACE
/STÜTZSTREBE
/SUPPORT
/SOPORTE
/STAFFA DI SUPPORTO
/POPRZECZKA
WSPORNIKOWA
LEFT LEG
/LINKES BEIN
/PIED GAUCHE
/PATA IZQUIERDA
/GAMBA SINISTRA
/LEWA NOGA
RIGHT LEG
/RECHTES BEIN
/PIED DROIT
/PATA DERECHA
/GAMBA DESTRA
/PRAWA NOGA
END LEG BRACE
/ENDBEINSTÜTZE
/SUPPORT DE PIED
D'EXTRÉMITÉ
/TIRANTE DE PATA EXTREMA
/SUPPORTO DELLA FINE GAMBA
/WSPORNIK NOGI
PLAYER ROD
/SPIELERSTANGE
/TIGE DE JOUEUR
/BARRA DE JUGADOR
/ASTA DEL GIOCATORE
/PRĘT
08 09
Football Table
Fußballtisch
Table de Football
Futbolín
Tavolo da Calcio
Stół do gry w piłkarzyki
1
x2
2 x2
3
x1
4 x1
5
x2
6 x2
7 x2
8
x6
SIDE APRON
/SEITENSCHÜRZE
/TABLIER LATÉRAL
/PANEL LATERAL
/GREMBIULE LATERALE
/PANEL BOCZNY
END APRON
/ENDSCHÜRZE
/TABLIER D'EXTRÉMITÉ
/PANEL EXTREMO
/GREMBIULE FINALE
/PANEL Z BRAMKĄ
SOCCER PLAYFIELD
/FUßBALL-SPIELFELD
/TERRAIN DE JEU
DE FOOTBALL
/CAMPO DE FÚTBOL
/CAMPO DA CALCIO
/BOISKO
SUPPORT BRACE
/STÜTZSTREBE
/SUPPORT
/SOPORTE
/STAFFA DI SUPPORTO
/POPRZECZKA
WSPORNIKOWA
LEFT LEG
/LINKES BEIN
/PIED GAUCHE
/PATA IZQUIERDA
/GAMBA SINISTRA
/LEWA NOGA
RIGHT LEG
/RECHTES BEIN
/PIED DROIT
/PATA DERECHA
/GAMBA DESTRA
/PRAWA NOGA
END LEG BRACE
/ENDBEINSTÜTZE
/SUPPORT DE PIED
D'EXTRÉMITÉ
/TIRANTE DE PATA EXTREMA
/SUPPORTO DELLA FINE GAMBA
/WSPORNIK NOGI
PLAYER ROD
/SPIELERSTANGE
/TIGE DE JOUEUR
/BARRA DE JUGADOR
/ASTA DEL GIOCATORE
/PRĘT
08 09
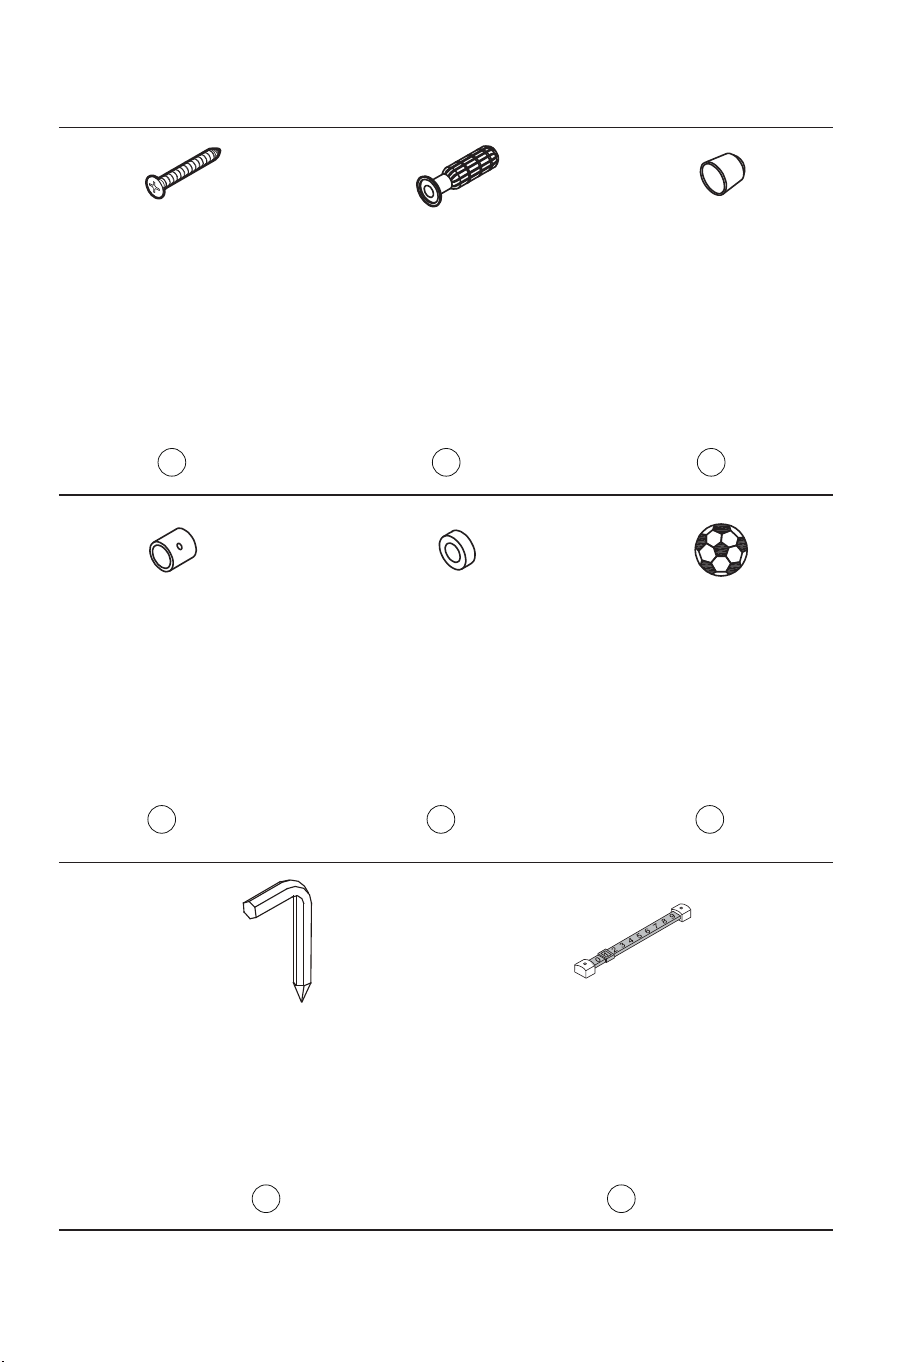
9
x7
10 x7
11 x8
12 x16
13 x16
14 x2
15 x18
16 x4
17
x6
18 x6
19
x4
20
x12
21 x2
22
x1
23
x2
PLAYER (RED)
/SPIELER(ROT)
/JOUEUR (ROUGE)
/JUGADOR (ROJO)
/GIOCATORE (ROSSO)
/PIŁKARZYK (CZERWONY)
PLAYER (BLUE)
/SPIELER(BLAU)
/JOUEUR (BLEU)
/JUGADOR (AZUL)
/GIOCATORE (BLU)
/PIŁKARZYK (NIEBIESKI)
WASHER HEAD SCREW
/SCHEIBENKOPFSCHRAUBE
/VIS À TÊTE CYLINDRIQUE
/TORNILLO DE CABEZA
DE ARANDELA
/VITE CON TESTA A RONDELLA
/ŚRUBA Z ŁBEM PODKŁADKOWYM
BOLT
/SCHRAUBE
/BOULON
/PERNO
/BULLONE
/ŚRUBA
4X20MM
6X25MM
STOP RING
/ANSCHLAGRING
/ANNEAU D'ARRÊT
/ANILLO DE TOPE
/ANELLO DI ARRESTO
/OGRANICZNIK
RUBBER BUMPER
/GUMMIPUFFER
/PARE-CHOCS EN
CAOUTCHOUC
/TOPE DE GOMA
/PARACOLPI IN GOMMA
/GUMOWY AMORTYZATOR
SOCCER BALL
/FUßBALL
/FOOTBALL
/BALÓN DE FÚTBOL
/PALLONE DA CALCIO
/PIŁKA
18X6.5MM
3.5X35MM
ALLEN WRENCH
/INNENSECHSKANTSCHLÜSSEL
/CLÉ ALLEN
/LLAVE ALLEN
/CHIAVE A BRUGOLA
/KLUCZ IMBUSOWY
SCORER
/SCORER
/MARQUEUR
/MARCADOR
/SEGNAPUNTI
/LICZNIK PUNKTÓW
3.5X18MM
3.0X18MM
WASHER
/UNTERLEGSCHEIBE
/RONDELLE
/ARANDELA
/RONDELLA
/PODKŁADKA
WASHER HEAD SCREW
/SCHEIBENKOPFSCHRAUBE
/VIS À TÊTE CYLINDRIQUE
/TORNILLO DE CABEZA
DE ARANDELA
/VITE CON TESTA
A RONDELLA
/WKRĘT Z ŁBEM PODKŁADKOWYM
ROUND HEAD SCREW
/RUNDKOPFSCHRAUBE
/VIS À TÊTE RONDE
/TORNILLO DE CABEZA
REDONDA
/VITE A TESTA ROTONDA
/WKRĘT Z ŁBEM GUZIKOWYM
FLAT HEAD SCREW
/RUNDKOPFSCHRAUBE
/VIS À TÊTE PLATE
/TORNILLO DE
CABEZA PLANA
/VITE A TESTA PIATTA
/WKRĘT Z ŁBEM PŁASKIM
HAND GRIP
/HANDGRIFF
/POIGNÉE
/EMPUÑADURA
/GRIGLIA A MANO
/RĄCZKA
END CAP
/ENDKAPPE
/EMBOUT
/TAPA DEL EXTREMO
/TAPPO TERMINALE
/ZAŚLEPKA PRĘTA
10 11

1 ) Open the carton near where you plan to place the table. Select a
clean and level floor. At least two adults are required for assembly.
2 ) Remove all the contents inside the carton and verify that you have all
listed parts as shown on the Parts List.
NOTE: The player rods are pre-assembled.We suggest that you use the
bottom carton as a clean flat working area to protect the game. Carefully
cut or tear the four carton comers so that the bottom can be used as
your work area.
1) Öffnen Sie den Karton in der Nähe der Stelle, an der Sie den Tisch
aufstellen möchten. Wählen Sie einen sauberen und ebenen Boden. Für
den Aufbau sind mindestens zwei Erwachsene erforderlich.
2) Nehmen Sie den gesamten Inhalt aus dem Karton und vergewissern
Sie sich, dass Sie über alle in der Teileliste aufgeführten Teile verfügen.
HINWEIS: Die Spielerstangen sind vormontiert. Wir empfehlen Ihnen,
den unteren Karton als sauberen, flachen Arbeitsbereich zum Schutz
des Wildes zu verwenden. Schneiden oder reißen Sie die vier
Kartonecken vorsichtig auf, sodass die Unterseite als Arbeitsbereich
genutzt werden kann.
1) Ouvrez le carton à proximité de l'endroit où vous prévoyez de placer
la table. Choisissez un sol propre et plat. Deux adultes au moins sont
nécessaires pour le montage.
2) Retirez tout le contenu du carton et vérifiez que vous disposez de
toutes les pièces indiquées dans la liste des pièces.
REMARQUE : Les tiges du joueur sont préassemblées. Nous vous
conseillons d'utiliser le carton inférieur comme surface de travail plane et
propre afin de protéger le jeu. Coupez ou déchirez soigneusement les
quatre coins du carton de façon à ce que le fond puisse être utilisé
comme surface de travail.
1) Rozpakuj produkt w pobliżu docelowego miejsca, w którym
zamierzasz umieścić stół. Wybierz czyste i równe podłoże. Do montażu
potrzebne będą co najmniej dwie osoby dorosłe.
2) Wyjmij wszystkie elementy z opakowania i upewnij się, że posiadasz
wszystkie części wymienione w instrukcji.
UWAGA: Pręty do gry są wstępnie zamontowane. Zalecamy użycie
kartonowego pudełka jako czystego i płaskiego obszaru roboczego, aby
uniknąć uszkodzenia produktu i podłogi. Ostrożnie rozetnij lub rozerwij
opakowanie w narożnikach, aby korton mógł posłużyć ci jako
powierzchnia robocza.
1) Abra la caja cerca del lugar donde piensa colocar la mesa.
Seleccione un suelo limpio y nivelado. Se necesitan al menos dos
adultos para el montaje.
2) Saque todo el contenido de la caja y compruebe que tiene todas las
piezas de la lista de piezas.
NOTA: Las barras de los jugadores vienen premontadas, por lo que le
sugerimos que utilice la parte inferior de la caja como superficie de
trabajo limpia y plana para proteger el juego. Corte o rasgue con
cuidado los cuatro bordes de la caja para poder utilizar la parte inferior
como área de trabajo.
1 ) Aprire la confezione in prossimità del luogo in cui si intende collocare
il tavolo. Scegliere un pavimento pulito e in piano. Per il montaggio sono
necessari almeno due adulti.
2 ) Rimuovere tutto il contenuto della confezione e verificare che siano
presenti tutti i componenti elencati nella Lista delle Parti.
NOTA: le aste dei giocatori sono preassemblate. Si consiglia di utilizzare
il cartone inferiore come area di lavoro piana e pulita per proteggere il
gioco. Tagliare o strappare con attenzione i quattro angoli del cartone in
modo da poter utilizzare il fondo come area di lavoro.
EN
DE
FR
ES
IT
PL
12 13
FIG/ABB/RYS.1
13
12
3
2
1
1
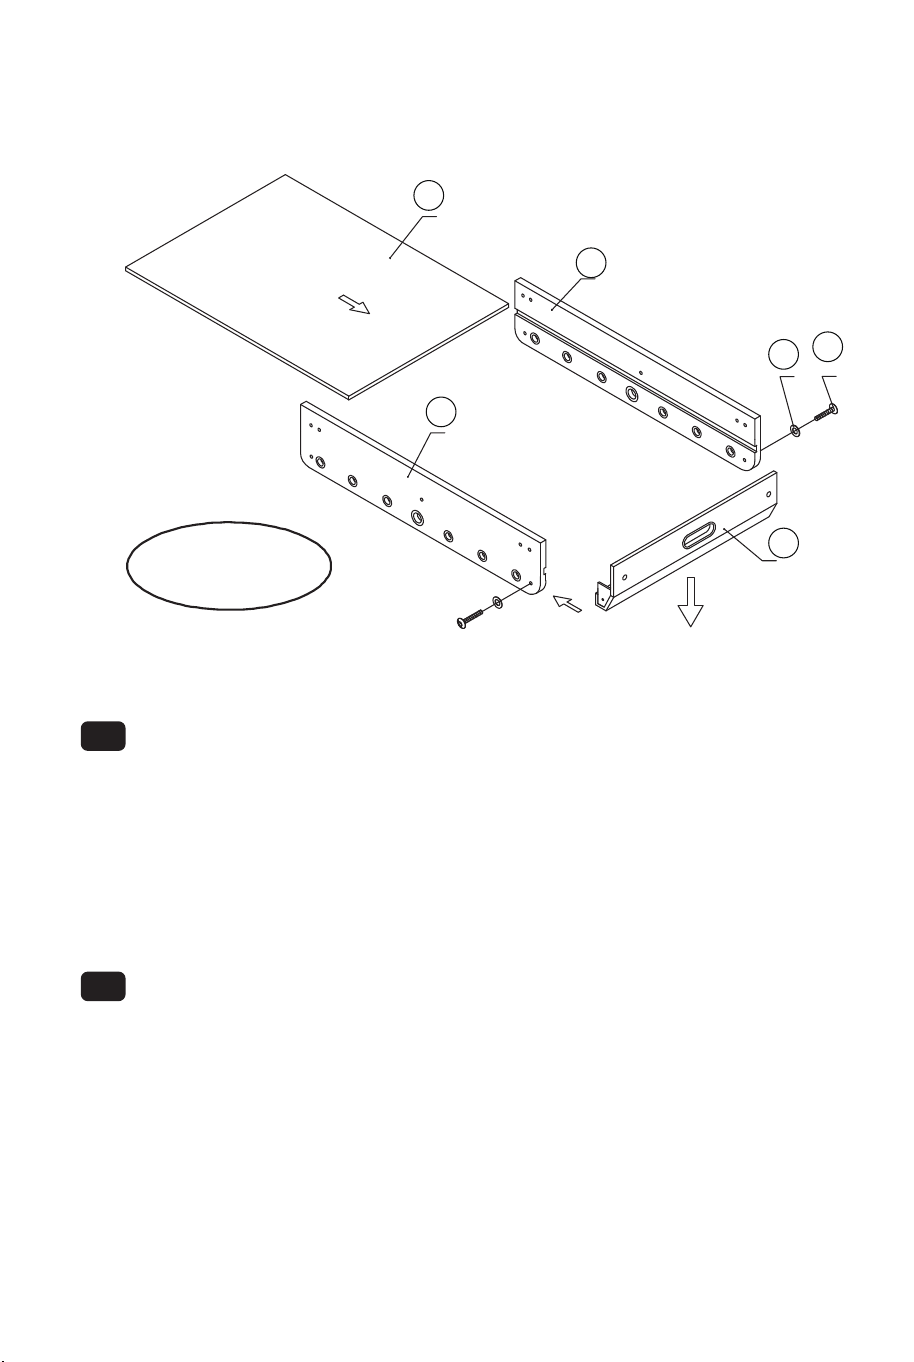
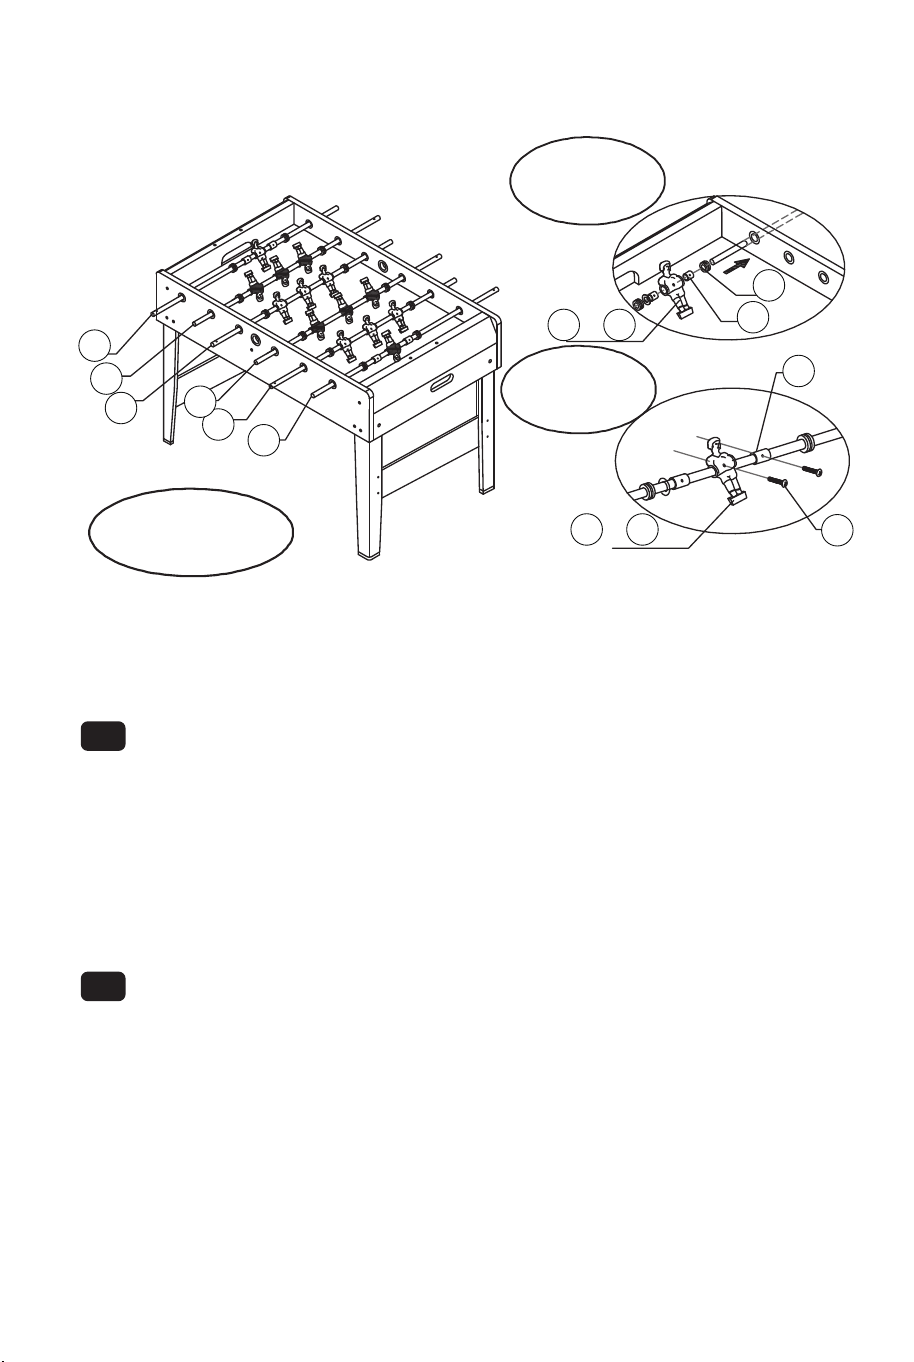
3 ) Attach one End Apron (#2) between Side Aprons (# 1). Secure with
one Leg Bolt (# 12) and one Washer (# 13) per side apron, and screw
them through Side Aprons into End Apron. NOTE: Do not tighten screws
securely at this time. Leave the screws slightly loose.
4 ) Locate Playfield ( # 3 ) and slide the playfield with graphics facing
down as shown in FIG. 1 . If the field does not slide smoothly, ensure
you have not over-tightened any screws, or the playfield is not caught by
the slot.
EN
3) Befestigen Sie eine Endschürze (Nr. 2) zwischen den Seitenschürzen
(Nr. 1). Befestigen Sie jede Seitenschürze mit einer Beinschraube (Nr.
12) und einer Unterlegscheibe (Nr. 13) und schrauben Sie sie durch die
Seitenschürzen in die Endschürze. HINWEIS: Ziehen Sie die Schrauben
zu diesem Zeitpunkt noch nicht fest an. Lassen Sie die Schrauben
etwas locker.
4) Suchen Sie das Spielfeld (Nr. 3) und schieben Sie das Spielfeld mit
der Grafik nach unten, wie in ABB. 1 gezeigt. Wenn das Spielfeld nicht
reibungslos gleitet, stellen Sie sicher, dass Sie keine Schrauben zu fest
angezogen haben, da das Spielfeld sonst nicht im Schlitz hängen bleibt.
3) Attachez un tablier d'extrémité (#2) entre les tabliers latéraux (#1).
Fixez-le avec un boulon (#12) et une rondelle (#13) par tablier latéral, et
vissez-les à travers les tabliers latéraux dans le tablier d'extrémité.
REMARQUE : Ne serrez pas les vis fermement à ce stade. Laissez les
vis légèrement desserrées.
4) Localisez le terrain de jeu (#3) et faites glisser le terrain de jeu avec
les graphiques vers le bas comme indiqué sur la FIG.1. Si le terrain ne
glisse pas facilement, assurez-vous que vous n'avez pas trop serré les
vis ou que le terrain n'est pas coincé par la fente.
3) Fije un panel extremo (# 2) entre los paneles laterales (# 1). Asegure
con un perno de pata (# 12) y una arandela (# 13) por panel lateral, y
atorníllelos a través de los paneles laterales en el panel extremo. NOTA:
No apriete los tornillos firmemente en este momento. Deje los tornillos
ligeramente flojos.
4) Localice el campo de juego (# 3) y deslice el campo de juego con los
gráficos hacia abajo como se muestra en la FIG. 1 . Si el campo no se
desliza suavemente, asegúrese de que no ha apretado demasiado
ningún tornillo, o de que el campo de juego no está atrapado por la
ranura.
DE
FR
ES
3) Przymocuj panel z bramką (nr 2) między panelami bocznymi (nr 1).
Przymocuj panele boczne za pomocą śrub (nr 12) i podkładek (nr 13).
Przełóż każdą śrubę przez panel boczny, a następnie przez panel z
bramką. UWAGA: Na tym etapie nie dokręcaj całkowicie śrub. Pozostaw
śruby lekko poluzowane.
4)Zlokalizuj boisko (#3) i umieść je grafiką w dół, jak pokazano na RYS.
1. Jeśli boisko nie wsuwa się płynnie w panele, upewnij się, że nie
dokręciłeś śrub zbyt mocno. Zbyt mocne dokręcenie śrub uniemożliwi
zamocowanie boiska.
3 ) Fissare un grembiule finale (#2) tra i grembiuli laterali (# 1). Fissare
con un bullone per gamba (# 12) e una rondella (# 13) per ogni grembi-
ule laterale e avvitarli attraverso i grembiuli laterali nel grembiule finale.
NOTA: non serrare le viti in modo sicuro in questo momento. Lasciare
le viti leggermente allentate.
4 ) Individuare il campo di gioco (#3) e farlo scorrere con la grafica
rivolta verso il basso, come mostrato in FIG. 1 . Se il campo non scorre
agevolmente, accertarsi di non aver serrato eccessivamente le viti o
che il campo di gioco non sia incastrato nella fessura.
IT
PL
14 15

FIG/ABB/RYS.1
13
12
3
2
1
1
3 ) Attach one End Apron (#2) between Side Aprons (# 1). Secure with
one Leg Bolt (# 12) and one Washer (# 13) per side apron, and screw
them through Side Aprons into End Apron. NOTE: Do not tighten screws
securely at this time. Leave the screws slightly loose.
4 ) Locate Playfield ( # 3 ) and slide the playfield with graphics facing
down as shown in FIG. 1 . If the field does not slide smoothly, ensure
you have not over-tightened any screws, or the playfield is not caught by
the slot.
EN
3) Befestigen Sie eine Endschürze (Nr. 2) zwischen den Seitenschürzen
(Nr. 1). Befestigen Sie jede Seitenschürze mit einer Beinschraube (Nr.
12) und einer Unterlegscheibe (Nr. 13) und schrauben Sie sie durch die
Seitenschürzen in die Endschürze. HINWEIS: Ziehen Sie die Schrauben
zu diesem Zeitpunkt noch nicht fest an. Lassen Sie die Schrauben
etwas locker.
4) Suchen Sie das Spielfeld (Nr. 3) und schieben Sie das Spielfeld mit
der Grafik nach unten, wie in ABB. 1 gezeigt. Wenn das Spielfeld nicht
reibungslos gleitet, stellen Sie sicher, dass Sie keine Schrauben zu fest
angezogen haben, da das Spielfeld sonst nicht im Schlitz hängen bleibt.
3) Attachez un tablier d'extrémité (#2) entre les tabliers latéraux (#1).
Fixez-le avec un boulon (#12) et une rondelle (#13) par tablier latéral, et
vissez-les à travers les tabliers latéraux dans le tablier d'extrémité.
REMARQUE : Ne serrez pas les vis fermement à ce stade. Laissez les
vis légèrement desserrées.
4) Localisez le terrain de jeu (#3) et faites glisser le terrain de jeu avec
les graphiques vers le bas comme indiqué sur la FIG.1. Si le terrain ne
glisse pas facilement, assurez-vous que vous n'avez pas trop serré les
vis ou que le terrain n'est pas coincé par la fente.
3) Fije un panel extremo (# 2) entre los paneles laterales (# 1). Asegure
con un perno de pata (# 12) y una arandela (# 13) por panel lateral, y
atorníllelos a través de los paneles laterales en el panel extremo. NOTA:
No apriete los tornillos firmemente en este momento. Deje los tornillos
ligeramente flojos.
4) Localice el campo de juego (# 3) y deslice el campo de juego con los
gráficos hacia abajo como se muestra en la FIG. 1 . Si el campo no se
desliza suavemente, asegúrese de que no ha apretado demasiado
ningún tornillo, o de que el campo de juego no está atrapado por la
ranura.
DE
FR
ES
3) Przymocuj panel z bramką (nr 2) między panelami bocznymi (nr 1).
Przymocuj panele boczne za pomocą śrub (nr 12) i podkładek (nr 13).
Przełóż każdą śrubę przez panel boczny, a następnie przez panel z
bramką. UWAGA: Na tym etapie nie dokręcaj całkowicie śrub. Pozostaw
śruby lekko poluzowane.
4)Zlokalizuj boisko (#3) i umieść je grafiką w dół, jak pokazano na RYS.
1. Jeśli boisko nie wsuwa się płynnie w panele, upewnij się, że nie
dokręciłeś śrub zbyt mocno. Zbyt mocne dokręcenie śrub uniemożliwi
zamocowanie boiska.
3 ) Fissare un grembiule finale (#2) tra i grembiuli laterali (# 1). Fissare
con un bullone per gamba (# 12) e una rondella (# 13) per ogni grembi-
ule laterale e avvitarli attraverso i grembiuli laterali nel grembiule finale.
NOTA: non serrare le viti in modo sicuro in questo momento. Lasciare
le viti leggermente allentate.
4 ) Individuare il campo di gioco (#3) e farlo scorrere con la grafica
rivolta verso il basso, come mostrato in FIG. 1 . Se il campo non scorre
agevolmente, accertarsi di non aver serrato eccessivamente le viti o
che il campo di gioco non sia incastrato nella fessura.
IT
PL
14 15
14
13
12
4
FIG/ABB/RYS.2
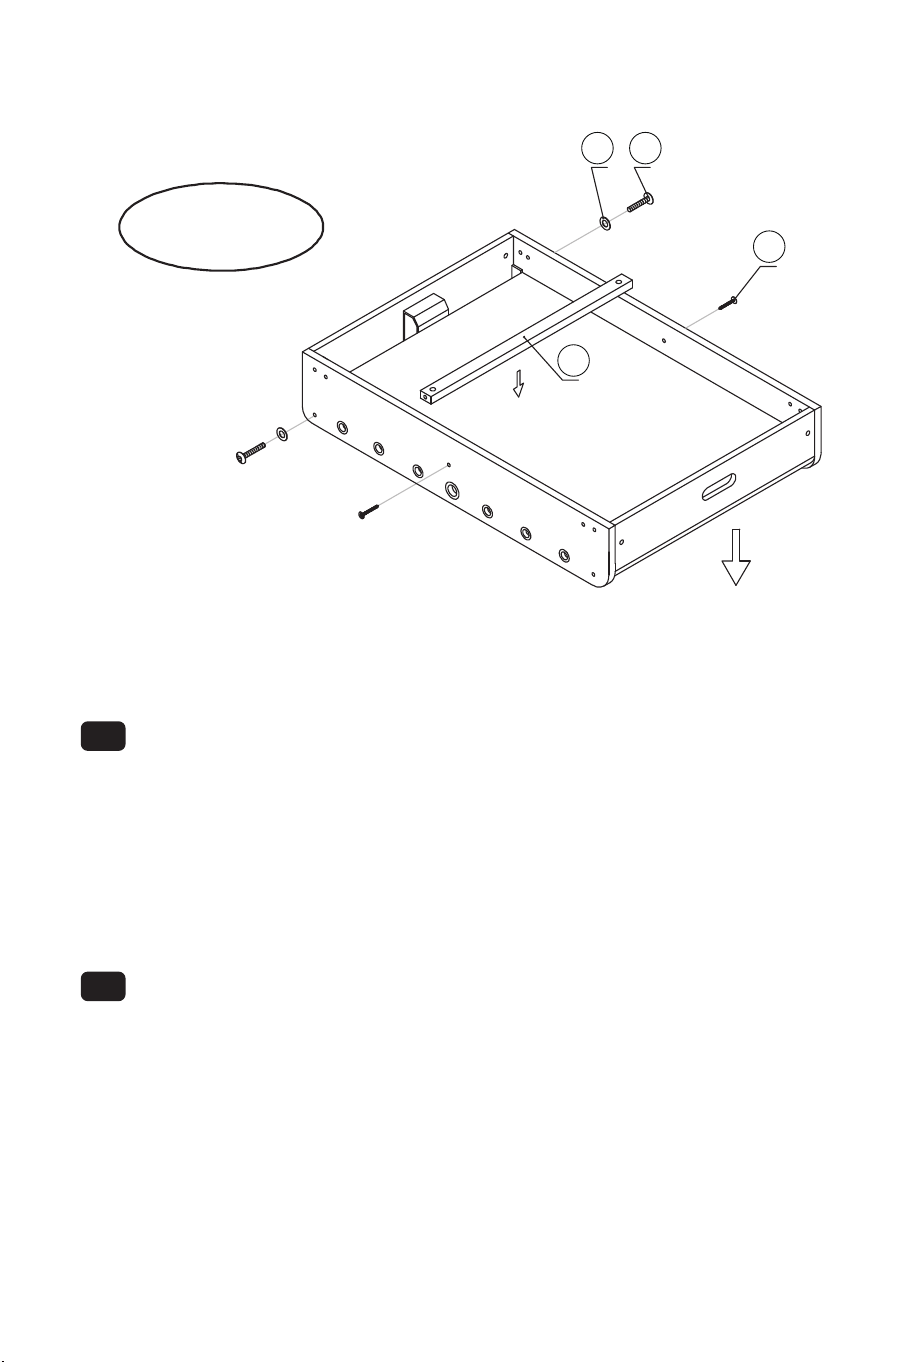
5 ) Repeat the step to attach the other End Apron (#2) to the Side
Aprons(# 1).Center the playfield between the two end aprons,and make
sure that the playfield is in the grooves of the side aprons and end
aprons.
NOTE: Be sure that two side aprons and end aprons are in line. Now go
back and tighten all the connections.
6 ) Place the Support Brace ( # 4 ) on the Playfield ( # 3 ) as shown in
FIG. 2. Attach it using two of Washer Head Screws ( #14 ).
EN
5) Wiederholen Sie den Schritt, um die andere Endschürze (Nr. 2) an
den Seitenschürzen (Nr. 1) zu befestigen. Zentrieren Sie das Spielfeld
zwischen den beiden Endschürzen und stellen Sie sicher, dass sich das
Spielfeld in den Rillen der Seitenschürzen und Endschürzen befindet .
HINWEIS: Stellen Sie sicher, dass zwei Seitenschürzen und
Endschürzen ausgerichtet sind. Gehen Sie nun zurück und ziehen Sie
alle Verbindungen fest.
6) Platzieren Sie die Stützstrebe (Nr. 4) auf dem Spielfeld (Nr. 3), wie in
ABB. 2 gezeigt. Befestigen Sie es mit zwei Scheibenkopfschrauben (Nr.
14).
5) Répétez l'étape pour attacher l'autre tablier d'extrémité (#2) aux
tabliers latéraux (#1). Centrez le terrain de jeu entre les deux tabliers
d'extrémité et assurez-vous que le terrain de jeu se trouve dans les
rainures des tabliers latéraux et des tabliers d'extrémité.
REMARQUE : Veillez à ce que les deux tabliers latéraux et les deux
tabliers d'extrémité soient alignés. Revenez en arrière et serrez toutes
les connexions.
6) Placez le support (#4) sur le terrain de jeu (#3) comme indiqué sur la
FIG.2. Attachez-le à l'aide de deux vis à tête cylindrique (#14).
5) Repita el paso para fijar el otro panel extremo (# 2) a los paneles
laterales (# 1). Centre el campo de juego entre los dos paneles
extremos, y asegúrese de que el campo de juego está en las ranuras de
los paneles laterales y los paneles extremos.
NOTA: Asegúrese de que los dos paneles laterales y los paneles
extremos están alineados. Ahora vuelva atrás y apriete todas las
conexiones.
6) Coloque el soporte (# 4) sobre el campo de juego (# 3) como se
muestra en la FIG.2. Asegúrelo con dos tornillos de cabeza plana (# 14).
DE
FR
ES
5) Powtórz powyższe czynności, aby przymocować drugi panel z
bramką (#2) do paneli bocznych (#1). Wyśrodkuj boisko między dwoma
panelami z bramkami, upewniając się, że znajduje się ono w szczelin-
ach wszystkich paneli bocznych i paneli z bramkami. UWAGA: Upewnij
się, że panele boczne i panele z bramkami są wyrównane. Następnie
dokręć wszystkie śruby.
6) Umieść poprzeczkę wspornikową (nr 4) na boisku (nr 3), jak pokaza-
no na RYS. 2. Zamocuj za pomocą dwóch wkrętów z łbem podkładkow-
ym (#14).
5 ) Ripetere la procedura per fissare l'altro grembiule finale (#2) ai
grembiuli laterali (#1). Centrare il campo di gioco tra i due grembiuli finali
e assicurarsi che il campo di gioco si trovi nelle scanalature dei grembiuli
laterali e dei grembiuli finali.
NOTA: assicurarsi che i due grembiuli laterali e quelli terminali siano
allineati. Ora tornare indietro e stringere tutti i collegamenti.
6 ) Posizionare la staffa di supporto (#4) sul campo di gioco (#3) come
mostrato in FIG. 2. Fissarla con due rondelle di testa. Fissarlo utilizzando
due viti a testa di rondella ( #14 ).
IT
PL
16 17

14
13
12
4
FIG/ABB/RYS.2
5 ) Repeat the step to attach the other End Apron (#2) to the Side
Aprons(# 1).Center the playfield between the two end aprons,and make
sure that the playfield is in the grooves of the side aprons and end
aprons.
NOTE: Be sure that two side aprons and end aprons are in line. Now go
back and tighten all the connections.
6 ) Place the Support Brace ( # 4 ) on the Playfield ( # 3 ) as shown in
FIG. 2. Attach it using two of Washer Head Screws ( #14 ).
EN
5) Wiederholen Sie den Schritt, um die andere Endschürze (Nr. 2) an
den Seitenschürzen (Nr. 1) zu befestigen. Zentrieren Sie das Spielfeld
zwischen den beiden Endschürzen und stellen Sie sicher, dass sich das
Spielfeld in den Rillen der Seitenschürzen und Endschürzen befindet .
HINWEIS: Stellen Sie sicher, dass zwei Seitenschürzen und
Endschürzen ausgerichtet sind. Gehen Sie nun zurück und ziehen Sie
alle Verbindungen fest.
6) Platzieren Sie die Stützstrebe (Nr. 4) auf dem Spielfeld (Nr. 3), wie in
ABB. 2 gezeigt. Befestigen Sie es mit zwei Scheibenkopfschrauben (Nr.
14).
5) Répétez l'étape pour attacher l'autre tablier d'extrémité (#2) aux
tabliers latéraux (#1). Centrez le terrain de jeu entre les deux tabliers
d'extrémité et assurez-vous que le terrain de jeu se trouve dans les
rainures des tabliers latéraux et des tabliers d'extrémité.
REMARQUE : Veillez à ce que les deux tabliers latéraux et les deux
tabliers d'extrémité soient alignés. Revenez en arrière et serrez toutes
les connexions.
6) Placez le support (#4) sur le terrain de jeu (#3) comme indiqué sur la
FIG.2. Attachez-le à l'aide de deux vis à tête cylindrique (#14).
5) Repita el paso para fijar el otro panel extremo (# 2) a los paneles
laterales (# 1). Centre el campo de juego entre los dos paneles
extremos, y asegúrese de que el campo de juego está en las ranuras de
los paneles laterales y los paneles extremos.
NOTA: Asegúrese de que los dos paneles laterales y los paneles
extremos están alineados. Ahora vuelva atrás y apriete todas las
conexiones.
6) Coloque el soporte (# 4) sobre el campo de juego (# 3) como se
muestra en la FIG.2. Asegúrelo con dos tornillos de cabeza plana (# 14).
DE
FR
ES
5) Powtórz powyższe czynności, aby przymocować drugi panel z
bramką (#2) do paneli bocznych (#1). Wyśrodkuj boisko między dwoma
panelami z bramkami, upewniając się, że znajduje się ono w szczelin-
ach wszystkich paneli bocznych i paneli z bramkami. UWAGA: Upewnij
się, że panele boczne i panele z bramkami są wyrównane. Następnie
dokręć wszystkie śruby.
6) Umieść poprzeczkę wspornikową (nr 4) na boisku (nr 3), jak pokaza-
no na RYS. 2. Zamocuj za pomocą dwóch wkrętów z łbem podkładkow-
ym (#14).
5 ) Ripetere la procedura per fissare l'altro grembiule finale (#2) ai
grembiuli laterali (#1). Centrare il campo di gioco tra i due grembiuli finali
e assicurarsi che il campo di gioco si trovi nelle scanalature dei grembiuli
laterali e dei grembiuli finali.
NOTA: assicurarsi che i due grembiuli laterali e quelli terminali siano
allineati. Ora tornare indietro e stringere tutti i collegamenti.
6 ) Posizionare la staffa di supporto (#4) sul campo di gioco (#3) come
mostrato in FIG. 2. Fissarla con due rondelle di testa. Fissarlo utilizzando
due viti a testa di rondella ( #14 ).
IT
PL
16 17
13
12
11
7
6
5
FIG/ABB/RYS.3
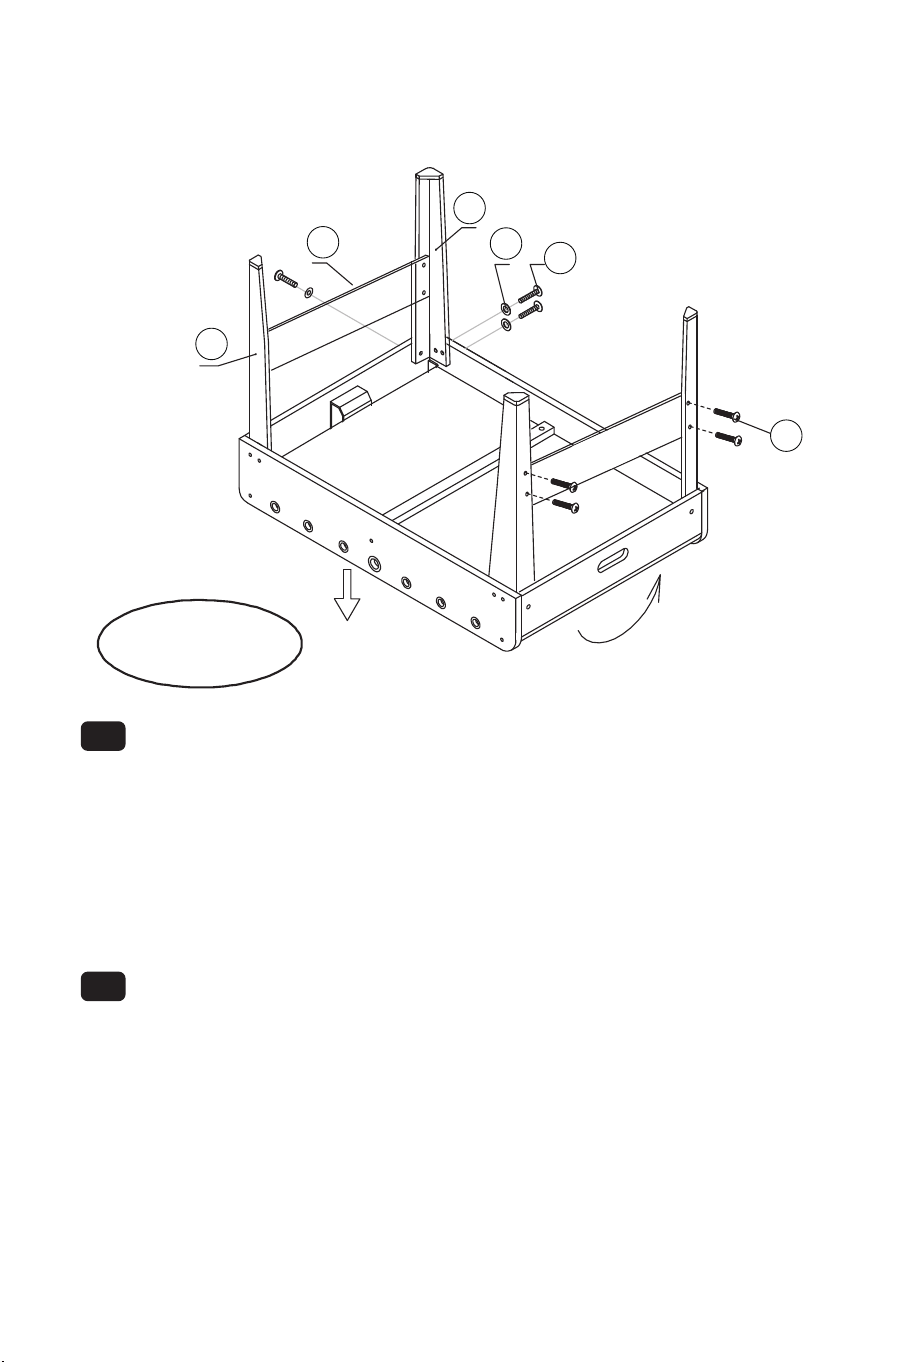
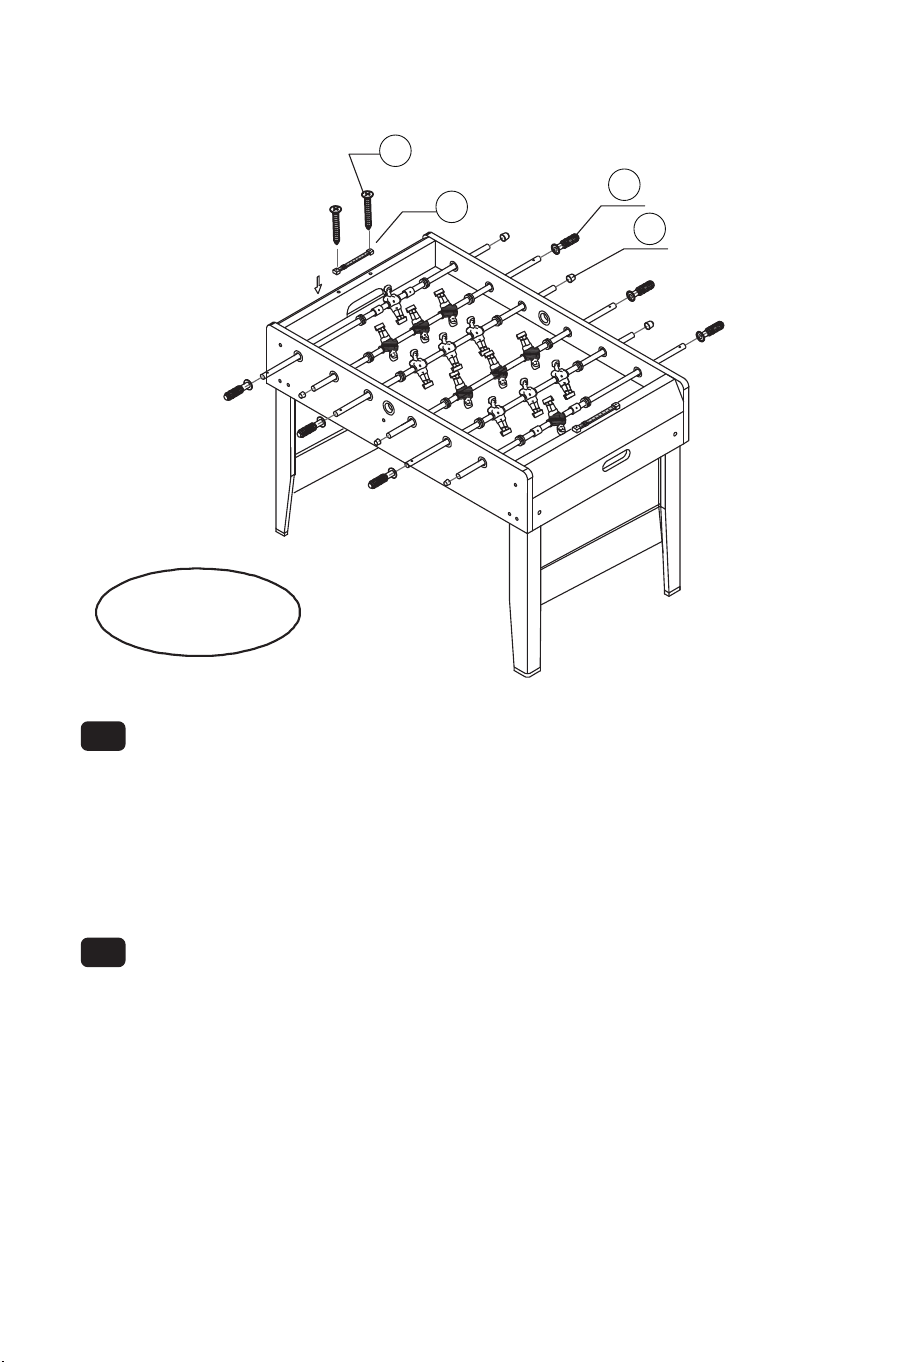
7 ) Attach the Left (#5) and Right (#6) Legs to the cabinet using three of
the Leg Bolts (# 12) and three of Washers (# 13)per leg. See.FIG.3.
8 ) Lift the table, turn it over, and set the table on its legs in the location
where you will play. This should be done by at least two adults. Go back
and make sure that all connections are tight.
9 ) Attach the End Leg Brace ( # 7 ) to the legs ( # 5 # 6 ) using four
Screws ( # 11 ) per Leg Brace.
EN
7) Befestigen Sie die linken (Nr. 5) und rechten (Nr. 6) Beine mit drei
Beinschrauben (Nr. 12) und drei Unterlegscheiben (Nr. 13) pro Bein am
Schrank. Siehe ABB.3.
8) Heben Sie den Tisch an, drehen Sie ihn um und stellen Sie ihn auf
die Beine an der Stelle, an der Sie spielen möchten. Dies sollte von
mindestens zwei Erwachsenen durchgeführt werden. Gehen Sie zurück
und stellen Sie sicher, dass alle Verbindungen fest sind.
9) Befestigen Sie die Endbeinstütze (Nr. 7) mit vier Schrauben (Nr. 11)
pro Beinstütze an den Beinen (Nr. 5, Nr. 6).
7) Attachez les pieds gauche (#5) et droit (#6) au corps à l'aide de trois
boulons (#12) et de trois rondelles (#13) par pied. Voir FIG.3.
8) Soulevez la table, retournez-la et placez-la sur ses pieds à l'endroit
où vous allez jouer. Cette opération doit être effectuée par au moins
deux adultes. Revenez en arrière et assurez-vous que toutes les
connexions sont bien serrées.
9) Attachez le support de pied d'extrémité (#7) aux pieds (#5 & #6) à
l'aide de quatre vis (#11) par support de pied.
7) Fije las patas izquierda (# 5) y derecha (# 6) al mueble usando tres
tornillos (# 12) y tres arandelas (# 13) por pata. Vea la FIG.3.
8) Levante la mesa, dele la vuelta y colóquela sobre sus patas en el
lugar donde vaya a jugar. Esto deben hacerlo al menos dos adultos.
Vuelva atrás y asegúrese de que todas las conexiones están bien
apretadas.
9) Fije el soporte de la pata extrema (# 7) a las patas (# 5 # 6) usando
cuatro tornillos (# 11) por cada soporte de pata.
DE
FR
ES
7) Przymocuj lewe (#5) i prawe (#6) nogi do konstrukcji za pomocą
trzech śrub nóg (#12) i trzech podkładek (#13) na każdą nogę. Patrz
RYS.3.
8) Podnieś stół do piłkarzyków, obróć go i postaw w docelowym miejscu.
Do podniesienia stołu potrzebne są co najmniej dwie osoby dorosłe. Po
obróceniu stołu upewnij się, że wszystkie śruby i łączenia są dokręcone.
9) Przymocuj wspornik nóg (#7) do nóg stołu (#5, #6) za pomocą
czterech śrub (#11) na każdy wspornik nóg.
7 ) Fissare le gambe sinistra (#5) e destra (#6) al mobile utilizzando tre
bulloni (#12) e tre rondelle (#13) per gamba. Vedere FIG. 3.
8 ) Sollevare il tavolo, girarlo e posizionarlo sulle gambe nel luogo in cui
si giocherà. Questa operazione deve essere eseguita da almeno due
adulti. Tornare indietro e verificare che tutti i collegamenti siano ben saldi.
9 ) Fissare il supporto per la fine della gamba (#7) alle gambe (#5 e #6)
utilizzando quattro viti (#11) per ogni supporto.
IT
PL
18 19

13
12
11
7
6
5
FIG/ABB/RYS.3
7 ) Attach the Left (#5) and Right (#6) Legs to the cabinet using three of
the Leg Bolts (# 12) and three of Washers (# 13)per leg. See.FIG.3.
8 ) Lift the table, turn it over, and set the table on its legs in the location
where you will play. This should be done by at least two adults. Go back
and make sure that all connections are tight.
9 ) Attach the End Leg Brace ( # 7 ) to the legs ( # 5 # 6 ) using four
Screws ( # 11 ) per Leg Brace.
EN
7) Befestigen Sie die linken (Nr. 5) und rechten (Nr. 6) Beine mit drei
Beinschrauben (Nr. 12) und drei Unterlegscheiben (Nr. 13) pro Bein am
Schrank. Siehe ABB.3.
8) Heben Sie den Tisch an, drehen Sie ihn um und stellen Sie ihn auf
die Beine an der Stelle, an der Sie spielen möchten. Dies sollte von
mindestens zwei Erwachsenen durchgeführt werden. Gehen Sie zurück
und stellen Sie sicher, dass alle Verbindungen fest sind.
9) Befestigen Sie die Endbeinstütze (Nr. 7) mit vier Schrauben (Nr. 11)
pro Beinstütze an den Beinen (Nr. 5, Nr. 6).
7) Attachez les pieds gauche (#5) et droit (#6) au corps à l'aide de trois
boulons (#12) et de trois rondelles (#13) par pied. Voir FIG.3.
8) Soulevez la table, retournez-la et placez-la sur ses pieds à l'endroit
où vous allez jouer. Cette opération doit être effectuée par au moins
deux adultes. Revenez en arrière et assurez-vous que toutes les
connexions sont bien serrées.
9) Attachez le support de pied d'extrémité (#7) aux pieds (#5 & #6) à
l'aide de quatre vis (#11) par support de pied.
7) Fije las patas izquierda (# 5) y derecha (# 6) al mueble usando tres
tornillos (# 12) y tres arandelas (# 13) por pata. Vea la FIG.3.
8) Levante la mesa, dele la vuelta y colóquela sobre sus patas en el
lugar donde vaya a jugar. Esto deben hacerlo al menos dos adultos.
Vuelva atrás y asegúrese de que todas las conexiones están bien
apretadas.
9) Fije el soporte de la pata extrema (# 7) a las patas (# 5 # 6) usando
cuatro tornillos (# 11) por cada soporte de pata.
DE
FR
ES
7) Przymocuj lewe (#5) i prawe (#6) nogi do konstrukcji za pomocą
trzech śrub nóg (#12) i trzech podkładek (#13) na każdą nogę. Patrz
RYS.3.
8) Podnieś stół do piłkarzyków, obróć go i postaw w docelowym miejscu.
Do podniesienia stołu potrzebne są co najmniej dwie osoby dorosłe. Po
obróceniu stołu upewnij się, że wszystkie śruby i łączenia są dokręcone.
9) Przymocuj wspornik nóg (#7) do nóg stołu (#5, #6) za pomocą
czterech śrub (#11) na każdy wspornik nóg.
7 ) Fissare le gambe sinistra (#5) e destra (#6) al mobile utilizzando tre
bulloni (#12) e tre rondelle (#13) per gamba. Vedere FIG. 3.
8 ) Sollevare il tavolo, girarlo e posizionarlo sulle gambe nel luogo in cui
si giocherà. Questa operazione deve essere eseguita da almeno due
adulti. Tornare indietro e verificare che tutti i collegamenti siano ben saldi.
9 ) Fissare il supporto per la fine della gamba (#7) alle gambe (#5 e #6)
utilizzando quattro viti (#11) per ogni supporto.
IT
PL
18 19
4
4
3
3
2
2
1
1
EN
CAUTION:
Two adults are recommended to flip the table as shown.
1. Grab the table on the ground.
2. Turn the table over.
3. Place it on all four feet at the same time on the ground.
DE
ACHTUNG:
Es wird empfohlen, den Tisch wie abgebildet von zwei
Erwachsenen umzudrehen.
1. Fassen Sie den Tisch auf dem Boden.
2. Drehen Sie den Tisch um.
3.Stellen Sie es mit allen vier Füßen gleichzeitig auf den Boden
FR
ATTENTION :
Deux adultes sont recommandés pour retourner la table comme indiqué.
1. Saisissez la table au sol.
2. Retournez la table.
3. Placez-la sur les quatre pieds en même temps sur le sol.
ES
PRECAUCIÓN:
Se recomiendan dos adultos para voltear la mesa como se muestra.
1. Agarre la mesa por el suelo.
2. Dé la vuelta a la mesa.
3. Colóquela sobre los cuatro pies al mismo tiempo en el suelo.
IT
ATTENZIONE:
Si consiglia di rivolgersi a due adulti per ribaltare il tavolo come illustrato.
1. Afferrare il tavolo a terra.
2. Ribaltare il tavolo.
3. Posizionarlo a terra su tutti e quattro i piedi contemporaneamente.
PL
UWAGA:
Zaleca się, aby stół podnosiły dwie osoby dorosłe tak, jak pokazano.
1. Chwyć stół na podłodze.
2. Obróć stół.
3. Postaw na ziemi wszystkie cztery nogi stołu jednocześnie.
HOLD TABLE
/TISCH HALTEN
/TENIR LA TABLE
/SOSTENGA MESA
/TENERE IL TAVOLO
/CHWYĆ STÓŁ
CABINET
/SCHRANK
/CORPS
/GABINETE
/MOBILE
/BOISKO DO GRY
DO NOT HOLD THE LEGS
/HALTEN SIE DIE BEINE NICHT
/NE PAS TENIR LES PIEDS
/NO SUJETE LAS PATAS
/NON TENERE LE GAMBE
/NIE TRZYMAJ ZA NOGI
DO NOT LEAN THE TABLE
/DEN TISCH NICHT ANLEHNEN
/NE PAS PENCHER LA TABLE
/NO INCLINE LA MESA
/NON TENERE IL TAVOLO
/NIE PRZECHYLAJ STOŁU
20 21

4
4
3
3
2
2
1
1
EN
CAUTION:
Two adults are recommended to flip the table as shown.
1. Grab the table on the ground.
2. Turn the table over.
3. Place it on all four feet at the same time on the ground.
DE
ACHTUNG:
Es wird empfohlen, den Tisch wie abgebildet von zwei
Erwachsenen umzudrehen.
1. Fassen Sie den Tisch auf dem Boden.
2. Drehen Sie den Tisch um.
3.Stellen Sie es mit allen vier Füßen gleichzeitig auf den Boden
FR
ATTENTION :
Deux adultes sont recommandés pour retourner la table comme indiqué.
1. Saisissez la table au sol.
2. Retournez la table.
3. Placez-la sur les quatre pieds en même temps sur le sol.
ES
PRECAUCIÓN:
Se recomiendan dos adultos para voltear la mesa como se muestra.
1. Agarre la mesa por el suelo.
2. Dé la vuelta a la mesa.
3. Colóquela sobre los cuatro pies al mismo tiempo en el suelo.
IT
ATTENZIONE:
Si consiglia di rivolgersi a due adulti per ribaltare il tavolo come illustrato.
1. Afferrare il tavolo a terra.
2. Ribaltare il tavolo.
3. Posizionarlo a terra su tutti e quattro i piedi contemporaneamente.
PL
UWAGA:
Zaleca się, aby stół podnosiły dwie osoby dorosłe tak, jak pokazano.
1. Chwyć stół na podłodze.
2. Obróć stół.
3. Postaw na ziemi wszystkie cztery nogi stołu jednocześnie.
HOLD TABLE
/TISCH HALTEN
/TENIR LA TABLE
/SOSTENGA MESA
/TENERE IL TAVOLO
/CHWYĆ STÓŁ
CABINET
/SCHRANK
/CORPS
/GABINETE
/MOBILE
/BOISKO DO GRY
DO NOT HOLD THE LEGS
/HALTEN SIE DIE BEINE NICHT
/NE PAS TENIR LES PIEDS
/NO SUJETE LAS PATAS
/NON TENERE LE GAMBE
/NIE TRZYMAJ ZA NOGI
DO NOT LEAN THE TABLE
/DEN TISCH NICHT ANLEHNEN
/NE PAS PENCHER LA TABLE
/NO INCLINE LA MESA
/NON TENERE IL TAVOLO
/NIE PRZECHYLAJ STOŁU
20 21
FIG/ABB/RYS.4
FIG/ABB
/RYS.4-1
FIG/ABB
/RYS.4-2
20
19
19
15
10
9
8
8
8
8
8
8
&
10
9
&
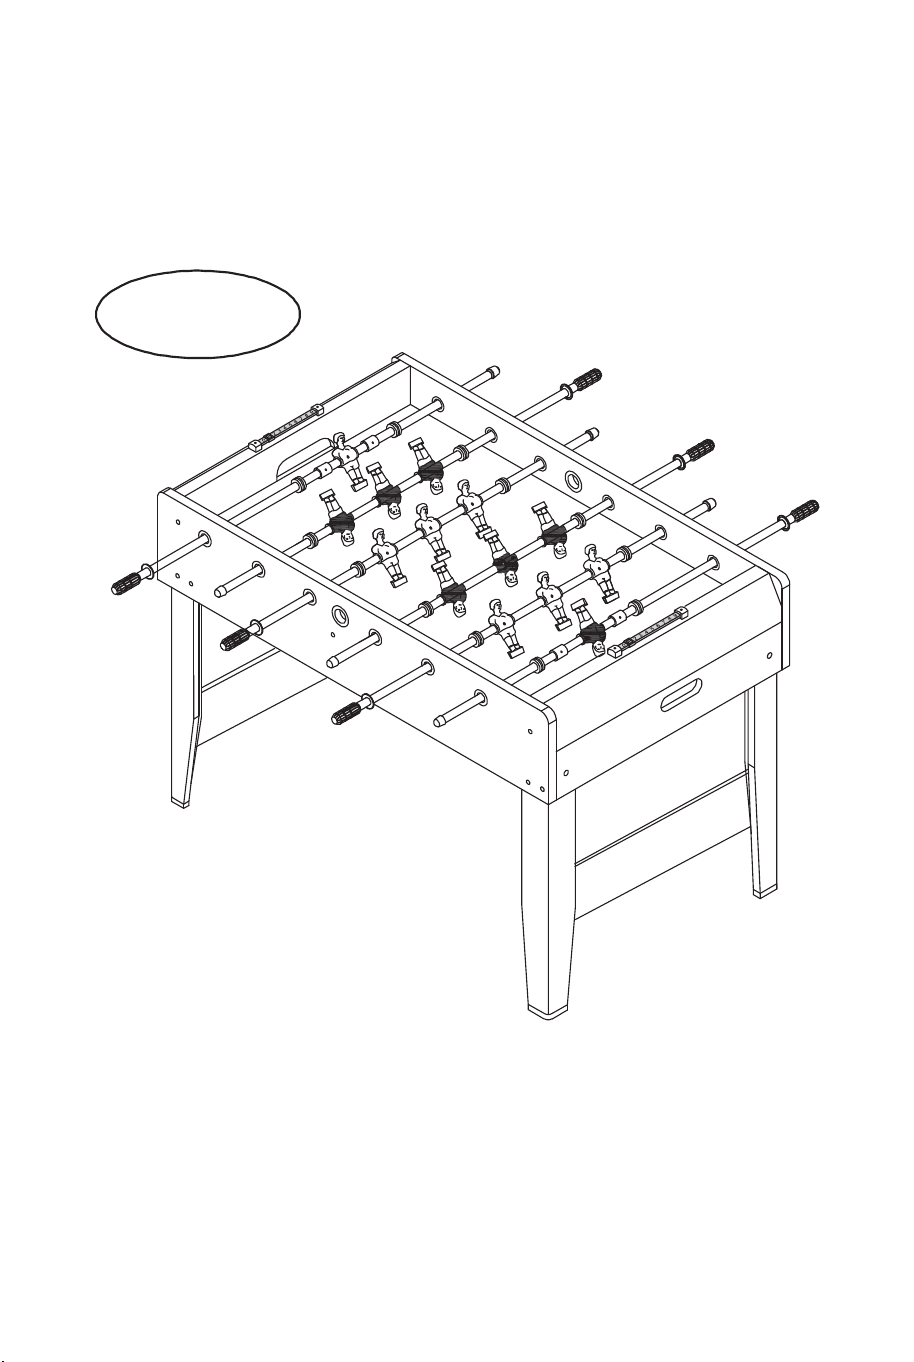
10) Attach the player rods (#8) into the side aprons as shown in Fig.4-1
Attach rubber bumper (#20) to the player rod, followed by the players
(#9 & # 10) and another rubber bumper (# 20).For the two goalie player
rods an additional stop ring (# 19) will be needed to be added between
the goalie.
11) Attach Stop Rings (# 19) and Players (#9 & # 10) to the player rods
using Round Head Screws (# 15) as shown in Fig.4-2.
EN
10) Befestigen Sie die Spielerstangen (Nr. 8) in den Seitenschürzen, wie
in Abb. 4-1 gezeigt. Befestigen Sie den Gummipuffer (Nr. 20) an der
Spielerstange, gefolgt von den Spielern (Nr. 9 und Nr. 10) und einem
weiteren Gummipuffer (Nr. 20). Für die beiden Torwartstangen muss ein
zusätzlicher Anschlagring (Nr. 19) zwischen den Torwartstangen
angebracht werden.
11) Befestigen Sie Anschlagringe (Nr. 19) und Spieler (Nr. 9 und Nr. 10)
mit Rundkopfschrauben (Nr. 15) an den Spielerstangen, wie in Abb. 4-2
gezeigt.
10) Attachez les tiges de joueur (#8) dans les tabliers latéraux comme
indiqué sur la Fig.4-1. Attachez le pare-chocs en caoutchouc (#20) à la
tige de joueur, suivi par les joueurs (#9 & #10) et un autre pare-chocs en
caoutchouc (#20). Pour les deux tiges de joueur de gardien de but, un
anneau d'arrêt supplémentaire (#19) sera nécessaire pour être ajouté
entre le gardien de but.
11) Attachez les anneaux d'arrêt (#19) et les joueurs (#9 & #10) aux
tiges de joueur à l'aide des vis à tête ronde (#15) comme indiqué sur la
Fig.4-2.
10) Fije las barras de jugador (# 8) en los paneles laterales como se
muestra en la Fig.4-1 Fije el tope de goma (# 20) a la barra de jugador,
seguido por los jugadores (# 9 & # 10) y otro tope de goma (# 20). Para
las dos barras de jugador portero se necesitará añadir un anillo de tope
adicional (# 19) entre el portero.
11) Fije los anillos de tope (# 19) y los jugadores (# 9 y # 10) a las
barras de jugadores usando tornillos de cabeza redonda (# 15) como se
muestra en la Fig.4-2.
DE
FR
ES
10) Przymocuj pręty (nr 8) do paneli bocznych, jak pokazano na rysunku
4-1. Przymocuj gumowy amortyzator (#20) do pręta, a następnie
piłkarzyki (#9 i #10) i kolejny gumowy amortyzator (#20). Dodatkowy
ogranicznik (nr 19) należy zamocować pomiędzy prętami bramkarzy.
11) Przymocuj ograniczniki (nr 19) i piłkarzyki (nr 9 i 10) do prętów za
pomocą wkrętów z łbem guzikowym (nr 15), jak pokazano na rysunku
4-2.
10) Fissare le aste dei giocatori (#8) nei grembiuli laterali come
mostrato in FIG.4-1 Fissare il paracolpi in gomma (#20) all'asta dei
giocatori, seguita dai giocatori (#9 e #10) e da un altro paracolpi in
gomma (#20).Per le due aste dei giocatori dei portieri sarà necessario
aggiungere un ulteriore anello di arresto (#19) tra i portieri.
11) Fissare gli anelli di arresto (#19) e i giocatori (#9 e #10) alle aste
dei giocatori utilizzando le viti a testa tonda (#15) come illustrato nella
Fig. 4-2.
IT
PL
22 23

FIG/ABB/RYS.4
FIG/ABB
/RYS.4-1
FIG/ABB
/RYS.4-2
20
19
19
15
10
9
8
8
8
8
8
8
&
10
9
&
10) Attach the player rods (#8) into the side aprons as shown in Fig.4-1
Attach rubber bumper (#20) to the player rod, followed by the players
(#9 & # 10) and another rubber bumper (# 20).For the two goalie player
rods an additional stop ring (# 19) will be needed to be added between
the goalie.
11) Attach Stop Rings (# 19) and Players (#9 & # 10) to the player rods
using Round Head Screws (# 15) as shown in Fig.4-2.
EN
10) Befestigen Sie die Spielerstangen (Nr. 8) in den Seitenschürzen, wie
in Abb. 4-1 gezeigt. Befestigen Sie den Gummipuffer (Nr. 20) an der
Spielerstange, gefolgt von den Spielern (Nr. 9 und Nr. 10) und einem
weiteren Gummipuffer (Nr. 20). Für die beiden Torwartstangen muss ein
zusätzlicher Anschlagring (Nr. 19) zwischen den Torwartstangen
angebracht werden.
11) Befestigen Sie Anschlagringe (Nr. 19) und Spieler (Nr. 9 und Nr. 10)
mit Rundkopfschrauben (Nr. 15) an den Spielerstangen, wie in Abb. 4-2
gezeigt.
10) Attachez les tiges de joueur (#8) dans les tabliers latéraux comme
indiqué sur la Fig.4-1. Attachez le pare-chocs en caoutchouc (#20) à la
tige de joueur, suivi par les joueurs (#9 & #10) et un autre pare-chocs en
caoutchouc (#20). Pour les deux tiges de joueur de gardien de but, un
anneau d'arrêt supplémentaire (#19) sera nécessaire pour être ajouté
entre le gardien de but.
11) Attachez les anneaux d'arrêt (#19) et les joueurs (#9 & #10) aux
tiges de joueur à l'aide des vis à tête ronde (#15) comme indiqué sur la
Fig.4-2.
10) Fije las barras de jugador (# 8) en los paneles laterales como se
muestra en la Fig.4-1 Fije el tope de goma (# 20) a la barra de jugador,
seguido por los jugadores (# 9 & # 10) y otro tope de goma (# 20). Para
las dos barras de jugador portero se necesitará añadir un anillo de tope
adicional (# 19) entre el portero.
11) Fije los anillos de tope (# 19) y los jugadores (# 9 y # 10) a las
barras de jugadores usando tornillos de cabeza redonda (# 15) como se
muestra en la Fig.4-2.
DE
FR
ES
10) Przymocuj pręty (nr 8) do paneli bocznych, jak pokazano na rysunku
4-1. Przymocuj gumowy amortyzator (#20) do pręta, a następnie
piłkarzyki (#9 i #10) i kolejny gumowy amortyzator (#20). Dodatkowy
ogranicznik (nr 19) należy zamocować pomiędzy prętami bramkarzy.
11) Przymocuj ograniczniki (nr 19) i piłkarzyki (nr 9 i 10) do prętów za
pomocą wkrętów z łbem guzikowym (nr 15), jak pokazano na rysunku
4-2.
10) Fissare le aste dei giocatori (#8) nei grembiuli laterali come
mostrato in FIG.4-1 Fissare il paracolpi in gomma (#20) all'asta dei
giocatori, seguita dai giocatori (#9 e #10) e da un altro paracolpi in
gomma (#20).Per le due aste dei giocatori dei portieri sarà necessario
aggiungere un ulteriore anello di arresto (#19) tra i portieri.
11) Fissare gli anelli di arresto (#19) e i giocatori (#9 e #10) alle aste
dei giocatori utilizzando le viti a testa tonda (#15) come illustrato nella
Fig. 4-2.
IT
PL
22 23
FIG/ABB/RYS.5
23
18
17
16
12 ) Put the Hand Grips ( 17 ) and End Caps ( 18 ) on the player rods in
order as shown in FIG. 5 . NOTE: To make the handles easier to attach,
spray a little window cleaner/lubricant on the rod ends prior to installa-
tion and tap on the players gently with a hammer once in place. See
FIG. 5
13 ) Insert Scorer ( # 23 ) on each end apron as shown in FIG 5.
EN
12) Setzen Sie die Handgriffe (17) und Endkappen (18) in der in ABB. 5
gezeigten Reihenfolge auf die Spielerstangen. HINWEIS: Um das
Anbringen der Griffe zu erleichtern, sprühen Sie vor der Installation ein
wenig Fensterreiniger/Schmiermittel auf die Stangenenden und klopfen
Sie nach dem Einbau vorsichtig mit einem Hammer auf die Mitnehmer.
Siehe ABB. 5.
13) Setzen Sie den Scorer (Nr. 23) an jeder Endschürze ein, wie in Abb.
5 gezeigt.
12) Placez les poignées (#17) et les embouts (#18) sur les tiges de
joueur dans l'ordre comme indiqué sur la FIG.5. REMARQUE : Pour
faciliter la fixation des poignées, vaporisez un peu de nettoyant/lubrifiant
pour vitres sur les extrémités des tiges avant l'installation et tapez
doucement sur les joueurs à l'aide d'un marteau une fois qu'ils sont en
place. Voir FIG.5.
13) Insérez le marqueur (#23) sur chaque tablier d'extrémité comme
indiqué sur la FIG.5.
12 ) Coloque las empuñaduras (# 17 ) y las tapas de los extremos (# 18)
en las barras de los jugadores en orden como se muestra en la FIG. 5.
NOTA: Para facilitar la colocación de las empuñaduras, rocíe un poco
de limpiacristales/lubricante en los extremos de las barras antes de la
instalación y golpee suavemente los reproductores con un martillo una
vez colocados. Vea FIG. 5
13 ) Inserte el marcador (# 23) en cada extremo del panel como se
muestra en la FIG 5.
DE
FR
ES
12)Umieść rączki (17) i zaślepki (18) w miejscach pokazanych na RYS.
5. UWAGA: Aby ułatwić montaż rączek, najpierw nasmaruj końce prętów
niewielką ilością środka do czyszczenia/smaru. Po zamontowaniu
delikatnie uderz młotkiem w rączki. Patrz RYS. 5.
13) Przymocuj liczniki punktów (nr 23) do paneli z bramkami, jak poka-
zano na rys. 5.
12 ) Applicare le manopole (17 ) e i tappi terminali ( 18 ) sulle aste dei
giocatori nell'ordine indicato in FIG . 5 . NOTA: per facilitare il montaggio
delle impugnature, spruzzare un po' di detergente/lubrificante per vetri
sulle estremità delle aste prima dell'installazione e battere delicatamente
i giocatori con un martello una volta posizionati. Vedere FIG. 5
13 ) Inserire un giocatore ( # 23 ) su ciascun grembiule terminale come
mostrato in FIG 5.
IT
PL
24 25
In case a return is required, the item must be returned in original box. Without this
your return will not be accepted.
DO NOT discard the box / original packaging.
Take a photo of the box markings.
Take a photo of the damaged part (if applicable).
Send us an email with the images requested.
A photo of the markings (text) on the side of the box is required in case a part is
needed for replacement. This helps our staff identify your product number to
ensure you receive the correct parts.
A photo of the damage is always required to file a claim and get your replacement
or refund processed quickly. Please make sure you have the box even if it is
damaged.
Email us directly from marketplace where your item was purchased with the
attached images and a description of your claim.
Falls eine Rücksendung erforderlich ist, muss der Artikel in der
Originalverpackung zurückgeschickt werden. Andernfalls wird Ihre Rücksendung
nicht angenommen.
Werfen Sie den Karton / die Originalverpackung NICHT weg.
Machen Sie ein Foto von der Beschriftung des Kartons.
Machen Sie ein Foto des beschädigten Teils (falls zutreffend).
Schicken Sie uns eine E-Mail mit dem gewünschten Foto.
Für den Fall, dass ein Ersatzteil benötigt wird, benötigen wir ein Foto der
Beschriftung (Text) auf der Seite des Kartons. So können unsere Mitarbeiter Ihre
Artikelnummer identifizieren und sicherstellen, dass Sie die richtigen Teile
erhalten.
Ein Foto des beschädigten Teils ist immer erforderlich, um eine Reklamation
einzureichen und eine schnelle Bearbeitung Ihres Ersatzteils oder Ihrer
Rückerstattung zu gewährleisten. Bitte stellen Sie sicher, dass Sie den Karton
haben, auch wenn er beschädigt ist.
Schicken Sie uns eine E-Mail direkt vom Marktplatz, auf dem Sie den Artikel
gekauft haben, mit den angehängten Fotos und einer Beschreibung Ihrer
Reklamation.
EN
DE
Return / Damage Claim Instructions
Rücksendung / Beschädigung Anweisungen
FIG/ABB/RYS.6
26 27
Instructions De Retour / Réclamation De Dommages
Dans le cas où un retour est requis, l'article doit être retourné dans sa boîte
d'origine. Sans cela, votre retour ne sera pas accepté.
NE PAS jeter la boîte/l'emballage d'origine.
Prenez une photo des marquages de la boîte.
Prenez une photo des dommages (le cas échéant).
Envoyez-nous un e-mail avec les images demandées.
Une photo des marquages (texte) sur le côté de la boîte est requise au cas où une
pièce serait nécessaire pour le remplacement. Cela aide notre personnel à
identifier votre numéro de produit pour s'assurer que vous recevez les bonnes
pièces.
Une photo des dommages est toujours requise pour déposer une réclamation et
obtenir rapidement votre remplacement ou votre remboursement. Assurez-vous
d'avoir la boîte même si elle est endommagée.
Envoyez-nous un e-mail directement depuis le marché où votre article a été
acheté avec les images ci-jointes et une description de votre réclamation.
Instrucciones de Devolución / Reclamación de Daños
En caso de que se requiera una devolución, el artículo debe ser devuelto en la
caja original. Sin esto su devolución no será aceptada.
NO deseche la caja/embalaje original.
Tome una foto de las marcas de la caja.
Tome una foto de las piezas dañadas (si procede).
Envíenos un correo electrónico con las imágenes solicitadas.
Se requiere una foto de las marcas (texto) en el lado de la caja en caso de que se
necesite una pieza para reemplazarla. Esto ayuda a nuestro personal a identificar
su número de producto para asegurarse de que recibe las piezas correctas.
Una foto de los daños es siempre necesaria para presentar una reclamación y
conseguir que su reemplazo o reembolso sea procesado rápidamente. Por favor,
asegúrese de tener la caja aunque esté dañada.
Envíenos un correo electrónico directamente desde el mercado donde se compró
su artículo con las imágenes adjuntas y una descripción de su reclamación.
FR
ES
Nel caso in cui sia richiesto un reso, l'articolo deve essere restituito nella scatola
originale. Senza la scatola originale il tuo reso non sarà accettato.
NON scartare la scatola / confezione originale.
Fare una foto dei contrassegni sulla scatola.
Fare una foto di Danno (se è applicabile).
Inviarci una mail con le immagini richieste.
È necessaria una foto dei contrassegni (testo) sul lato della scatola nel caso in
cui la parte debba essere sostituita. Questo aiuta il nostro staff a identificare il
numero del tuo prodotto per assicurarti di ricevere le parti corrette.
Una foto del danno è sempre necessaria per presentare un reclamo e ottenere
rapidamente la sostituzione o il rimborso. Assicurati di avere la scatola anche se
è danneggiata.
Inviarci un'e-mail direttamente dal mercato in cui è stato acquistato il tuo articolo
con le immagini allegate e una descrizione del tuo reclamo.
Jeśli chcesz zwrócić produkt, musi znajdować się on w oryginalnym opakowaniu.
Towar zwrócony w nieoryginalnym opakowaniu nie zostanie przyjęty.
Nie wyrzucaj oryginalnego opakowania.
Zrób zdjęcie oznaczeń na opakowaniu.
Zrób zdjęcie uszkodzonej części (jeśli dotyczy).
Skontaktuj się z nami.
Jeśli jakakolwiek część wymaga wymiany, zrób zdjęcie oznaczeń kodu produktu,
który znajduje się na opakowaniu. Pozwoli nam to zidentyfikować produkt i
dostarczyć ci właściwą część.
Jeśli chcesz złożyć reklamację, zrób zdjęcie uszkodzonej części. Pozwoli nam to
zatwierdzić reklamację i zlecić zwrot środków na twoje konto. Do złożenia
reklamacji potrzebne będzie oryginalne opakowanie.
Skontaktuj się z nami telefonicznie, mailowo lub poprzez formularz kontaktowy.
Załącz zdjęcia produktu i opis roszczenia.
IT
PL
Istruzioni Per La Restituzione / Reclamo Per Danni
Zwroty i reklamacje
28 29

UY10052
If you're having difficulty, our friendly
customer team is always here to help.
THIS INSTRUCTION BOOKLET CONTAINS IMPORTANT SAFETY INFORMATION. PLEASE READ AND KEEP FOR FUTURE REFERENCE.
AUS:cs.au@costway.com
FRA:cs.fr@costway.com
DEU:cs.de@costway.com
ITA:cs.it@costway.com ESP:cs.es@costway.com
POL:sklep@costway.com
GBR:cs.uk@costway.com
DEU office: FDS GmbH, Neuer Höltigbaum 36, 22143 Hamburg, Deutschland
ITA office: Milano
FRA office: Saint Vigor d'Ymonville
POL office: GdańskGBR office: IpswichAUS office: TruganinaUSA office: Fontana
Football Table
Fußballtisch
Table de Football
Futbolín
Tavolo da Calcio
Stół do gry w piłkarzyki