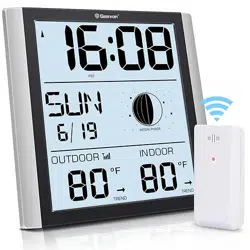
Loading ...
Loading ...
Loading ...

Note: when the temperature in 50°C ~ 70°C range, the temperature is
only for reference.
MAX/MIN Temperature
1.Press a the MEM button to display the maximum temperature. Note the MAX
on the display.
2.Press the MEM button again to display the minimum
temperature. Note the MIN display.
3.Press and hold the MEM button for 5 seconds to clear the MAX/MIN
temperature readings.
Low Battery Indicator
If the low battery indicator is displayed on the LCD for either the outdoor
sensor or the display unit, immediately change the batteries to prevent
disruptions in communications of the devices.
Moon Phase
Important Placement Guidelines
a. The sensor must be placed outside to observe outdoor
conditions. It is water resistant and designed for general outdoor use,
however, to prevent damage place the sensor in an area which is protected
from the direct weather elements and direct sunshine. The best location is 4
to 8 feet above the ground with permanent shade and plenty of fresh air to
circulate around the sensor.
b. Display unit and outdoor sensor must be within 200 feet of each other.
c. In order to maximize the wireless range, place units away from large
metallic items, thick walls, metal surfaces or other objects that may limit
wireless communications.
d. To prevent wireless interferences, place both units at least 3 feet away from
electronic devices (EX: TV, computer, microwave etc.)
Outdoor Sensor Placement
a. The sensor must be placed outside to observe outdoor conditions. It is
water resistant and designed for general outdoor use, however, to prevent
damage place the sensor in an area which is protected from the direct
weather elements and direct sunshine. The best location is 4 to 8 feet
above the ground with permanent shade and plenty of fresh air to circulate
around the sensor.
b. Display unit and outdoor sensor must be within 100 feet of each other.
c. In order to maximize the wireless range, place units away from large
metallic items, thick walls, metal surfaces or other objects that may limit
wireless communications.
d. To prevent wireless interferences, place both units at least 3 feet away
from electronic devices (EX: TV, computer, microwave etc.)
Outdoor Sensor Function:
a. Once the display unit has been set up and the channel synchronized
with the outdoor sensor, the display unit will begin the registration process.
It can take up to 3 minutes to complete the registration, where the display
unit will search for an RF (Radio Frequency) signal from the outdoor
sensor. The outdoor sensor signal strength will show the connection
strength to the outdoor sensor. If there are no bars or if bars are not show-
ing at its maximum strength (4 bars) (3) try placing the outdoor sensor or
display unit elsewhere for better connection.
b. If the RF Signal was lost and not reconnected, the outdoor
temperature level will begin to flash after 1 hour of lost connection. If no
connection was found after 2 hours only a dotted line ‘ - - - ’ will be
displayed in place of the temperature level.
c. To manually restart the RF registration, press and hold the “CH” button
for 3 seconds. The display unit will now search for the RF signal for the
next 3 minutes.
TROUBLESHOOTING:
Problem Possible Solution
Flashing of the outdoor reading is generally an
indication of wireless interference.
1. Bring both of the sensor and display indoors, side
by side and remove batteries from each.
2. Power the weather station as described in
Getting started.
3. Insert the batteries in the external sensor.
Automatic data will be transmitted.
1. Reload the batteries of both outdoor sensor
and main unit.
(Please refer to the SENSOR SETUP section.)
2. Press and hold the CH button to receive RF
signal.
3. Relocate the main unit and/or the outdoor
sensor. The units
must be within 200 ft (60m) of each other.
4. Make sure both units are placed at least 3 ft
(1m) away from
electronics that may interfere with the wireless
communication
(such as TV, microwave, computer, radio, etc).
5. Do not use heavy duty or rechargeable
batteries. The outdoor sensor requires lithium
batteries in low temperature conditions. Cold
temperatures would cause alkaline batteries work
improperly.
6. Do not mix old and new batteries.
1. Temperature accuracy:
-40°C ~ -20°C: ± 4°C
-20°C ~ 0°C: ± 2°C
0°C ~ +50°C: ±1°C
2. When it is first stalled,it takes at least 1 Hour
to have accurate
temperature data.
3. Make sure both the main unit and sensor are
placed out of
direct sunlight and away from any heat sources,
vents or
moisture sources.
4. Do not tamper with the internal components.
1. To maximize wireless range, place units away
from large metallic
items, thick walls, metal surfaces, or other objects
that may limit
wireless communication.
2. Please immediately change the batteries if the low
battery indicator
is displayed on the LCD for sensor.
3. Do not clean any part of the product with
benzene,thinner or other
solvent chemicals. When necessary, clean it with a
soft cloth.
4. Never immerse the product in water. This will
damage the product.
5. Do not subject the product to extreme force,
shock, or fluctuations
in temperature.
If the temperature is higher than the detection
range, HH will
display on screen for indication; if lower than
the detection
range, LL will display on screen for indication.
If your Geevon product does not operate properly after trying the
troubleshooting steps, contact the seller on your order page or
shoot an email to : [email protected].
Outdoor
Reading
Is Flashing
or Showing
Dashes
No outdoor
sensor
reception
Inaccurate
temperature
/humidity
Care and
maintenance
"HH/LL"
display
in indoor
and/or
outdoor
temperature
