INSTRUCTIONS FOR:
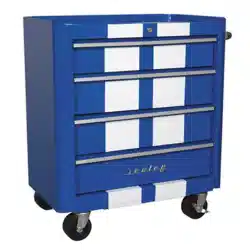
TOPCHEST 4 DRAWER RETRO, ROLLCAB 4 DRAWER RETRO -
BLACK WITH RED ANODISED DRAWER PULLS
MODEL No's:
AP28104BR, AP28204BR
1. SAFETY
2. INTRODUCTION
3. SPECIFICATION
1.1 GENERAL SAFETY
WARNING! Ensure Health & Safety, local authority, and general workshop practice regulations
are adhered to when using this product.
WARNING! Use caution when handling and assembling the metal components. The metal may
have sharp edges or corners, the use of protective gloves is recommended.
DO NOT open more than one drawer at a time.
DO NOT step on the drawers.
DO NOT let children play with the rollcab or topchest.
Ensure all drawers are fully closed and the self locking catch is activated, before moving the toolbox.
Secure the brakes when rollcab is in the desired position.
Keep the work area clean, uncluttered and ensure there is adequate lighting.
Keep the mounting frame clean and tidy in accordance with good workshop practice.
DO NOT use in damp work areas.
WARNING! The warnings, cautions and instructions referred to in this instruction manual
cannot cover all possible conditions and situations that may occur. It must be understood that
common sense and caution are factors which cannot be built into this product, but must be
applied by the operator.
4. ASSEMBLY
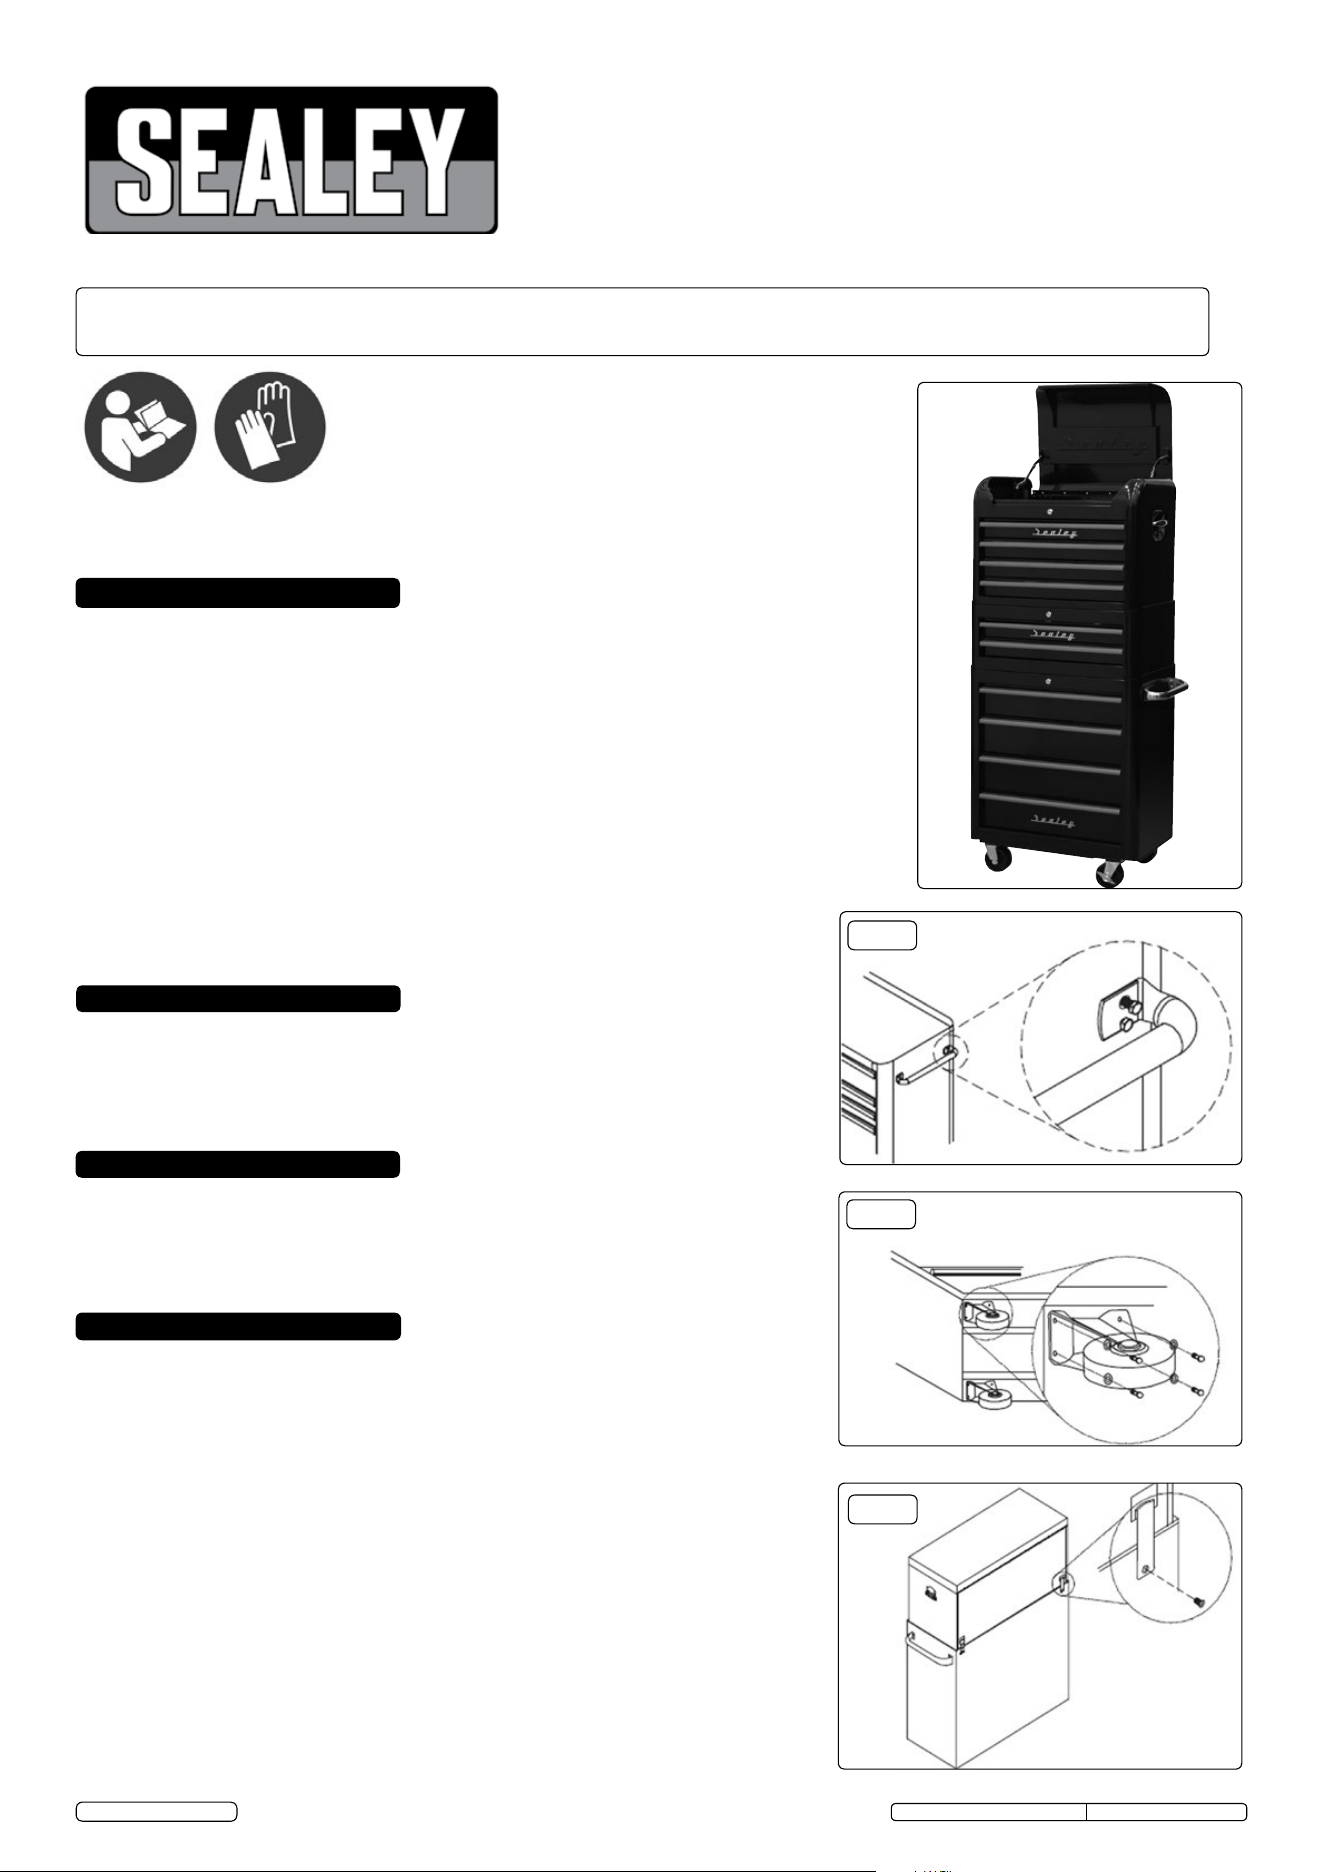
4.1. Roll Cab Handle Installation.
Position the handle over the holes in the roll cab, attach using the M6 x 12mm hex bolts
andtightensecurely(g.1).Assemblingthehandlerstwillmakeiteasiertohandlethe
the roll cab.
4.2. Castor Installation.
4.2.1. Laytherollcabcarefullyonitsback,protectingitwithasoftmatplacedontheoor.
4.2.2. Position the two rigid castors at the end opposite the handle.
4.2.3. Insert the M8 x 20mm hex bolts through the washers, then through the castors and into
the base of the roll cab, tightening securely.
4.2.4. Repeatwiththetwoswivelcastorsontheopposite(handle)end.
4.3. Roll Cab and Top Chest Connection.
4.3.1. Place the top chest onto the roll cab.
4.3.2. Snaptheconnectorsintothesquareholesonthebackofthetopchest(g.3).
4.3.3. Fasten the connectors with the screws provided.
g.1
g.2
g.3
Retro styled tool chests with modern day functionality. Features drawers with ball bearing
slides and red anodised 'lift & latch' drawer pulls preventing inadvertent opening.
Heavy duty chrome plated side handles on chest and stainless handle on rollcab for easy
manoeuvrability. Topchest is further enhanced with chrome plated supports on the clam shell
lid for easy opening, providing additional storage. Rollcab features stylish heavy duty castors,
twowithbrakes.Alldrawersarettedwithcastorsandlockononekeyturn.
Model No:...............................AP28104BR ..............AP28204BR
OverallDimensions(WxDxH):........700 x 450 x 495mm........730 x 460 x 825mm
Mediumdrawer(x4): .................570 x 400 x 60mm.....................n/a
Clam Shell Top: ......................590 x 430 x 80mm ....................n/a
Largedrawer(x1):................................ n/a........570 x 400 x 105mm
Largedrawer(x3):................................ n/a........570 x 400 x 135mm
Thank you for purchasing a Sealey product. Manufactured to a high standard, this product will, if used according to these
instructions, and properly maintained, give you years of trouble free performance.
IMPORTANT: PLEASE READ THESE INSTRUCTIONS CAREFULLY. NOTE THE SAFE OPERATIONAL REQUIREMENTS, WARNINGS & CAUTIONS. USE THE PRODUCT
CORRECTLY AND WITH CARE FOR THE PURPOSE FOR WHICH IT IS INTENDED. FAILURE TO DO SO MAY CAUSE DAMAGE AND/OR PERSONAL INJURY AND WILL
INVALIDATE THE WARRANTY. KEEP THESE INSTRUCTIONS SAFE FOR FUTURE USE.
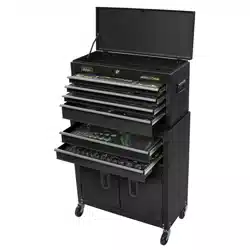
Shown with
Mid-box
Model no:
AP28102BR
Refer to
instruction
manual
Wear
protective
gloves
AP28104BR,AP28204BRIssue:2(L)-16/01/17
Original Language Version
© Jack Sealey Limited
5. OPERATION
6. MAINTENANCE
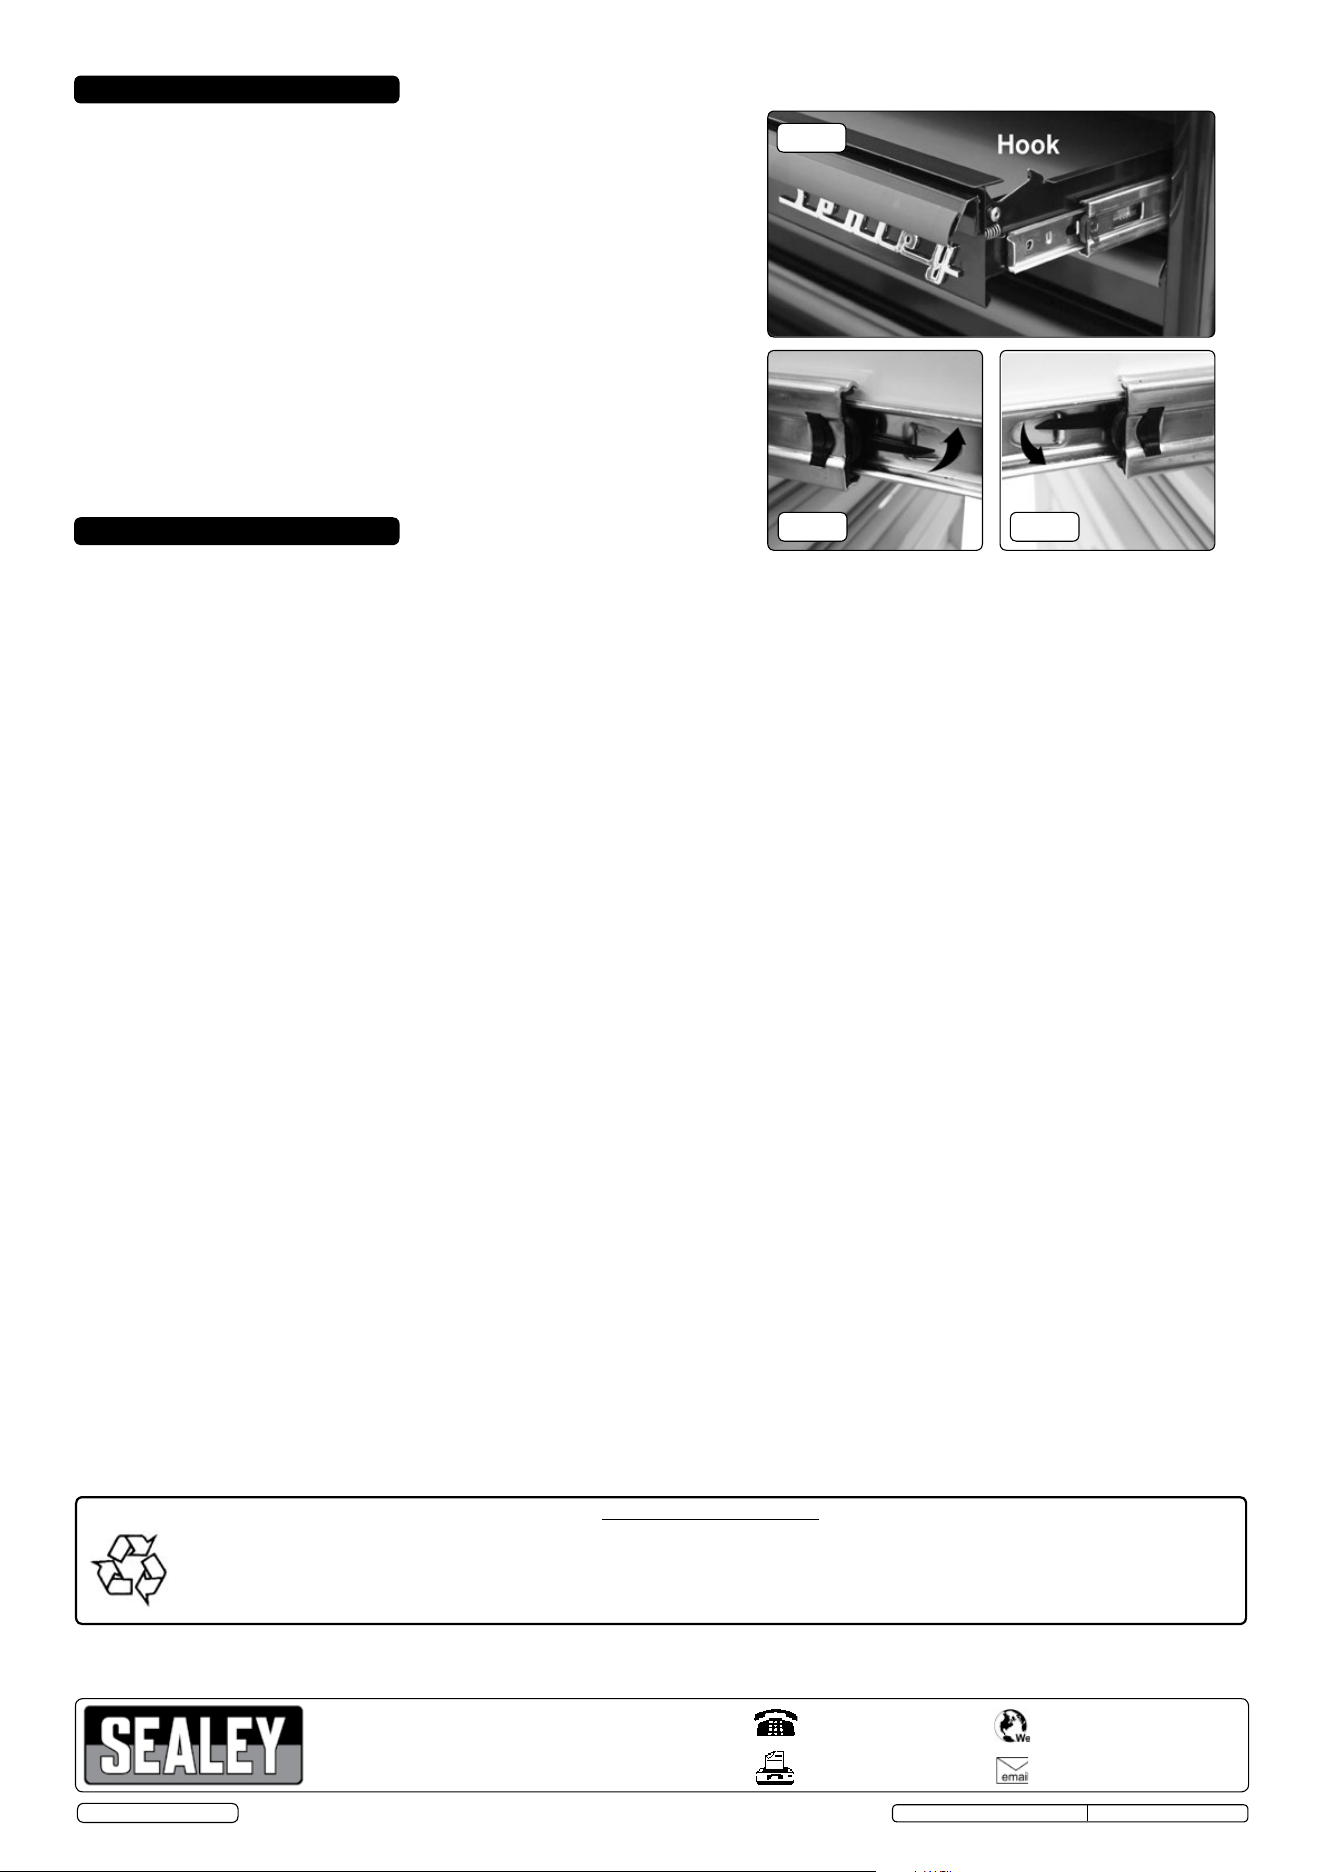
5.1. Raise and Release Drawers.
5.1.1. Toopen:liftthedrawerfrontwhilstpullingitout(g.4).
5.1.2. Toclose:shutthedrawerrmlyuntilthelatchengages.
5.1.3. Ifthedrawerdoesnotlatch,thehook(g.4)maybemisalignedorbinding.
Bendthehookgentlyuntilitisparalleltothedraweredgeandengageswhen
closed.
5.2. To Remove Drawers
5.2.1. Pull drawer out almost fully.
5.2.2. Locatetheblacklockinglevers(gs.5&6).
5.2.3. Facingthedrawer;liftoneleverup(g.5),andpushtheotherleverdown
(g.6).
5.2.4. With both levers deployed, the drawer can be pulled out from the slides.
5.3. To Replace Drawers
5.3.1. Extend the drawer runners from the cabinet.
5.3.2. Engage the slides on either side of the drawer carefully into the runners.
5.3.3. Push the drawer closed squarely until the drawer is closed fully, engaging the
locking levers as it goes.
g.4
g.5 g.6
6.1. Lubricate the drawer slides sparingly every six months.
6.2. Clean the metalwork periodically with warm water and a mild detergent.
6.3. Stubborn grease and oil marks can be removed by using a non-abrasive
cleaner.
Environmental Protection
Recycle unwanted materials instead of disposing of them as waste. All tools, accessories and packaging should be sorted,
taken to a recycling centre and disposed of in a manner which is compatible with the environment.
When the product becomes completely unserviceable and requires disposal, drain off any fluids (if applicable)
into approved containers and dispose of the product and the fluids according to local regulations.
NOTE: It is our policy to continually improve products and as such we reserve the right to alter data, specifications and component parts without prior notice.
IMPORTANT: No liability is accepted for incorrect use of this product.
WARRANTY: Guarantee is 12 months from purchase date, proof of which will be required for any claim.
01284 757500
01284 703534
sales@sealey.co.uk
Sole UK Distributor, Sealey Group,
KempsonWay,SuffolkBusinessPark,
BurySt.Edmunds,Suffolk,
IP327AR
www.sealey.co.uk
AP28104BR,AP28204BRIssue:2(L)-16/01/17
Original Language Version
© Jack Sealey Limited