MANUAL DE USARIO
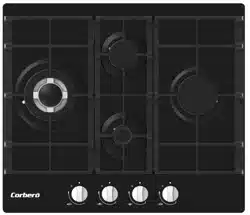
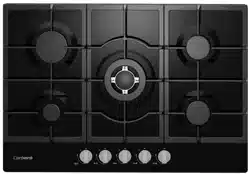
PLACA CRISTAL GAS DE 3 FUEGOS NEGRO
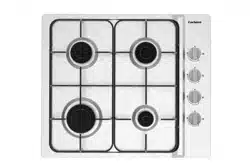
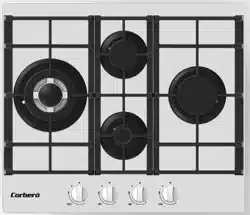
PLACA CRISTAL GAS DE 3 FUEGOS BLANCO
CPCGM 3F 3021 N
CPCGM 3F 3022 W

Prefacio
Gracias por elegir nuestra cocina de gas.
Para usar este aparato correctamente y prevenir riesgos de incendio, lea estas
instrucciones antes de usar el aparato.
Guarde estas instrucciones en un lugar, donde las pueda encontrar fácilmente.
Si no está seguro de cualquier información que contenga este manual de instrucciones, por
favor contacte con nuestro centro de atención al cliente.
El fabricante no se hace responsable de cualquier daño en personas, causadas por una
incorrecta instalación o uso de este aparato.
El aparato tiene la certificación de uso de los países que están marcados en su etiqueta.
El fabricante reserva el derecho de hacer cualquier modificación que pueda ser
considerada importante, sin poner en peligro las principales características funcionales y de
seguridad de los propios productos.
El aparato está destinado para un ambiente doméstico y no comercial.
1

Indice
Advertencias de seguridad
Instrucciones técnicas
Instrucciones de funcionamient.15
Posición.....................................16
Instalación del aparato...............17
Conexión de gas........................18
Especificación de gas.................19
Conexión eléctrica......................
Conversión de gas......................21
Solución de problemas...............22
Instrucciones de seguridad........3
Instalación..................................4
Seguridad infantil.......................5
Funcionamiento.........................6
Mantenimiento y limpieza..........8
Información ambiental...............8
Instrucciones para uso y mantenimiento
Descripción del aparato.............9
Cómo usar el aparato................10
..........................12
.........13
Mantenimiento y limpieza
S
eguridad y consejos para
ahorrar energía
20
Prefac
io
2
Instrucciones de seguridad
Peligro/Advertencia
No cumplir esta nota puede provocar lesiones graves
o muerte.
Precaución
No cumplir esta nota puede provocar lesiones graves
o muerte.
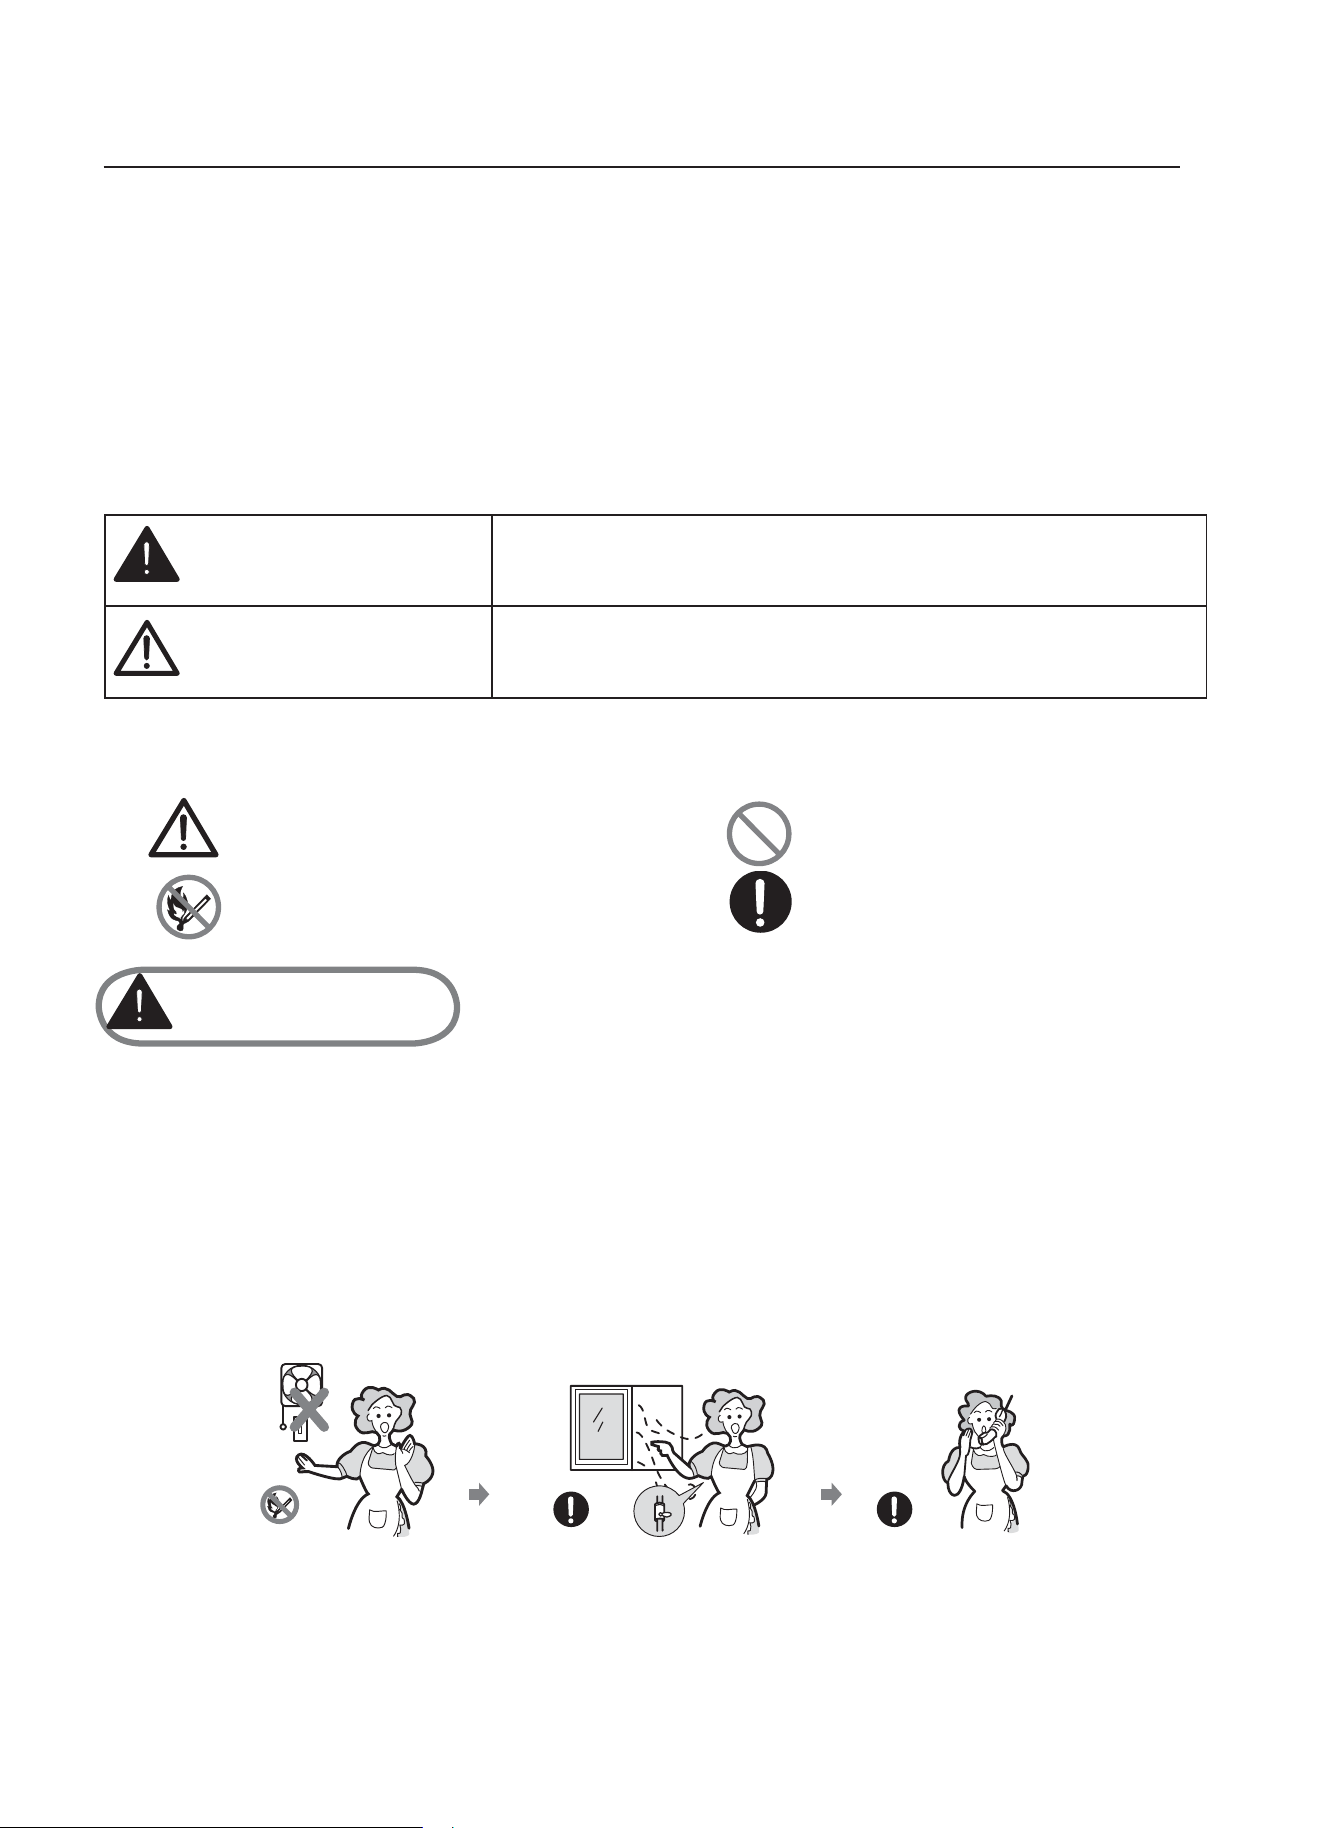
Precaución Sin acceso
Advertencia
Prohibido hacer fuego
Precaución
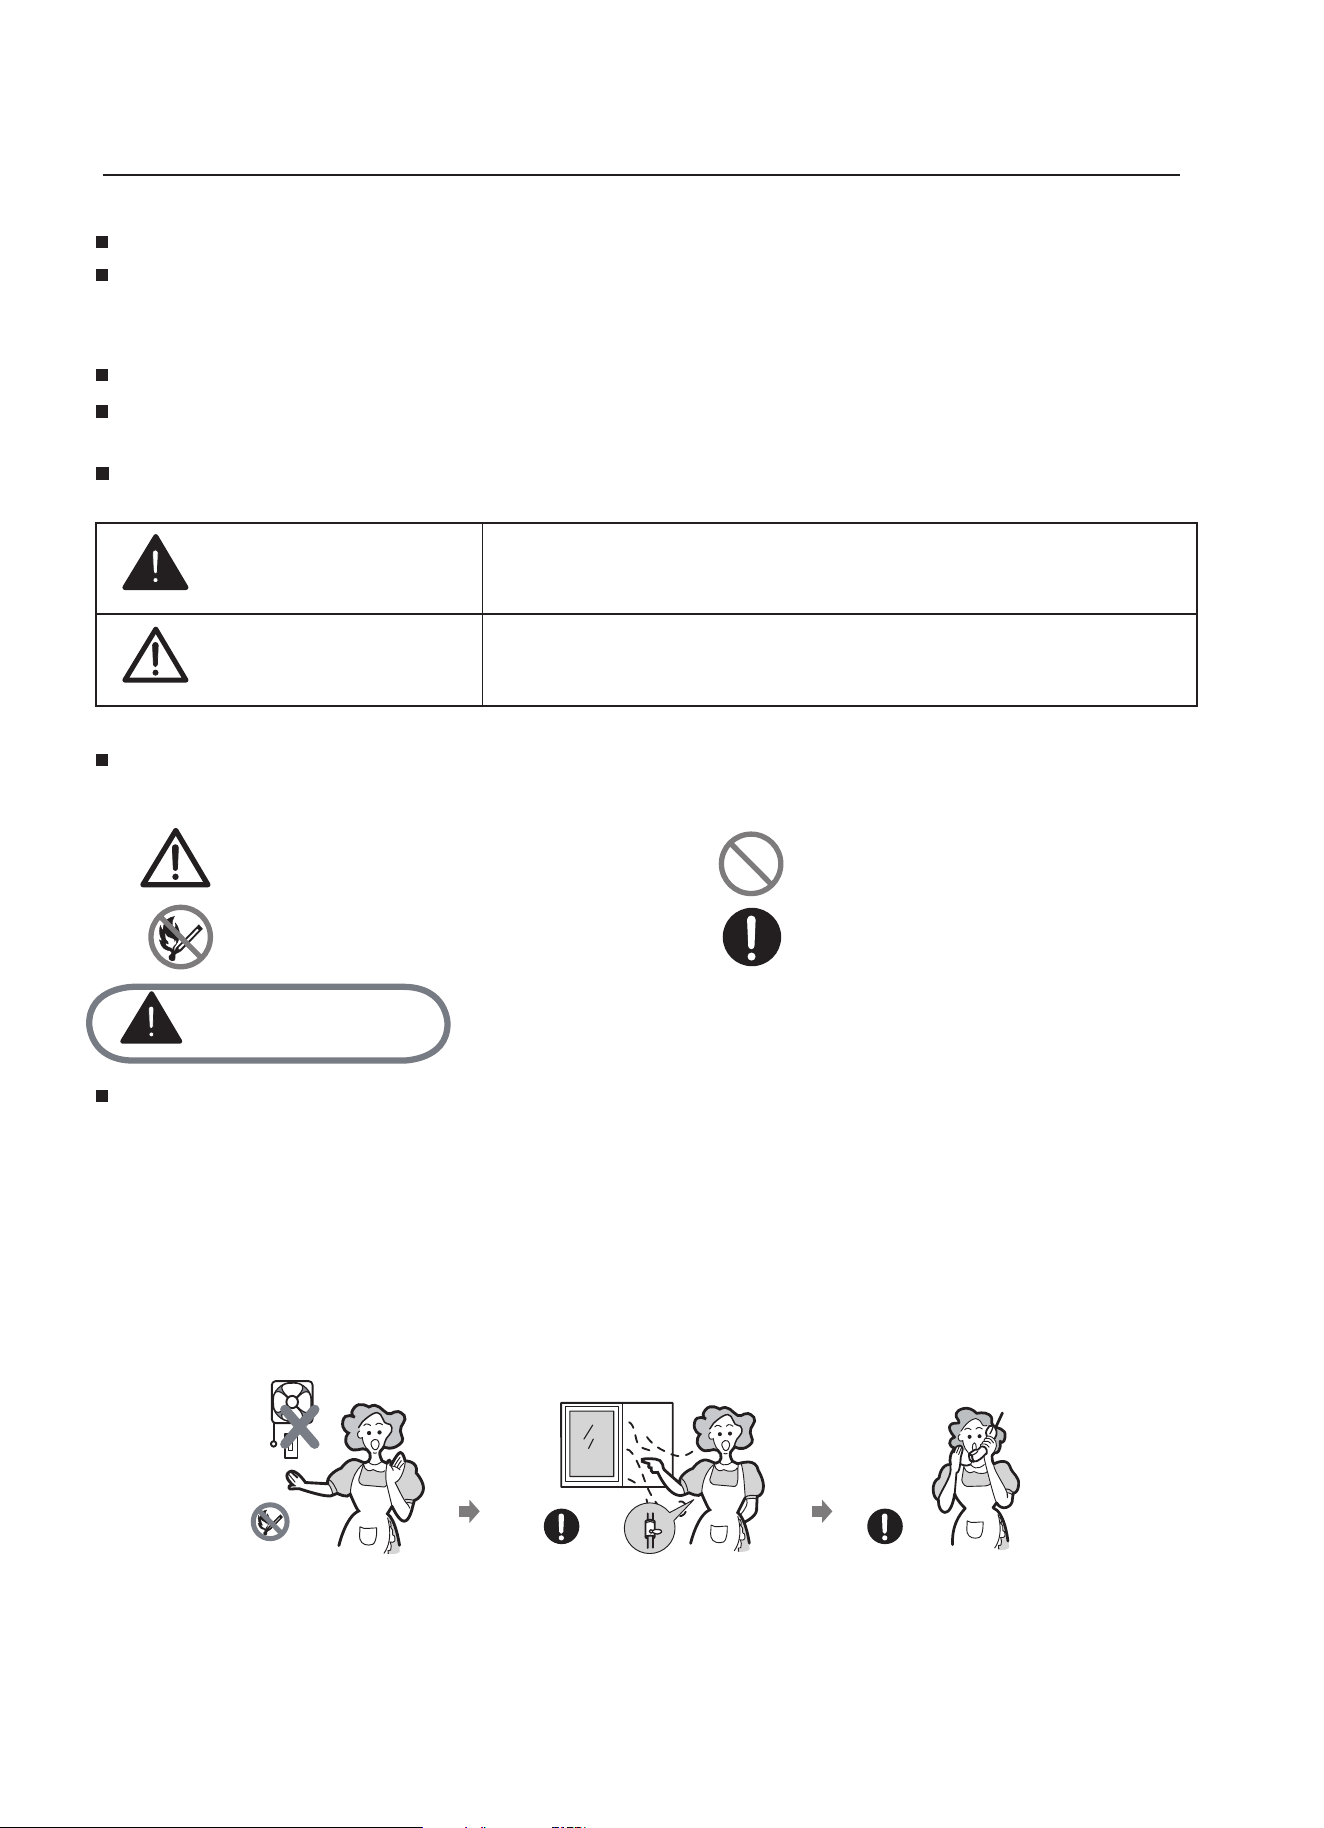
ʄSi hay una fuga de gas, tome las siguientes pautas:
- No encienda la luz.
- No apague ni enchufe ningún aparato eléctrico y no toque ninguna toma de corriente.
- No use telefóno.
1 Deje de usar el producto y cierre la válvula media.
2 Abra la ventana para ventilar.
3 Póngase en contacto con nuestro centro de servicio mediante el uso de otro télefono
•Lea estas instrucciones antes de la instalación o uso del aparato.
•Este manual de instrucciones debe guardarlo para futuras referencias.
•Si este aparato es transferido o vendido a otra persona, asegúrese de entregar el manual de
instrucciones.
•El fabricante no se hace responsable si estas normas no son cumplidas.
•Las siguientes notas son para entender más fácilmente que puede prevenir cualquier
accidente causado, y un uso mas conveniente.
•Lea las siguientes instrucciones adecuadamente y asegúrese de entenderlas.
Los siguientes logotipos significan lo siguiente:
3
Instalación
Advertencia
Este aparato debe ser instalado por personal cualificado.
Las condiciones de ajuste para este aparato se encuentran en la etiqueta.
Quite todo el embalaje antes de usar el aparato.
Después de desenvolver el aparato, asegúrese que el producto no se encuentra
dañado y que el cable de conexión está en perfecto estado. Por otro lado, contacte
con el distribuidor antes de instalar el aparato.
El armario contiguo y todos los materiales usados en la instalación deben ser capaces
de soportar como mínimo una temperatura de 85ºC sobre la temperatura de la
habitación en la que esté localizado el aparato.
En caso de que aparezcan llamas en el hornillo, apáguelo y no vuelva a enchufarlo
hasta que no haya pasado como mínimo 1 minuto.
El uso de una cocina de gas genera calor y humedad en la habitación donde se
instala. Asegúrese de que la cocina está bien ventilada: mantenga abiertos los huecos
de ventilación natural o instale un aparato de ventilación mecánico.
El uso intensivo y prolongado del electrodoméstico puede requerir aún más
ventilación. Quizás sea necesario abrir una ventana o disponer de ventilación más
eficaz, por ejemplo, aumentando el nivel de ventilación mecánica donde se encuentre.
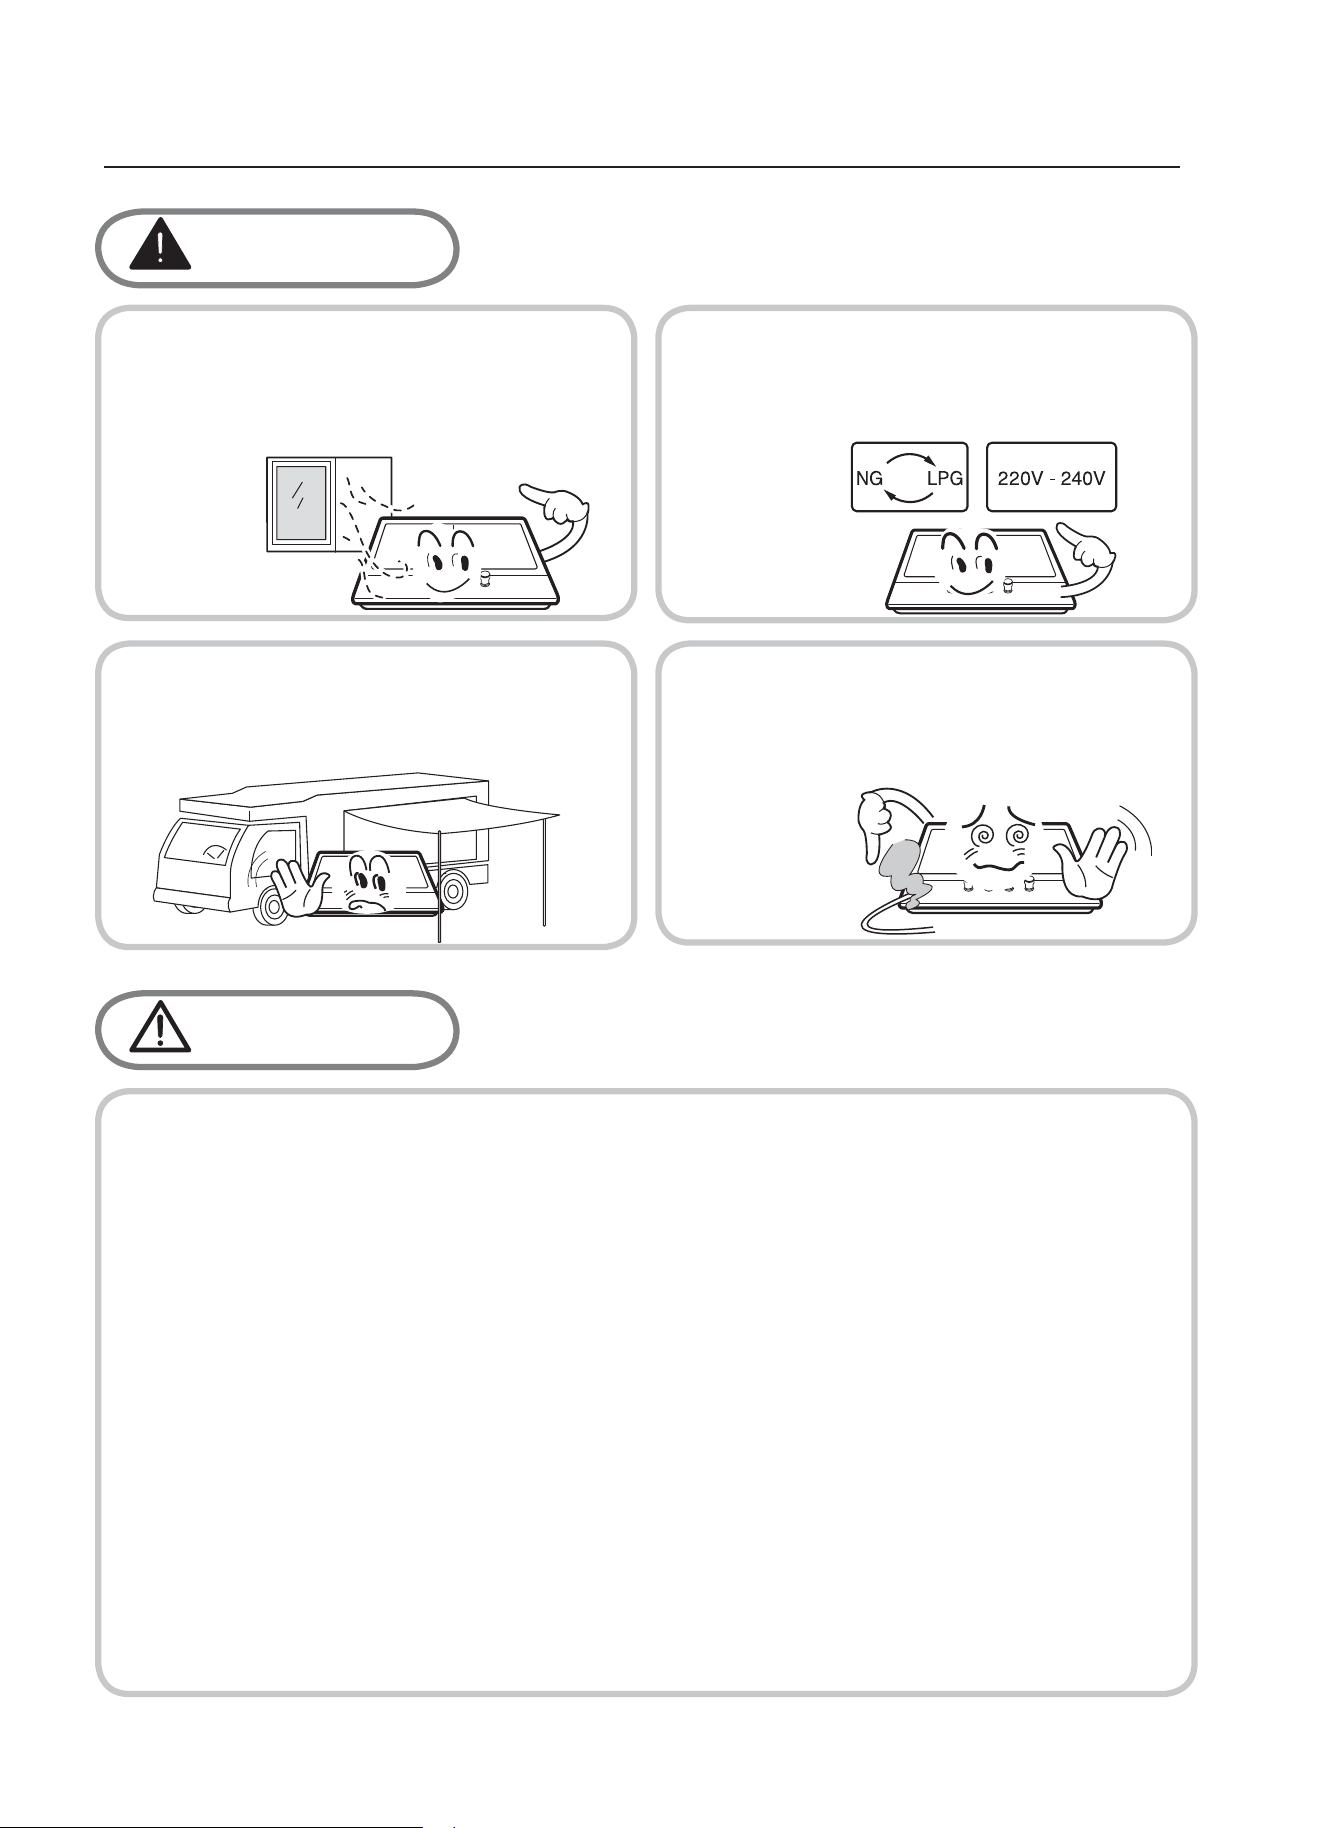
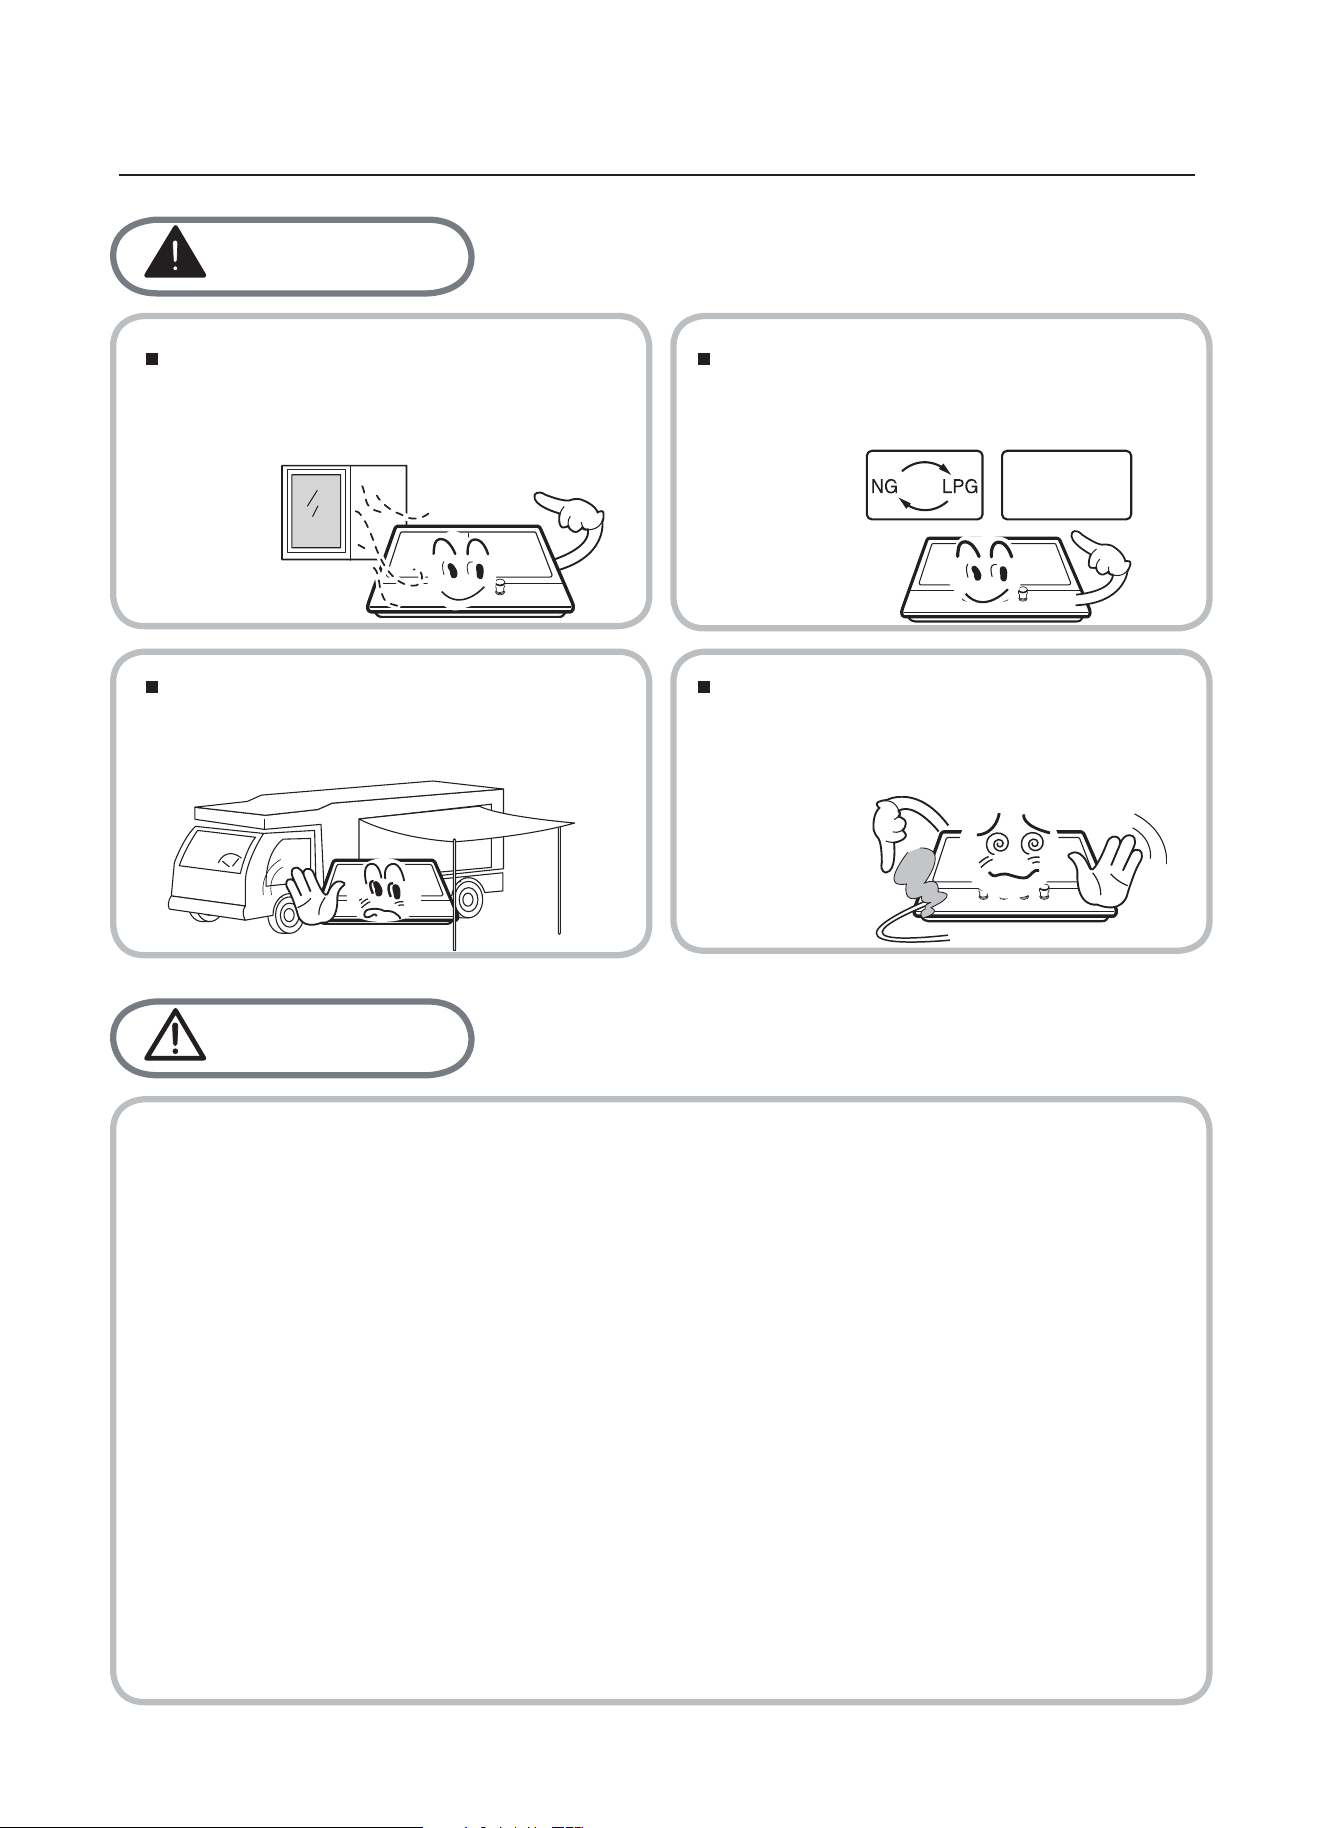
Peligro
Este aparato debe ser instalado de acuerdo
con las reglas y ubicado en un ambiente
con ventilación.
Antes de la instalación , asegúrese de que
el gas y el suministro eléctrico cumplen
con el tipo especificado en la placa de
características
Cuando el aparato está instalado en
caravanas, éste no debería ser usado para
calentar el ambiente.
La tubería de gas y el cable de corriente
debe estar instalado de tal manera que
no toque ninguna parte del aparato.
4
Seguridad Infantil
Advertencia
Peligro
No permita que los niños
jueguen cerca o con este
aparato.
Este aparato está diseñado para ser utilizado por adultos.
Los niños también pueden hacerse daño tocando las
sartenes o las ollas de la cocina.
Este aparato no debe ser utilizado por personas con falta de
experiencia, y/o falta de capacidades sin supervisión.
5
Durante el uso
Advertencia
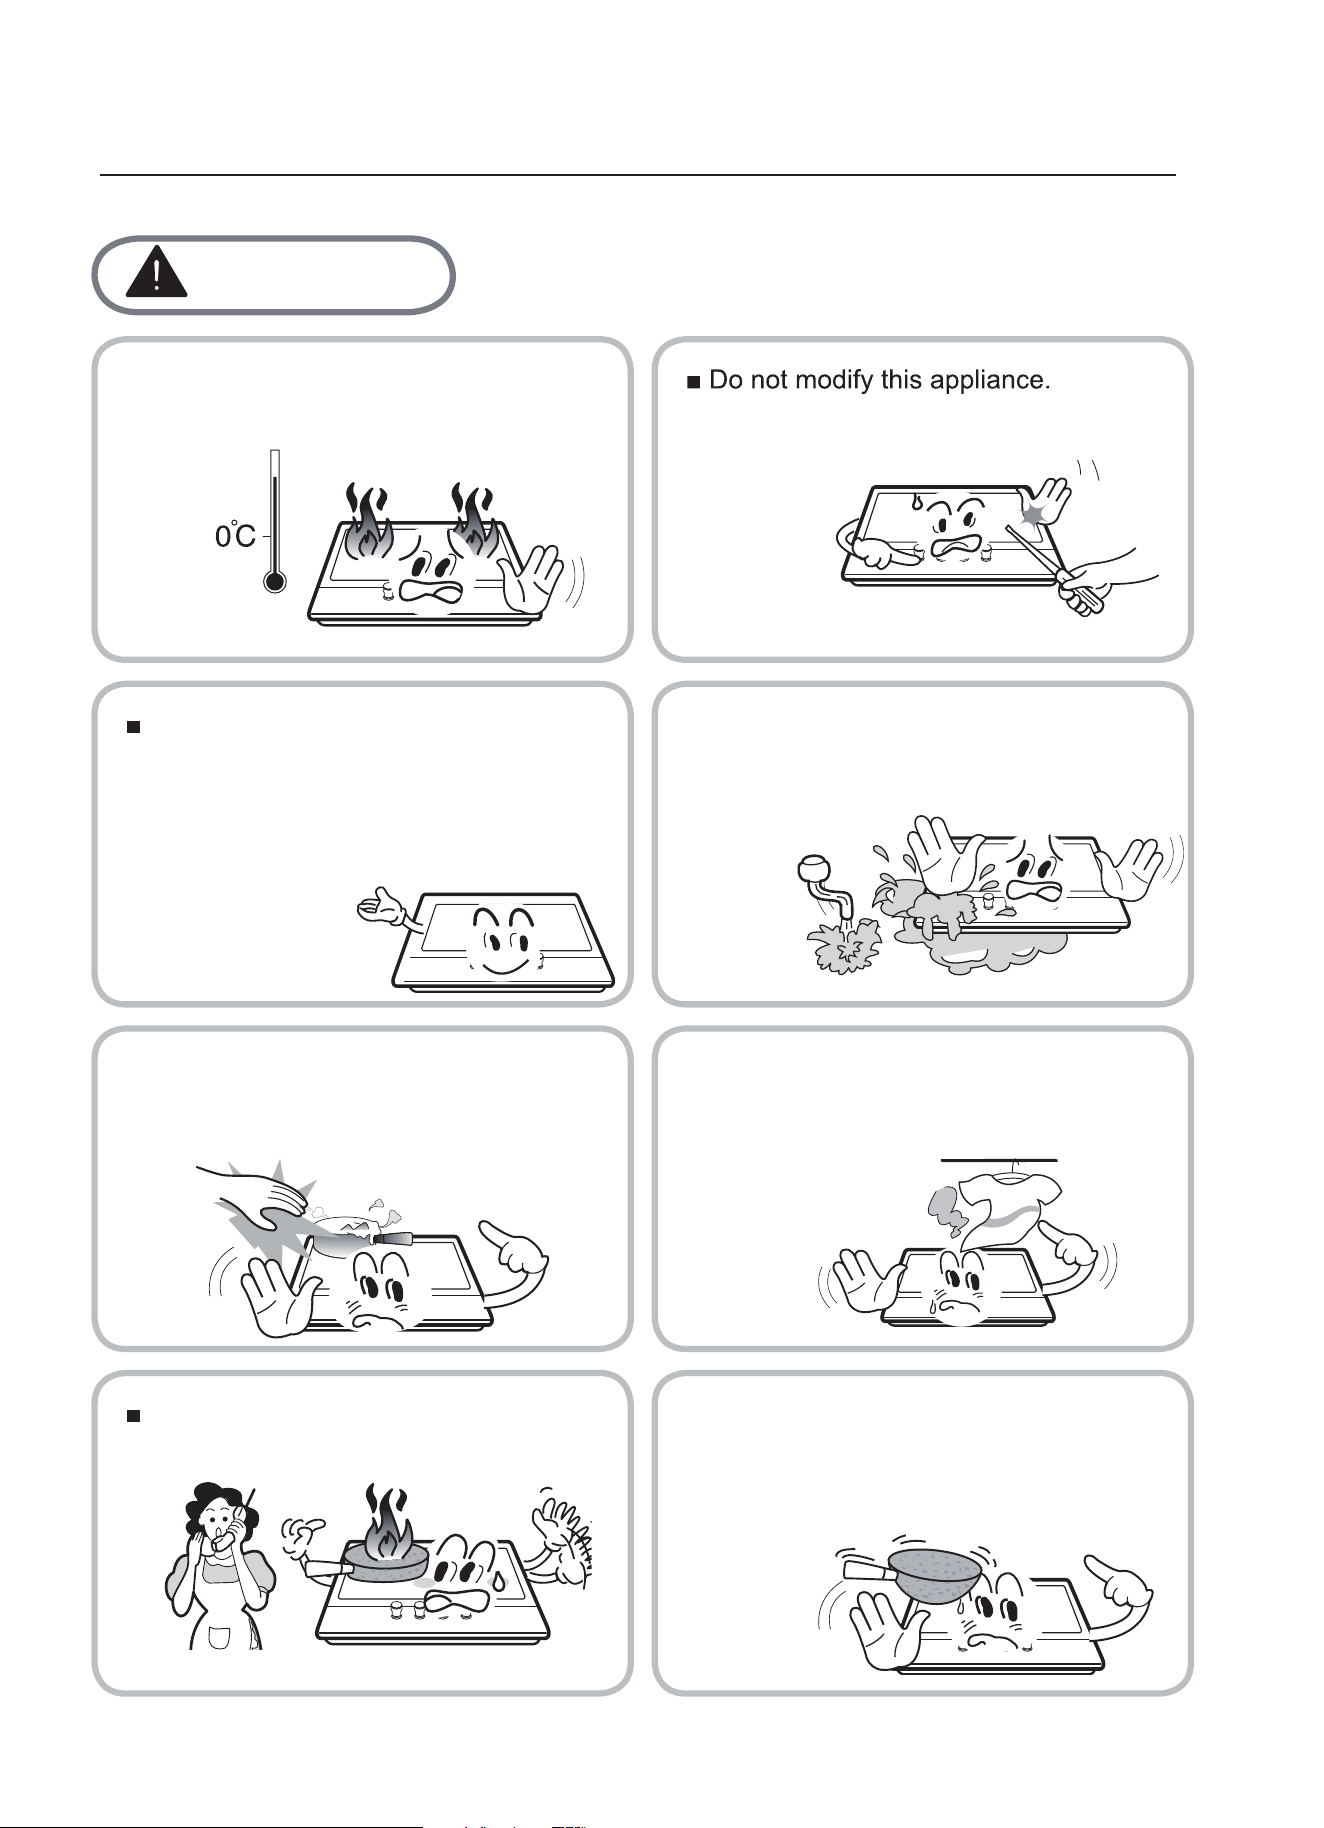
La cocina tan solo tiene un uso culinario
doméstico.
No altere este aparato. El panel del
hornillo no está diseñado para operar
desde un temporizador externo o sistema
de control remoto.
El uso de la cocina de gas genera calor
y humedad en la habitación donde se
haya instalado. Asegúrese que la cocina
está bien ventilada: guarde ventilación
natural o instale un aparato de
ventilación mecánica ( campana
extractora).
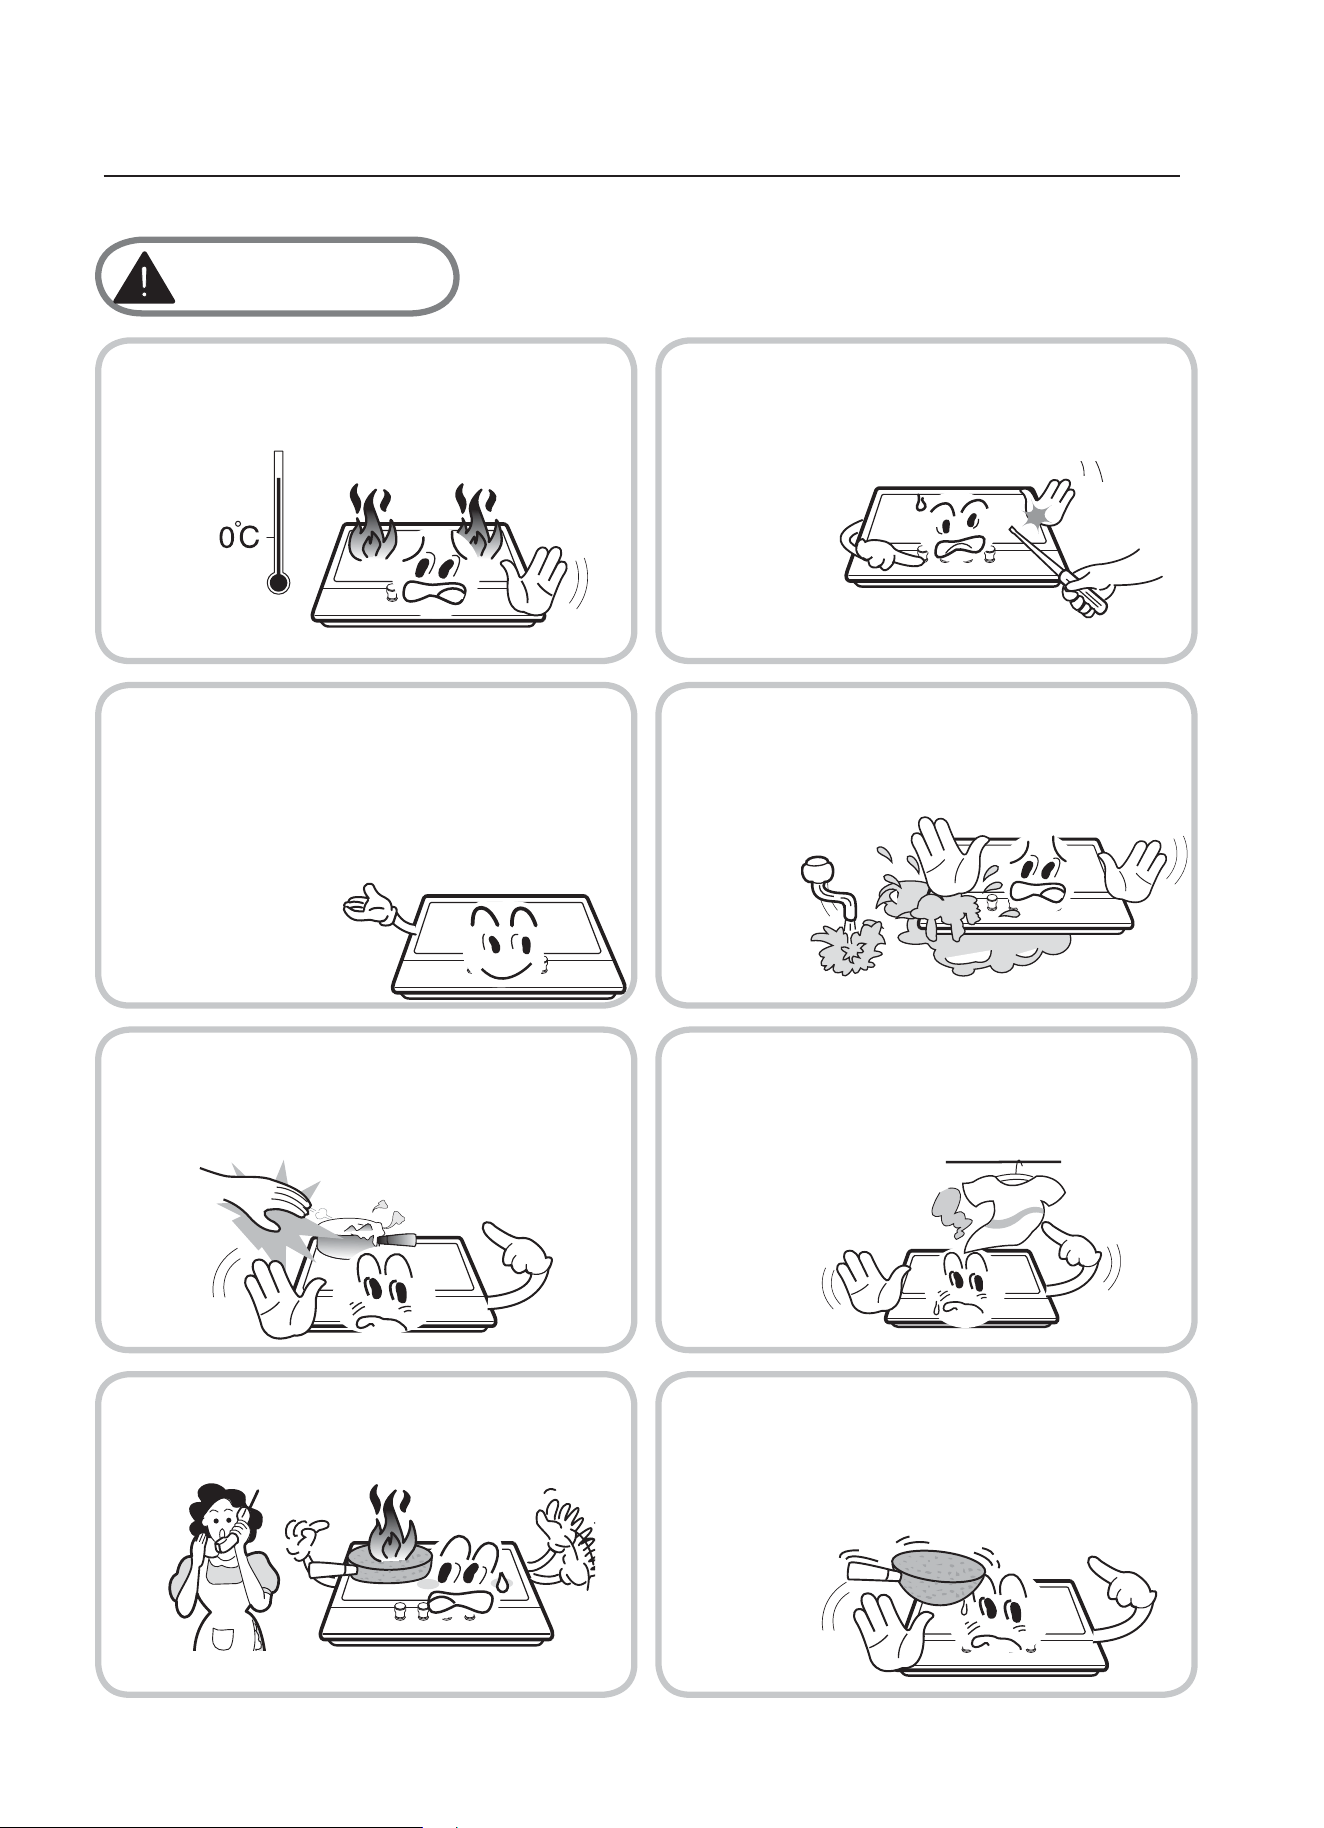
No use este aparato si está en contacto
con agua. No ponga en funcionamiento
el aparato con las manos húmedas.
La superficie de cocción comienza a
calentarse cuando el aparato está en uso.
Tome todas las precauciones
Nunca deje el aparato desatendido
mientras esté cocinando.
Las sartenes con base inestable o
irregular no deberían colocarse sobre la
cocina, ya que si se vuelcan o
derraman puede producirse un
accidente.
No use prendas grandes, toallas o
similares que puedan prender.
6
Durante el uso
Peligro
La cocina tan solo tiene uso culinario doméstico. No se ha diseñado con fines
comerciales ni industriales.
Si utiliza la cocina durante un tiempo prolongado, consiga más ventilación abriendo una
ventana o subiendo el nivel de velocidad del extractor.
Use guantes para coger cualquier sartén o utensilio de cocina ya que estarán calientes.
No deje cerca de la cocina en funcionamiento objetos con sensibilidad a prender.
No deje las agarraderas o los guantes mojados o húmedos, por que esto puede causar
la transferencia de calor al material rápidamente y el riesgo de prender tu mismo.
Utilice solamente los quemadores después de colocar sartenes y ollas. No caliente
ninguna sartén ni olla sin nada en el interior.
No utilice platos de plástico ni de aluminio en la cocina.
Cuando utilice otros aparatos eléctricos, asegúrese de que los cables no entran en
contacto con las superficies calientes del electrodoméstico.
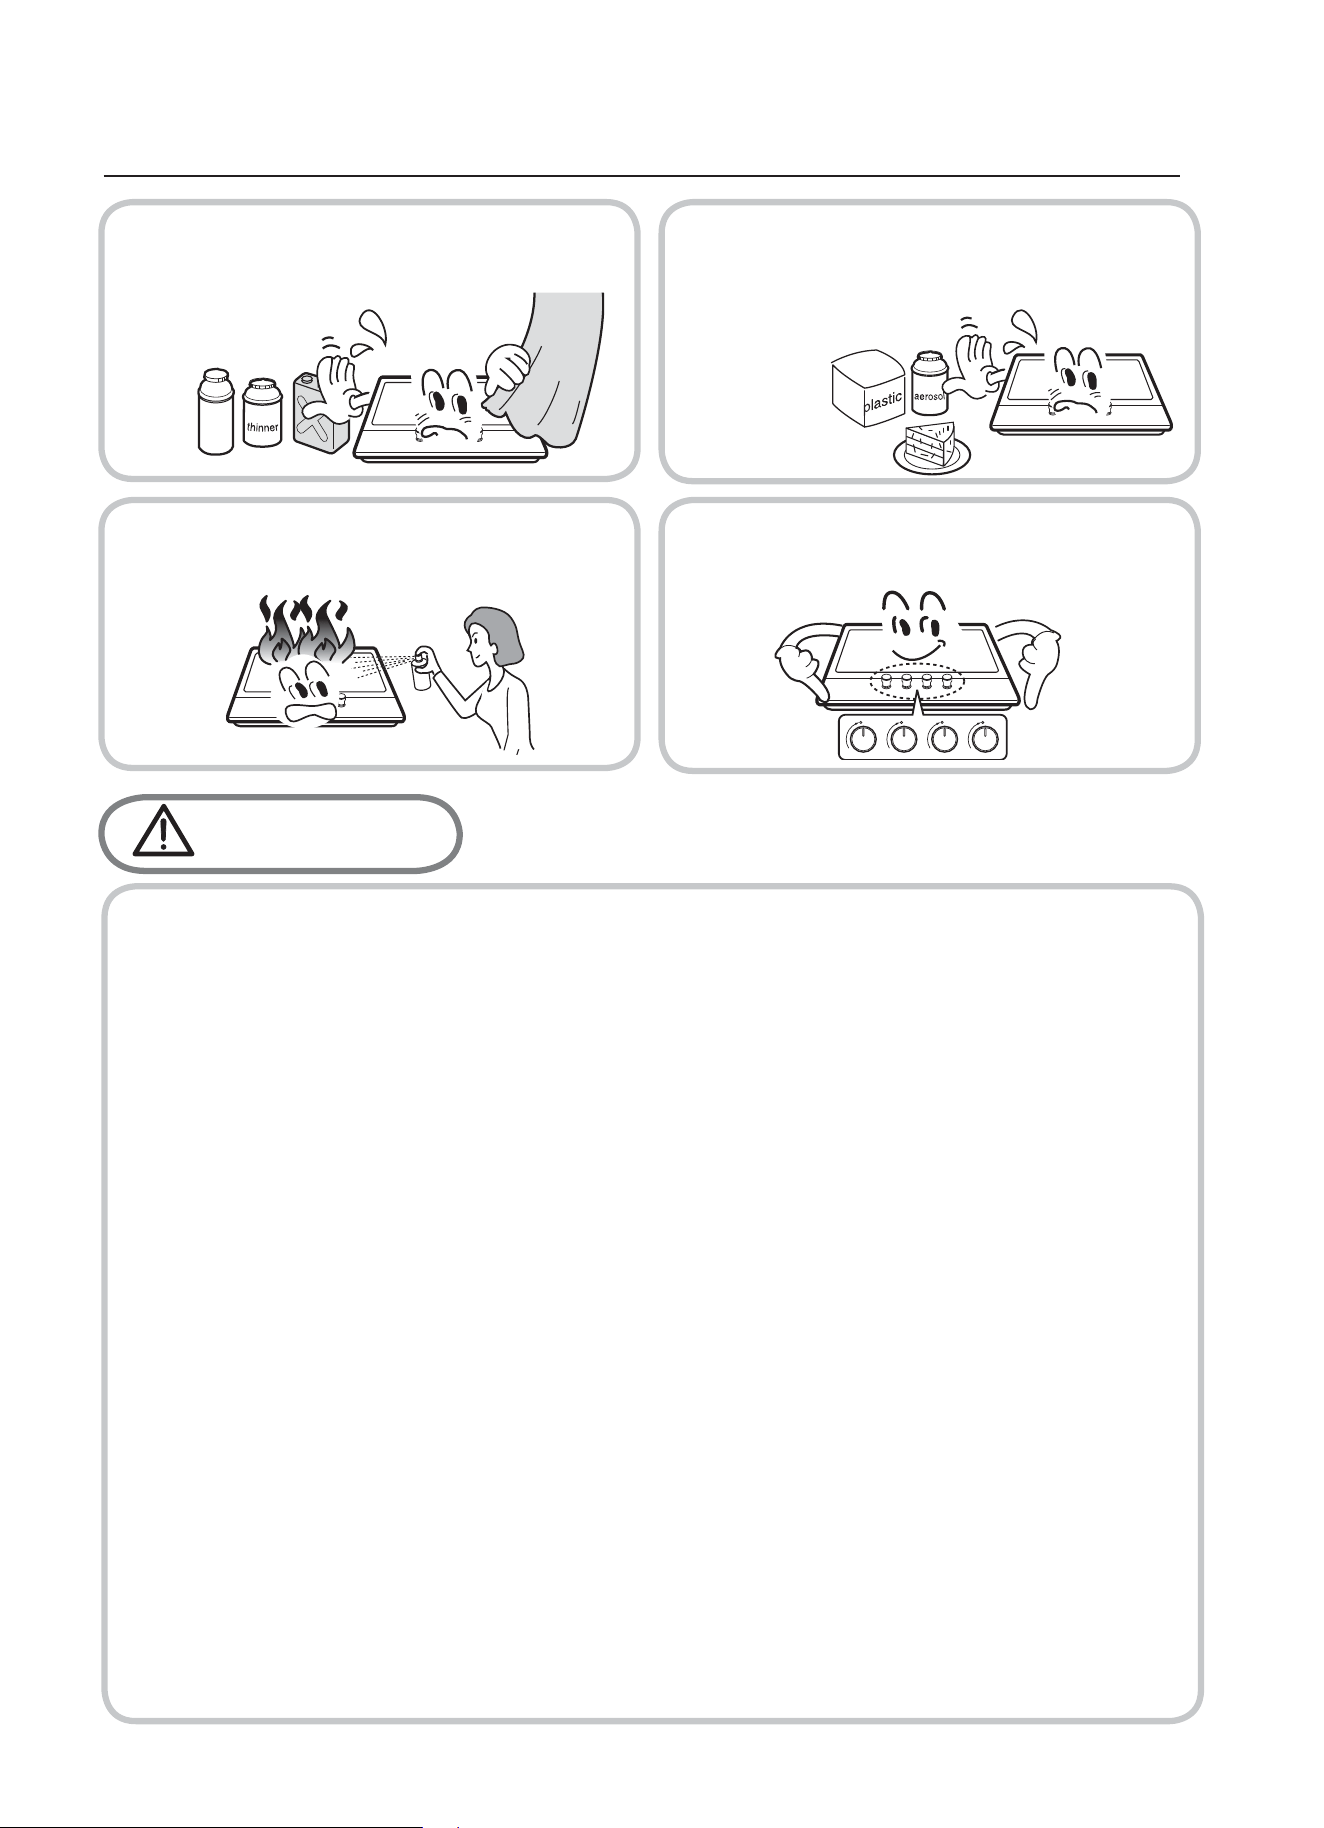
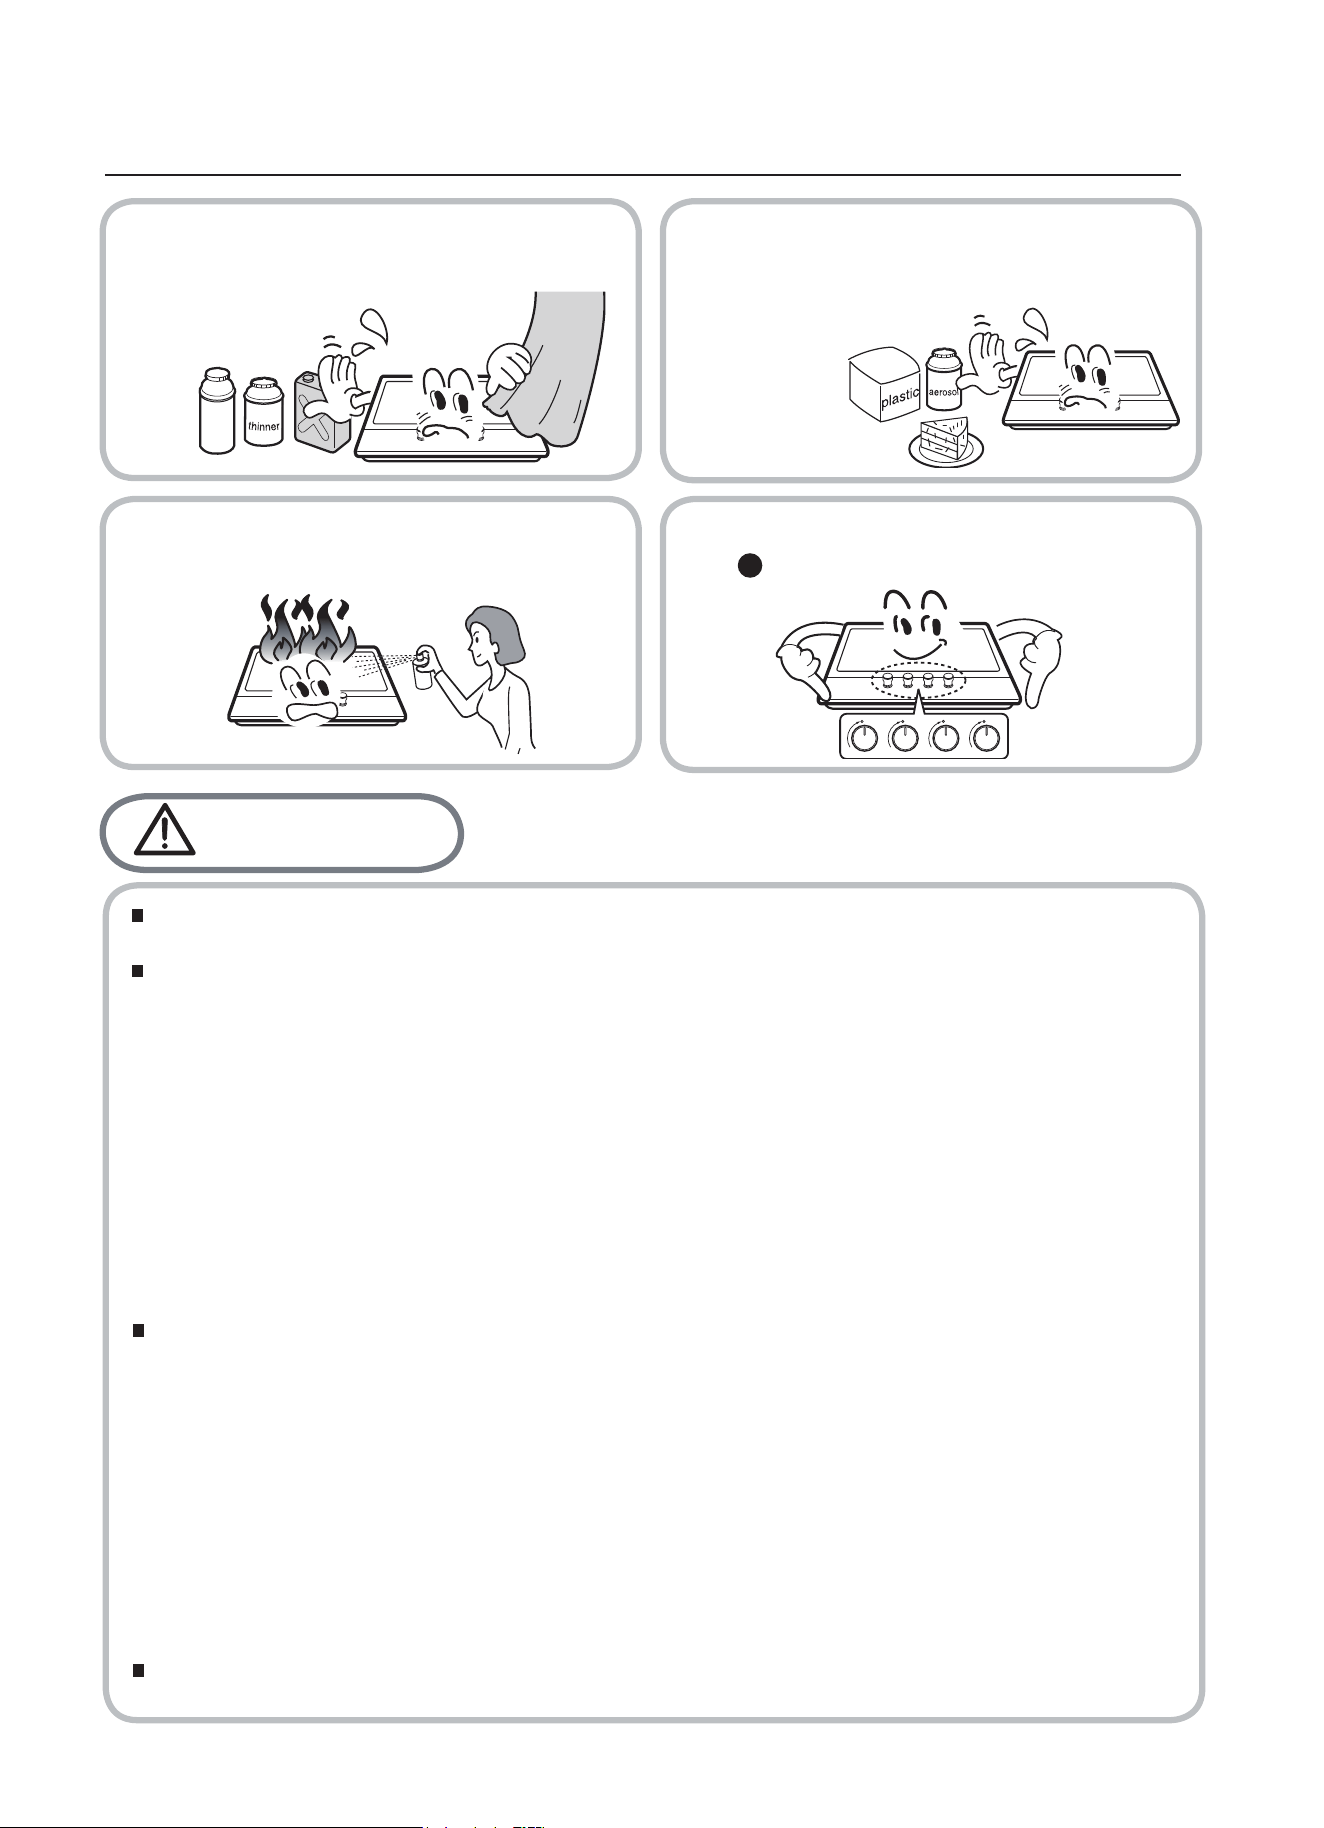
No utilice materiales inflamables para
limpiar el aparato.
A los alimentos perecederos, los objetos de
plástico y los aerosoles les afecta el calor,
por lo que no deben colocarse ni encim
a ni
debajo de la unidad de cocina.
Asegúrese que los mandos están cerrados
cuando no se utilicen.
No eche spray por los alrededores del
aparato cuando esté en funcionamiento.
No utilice un paño de cocina en lugar de un agarrador para las ollas. Objetos tales
como, ropa pueden prender fuego muy rápidamente.
Cuando utilice utensilios de cocina de cristal, asegúrese que son específicos para
cocinar. Si la superficie está fabricada con cristal endeble, apague el aparato para
evitar errores eléctricos.
Apague siempre el control de los quemadores antes de quitar el utensilio de cocina
en cuestión.
Vigile cuidadosamente los alimentos que son fritos con altos niveles de temperatura
Siempre caliente el aceite lentamente y observe mientras se calienta.
Los alimentos para freír deben estar lo más secos posible. Los alimentos
congelados o la humedad en los alimentos frescos pueden provocar que la grasa
caliente salpique por fuera de los lados de la olla.
Nunca intente mover una sartén con grasa caliente, espere a que se enfríe.
7
Mantenimiento y limpieza
Información medioambiental
Advertencia
Peligro
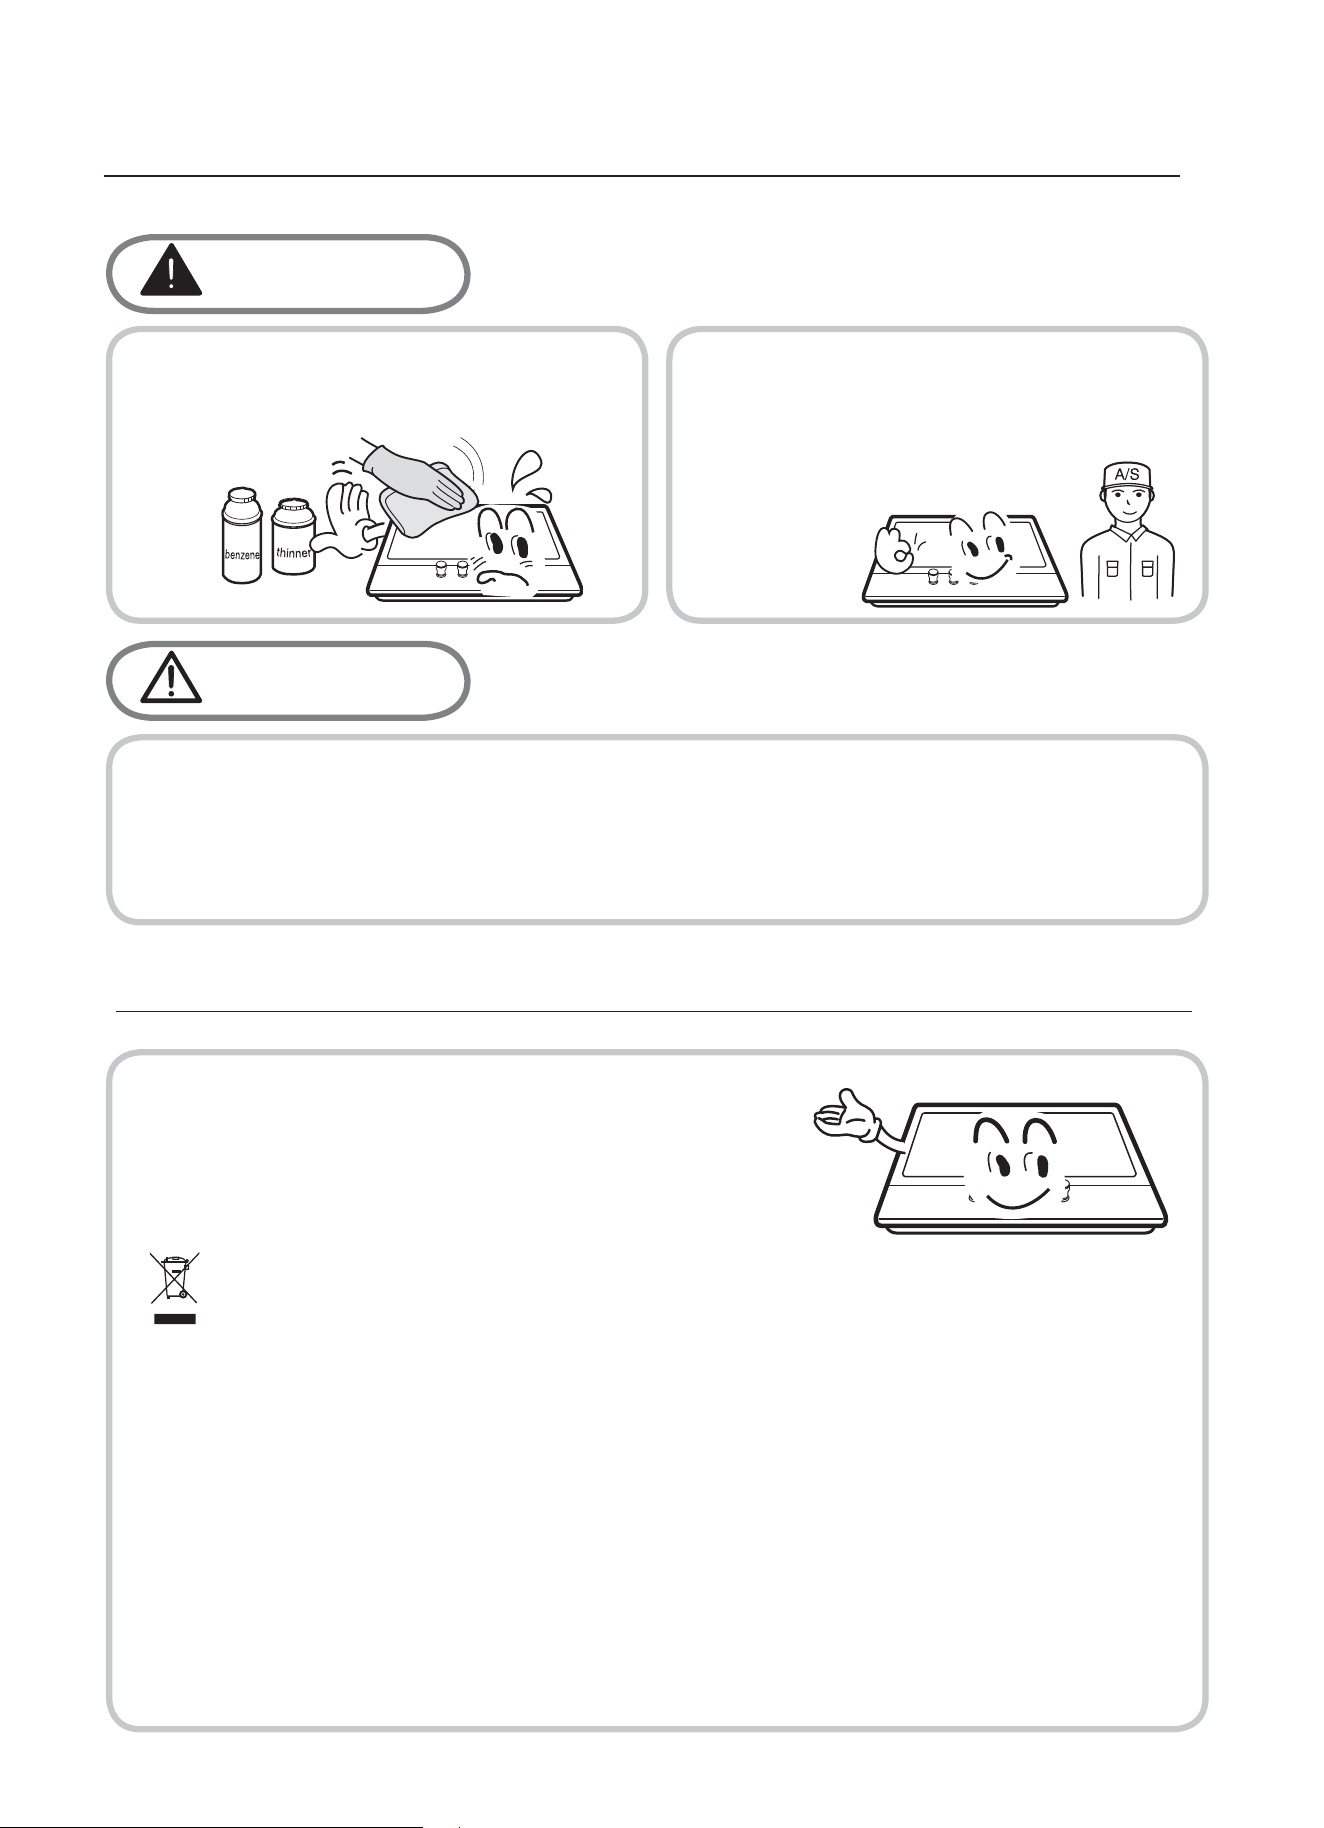
Nunca utilice agentes de limpieza abrasivos.
Este aparato debería ser reparado por
personales cualificados o servicios técnicos.
Antes de realizar cualquier tarea de mantenimiento o limpieza, debe desconectar la cocina a la red
eléctrica.
No debería usar vapor o cualquier otra elemento de limpieza con altas presiones para limpiar el
aparato.
Tras la instalación, por favor elimine los envases de forma
ecológica y segura.
Al eliminar un electrodoméstico antiguo, inutilícelo cortando el
cable.
El desecho correcto de este product
o
Residuos eléctricos y equipos electrónicos.
Este símbolo que se encuentra sobre el producto o su envase indica que este producto
no debe tratarse como residuo doméstico. En su lugar, deberá llevarlo al punto de
recogida correspondiente, ayudará a evitar las posibles consecuencias negativas para el
medio ambiente y la salud que podrían producirse por una manipulación inadecuada de
los residuos de este producto. Si desea obtener información más detallada acerca del
reciclaje de este producto, póngase en contacto con el ayuntamiento, el servicio de
eliminación de residuos domésticos de su zona o la tienda en la que la compró el
producto.
8
Descripción del aparato
ΣQn
2W
220-240V,
50Hz-60Hz,
Dimen
siones
(W*D*H)
Placa
superior
Dispositivo
de encendido
Conexión
Suministro
eléctrico
Características
del quemador
Hilo G1/2
Auxiliar(1),
á
pid
o
(1),
Semi-r
encendido
Tipo de
co
n
tin
u
o
de gas
cristal
Wok (1),
9
600*510*90
6.05kW
mm
Como usar el aparato
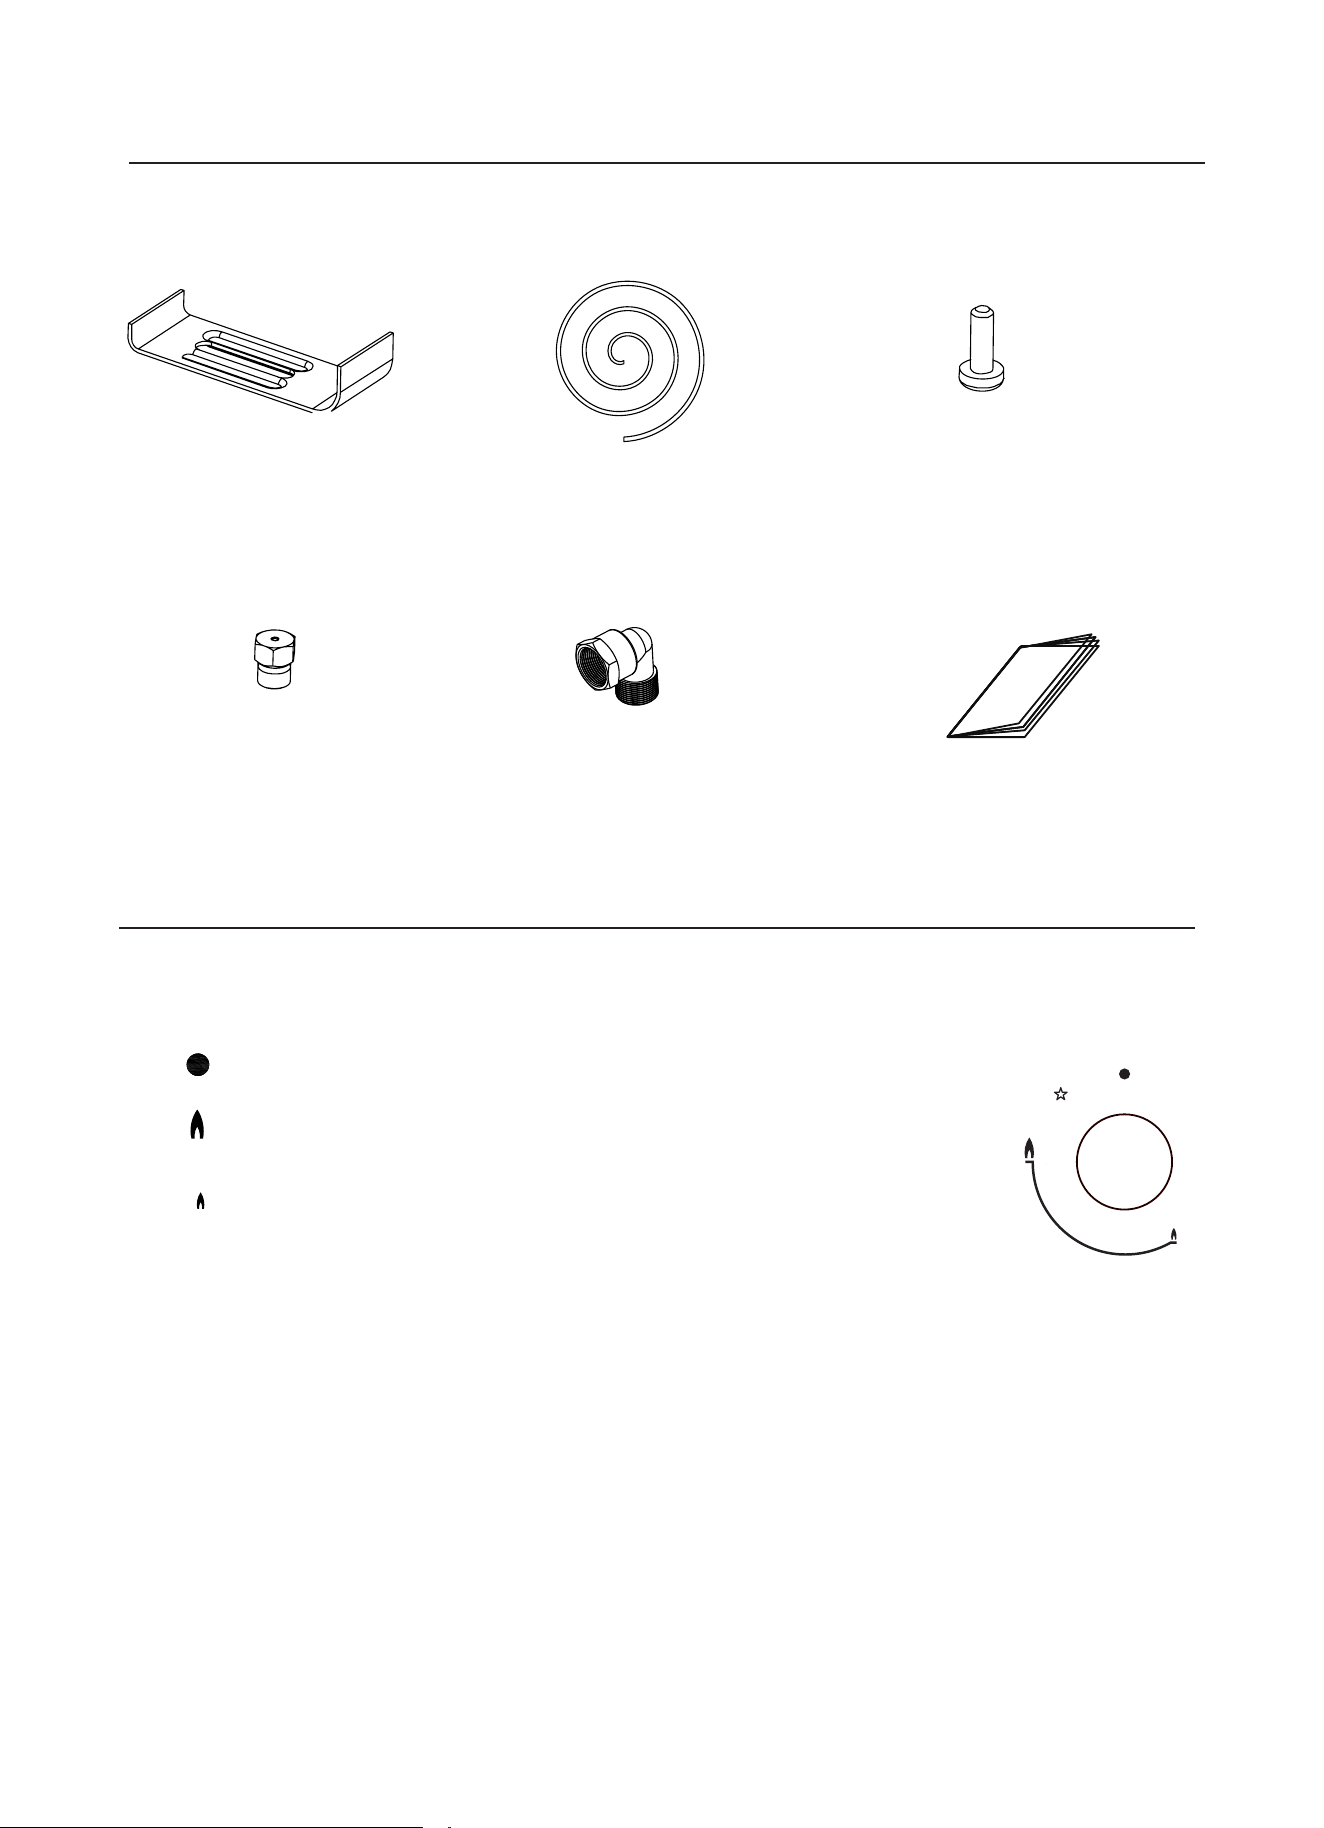
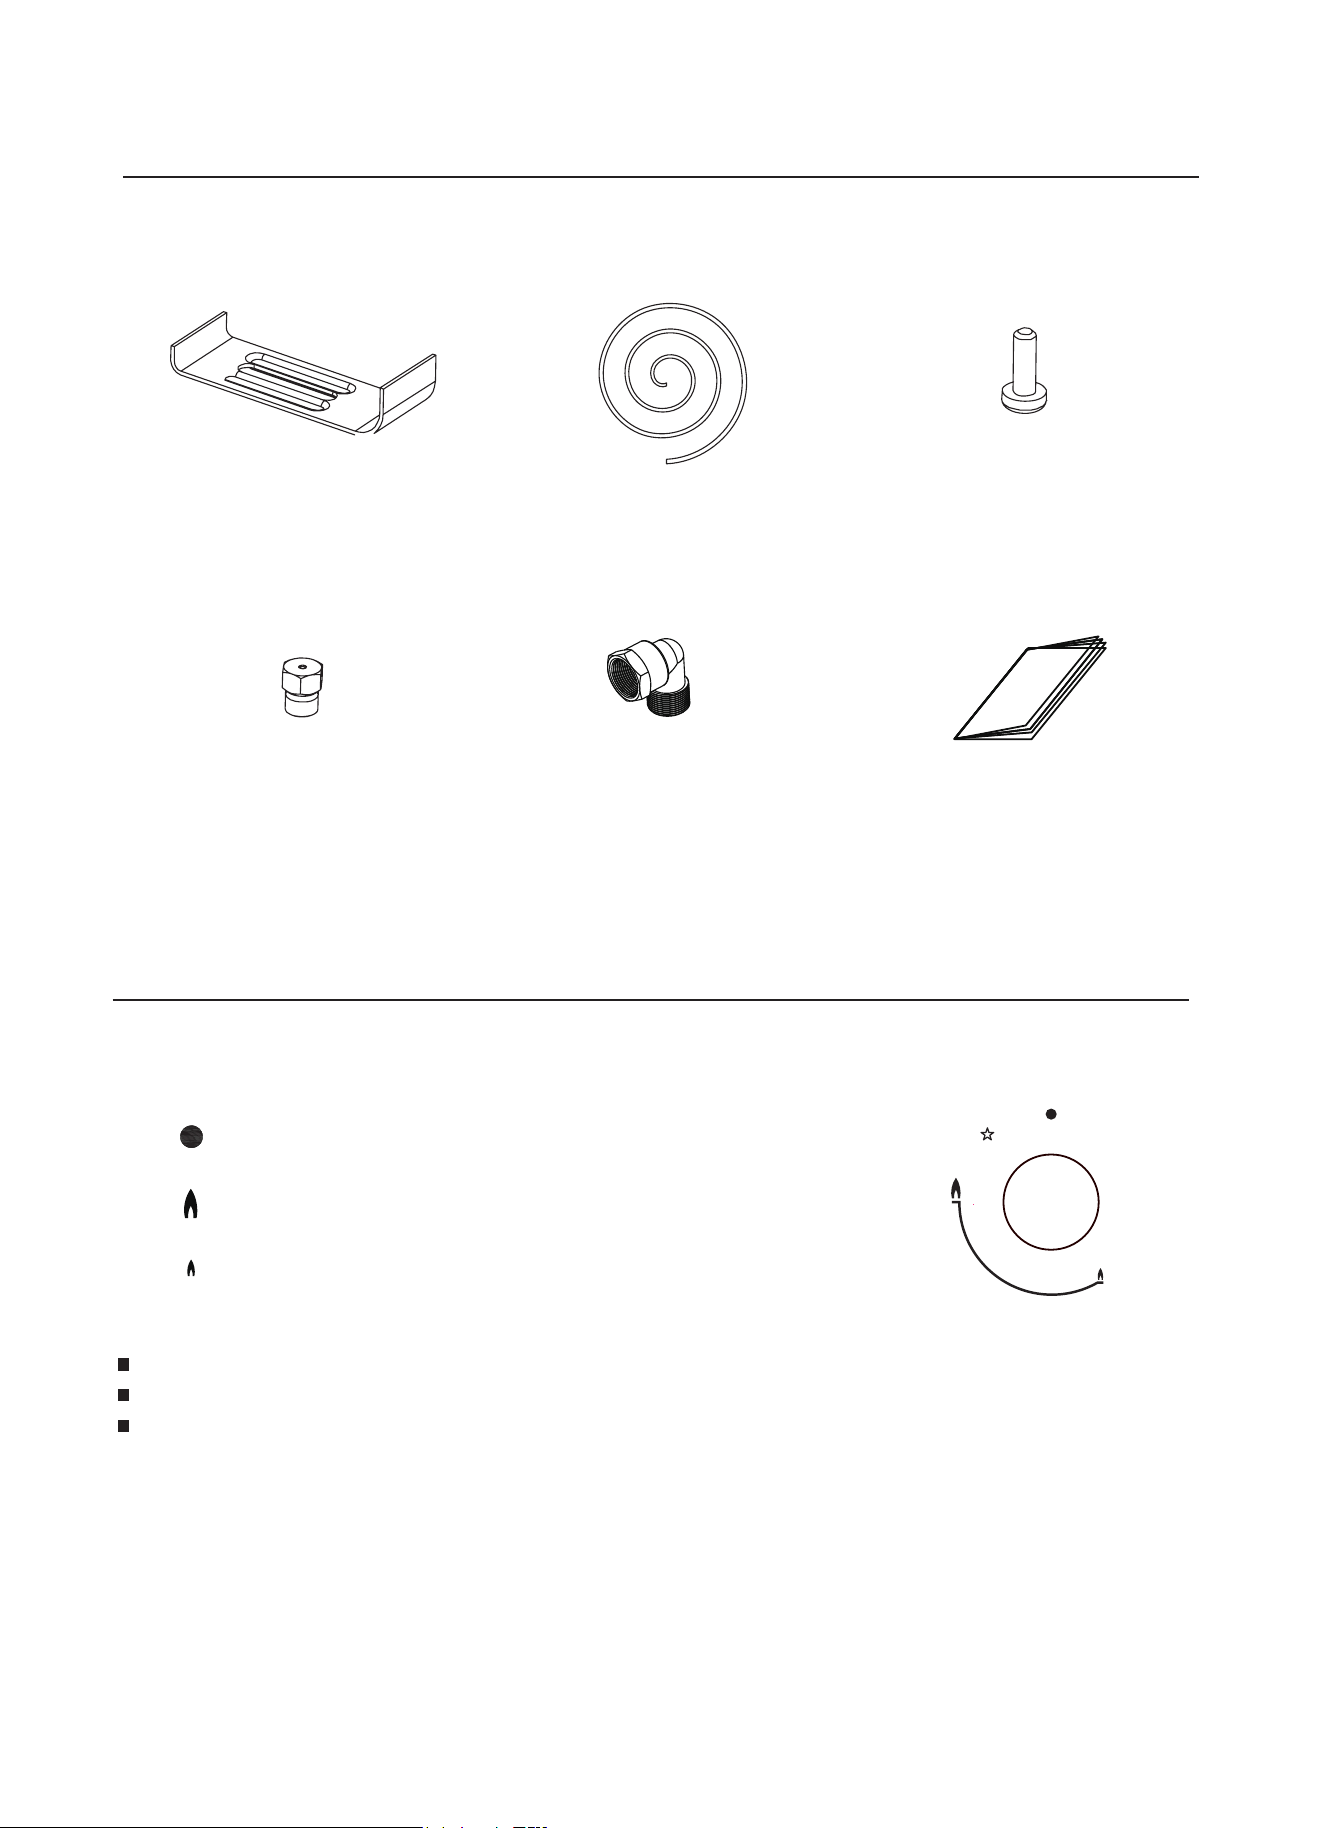
Accessorios
Descripción del aparato
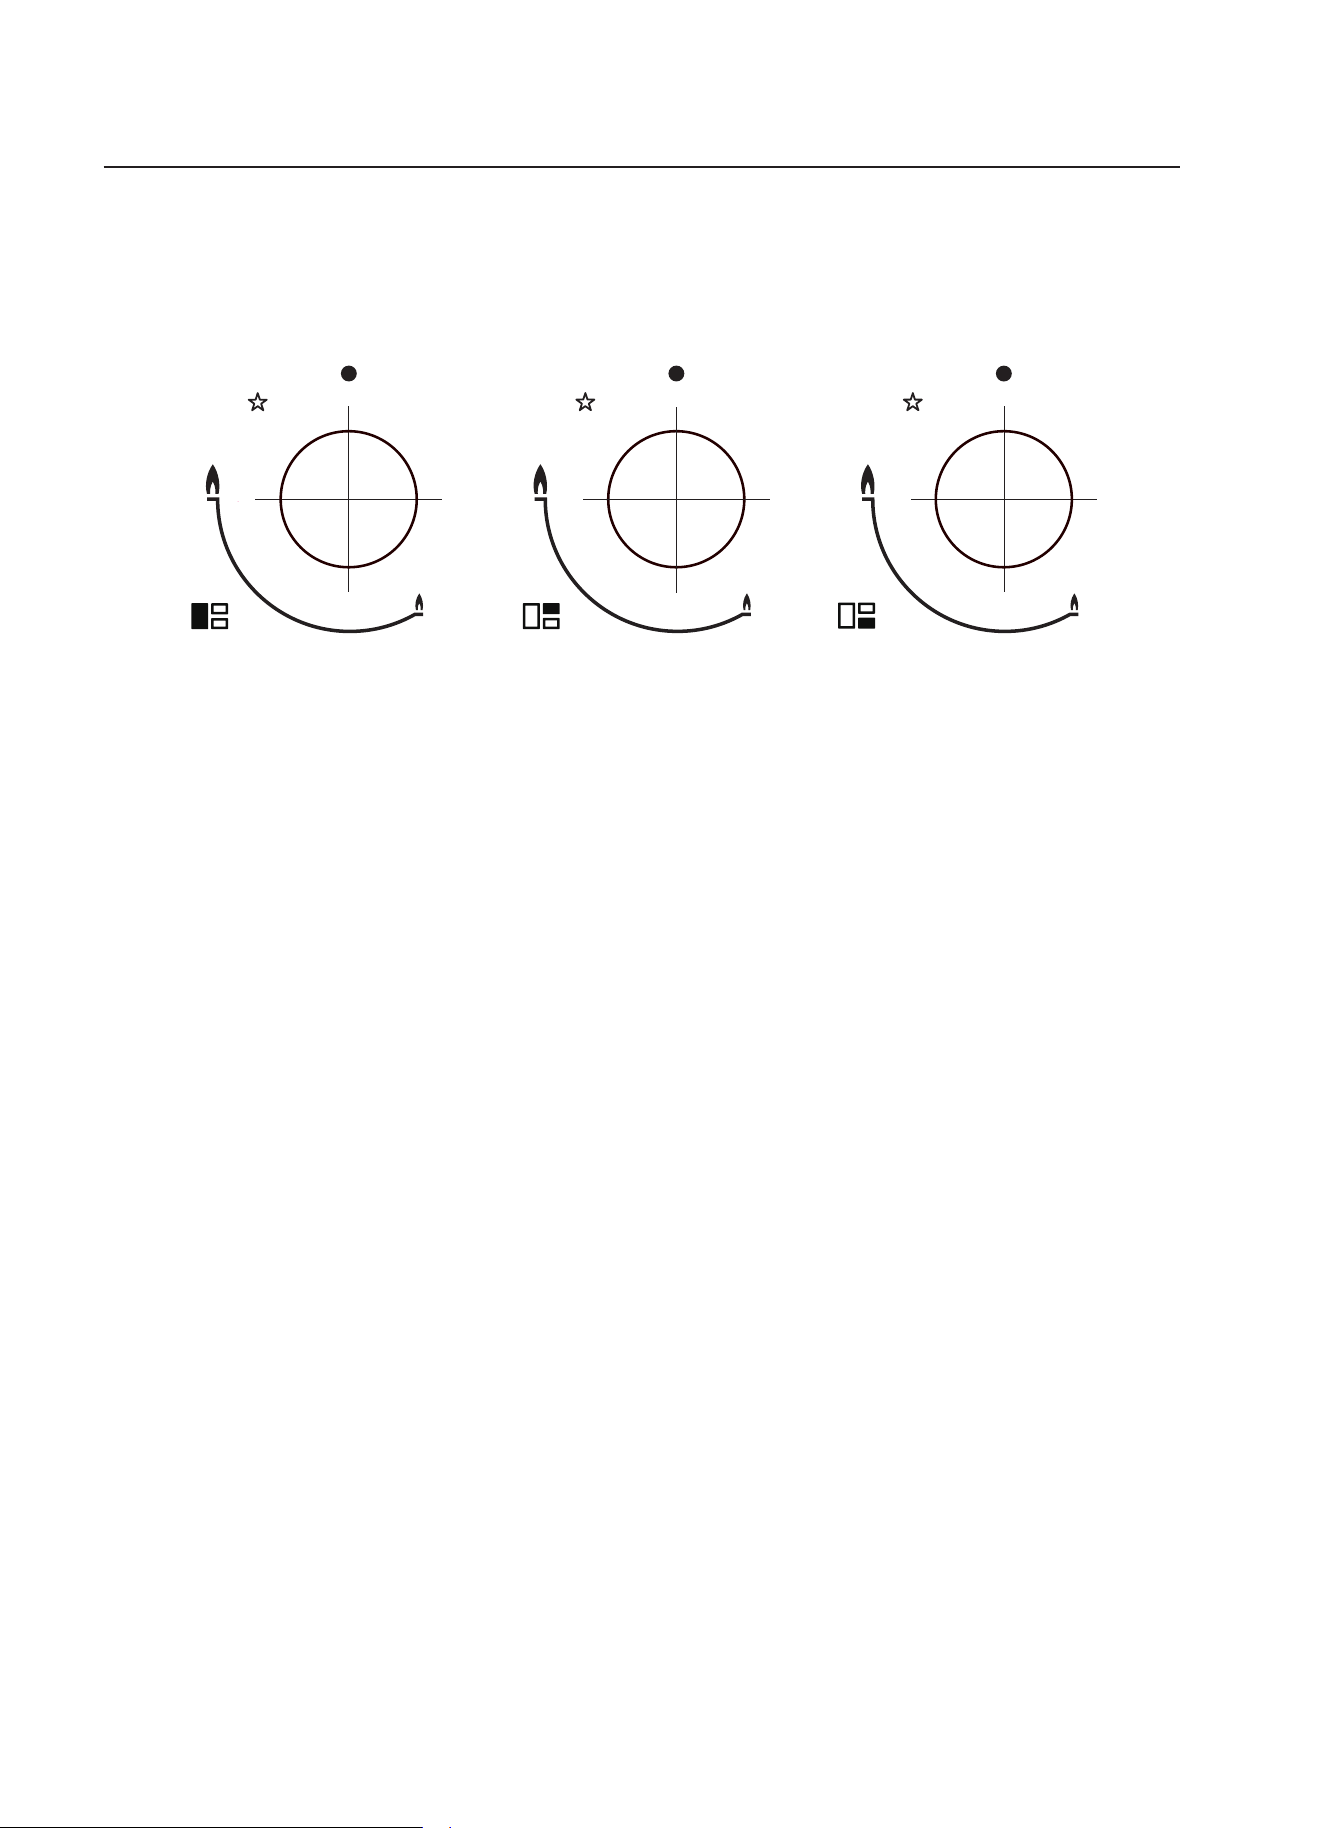
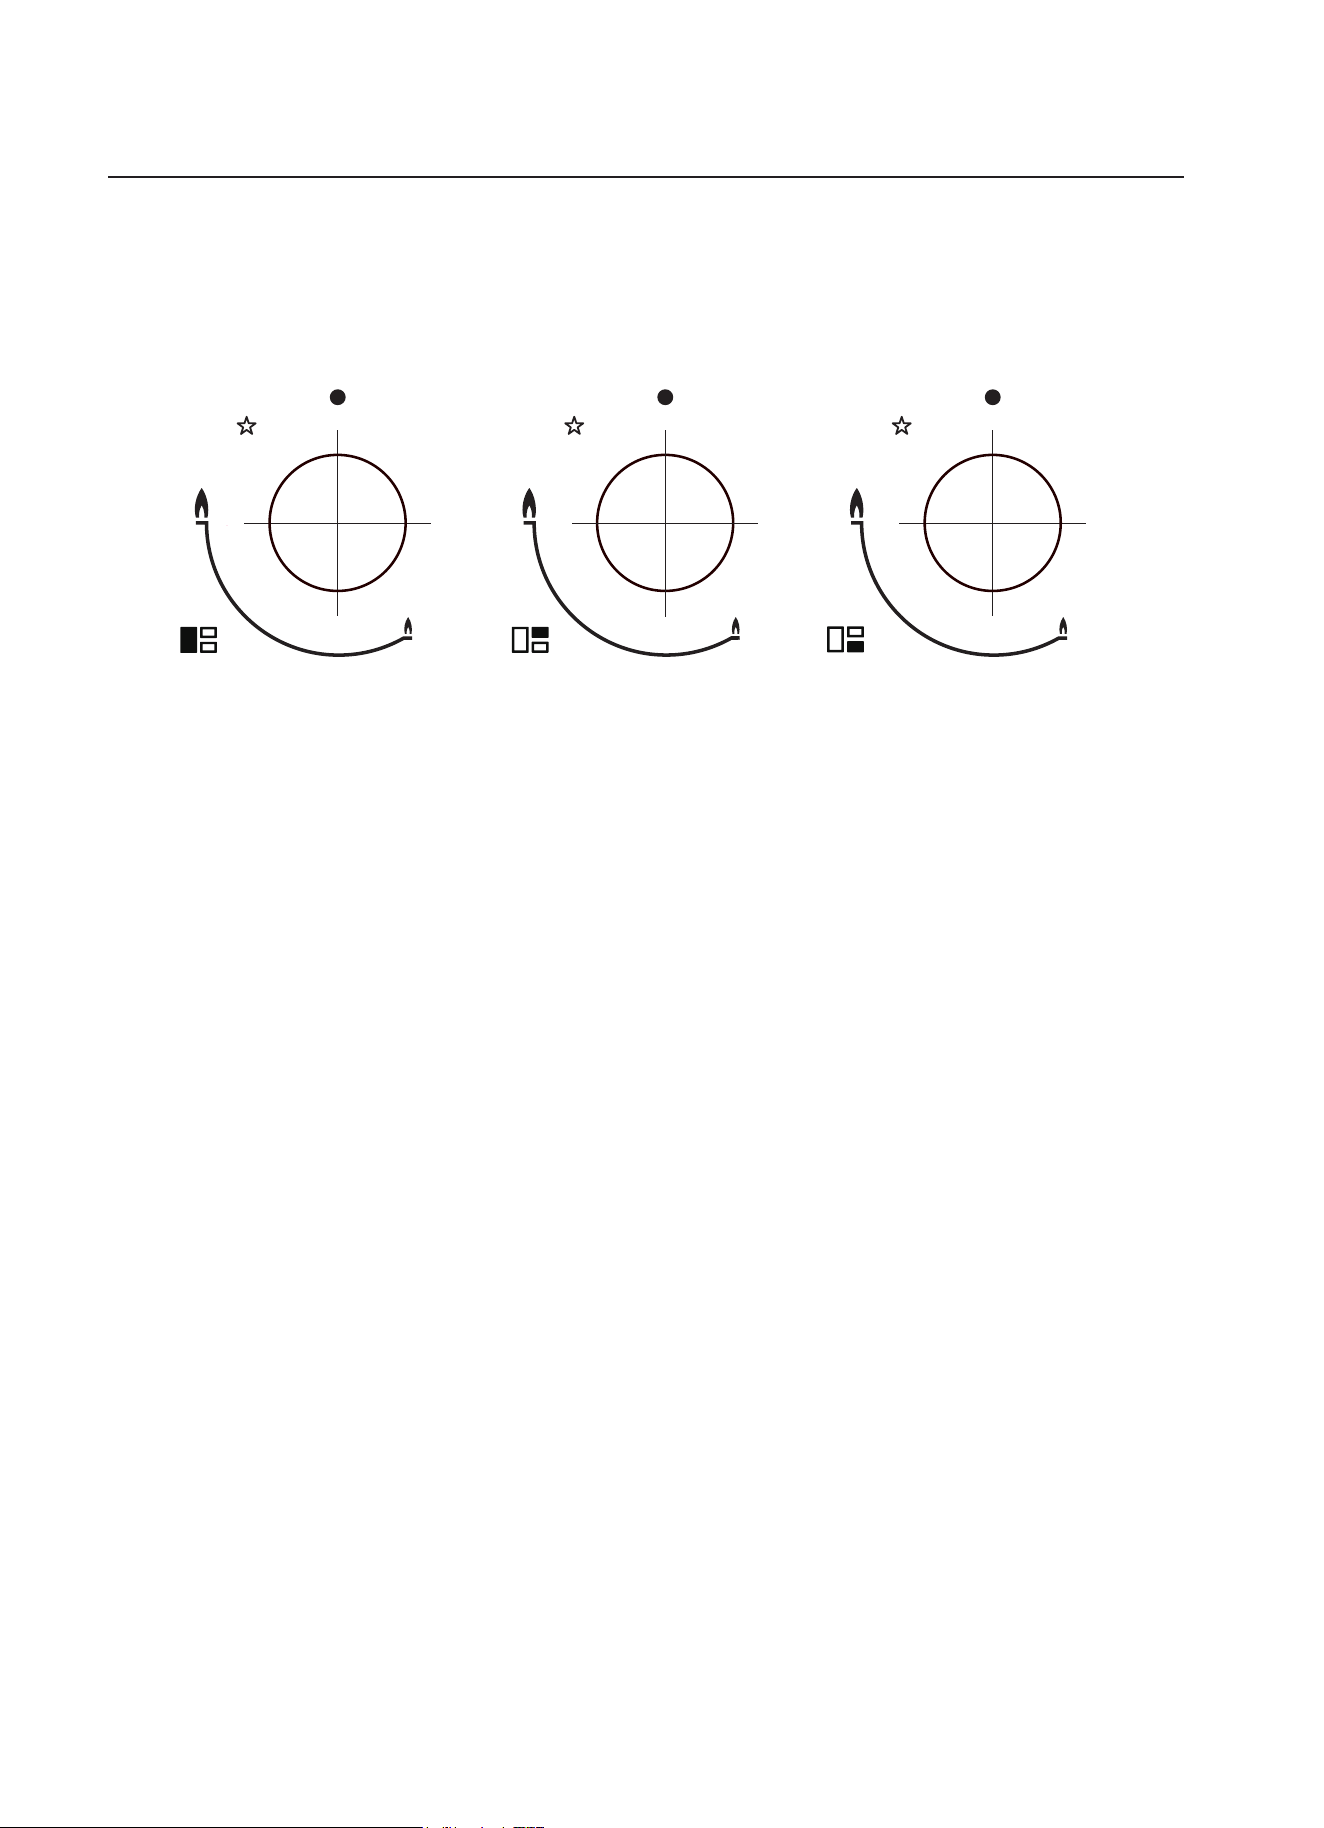
Los siguientes símbolos aparecerán en el panel de control, cerca de cada mando de control
Circulo negro: gas apagado
Llama larga: máximo ajuste
Llama pequeña: mínimo ajuste
•El ajuste mínimo es el que se encuentra al final al contrario de las agujas del reloj.
•Todas las posiciones de operación deben ser seleccionadas entre la posición máxima y
la posición mínima.
•El símbolo en el panel de control, cerca de la ruleta de control indicará la operación del
hornillo en cuestión.
Soporte (4)
Esponja (4)
Tornillo (4)
Manual de instrucciones (1)
Curva de gas (1)
Encendido automático con dispositivo de seguridad de fallo de llama
El aparato está equipado con un dispositivo de seguridad de fallo en cada quemador, el cuál
está diseñado para detener los escapes de gas.
I nyector (3)
10
Como usar el aparato
Encendido automático con dispositivo de seguridad de fallo de llama
El aparato está equipado con un dispositivo de seguridad de fallo de cada llama en cada
quemador, el cuál está diseñado para detener los escapes de gas.
Para encender el hornillo:
•Presione la perilla de control en el hornillo que desee enchufar y gire al contrario de las
agujas del reloj para la posición máxima.
•Si tu mantienes presionada la perilla, el arranque automático para el hornillo funcionará.
•Mantenga pulsado el mando durante 15 segundos después de que la llama aparezca. Si
después de 15 segundos el quemador no se ha encendido, deje de hacer funcionar el
dispositivo, abra la puerta y/o espere al menos 1 minuto antes de volver a intentar otro
encendido
•Después de este intervalo de 15 segundos, para regular la llama, debería de seguir girando
el mando en contra de las agujas del reloj hasta que la llama tenga un nivel considerable.
La posición de funcionamiento debería estar entre la posición máxima y mínima.
•Para apagar el hornillo, gire el mando de control completamente para apagar la posición de
gas.
•En caso de fallo de arranque, los hornillos pueden ser enchufados adecuadamente usando
una cerilla.
11
S
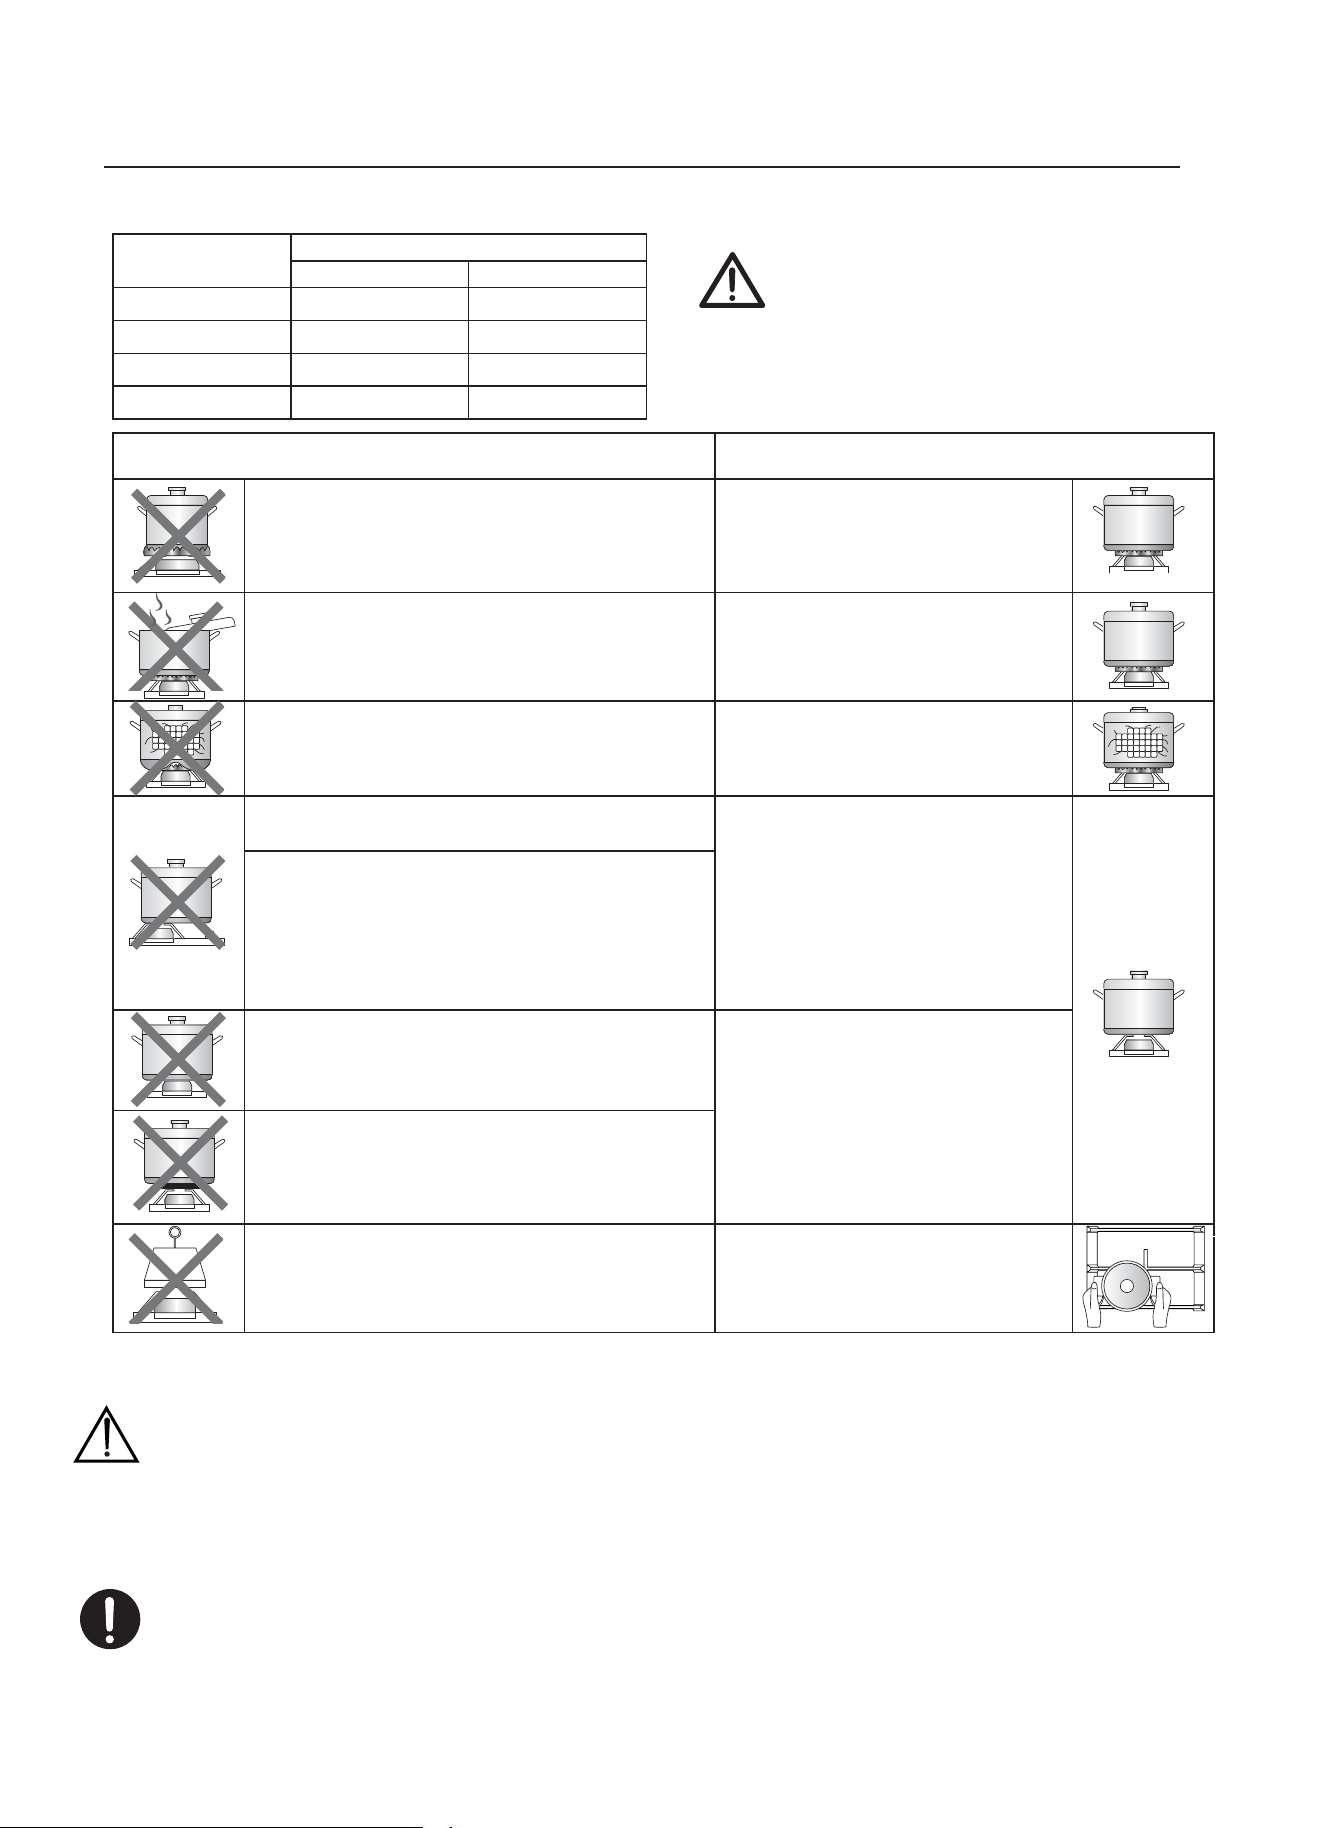
eguridad y consejos para ahorrar energía
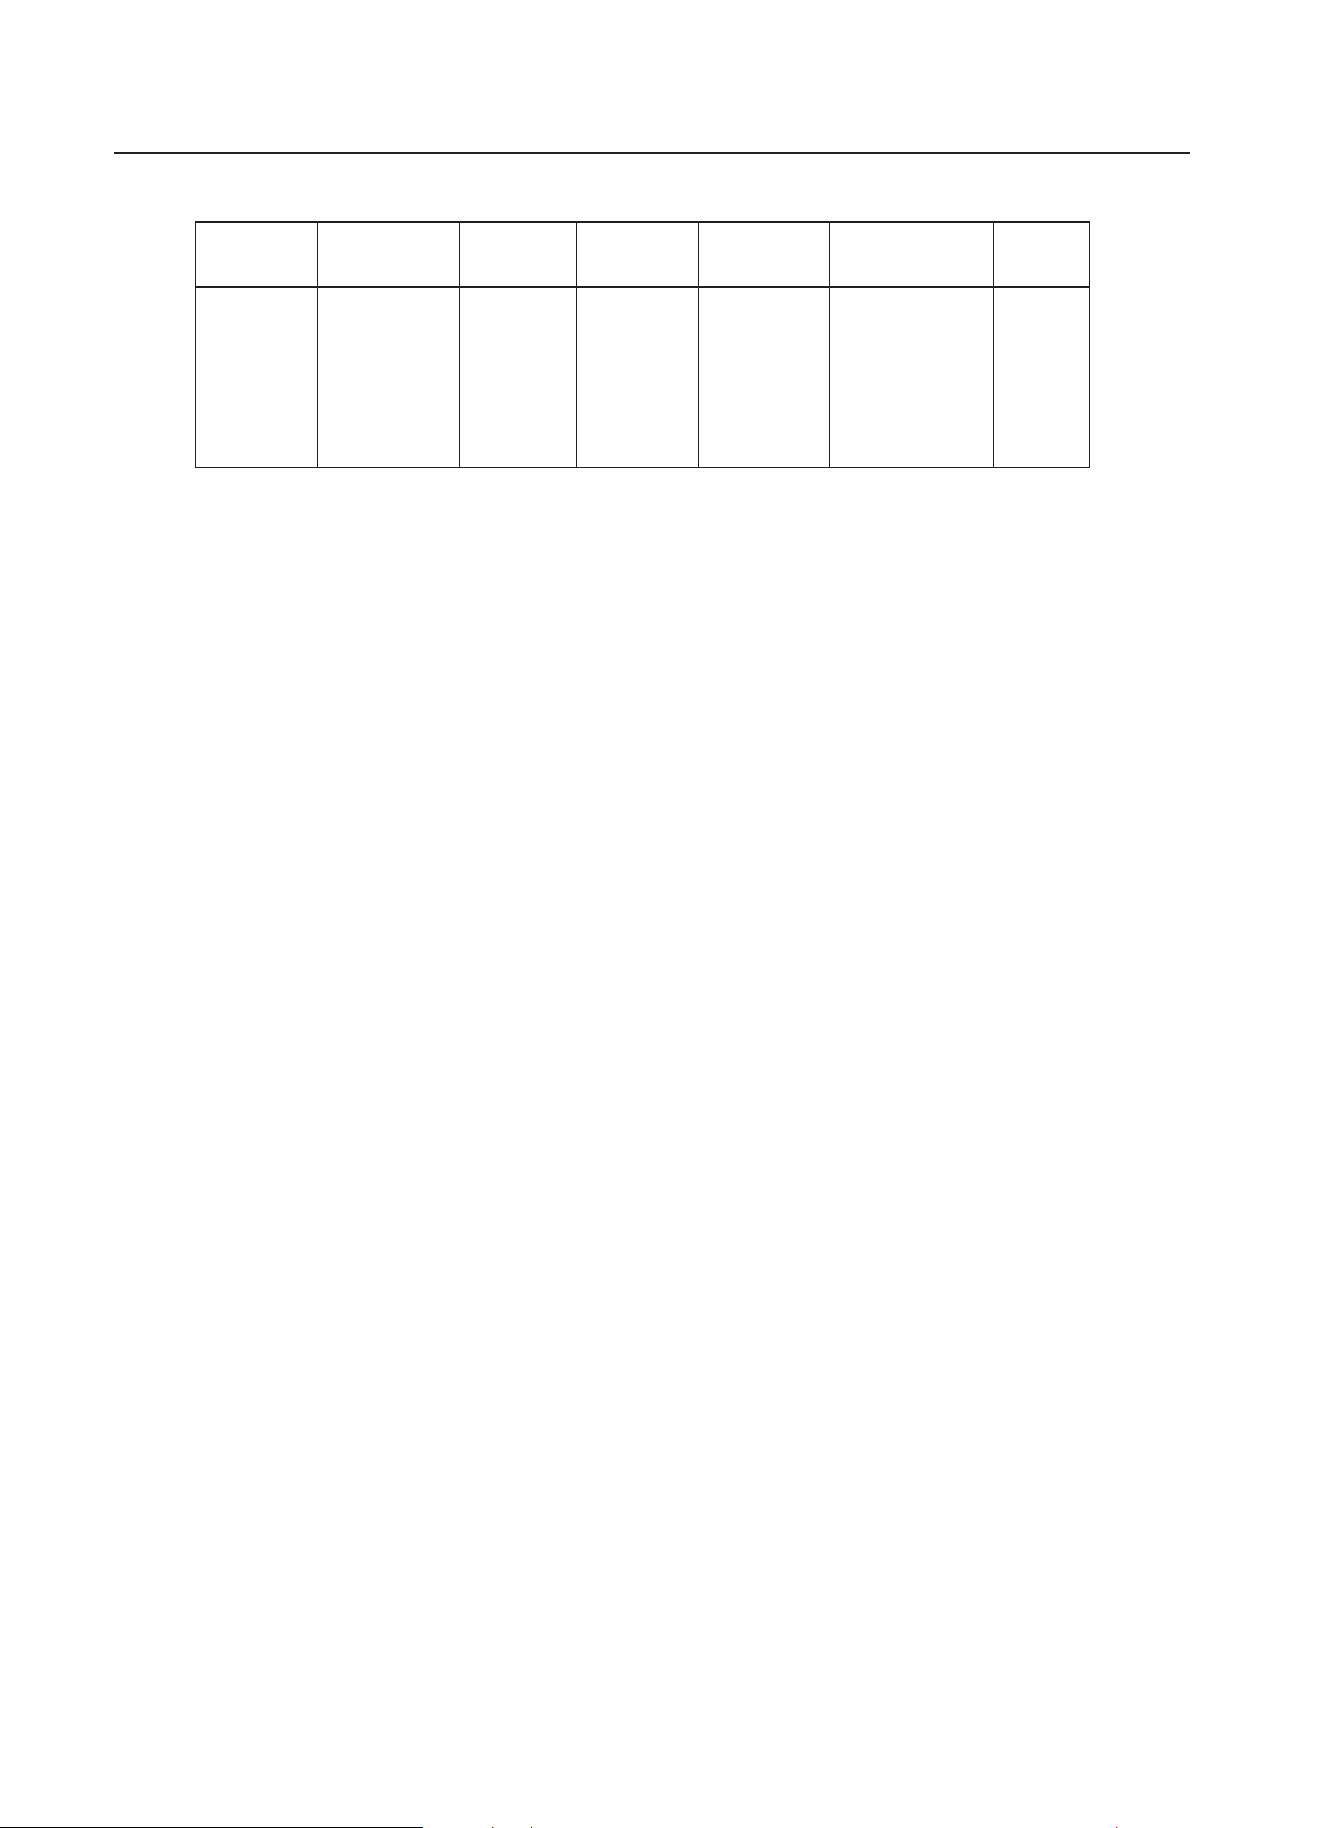
- El diámetro de la parte trasera de la cacerola debería corresponder con la tabla siguiente para el buen
funcionamiento del hornillo.
QUEMADORES
CACEROLAS
PD[PLQ
7ULSOH&orona
2 0mm200mm
Rapido
240mm200mm
Semi Rapido
160mm
PP
$X[LOLDU
NO
SI
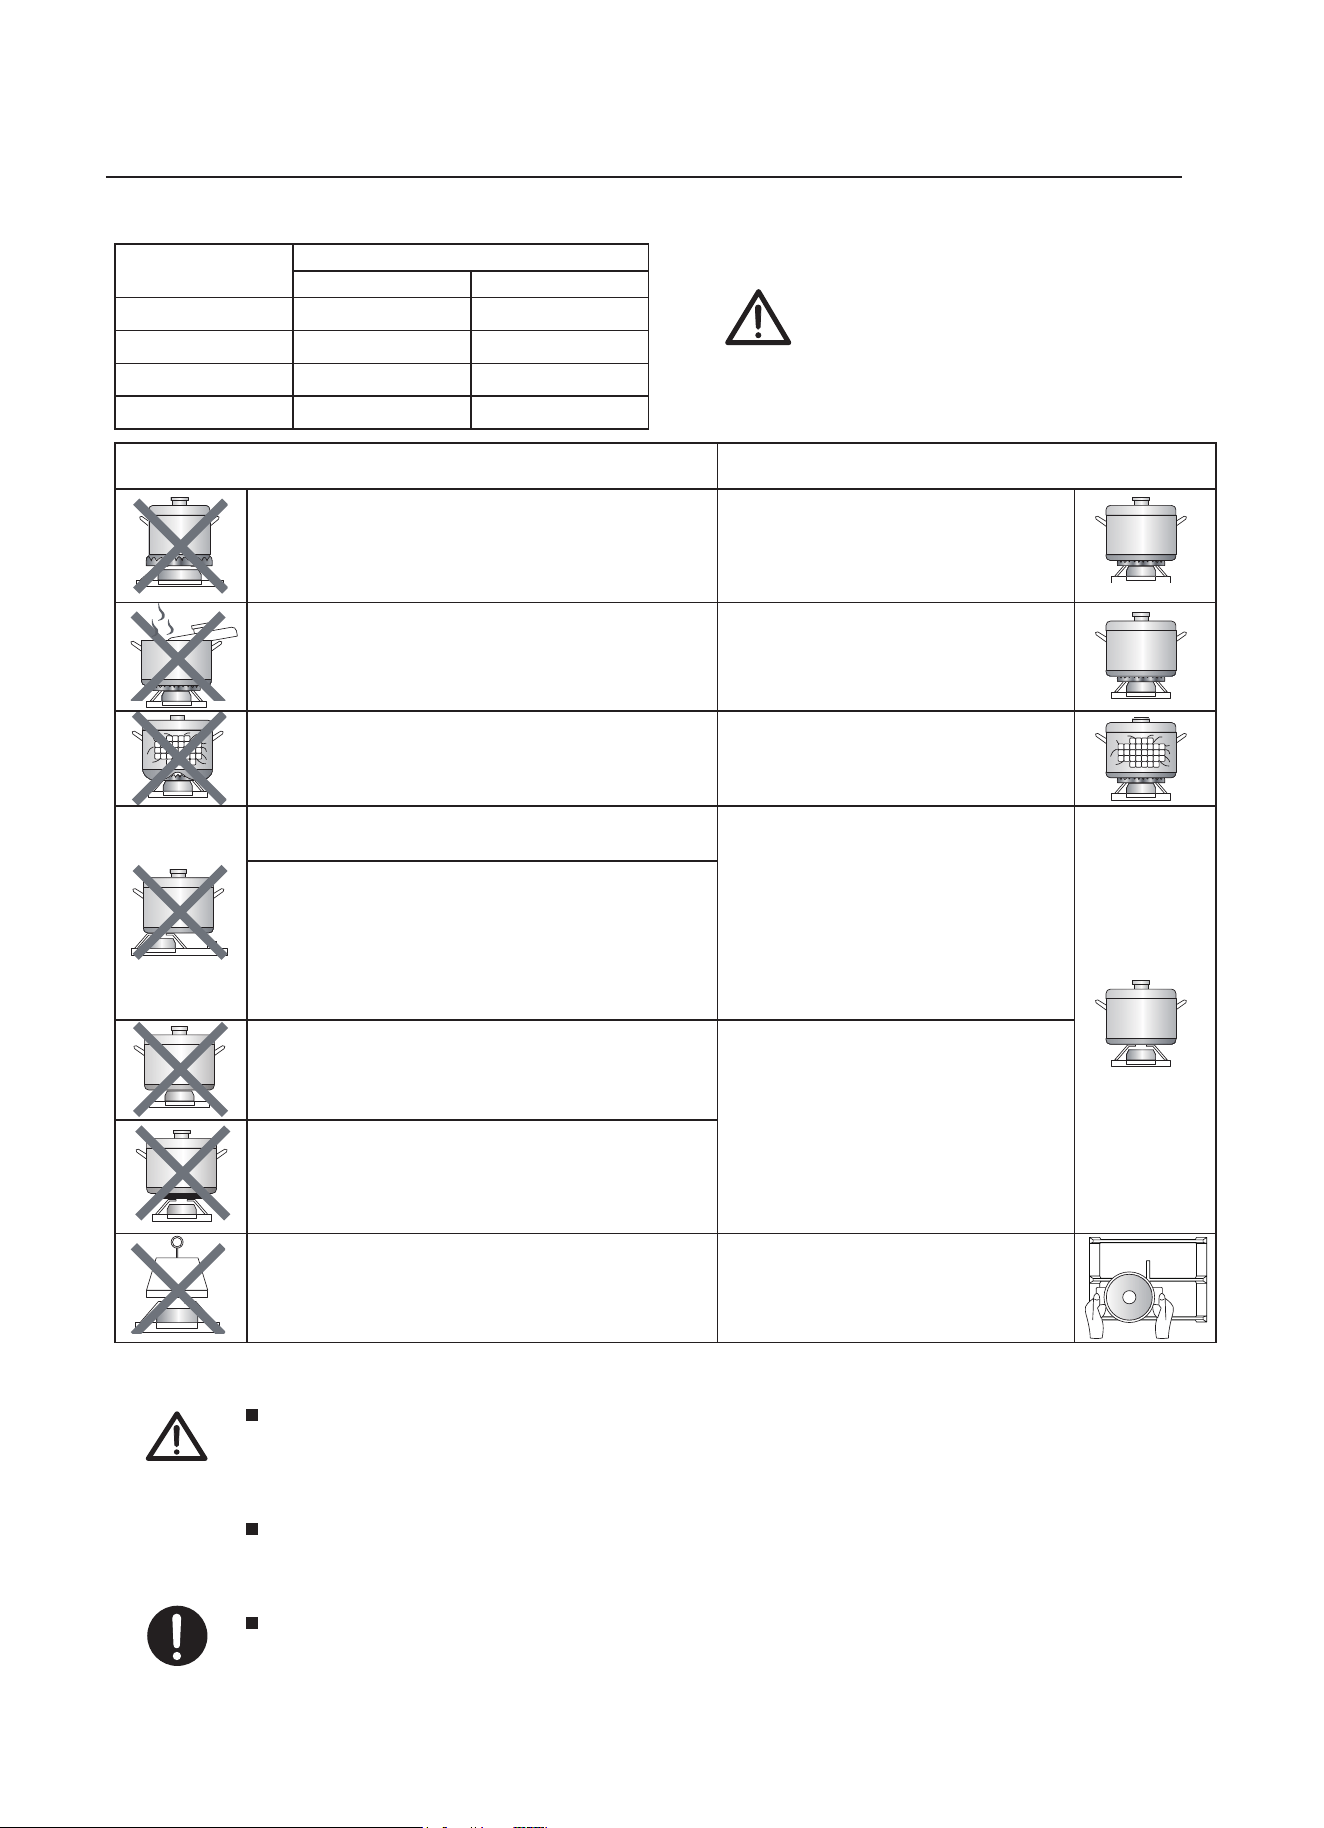
No use utensilios de cocina con
diámetro pequeño en hornillos grandes.
Las llamas nunca deberían pasar los
lados del utensilio en cuestión.
Evite cocinar sin una tapa o con la tapa
colocada a la mitad.
No use una cacerola con la parte
trasera convexa o concava.
Utilice solamente cacerolas,
sartenes con la parte trasera
gruesa.
No coloque los utensilios de cocina
desplazados del centro del hornillo.
Siempre coloque los
utensilios en el centro del
hornillo, nunca en el lado.
No utilice utensilios de cocina grandes en
los hornillos cerca de los controles, los
cuales cuando coloca en la mitad del
hornillo puede rozar los controles o
cerrarlos y con ello incrementar la
te
mperatura y puede causar daños.
Nunca coloque los utensilios
directamente en la parte superior del
quemador.
Coloque los utensilios de
cocina en la parte superior
del trípode.
No coloque ningun elemento entre los
soportes de las sártenes porque puede
provocar serios daños en el producto.
Sostenga el mango de la
olla con cuidado cuando
ésta esté en el hornillo.
Use siempre utensilios que
sean adecuados para cada
hornillo, para evitar fugas de
gas.
Coloque una tapa en el
utensilio
No utilice utensilios que pesen
demasiado para evitar daños en la
superficie de cocción.
ŶTan pronto como el líquido empieze a hervir, baje la llama para
mantener el líquido a fuego lento.
120mm
160mm
180
4
•No utilice utensilios de cocina que
sobrepasen los bordes del hornillo.
No es recomendable usar sarténes para asar, sartenes o parrillas de piedra calientes
simultáneamente en varios hornillos porque el calor resultante puede causar daños
en
el aparato.
No toque el plato superior y el trípode mientras esté en uso.
12
Mantenimiento y limpieza
■ Quite el soporte de la sartén.
■ Limpielo con un paño húmedo.
■ Sequelo todo con un paño seco y suave.
Soporte para sartenesmandos de control
Placa superior
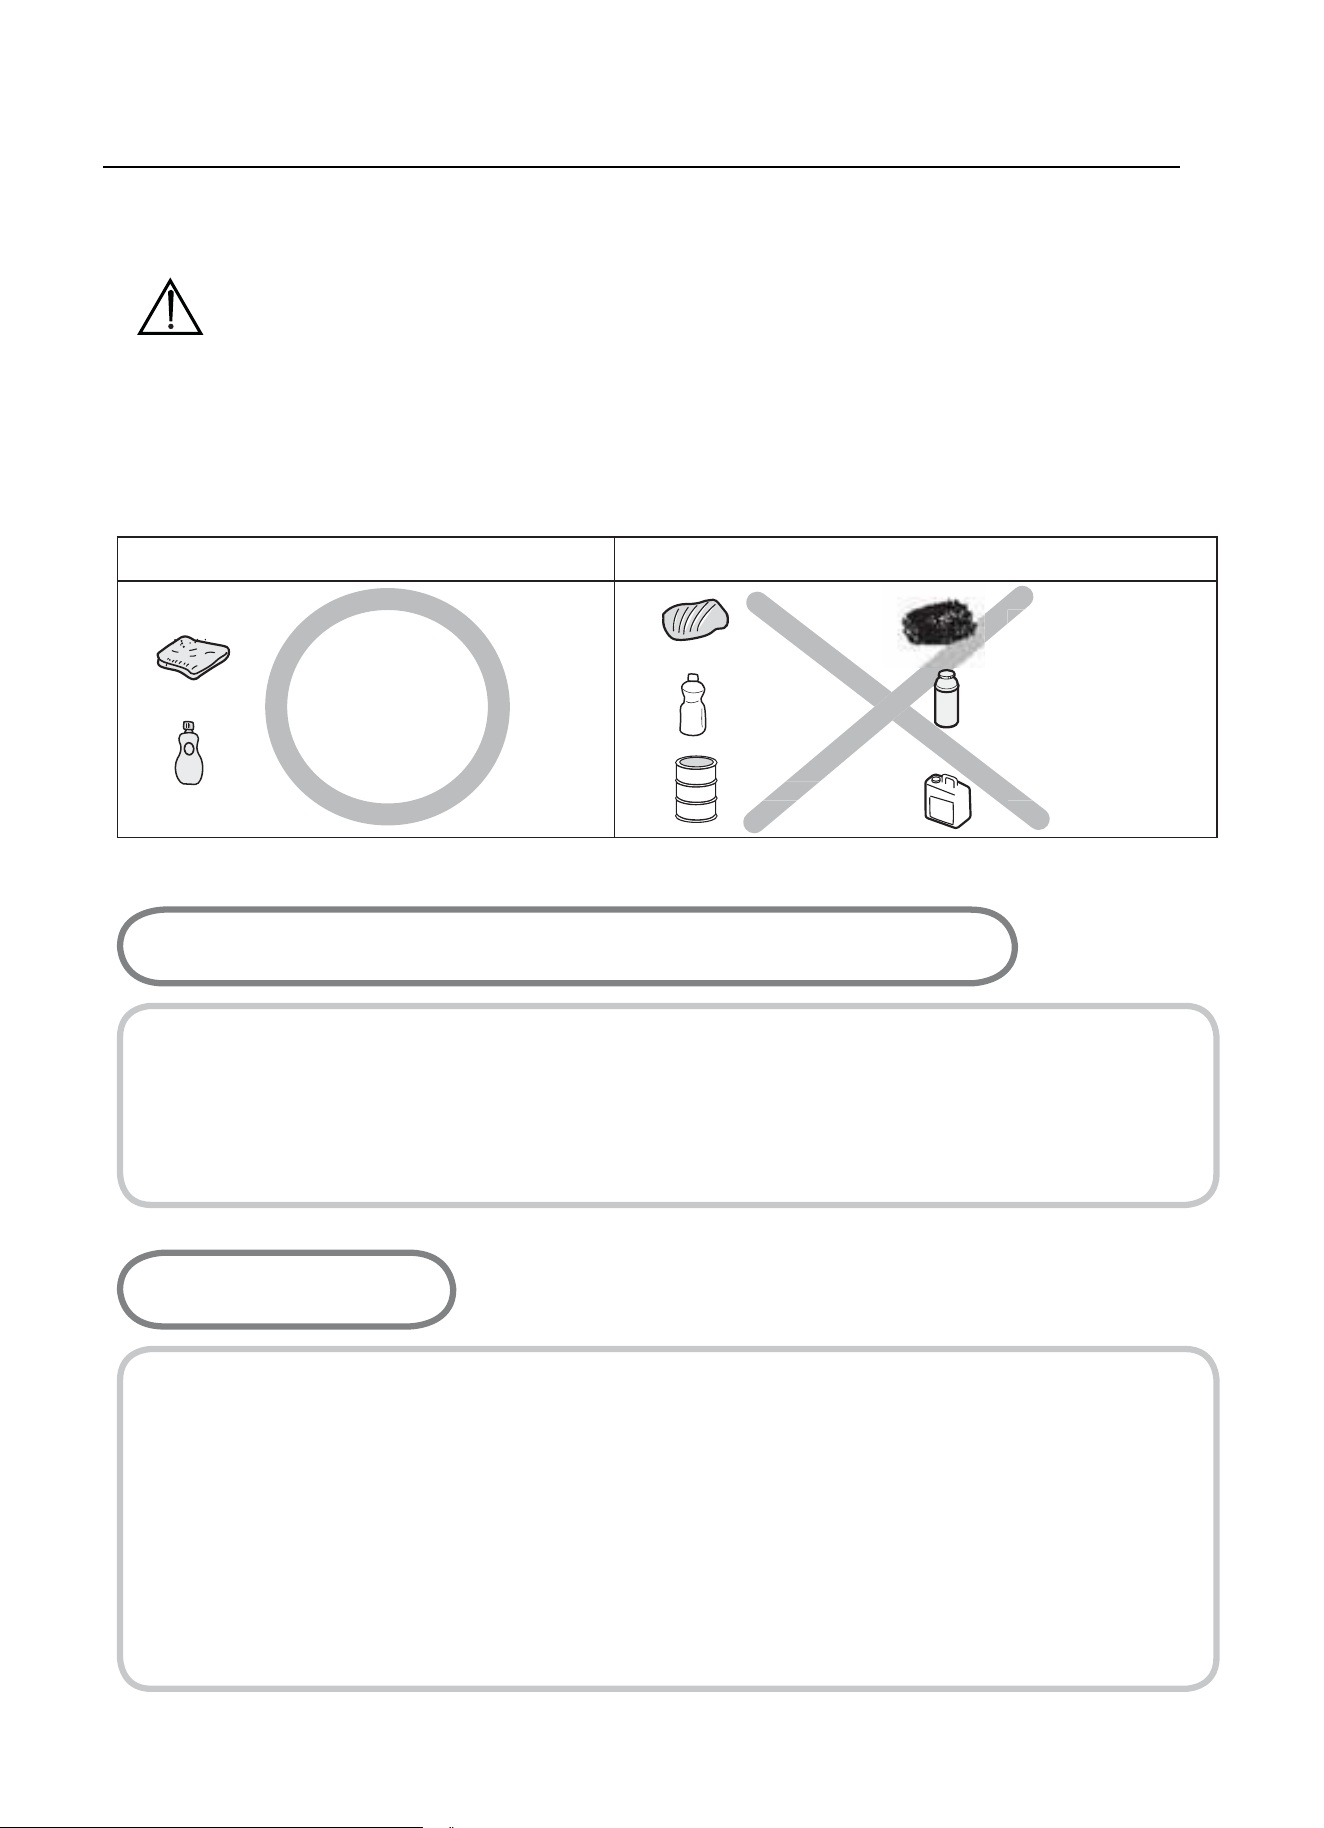
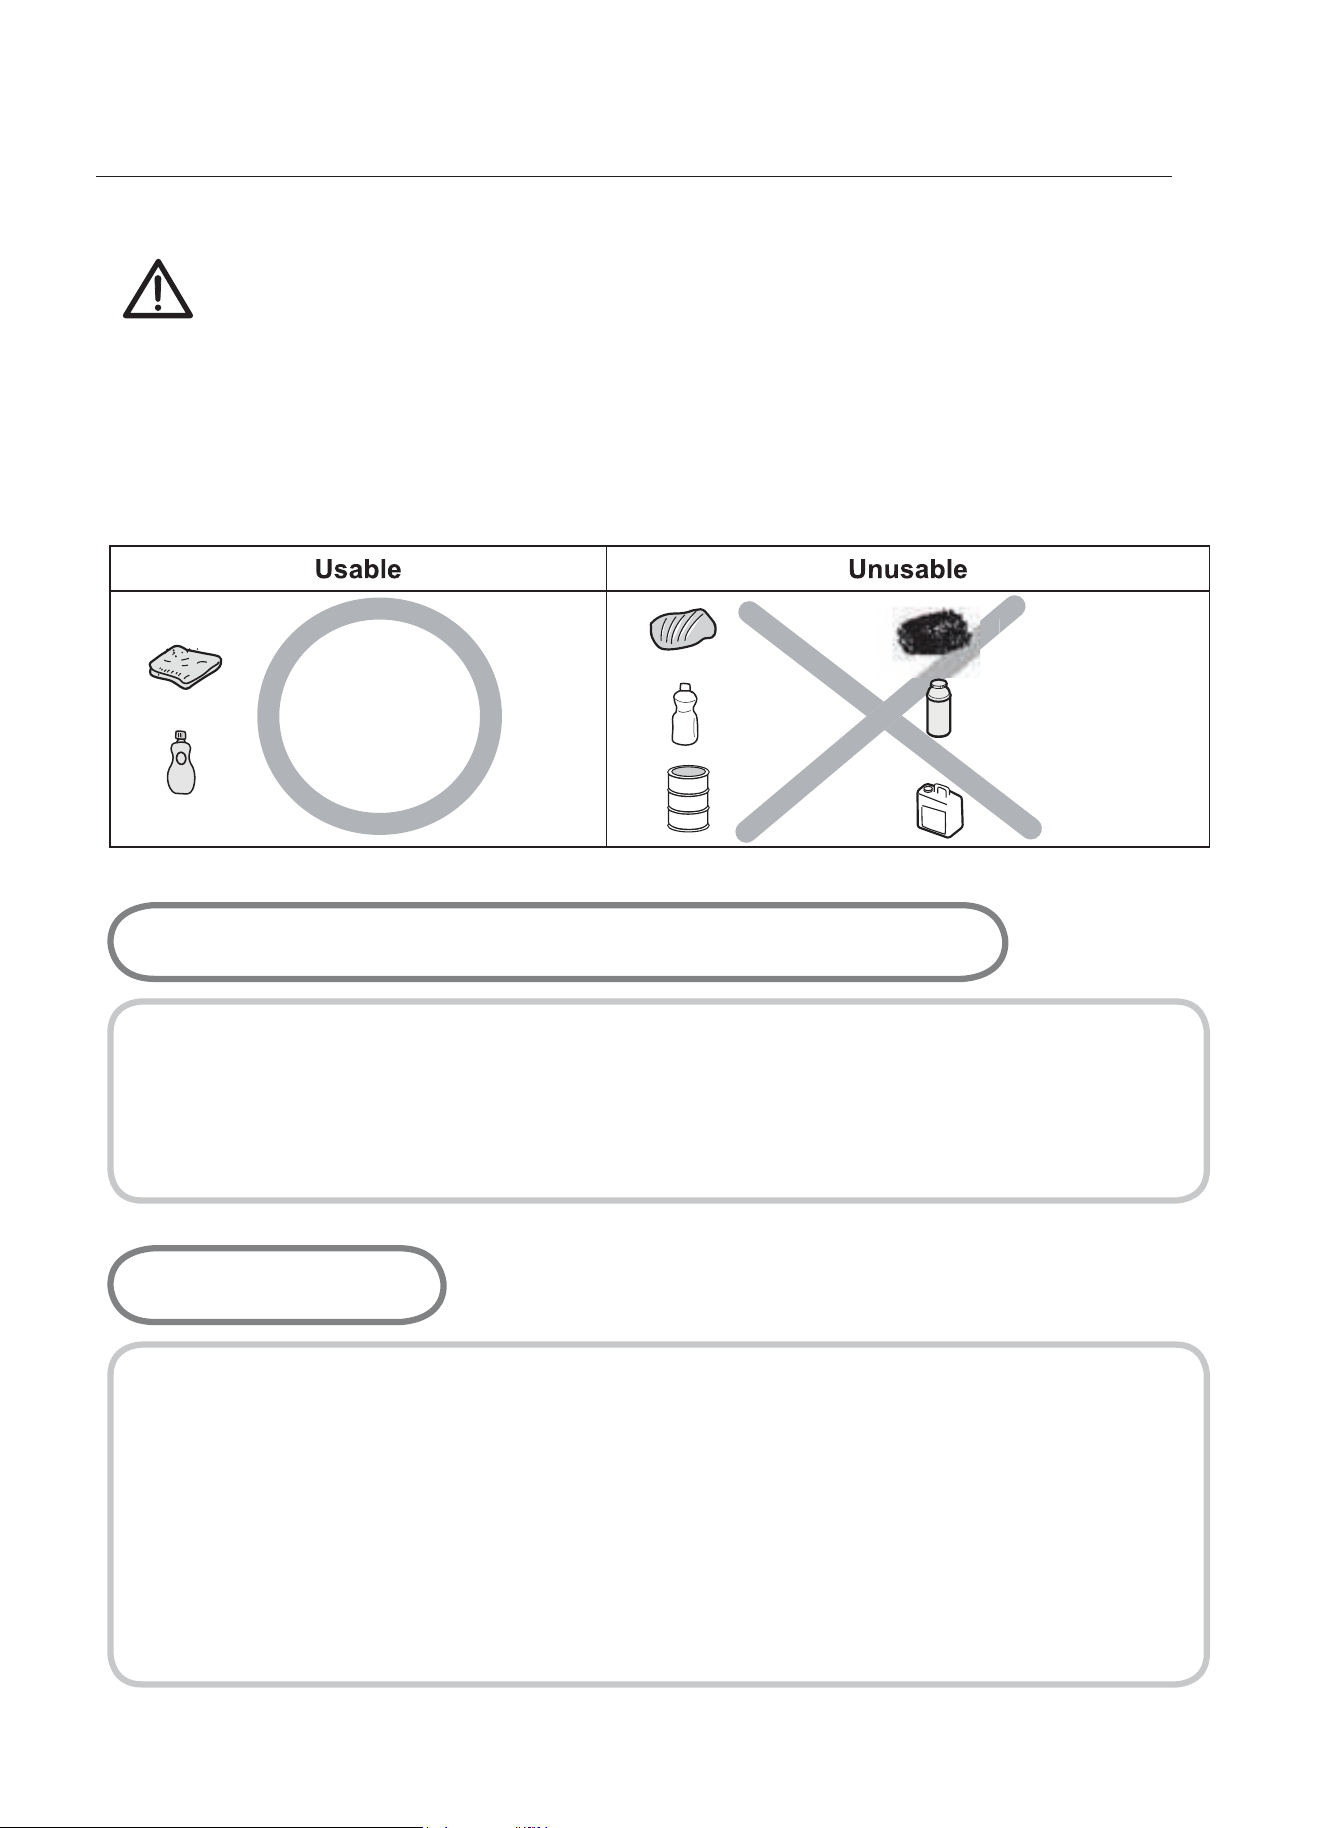
8TILIZABLE
NO UTILIZABLE
Aceite
comestible
Cepillo de metal
Detergente ácido
Disolvente
$EUDVLYos
Ropa suave
Detergente neutro
Cepillo de
Nylon
•Limpie la placa superior usando un paño suave bien escurrido.
•Seque la placa superior completamente después de la limpieza.
•Quite la comida salada o los líquidos de los hornillos tan pronto como sea posible
para evitar el riesgo de corrosión.
•Las partes de acero inoxidable de el aparato pueden descolorarse. Esto es
normal por las altas temperaturas. Cada vez que el aparato esté en uso estas
partes deberían ser limpiadas con un producto adecuado para el acero
inoxidable.
ŶLa limpieza solo se puede llevar a cabo cuando el aparato esté
completamente frío.
ŶEl aparato debe ser desconectado de la corriente, antes de comenzar
la limpieza.
ŶLimpie el aparato regularmente, preferiblemente después de cada uso.
ŶLos limpiadores abrasivos o los objetos afilados causarán daños en la
superficie del aparato. Usted debería limpiar usando agua y y un poco de
líquido.
13

Mantenimiento y limpieza
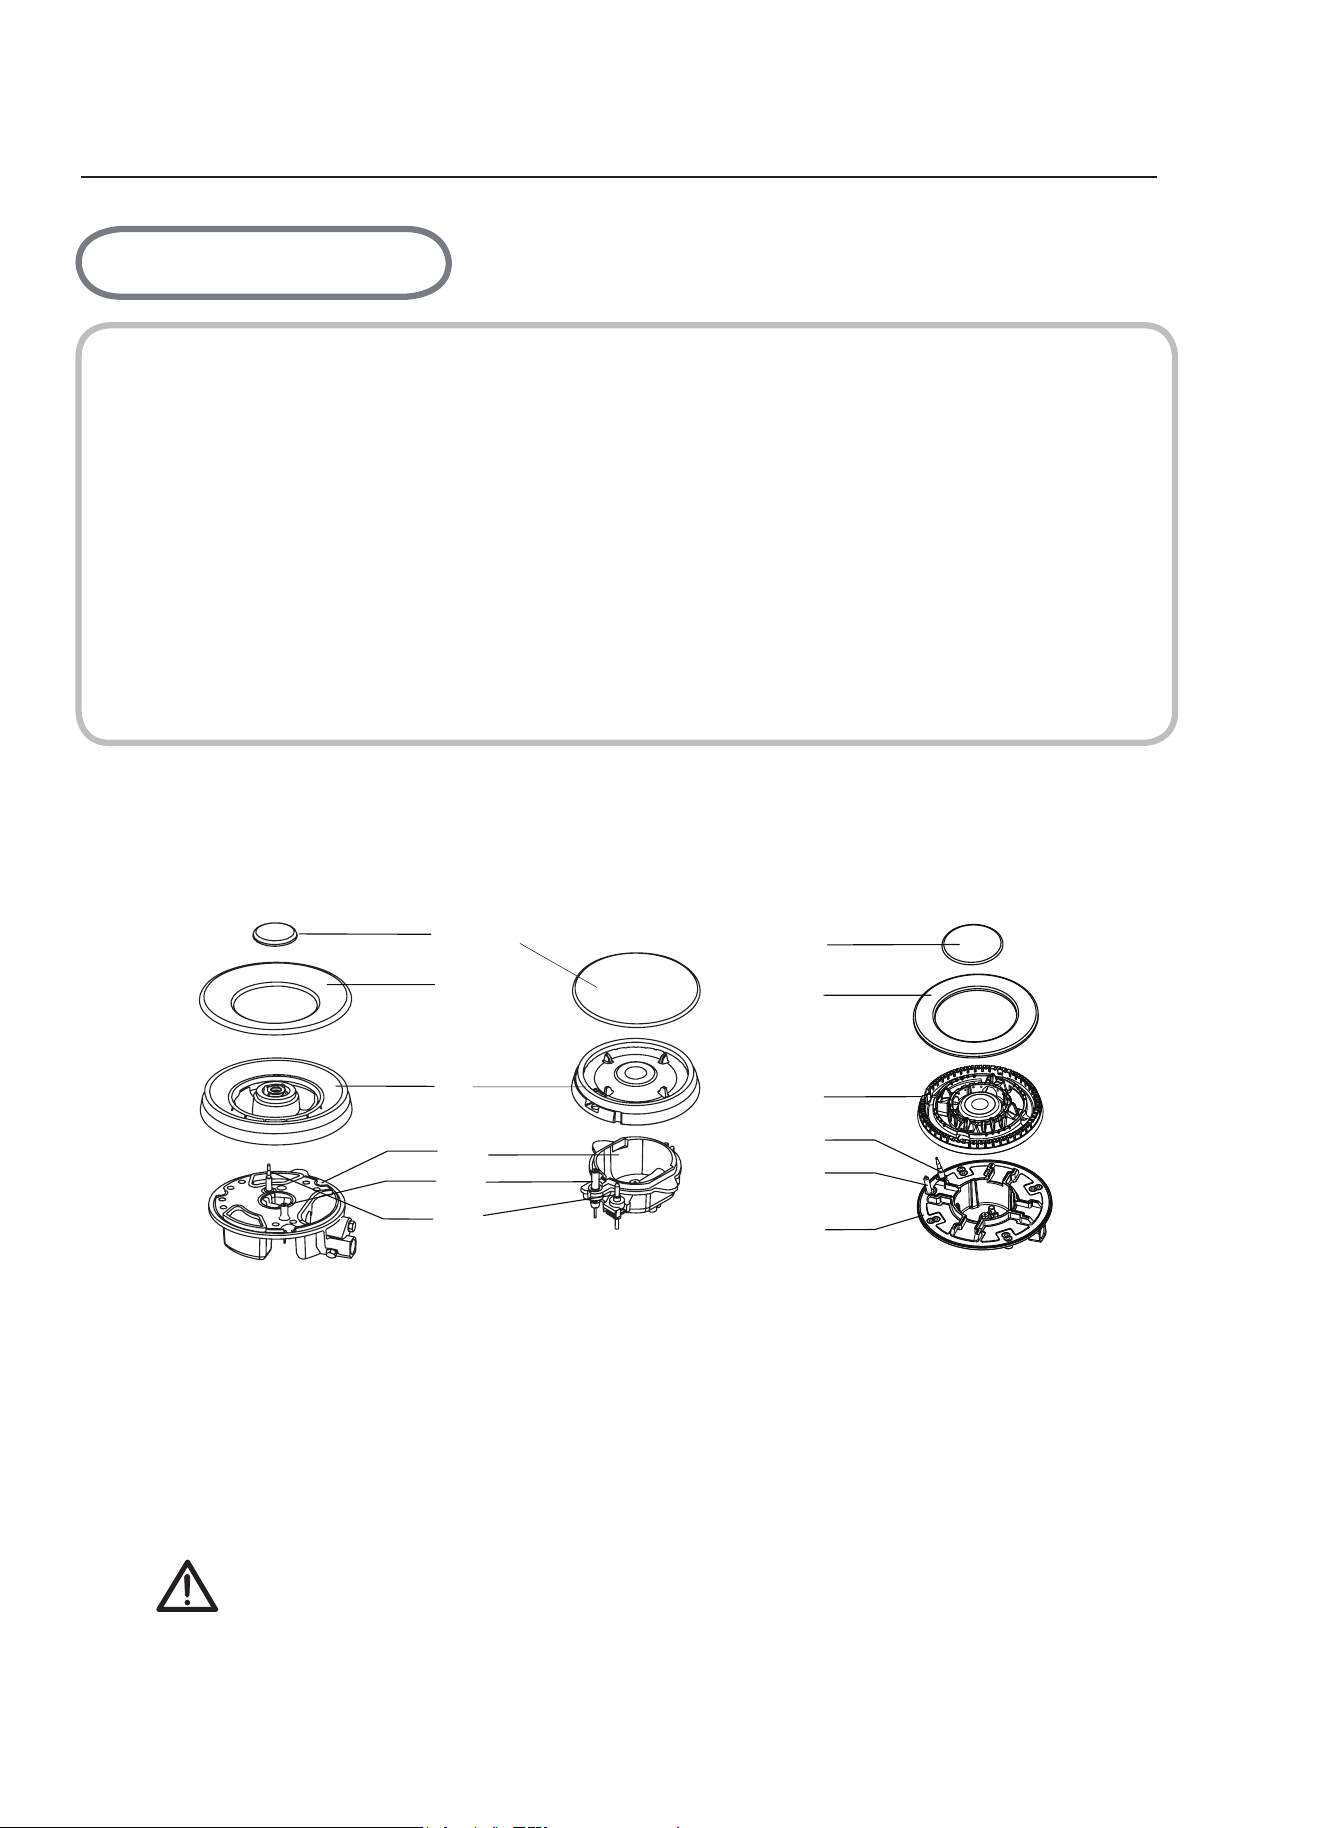
Coloque las partes en el orden correcto después de limpiarlo
No mueva ni la tapa ni la parte trasera.
Los fogones deben de encajar exactamente en el hueco.
HORNILLOS
•Las tapas y los cálices de los quemadores pueden retirarse para su limpieza.
•Lave las tapas y los cálices de los quemadores con agua caliente jabonosa y retire las
marcas con una pasta limpiadora suave.
•En caso de que cueste eliminar las marcas, puede utilizar, llevando cuidado, un
estropajo de níquel bien impregnado en jabón.
•Tras la limpieza, asegúrese de secar con un paño suave.
Reensamble el hornillo auxiliar, semi-rápido, rapido y el hornillo triple corona como sigue:
1.Coloque el esparcidor de llama (4) en el quemador de cubeta (5), para que el equipo de arranque y el
equipo de supervisión de llama se expandan hacia sus respectivos agujeros. El esparcidor de llama
debería hacer el click correctamente.
2.Posicione la tapa del quemador (1,2,3) sobre el esparcidor de llama (4), para que
encajen en sus
respectivos huecos.
2
1
2
3
3
4
4
5
7
6
6
7
5
14
Advertencias
Instruc
c
iones de uso
No altere este aparato.
Este aparato debería ser instalado por personal autorizado o un instalador.
Antes de comenzar la instalación, asegúrese que las condiciones de distribución locales ( gas
natural y presión de gas) y el ajuste de el aparato son compatibles.
Las condiciones de ajuste para este aparato están colocadas en la etiqueta del producto.
Este aparato no se debe conectar a un equipo de evacuación de productos de combustión. Este
debería ser conectado de acuerdo con las regulaciones de la instalación de corriente.
Antes de la instalación, apague el gas y la corriente eléctrica para el aparato.
Todos los aparatos que contengan cualquier componente eléctrico deben tener toma a tierra.
Asegúrese que el gas y el cable de electricidad son instalados, de manera que ellos no toquen
ninguna parte del aparato, la cuál pueda calentarse.
La tubería de gas no debería ser doblada o bloqueada por ningún objeto.
Compruebe las dimensiones del aparato al igual que las dimensiones del hueco a cortar en la
unidad de cocina.
Los paneles sobre la superficie de trabajo, directamente cerca del aparato deberían ser
fabricadas de material no inflamable. Ambos la superficie estratificada y el pegamento deberían
ser resistentes, para prevenir el deterioro.
Enchufe el aparato y la llama.
Compruebe una llama limpia azul sin puntas amarillas
- La tapa del quemador esta colocada correctamente.
- El esparcidor de llama está colocado correctamente.
- La llama vertical está alineada verticalmente con el manguito de unión.
Una prueba de funcionamiento completa debe ser realizada para una instalación más adecuada.
La manguera flexible debería ser instalada para que no entre en contacto con partes movibles de
la unidad de alojamiento y no pase hacia cualquier espacio en el que se pueda ver afectada.
15
P
osición
- El horno deberá tener ventilación forzada para instalar una placa sobre el mismo.
- Compruebe las dimensiones del horno en el manual de instalación.
45 mm
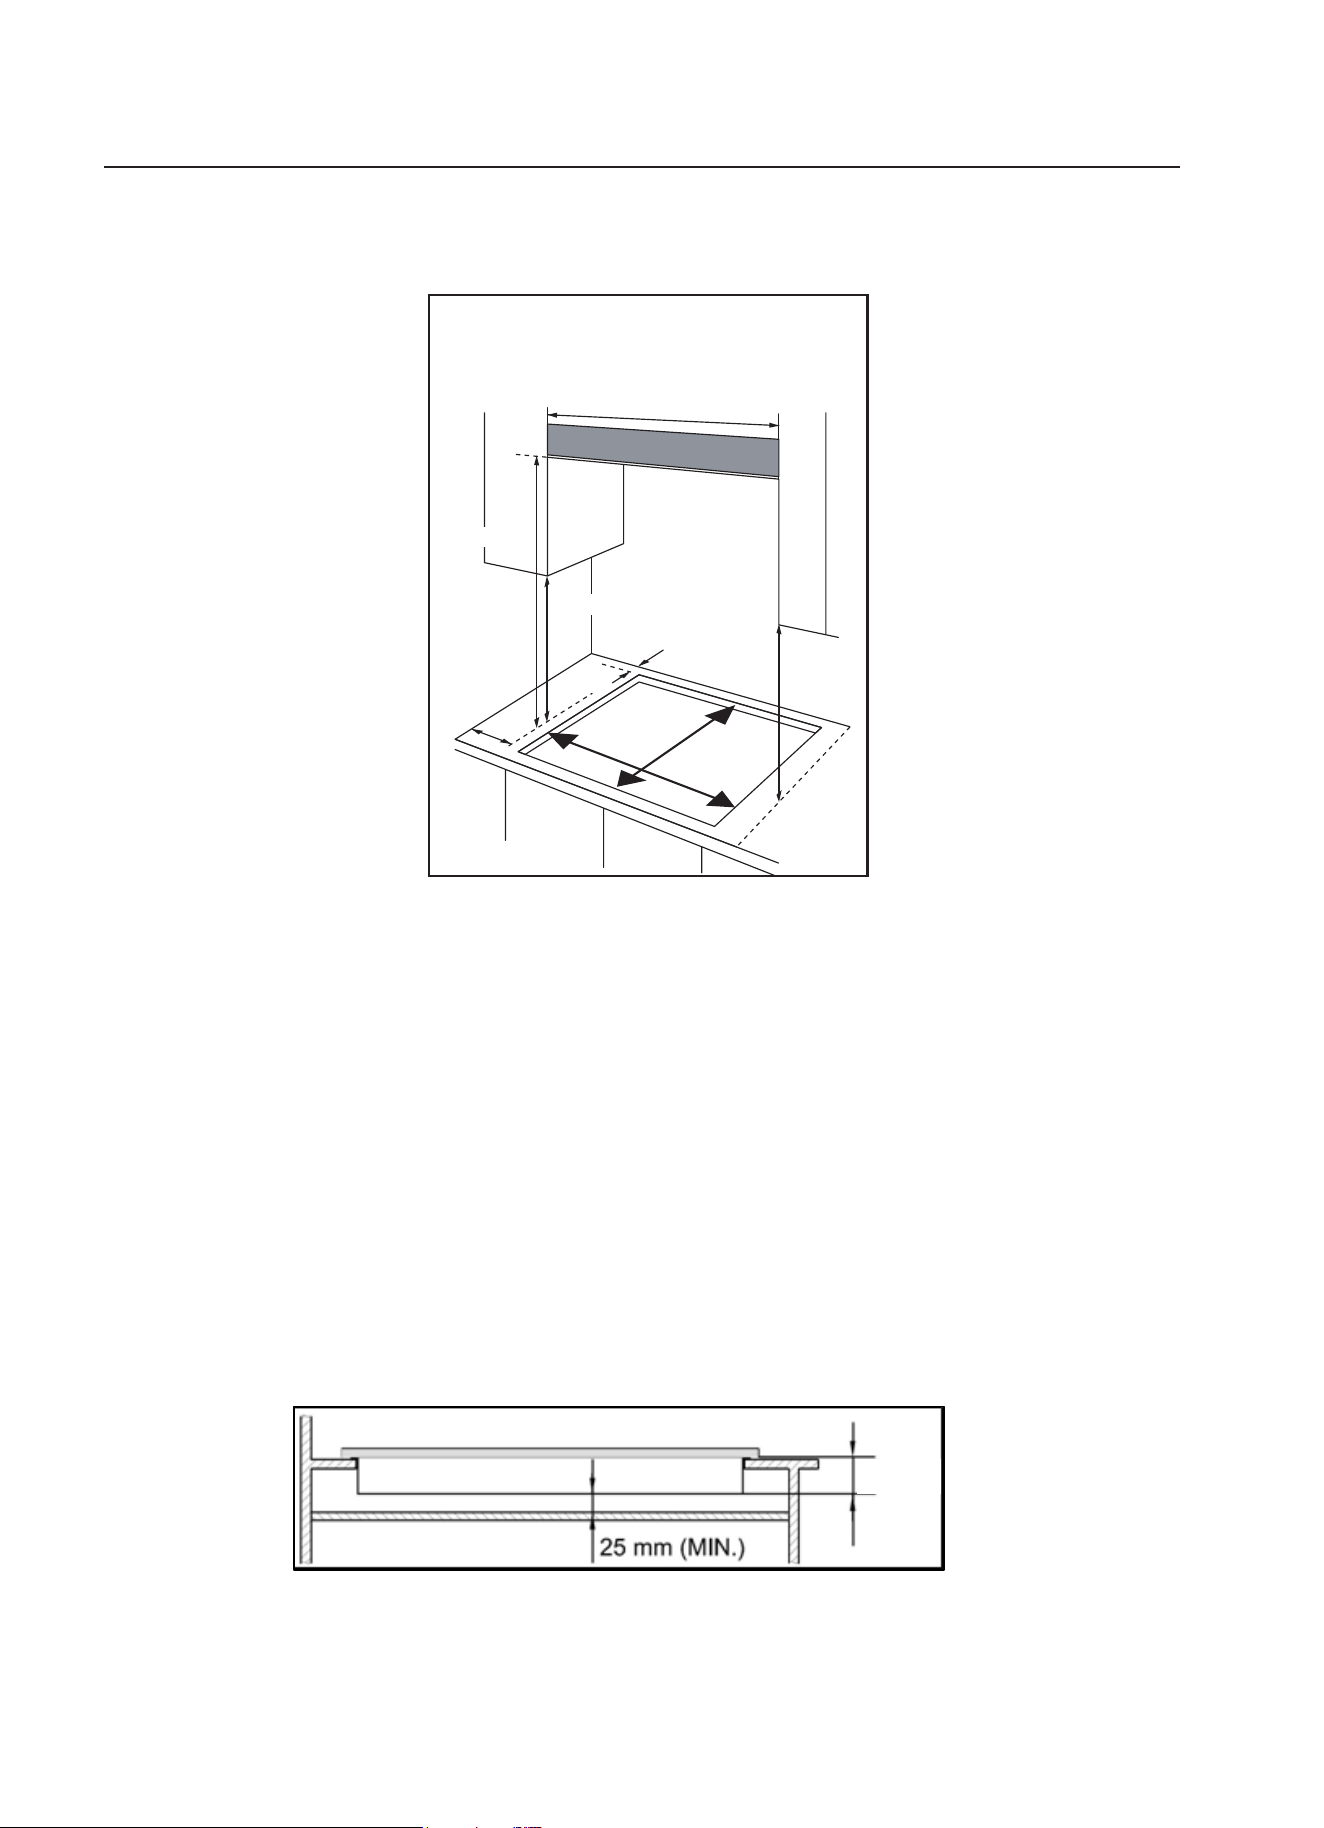
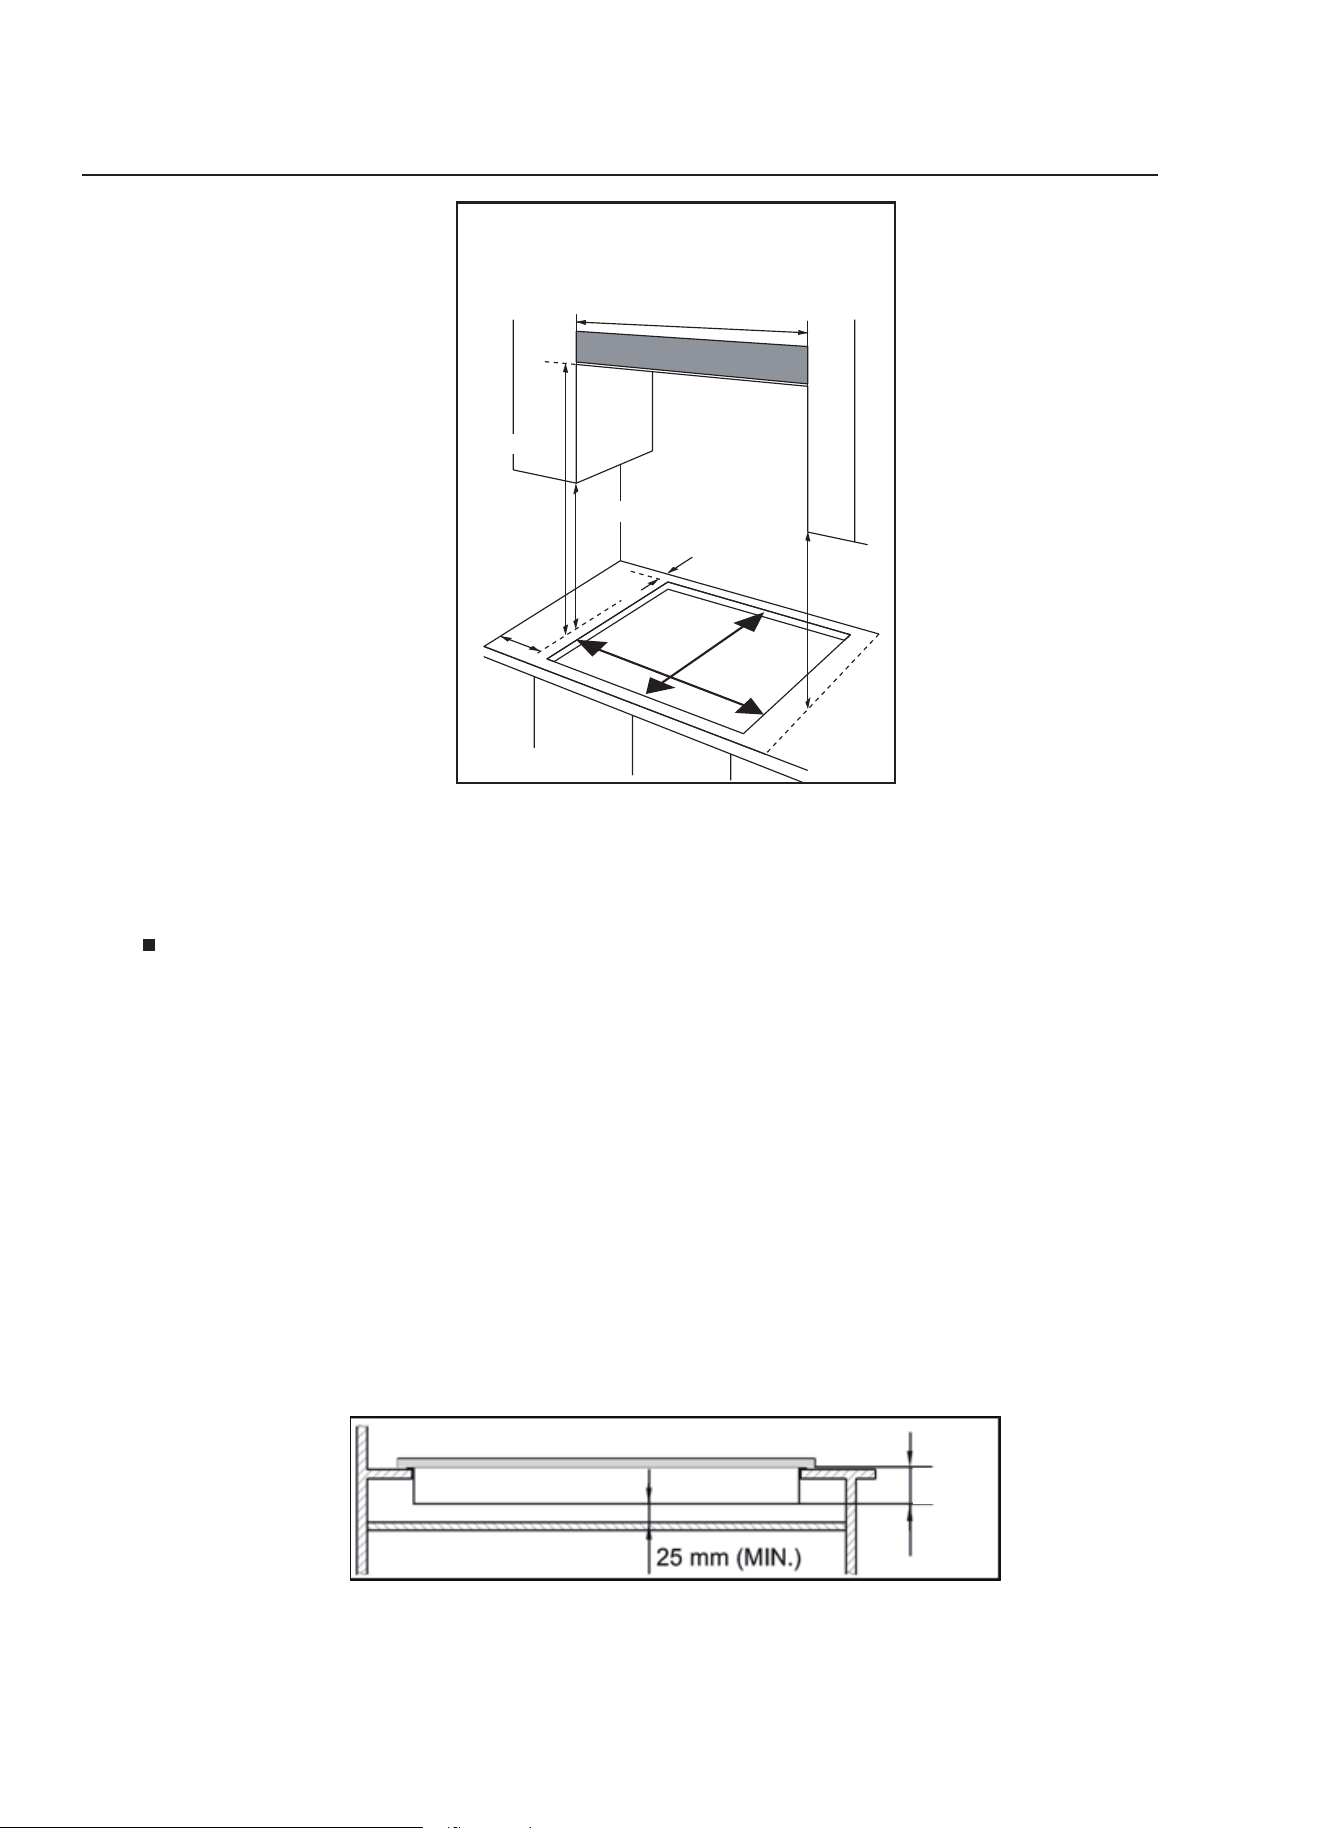
Este aparato debe ser instalado dentro de una cocina, asegurando la mínima distancia permitida:
•Los bordes de la placa deberían tener un mínimo de distancia de 60mm de
un lado o la parte trasera.
•700mm entre el punto alto de la superficie de la placa(incluyendo los
hornillos) y la parte inferior de cualquier superficie horizontal sobre la que se
encuentra.
•400mm entre la superficie de la placa, siempre y cuando que la parte inferior
de la superficie horizontal esté en linea con el otro borde de la placa. Si la
parte inferior es más baja que 400mm, entonces debería de haber al menos
50mm en horizontal hasta el borde de la placa.
16
600mm
700mm
400mm
400mm
60mm
in
0
.
0mm
M
2
560mm
480mm
Espacio requerido cuando fije
la campana con el tope de su
cocina
Instalación del aparato
Vista trasera
El espesor de la esponja es 3mm
El ancho de la esponja es 10mm
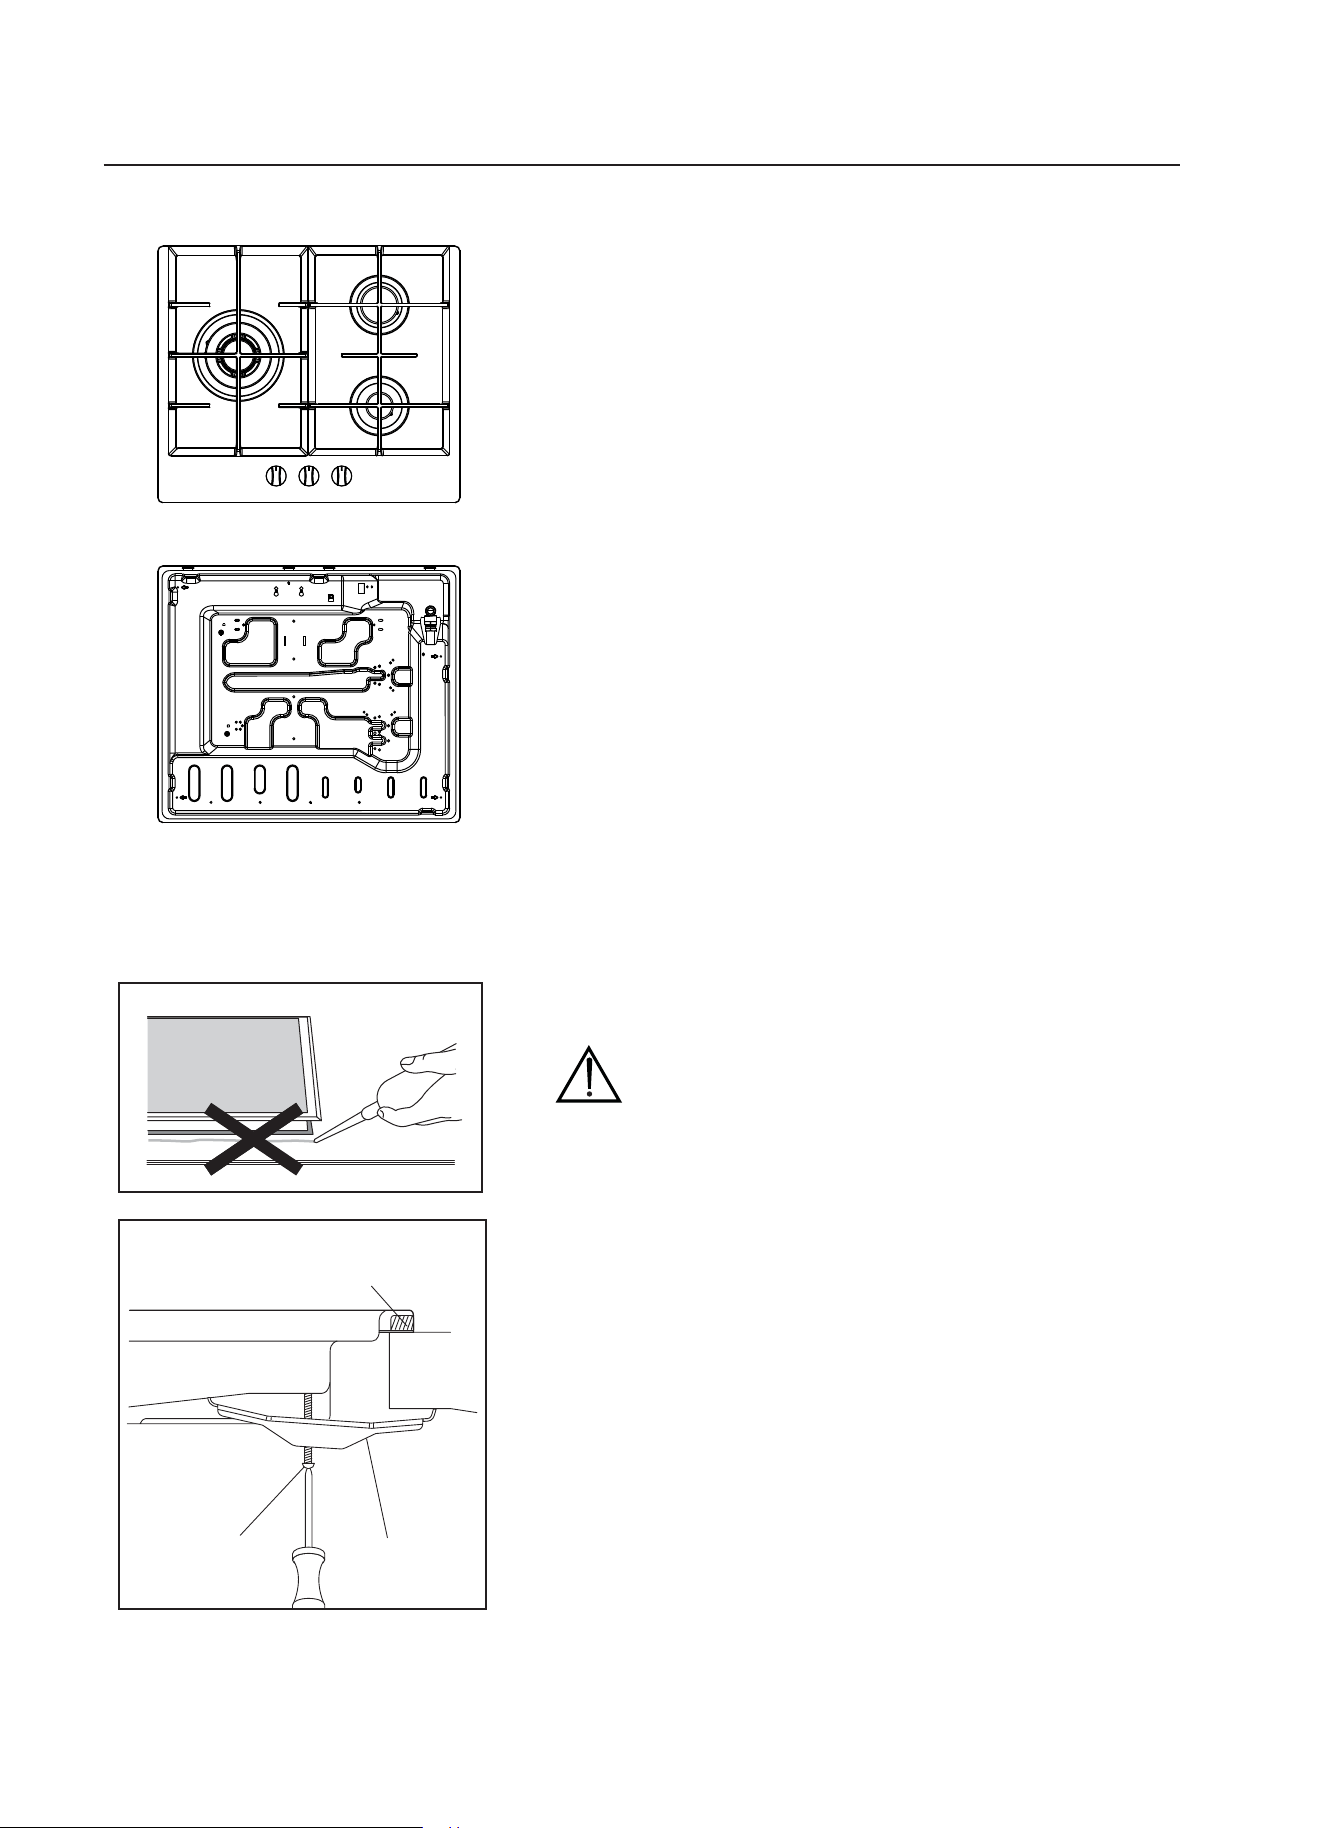
(A) TIRA DE SELLADO
(C) TORNILLO (B) SOPORTE
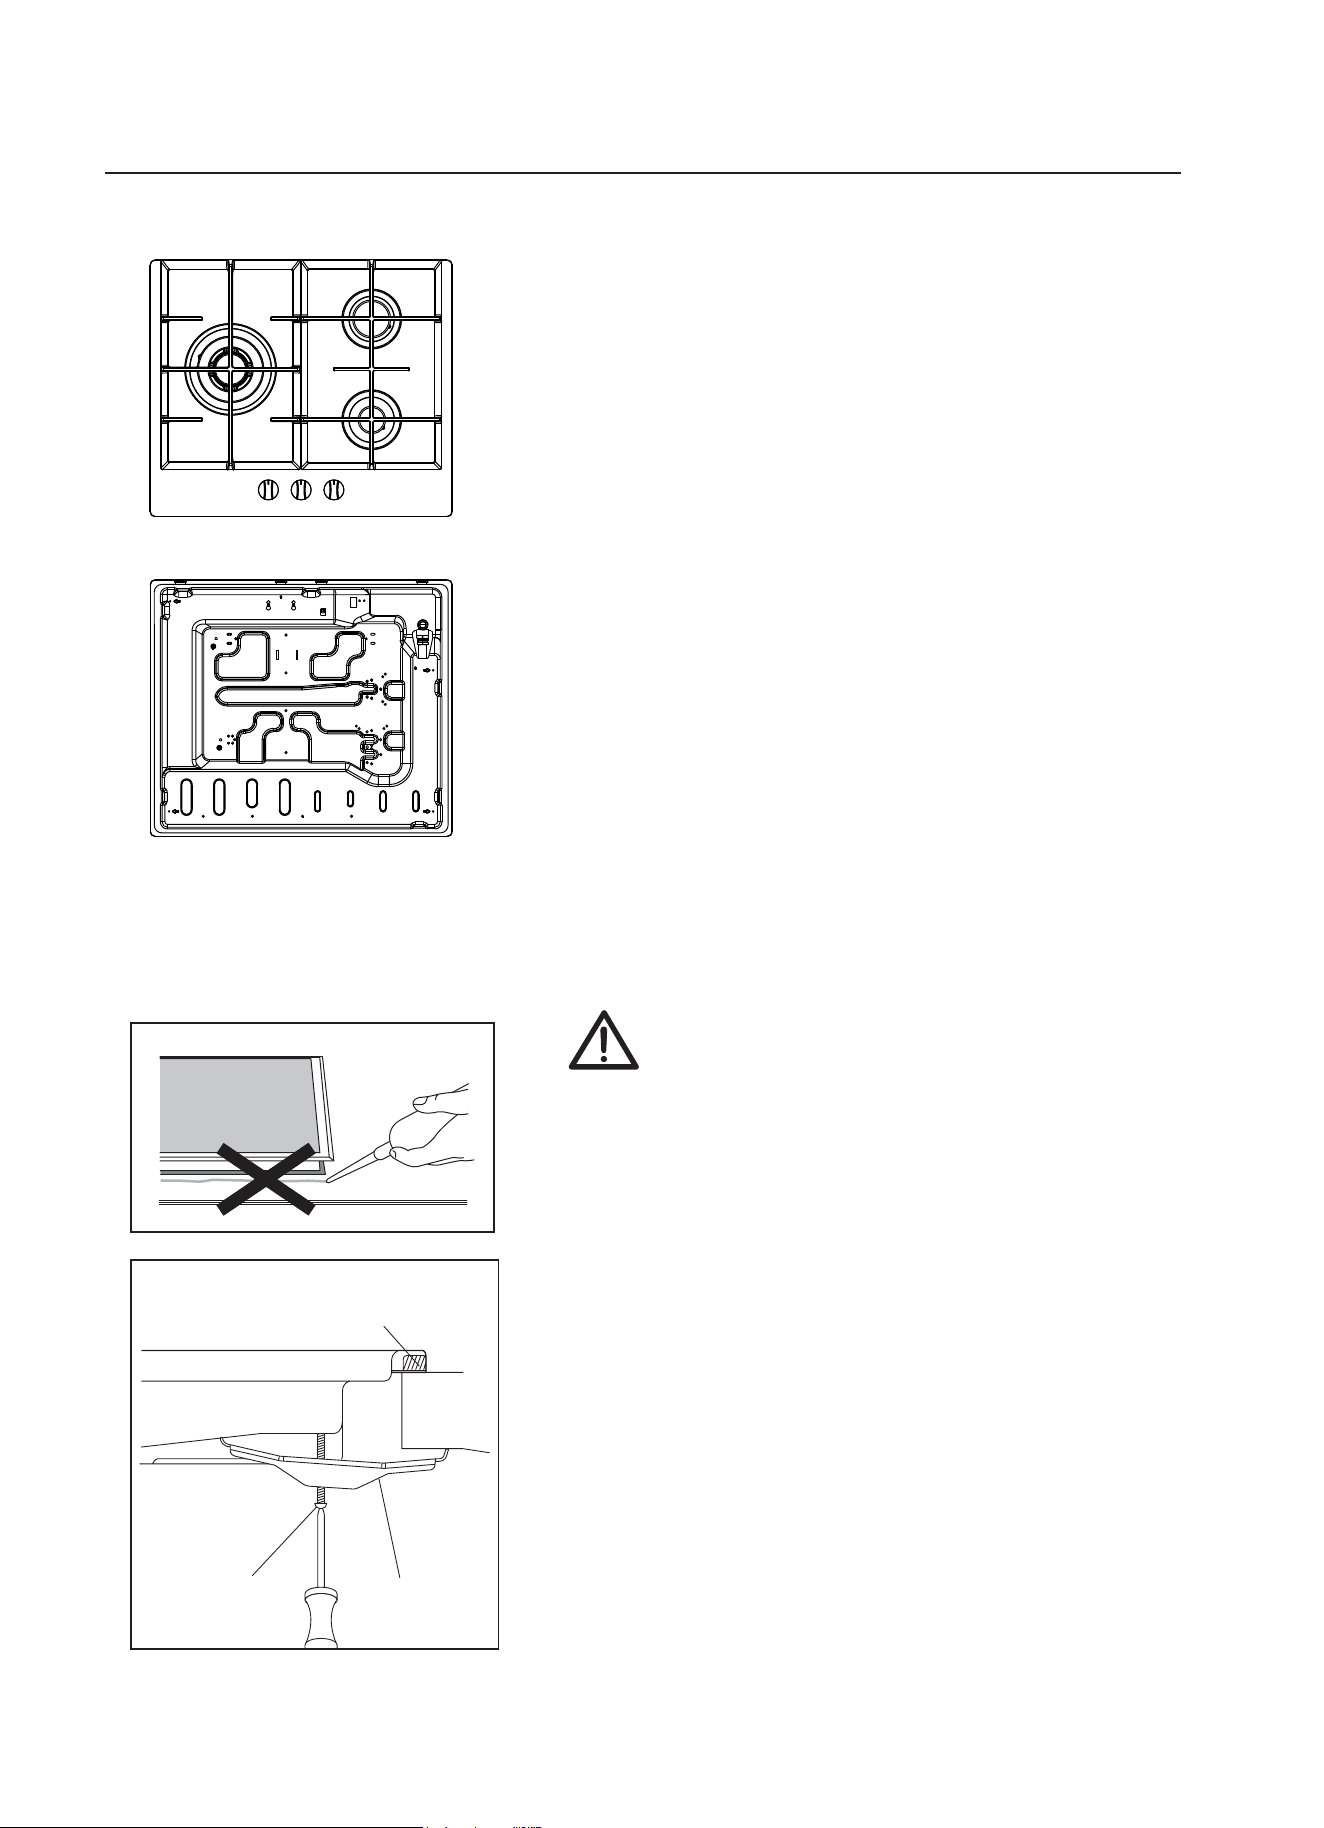
No use silicona para adherir el aparato al hueco
Esto dificultará mover el aparato en un
futuro, particularmente si este necesita
ser reparado.
1.Quite el soporte de la sartén, la tapa del
quemador, y el esparcidor de llama,y
adecuadamente ponga el aparato al revés y
colóquelo en el tapete acolchado. Tenga
cuidado que el equipo de arranque y el equipo
de supervisión de llama no sean afectados en
esta operación.
2. Adhiera la esponja al borde sobre el
perímetro inferior del aparato.
3. No deje huecos sin esponja de sellado a lo
largo de todo el perímetro.
Esponja
1. Coloque el soporte (B) alineándolo sobre los orificios del
tornillo. Hay un conjunto de orificios de tornillos en cada
esquina de la placa (H)
Apriete ligeramente un tornillo (C) hacia el soporte (B),
para que el soporte se una a la placa, así podrá ajustar
la posición.
2. Gire con cuidado la encimera hacia atrás y luego baje
suavemente en el orificio de abertura que ha recortado.
3. En la parte inferior de la placa, ajuste los soportes en la
posición adecuada a la mesa de trabajo.
Después apriete los tornillos (C) para asegurar que esté
fijada en su posición.
Por ejemple:
17
Conex
ión de gas
o Conforme a la ley todos los equipos de gas han de ser instalados por personas
competentes de acuerdo con la legislación actual de seguridad en la instalación y
las regulaciones de uso.
o Asegúrese de estar en concordancia con la ley, ya que es de su interés.
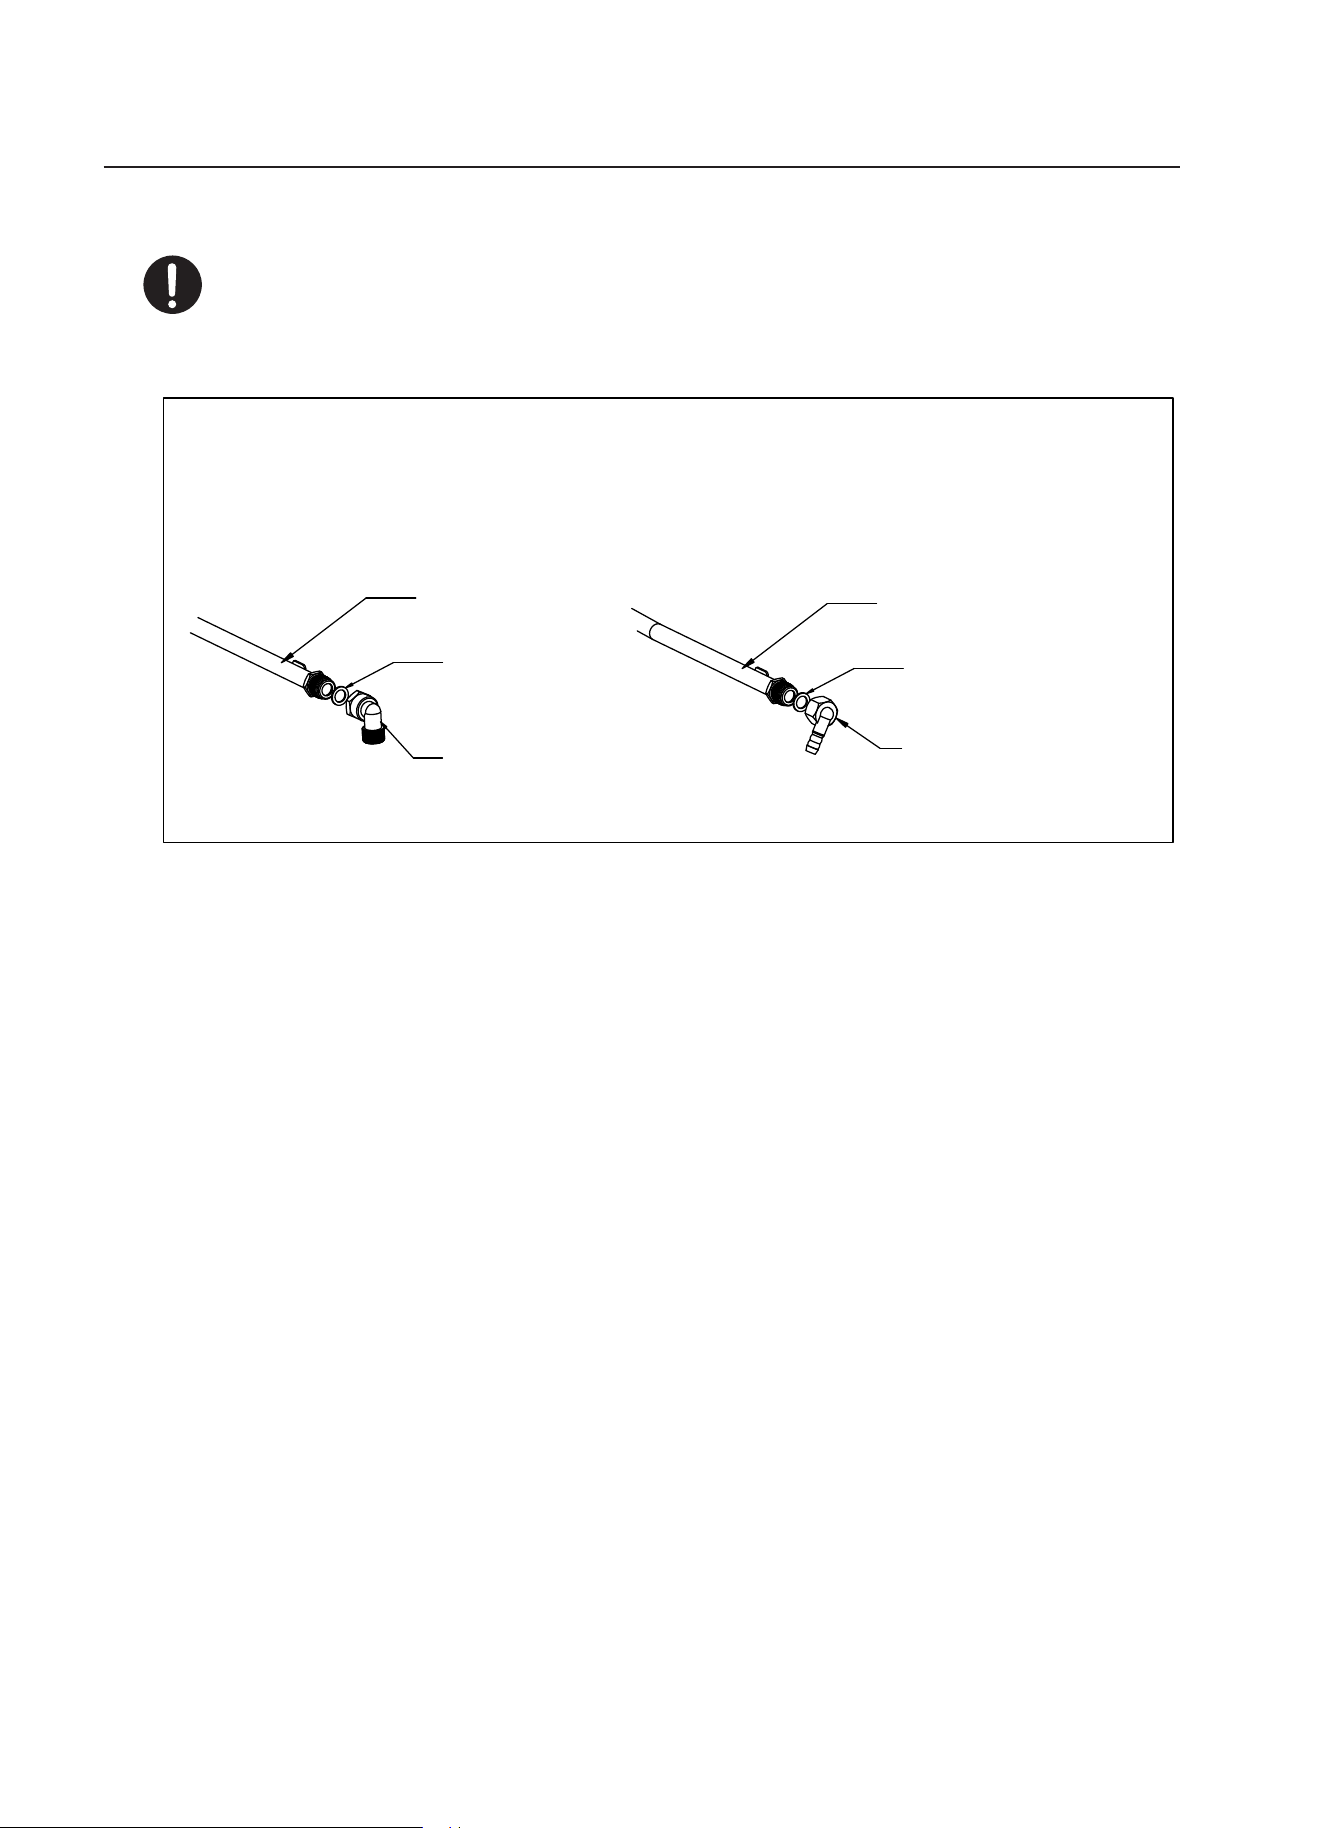
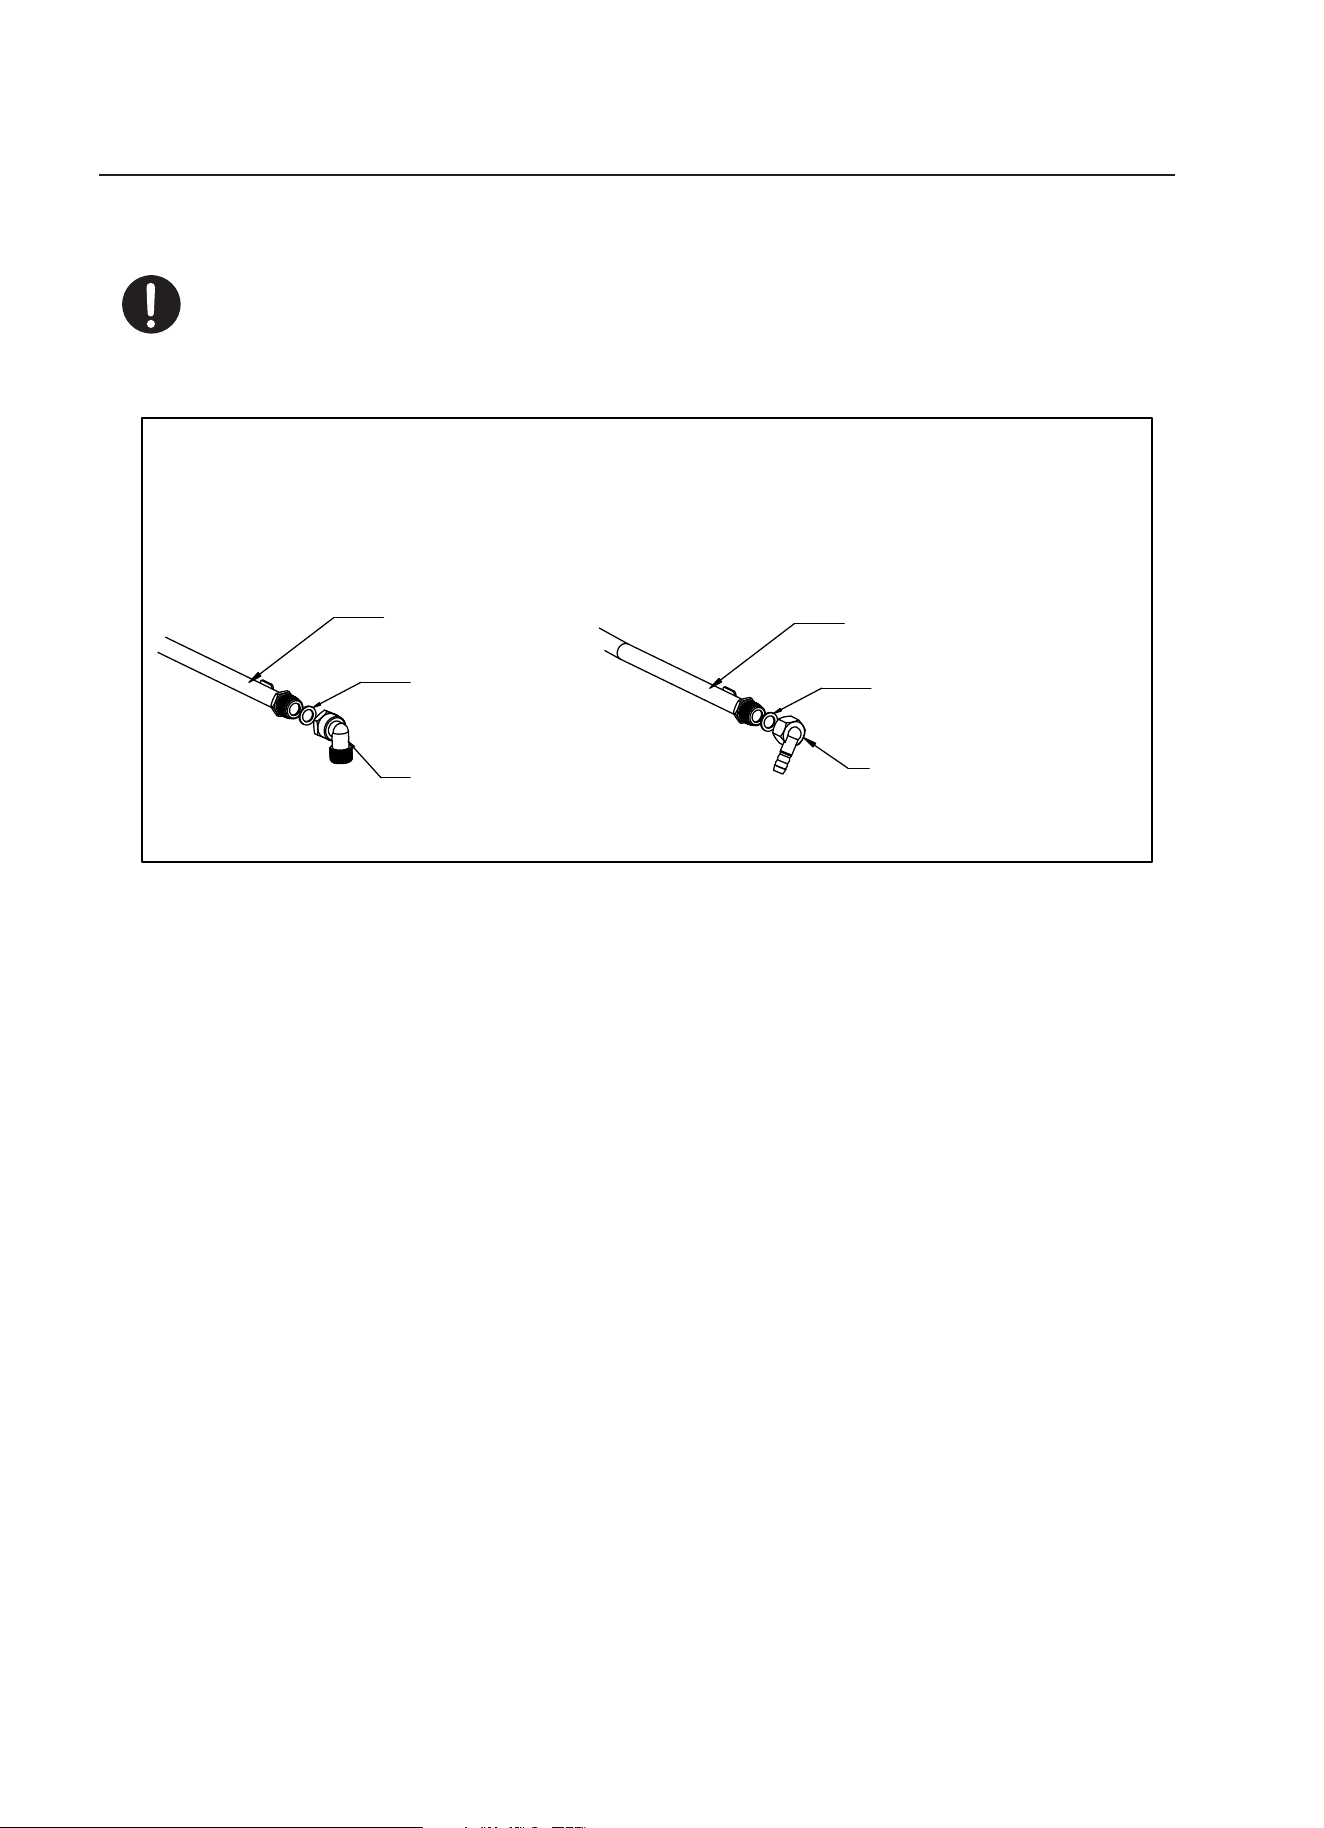
Junta
G1/2"Acoplador
Colector de gas
Junta
Colector de gas
Ø
11.5 Acoplador
LPG > NG NG > LPG
Suministro de gas y guías de instalación
•Este aparato debe ser instalado y conectado de acuerdo con las
regulaciones concretas del país donde va a ser instalado.
18
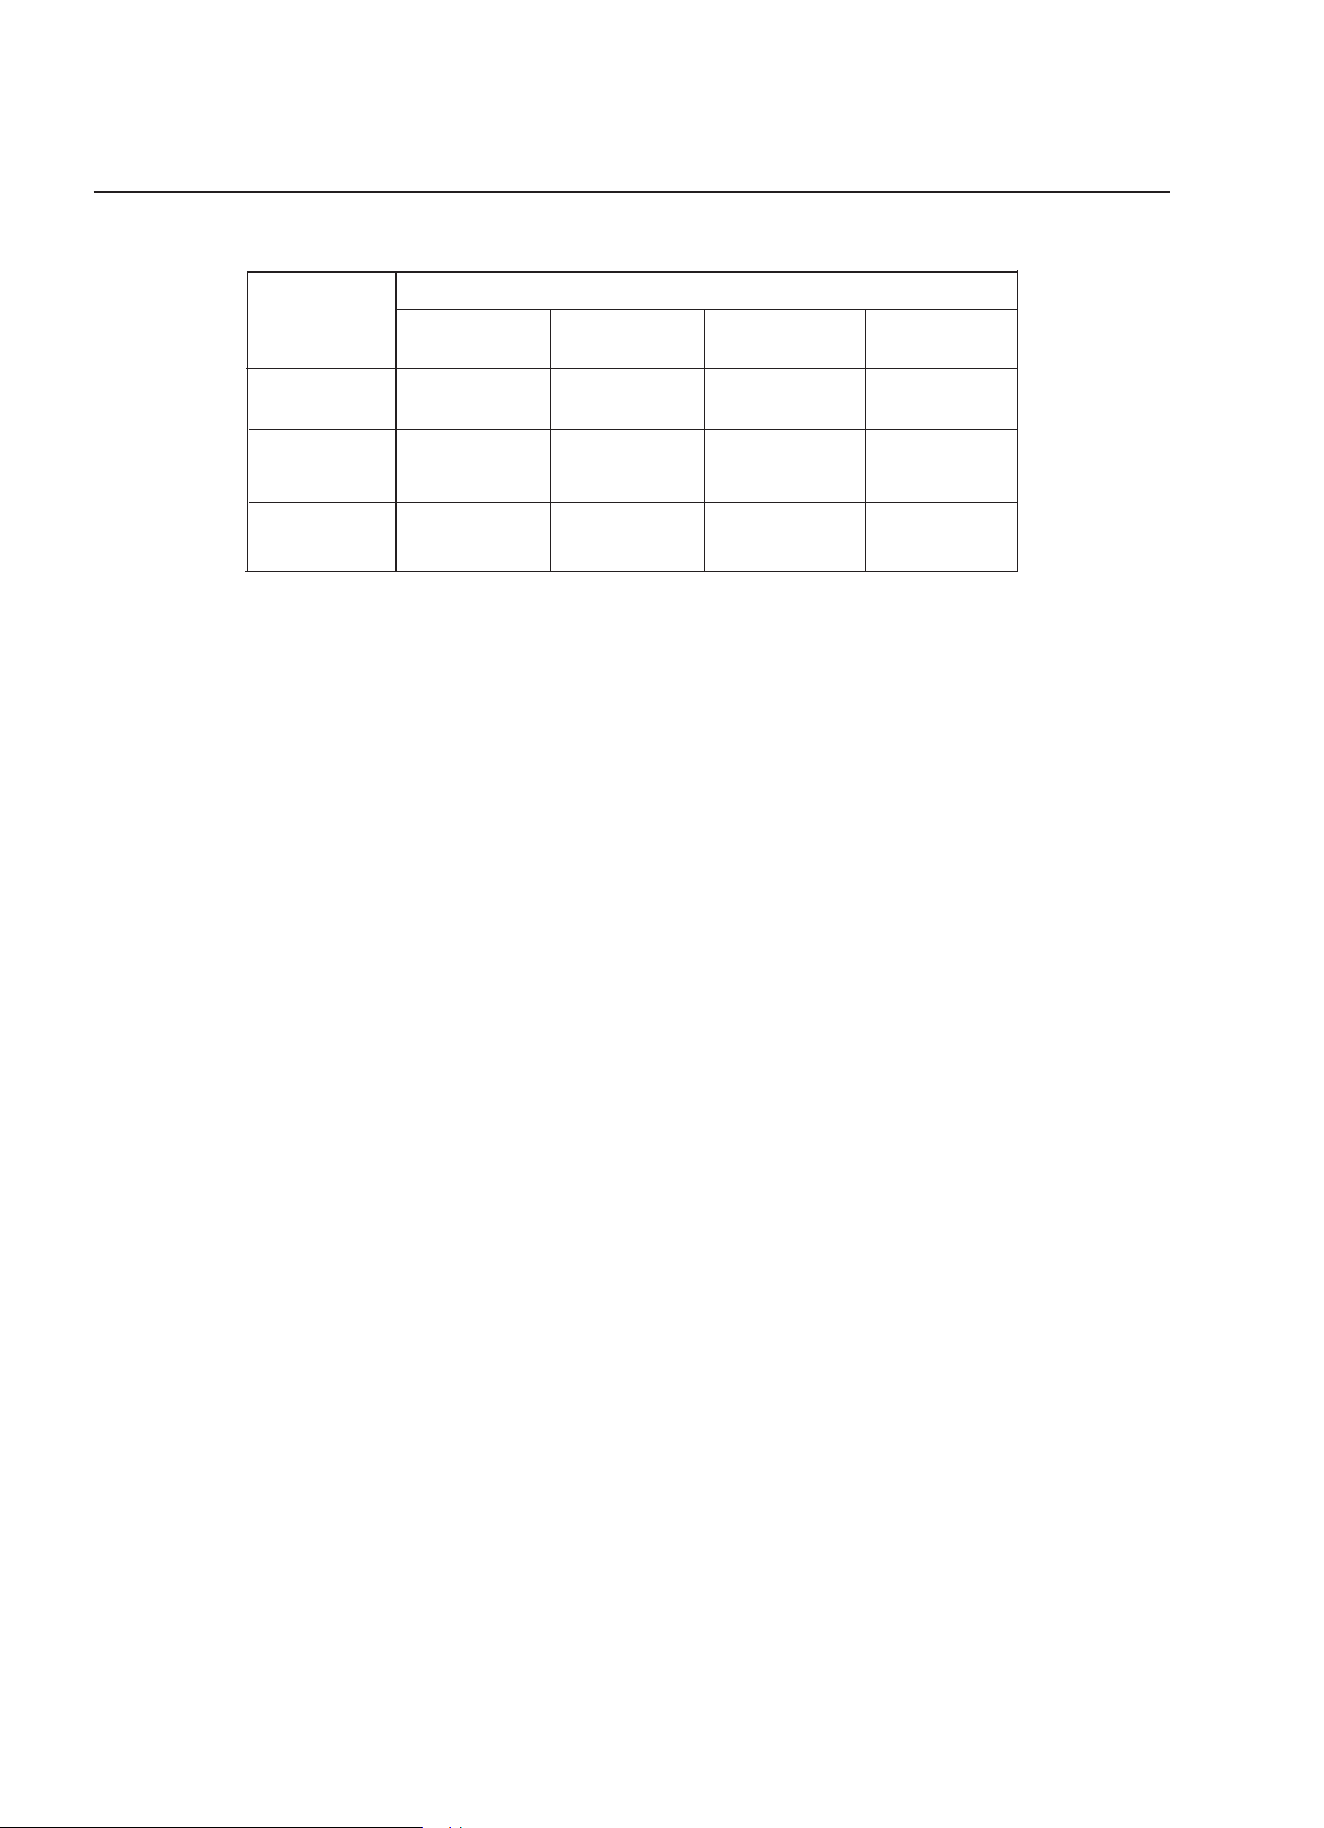
Especificación de gas
Wok
3.0kW(218g/h)
1.75kW
(127g/h)
1.0kW
(73g/h)
G30 29mbar
0.66
0.50
G20 20mbar
1.00 0.78
/
Tipo de gas y
presión
Entrada de calor y tamaño del orificio
(mm)
Semi-rápido
auxiliar
rápido
Quemador Quemador
3.3kW(241g/h)
0.93
1.28
19
/
/

- Verde/amarillo = Tierra
= Neutro
- Azul
- Marrón
■ Este aparato debe estar conectado a tierra.
■ Este aparato está diseñado para ser conectado a una corriente eléctrica de 220-240V,50Hz-60Hz
■ El cable principal esta coloreado de acuerdo con el siguiente código;
Conex
ión eléctrica
=Fase
•El cable de color verde y amarillo debe ser conectado con la letra E o por el
símbolo de tierra.
20
Conversión de gas
Ŷ7ome precauciones en las operaciones y ajustes cuando vaya a llevar a
cabo la conversión de un gas a otro.
Ŷ
Este trabajo debe ser llevado a cabo por un técnico cualificado.
Ŷ
Antes de comenzar, apague el gas y la corriente eléctrica del aparato.
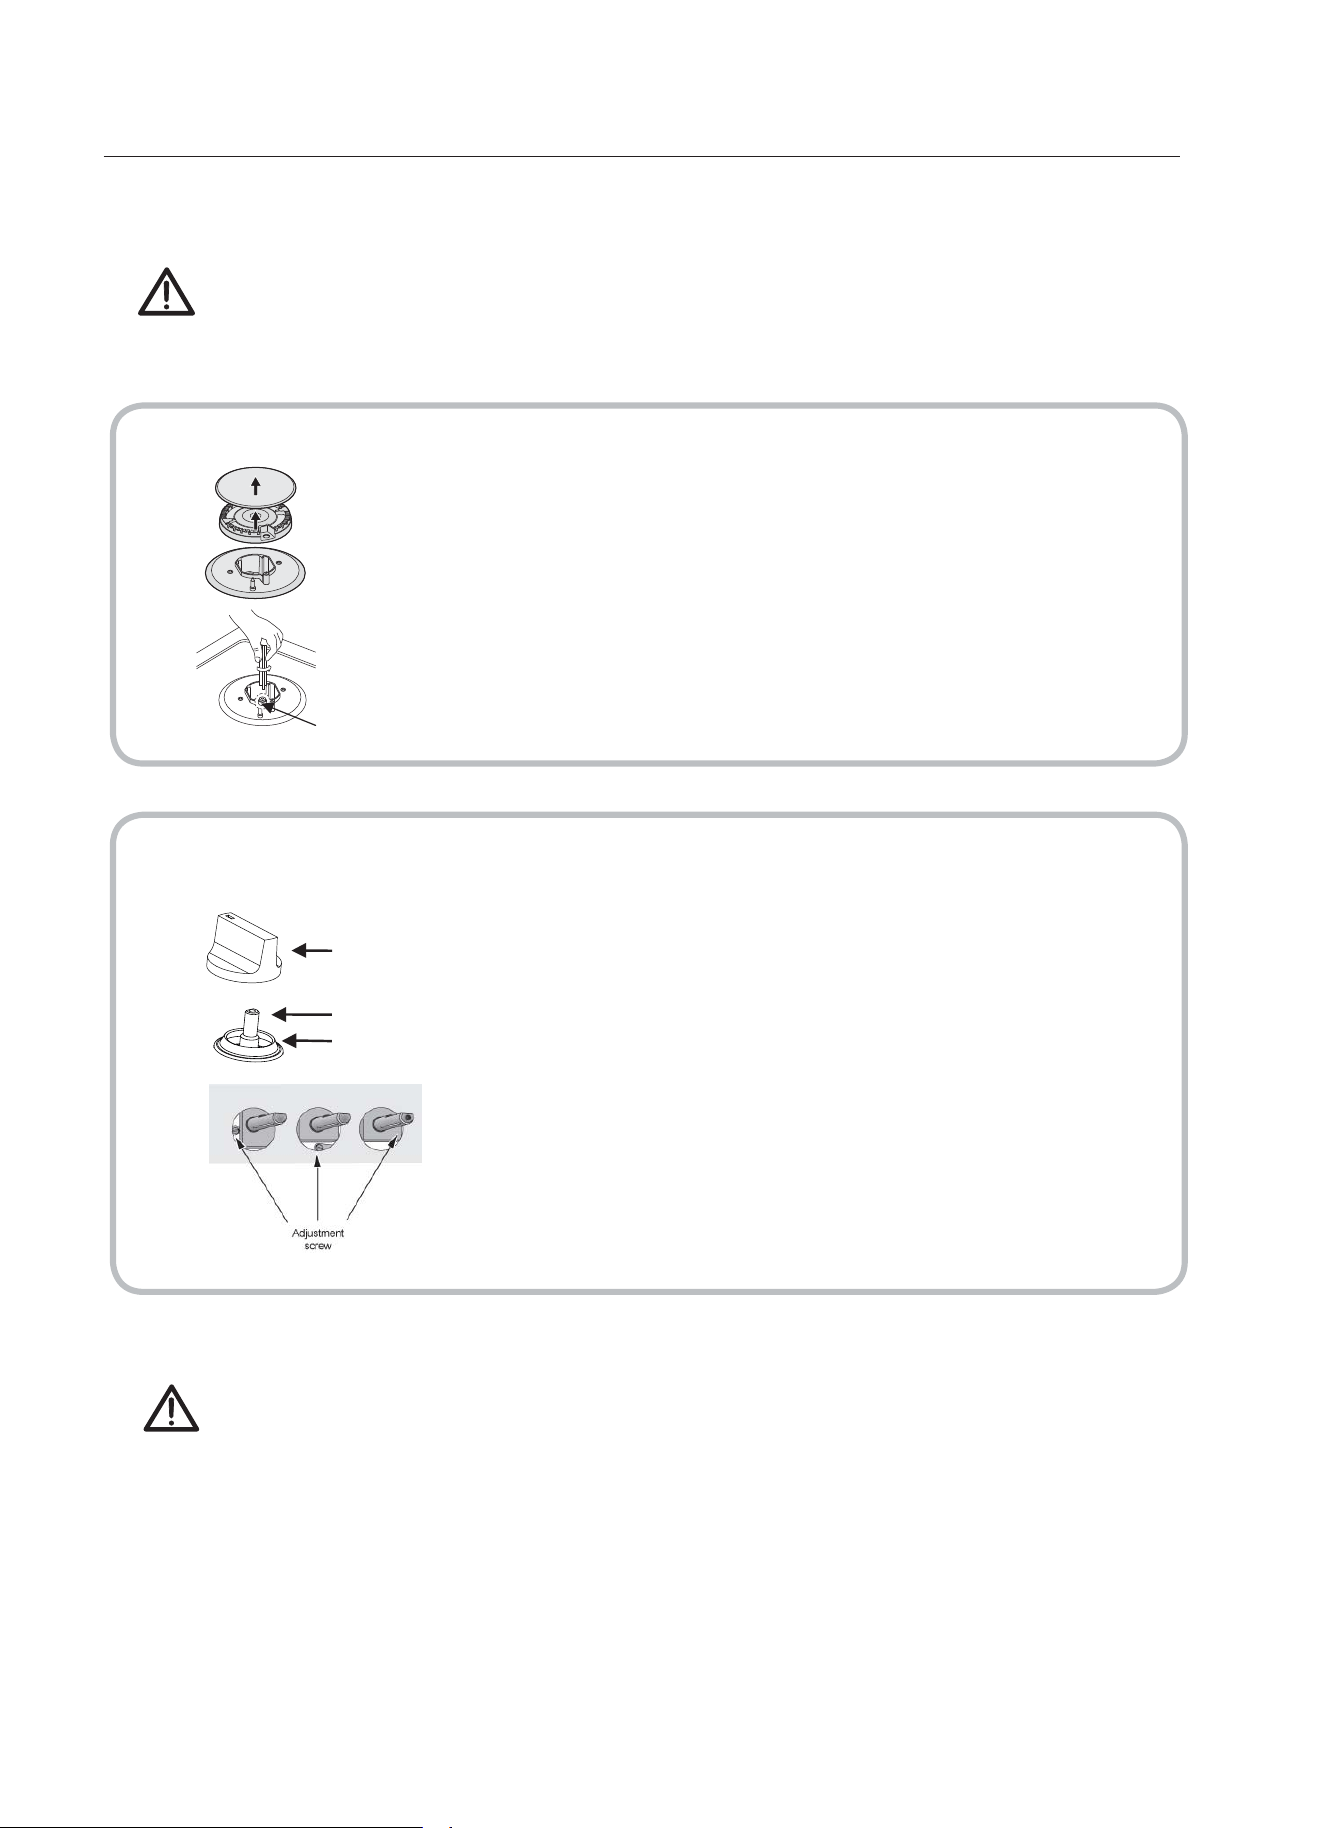
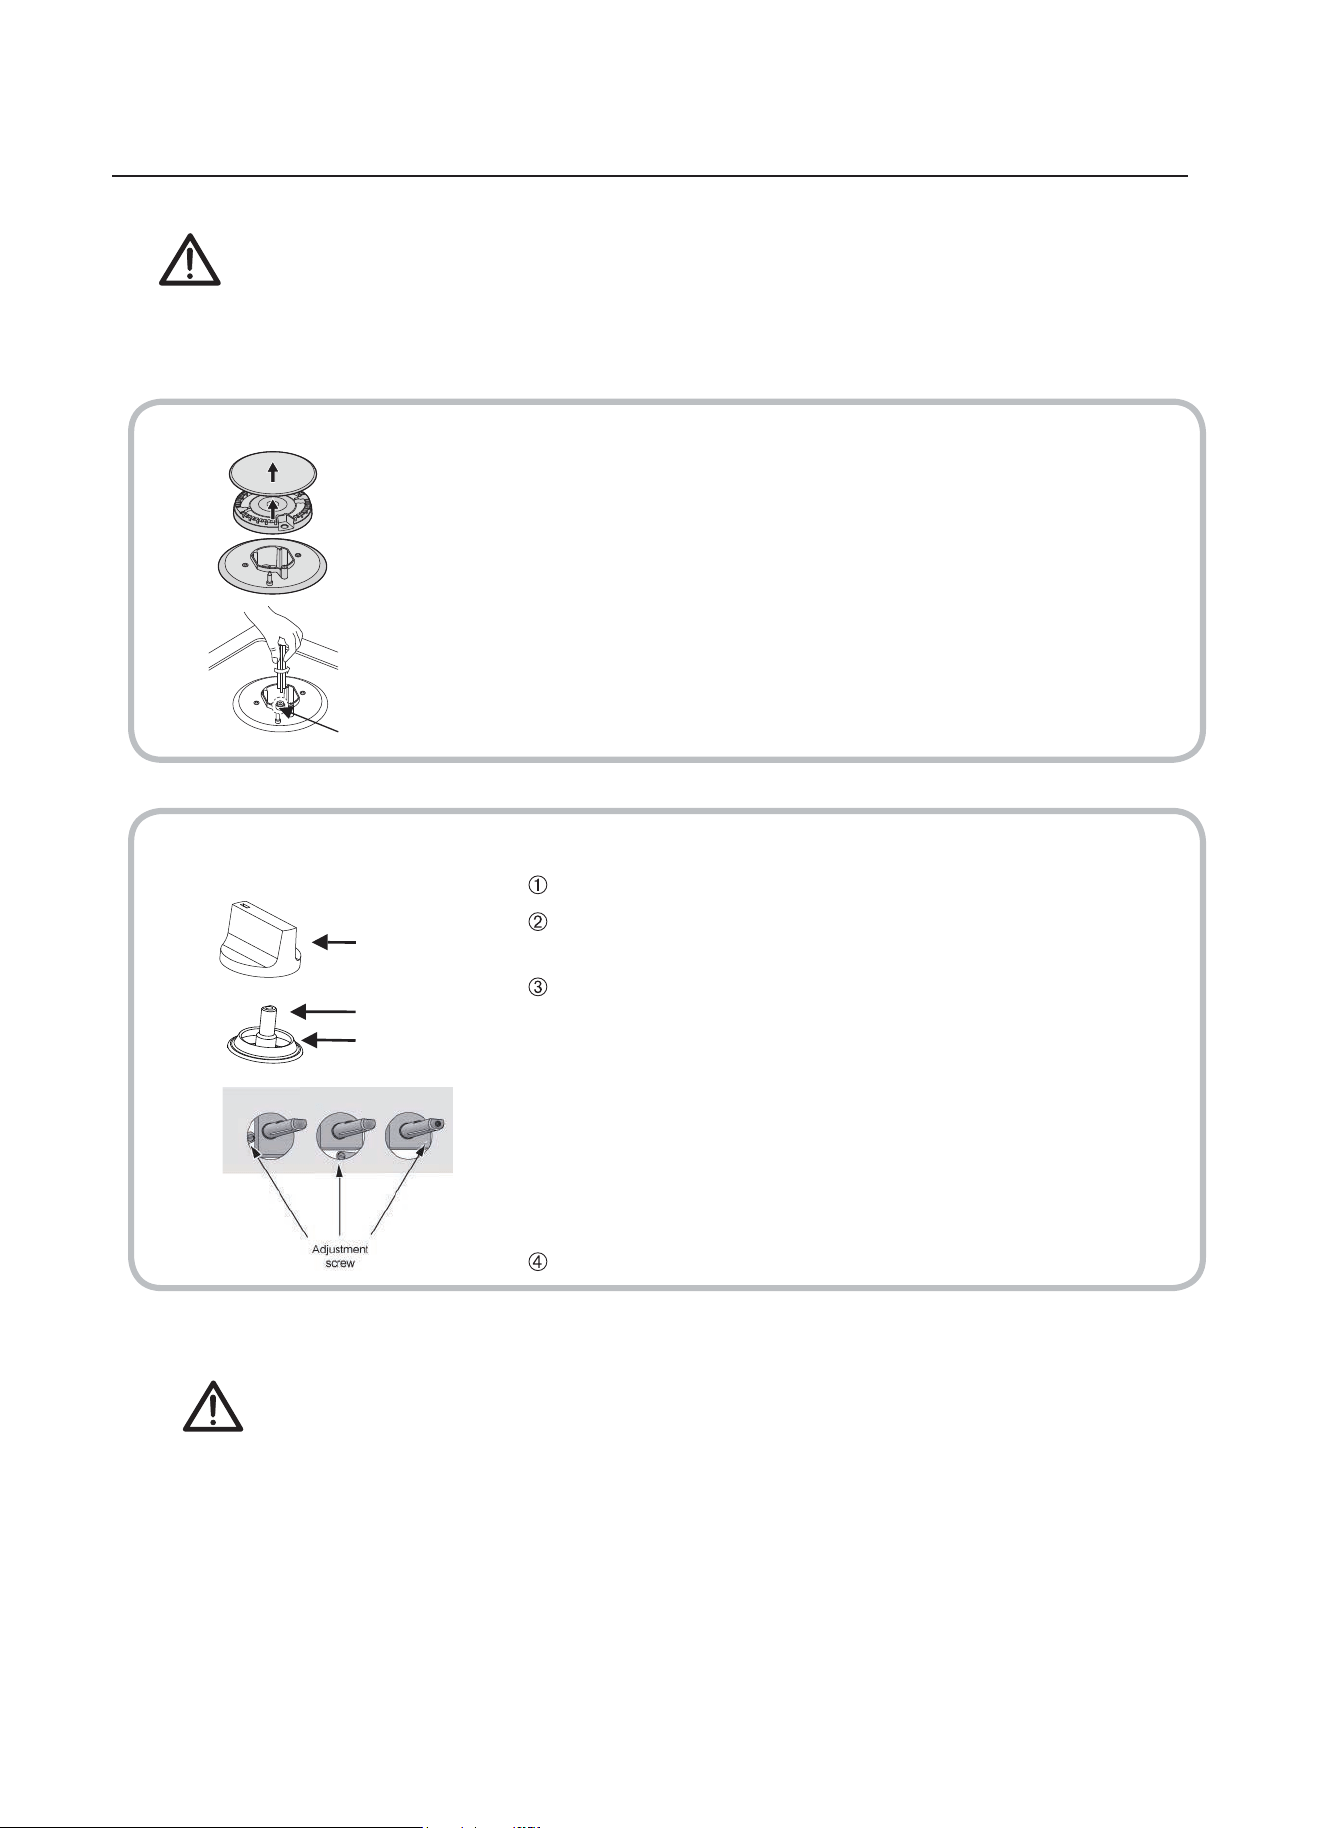
Cambie el inyector de los hornillos
1
2
Inyector
Perilla de control
Llave
Anillo de sellado
A
juste del nivel mínimo de la llama
Quite el soporte de la sartén, la tapa del quemador y el
esparcidor de llama.
Desatornille el inyector usando un llave de tubo de 7mm y
reemplazalo con el inyector estipulado para nueva corriente de
gas.
Después de remplazar , se aconseja que aprete lo inyectores
en el lugar
Gire la perilla hasta el mínimo.
Quite la perilla de la llave y ajuste el pequeño tornillo en
el centro del eje de la llave.
El ajuste correcto es obtenido cuando la llama tiene una
longitud aproximada de 3-4mm
* Para gas butano/propano, el ajuste del tornillo debe estar
correctamente apretado.
* Ponga la llave de nuevo en la perilla.
*Asegúrese que la llama no se apague rápidamente
cuando bajes del máximo al mínimo.
Repita este proceso para cada una de las llaves de gas
* No desmonte la llave, en el caso de un mal funcionamiento, cambie toda la llave.
* Antes de colocar los hornillos de nuevo en el plato superior, asegúrese que el inyector no
está bloqueado.
* Un test de operaciones completo y un test para posibles derrames deben ser llevadas a
cabo después de una conversión de gas.
* Después de completar la conversión, un técnico cualificado o instalador deberá de hacer
una marca "V" en la categoría de gas para marcarlo con el ajuste de las características de
la placa. Quite la nota previa "V".
21
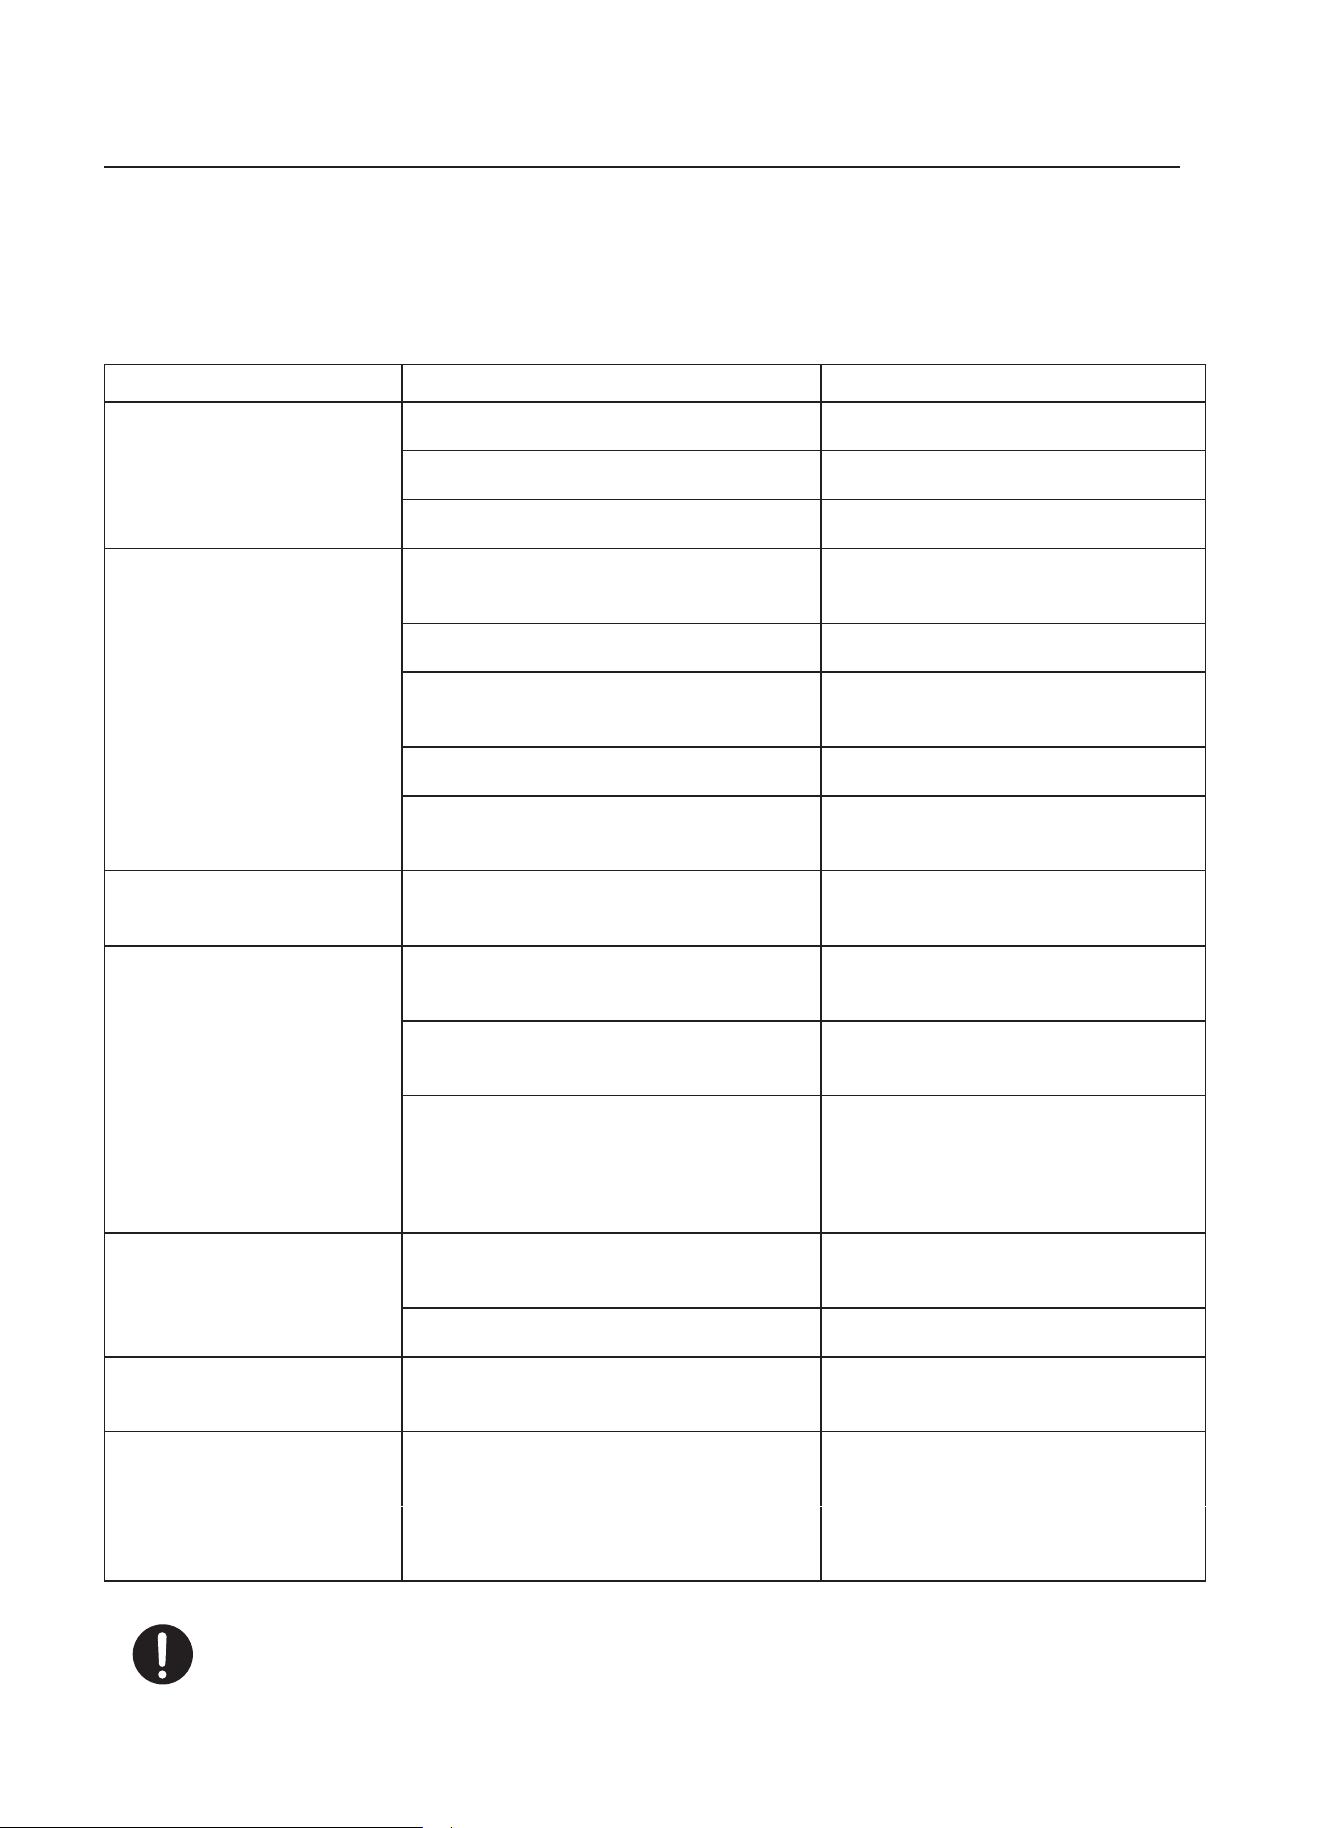
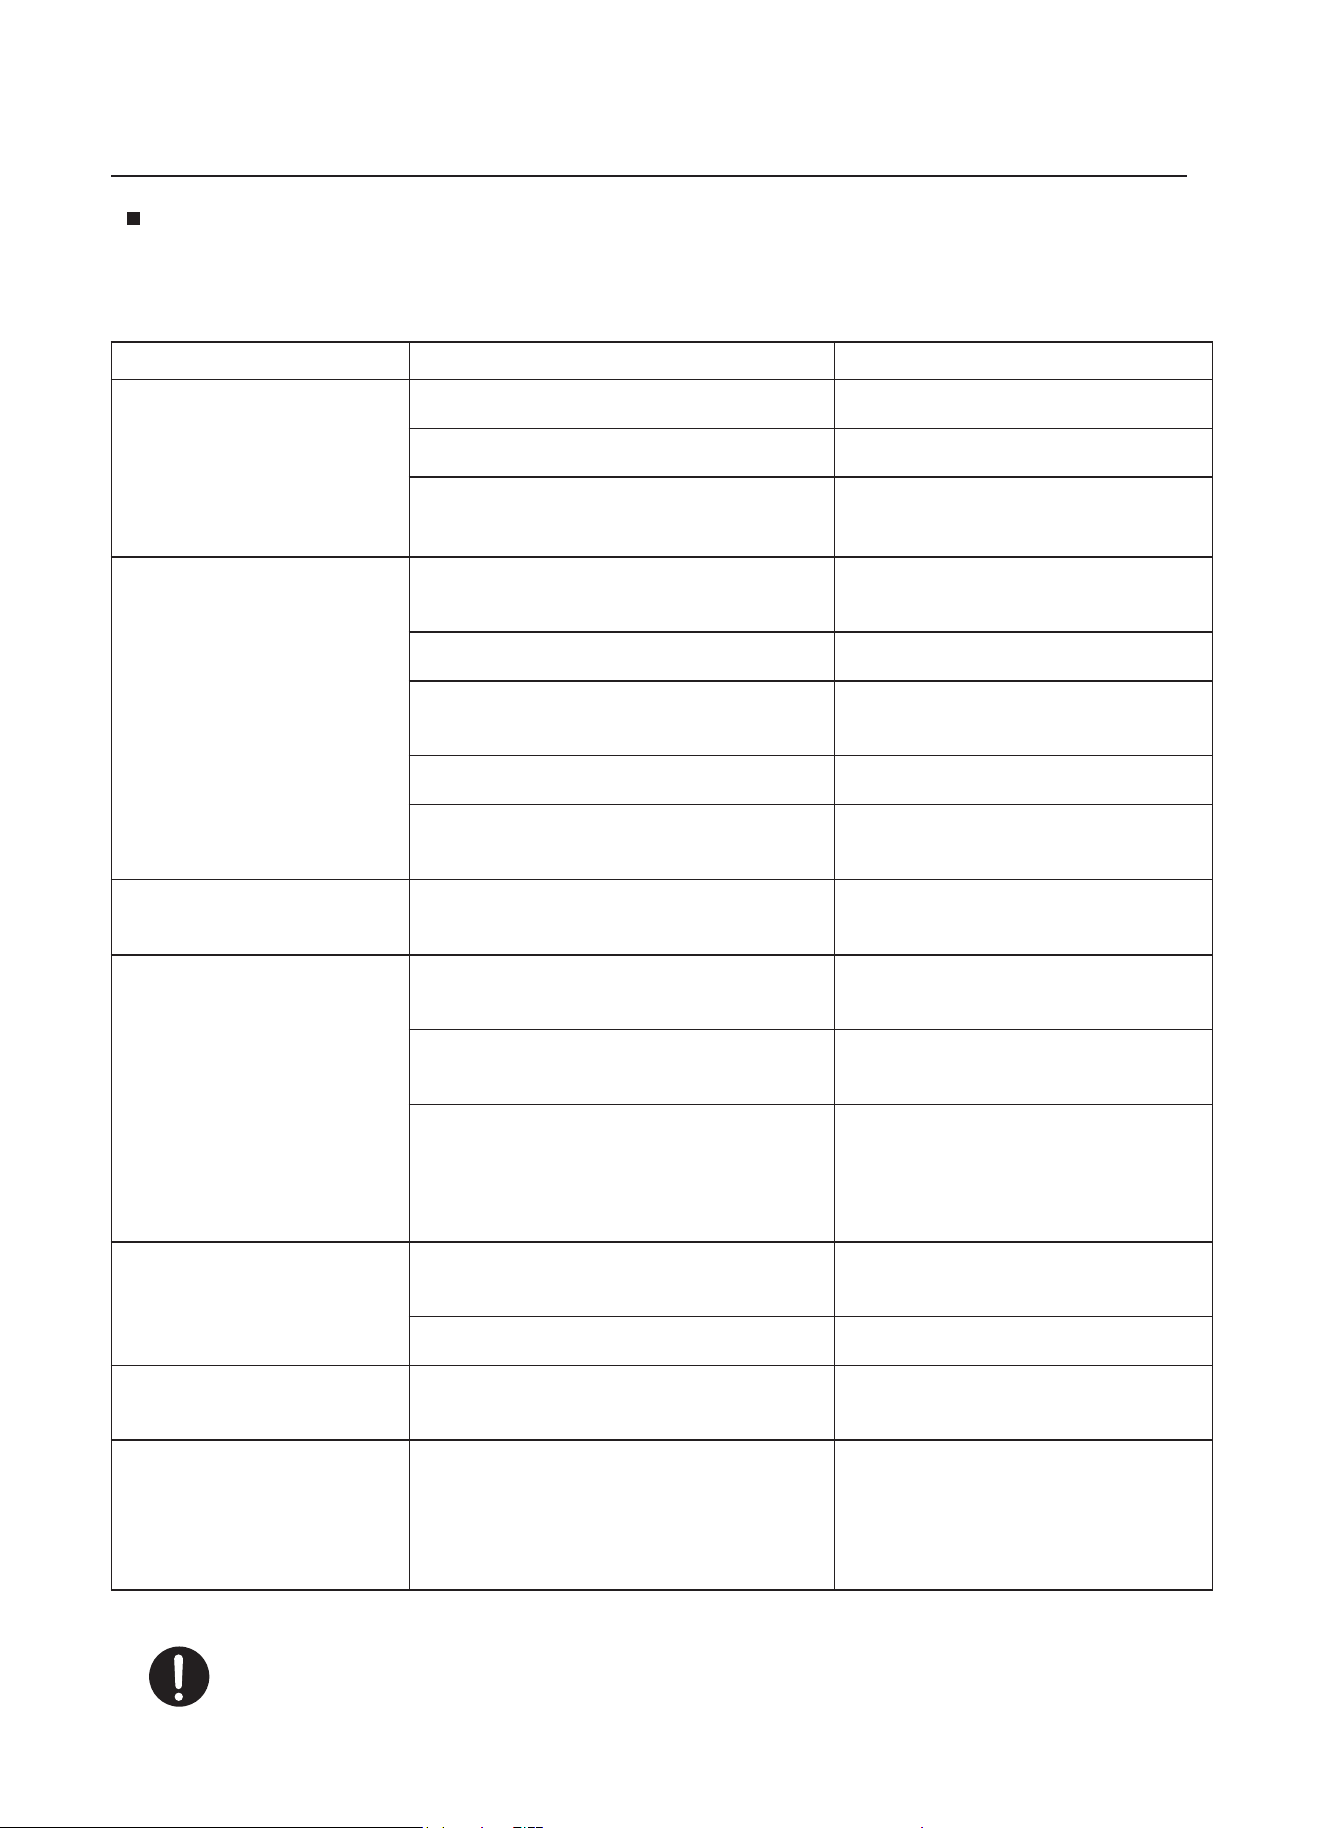
Resolución de problemas
3UREOHPa 3osible causa 6ROXcLRQ
No enciende
No hay llama
Compruebe la corriente de electricidad.
La tapa del quemador está mal ensamblada
Ensamble la tapa correctamente
La corriente de gas estás cerrada.
Abra la corriente de gas completamente
Mal encendido
La corriente de gas no está
correctamente abierta
Abra la corriente de gas correctamente
La tapa del quemador está mal ensamblada
El enchufe de arranque está contaminado
con alguna sustancia extraña
Los quemadores están mojados
Seque la tapa de los quemadores
correctamente
Los huecos en el esparcidor de llama están
congestionados.
Limpie el esparcidor de llama
Produce ruido cuando
se quema y se enciende
La tapa del quemador está mal
ensamblada
Ensamble la tapa
correctamente
La llama se apaga
durante el uso
El equipo de supervisión de la llama
esta ensuciado
Limpie el equipo de
supervisión de la llama
El producto que se estaba
cocinando se ha derramado.
Apague el hornillo. Espere un
minuto y reinicie la zona.
Llama amarilla
Los orificios en el esparcidor de
llama están obstruidos
&OHDQWKHÀDPHVSUHDGHU
Se usa diferente gas. Compruebe el gas que usa.
Llama inestable
La tapa del quemador está mal
ensamblada
Ensamble la tapa del
quemador correctamente
Huele a gas
ŶSi el problema no se soluciona, contacte con su servicio técnico mas cercano
Limpie la sustancia extraña con un
paño seco
Una fuerte corriente de aire ha
apagado la llama
Por favor desactive la zona y
compruebe que en el area de cocción
no hay ventanas abiertas. Espere un
minuto y reinicie la zona
Fuga de gas
Pare de usar el producto y cierre
la válvula. Abra la ventana para
ventilar. Contacte con nuestro
servicio técnico usando un móvil
fuera
•Las reparaciones deben hacerlas técnicos con licencia. Una reparación inapropiada
puede provocar peligro para usted y otros.
•Sin embargo, algunos problemas más pequeños pueden ser resueltos de la siguiente
manera:
Ensamble la tapa correctamente
22


GAS HOB 3 BURNERS BLACK GLASS
GAS HOB 3 BURNERS WHITE GLASS
CPCGM 3F 3021 N
CPCGM 3F 3022 W
USER MANUAL

Preface
Thank you for choosing our gas cooktop.
To use this appliance correctly and prevent any potential risk, read these instructions
before using the appliance.
Keep these instructions in a place where you can find them easily.
If you are unsure of any of the information contained in these instructions, please contact
our customer care centre.
The manufacturer shall not be responsible for any damages to persons or property caused
by incorrect installation or use of the appliance.
The appliance has been certified for use in countries other than those marked on the
appliance.
The manufacturer also reserves the right to make any modifications to the products as may
be considered necessary or useful, also in the interests of the user, without jeopardising
the main functional and safety features of the products themselves.
The appliance is designed for a domestic environment and not a commercial one.
1

Contents
Preface
Instructions for use and maintenance
Safety Warning
Safety Instructions
Installation
Child and People Safety
During Use
Cleaning and Service
8
Environmental Information
Description of the appliance
How to Use the appliance
Safety and Energy saving advice
Cleaning and Maintenance
Technical instructions
6
16
17
18
19
15
13
12
21
2
5
4
3
8
9
10
20
22
Using instructions
Positioning
Installing the appliance
Gas Connection
Gas Specifition
Electrical Connection
Gas adujstment
Trouble shooting
Safety Instructions
Danger/Warning
Caution
Neglect of this mark may result in minor personal injury
or property damage.
Caution No Access
No Fire Tool
Must Do
Danger
- Do not turn on the light.
- Do not switch on/off any electrical appliance and do not touch any electric plug.
- Do not use a telephone.
1 Stop using the product and close the middle valve.
2 Open the window to ventilate.
3 Contact our service centre by using a phone outside.
cilrag nettor fo llems( kael sag eht llems nac uoy taht os ,natpacrem sniatnoc sag leuf ehT *
or egg) even where only 1/1000 of the gas is in the air.
Please take the time to read this Instruction Manual before installing or
using the appliance.
The following marks are used
in the Instruction Manual
as follows:
3
If gas seems to leak,take the actions as follow:
Neglect of this mark may result in severe personal injury
or death.
7KLVLQVWUXFWLRQERRNOHWPXVWEHNHSWZLWKWKHDSSOLDQFHIRUDQ\IXWXUHUHIHUHQFH.
If the appliance is sold or transferred to another person, ensure the booklet is
passed on to the new user.
7KHPDQXIDFWXUHUGHFOLQHVDQ\OLDELOLW\VKRXOGWKHVHVDIHW\PHDVXUHVQRWEHREVHUYHG
TKHIROORZLQJPDUNVDUHPDGHWREHHDVLO\XQGHUVWRRGVRWKDW\RXFDQSUHYHQWDQ\
accident caused by misuse in advance, and use the appliance more conveniently.
RHDGWKHIROORZLQJFRQWHQWVWKRURXJKO\DQGHQVXUH\RXXQGHUVWDQGWKHP
.
Installation
Warning
This appliance shall be installed in
accordance with regulations in force
and only used in a well ventilated
space.
Prior to installation,ensure that the
gas and electrical supply complies with
the type stated on the rating plate.
Where this appliance is installed in
marine craft or in caravans, it should
not be used as a space heater.
The gas pipe and electrical cable
must be installed in such a way that
they do not touch any parts or the
appliance.
Caut ion
4
220V-240V
Ŷ7KLVDSSOLDQFHVKRXOGEHLQVWDOOHGE\DTXDOL¿HGWHFKQLFLDQRULQVWDOOHU
Ŷ7KHDGMXVWPHQWFRQGLWLRQVIRUWKLVDSSOLDQFHDUHVWDWHGRQWKHODEHORUGDWDSODWH
Ŷ5HPRYHDOOSDFNDJLQJEHIRUHXVLQJWKHDSSOLDQFH
Ŷ$IWHUXQSDFNLQJWKHDSSOLDQFHPDNHVXUHWKHSURGXFWLVQRWGDPDJHGDQGWKDWWKH
connection cord is in perfect condition. Otherwise, contact the dealer before installing
the appliance.
Ŷ7KHDGMDFHQWIXUQLWXUHDQGDOOPDWHULDOVXVHGLQWKHLQVWDOODWLRQPXVWEHDEOHWR
ZLWKVWDQGDPLQLPXPWHPSHUDWXUHRIÛ&DERYHWKHDPELHQWWHPSHUDWXUHRIWKH
room it is located in, whilst in use.
Ŷ,QWKHHYHQWRIEXUQHUÀDPHVEHLQJDFFLGHQWDOO\H[WLQJXLVKHGWXUQRIIWKHEXUQHU
control and do not attempt to re-ignite the burner for at least one minute.
Ŷ
The use of a gas cooking appliance results in the production of heat and moisture in the
room in which it is installed. Ensure that the kitchen is well ventilated: keep naturalro
YHQWLODWLRQKROHVRSHQRULQVWDOODPHFKDQLFDOYHQWLODWLRQGHYLFHPHFKDQLFDOH[WUDFWRUKRRG
Ŷ3URORQJHGLQWHQVLYHXVHRIWKHDSSOLDQFHPD\FDOOIRUDGGLWLRQDOYHQWLODWLRQIRU
H[DPSOHRSHQLQJRIDZLQGRZRUPRUHHIIHFWLYHYHQWLODWLRQIRUH[DPSOHLQFUHDVLQJ
the level of mechanical ventilation where present.

Child and People Safety
Do not allow children to play near or with the appliance.
The appliance gets hot when it is in use.
Children should be kept away until it has cooled.
Warning
Caut ion
5
Ŷ7KLVDSSOLDQFHLVGHVLJQHGWREHRSHUDWHGE\DGXOWV
Ŷ&KLOGUHQFDQDOVRLQMXUHWKHPVHOYHVE\SXOOLQJSDQVRUSRWVRIIWKHDSSOLDQFH
Ŷ7KLVDSSOLDQFHLVQRWLQWHQGHGIRUXVHE\FKLOGUHQRURWKHUSHUVRQVZKRVHSK\VLFDO
VHQVRU\RUPHQWDOFDSDELOLWLHVRUODFNRIH[SHULHQFHDQGNQRZOHGJHSUHYHQWVWKHP
from using the appliance safety without supervision or instruction by a responsible
person to ensure that they can use the appliance safety.
During Use
Warning
The use of a gas cooking appliance
results in the production of heat and
moisture in the room in which it is
installed. Ensure that the kitchen is well
ventilated : keep natural ventilation
holes open or install a mechanical
ventilation device
(mechanical
extractor hood).
dednettanu ecnailppa eht evael reveN
when cooking.
Burner
panel is not designed to operate from
an external timer or separate remote
control system.
6
Ŷ2QO\XVHWKHDSSOLDQFHIRUSUHSDULQJ
food.
LQ
contact with water. Do not operate
this appliance with wet hands.
Ŷ'RQRWXVHWKLVDSSOLDQFHLILW
comes
Ŷ7KHKHDWLQJDQGFRRNLQJVXUIDFHVRI
the appliance become hot when they
are in use, take all due precautions.
Ŷ'RQRWXVHODUJHFORWKVWHDWRZHOVRU
similar as the ends could touch the
ÀDPHVDQGFDWFK¿UH
Ŷ8QVWDEOHRUPLVVKDSHQSDQVVKRXOG
not be used on the appliance as they
can cause an accident by tipping or
spillage.
During Use
materials in the storage drawer
near this appliance.
this appliance while it is in operaiton.
aerosols may be affected by heat
and should not stored above or
below the appliance.
‘ ’ position when not in use.
Caut ion
7
Ŷ'RQRWXVHRUVWRUHÀDPPDEOH
Ŷ'RQRWVSUD\DHURVROVLQWKHYLFLQLW\RI
Ŷ3HULVKDEOHIRRGSODVWLFLWHPVDQG
Ŷ(QVXUHWKHFRQWURONQREVDUHLQWKH
This appliance is intended for domestic cooking only.It is not designed for commercial
or industrial purposes.
Prolonged intensive use of the appliance may call for additional ventilation,for example
opening of a window,or increasing the level of mechanical ventilation where present.
Ŷ 8VHKHDWUHVLVWDQWSRWKROGHUVRUJORYHVZKHQKDQGOLQJKRWSRWVDQGSDQV
Ŷ'RQRWOHWSRWKROGHUVFRPHQHDURSHQÀDPHVZKHQOLIWLQJFRRNZDUH
Ŷ7DNHFDUHQRWWROHWSRWKROGHUVRUJORYHVJHWGDPSRUZHWDVWKLVFDXVHVKHDWWRWUDQVIHU
WKURXJKWKHPDWHULDOTXLFNHUZLWKWKHULVNRIEXUQLQJ\RXUVHOI
ŶOQO\HYHUXVHWKHEXUQHUVDIWHUSODFLQJSRWVDQGSDQVRQWKHP'RQRWKHDWXSDQ\HPSW\
pots or pans.
Ŷ1HYHUXVHSODVWLFRUDOXPLQLXPIRLOGLVKHVRQWKHDSSOLDQFH
Ŷ:KHQXVLQJRWKHUHOHFWULFDODSSOLDQFHVHQVXUHWKHFDEOHGRHVQRWFRPHLQWRFRQWDFWZLWK
the appliance surfaces of the cooking appliance.
Ŷ,I\RXKDYHDQ\PHFKDQLFDOSDUWVHJDQDUWL¿FDOKHDUWLQ\RXUERG\FRQVXOWDGRFWRUEHIRUH
is made of glass-cracked, switch off the appliance to avoid defeat electr cutiono.
Ŷ7RPLQLPLVHWKHSRVVLELOLW\RIEXUQVLJQLWLRQRIÀDPPDEOHPDWHULDOVDQGVSLOODJHWXUQ
FRRNZDUHKDQGOHVWRZDUGWKHVLGHRUFHQWHURIWKHWRSSODWHZLWKRXWH[WHQGLQJRYHU
adjacent burners.
Ŷ$OZD\VWXUQEXUQHUFRQWUROVRIIEHIRUHUHPRYLQJFRRNZDUH
Ŷ&DUHIXOO\ZDWFKIRRGVEHLQJIULHGDWDKLJKÀDPHVHWWLQJ
Ŷ$OZD\VKHDWIDWVORZO\DQGZDWFKDVLWKHDWV
Ŷ)RRGVIRUIU\LQJVKRXOGEHDVGU\DVSRVVLEOH)URVWRQIUR]HQIRRGVRUPRLVWXUHRQIUHVK
foods can cause hot fat to bubble up and over the sides of the pan.
Ŷ:KHQXVLQJJODVVFRRNZDUHPDNHVXUHLWLVGHVLJQHGIRUWRSSODWHFRRNLQJ
If the surface
using the appliance.
'RQRWXVHDWHDWRZHORUVL PL ODUPDWHUL DOVL QSODFHRIDSRWK ROGHU6XFK FORWK VFDQ
FDWFK IL UHRQDK RWEXUQHU
Never try to move a pan of hot fat,especially a deep fat fryer.Wait until the fat is
completely cool.
Cleaning and Service
Environmental Information
with due regard to safety and the environment.
unusable, by cutting off the cable.
disposed with other household wastes at the end of its working life. To prevent
possible harm to the environment or human health from uncontrolled waste disposal,
please separate this from other types of wastes and recycle it responsibly to promote
the sustainable reuse of material resources.
Warning
and cooled.
clean the appliance.
Caut ion
8
Ŷ%HIRUHDWWHPSWLQJWRFOHDQWKHDSSOLDQFHLWVKRXOGEHGLVFRQQHFWHGIURPWKHPDLQV
Ŷ<RXVKRXOGQRWXVHDVWHDPMHWRUDQ\RWKHUKLJKSUHVVXUHFOHDQLQJHTXLSPHQWWR
Ŷ$IWHULQVWDOODWLRQSOHDVHGLVSRVHRIWKHSDFNDJLQJ
Ŷ:KHQGLVSRVLQJRIDQROGDSSOLDQFHPDNHLW
&RUUHFW'LVSRVDORI7KLV3URGXFW
:DVWH(OHFWULFDO(OHFWURQLF(TXLSPHQW
Ŷ7KLVPDUNLQJVKRZQRQWKHSURGXFWRULWVOLWHUDWXUHLQGLFDWHVWKDWLWVKRXOGQRWEH
Ŷ+RXVHKROGXVHUVVKRXOGFRQWDFWHLWKHUWKHUHWDLOHUZKHUHWKH\SXUFKDVHGWKLVSURGXFW
RUWKHLUORFDOJRYHUQPHQWRI¿FHIRUGHWDLOVRIZKHUHDQGKRZWKH\FDQWDNHWKLVLWHP
for environmentally safe recycling.
Ŷ%XVLQHVVXVHUVVKRXOGFRQWDFWWKHLUVXSSOLHUDQGFKHFNWKHWHUPVDQGFRQGLWLRQVRI
WKHSXUFKDVHFRQWUDFW7KLVSURGXFWVKRXOGQRWEHPL[HGZLWKRWKHUFRPPHUFLDO
wastes for disposal.
agents.
or serviced by an authorised Service
Engineer and only genuine approved
spare parts should be used.
Ŷ1HYHUXVHDEUDVLYHRUFDXVWLFcleaning
Ŷ 7KLVDSSOLDQFHVKRXOGRQO\EHrepaired
9
Description of the appliance
ΣQn
6.05kW
Continuous
Ignition
Type
G1/2 thread
220-240Vac,
50Hz-60Hz,
Triple-Crown(1),
Semi-rapid(1),
Auxiliary (1)
Ignition
device
Gas
Connection
Electric
supply
Burner
Feature
Dimen
sion
(W*D*H)
Top Plate
Glass
600*510*90
2W
mm
A
How to Use the appliance
ccessories
Description of the appliance
Black circle: gas off
Large flame: maximum setting
Small flame: minimum setting
Automatic ignition with flame failure safety device
10
The appliance is fitted with a flame failure safety device on each burner, which
is designed to stop the flow of gas to the burner head in the event of the flame
going out.
The minimum setting is at the end of the anti-clockwise rotation of the control handle.
All operation positions must be selected between the maximum and minimum position.
The symbol on the control panel,next to the control handle will indicate which burner it
operates.
7KHIROORZLQJV\PEROVZLOODSSHDURQWKHFRQWUROSDQHOQH[WWRHDFKFRQWUROKDQGOH
Bracket (4) Sponge (4) Screw (4)
Instruction Manual (1)
Gas-pipe bend (1)
Injector(3)
How to Use the appliance
Automatic ignition with flame failure safety device
The appliance is fitted with a flame failure safety device on each burner, which
is designed to stop the flow of gas to the burner head in the event of the flame
going out.
To ignite a burner:
o Press in the control knob of the burner that you wish to light and turn it
anti-clockwise to the maximum position.
o If you keep the control knob depressed, the automatic ignition for the
burner will operate.
o
o After this 15-second interval, to regulate the flame you should continue
turning the control knob anti-clockwise until the flame is at a suitable level.
The operating position MUST be at a position between the maximum and
minimum position.
o
To switch the burner off, turn the control knob fully clockwise to the gas
off position.
o In case of power failure, the burners can be lit by carefully using a match.
11
You should hold down the control knob for 15 seconds after the flame on
the burner has lit. If after 15s the burner has not lit, stop operating the
device and open the compartment door and/or wait at least 1 min before
attempting a further ignition of the burner.
Safety and Energy saving advice
- The diameter of the bottom of the pan should correspond to that of the burner.
BURNERS
200mm
240mm
200mm 240mm
160mm
NO YES
120mm
160mm
180mm
12
Triple-Crown
Rapid
Semi-Rapid
Auxiliary
PANS
min.
max.
Do not use small diameter cookware on large
burners.
The flame should never come up the sides of
the cookware.
Avoid cooking without a lid or with the
lid half off
-as this wastes energy
Do not use a pan with a convex or
concave bottom.
Do not place cookware on one side of a
burner,as it could tip over.
Do not use cookware with a large diameter
on the burners near the controls,which when
placed on the middle of the burner may
touch the controls or be so close to them
that they increase the temperature in this
area and may cause damage.
Never place cookware directly on top of the
burner.
Do not place anything,eg.flame
tamer,asbestos mat,between pan and pan
support as serious damage to the appliance
may result.
Do not use excessive weight and do not
hit the cooktop with heavy objects.
Always use cookware that is
suitable for each burner, to avoid
wasting gas and discolouring the
cookware.
Place a lid on the cookware.
Only use pots,saucepans and
frying pans with a thick,flat
bottom.
Always place the cookware right
over the burners,not to one
side.
Place the cookware on top of
the trivet.
Handle cookware carefully when
they are on the burner.
Ŷ'RQRWXVHFRRNZDUH
WKDW
RYHUODSVWKH
HGJH
of the
burner.
It is not recommended to use roasting pans,frying pans or grill stones
heated simultaneously on several burners because the resulting heat
build-up may damage the appliance.
Do not touch the top plate and trivet whilst in use for a certain period
after use.
As soon as a liquid starts boiling,turn down the flame so that it will
barely keep the liquid simmering.
Cleaning and Maintenance
Soft cloth
Neutral Detergent
Nylon Brush
13
Edible Oil
Abrasive
Thinner/Benzene
Metal Brush
Acidic/Alkali
Detergent
Ŷ7DNHRIIWKH3DQVXSSRUW
Ŷ&OHDQWKHVHDQGWKHFRQWUROKDQGOHVZLWKDGDPSFORWKZDVKLQJXSOLTXLGDQGZDUP
water. For stubbon soiling, soak beforehand.
Ŷ'U\HYHU\WKLQJZLWKDFOHDQVRIWFORWK
3DQVXSSRUW&RQWUROKDQGOHV
Ŷ5HJXODUO\ZLSHRYHUWKHWRSSODWHXVLQJDVRIWFORWKZHOO rung-out
LQZDUPZDWHUWR
ZKLFKDOLWWOHZDVKLQJXSOLTXLGKDVEHHQDGGHG
Ŷ'U\WKHWRSSODWHWKRURXJKO\DIWHUFOHDQLQJ
Ŷ7KRURXJKO\UHPRYHVDOW\IRRGVRUOLTXLGVIURPWKHKREDVVRRQDVSRVVLEOHWRDYRLG
the risk of corrosion.
Ŷ6WDLQOHVVVWHHOSDUWVRIWKHDSSOLDQFHPD\EHFRPHGLVFRORXUHGRYHUWLPH7KLVLV
normal because of the high temperatures. Each time the appliance is used these
parts should be cleaned with a product that is suitable for stainless steel.
7RSSODWH
Ŷ &OHDQLQJRSHUDWLRQVPXVWRQO\EHFDUULHGRXWZKHQWKHDSSOLDQFH is
completely cool.
Ŷ7KHDSSOLDQFHVKRXOGEHGLVFRQQHFWHGIURP\RXUPDLQVVXSSO\EHIRUH
FRPPHQFLQJDQ\FOHDQLQJSURFHVV
Ŷ&OHDQWKHDSSOLDQFHUHJXODUO\SUHIHUDEO\DIWHUHDFKXVH
Ŷ$EUDVLYHFOHDQHUVRUVKDUSREMHFWVZLOOGDPDJHWKHDSSOLDQFHVXUIDFH
\RXVKRXOGFOHDQLWXVLQJZDWHUDQGDOLWWOHZDVKLQJXSOLTXLG
Cleaning and Maintenance
14
2
1
2
3
3
4
4
5
7
6
6
7
5
1.Place the flame spreader ( 4 ) on to the burner cup ( 5 ) so that the ignition device
and the flame supervision device extend through their respective holes in the flame
spreader.The flame spreader must click into place correctly.
2.Position the burner lid ( 1,2,3 ) onto the flame speader ( 4 ) so that the retaining pins
fit into their respective recesses.
Ŷ5HPRYHWKHEXUQHUOLGVDQG)ODPH6SUHDGHUVE\SXOOLQJWKHPXSZDUGVDQGDZD\
from the top plate.
Ŷ6RDNWKHPLQKRWZDWHUDQGDOLWWOH detergent or washing up liqui.
Ŷ$IWHUFOHDQLQJDQGZDVKLQJWKHPZLSHDQGGU\WKHPFDUHIXOO\0DNHVXUHWKDWWKH
ÀDPHKROHVDUHFOHDQDQGFRPSOHWHO\GU\
Ŷ:LSHWKH¿[HGSDUWVRIWKHEXUQHUFXSZLWKDGDPSFORWKDQGGU\DIWHUZDUGV
Ŷ*HQWO\ZLSHWKH
L
JQLWLRQGHYLFHDQGÀDPHVXSHUYLVLRQGHYLFHZLWKDZHOOZUXQJRXW
cloth and wipe dry with a clean cloth.
Ŷ%HIRUHSODFLQJWKHEXUQHUVEDFNRQWKHWRSSODWHPDNHVXUHWKDWWKHLQMHFWRULVQRW
blocked.
%851(56
ʄ5HDVVHPEOHWKH$X[LOLDU\6HPL5DSLG5DSLGDQG
7ULSOH&URZQEXUQHUVDVIROORZV
5HSODFHSDUWVLQWKHFRUUHFWRUGHUDIWHUFOHDQLQJ
'RQRWPL[XSWKHWRSDQGERWWRP
7KHORFDWLQJSLQVPXVW¿WH[DFWO\LQWRWKHQRWFKHV
Warnings
Using instructions
15
Ŷ'RQRWPRGLI\WKLVDSSOLDQFH
Ŷ7KLVDSSOLDQFHPXVWEHLQVWDOOHGE\DQDXWKRULVHGWHFKQLFLDQRU
LQVWDOOHU
Ŷ3ULRUWRLQVWDOODWLRQHQVXUHWKDWWKHORFDOGLVWULEXWLRQFRQGLWLRQV
QDWXUHRIWKHJDVDQGJDVSUHVVXUHDQGWKHDGMXVWPHQWRIWKH
DSSOLDQFHDUHFRPSDWLEOH
Ŷ7KHDGMXVWPHQWFRQGLWLRQVIRUWKLVDSSOLDQFHDUHVWDWHGRQWKHODEHO
RUGDWDSODWH
Ŷ7KLVDSSOLDQFHLVQRWFRQQHFWHGWRDFRPEXVWLRQSURGXFWVHYDFXDWLRQ
LQVWDOODWLRQUHJXODWLRQV3DUWLFXODUDWWHQWLRQ
VKRXOG
EHJLYHQWRWKH
UHOHYDQWUHTXLUHPHQWVUHJDUGLQJYHQWLODWRQ
Ŷ%HIRUHLQVWDOOLQJWXUQRIIWKHJDVDQGHOHFWULFLW\VXSSO\WRWKH
DSSOLDQFH
Ŷ$OODSSOLDQFHVFRQWDLQLQJDQ\HOHFWULFDOFRPSRQHQWVPXVWEHHDUWKHG
Ŷ(QVXUHWKDWWKHJDVSLSHDQGHOHFWULFDOFDEOHDUHLQVWDOOHGLQVXFKD
ZD\WKDWWKH\GRQRWWRXFKDQ\SDUWVRIWKHDSSOLDnceZKLFK
may
EHFRPH
KRW
Ŷ*DVSLSHRUFRQQHFWRUVKRXOGQ¶WEHEHQWRUEORFNHGE\DQ\RWKHU
DSSOLDQFHV
Ŷ&KHFNWKHGLPHQVLRQVRIWKHDSSOLDQFHDVZHOODVWKHGLPHQVLRQVRI
WKHJDSWREHFXWLQWKHNLWFKHQXQLW
Ŷ7KHSDQHOVORFDWHGDERYHWKHZRUNVXUIDFHGLUHFWO\QH[WWRWKH
DSSOLDQFHPXVWEHPDGHRIQRQÀDPPDEOHPDWHULDO%RWKWKHVWUDWL
¿HGVXUIDFLQJDQGWKHJOXHXVHGWRVHFXUHLWVKRXOGEHKHDWUHVLVWDQW
WRSUHYHQWGHWHULRUDWLRQ
Ŷ7XUQRQDSSOLDQFHWDSDQGOLJKWHDFKEXUQHUV
&KHFNIRUDFOHDUEOXHÀDPHZLWKRXW\HOORZWLSSLQJ
,IEXUQHUVVKRZVDQ\DEQRUPDO
L
WLHVFKHFNWKHIROORZLQJ
%XUQHUOLGRQFRUUHFWO\
)ODPHVSUHDGHUSRVLWLRQHGFRUUHFWO\
%XUQHUYHUWLFDOO\DOLJQHGZLWKLQMHFWRUQLSSOH
Ŷ$IXOORSHUDWLRQDOWHVWDQGDWHVWIRUSRVVLEOHOHDNDJHVPXVWEHFDUULHG
RXWE\WKH¿WWHUDIWHUinstallation
Ŷ7KHÀH[LEOHKRVHVKDOOEH¿WWHGLQVXFKDZD\WKDWLWFDQQRWFRPHLQWR
FRQWDFWZLWKDPRYHDEOHSDUWRIWKHKRXVLQJXQLWDQGGRHVQRWSDVV
WKURXJKDQ\VSDFHVXVFHSWLEOHRIEHFRPLQJFRQJHVWHG
GHYLFH,WVKRXOG be installed and connected in accordance with current
Grease cranes produced at the factory to meet the requirement of all
life hob.
Ŷ
Positioning
The edges of the hob must be a minimum distance of mm from a side or
rear wall.
700 mm between the highest point of the hob surface (including the burners)
and the underside of any horizontal surface directly above it.
400 mm between the hob surfaces, providing that the underside of the
horizontal surface is in line with the outer edge of the hob. If the underside of
the horizontal surface is lower than 400 mm, then it must be at least 50 mm
away from the outer edges of the hob.
50 mm clearance around the appliance and between the hob surface and any
combustible materials.
45 mm
60
You must have a gap of at least 25 mm and at most 74 mm between
the underneath of the appliance and any surface that is below it.
16
o
o
o
o
o
CLEARANCES REQUIRED WHEN
FITTING THE HOB WITH A COOKER
HOOD ABOVE
600mm
700mm
400mm
400mm
60mm
in
0
.
0mm
M
2
This appliance is to be built into a kitchen unit or 600mm worktop,providing
the following minium distances are allowed;
- An oven must have forced ventilation to install a hob above it.
- Check the dimensions of the oven in the installation manual.
- The cut out size must obey the indication.
560mm
480mm
Installing the appliance
Sponge
Bottom view
The thickness of the sponge is 3 mm.
The width of the sponge is 10 mm.
of the screws.There are one set of screw holes in
each corner of the hob (H) .
Slightly tighten a screw (C) through the bracket (B) so
that the bracket is attached to the hob, but so that you
can still adjust the position
.
.2 Carefully turn the hob back over and then gently lower
it into the aperture hole that you have cut out.
.3 On the underneath of the hob, adjust the brackets into
a position that is suitable for your worktop.
Then fully tighten the screws (C) to secure the hob
into position.
17
Remove the pan supports, the burner lid
and flame spreader and carefully turn the
appliance upside down and place it on a
cushioned mat.
Take care that the Ignition devices and
flame supervision devices are not damaged
in this operation.
2.
Apply the sponge provided around the
edge of the appliance.
3.
1.
Do not leave a gap in the sealing agent or
overlap the thickness.
3ODFHWKHEUDFNHW %RYHUWKHKROHVWKDWPDWFKWKHVL]H
7KLVZLOOPDNHLWGLI¿FXOWWRUHPRYHWKH
DSSOLDQFHIURPWKHDSHUWXUHLQIXWXUH
SDUWLFXODUO\LILWQHHGVWREHVHUYLFHG
(A) SEALING STRIP
(C) SCREW (B) BRACKET
Do not use a silicon sealant to seal the
appliance against the aperture.
Gas Connection
18
Ŷ7KLVDSSOLDQFHPXVWEHLQVWDOOHGDQGFRQQHFWHGLQDFFRUGDQFHZLWKLQVWDOOD
WLRQUHJXODWLRQVLQIRUFHLQWKHFRXQWU\LQZKLFKWKHDSSOLDQFHLVWREHXVHG
Ŷ7KLVDSSOLDQFHLVVXSSOLHGWRUXQRQ
/3*
DQG
QDWXUDOJDV
&RQYHUVLRQIRU
JDVHVPXVWRQO\EHXQGHUWDNHQE\DTXDOL¿HGSHUVRQ
o
It is the law that all gas appliances are installed by competent persons
in accordance with the current edition of the Gas Safety Installation
and Use Regulations.
o
It is in your interest and that of safety to ensure compliance with the law.
o
In the UK, GASSAFE registered installers work to safe standards
of practice. The hob must also be installed in accordance with the
current edition of BS 6172. Failure to install the cooker correctly could
invalidate the warranty, liability claims and lead to prosecution.
XVHRQ/3*DQG
QDWXUDO
seal
G1/2"Female coupler
The gas rail
seal
The gas rail
Ø11.5 Female coupler
LPG > NG NG > LPG
Gas supply replacement and installation guidelines:
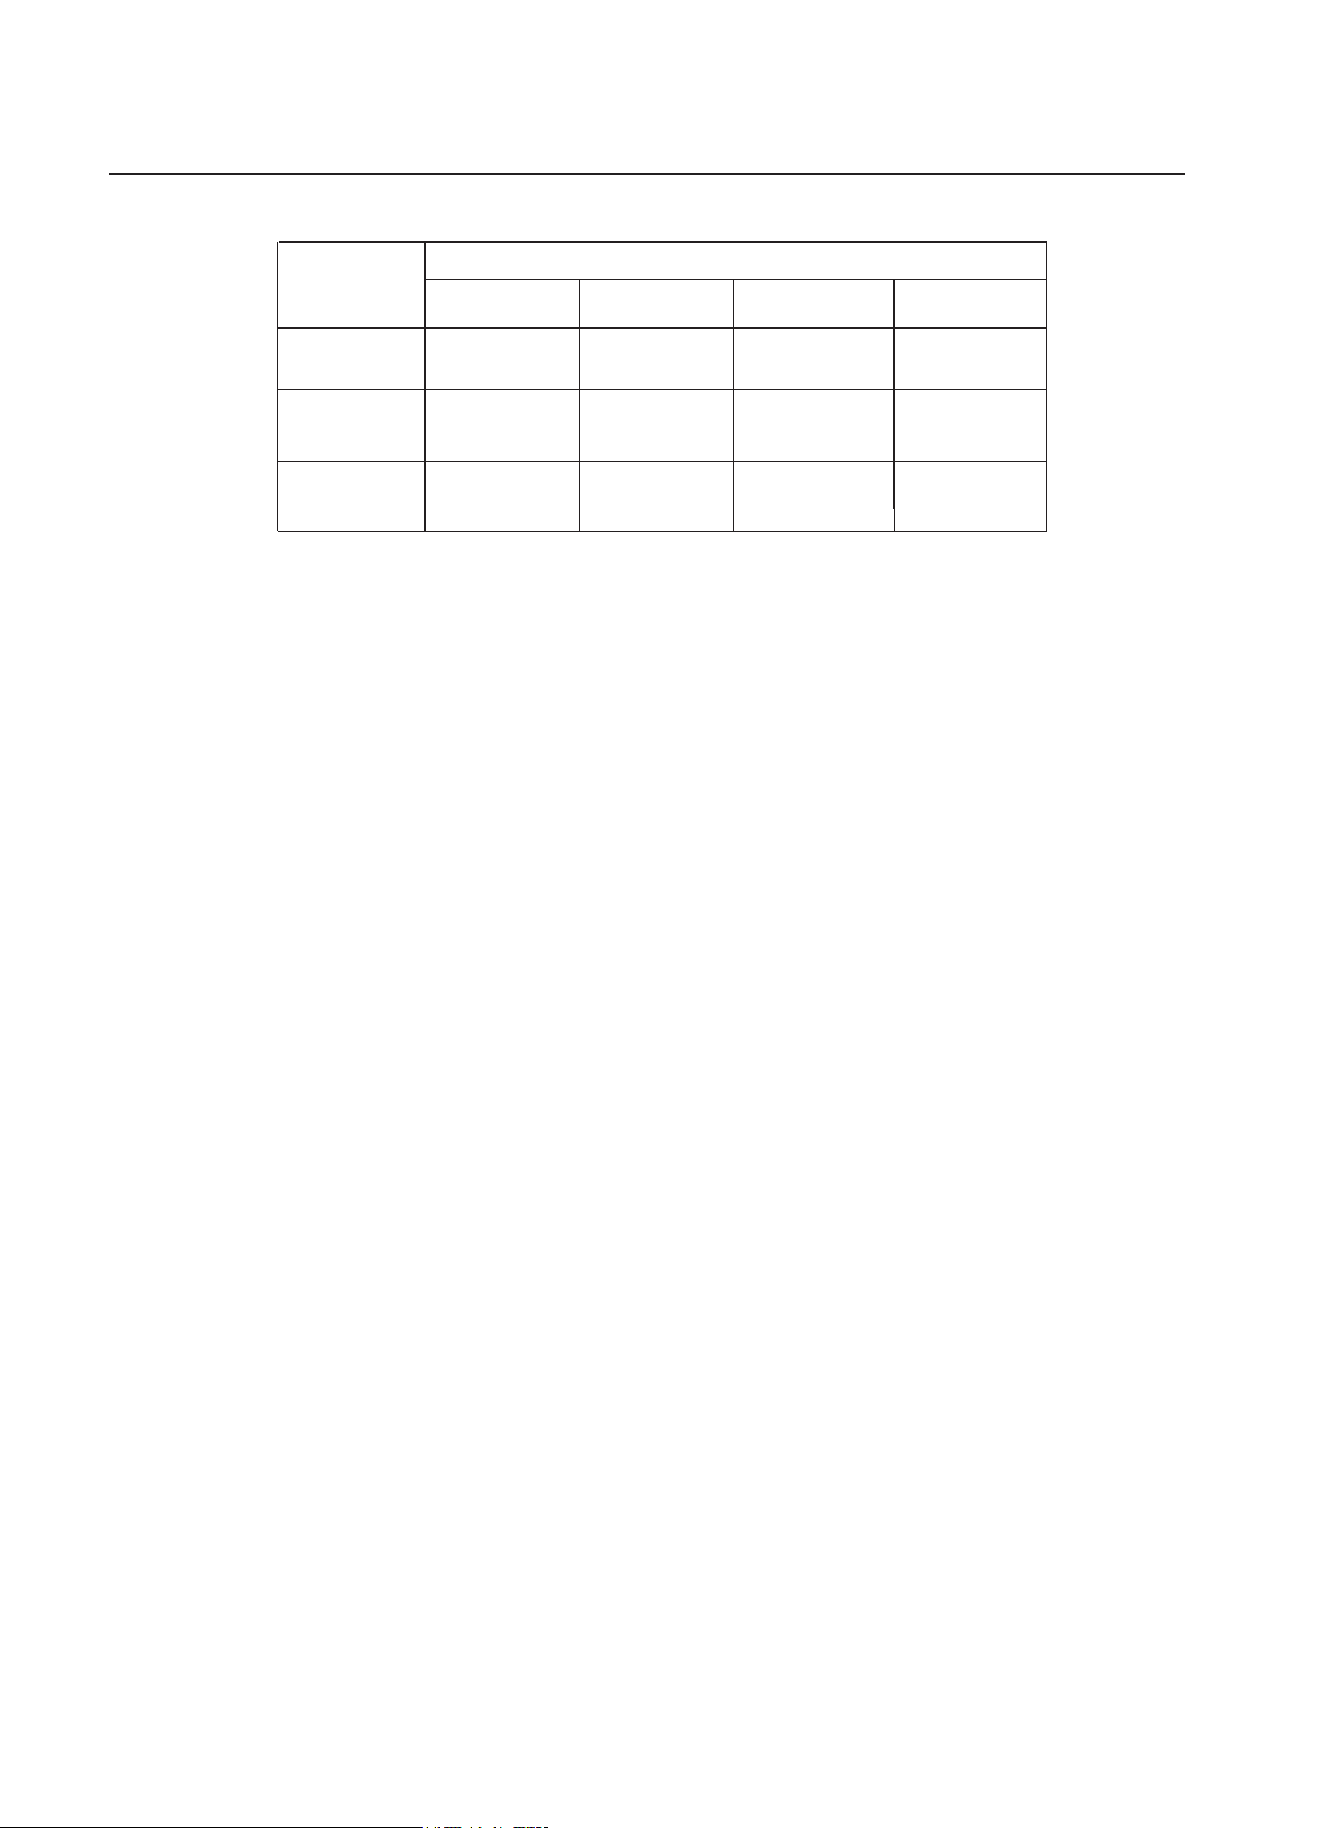
Gas Specification
19
Heat input and orifice s
ize mark
ed(mm)
Wok
burner
Rapid burner
Semi-rapid
Auxiliary- rapid
3.3kW(241g/h)
/
1.75kW
(127g/h)
1.0kW
(73g/h)
G30 29mbar
0.93
/
0.66
0.50
G20 20mbar
1.28
/
0.78
Gas type &
pressure
1.00

Electrical Connection
- Green/yellow = Earth
- Blue = Neutral
- Brown = Live
20
■ This appliance is designed to be connected to a 220-240V, 50Hz-60Hz AC electricity supply.
Ŷ7KHZLUHZKLFKLVFRORXUHGJUHHQDQG\HOORZPXVWEHFRQQHFWHG
WRWKHWHUPLQDOZKLFKLVPDUNHGZLWKWKHOHWWHU(RUE\WKHHDUWK
V\PERO
Ŷ7KLVDSSOLDQFHPXVWEHHDUWKHG
Ŷ7KHZLUHVLQWKHPDLQVOHDGDUHFRORXUHGLQDFFRUGDQFHZLWKWKHIROORZLQJFRGH
Gas adjustment
1
2
Injector
Control handle
Tap
Sealing ring
21
Remove the pan support, Burner lid and Flame spreader.
Unscrew the injector using a 7mm box spanner and
replace it with the stipulated injector for new gas
supply. Carefully reassemble the all components.
After injectors are replaced, it is advisable to strongly
tighten the injector in place.
Adjustment of minimum level of the flame.
Turn the taps down to minimum.
-
Remove the knob from the tap and place a small
bladed screwdriver in the centre of the tap shaft.
The correct adjustment is obtained when the flame
has a length of about 3 - 4 mm.
-
For butane
/
propane gas, the adjusting screw must
M
ake sure that the flame does not go out by
quickly turning from maximum flow to minimum
flow. If it does then remove the control knob and
make further adjustments to the gas flow, testing it
again once the adjustment has been made.
Repeat this process for each one of the gas taps.
be tightly screwed in.
Refit the control knob.
Ŷ7DNHSUHFDXWLRQVRQWKHRSHUDWLRQVDQGDGMXVWPHQWVWREHFDUULHGRXWZKHQ
FRQYHUWLQJIURPRQHJDVWRDQRWKHU
Ŷ$OOZRUNPXVWEHFDUULHGRXWE\DTXDOL¿HGWHFKQLFLDQ
Ŷ%HIRUH\RXEHJLQWXUQRIIWKHJDVDQGHOHFWULFLW\VXSSO\WRWKHDSSOLDQFH
-
Change the injector of the burners.
FKDQJHWKHZKROHWDS
Ŷ
%HIRUHSODFLQJWKHEXUQHUV
EDFNRQWKHWRSSODFHPDNHVXUH
WKDWWKHLQMHFWRULV
QRWEORFNHG
DTXDOL¿HGWHFKQLFLDQRULQVWDOOHU
KDVWRPDUN³9´
RQWKHULJKWJDV
FDWHJRU\
WRPDWFKZLWKWKH
VHWWLQJ
LQUDWLQJSODWH
5HPRYHWKHSUHYLRXV
VHWWLQJ³9´PDUN
LQWKHHYHQWRIDPDOIXQFWLRQ
Ŷ
$IXOORSHUDWLRQDOWHVWDQGDWHVW
Ŷ
$IWHUFRPSOHWLQJFRQYHUVLRQ
IRUSRVVLEOHOHDNDJHVPXVWEH
FDUULHGRXWDIWHU
JDVFRQYHUVLRQ
VXFKDVVRDSZDWHURUJDV
GHWHFWRU
Ŷ
Do not dismantle the tap shafe:
Trouble shooting
Not ignited
No Spark.
Check the electricity supply.
Badly ignited
The gas supply is closed.
The ignition plug is contaminated
with alien substance.
Noise made when
combusted and ignited
Flame goes out
when in use.
Yellow Flame
Different gas is used.
Check the gas used.
Unstable Flame
Gas Smell
Wipe alien substance with a
dry cloth.
Gas leakage
Stop using the product and
close the
middle valve.
Open
the window to ventilate.
Contact our service centre
by
using a phone outside.
22
Repairs should be performed by a licensed technician only.Improper repair may result in
considerable danger to you and others.
The burner lid is badly assembled. Assemble the lid correctly.
The gas supply is not completely
open.
Open the gas supply
completely.
The burners are wet.
Dry the burners lids carefully.
The holes in the flame spreader
are clogged.
Clean the flame spreader.
The burner lid is badly assembled.
Assemble the burner lid
correctly.
The flame supervision device is
contaminated with alien substance.
Open the gas supply
completely.
The burner lid is badly assembled.
Assemble the lid correctly.
Clean the flame supervision
device.
Product being cooked has boiled
over and extinguished the flame.
Turn off burner knob.Wait one
minute and reignite zone.
A strong draught may have blown
the flame out.
Please turn off zone and check
cooking area for draught such
as open windows.Wait one
minute and reignite zone
The holes in the flame spreader
are clogged.
Clean the flame spreader.
The burner lid is badly assembled.
Assemble the burner lid
correctly.
Ŷ+RZHYHUVRPHPLQRUSUREOHPVFDQEHUHVROYHGDVIROORZV
Problem
Probable cause
Solution
Ŷ,ISUREOHPLVQRWVROYHGSOHDVHFRQWDFWFXVWRPHUFDUH centre.

CERTIFICADO DE GARANTÍA
Imprescindible la presentación de la factura de compra acompañada del presente certificado de garantía.
Riesgos cubiertos.
Este aparato está garantizado contra cualquier defecto de funcionamiento, siempre que se destine a uso doméstico,
procediéndose a su reparación dentro del plazo de garantía y sólo por la red de SAT autorizados.
Nuestros electrodomésticos Corberó cuentan con la garantía legal del fabricante que cubre cualquier avería o defecto durante36
meses, desde su fecha factura de 1 de enero del 2022. En caso de que fuera necesario, nosotros nos ocupamos de cualquier posible
incidencia siempre que se deba a un componente defectuoso o fallo de fabricación.
Excepciones de garantía.
• Que la fecha del certificado no coincida con la fecha de venta de la factura original.
• Averías producidas por golpe, por caída o cualquier otra causa de fuerza mayor.
• Si el apa
rato ha sido manipulado por personal no autorizado.
• Las averías producidas o derivadas como consecuencia de un uso inadecuado, por defectos de instalación,
por introducir modificaciones en el aparato que alteren su funcionamiento.
• Puestas en marcha, mantenimiento, limpiezas, componentes sujetos a desgaste, lámparas, piezas estéticas,
oxidaciones, plásticos, gomas, carcasas y cristales.
“ESTAS EXCEPCIONES ANULAN LA GARANTÍA, SIENDO LA REPARACIÓN CON CARGO AL CLIENTE”
Periodo amparado en aparatos según ley de garantias en la venta de bienes de consumo Ley vigente es “RD 7/2021”
Horario de atención Lunes a Viernes de 9h00 a 19h00. Teléfono de contacto_ 911 08 08 08 Mail de contacto_ [email protected] web_ www.corbero.es
Dirección de Servicio técnico oficial_Vidal i Ribes 8-10 08950 Esplugues de Llobregat Barcelona
Sevicio Técnico Oficial: 911 08 08 08
Los hornos microondas (a excepción de los integrables) y los hornos sobremesa en el caso de cualquier incidencia de
funcionamiento, deben de llevarse al servicio técnico más próximo por parte del cliente. No se recojen ni reparan en el
domicilio.
•
Garantía termos eléctricos. Garantía de 3 años incluyendo los costes de desplazamiento y mano de obra que
correspondan de la reparación del producto, teniendo que tener un mantenimiento una vez cada 12 meses.
Especialmente si Ud. ha instalado un aparato a gas, tenga presente como titular de la instalación, la obligatoriedad de
realizar una revisión completa de los equipos, (según Real Decreto 238 / 2013, del 5 Abril. RITE. IT3, M. Lo termos
eléctricos y calderas que incluyen depósitos acumuladores de agua caliente, para que se aplique la prestación de la
Garantía, es obligatorio que el ánodo de magnesio esté operativo y que realice la función de protección
adecuadamente. Para ello es recomendable que el ánodo se revise bianualmente por el Servicio Oficial y sea renovado
cuando fuera necesario. Periodicidad que deberá ser anual en aquellas zonas con aguas críticas (contenido de CaCO3
superiores a 200mg/L, es decir a partir de 20ºfH de dureza). Depósitos sin el correcto estado del ánodo de protección, no
tienen la cobertura de la garantía. Independientemente del tipo de depósito o producto, todas las válvulas de
sobrepresión de calefacción o a.c.s., deberán ser canalizadas para evitar daños en Ia vivienda por descargas de agua. La
garantía del producto no asume los daños causados por Ia no canalización del agua derramada por esta válvula.
•
CERTIFICATE OF GUARANTEE
The presentation of the purchase invoice accompanied by this guarantee certificate is essential.
Covered Risks.
This appliance is guaranteed against any malfunction, provided that it is intended for domestic use, proceeding to its repair within
the warranty period and only by the authorized SAT network.
Our Corberó appliances have the manufacturer's legal warranty that covers any breakdown or defect for 36 months, from the
invoice date of January 1, 2022. If necessary, we take care of any possible incident whenever it is due to a defective component or
manufacturing fault. Warranty Exceptions
Warranty Exceptions
•
That the date of the certificate does not coincide with the date of sale of the original invoice.
•
Faults produced by blow, by fall or any other cause of force majeure.
•
If the device has been manipulated by unauthorized personnel.
•
Faults produced or derived as a consequence of improper use, installation defects, or modifications to the device that
alter its operation.
•
Start-up, maintenance, cleaning, components subject to wear, lamps, aesthetic parts,
oxidation, plastics, rubbers, housings and crystals.
“THESE EXCEPTIONS VOID THE WARRANTY, THE REPAIR BEING CHARGED TO THE CUSTOMER”
Period covered in devices according to the law of guarantees in the sale of consumer goods Current law is “RD 7/2021”
Hours of operation Monday to Friday from9h00 a 19h00. Telephone contact_ 911 08 08 08 Contact email_ [email protected] web_ www.corbero.es
Official Technical Service Address_Vidal i Ribes 8-10 08950 Esplugues de Llobregat Barcelona
Official Technical Service: 911 08 08 08
Microwave ovens (with the exception of built-in ones) and tabletop ovens in the event of any incident of
operation, they must be taken to the nearest technical service by the customer. They are not collected or repaired at
home.
•
Electric thermos guarantee. 3-year warranty including travel and labor costs that correspond to the repair of the
product, having to have maintenance once every 12 months. Especially if you have installed a gas appliance, keep in
mind as the owner of the installation, the obligation to carry out a complete review of the equipment, (according to
Royal Decree 238 / 2013, of April 5. RITE. IT3, M. Lo thermos electrical and boilers that include hot water storage tanks,
for the benefit of the Guarantee to apply, it is mandatory that the magnesium anode is operational and that it performs
the protection function adequately.For this, it is recommended that the anode be checked biannually by the Official
Service and is renewed when necessary Periodicity that must be annual in those areas with critical waters (CaCO3
content greater than 200mg/L, that is, from 20ºfH of hardness) Deposits without the correct state of the protection
anode are not covered by the warranty Regardless of the type of tank or product, all heating or DHW overpressure
valves must be channeled to avoid damage and n the house due to water discharges. The product warranty does not
cover damages caused by not channeling the water spilled by this valve.
•