Loading ...
Loading ...

3
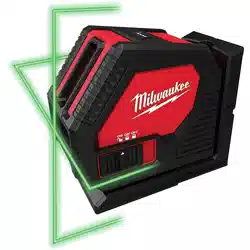
FUNCTIONAL DESCRIPTION
1. Laser apertures
2. Laser mode button
3. On/O switch
4. Battery door
5. Pivot Bracket
6. Threaded insert
7. Magnets
8. Nail/Screw hole
8
6
7
2
1
3
5
4
SPECIFICATIONS
Cat. No. ...........................................................3421
Volts................................................................ 6 DC
Battery Type ................4x(AA) NEDA 15A IEC LR6
Laser............................................................Class 2
Lines Max Power ................................. P
AVG
≤ 7 mW
Pulse Frequency..........................................10 KHz
Pulse Duration Normal Mode ............... Continuous
Pulse Duration Power Save.................... T
p
≤ 50 µs
Wavelength.......................................... 510-530 nm
Lines Beam Divergence ................................. 1 rad
Storage Temp ....................................-4°F to 140°F
Working Range ................................................. 100'
Range with Detector .........................................165'
Accuracy ...............................................±1/8" @ 33'
Settle Time ......................................... < 3 Seconds
Tripod Mount ...............................................1/4"-20
Ingress Protection............................................ IP54
Drop Rating .......................................................1 m
Leveling ............Auto ±°4 side to side, front to back
Recommended Ambient
Operating Temperature
...................-4°F to 104°F
ASSEMBLY
Removing/Inserting the Batteries
To remove the batteries, rotate laser on the bracket
180⁰, then unclip the battery door. Pull gently on
battery tether to release 4 (AA) batteries.
WARNING
Always remove batteries before
changing or removing accessories.
To insert the batteries, gently push AA batteries into
position according to the directions on the bottom of
the battery port. Close the battery door. Make sure
it latches securely into place.
WARNING
Only use accessories specically
recommended for this tool. Others
may be hazardous.
Detector/Power Save Mode
Use Detector/Power Save Mode with MILWAUKEE
48-35-1211 Laser Line Detector to extend the battery
run time. Manually activate Detector/Power Save
Mode by holding the Mode button for 3 seconds.
Visual range will be decreased when Detector/
Power save mode is activated. Power Save Mode
is indicated when ashing laser output appears with
approximately 30 minutes battery left.
Low Battery Indication
To indicate low battery (about 30 minutes of battery
life remaining*), the laser lines will ash:
•In Unlocked
ON – 3 times every 4 seconds
•In Locked
ON - 3 times every 8 seconds
The low battery indicator ashing will continue until
the batteries are removed and replaced.
During self-leveling, the out-of-level indicator (ash-
ing 3 times per second) will override the low battery
indicator.
NOTE: Battery life may vary by brand/age. Replace
the batteries as soon as possible.
WARNING
To reduce the risk of injury or dam-
age, securely mount/attach the
laser before starting an operation. Injury/damage
may occur if the laser falls.
Mounting/Adjusting the Laser Level
The pivot bracket can be used to mount the laser
level in multiple ways:
• Use the embedded magnets to secure the laser level
to steel studs, steel beams, etc.
• Use the keyhole slot to hang the laser level on the
wall with a nail or screw.
• Set the laser level on a at surface.
• Position the laser and/or wall mount on a stable
surface.
• Use the 1/4"-20 threaded insert to mount on a tripod.
• Once the level is mounted, use the micro adjustment
knobs to ne tune the laser line.
Loading ...
Loading ...
Loading ...