Loading ...
Loading ...
Loading ...
Maintenance Daily Weekly Monthly
Make sure that the screws and nuts are tight. X
Make sure that the battery release buttons on the battery works and locks the
battery in the product.
X
Examine that the battery charger is not damaged and function correctly. X
Make sure that the battery is not damaged. X
Make sure that the battery is charged. X
Make sure that the battery charger is not damaged. X
Examine all couplings and connections. Make sure they are not damaged and
free from dirt.
X
Do a check of the connections between the battery and the product. Do a check
of the connection between the battery and the battery charger.
X
To examine the battery and the battery
charger
1. Examine the battery for damages, for example
cracks.
2. Examine the battery charger for damages, for
example cracks.
3. Make sure that the connection cord of the battery
charger is not damaged and that there are no cracks
in it.
To clean the product, the battery and
the battery charger
1. Clean the product with a dry cloth after use.
2. Clean the battery and battery charger with a dry
cloth. Keep the battery guide tracks clean.
3. Make sure that the terminals on the battery and the
battery charger are clean before the battery is put in
the battery charger or the product.
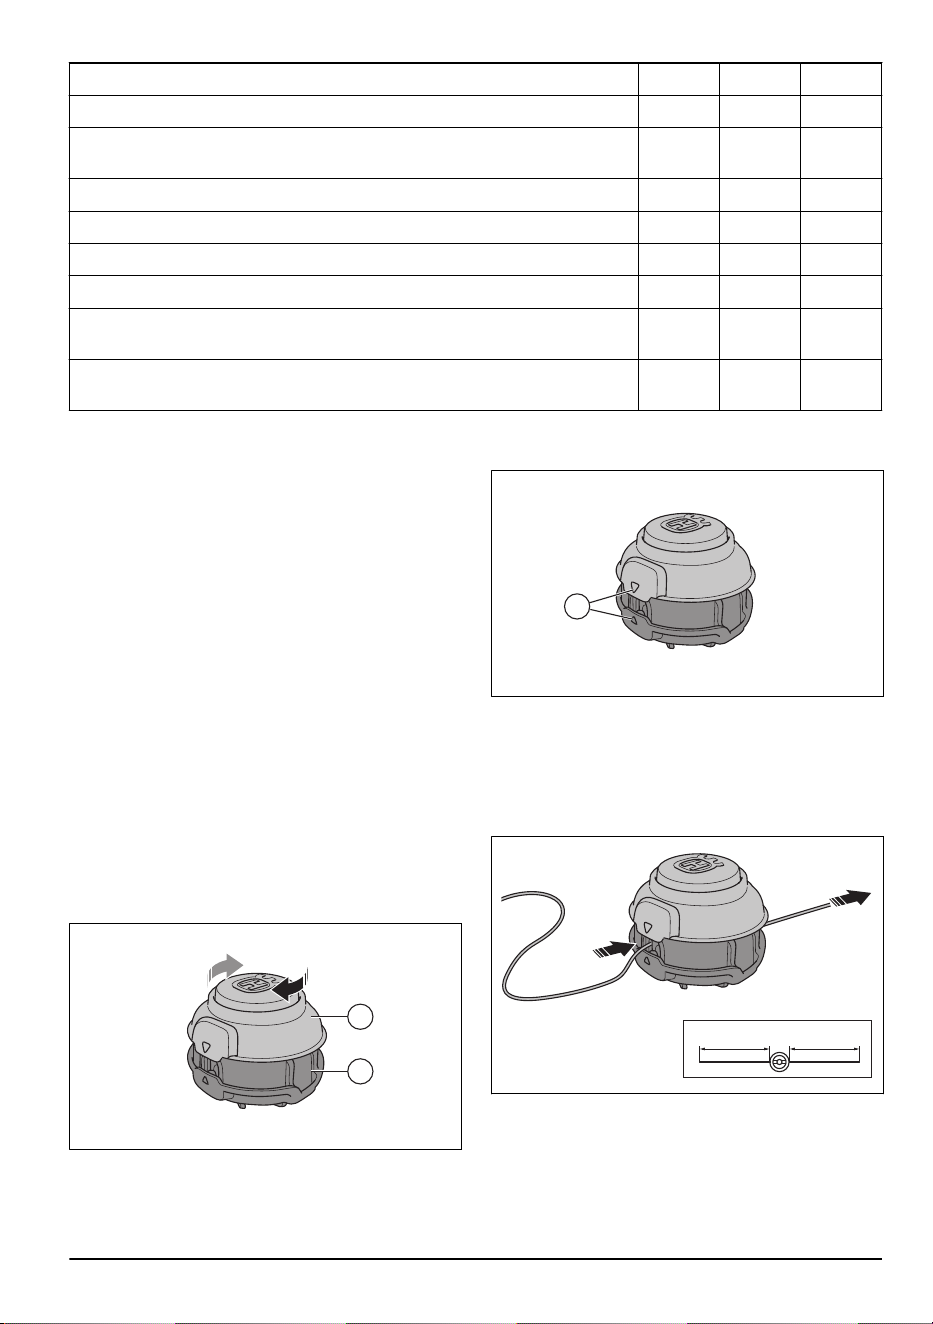
To replace the trimmer line
1. Hold the lower half (A) of the trimmer head stable
with one hand.
B
A
2. Use your opposite hand to turn the top half (B) of the
trimmer head clockwise.
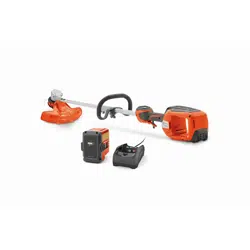
3. Continue to turn the top half of the trimmer head until
the triangles (C) align.
C
4. Remove and discard the remaining trimmer line, if
there is.
5. Cut approximately 5.5 m/18 ft of new trimmer line.
6. Put one end of the trimmer line into one of the holes.
7. Push the trimmer line through the trimmer head and
through the opposite hole.
X X
8. Pull the trimmer line through the trimmer head until
there is an equal length of trimmer line on each side.
9. Hold the trimmer head lower half stable with one
hand.
1511 - 013 - 01.11.2023
17
Loading ...
Loading ...
Loading ...