Loading ...
Loading ...
Loading ...

14
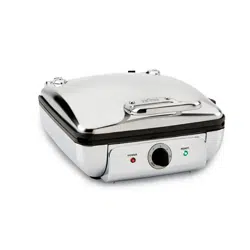
USING YOUR WAFFLE MAKER
CAUTION: Do not immerse the appliance, cord or plug in water or any other liquid.
• Do not run the wae maker under water or any other liquid.
• Before using, remove all packaging, stickers or accessories both inside and outside of the appliance.
• Remove the excess batter tray from the styrofoam packaging.
• Always use the wae maker on a at, dry, heat resistant surface.
• Ensure that your hands are dry when using this appliance.
• Do not place the appliance on or near slippery or hot surfaces, or allow the cord to dangle above a heat source.
1. Make sure the plates are in place and the Shade Selector is turned to the OFF position. Plug in the wae maker
(Fig. 3)
2. Turn on the heater and begin preheating by selecting the desired setting with the Shade Selector Knob (Setting 1
will results in the lightest wae; setting 6 the darkest). Pre-heat the wae maker in the closed position. (Fig. 4)
a. e red ON indicator will light to indicate that the wae maker is on and heating.
NOTE: e Removable Plates have a non-stick cooking surface that may emit a slight odor during rst use.
is is normal and commonly occurs with non-stick coatings.
3. Baking time is determined by browning level. Choose a setting on the shade selector. We recommend using
Setting 3 for golden brown waes. When the wae maker has reached the selected temperature and is ready to
bake, the green READY indicator will light up accompanied by a beep. (Fig. 5)
a. Lift the lid and add batter. (Fig. 6) en close the lid again to cook. Do not lock the safety catches on the sides
of the wae maker when cooking. (Fig. 7)
NOTE: ere will be some steam during cooking. is is normal and expected.
4. When your waes are ready, the green READY indicator will light up accompanied by a beep again.
a. Carefully remove your wae and enjoy.
b. If making more than one wae, once your rst wae is removed – repeat the baking process by adding more
batter (step 3a).
Loading ...
Loading ...
Loading ...