Loading ...
Loading ...
Loading ...
12
5. Apply detergent from the bottom to the top of the dry
surface to be cleaned.
NOTE: Wetting the surface rst is not recommended as it
dilutes the detergent and reduces its cleaning ability.
6. Allow the detergent to remain on the surface for a short
time before rinsing. Do not allow the detergent to dry on
the surface.
mCAUTION! Damage may occur to painted surfaces if
the detergent is allowed to dry on the surface. Wash and rinse
a small section at a time. Avoid working on hot surfaces or in
direct sunlight.
7. When nished using the pressure washer, you must rst
drain and rinse the detergent tank. Run the pressure
washer in low pressure until all of the soap is drained from
the detergent tank.
mCAUTION! Failure to follow these cleaning
instructions will cause the injection system to become
clogged and inoperable.
mIMPORTANT! NEVER USE:
• Bleach, chlorine products, and other corrosive chemicals
• Liquids containing solvents (e.g. paint thinners, gasoline, oils)
• Tri-sodium phosphate products
• Ammonia products
• Acid-based products
These chemicals will harm the unit and will damage the
cleaning surface.
Using the Wheel + Rim Brush
Sun Joe
®
Wheel + rim brush safely cleans painted, topcoat,
and delicate surfaces. Compatible with all Sun Joe
®
SPX series
pressure washers.
1. Disconnect the spray wand from the trigger gun by
pressing it in rmly and twisting clockwise until the
2 locking tabs of the lance can be removed from the slot
(Fig. 21).
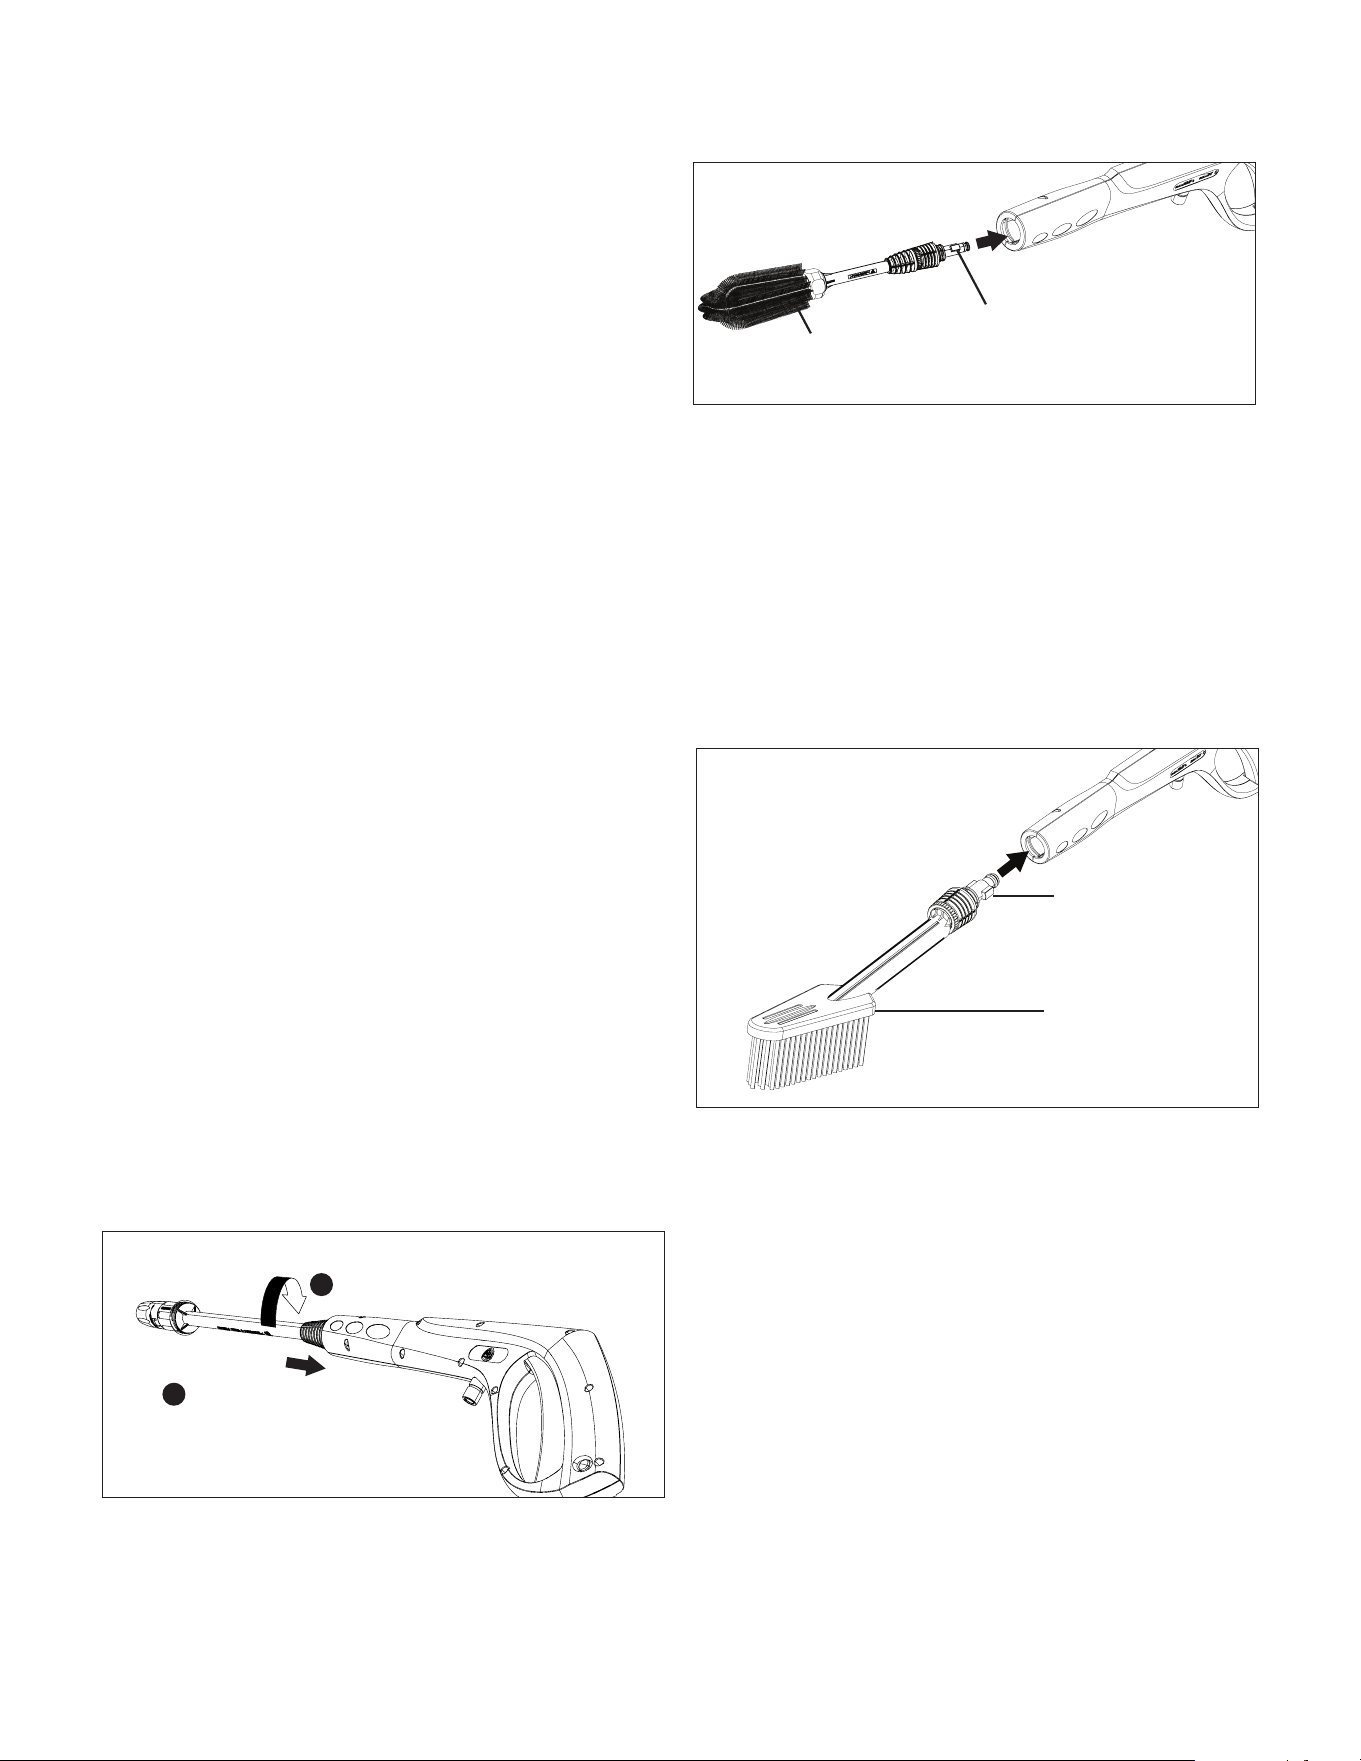
2. Take the Wheel + rim brush and align the two tabs with
the inside of the trigger gun (Fig. 22).
3. Once aligned, push the Wheel + rim brush into the trigger
gun, twist counterclockwise to lock into place.
Using the Utility Bristle Brush
Sun Joe
®
feather bristle pressure washer Utility bristle
brush safely cleans painted, topcoat, and delicate surfaces.
Compatible with all Sun Joe
®
SPX series pressure washers.
1. If not already done, detach your spray wand from your
trigger gun (Fig. 21).
2. Take the Utility bristle brush and align the two tabs with
the inside of the trigger gun (Fig. 23).
3. Once aligned, push the Utility bristle brush into the trigger
gun, twist counterclockwise to lock into place.
Shutting Down
1. Turn the switch to the STOP (0) position and unplug the
power cord from the outlet.
2. Turn o the water source.
3. Hold the trigger to release water pressure.
4. Disconnect the garden hose from the water inlet on
the unit.
5. Disconnect the high-pressure hose connection on the
trigger gun handle.
6. Release the trigger and engage the gun safety lock.
mWARNING! Turn o the water supply and squeeze the
trigger to depressurize the unit. Failure to do so could result in
personal injury due to discharge of high-pressure water.
Fig. 21
Press the lance inside
1
Twist the lance as shown
2
Fig. 22
Wheel + rim
brush
Locking tab
Fig. 23
Utility bristle
brush
Locking tab
Loading ...
Loading ...
Loading ...