Loading ...
Loading ...
Loading ...

5
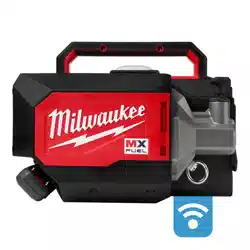
ONE-KEY™
To learn more about the ONE-KEY™ functionality for
this machine, go to milwaukeetool.com/One-Key. To
download the ONE-KEY™ app, visit the App Store
®
or Google Play™ from your smart device.
ONE-KEY™ Indicator
Solid Blue Wireless mode is active and ready
to be congured via the ONE-KEY™
app.
Blinking Blue Machine is actively communicating
with the ONE-KEY™ app.
Blinking Red Machine is in security lockout and
can be unlocked by the owner via
the ONE-KEY™ app.
OPERATION
WARNING
To reduce the risk of injury, always
wear proper eye protection marked
to comply with ANSI Z87.1.
Arming the Machine
The MX FUEL™ machines must be armed prior to
use. Even with the battery pack inserted, the machine
functions will not operate until the machine is armed.
To arm the machine:
1. Insert the battery pack.
2. Press the arm button. The MX FUEL™ icon will
light.
3. After 15 minutes of inactivity, the machine will enter
sleep mode. The MX FUEL™ icon will go o and
the LEDs are un-operational.
4. Press and hold the arm button for 1 second to
reactivate the machine.
5. Press and hold the arm button for 1 second to
unarm (turn o) the machine. The MX FUEL™
icon will go o.
Starting and Stopping
1. Arm the machine.
2. To start the machine, set the switch to the
position.
3. To stop the machine, set the switch to the
position.
Starting and Stopping (Remote Mode)
1. Arm the machine.
2. On the machine, set the switch to the position.
3. Turn on the remote
4. To start the machine, press the button on the
remote.
5. To stop the machine, press the button on the
remote.
Cold Start LED
The Cold Start LED will illuminate when the machine
is started in cold conditions (below 32°F). The ma-
chine will will gradually bring the VPM up to 10,000
in order to avoid nuisance shutdowns. Once the VPM
reaches 10,000 VPM the Cold Start LED will go o.
This feature allows the machine to start in temps as
low as -4°F.
Low Battery Alert
During use, when the battery nears end of charge
(at 10% and 2% remaining charge), the machine will
notify the user by turning itself o and on (pausing).
Charge the battery.
General Operation
1. Insert head vertically into material allowing head
to sink to desired depth by its own weight.
2. Hold in place for 5-15 seconds, then slowly lift head
up, staying behind the trapped air's movement to
avoid retrapping air.
3. A small up and downward movement will close the
hole formed by the head.
4. To prevent agitating air into material, withdraw the
head quickly when near the top.
5. Move head, re-insert and repeat as desired.
MAINTENANCE
WARNING
To reduce the risk of injury, always
unplug the charger and remove the
battery pack from the charger or machine before
performing any maintenance. Never disassemble
the battery pack, charger, or machine, except as
provided in these instructions. Contact a
MILWAUKEE service facility for all other repairs.
Maintaining Machine
Keep your machine, battery pack and charger in good
repair by adopting a regular maintenance program.
Inspect your machine for issues such as undue noise,
misalignment or binding of moving parts, breakage
of parts, or any other condition that may aect the
machine operation. Return the machine, battery
pack, and charger to a MILWAUKEE service facility
for repair. After six months to one year, depending on
use, return the machine, battery pack and charger to
a MILWAUKEE service facility for inspection.
If the machine does not start or operate at full power
with a fully charged battery pack, clean the contacts
on the battery pack. If the machine still does not work
properly, return the machine, charger and battery
pack, to a MILWAUKEE service facility for repairs.
ONE-KEY™
WARNING
Chemical Burn Hazard.
This device contains a
lithium button/coin cell battery. A new
or used battery can cause severe in-
ternal burns and lead to death in as
little as 2 hours if swallowed or enters the body.
Always secure the battery cover. If it does not
close securely, stop using the device, remove the
batteries, and keep it away from children. If you
think batteries may have been swallowed or en-
tered the body, seek immediate medical attention.
Internal Coin Cell Battery
An internal coin cell battery is used to facilitate full
ONE-KEY™ functionality.
To replace the coin cell battery:
1. Remove the battery pack.
2. Remove the screw(s) and open the coin cell bat-
tery door.
3. Remove the old coin cell battery, keep it away from
children, and dispose of it properly.
4. Insert the new coin cell battery (3V CR2032), with
the positive side facing up.
5. Close the battery door and tighten the screw(s)
securely.
Loading ...
Loading ...
Loading ...