Loading ...
Loading ...
DO NOT PUT THE SENSOR
INTO POWER DIRECTLY!
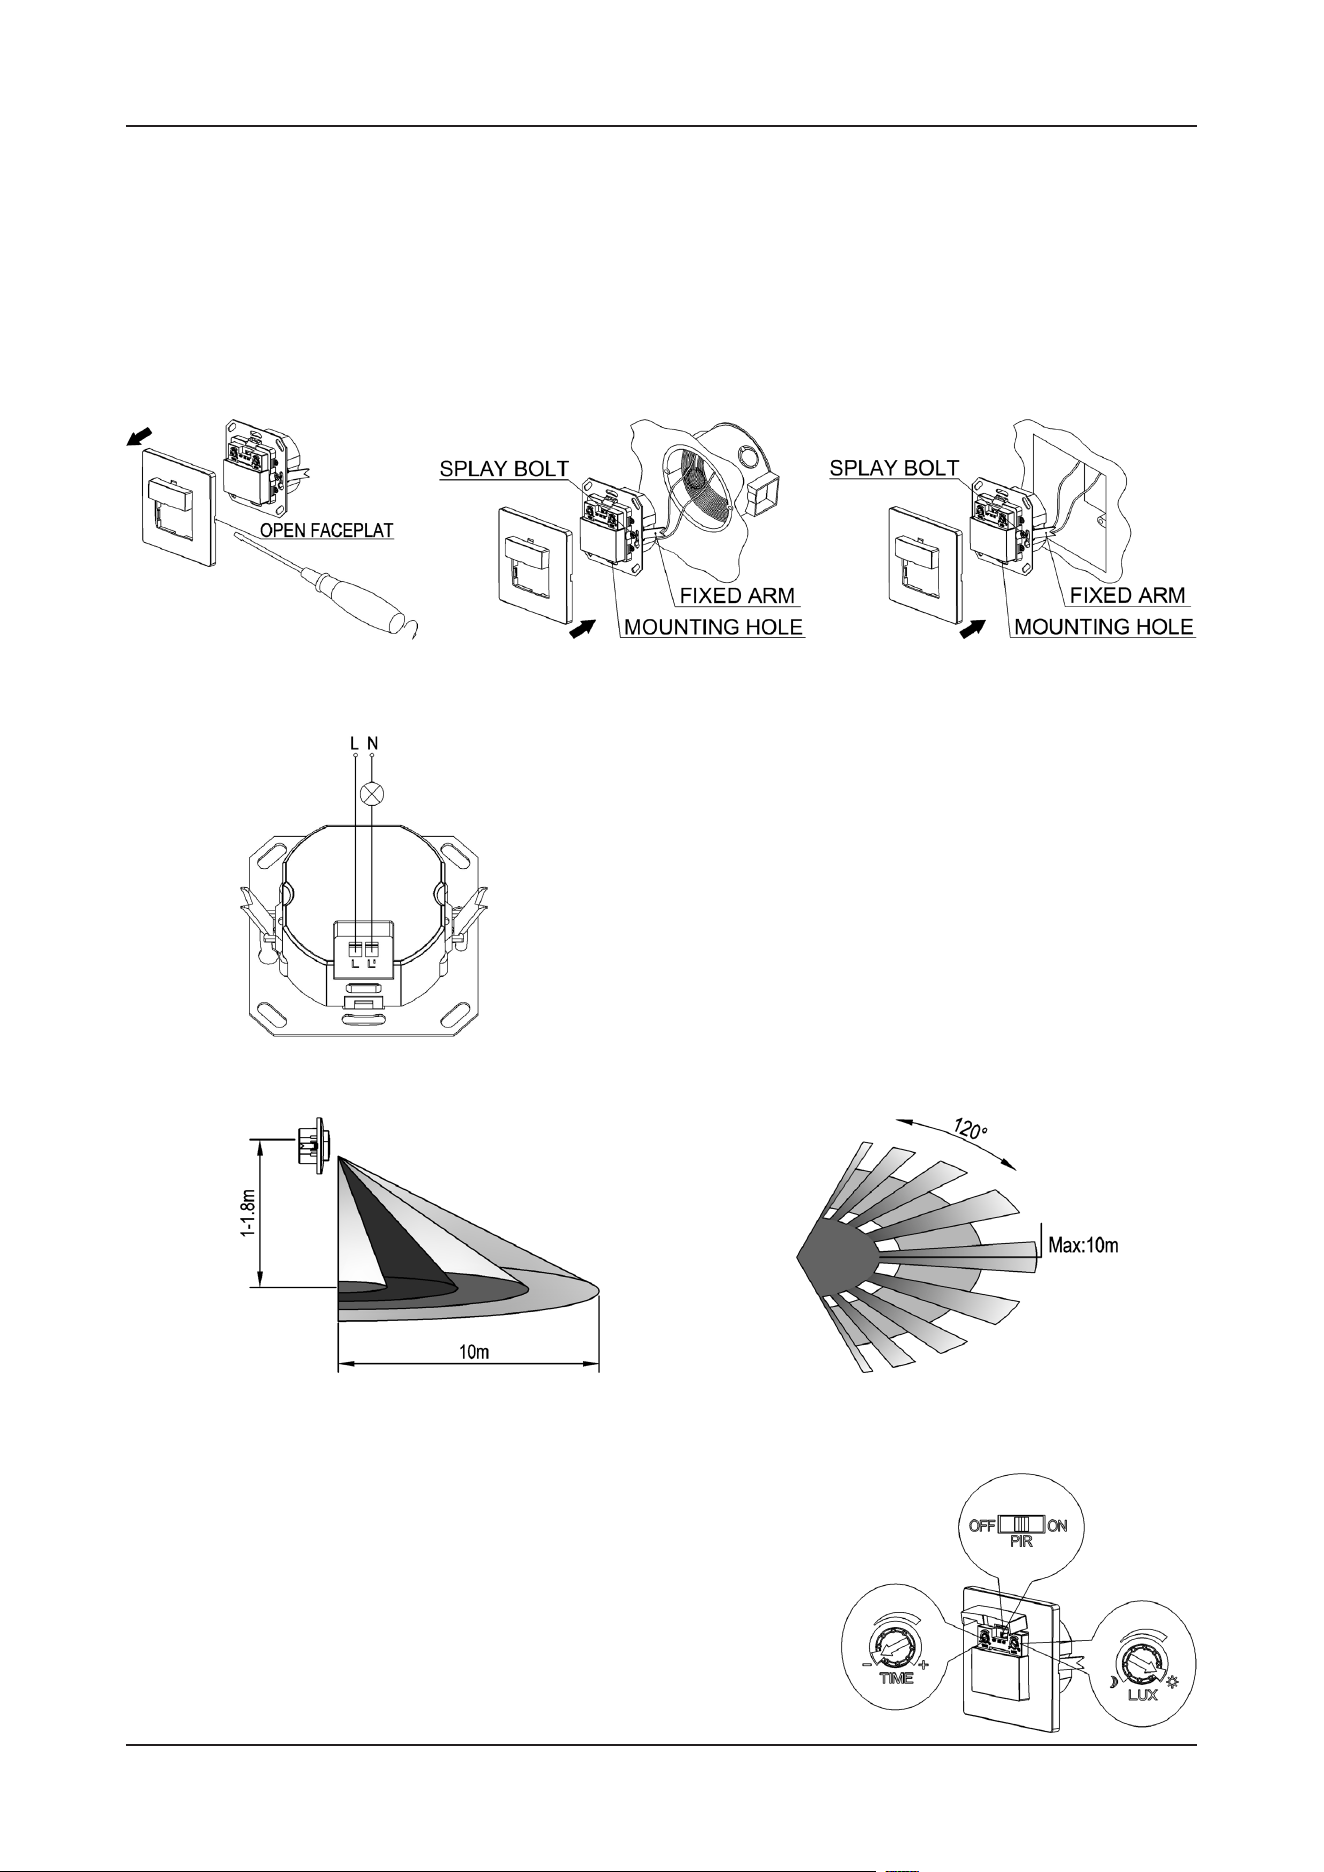
CONNECTION
WIRING DIAGRAM
SENSOR INFORMATION
TEST
• Set the function switch to “ON”, set “TIME” anti-clock-
wise to minimum (-), “LUX” clockwise to maximum (sun).
• Switch on the power, the lamp should be on.
• Set the function switch to “OFF”, the lamp should be o
immediately.
• Set the function switch to “PIR”,Switch on the power;
the sensor and its connected lamp will have no signal
• Unload the faceplate of sensor and adjust the time and LUX knob.(refer to figure 1)
• Loose the screws in the connection terminal, and then connect the power to connection
terminal of sensor according to connection-wire diagram.
• If you want to install it in circular hole, put the sensor into the hole and tighten the splay
bolt on both sides (refer to figure 2). If you want to install in quadrate hole, put the sen-
sor into the hole, fix the screw through the mounting hole (refer to figure 3).
• Install back the faceplate, switch on the power and then test it.
Height of Installation: 1-1.8m DETECTION DISTANCE: Max. 10m
Loading ...