THIS INSTRUCTION BOOKLET CONTAINS IMPORTANT SAFETY INFORMATION. PLEASE READ AND KEEP FOR FUTURE REFERENCE.
EN DE FR ES IT PL
USER'S MANUAL/HANDBUCH
/MANUEL DE L'UTILISATEUR/MANUAL DEL USUARIO
/MANUALE UTENTE/INSTRUKCJA OBSŁUGI
Lawn Roller / Rasenwalze
/ Rouleau à Gazon / Rodillo de Césped / Rullo da Giardino
/ Walec do trawnika
EN
DE
FR
ES
IT
PL
With your inspiring rating, COSTWAY will be more consistent to offer you EASY
SHOPPING EXPERIENCE, GOOD PRODUCTS and EFFICIENT SERVICE!
Mit Ihrer inspirierenden Bewertung wird COSTWAY konsistenter sein, um Ihnen EIN
SCHÖNES EINKAUFSERLEBNIS, GUTE PRODUKTE und EFFIZIENTEN SERVICE zu
bieten!
Avec votre évaluation inspirante, COSTWAY continuera à fournir une EXPÉRIENCE
D’ACHAT PRATIQUE, des PRODUITS DE QUALITÉ et un SERVICE EFFICACE !
Con su calificación inspiradora, COSTWAY será más consistente para ofrecerle
EXPERIENCIA DE COMPRA FÁCIL, BUENOS PRODUCTOS y SERVICIO EFICIENTE.
Con la tua valutazione incoraggiante, COSTWAY sarà più coerente per offrirti
ESPERIENZA DI ACQUISTO FACILE, BUONI PRODOTTI e SERVIZIO EFFICIENTE!
Dzięki twojej opinii COSTWAY będzie mógł oferować jeszcze WYGODNIEJSZE
ZAKUPY, LEPSZE PRODUKTY i SPRAWNIEJSZĄ OBSŁUGĘ KLIENTA.
US office: Fontana UK office: Ipswich AU office: Truganina
DE office: FDS GmbH, Neuer Höltigbaum 36, 22143 Hamburg, Deutschland
FR office: Saint Vigor d'Ymonville
PL office: Gdańsk

EN EN
PARTS REQUIRED
(not supplied)
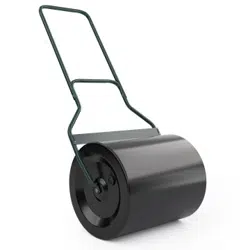
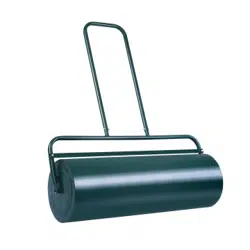
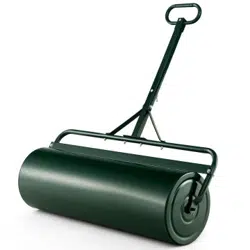
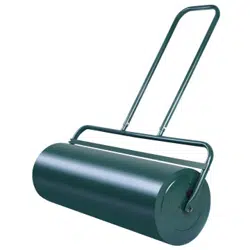
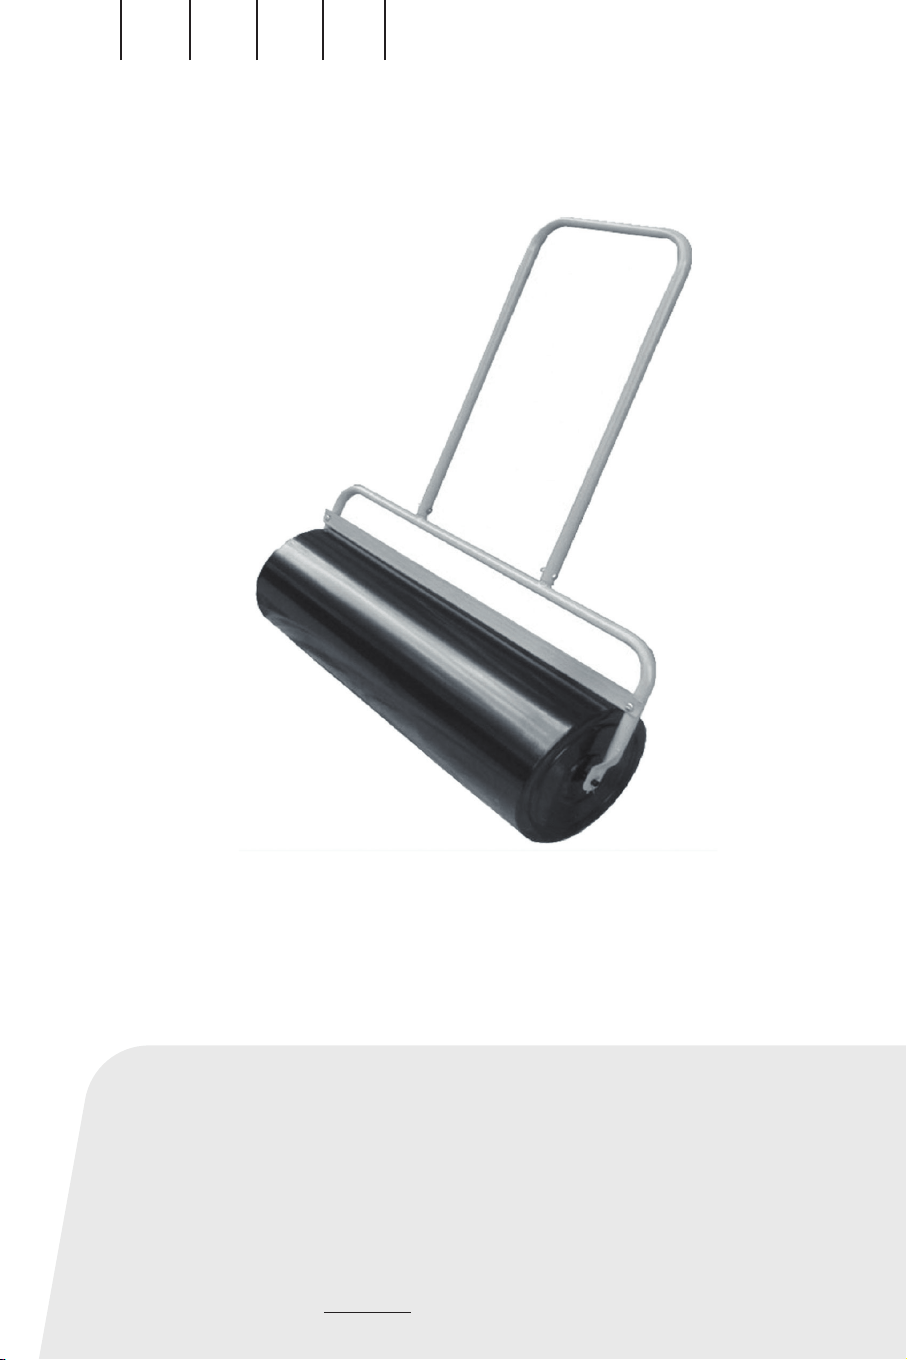
Lawn Roller Application
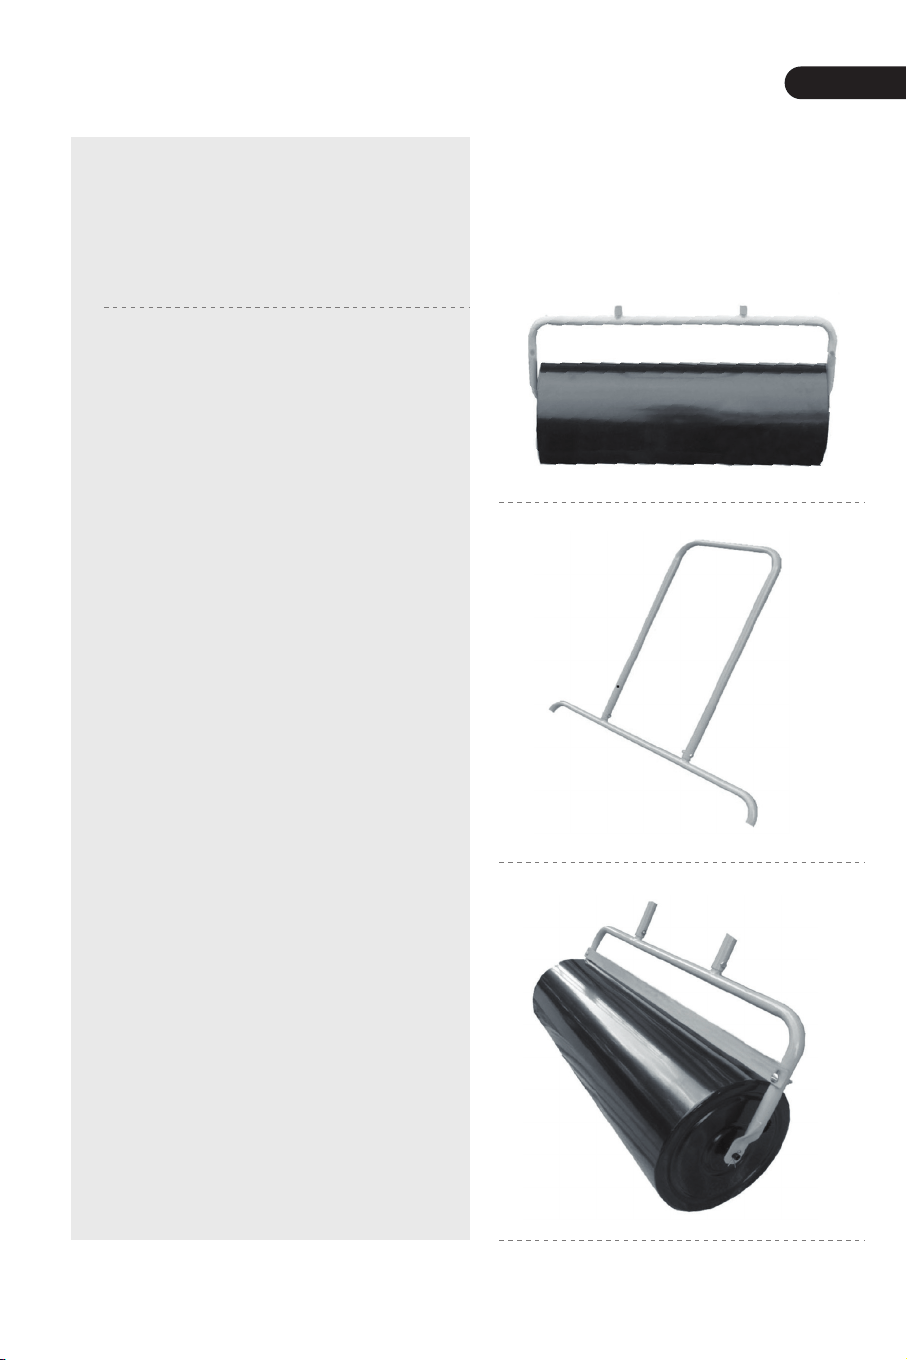
PARTS:
02 03
Water / Sand / Cement
4 X self-locking nuts
4 X bolts
4 X washers
2 X large washer
2 X cotter pin
1 X metal bottom brace
1 X cross bar
1 X handle
1 X drum
ASSEMBLY
Use the lawn roller when seeding a new lawn or after cutting to improve
the overall appearance of the lawn. Rolling will spread the grass roots
giving a thicker coverage. Rolling is advised every time the lawn is cut.
- Attach 1 X metal bottom
brace to the drum using 2 X
large washers, 2x cotter pins.
- Attach the handle to the
metal bottom brace with 2 x
bolts, 2 x self-locking nuts,
washers.
- Attach 1 x cross bar to the
metal bottom brace with 2 x
bolts and self-locking nuts,
washers.
- Tighten all 4 nuts and bolts
securely.
- Remove the cap on the drum
and fill carefully with either
sand, water or concrete mix
until it is completely full.
Replace the cap securely.
Safety warning
When using the lawn roller it's essential you keep your hands and feet
clear of the heavy drum. Special care is necessary when using the lawn
roller on a slope. This product is not suitable for use by children.
EN EN
PARTS REQUIRED
(not supplied)
Lawn Roller Application
PARTS:
02 03
Water / Sand / Cement
4 X self-locking nuts
4 X bolts
4 X washers
2 X large washer
2 X cotter pin
1 X metal bottom brace
1 X cross bar
1 X handle
1 X drum
ASSEMBLY
Use the lawn roller when seeding a new lawn or after cutting to improve
the overall appearance of the lawn. Rolling will spread the grass roots
giving a thicker coverage. Rolling is advised every time the lawn is cut.
- Attach 1 X metal bottom
brace to the drum using 2 X
large washers, 2x cotter pins.
- Attach the handle to the
metal bottom brace with 2 x
bolts, 2 x self-locking nuts,
washers.
- Attach 1 x cross bar to the
metal bottom brace with 2 x
bolts and self-locking nuts,
washers.
- Tighten all 4 nuts and bolts
securely.
- Remove the cap on the drum
and fill carefully with either
sand, water or concrete mix
until it is completely full.
Replace the cap securely.
Safety warning
When using the lawn roller it's essential you keep your hands and feet
clear of the heavy drum. Special care is necessary when using the lawn
roller on a slope. This product is not suitable for use by children.

DE DE
ERFORDERLICHE TEILE
(nicht mitgeliefert)
Anwendung der Rasenwalze
TEILE:
04 05
Wasser / Sand / Zement
4 x selbstsichernde Muttern
4x Bolzen
4 x Unterlegscheiben
2 x große Unterlegscheibe
2x Splint
1 x Bodenstrebe aus Metall
1x Querstange
1 x Griff
1x Trommel
Montage
Verwenden Sie die Rasenwalze beim Säen eines neuen Rasens oder
nach dem Mähen, um das Gesamtbild des Rasens zu verbessern.
Das Walzen verteilt die Graswurzeln und sorgt für eine dickere
Abdeckung. Es wird empfohlen, den Rasen nach jedem Mähen zu
walzen.
- Befestigen Sie 1 x
Metallbodenstrebe mit 2 x
großen Unterlegscheiben und 2
x Splinten an der Trommel.
- Befestigen Sie den Griff mit 2
x Schrauben, 2 x
selbstsichernden Muttern und
Unterlegscheiben an der
unteren Metallstrebe.
- Befestigen Sie 1 x
Querstange an der unteren
Metallstrebe mit 2 x
Schrauben, selbstsichernden
Muttern und Unterlegscheiben.
- Ziehen Sie alle 4 Muttern und
Schrauben fest an.
- Entfernen Sie den Deckel des
Fasses und füllen Sie es
vorsichtig mit Sand, Wasser
oder Betonmischung, bis es
vollständig gefüllt ist. Bringen
Sie den Deckel wieder fest an.
Sicherheitshinweis
Bei der Verwendung der Rasenwalze ist es wichtig, dass Sie Hände und
Füße von der schweren Trommel fernhalten. Besondere Vorsicht ist
geboten, wenn die Rasenwalze an einem Hang verwendet wird. Dieses
Produkt ist nicht für die Benutzung durch Kinder geeignet.

FR FR
Matériaux requis
(non fournis)
Application de rouleau à gazon
PIÈCES :
06 07
Eau / Sable / Ciment
Contre-écrou x 4
Boulon x 4
Rondelle x 4
Grande rondelle x 2
Goupille fendue x 2
Support inférieur en métal x 1
Barre x 1
Poignée x 1
Tambour x 1
ASSEMBLAGE
Utilisez le rouleau à gazon lors de l’ensemencement d’une nouvelle
pelouse ou après la tonte pour améliorer l’aspect général de la pelouse.
Le rouleau étale les racines de l’herbe, ce qui donne une couverture plus
épaisse. Il est conseillé de rouler chaque fois que la pelouse est coupée.
- Fixez le support inférieur
métallique au tambour à l’aide
de 2 grandes rondelles et 2
goupilles fendues.
- Fixez la poignée sur le
support inférieur métallique à
l’aide de 2 boulons, 2
contre-écrous s et des
rondelles.
- Fixez la barre au support
inférieure métallique à l’aide de
2 boulons, des contre-écrous
et des rondelles.
- Serrez bien les 4 écrous et
boulons.
- Enlevez le bouchon du
tambour et remplissez le
tambour soigneusement avec
de l’eau ou sable ou du
mélange de béton jusqu’à ce
qu’il soit complètement rempli.
Remettez le bouchon en place.
Avertissement de sécurité
Lorsque vous utilisez le rouleau à gazon, il est essentiel de garder vos
mains et vos pieds à l’écart du tambour lourd. Une attention particulière
est nécessaire lors de l’utilisation du rouleau à gazon sur une pente. Ce
produit n’est pas adapté à l’utilisation par des enfants.

ES ES
MATERIALES NECESARIOS
(no suministrados)
Aplicación de Rodillo de Césped
PIEZAS
08 09
Agua/Arena/Cemento
Tuerca autobloqueante x4
Perno x4
Arandela x4
Arandela grande x2
Pasador de chaveta x2
Soporte inferior de metal x1
Barra transversal x1
Manija x1
Rodillo x1
MONTAJE
Utilice el rodillo para césped al sembrar un césped nuevo o después de
cortarlo para mejorar la apariencia general del césped. Rodar esparcirá
las raíces de la hierba dando una cobertura más gruesa. Se recomienda
rodar cada vez que se corta el césped.
- Fije el soporte inferior de
metal al rodillo con 2 arandelas
grandes y 2 pasadores de
chaveta.
- Fije la manija al soporte
inferior de metal con 2 pernos,
2 tuercas autobloqueantes y
arandelas.
- Fije la barra transversal al
soporte inferior de metal con 2
pernos, tuercas
autobloqueantes y arandelas.
- Apriete firmemente las 4
tuercas y pernos.
- Quite la tapa del rodillo y
llénelo con cuidado con arena,
agua o mezcla de hormigón
hasta que esté completamente
lleno. Vuelva a colocar la tapa
de forma segura.
Advertencia de Seguridad
Al utilizar el rodillo para césped, es fundamental que mantenga las
manos y los pies alejados del pesado rodillo. Es necesario tener especial
cuidado al utilizar el rodillo para césped en una pendiente. Este producto
no es adecuado para que lo utilicen los niños.

IT IT
Parti richieste
(Non fornite)
Applicazione del rullo del prato
Parti:
10 11
Acqua/Sabbia/Cemento
4 x Dadi autobloccanti
4 x Bulloni
4 x Rondelle
2 x Rondelle grandi
2 x Coppiglie
1 x Supporto inferiore in metallo
1 x Traversa
1 x Maniglia
1 x Tamburo
MONTAGGIO
Utilizzare il rullo da prato durante la semina di un nuovo prato o dopo il
taglio per migliorare l'aspetto generale del prato. Il rotolamento
diffonderà le radici dell'erba dando una copertura più spessa. Si consiglia
di rullare ogni volta che si taglia il prato.
- Fissare 1 supporto inferiore
in metallo al tamburo con 2
rondelle grandi e 2 coppiglie.
- Fissare la maniglia al
supporto inferiore in metallo
con 2 bulloni, 2 dadi
autobloccanti, rondelle.
- Fissare 1 traversa al
supporto inferiore in metallo
con 2 bulloni e dadi
autobloccanti, rondelle.
- Stringere bene tutti e 4 i dadi
e i bulloni.
- Rimuovere il coperchio del
tamburo e riempire
accuratamente con sabbia,
acqua o calcestruzzo fino a
completo riempimento.
Riposizionare il coperchio in
modo sicuro.
Avvertenza di sicurezza
Quando si utilizza il rullo da giardino è essenziale tenere mani e piedi
lontani dal pesante tamburo. È necessario prestare particolare
attenzione quando si utilizza il rullo da giardino in pendenza. Questo
prodotto non è adatto all'uso da parte dei bambini.

PL PL
Wymagane materiały
(brak w zestawie)
Zastosowanie walca do trawnika
Lista części
12 13
Woda/piasek/cement
Nakrętka zabezpieczająca x4
Śruba X 4
Podkładka x 4
Duża podkładka x 2
Zawleczka x 2
Metalowy wspornik x 1
Rura poprzeczna x 1
Uchwyt x 1
Bęben walca x 1
MONTAŻ
Użyj go podczas wysiewu nowego trawnika lub po koszeniu, aby
poprawić ogólny wygląd trawy.
Wałek rozkłada korzenie trawy, co zapewnia grubsze pokrycie. Zaleca się
używanie produktu zawsze, gdy trawnik jest cięty.
- Przymocuj dolną metalową
podporę do bębna za pomocą
2 dużych podkładek i 2
zawleczek.
- Przymocuj uchwyt do dolnej
metalowej podpory za pomocą
2 śrub, 2 przeciwnakrętek i
podkładek.
- Przymocuj pręt do dolnej
metalowej podpory za pomocą
2 śrub, przeciwnakrętek i
podkładek.
- Mocno dokręć 4 nakrętki i
śruby.
- Zdejmij korek z bębna i
ostrożnie napełnij wodą,
piaskiem lub mieszanką
betonową, aż do całkowitego
napełnienia. Nałóż korek.
Ostrzeżenie dotyczące zabezpieczeń
Podczas korzystania z produktu ważne jest, aby trzymać ręce i stopy z
dala od ciężkiego bębna walca. Należy zachować szczególną ostrożność
podczas korzystania z walca na pochyłym terenie. Produkt nie jest
przeznaczony do użytku przez dzieci.

THIS INSTRUCTION BOOKLET CONTAINS IMPORTANT SAFETY INFORMATION. PLEASE READ AND KEEP FOR FUTURE REFERENCE.
EN DE FR ES IT PL
USER'S MANUAL/HANDBUCH
/MANUEL DE L'UTILISATEUR/MANUAL DEL USUARIO
/MANUALE UTENTE/INSTRUKCJA OBSŁUGI
Lawn Roller / Rasenwalze
/ Rouleau à Gazon / Rodillo de Césped / Rullo da Giardino
/ Walec do trawnika
EN
DE
FR
ES
IT
PL
With your inspiring rating, COSTWAY will be more consistent to offer you EASY
SHOPPING EXPERIENCE, GOOD PRODUCTS and EFFICIENT SERVICE!
Mit Ihrer inspirierenden Bewertung wird COSTWAY konsistenter sein, um Ihnen EIN
SCHÖNES EINKAUFSERLEBNIS, GUTE PRODUKTE und EFFIZIENTEN SERVICE zu
bieten!
Avec votre évaluation inspirante, COSTWAY continuera à fournir une EXPÉRIENCE
D’ACHAT PRATIQUE, des PRODUITS DE QUALITÉ et un SERVICE EFFICACE !
Con su calificación inspiradora, COSTWAY será más consistente para ofrecerle
EXPERIENCIA DE COMPRA FÁCIL, BUENOS PRODUCTOS y SERVICIO EFICIENTE.
Con la tua valutazione incoraggiante, COSTWAY sarà più coerente per offrirti
ESPERIENZA DI ACQUISTO FACILE, BUONI PRODOTTI e SERVIZIO EFFICIENTE!
Dzięki twojej opinii COSTWAY będzie mógł oferować jeszcze WYGODNIEJSZE
ZAKUPY, LEPSZE PRODUKTY i SPRAWNIEJSZĄ OBSŁUGĘ KLIENTA.
US office: Fontana UK office: Ipswich AU office: Truganina
DE office: FDS GmbH, Neuer Höltigbaum 36, 22143 Hamburg, Deutschland
FR office: Saint Vigor d'Ymonville
PL office: Gdańsk