
Loading ...
Loading ...
Loading ...
Page 12 AXIS Q7900 Installation Guide
Pin assignments for the I/O Connector of the AXIS Q7900 Rack
Note: For I/O unit connector information for video encoders, refer to their respective Installation Guide for I/O
connector information.
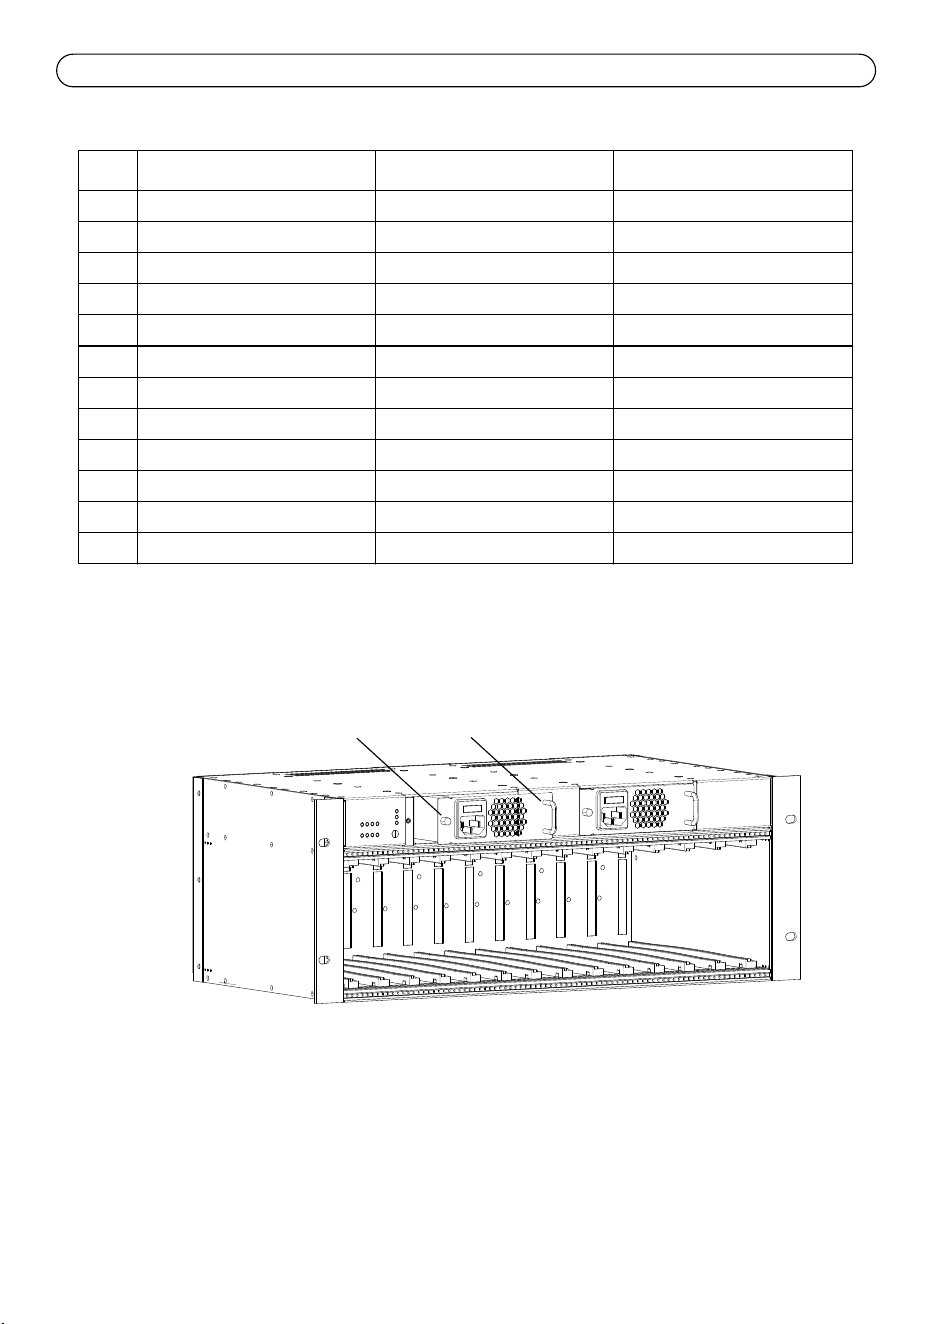
Replacing a power supply
1. Turn off the power supply that needs to be replaced.
2. Loosen the screw located on the left side of the power supply and remove the power supply
using the handle.
3. Insert a new power supply and retighten the screw.
4. Turn on the new power supply to begin using it.
Pin AXIS Q7406 AXIS 243Q AXIS 241Q/S, AXIS 240Q
12 Channel 6, Configurable I/O 2 NC NC
11 Channel 5, Configurable I/O 2 NC NC
10 Channel 4, Configurable I/O 2 NC NC
9 Channel 3, Configurable I/O 2 NC NC
8 Channel 2, Configurable I/O 2 Channel 4, Output1 Output4
7 Channel 1, Configurable I/O 2 Channel 3, Output1 Output3
6 Channel 6, Configurable I/O 1 Channel 2, Output1 Output2
5 Channel 5, Configurable I/O 1 Channel 1, Output1 Output1
4 Channel 4, Configurable I/O 1 Channel 4, Input 1 Input4
3 Channel 3, Configurable I/O 1 Channel 3, Input 1 Input3
2 Channel 2, Configurable I/O 1 Channel 2, Input 1 Input2
1 Channel 1, Configurable I/O 1 Channel 1, Input 1 Input1
Screw
Handle
Loading ...
Loading ...
Loading ...