Loading ...
Loading ...
Loading ...

combinations. Improper combinations
can result in an incomplete press con-
nection, which increases the risk of
leaks, equipment damage and injury.
Follow Set-up and Operation to reduce
the risk of injury from crushing and other
causes and to prevent tool damage.
1. Confirm appropriate work area (See
General Power Tool Safety Warnings).
Operate in a clear, level, stable, dry loca-
tion. Do not use tool while standing in
water.
2.
Inspect the w
ork to be done and deter-
mine the correct RIDGID tool and
RIDGID attachment for the application
per their specifications. Using incorrect
equipment for an application can cause
injury, damage the tool and make incom-
plete connections.
3. Confirm all equipment has been in-
spected and set up as directed in their
instructions.
Removing/Installing
Attachment
a. Remove battery from tool.
b
.
Open the at
tachment mounting pin:
1. Slightly push the attachment mounting
pin.
2. Twist counterclockwise by about 45° to
open.
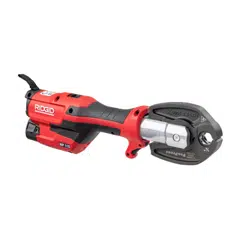
c. Remove/insert the appropriate attach-
ment (Figure 7).
Figure 7 – Opening The Attachment Mounting
Pin
d. Push to fully close the attachment mount-
ing pin until it locks into the closed posi-
tion. Attachment mounting pin must be
Do not modify pressing attachments or
use modified attachments. A pressing
attachment component that has been
welded, ground, drilled or modified in
any manner can shatter during press-
ing, resulting in sharp flying objects,
severe injury or death. Discard and
replace damaged pressing attach-
ments.
•
Inspect the at
tachment markings to
make sure that it is clearly marked as
to the system and size that it is appro-
priate for. Do not use an attachment
that is not clearly marked.
• Inspect the press profile of the attach-
ment. If it is rusty, dirty or if there is
a buildup of fitting material, clean as
described in the Maintenance section.
It is important to keep the press profile
clean to prevent the formation of burrs
during pressing process, prevent the
attachment from sticking to the fitting
and making sure that a proper press
connection is made.
• Make sure that springs are intact and
bias the attachment in the closed direc-
tion. Attachment should cycle freely
from the fully open to fully closed posi-
tion. If needed, lubricate pivot points
with a light lubricating oil. Wipe any
excess oil from the attachment.
5
.
Inspect and maint
ain any other equip-
ment being used per its instructions to
make sure it is functioning properly.
Set-Up and Operation
WARNING
Keep your fingers and hands away
from the tool attachment during the
press cycle. Your fingers or hands can
be crushed, fractured or amputated in
the attachment, tool, between the tool
and attachment, work piece and other
objects.
Large forces are generated during prod-
uct use that can break or throw parts
and cause injury. Stand clear during use
and wear appropriate protective equip-
ment, including eye protection.
Use proper tool, attachment and fitting
RP 115 Press Tool
999-995-408.10_REV. A
8
1. Slightly
Push
2. Twist
counter-
clockwise
by about
45°
Loading ...
Loading ...
Loading ...