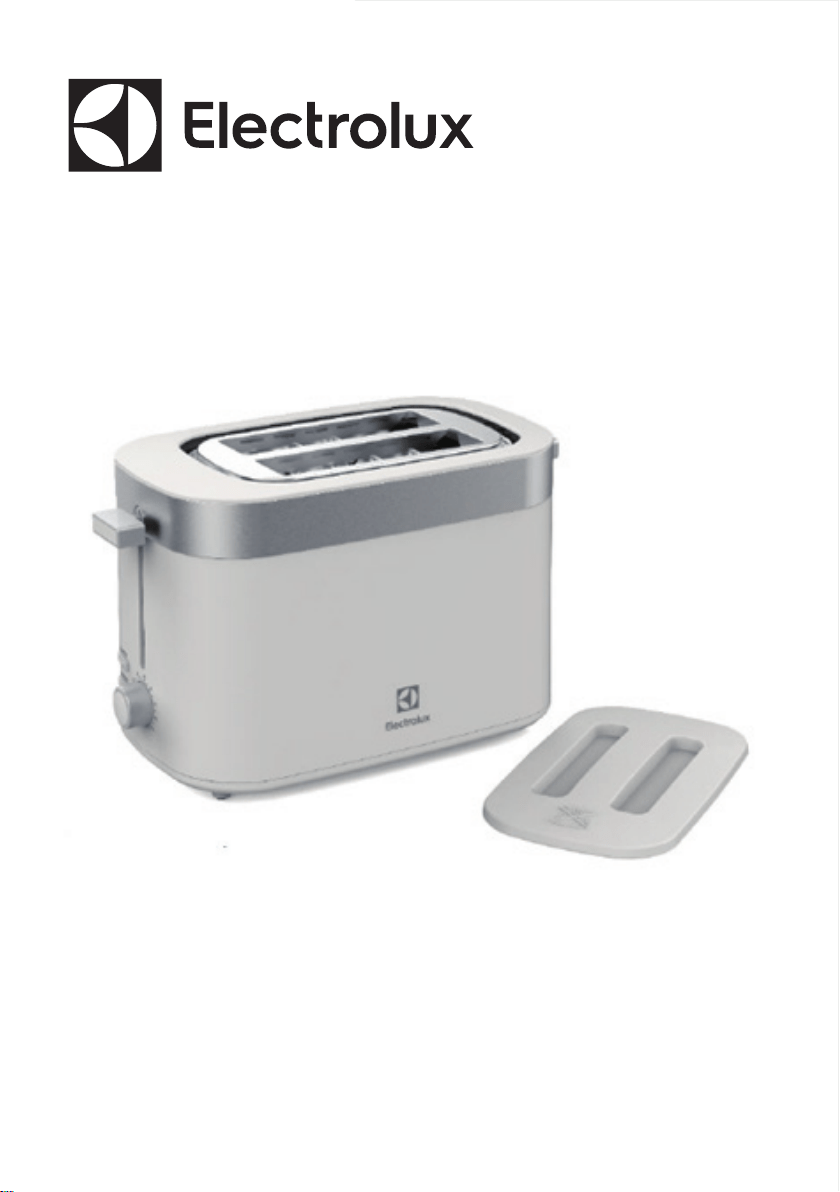
TOASTER
E2TS1-100W
EN INSTRUCTION BOOK
ID Buku Panduan
TH
VN Sách Hướng Dẫn
AR

A
B
C
D
E
F
G
H
I
J

3www.electrolux.com
AR
ID
TH
VN
EN
INSTRUCTION MANUAL
Read this booklet thoroughly before using and save it for future reference
COMPONENTS
A. Rack control handle
B. Crumb tray
C. Crumb tray handle
D. Dust-proof cover
E. Toasting rack
F. Carriage handle
G. Defrost
H. Reheat
I. Cancel (Stop)
J. Color control Knob
IMPORTANT SAFEGUARD
When using electrical appliance. Basic safety precautions should always be followed including the
following:
1. Read all instruction.
2. Make sure that your outlet voltage corresponds to the voltage stated on the rating label of the toaster.
3. Do not touch hot surface. Use handles or knobs only.
4. To protect against electrical shock, do not immerse cord, plug, or any part of the toaster in water or
other liquid.
5. Close supervision is necessary when it is used by or near children.
6. Unplug unit from outlet when not in use and before cleaning.
7. Do not operate any appliance with a damaged cord or plug, or in abnormal state. If its main cord is
damaged, it must be replaced by the manufacturer’s the nearest service agent or a qualified person.
8. Do not let the cord hang over edge of table or counter, or touch hot surface.
9. Do not place on or near a hot gas or electric burner, or in a heated oven.
10. Do not use the appliance for other than its intended use.
11. Oversize food, metal foil packages or utensils must not be inserted in the toaster as they may cause
fire or electric shock.
12. Bread may burn, therefore toasters must not be used near or below curtains and other combustible
materials, they must be watched.
13. The use of accessory attachments not recommended by the appliance manufacturer may cause
injuries.
14. Don’t attempt to dislodge food when toaster is in operation.
15. Be sure to take the bread out carefully after toasting after toasting to avoid injuries.
16. This appliance has been incorporated with a grounded plug. Please ensure the wall outlet in your
house is well earthed.
17. The appliance is not intended to be operated by means of an external timer or separate remote-
control system.
18. This appliance can be used by children aged from 8 years and above and persons with reduced
physical, sensory or mental capabilities or lack of experience and knowledge if they have been given
supervision or instruction concerning use of the appliance in a safe way and understand the hazards
involved. Children shall not play with the appliance. Cleaning and user maintenance shall not be
made by children unless they are older than 8 and supervised.
19. Keep the appliance and its cord out of reach of children less than 8 years.
20. Warning: if toast of small bread slices less than 85mm length, you must pay attention to the potential
risk of burning when taking out the slices.
21. Don’t use the appliance outdoors.
22. This appliance is intended to be used in household and similar applications such as:
– staff kitchen areas in shops, offices and other working environments;
– farm houses;
– by clients in hotels, motels and other residential type environments;
– bed and breakfast type environments.
23. Save these instructions.
D
E
F
G
H
I
J

4 www.electrolux.com
AR
ID
TH
VN
EN
FOR THE FIRST USE
As there is manufacturing residue or oil remained in the toaster or heat element, it usually emits the odor
for the first use. It is normal and will not occur after several times use. Before toasting the first slice of bread
it is strongly suggested to operate the appliance following below instructions, except without bread.
OPERATION:
1. Put bread slice into the bread slot, it can be inserted two slices at most every time. Only the regular
slice can be placed into the bread slot. The irregular bread can only be toasted on the toasting rack
and only one piece every time. When toasting on the toasting rack, press down the rack control handle
to make the toasting rack uplift, then put the bread on the toasting rack. Lift the rack control handle to
reset the rack when do not use.
Note:
Make sure the crumb tray is completely positioned in place before using.
2. Plug the power cord into the outlet.
3. Set color control knob to your desired color. There is 7-position level, the lowest is white and the highest
is puce. The bread slice can be toasted to golden color at the position of “4”.
Note:
1) Toasting color for one side is darker than that for double bread at the same level.
2) If toasted continuously, toasting color for the latter bread is darker than the color of previous cycle
at the same level.
4. Press carriage handle down vertically until it is positioned in place, the indicator of STOP will be
illuminated, and toasting begins. Once the bread has been toasted to the preset color, the carriage
handle will be automatically sprung up, and you can remove the bread readily.
Note:
The carriage handle can only be latched when the appliance connects to the power supply.
5. During the toasted process, you may observe the toasting color. If it is satisfactory, you may interrupt
the toasting process by pressing the STOP button at any time.
6. If the bread has been taken out from refrigerator. Set color control knob to your desired color. Press
carriage handle down vertically until it is positioned in place, then press DEFROST button and the
indicator of DEFROST will be illuminated. In this mode it will be toasted to your desired color.
7. If you want to reheat the cold toasted bread. Press carriage handle down vertically until it is positioned
in place, then press REHEAT button and the indicator of REHEAT will be illuminated. In this mode
toasting time is fixed, so long as time is running over, the carriage handle will automatically spring up
and end up the reheating process.
CAUTION:
1. Remove all protective wrapping prior to toasting.
2. If toaster starts to smoke, press STOP button to stop toasting immediately.
3. Avoid toasting the food with extremely runny ingredients such as butter.
4. Never attempt to remove bread jammed in the slots without unplugging the toaster from the electrical
outlet first. Be sure not to damage the internal mechanism or heating elements when removing bread.
5. The bread slot is only applicable for toasting regular bread slice. Like the irregular bread or round
bread, you can toast it on the toasting rack.
6. There is a dust-proof cover, when not use, you can put it on the top of the toaster to prevent dust.
CLEANING AND MAINTENANCE:
1. Disconnect the power supply before cleaning.
2. Wipe the outside with soft dry cloth after toaster cools down, never use metal polish.
3. Pull out the crumb tray on the bottom of toaster by crumb tray handle and empty it. If toaster is used
frequently, accumulated bread crumbs should removed at least once a week. Make sure the crumb tray
is completely closed before using the toaster again.
4. When not use or storage, the power cord may be wound under the bottom of toaster.

5www.electrolux.com
AR
ID
TH
VN
EN
ENVIRONMENT FRIENDLY DISPOSAL
You can help protect the environment!
Please remember to respect the local regulations: hand in the non-working
electrical equipments to an appropriate waste disposal center.

AR
TH
VN
ID
EN
6 www.electrolux.com
BUKU PETUNJUK
Baca buku panduan ini dengan cermat sebelum menggunakan perabot dan simpan untuk referensi di masa
mendatang
KOMPONEN
A. Tuas pengatur rak
B. Baki remah roti
C. Tuas baki remah roti
D. Tutup antidebu
E. Rak pemanggang
F. Tuas pengangkat
G. Tombol Defrost
H. Tombol Penghangat
I. Tombol Batal (Stop)
J. Kenop pengatur kematangan
LANGKAH PENGAMANAN PENTING
Saat menggunakan perabot elektronik, tindakan perlindungan dasar harus selalu diikuti, termasuk berikut ini:
1. Baca semua petunjuk dengan cermat.
2. Pastikan voltase stopkontak sesuai dengan yang tercantum pada label rating pemanggang roti.
3. Jangan menyentuh permukaan yang panas. Hanya pegang pada bagian tuas atau kenop.
4. Untuk melindungi dari sengatan listrik, jangan merendam kabel, steker, atau komponen pemanggang roti
lainnya di dalam air atau cairan apa pun.
5. Pengawasan ketat diperlukan saat perabot digunakan oleh atau di dekat anak-anak.
6. Cabut steker perabot dari stopkontak saat tidak digunakan dan sebelum dibersihkan.
7. Jangan mengoperasikan perabot jika kabel atau stekernya rusak, atau dalam kondisi tidak normal. Kabel
yang rusak hanya boleh diganti oleh produsen, agen servis setempat, atau personel yang berkualifikasi.
8. Jangan biarkan kabel menggantung di tepi meja atau menyentuh permukaan yang panas.
9. Jangan diletakkan di atas atau di dekat kompor gas atau kompor listrik yang panas, atau di dalam oven
yang dipanaskan.
10. Jangan menggunakan perabot untuk tujuan lain selain memanggang roti.
11. Bahan makanan yang berukuran terlalu besar, kemasan foil logam, atau alat makan tidak boleh
dimasukkan ke dalam pemanggang roti karena dapat menyebabkan kebakaran atau sengatan listrik.
12. Roti dapat terbakar, oleh karena itu pemanggang roti tidak boleh digunakan di dekat atau di bawah tirai
dan bahan lain yang mudah terbakar, dan harus diawasi selama penggunaan.
13. Penggunaan aksesori tambahan yang tidak direkomendasikan oleh produsen dapat menyebabkan cedera.
14. Jangan mencoba mengeluarkan bahan makanan saat perabot sedang dioperasikan
15. Keluarkan roti dengan hati-hati setelah selesai dipanggang untuk menghindari cedera
16. Perabot ini memiliki steker yang diardekan. Pastikan stopkontak di rumah Anda diardekan dengan benar.
17. Perabot tidak ditujukan untuk dioperasikan dengan pengatur waktu eksternal atau sistem kendali jarak jauh.
18. Perabot ini dapat digunakan oleh anak-anak berusia 8 tahun ke atas dan orang-orang dengan disabilitas
fisik, inderawi, atau kejiwaan atau yang kurang pengalaman dan pengetahuan asalkan mereka diawasi
atau telah diberi arahan mengenai penggunaan perabot dengan cara yang aman dan juga memahami
bahayanya. Anak-anak tidak boleh bermain-main dengan alat ini. Pembersihan dan pemeliharaan tidak
boleh dilakukan oleh anak-anak, minimal berusia 8 tahun ke atas dan diawasi oleh orang dewasa.
19. Jauhkan perabot dan kabel dari jangkauan anak-anak di bawah 8 tahun.
20. Peringatan: jika memanggang potongan roti berukuran kecil kurang dari 85 mm, Anda harus
memperhatikan potensi risiko hangus ketika mengeluarkannya.
21. Jangan menggunakan perabot di luar ruangan.
22. Perabot ini dimaksudkan untuk digunakan dalam skala rumah tangga dan aplikasi serupa seperti di:
– area dapur untuk staf di toko, kantor, dan lingkungan kerja lainnya;
– dapur rumah;
– hotel, motel, dan lingkungan tipe tempat tinggal lainnya;
– lingkungan tipe kamar yang dilengkapi dapur kecil.

AR
TH
VN
EN
ID
7www.electrolux.com
23. Harap simpan buku panduan ini.
PENGGUNAAN PERTAMA
Karena adanya residu atau minyak yang menempel pada perabot atau elemen pemanas, biasanya akan
tercium bau hangus ketika penggunaan pertama. Ini adalah hal wajar dan akan hilang setelah beberapa
kali digunakan. Sebelum memanggang roti untuk pertama kali, sebaiknya operasikan perabot sesuai
instruksi di bawah ini tanpa memasukkan roti.
CARA MENGOPERASIKAN:
1. Masukkan potongan roti ke dalam slot, maksimal dua potong roti ukuran reguler dapat dimasukkan
untuk setiap sesi memanggang. Roti dengan bentuk tidak beraturan hanya dapat dipanggang
menggunakan rak dengan satu potong roti per sesi. Jika memanggang menggunakan rak, tekan tuas
pengatur rak ke bawah sampai rak terangkat, lalu letakkan roti di atas rak. Naikkan lagi tuas pengatur
rak untuk mengembalikan posisi rak saat tidak digunakan.
Catatan: Pastikan baki remah roti sudah dipasang sebelum mulai memanggang.
2. Tancapkan steker ke stopkontak.
3. Putar kenop pengatur kematangan untuk memilih warna yang diinginkan. Tersedia 7 pilihan
kematangan, pengaturan 1 menghasilkan warna putih, dan pengaturan 7 menghasilkan warna cokelat
tua. Warna cokelat keemasan dapat diperoleh dengan memilih pengaturan level “4”.
Catatan: 1) Pada pengaturan kematangan yang sama, warna roti akan lebih gelap jika hanya
memanggang satu potong roti pada satu slot dibandingkan jika memanggang dua potong roti
sekaligus.
2) Pada pengaturan kematangan yang sama, sesi memanggang kontinu akan menghasilkan warna roti
yang lebih gelap untuk roti yang dipanggang setelahnya.
4. Tekan tuas pengangkat ke bawah sampai terkunci, indikator STOP akan menyala, dan proses
pemanggangan dimulai. Setelah kematangan roti mencapai tingkat yang dipilih, tuas pengangkat
akan naik secara otomatis dan roti siap dikeluarkan.
Catatan: Tuas pengangkat hanya dapat dikunci jika perabot terhubung ke sumber listrik.
5. Anda dapat memeriksa warna roti selama proses pemanggangan berlangsung. Jika warna yang
diinginkan sudah tercapai, proses pemanggangan dapat dihentikan dengan menekan tombol STOP
kapan saja.
6. Untuk memanggang roti yang sebelumnya dimasukkan ke kulkas: masukkan roti ke dalam slot, putar
kenop pengatur kematangan. Tekan tuas pengangkat sampai terkunci, lalu tekan tombol DEFROST
sampai indikator DEFROST menyala. Dalam mode ini, roti yang dingin akan dipanggang hingga
tercapai warna yang diinginkan.
7. Untuk menghangatkan kembali roti panggang: masukkan roti ke dalam slot, tekan tuas pengangkat
sampai terkunci, lalu tekan tombol PENGHANGAT sampai indikator PENGHANGAT menyala. Dalam
mode ini, waktu pemanggangan akan ditentukan, dan setelah proses pemanasan selesai tuas akan
terangkat secara otomatis.
PERHATIAN:
1. Keluarkan roti dari kemasaannya sebelum memanggang.
2. Jika perabot mengeluarkan asap, segera tekan tombol STOP untuk menghentikan proses
memanggang.
3. Jangan memanggang bahan makanan yang mudah meleleh, seperti mentega.
4. Jangan berusaha mengeluarkan roti yang macet di dalam slot tanpa mencabut steker perabot dari
stopkontak listrik. Pastikan Anda tidak merusak mekanisme internal atau elemen pemanas ketika
mengeluarkan roti.
5. Hanya roti ukuran reguler yang dapat dimasukkan ke dalam slot pemanggang. Roti dengan bentuk
tidak beraturan atau bulat dapat dipanggang menggunakan rak.
6. Saat perabot tidak digunakan, pasang tutup antidebu untuk menjaga kebersihan.

AR
TH
VN
ID
EN
8 www.electrolux.com
PEMBERSIHAN DAN PERAWATAN:
1. Cabut steker dari stopkontak sebelum membersihkan perabot.
2. Lap bodi bagian luar dengan kain yang kering dan lembut saat suhu perabot dingin, jangan sekali-kali
menggunakan lap dari logam.
3. Tarik tuas baki remah roti di bagian bawah perabot dan buang remahannya. Jika perabot sering
digunakan untuk memanggang, bersihkan remah roti minimal seminggu sekali. Pastikan baki remah roti
dipasang dengan benar sebelum kembali digunakan untuk memanggang roti.
4. Saat tidak digunakan atau untuk penyimpanan, kabel dapat digulung di bagian bawah perabot.
PEMBUANGAN YANG RAMAH LINGKUNGAN
Anda dapat membantu melindungi lingkungan!
Harap patuhi peraturan setempat: buang alat listrik yang sudah tidak
berfungsi di pusat pembuangan limbah yang ditentukan.

AR
VN
EN
ID
TH
9www.electrolux.com
A.
B.
C.
D.
E.
F.
G.
H.
I.
J.
:
1.
2.
3.
4.
5.
6.
7.
Electrolux
8.
9.
10.
11.
12.
13.
14.
15.
16.
17.
18. 8
8
19. 8
20. : 85 .
21.
22. :
–
–
–
–
23.
AR
VN
EN
ID
TH
10 www.electrolux.com
:
1. 1
:
2.
3. 7
“4”
: 1)
2)
4. STOP
:
5. STOP
6.
DEFROST DEFROST
7. REHEAT
REHEAT
:
1.
2. STOP
3.
4.
5.
6.
:
1.
2.
3.
4.
AR
VN
EN
ID
TH
11www.electrolux.com
!
:
AR
VN
TH
EN
ID
12 www.electrolux.com
SÁCH HƯỚNG DẪN
Đọc kỹ sổ tay này trước khi sử dụng và cất giữ để tham khảo trong tương lai
CẤU TẠO
A. Tay cầm điều khiển giá nướng
B. Khay đựng vụn bánh
C. Tay cầm cho khay đựng vụn bánh
D. Nắp đậy chống bụi
E. Giá nướng
F. Tay cầm trượt
G. Nút rã đông
H. Nút làm nóng
I. Nút hủy (Dừng)
J. Núm vặn điều khiển màu
BIỆN PHÁP BẢO VỆ QUAN TRỌNG
Khi sử dụng thiết bị điện, người dùng cần tuân thủ các biện pháp phòng ngừa cơ bản sau, bao gồm:
1. Đọc tất cả hướng dẫn
2. Đảm bảo điện áp ổ cắm tương ứng với điện áp ghi trên nhãn định mức của máy nướng bánh mì
3. Không chạm vào bề mặt nóng. Chỉ sử dụng tay cầm hoặc núm vặn
4. Để bảo vệ khỏi điện giật, không nhúng dây, phích cắm, hoặc bất kỳ thành phần nào của máy nướng bánh
mì vào nước hoặc chất lỏng khác
5. Cần giám sát kỹ khi thiết bị được sử dụng gần trẻ em
6. Rút phích cắm của thiết bị khỏi ổ cắm khi không sử dụng và trước khi làm sạch
7. Không sử dụng bất kỳ thiết bị nào có dây hoặc phích cắm bị hỏng, hoặc trong trạng thái bất thường. Nếu
dây nguồn của thiết bị bị hỏng, dây phải được nhà sản xuất, đại lý dịch vụ gần nhất hoặc một người có đủ
trình độ thay thế
8. Không treo dây điện trên cạnh bàn hoặc quầy, hoặc chạm vào bề mặt nóng
9. Không được đặt thiết bị trên hoặc gần bếp khí ga nóng hoặc bếp điện, hoặc trong lò đang cấp nhiệt
10. Không sử dụng thiết bị cho mục đích sử dụng nào khác
11. Không được cho thức ăn quá khổ, gói bọc giấy hoặc dụng cụ kim loại vào máy nướng do những đồ này có
thể gây ra hỏa hoạn hoặc giật điện
12. Bánh mỳ có thể bị cháy, do đó máy nướng không được sử dụng gần hoặc bên dưới rèm cửa và các vật liệu
bắt lửa khác, các đồ dùng này phải được canh chừng cẩn thận
13. Việc sử dụng phụ kiện đi kèm không được khuyến nghị bởi nhà sản xuất thiết bị có thể gây ra thương tích
14. Không được cố gắng lấy thực phẩm ra khi máy nướng đang hoạt động
15. Hãy đảm bảo lấy bánh mỳ ra ngoài một cách cẩn thận sau khi nướng bánh để tránh gây thương tích
16. Thiết bị này đã được tích hợp phích cắm tiếp đất. Hãy đảm bảo rằng ổ cắm trên tường tại nhà bạn cũng
được nối tiếp đất phù hợp
17. Thiết bị không nhằm mục đích hoạt động bởi các phương tiện hẹn giờ bên ngoài hoặc hệ thống điều khiển
từ xa riêng
18. Thiết bị này có thể được sử dụng bởi trẻ em từ 8 tuổi trở lên và người bị suy giảm khả năng thể chất, cảm
giác hoặc tinh thần hoặc thiếu kinh nghiệm và hiểu biết nếu như họ được giám sát hoặc hướng dẫn sử dụng
thiết bị một cách an toàn và hiểu được các rủi ro có liên quan. Trẻ em không được nghịch thiết bị. Trẻ em
không được phép làm sạch và bảo dưỡng trừ khi trẻ lớn hơn 8 tuổi và được giám sát
19. Giữ cho thiết bị và dây nguồn thiết bị ngoài tầm với của trẻ em dưới 8 tuổi
20. Cảnh báo: trường hợp nướng lát bánh mỳ có chiều dài nhỏ hơn 85mm, bạn phải lưu ý rủi ro có thể bị cháy
khi lấy lát bánh mỳ ra
21. Không được sử dụng thiết bị ngoài trời
22. Thiết bị này nhằm mục đích sử dụng trong ứng dụng hộ gia đình và các ứng dụng tương đương chẳng hạn
như:
– khu vực nhà bếp nhân viên trong cửa hàng, văn phòng và các môi trường làm việc khác;
– nhà trang trại;
AR
EN
ID
TH
VN
13www.electrolux.com
– khách lưu trú tại khách sạn, nhà nghỉ và các môi trường lưu trú khác;
– môi trường dịch vụ bữa sáng và giường ngủ
23. Lưu giữ những hướng dẫn này.
KHI SỬ DỤNG LẦN ĐẦU TIÊN
Do có chất dư hoặc dầu bám lại khi sản xuất trong máy nướng hoặc cấu kiện nhiệt, máy nướng thường có mùi
khi sử dụng lần đầu tiên. Hiện tượng này là bình thường và sẽ không xảy ra sau một vài lần sử dụng. Trước khi
nướng lát bánh mỳ đầu tiên, chúng tôi đặc biệt khuyến nghị vận hành thiết bị tuân thủ các hướng dẫn dưới đây,
trừ khi không có bánh mỳ.
HOẠT ĐỘNG:
1. Cho bánh mỳ vào trong khe đựng bánh mỳ, có thể cho vào nhiều nhất hai lát bánh mỳ mỗi lần. Chỉ có lát
thông thường mới có thể cho vào khe đựng bánh mỳ. Bánh mỳ không thường quy chỉ có thể được nướng trên
giá nướng và chỉ nướng một bánh mỗi lần. Khi nướng trên giá nướng, ấn tay cầm cho giá nướng xuống để
nâng giá nướng lên, sau đó cho bánh mỳ lên trên giá nướng. Nâng tay cầm cho giá nướng lên để đặt lại vị trí
cho giá nướng khi không sử dụng
Lưu ý: Đảm bảo rằng khay đựng vụn bánh để đúng vị trí trước khi sử dụng
2. Cắm dây nguồn vào ổ điện.
3. Thiết lập núm vặn điều khiển theo màu sắc mong muốn. Có 7 vị trí tương ứng 7 cấp độ, cấp thấp nhất là màu
trắng và cấp cao nhất là màu nâu đậm. Lát bánh mỳ có thể được nướng đến màu vàng tại vị trí số “4”
Lưu ý: 1) Màu sắc nướng bánh cho một bên thường có màu tối hơn khi nướng bánh mỳ đôi ở cùng cấp độ.
2) Nếu được nướng liên tục, màu sắc nướng cho bánh mỳ sau thường tối hơn màu của chu trình trước đó có
cùng cấp độ
4. Ấn tay cầm trượt dọc xuống cho đến khi tay cầm đến đúng vị trí, đèn báo DỪNG sẽ sáng, và máy bắt đầu
nướng. Chỉ khi bánh mỳ được nướng đến màu sắc thiết lập, tay cầm trượt sẽ tự động này lên, và bạn có thể
lấy bánh mỳ đã nướng ra
Lưu ý: Chỉ có thể khóa tay cầm trượt khi thiết bị được kết nối với nguồn cấp điện
5. Trong quá trình nướng, bạn có thể quan sát được màu nướng. Nếu màu sắc đạt yêu cầu, bạn có thể gián
đoạn quá trình nướng bằng cách nhấn nút STOP (DỪNG) bất kỳ lúc nào.
6. Nếu bánh mỳ vừa được lấy ra khỏi tủ lạnh. Thiết lập núm vặn điều khiển màu đến màu sắc bạn mong muốn.
Ấn tay cầm trượt dọc xuống cho đến khi tay cầm vào đúng vị trí, sau đó ấn nút DEFROST (RÃ ĐÔNG) và đèn
báo DEFROST (RÃ ĐÔNG) sẽ sáng. Tại chế độ này bánh mỳ sẽ được nướng đến màu sắc bạn mong muốn
7. Nếu bạn muốn làm nóng lại bánh mỳ lạnh đã nướng trước đó. Ấn tay cầm trượt dọc xuống cho đến khi tay
cầm đến đúng vị trí, sau đó ấn nút REHEAT (HÂM LẠI) và đèn báo REHEAT (HÂM LẠI) sẽ sáng. Trong chế
độ này thời gian nướng là cố định, do đó ngay khi hết thời gian, tay cầm trượt chính sẽ tự động gạt lên và kết
lúc quá trình làm nóng
CẢNH BÁO:
1. Tháo bỏ toàn bộ vỏ bọc bảo vệ trước khi nướng.
2. Nếu máy nướng bắt đầu có khói, ấn nút STOP (DỪNG) để dừng nướng ngay lập tức.
3. Tránh nướng thức ăn với những nguyên liệu chảy như bơ.
4. Không bao giờ được cố lấy bánh mỳ bị kẹt trong khe mà không rút phích cắm máy nướng từ ổ điện trước.
Hãy đảm bảo không gây hư hại đối với cơ chế bên trong hoặc cấu kiện làm nóng khi lấy bánh mỳ ra
5. Khe đựng bánh mỳ chỉ được sử dụng để nướng lát bánh mỳ thông thường. Đối với bánh mỳ không thường
quy hoặc bánh mỳ tròn, bạn có thể nướng trên giá nướng.
6. Có một nắp đậy chống bụi, khi không sử dụng, bạn có thể để nắp máy nướng để ngăn bụi.
LÀM SẠCH VÀ BẢO TRÌ:
1. Ngắt điện từ nguồn điện trước khi làm sạch
2. Lau sạch bên ngoài bằng vải mềm khô sau khi máy nướng nguội, không bao giờ sử dụng đánh bóng kim loại
3. Kéo khay đựng vụn bánh ở đáy máy nướng ra bằng tay cầm khay đựng vụn bánh và đổ hết vụn bánh. Nếu
máy nướng được sử dụng thường xuyên, vụn bánh mỳ tích tụ phải được đổ đi ít nhất một lần một tuần. Đảm
bảo rằng khay đựng vụn bánh đóng hoàn toàn trước khi sử dụng lại máy nướng.
4. Khi không sử dụng hoặc đang cất, dây nguồn có thể được cuộn lại để bên dưới đáy máy nướng.

AR
VN
TH
EN
ID
14 www.electrolux.com
THẢI BỎ THÂN THIỆN VỚI MÔI TRƯỜNG
Bạn có thể giúp bảo vệ môi trường!
Xin nhớ tôn trọng các quy định địa phương:
gửi các thiết bị điện không hoạt động đến một trung tâm thải bỏ rác thải phù hợp.

EN
ID
TH
VN
15www.electrolux.com
AR
1
2
3
4
5
6
7
8
9
10
11
12
13
14
15
16
17
18
8
19
8520
21
22

VN
TH
EN
ID
16 www.electrolux.com
AR
23
1
2
73
4
1
2
4
5
6
7
1
2
3
4
5
6

EN
ID
TH
VN
17www.electrolux.com
AR
1
2
3
4

中国
伊莱克斯(中国)电器有限公司
中国,上海, 区
8号楼5室
办公电话: +86 21 3178 1000
传真: +86 21 3387 0368
售后服务: +86 9510 5801
网站: www.electrolux.com.cn
台灣
新加坡商伊萊克斯股份有限公司 台灣分公司
22065新北市板橋區縣民大道2段68號9F
免付費客服專線: 0800-888-259
傳真: 886-2-8964-5269
網站: www.electrolux.com.tw
KOREA
Electrolux Korea limited
9F, Pine Avenue B,
100 Euljiro, Jung-gu, Seoul, Korea 04551
Korea
Tel : +82 2 6020-2200
Fax: +82 2 6020-2271~3
Customer Care Services : +82 1566-1238
Email : [email protected]
Website: www.electrolux.co.kr
INDONESIA
Indonesia
Tel: 021 – 50817300
Fax: 021 – 50817399
Customer Care Services: 0804 111 9999
SMS: 0812 8088 8863
Email: [email protected]
Website: www.electrolux.co.id
PHILIPPINES
Electrolux Philippines, Inc.
10th Floor. W5th Avenue Building
5th Avenue Corner 32nd Street
Bonifacio Global City,
Taguig Philippines 1634
Trunkline: +63 2 737 4756
Domestic Toll Free: 1 800 10 845 care 2273
Customer Care Services: +63 2 845 care 2273
Email: [email protected]
Website: www.electrolux.com.ph
THAILAND
Electrolux Thailand Co., Ltd.
Electrolux Building
14th Floor 1910 New Petchburi Road
Bangkapi, Huay Kwang
Bangkok 10310
Thailand
Tel: +66 2 725 9100
Fax: +66 2 725 9299
Customer Care Services: +66 2 725 9000
Email: customercarethai@electrolux.com
Website: www.electrolux.co.th
VIETNAM
Electrolux Vietnam Ltd
Floor 9th, A&B Tower
76 Le Lai Street
Ben Thanh Ward - District 1
Ho Chi Minh City
Vietnam
Tel: +84 8 3910 5465
Fax: +84 8 3910 5470
Customer Care Services: 1800-58-8899
Email: [email protected]
Website: www.electrolux.vn
MALAYSIA
SINGAPORE
AUSTRALIA
Electrolux Home Products Pty Ltd
ABN 51 004 762 341
163 O’Riordan Street, Mascot, NSW 2020, Australia
Customer Service Phone: 1300 365 305
Website: www.electrolux.com
NEW ZEALAND
Electrolux (NZ) Limited
3-5 Niall Burgess Road, Mt. Wellington, Auckland,
New Zealand
Phone: (09) 9573 2220
Customer Service Phone: 0508 730 730
Website: www.electrolux.com
HONG KONG
Electrolux SEA Pte Ltd
1 Fusionopolis Place, Galaxis
#07-10 (West Lobby)
Singapore 138522
Customer Care Services: +65 6727 3699
Fax: +65 6727 3611
Email: [email protected]
Website: www.electrolux.com.sg
Electrolux Home Appliances Sdn Bhd
Lot C6, No. 28, Jalan 15/22,
Taman Perindustrian Tiong Nam,
40200 Shah Alam, Selangor
Malaysia
Customer Care Services Tel: +60 3 5525 0800
Customer Care Services Fax: +60 3 5524 2521
Email: [email protected]
Website: www.electrolux.com.my
共和新路1968号大宁国际广场
PT. Electrolux Indonesia
Electrolux Building
Jl.Abdul Muis No. 34,
Petojo Selatan, Gambir
Jakarta Pusat 10160
静安
大昌貿易行有限公司
電器維修中心
香港九龍灣啟祥道20號
大昌行集團大廈5樓
服務熱線: +(852) 3193 9888
電子郵件: [email protected]
網頁: www.electrolux.com.hk
UAE
Electrolux Appliances Middle East DMCC
Address: Floor 40, Mazaya Business Avenue
BB1, JLT
Dubai, United Arab Emirates
Mailing Address: PO Box 336148 Dubai, UAE
Switch: +971 4 5100 200

APAC-E2TS1-xxxx-IFU-AP-2
Share more of our thinking at
www.electrolux.com