Loading ...
Loading ...
Loading ...

Quick Start Guide of Blazer Express
23
Adding Devices by IP Address
Steps:
1. Click the Physical View.
2. Click Encoding Device and click Add to enter the adding device page.
3. Select IP Address as the adding mode.
4. Input the required information.
Manufacturer: Select the manufacturer of the device.
Device Address: Input the IP address of the device.
Device Port: Input the port No. of the device. By default, it’s 8000.
Alias: Edit a name for the device as desired.
User Name: Input the user name of the device.
Password: Input the password of the device.
Note: The password strength of the device can be checked by the system. For your privacy, we strongly
recommend changing the password to something of your own choosing (using a minimum of 8 characters,
including upper case letters, lower case letters, numbers, and special characters) in order to increase the
security of your product.
5. If the added device is an automatic number plate recognition (ANPR) camera, you can check Added as
Automatic Number Plate Recognition Unit checkbox.
Note: Up to four cameras can be added as ANPR unit for viewing the license plate and vehicle information
recognized by the camera via Control Client (for details, refer to User Manual of Blazer Express Control
Client).
6. Set the Add Camera to Area switch as ON to export the camera to an area. You can create a new area by the
device name, select an existing area, or custom a new area.
After adding cameras to area, you can check Synchronize Camera Name checkbox to get the camera name
from the device, select Recording Schedule Template to set the recording schedule for the device and the
recording task will automatically perform according to schedule.
Note: If you do not export cameras to area, you cannot perform the live view, playback, event settings, etc., for
the cameras.
7. Click Add to add the device and back to the device list page. You can also click Add and Continue to save
the settings and continue to add other devices.
Adding the Camera via PoE Interface
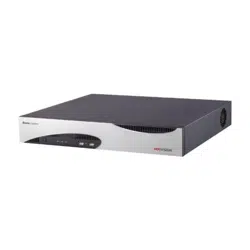
For Blazer Express/16/8P, eight PoE interfaces are available for enabling the Blazer Express to pass electrical
power safely, along with data, on Ethernet cabling to the connected network cameras.
Notes:
The camera to be connected via PoE interface should support PoE function.
If the PoE camera to be added is active, you must change the password of the camera’s admin user to that of
Blazer Express’s admin user before connecting the camera to the Blazer Express.
If the PoE camera to be added is inactive, Blazer Express will automatically activate it and set the camera
admin user’s password as the Blazer Express admin user’s password.
Steps:
1. Use the PoE interface on the rear panel and a network cable with RJ-45 connectors to connect the network
camera to Blazer Express.
2. On the device list, the cameras are added automatically.
Loading ...
Loading ...
Loading ...
