SMOKE DIAGNOSTIC TOOL - LEAK DETECTOR
MODEL N
o
:
VS868
Thank you for purchasing a Sealey product. Manufactured to a high standard, this product will, if used according to these instructions,
and properly maintained, give you years of trouble free performance.
IMPORTANT: PLEASE READ THESE INSTRUCTIONS CAREFULLY. NOTE THE SAFE OPERATIONAL REQUIREMENTS, WARNINGS & CAUTIONS. USE
THE PRODUCT CORRECTLY AND WITH CARE FOR THE PURPOSE FOR WHICH IT IS INTENDED. FAILURE TO DO SO MAY CAUSE DAMAGE AND/OR
PERSONAL INJURY AND WILL INVALIDATE THE WARRANTY. KEEP THESE INSTRUCTIONS SAFE FOR FUTURE USE.
1. SAFETY
1.1. PERSONAL PRECAUTIONS
9 Wear safety eye protection and protective clothing. Avoid touching eyes while working near battery.
9 Wash immediately with soap and water if battery acid contacts skin or clothing. If acid enters eye, ush eye immediately with cool,
clean running water for at least 15 minutes and seek immediate medical attention.
9 Remove personal metallic items such as rings, bracelets, necklaces and watches.
A lead-acid battery can produce a short-circuit current which is high enough to weld such items to the vehicle and cause severe burns.
8 DO NOT smoke or allow a spark or ame in the vicinity of the battery or engine.
WARNING! To prevent the risk of sparking, short circuit and possible explosion. DO NOT drop metal tools in the battery area, or allow
them to touch the battery terminals.
8 DO NOT cross-connect unit to battery. Ensure positive (RED) clamp is to positive terminal and negative (BLACK) clamp is to negative
terminal.
1.2. GENERAL SAFETY
WARNING! Ensure Health and Safety, local authority and general workshop practice regulations are adhered to when using this unit.
9 Use in conjunction with manufactures workshop manuals/information.
9 Maintain this product in good working order and condition, take immediate action to repair or replace damaged parts.
9 Use approved parts only. Unapproved parts may be dangerous and will invalidate the warranty.
8 DO NOT use to perform a task for which it is not designed.
8 DO NOT allow untrained persons to use the unit.
8 DO NOT use when tired or under the influence of drugs, alcohol or intoxicating medication.
8 AVOID direct inhalation of smoke.
WARNING! DO NOT pollute the environment by allowing uncontrolled discharge of uids.
9 Keep children and unauthorised persons away from the work area.
9 Keep work area clean and tidy and free from unrelated materials.
9 Ensure the work area has adequate lighting.
9 Wear suitable clothing to avoid snagging. DO NOT wear jewellery, and tie back long hair. A full range of personal safety equipment is
available from your Sealey stockist.
WARNING! Unit may get HOT!
9 Power Supply: 12V dc.
9 Maximum input pressure: 15psi (1bar).
9 Use mineral oil (baby oil) ONLY.
8 DO NOT remove ller cap when unit is ON.
9 Keep unit upright at all times to avoid oil leaking out.
9 When not in use, clean unit and store in a safe, dry,
childproof location.
9 Ensure that mineral oil (baby oil) safety data sheet
has been read, and that user understands the health
risks involved and uses appropriate personal protective
equipment.
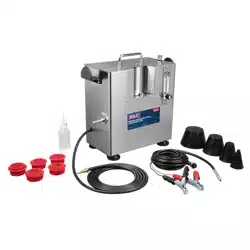
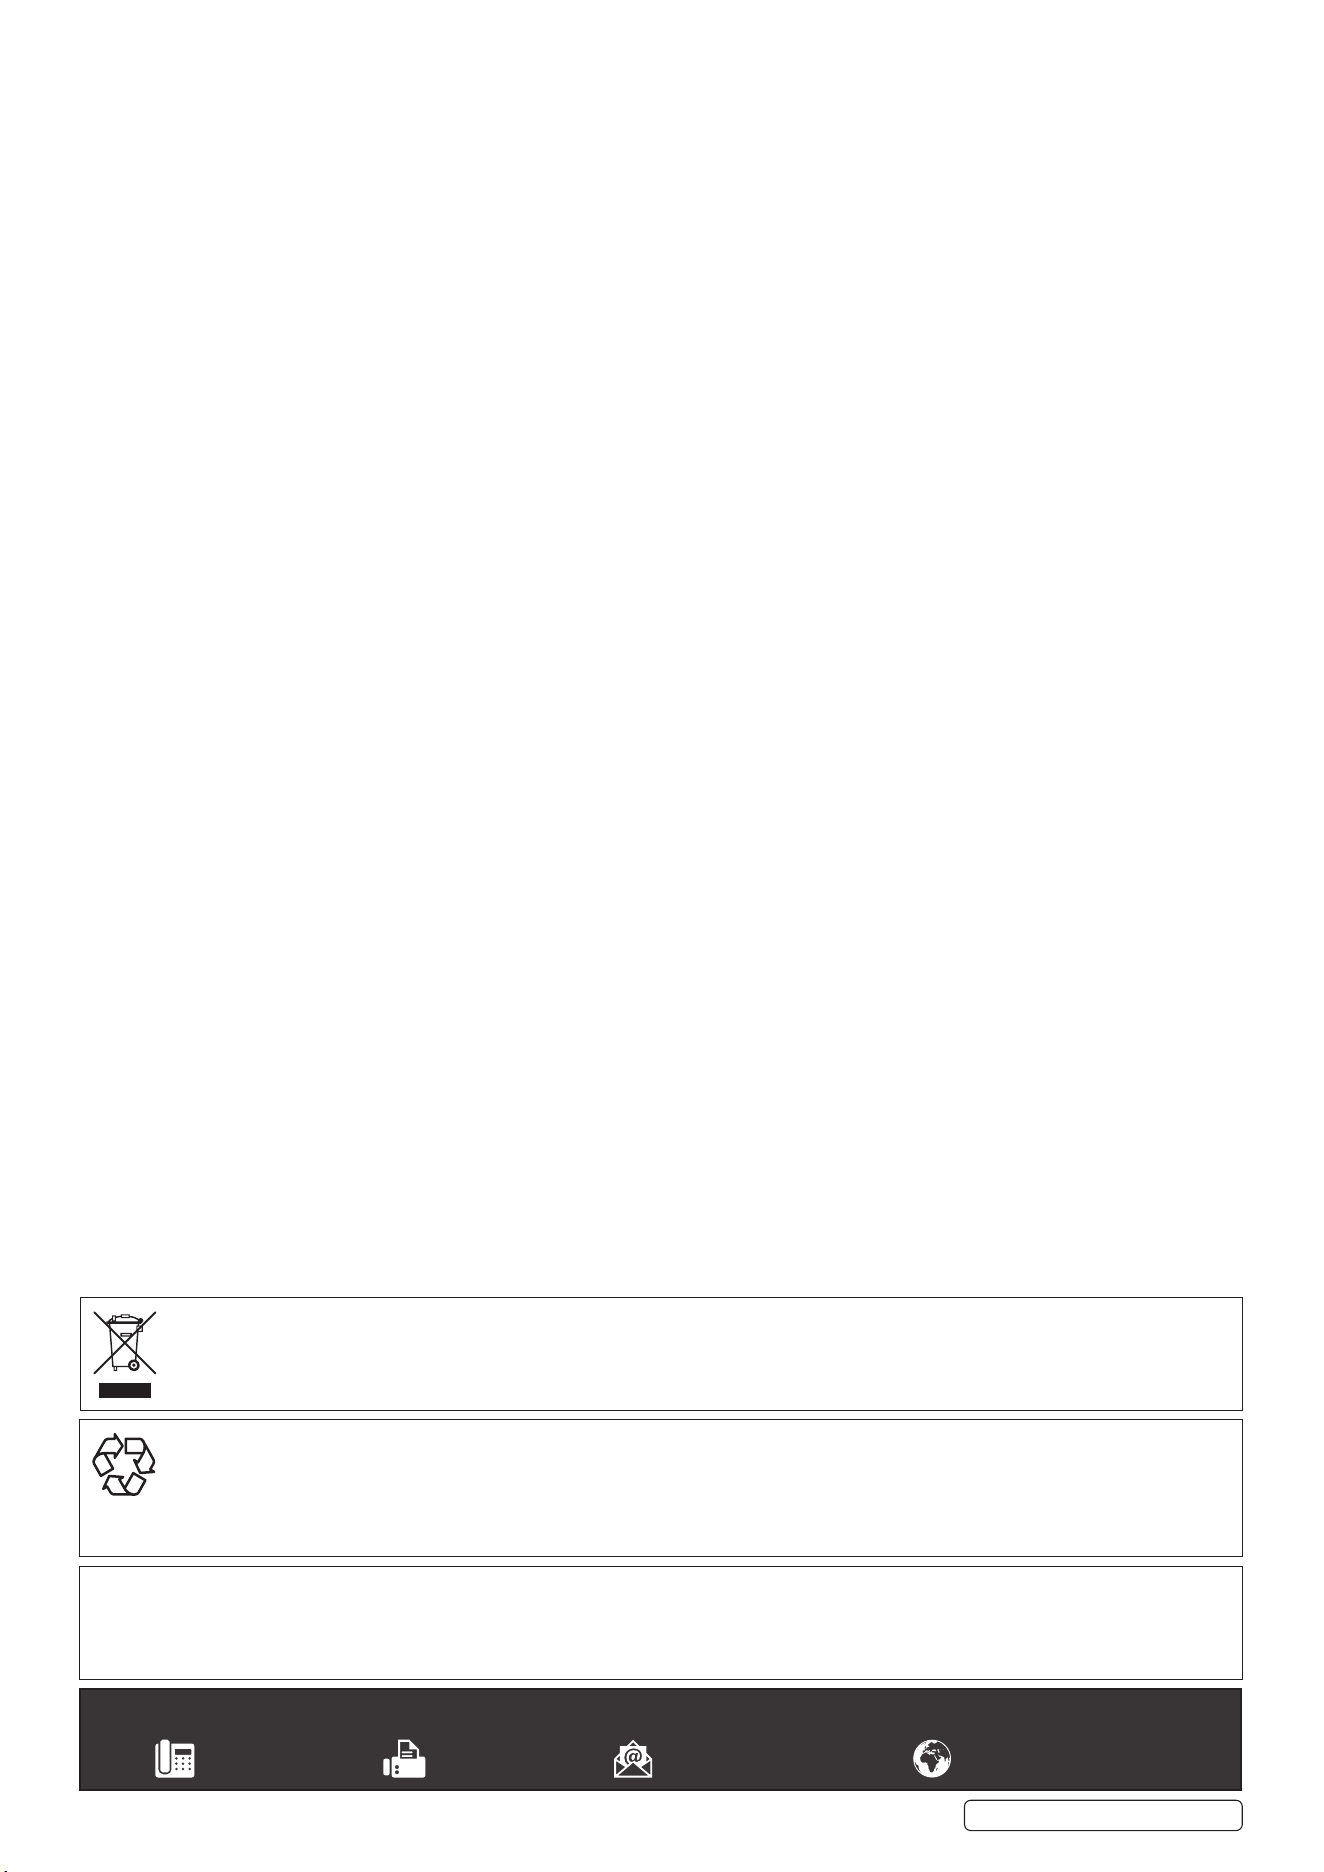
2. INTRODUCTION
Allows the technician to pinpoint all manner of system leaks
including the air intake, cooling, evaporation, fuel, exhaust and
vacuum systems. Fast and simple-to-use, maximising earning
potential. System is clean and quick to use and connects to a 12V
vehicle battery. Features air and smoke mode with pressure gauge
display. Supplied with cone adapter, power cord clamp, valve core
wrench, test oil rell bottle, smoke hose, EVAP connector, universal
airbag adapter, 8 x rubber blanking cones. Mineral oil not included.
VS868 Issue 1 13/12/21
Original Language Version
© Jack Sealey Limited
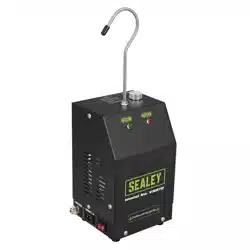
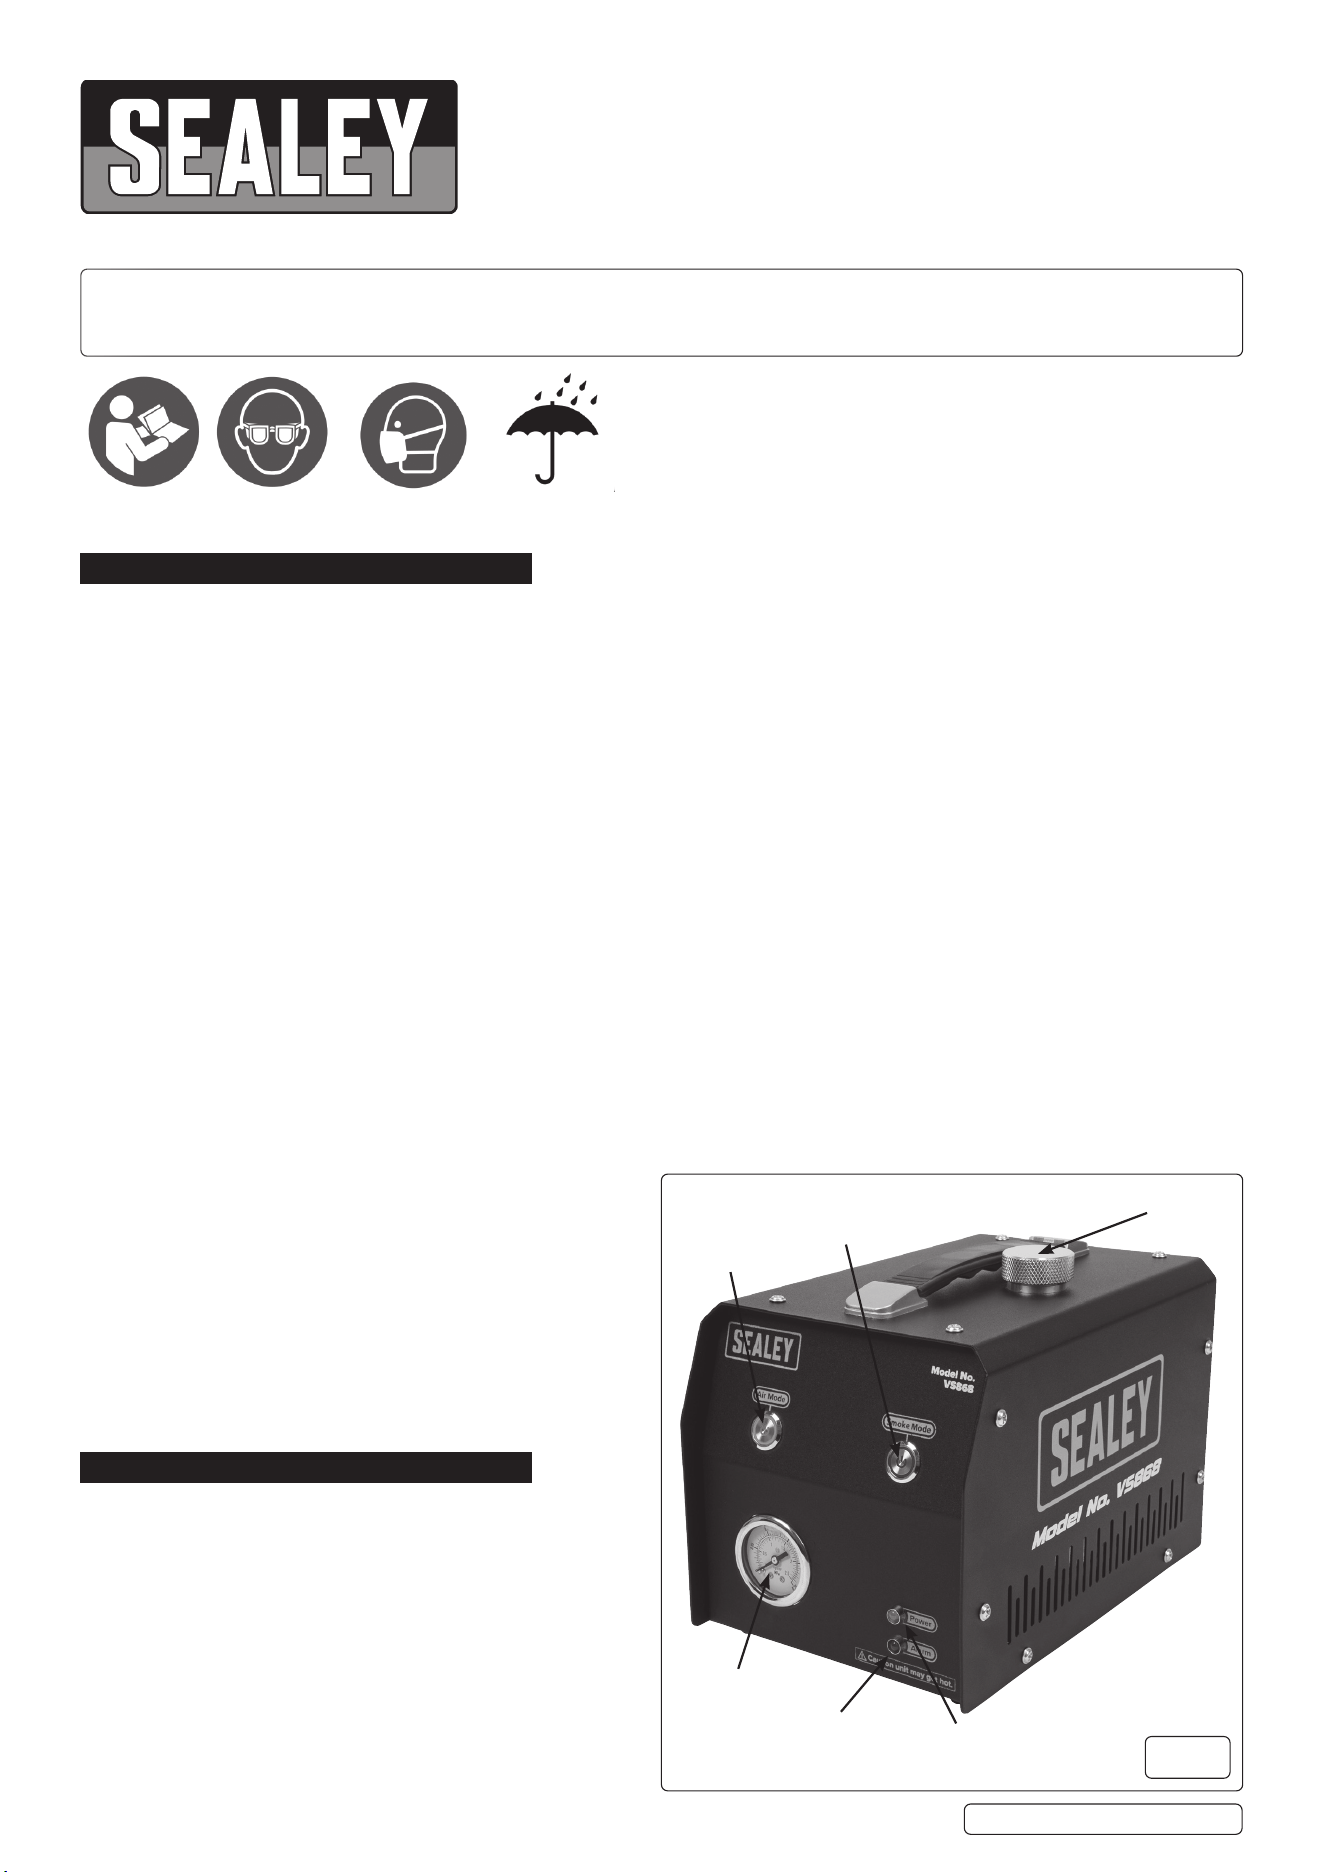
fig.
1
Pressure
Gauge
Oil Filler Cap
Air Mode
Button
Smoke Mode
Button
Overheat
Alarm Light
Power
Light
Refer to
instruction
manual
Wear eye
protection
Keep away
from rain
Wear a mask
3. SPECIFICATION
Model No:................................................................... VS868
Hose Length:............................................................1600mm
Maximum Input Pressure: ............................................. 15psi
Oil Reservoir Capacity: .................................................. 10ml
Output Smoke: ............................................................ 6L/min
Rubber Cone Sizes:
... Ø5-10, 9-15, 14-19, 18-26, 25-35, 32-45, 45-60, 60-75mm.
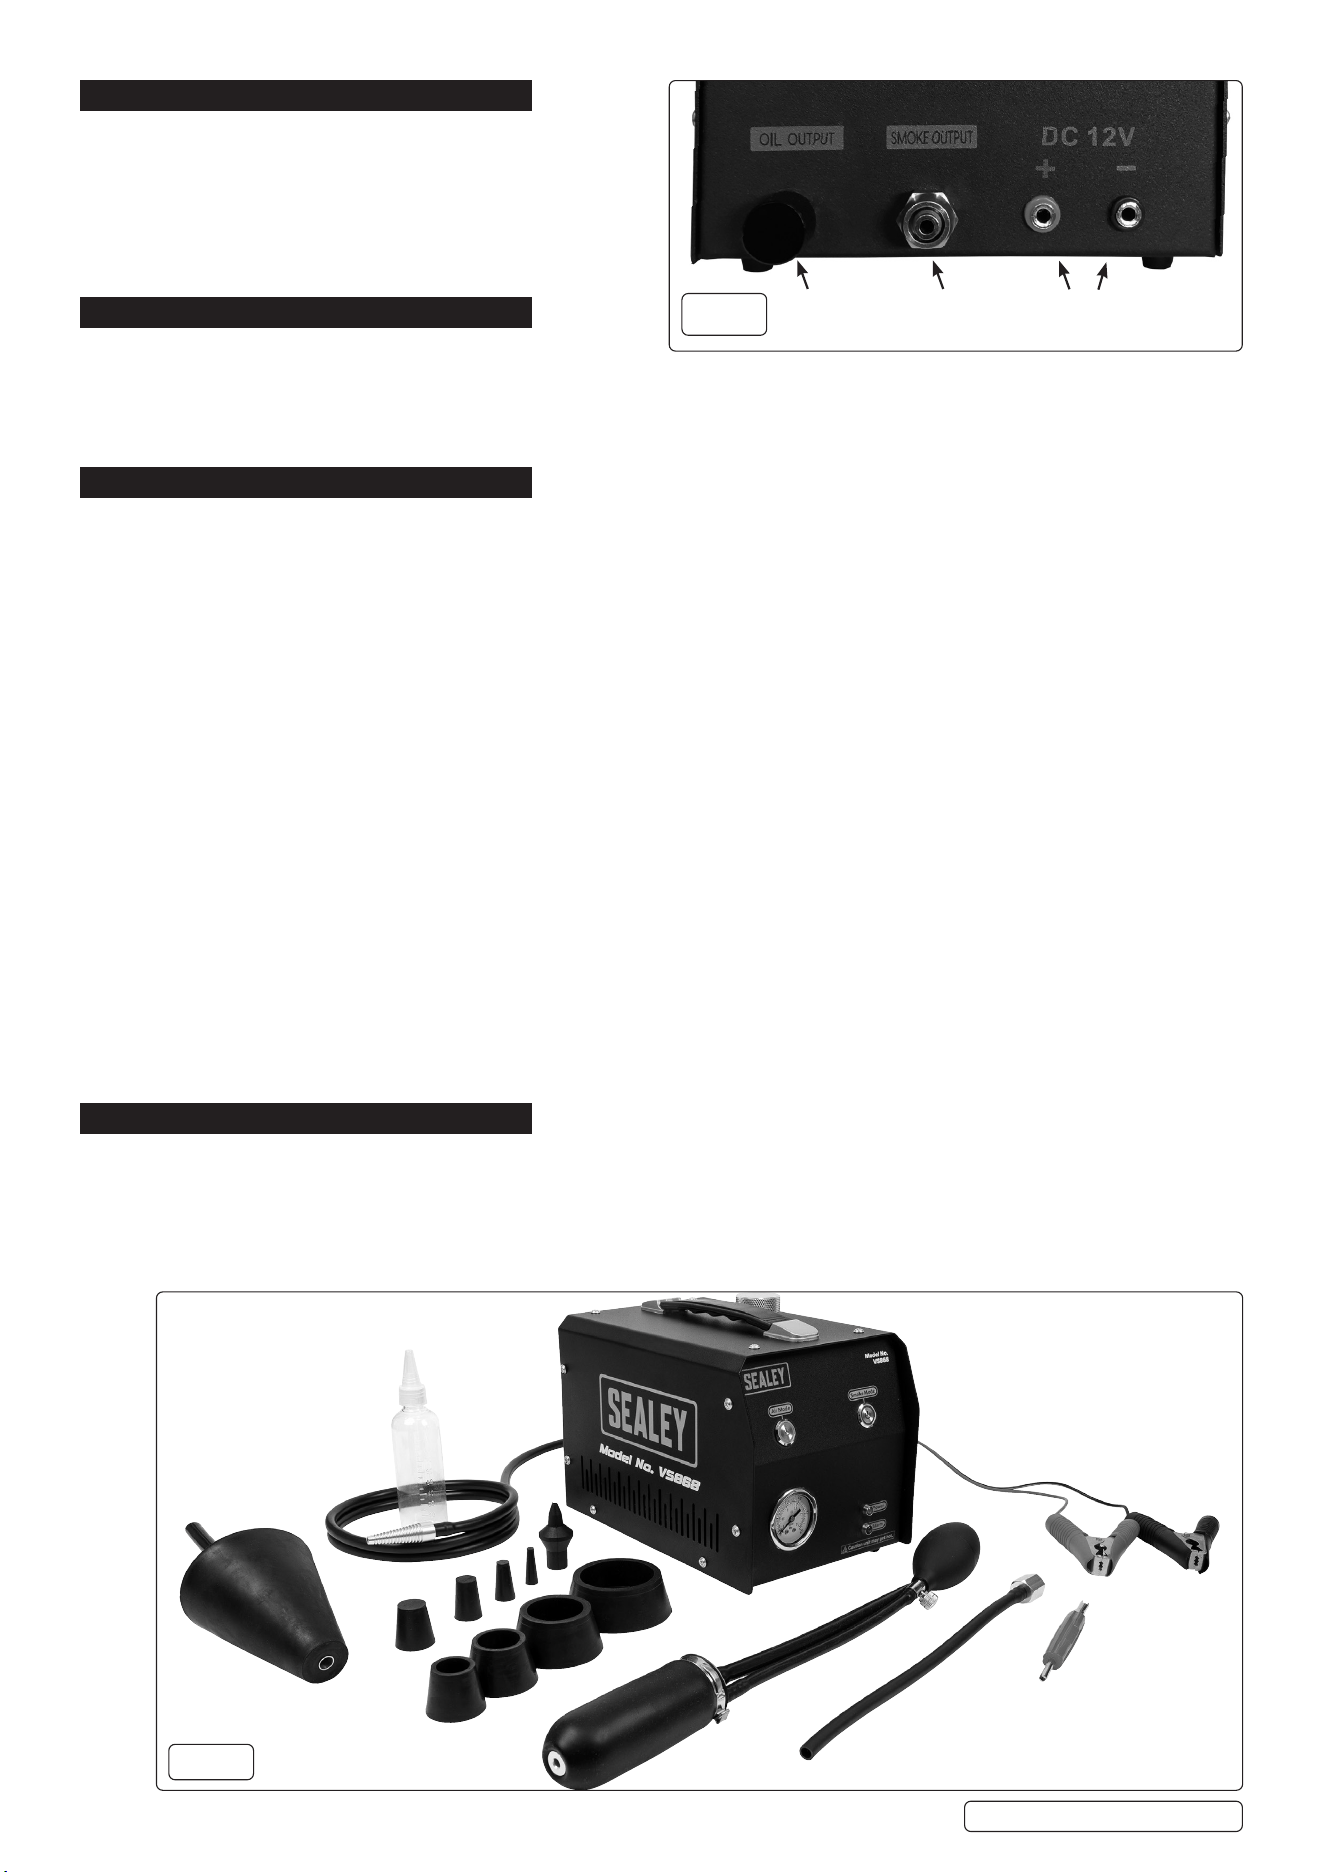
4. ASSEMBLY
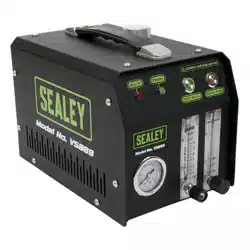
4.1. After unpacking, turn the machine so the back is facing (g.2).
4.1.1. Connect the 12v power cables to the positive(+) and negative(-) sockets.
4.1.2. Connect the smoke hose to the smoke output by removing the locking nut, slip the nut over the hose, push t the hose to the output
and then tighten the nut to hold the hose in place.
4.1.3. Connect the 12v power cables to the positive(+) and negative(-) terminals of a 12V car battery using the crocodile clips.
5. OPERATION
5.1. OPERATIONAL STEPS FOR AIR INTAKE SYSTEM TEST
5.1.1. Open the vehicles air filter cover and take out the air filter.
5.1.2. Take out the inflatable bladder from the accessory box and continue to squeeze it until the inflated diameter of the rubber bladder matches
the diameter of the air inlet.
5.1.3. Remove the oil filler cap (fig.1), add 10ml of test oil into it, and tighten the cap.
5.1.4. Press the air mode button and the smoke mode button respectively (fig.1).
5.1.5. Block the smoke/air nozzle and check that the gauge dial increases and is working correctly. Once pressure reaches 0.8kg/cm2 the check
is complete. Just press the Air Mode button for this test.
5.1.6. Connect smoke/air nozzle to the inflatable bladder.
5.1.7. The leak point of the air intake system can then be diagnosed by the escape of smoke/air. Reference the gauge to help diagnose the level
of leak.
5.2. AIR MODE - WHERE SMOKE IS NOT SUITABLE
5.2.1. Press Air Mode button only for this test (fig 1).
5.2.2. Allow the pressure to build. If you are testing a sealed unit then you would expect the gauge to read above 1kg/cm2. If there is a leak then
the gauge would not reach this level. Listen out for any air noises throughout the system referencing the gauge.
WARNING! It is not recommended to add more than 10ml of the test oil into the detector, otherwise it will cause the smoke generator to
stop working, smoke will not be generated and there is potential for an oil spill.
If the product is used for an excessive period of time, the internal temperature of the machine will rise and the overheat alarm light will
illuminate (g.1). Please disconnect the power supply immediately to stop device working and allow it to cool down.
It is not recommended to operate this product for more than 15 minutes at any one time.
5.3. SMOKE MODE
5.3.1. Press Smoke Mode button only for this test (g1).
5.3.2. Allow the pressure to build. If you are testing a sealed unit then you would expect the gauge to read above 1kg/cm2. If there is a leak
then the gauge would not reach this level. Listen out for any air noises throughout the system referencing the gauge. Smoke will help
further diagnose and locate the problem.
6. MAINTENANCE.
6.1. After the test, remove and clean the accessories. Then put them back into the box.
6.1.1. Remove the oil drain cap (g.2), drain the test oil out and pour it back into the oil bottle.
6.1.2. Clean the main unit and check if there is any fault, loose connection or damage.
6.1.3. After use of the main unit and the accessories, please keep them in a cool, dry and dust-free place.
6.1.4. Smoke and oil will oxidise and deteriorate after being in high temperature for a long time, which will aect the service life of the smoke
generator. Please change the test oil regularly.
Original Language Version
© Jack Sealey Limited
Oil Drain
Cap
Smoke
Output
Power
Sockets
fig.
2
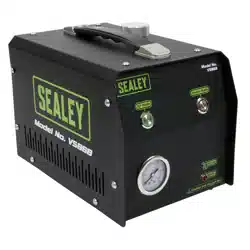
fig.
3
VS868 Issue 1 13/12/21
Sealey Group, Kempson Way, Suffolk Business Park, Bury St Edmunds, Suffolk. IP32 7AR
01284 757500 01284 703534 sales@sealey.co.uk www.sealey.co.uk
ENVIRONMENT PROTECTION
Recycle unwanted materials instead of disposing of them as waste. All tools, accessories and packaging should be sorted, taken to
a recycling centre and disposed of in a manner which is compatible with the environment. When the product becomes completely
unserviceable and requires disposal, drain any fluids (if applicable) into approved containers and dispose of the product and fluids
according to local regulations.
Note: It is our policy to continually improve products and as such we reserve the right to alter data, specifications and component parts without prior
notice.
Important: No Liability is accepted for incorrect use of this product.
Warranty: Guarantee is 12 months from purchase date, proof of which is required for any claim.
WEEE REGULATIONS
Dispose of this product at the end of its working life in compliance with the EU Directive on Waste Electrical and Electronic Equipment
(WEEE). When the product is no longer required, it must be disposed of in an environmentally protective way. Contact your local solid
waste authority for recycling information.
Original Language Version
© Jack Sealey Limited
VS868 Issue 1 13/12/21