Loading ...
Loading ...
Loading ...
49-1000332 Rev. 7 25
Installation Instructions
INSTALLING THE REFRIGERATOR
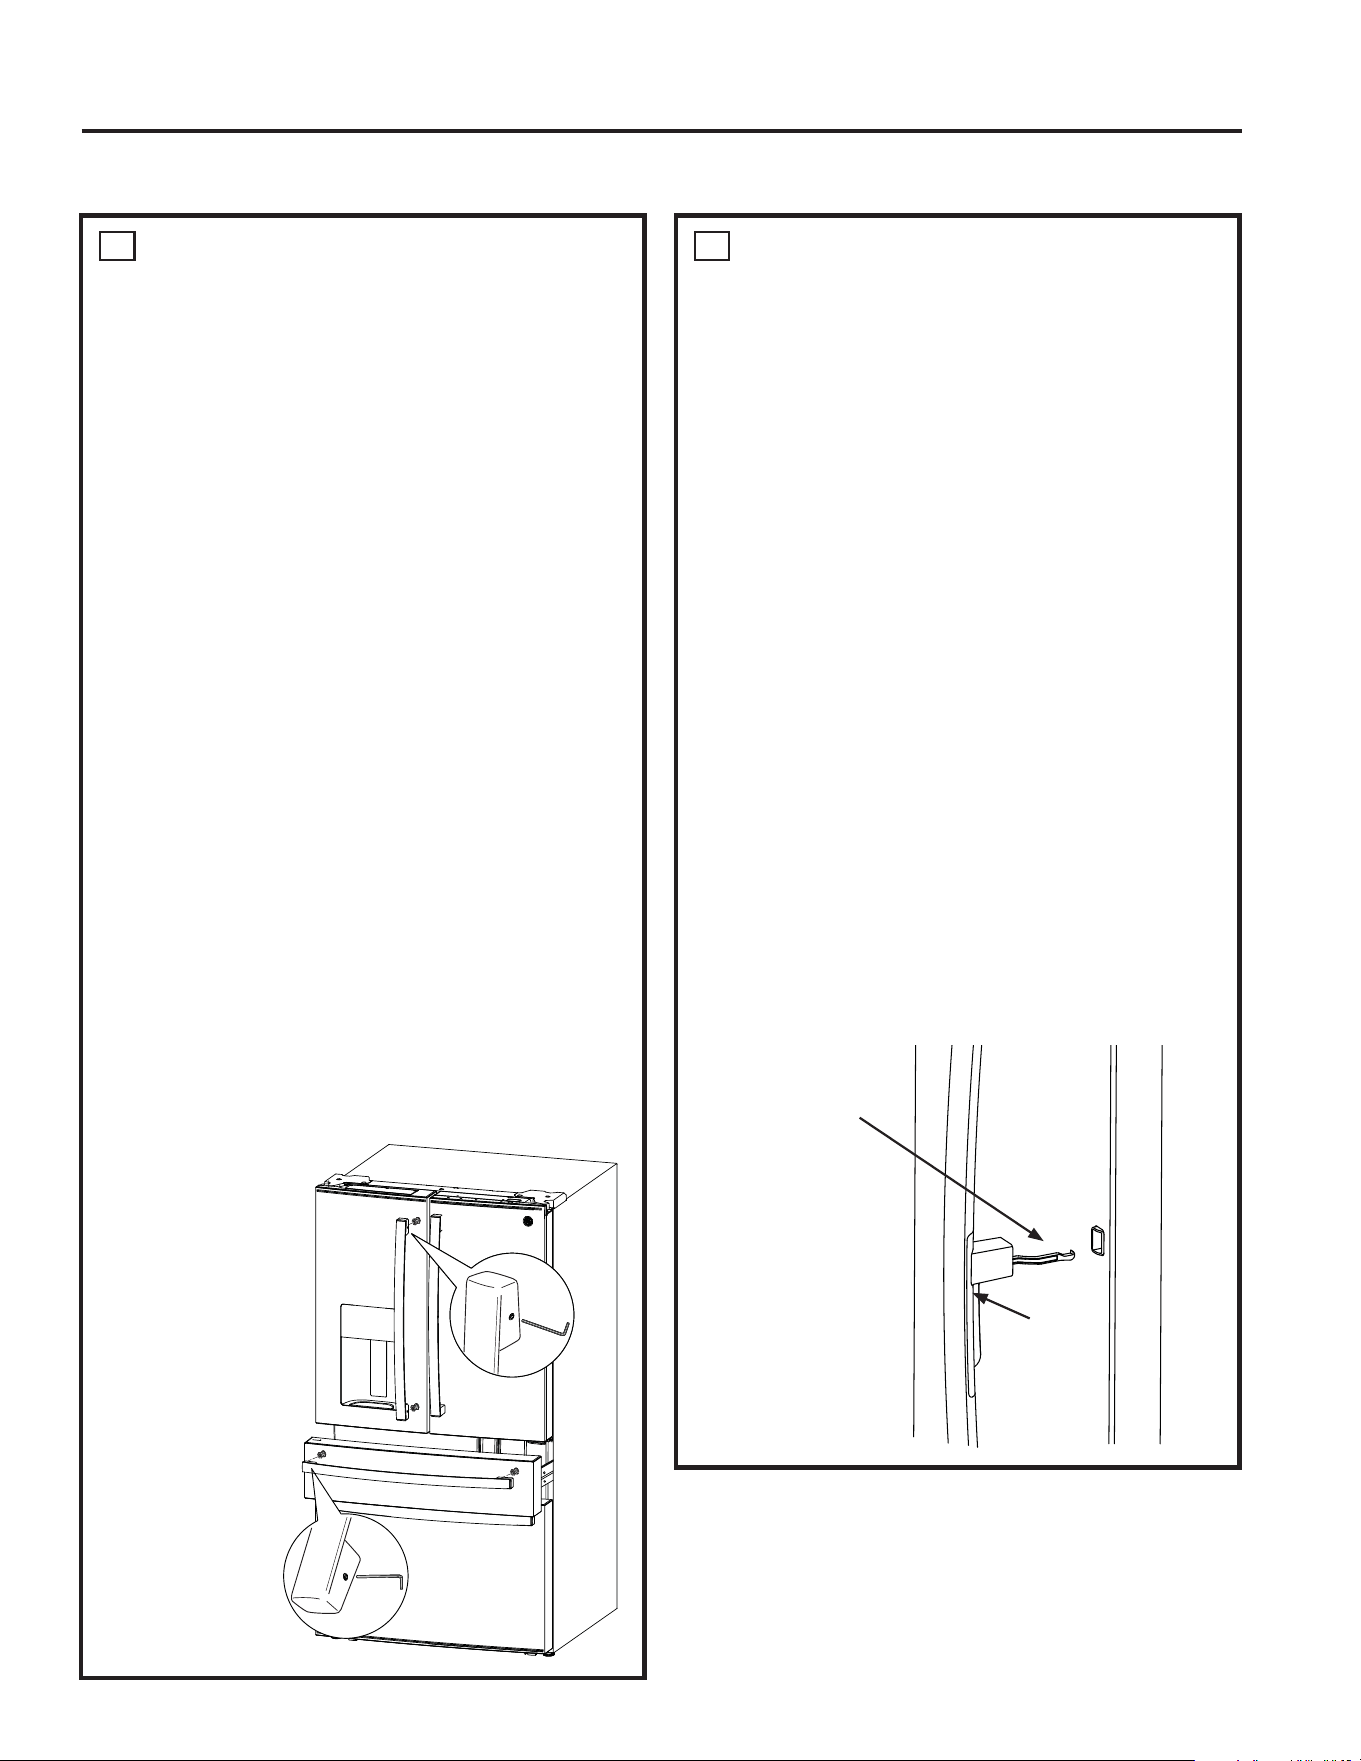
1
REFRIGERATOR AND
FREEZER HANDLE
INSTALLATION
Before You Start….
Ŷ To avoid injury, wear closed-toe shoes when
installing the handles.
Ŷ While installing the handle, grasp the handle
firmly to ensure it does not fall or scratch the
appliance’s finish.
Ŷ IMPORTANT: To make sure the handles are
accurately installed, please review the instructions
and graphics before you begin installation.
Ŷ IMPORTANT:'RQRWXVHSRZHUWRROVWRWLJKWHQ
set screws.
Tools Provided:
Ŷ´KH[NH\
Handle appearance may vary based on model;
however, the installation process is the same.
1. Remove any protective film from the door
or drawer fronts before installing handles (if
applicable).
2. Remove handle from packaging and locate the
SURYLGHG´KH[NH\
3. Place the handle over the mounting fasteners
until it is flush against the surface of the door.
4. Tighten both set screws in the handle end
FDSVE\WXUQLQJWKH´KH[NH\FORFNZLVHXQWLO
the handle will not hang loose or fall from its
PRXQWLQJ'RQRWIXOO\WLJKWHQ\HW
5. IMPORTANT:
Hold the
handle firmly
against the
door, make
sure there
are no gaps
between the
handle end
caps and the
door, and fully
tighten the set
screws.
To remove the
handles, reverse
the installation
process.
2
REFRIGERATOR HANDLE
INSTALLATION FOR DOOR-IN-
DOOR MODELS ONLY
Handle appearance may vary based on model;
however, the installation process is the same.
1. Remove any protective film from the door
or drawer fronts before installing handles (if
applicable). Do not remove the tape that
secures the inner door to the outer door until
after the handle is installed.
2. Remove handle from packaging and locate the
SURYLGHG´KH[NH\
3. Align the lever with the opening on the outer door.
Make sure the hook is pointed up.
4. Insert the latch lever into the opening and place
the handle over the mounting fasteners until it is
flush against the surface of the door.
5. Tighten both set screws in the handle end caps by
WXUQLQJWKH´KH[NH\FORFNZLVHXQWLOWKHKDQGOH
ZLOOQRWKDQJORRVHRUIDOOIURPLWVPRXQWLQJ'RQRW
fully tighten yet.
6. IMPORTANT: Hold the handle firmly against the
door, make sure there are no gaps between the
handle end caps and the door, and fully tighten the
set screws.
To remove the handles, reverse the installation
process.
Latch Lever with
Hook pointed up
'RRULQ
'RRU
Latch
INSTALLATION INSTRUCTIONS
Loading ...
Loading ...
Loading ...