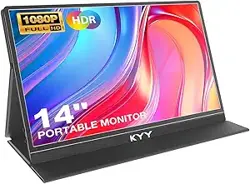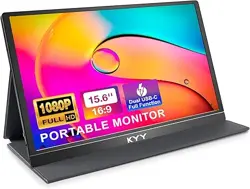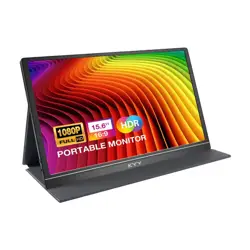

15.6
"
Full HD
Portable Monitor
K3
User Guide
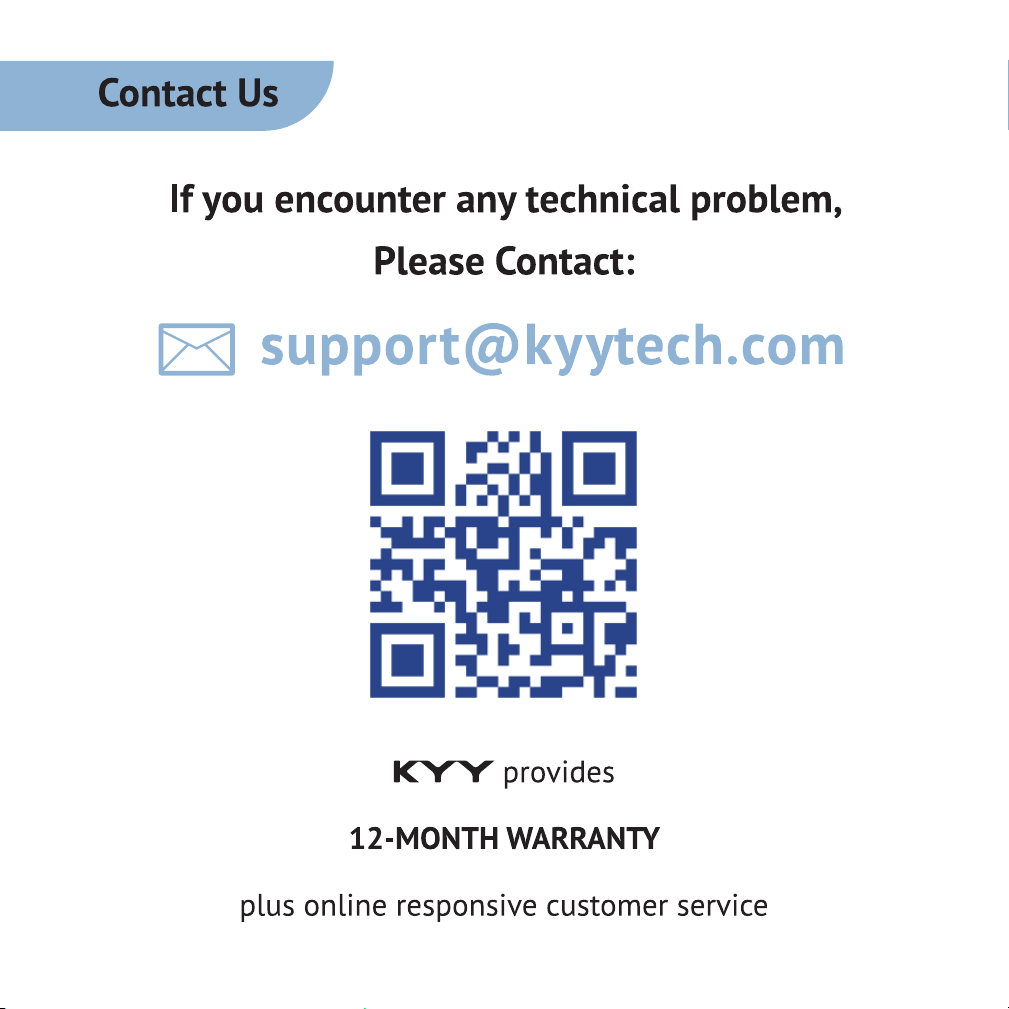
Note: Any technical problem pls contact support team
Service
12-MONTH WARRANTY
plus online responsive customer service
provides
Please Contact:
Not Satisfied?
Monitor Damaged?
Can’t Connect?
We apologize for any inconveniences,
if the monitor you received damaged or can’t connect
the monitor successfully with your devices,

Package List .......................................................................1
Introduction ..................................................................... 2
Smart Cover ..................................................................... 4
Connect with Devices ................................................... 6
Mode Settings ............................................................... 11
Supported Devices and Models .............................. 17
Specications ................................................................. 19
Notices .............................................................................. 20
Troubleshooting ........................................................... 21
Content
1
15.6
"
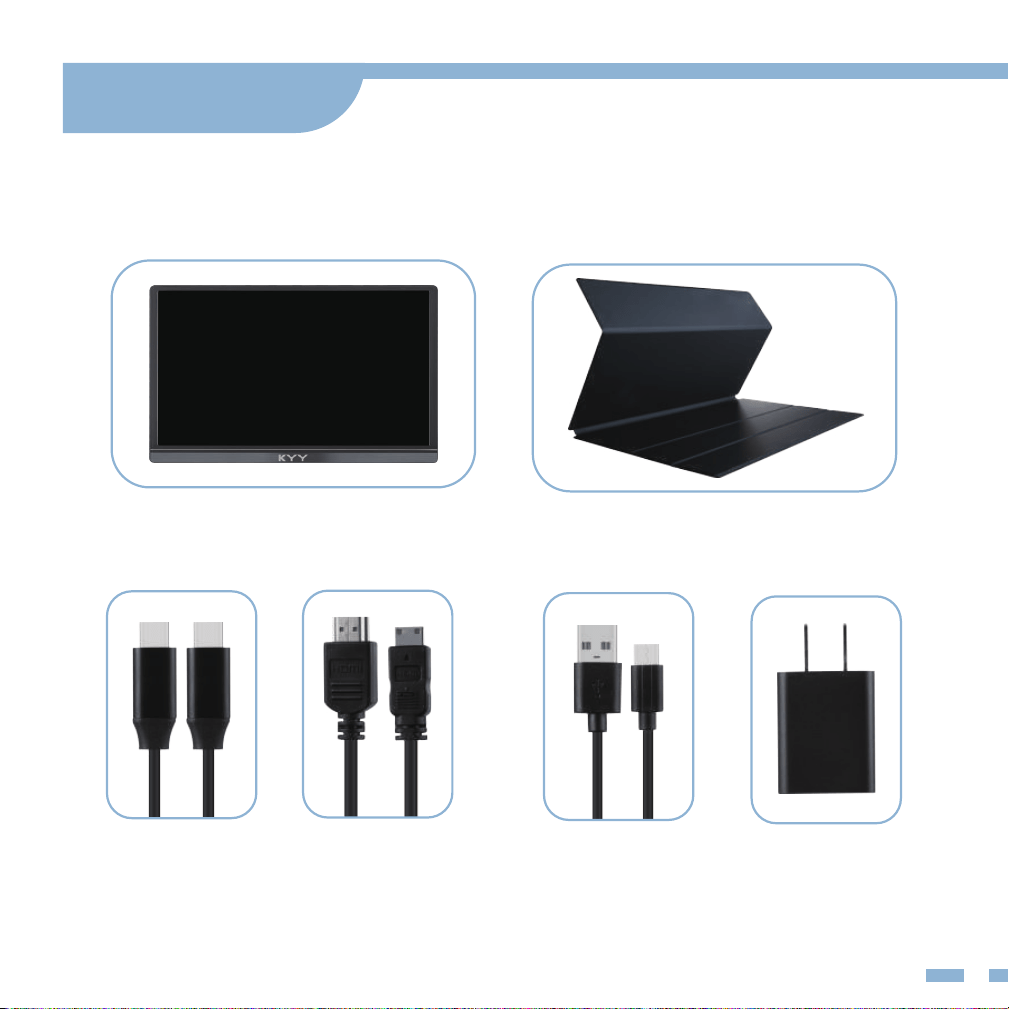
Portable Monitor Magnetic Smart Cover
USB-C to
USB-C Cable
Mini HDMI to
HDMI Cable
USB-C to USB-A
Cable (Power Supply)
5V/2.4A Power
Adapter
Package List
2
1
2
3
4
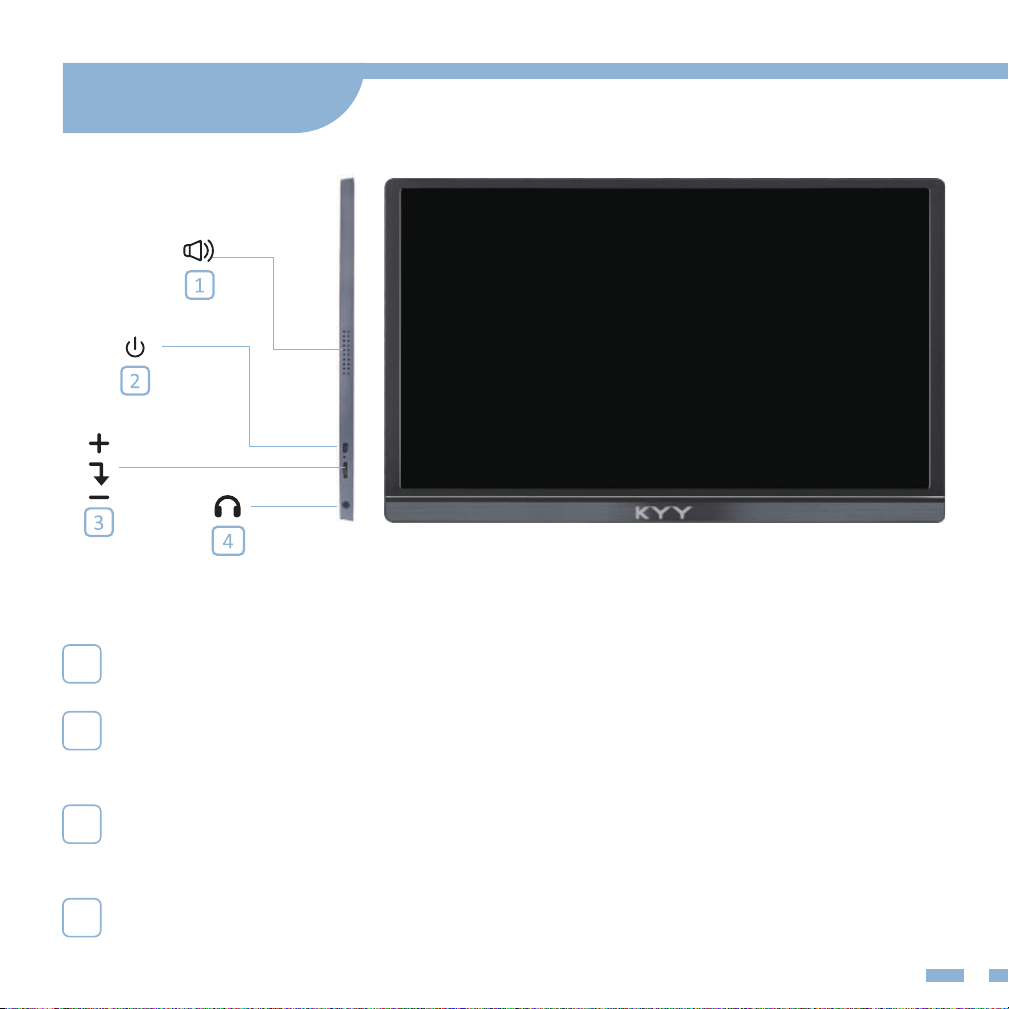
Dual Speakers
Listen to music, movies, games, and multimedia les.
Power Button/Back Button
Long press for 3s to turn the screen on/o. Short press to back to the previous page.
Trackwheel
• Press the trackwheel to turn to the OSD menu. Scroll the trackwheel to control
the cursor on the menu, and press to conrm;
• In the main interface, scroll up to open the adjust shortcut menu.
3.5mm Audio Outport
Headsets, speakers or digital audio equipment extension interface.
Introduction
3
5
6
7
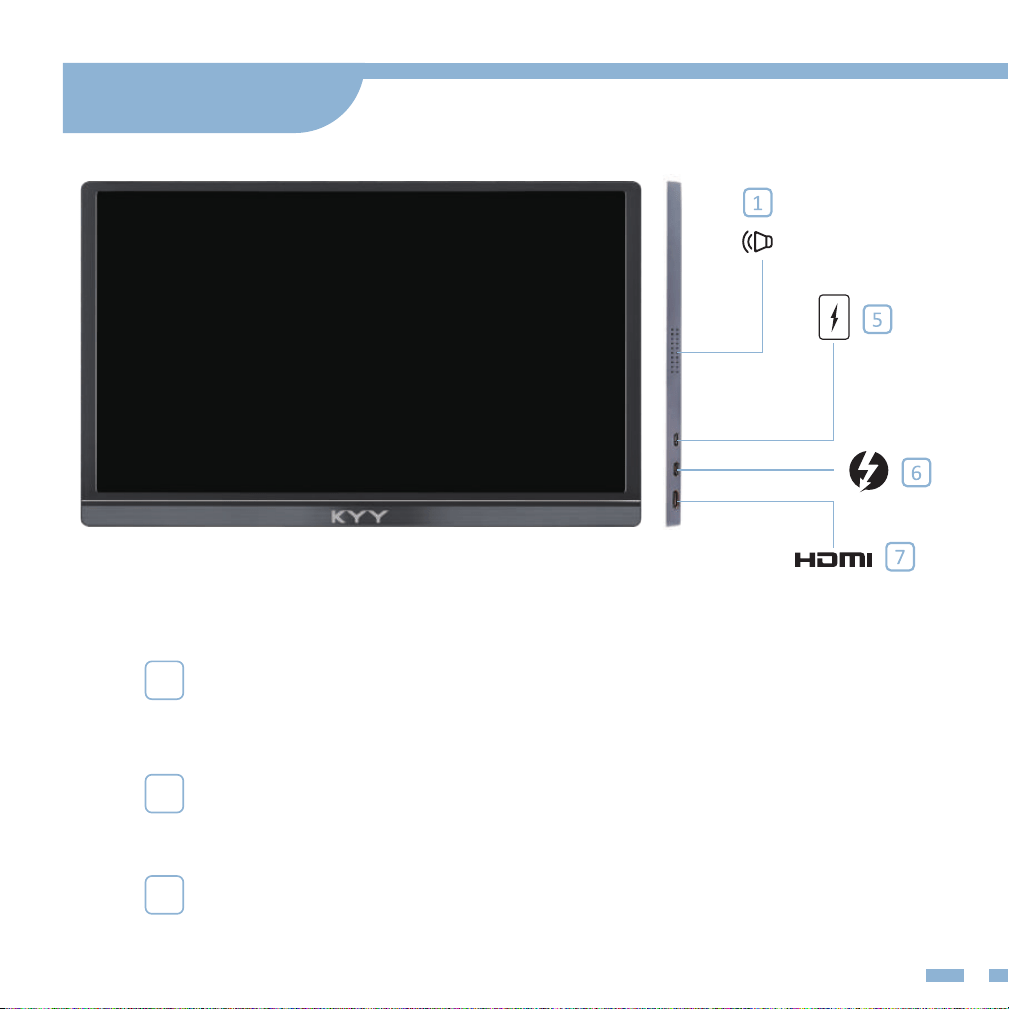
Type-C Power Supply Port
External power supply 5~20V voltage input.
(Only support power supply)
Type-C Full Function Port
• Supply power;
• Transmit the audio, video signal.
Mini HDMI Port
Audio and video signal transmission.
Introduction
4
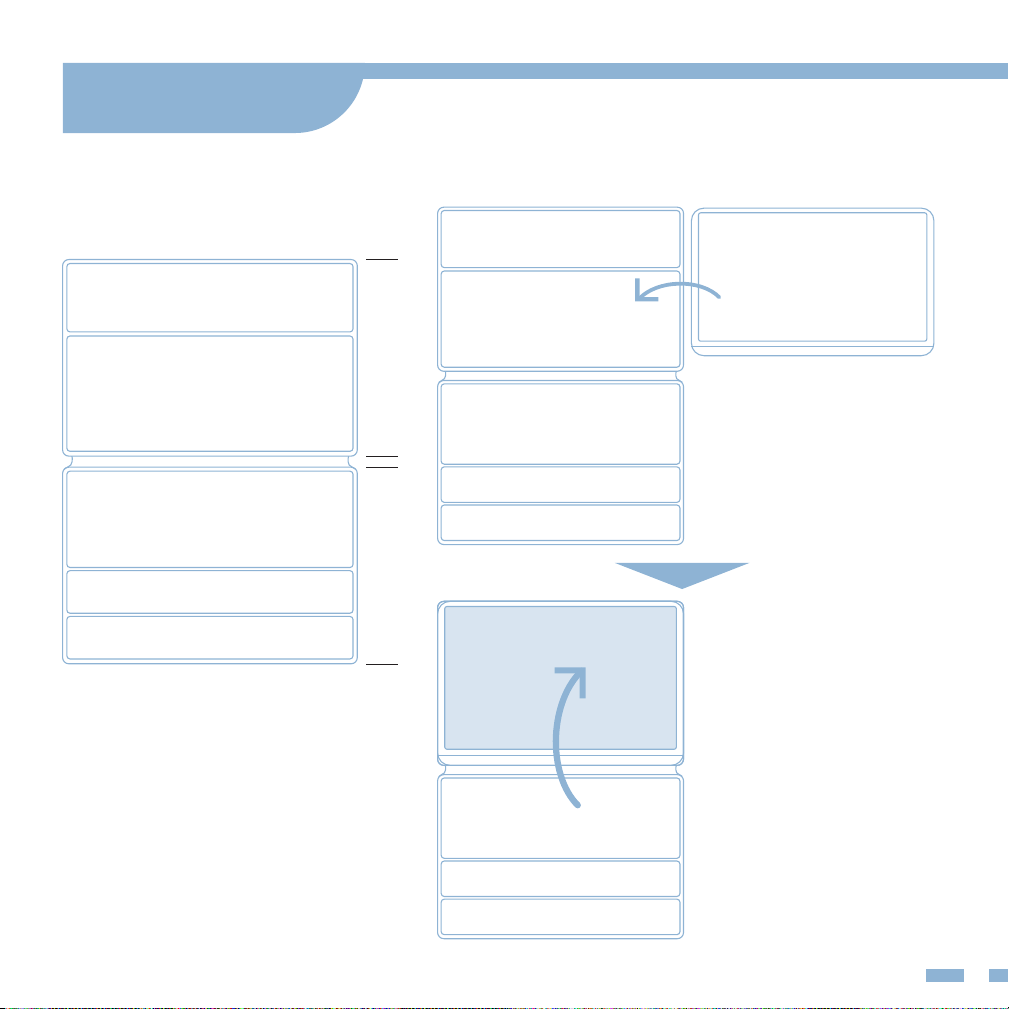
Smart Cover
Place the screen on
the backside of the
smart cover.
Cover the screen
side of the smart
cover on the screen
for protection.
Back Side Screen Side
5
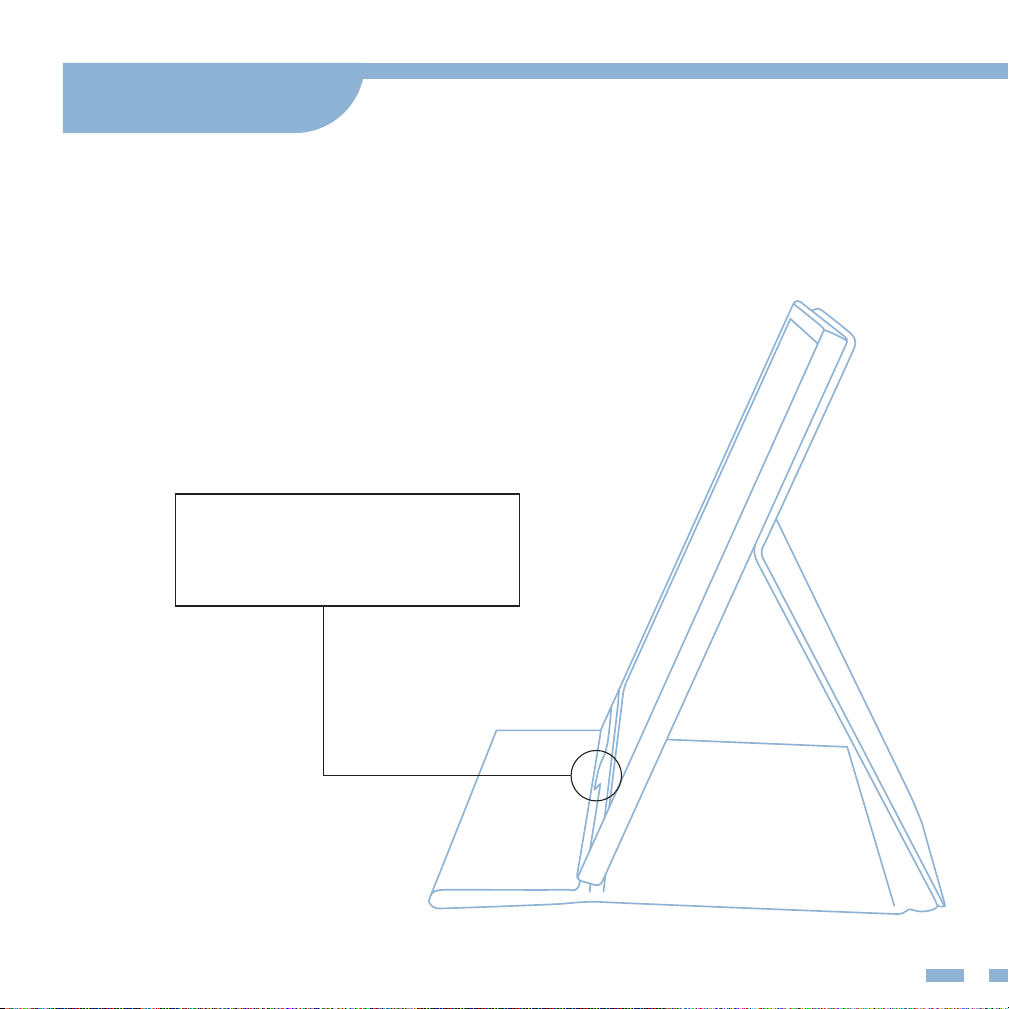
Use the smart cover to make the monitor stands
at a proper viewing angle.
Fold the screen side of the
smart cover back to support
the screen's bottom.
Smart Cover
6
Connect with Devices
2
Connect without External Power Supply
Only works with full-function USB-C port.
Please plug in the [usb-c to usb-c cable] to the second
USB-C full-function port and make sure the USB-C port
of your device is full-function.
Note: The monitor does not have an internal battery.
Before using, please make sure the connected devices
or power adapter can supply at least 5V/2.4A power.
1
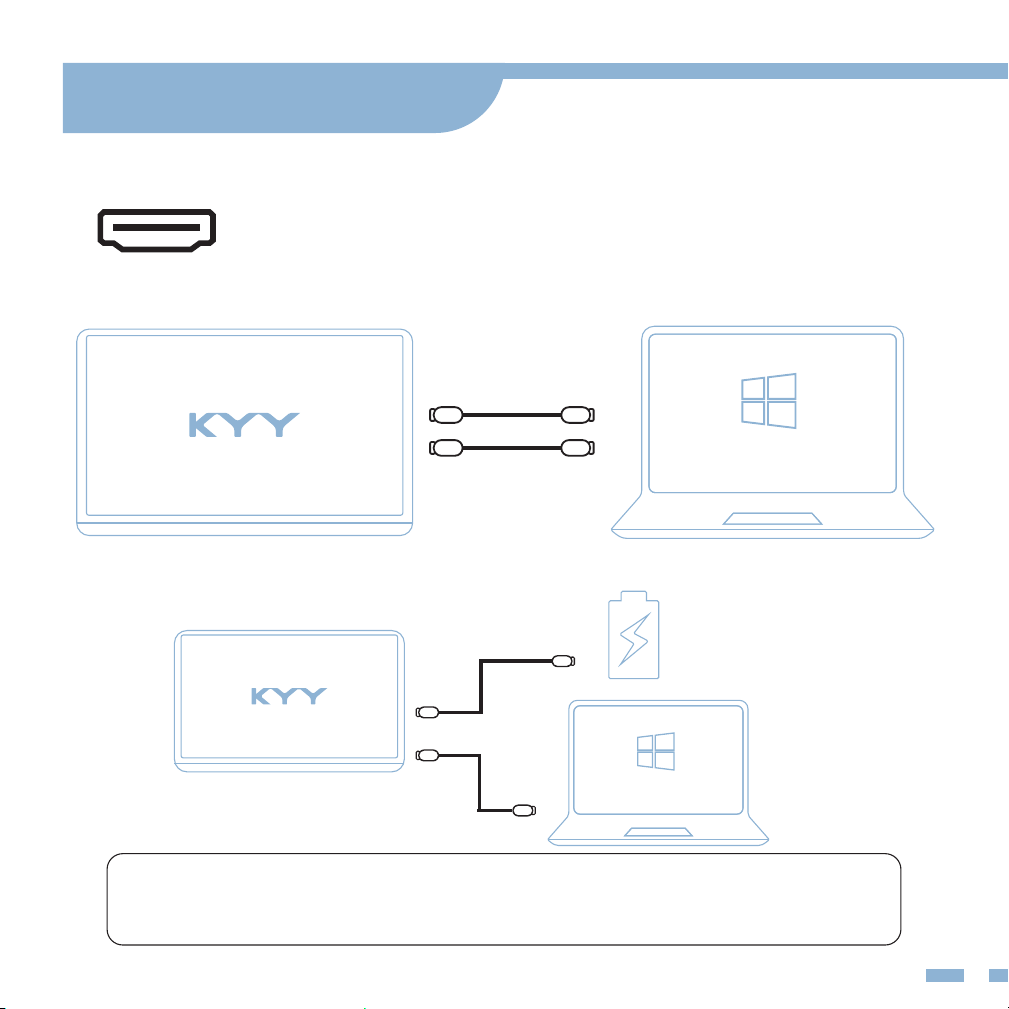
Connect with External Power Supply
Connect your monitor to the power supply
with the [usb-c to usb-a cable] and the Adapter provided,
plug in the [usb-c to usb-c cable] OR [mini HDMI to
HDMI cable] for video output.
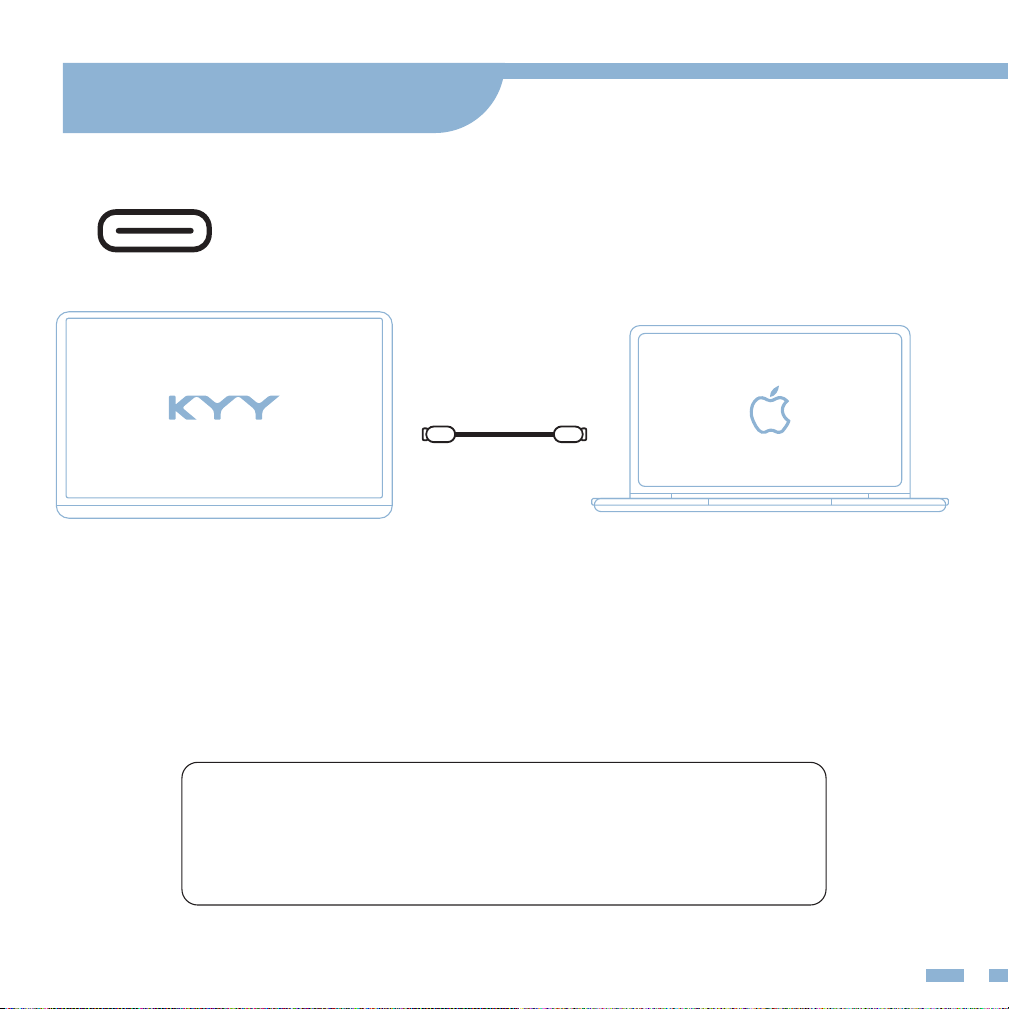
USB-C Laptop
USB-C to USB-C
7
Note: Please check if the USB-C port of your laptop
is compatible with audio and video signal transmission.
If not, it would need a corresponding adapter to connect.
External Power Supply Needed Conditions
1. Brightness or volume is greater than 80%.
2. The type-c cable does not have a power supply function.
Connect with Devices
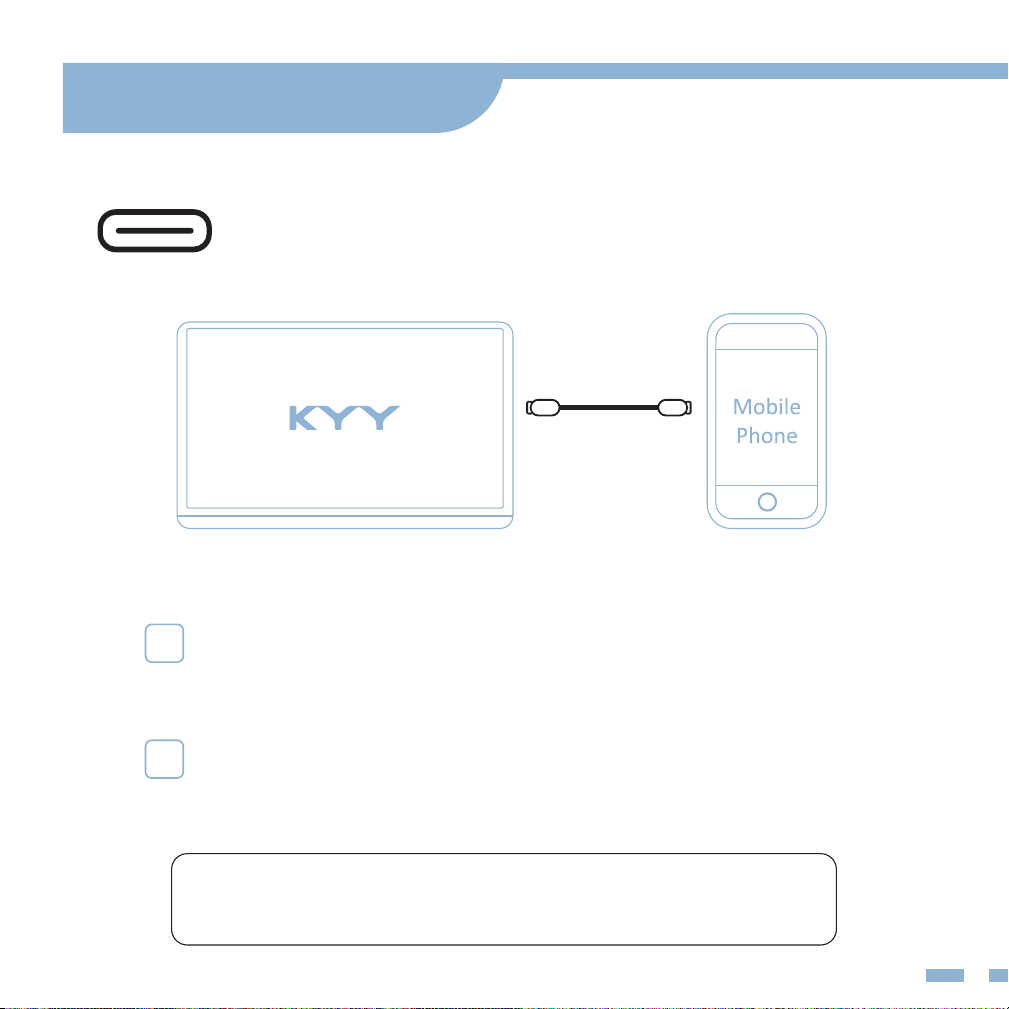
USB-C Phone
USB-C to USB-C
8
Note: Only works with phones with full-function USB-c port.
(for iPhone needs a Lightning to HDMI Adapter.)
Connect with Devices
1
If there is no external power supply, the phone would
supply power to the monitor. Then the monitor would
turn to energy-saving mode (30% brightness).
2
If plugin a 5V/2.4A (or above) external power,
the monitor can reversely charge the phone.
OR
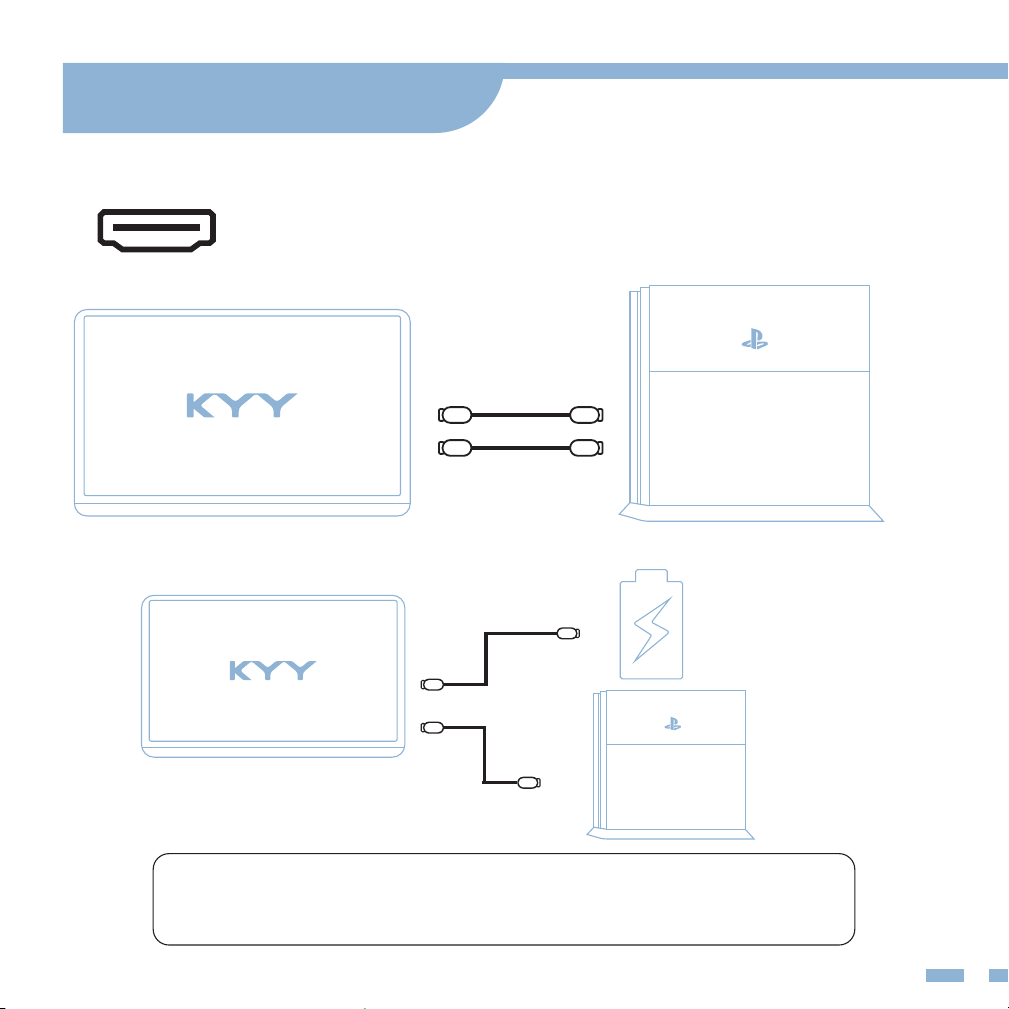
USB-C to USB-A
Computer
HD to Mini HD
USB-A to USB-C
Computer
HD to Mini HD
9
Note: HDMI port does not supply power. The monitor needs an external
power supply (5V/2.4A or above) or USB-A to USB-C cable to supply.
Connect with Devices
HDMI PC/Laptop
(external power supply)
OR
HD to Mini HD
USB-A to USB-C
10
Note: Please connect the external power supply rst then
the mini HDMI to HDMI cable to ensure smooth transmission.
Connect with Devices
HDMI Other Devices
USB-C to USB-A
HD to Mini HD
(external power supply)
11
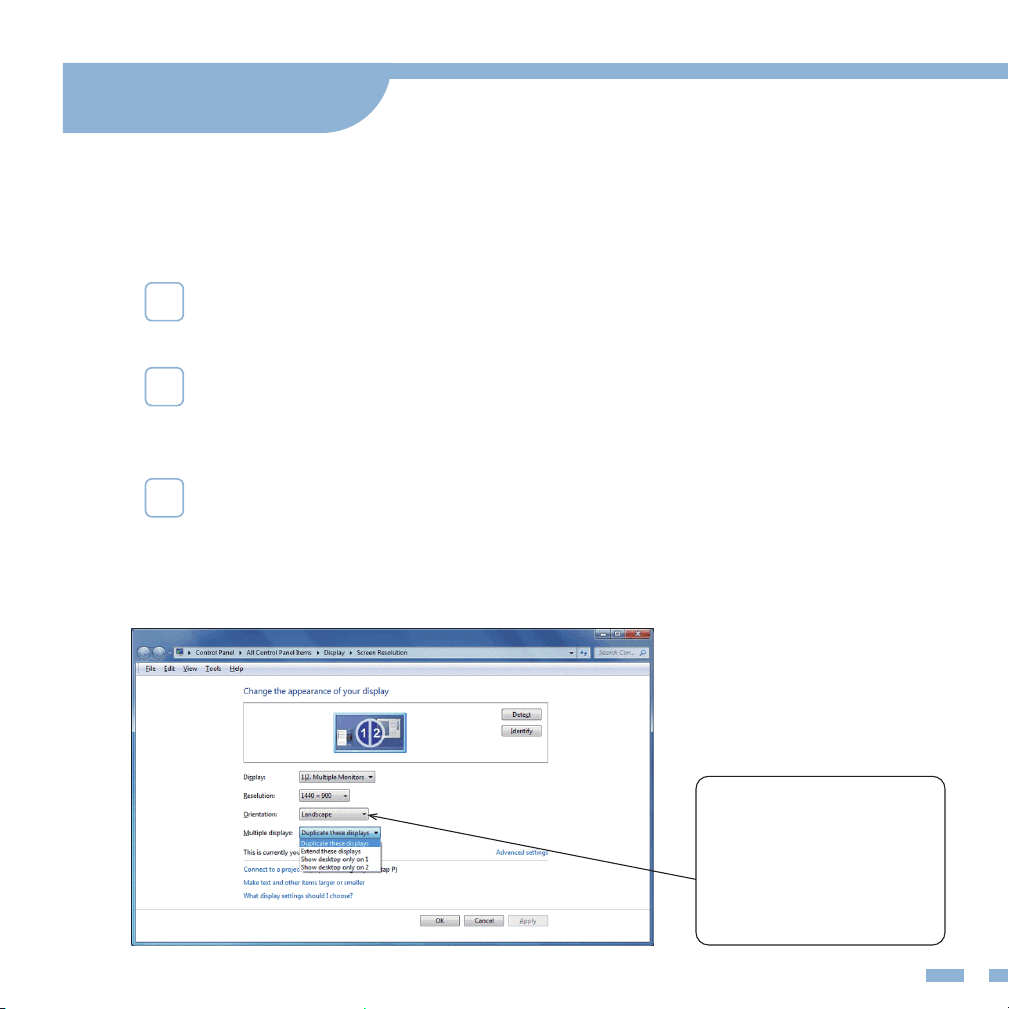
Right-click the desktop and select either Screen
Resolution (Windows 7/8) or Display Settings (Windows 10)
1
Screen Rotate Setting: Click the Orientation drop-down list, and
then select Landscape or Portrait.
2
Duplicate & Extend Mode Setting: Click the Multiple displays
drop-down list, and then select Extend/Duplicate these displays.
Note: If you cannot see the additional monitor listed, click Detect.
If does not work, try restarting your computer and do steps again.
3
Note: If you cannot
nd the Orientation
option, please check
if your laptop/PC has
this function.
Mode Settings
Multiple-Display Setting for Windows
12
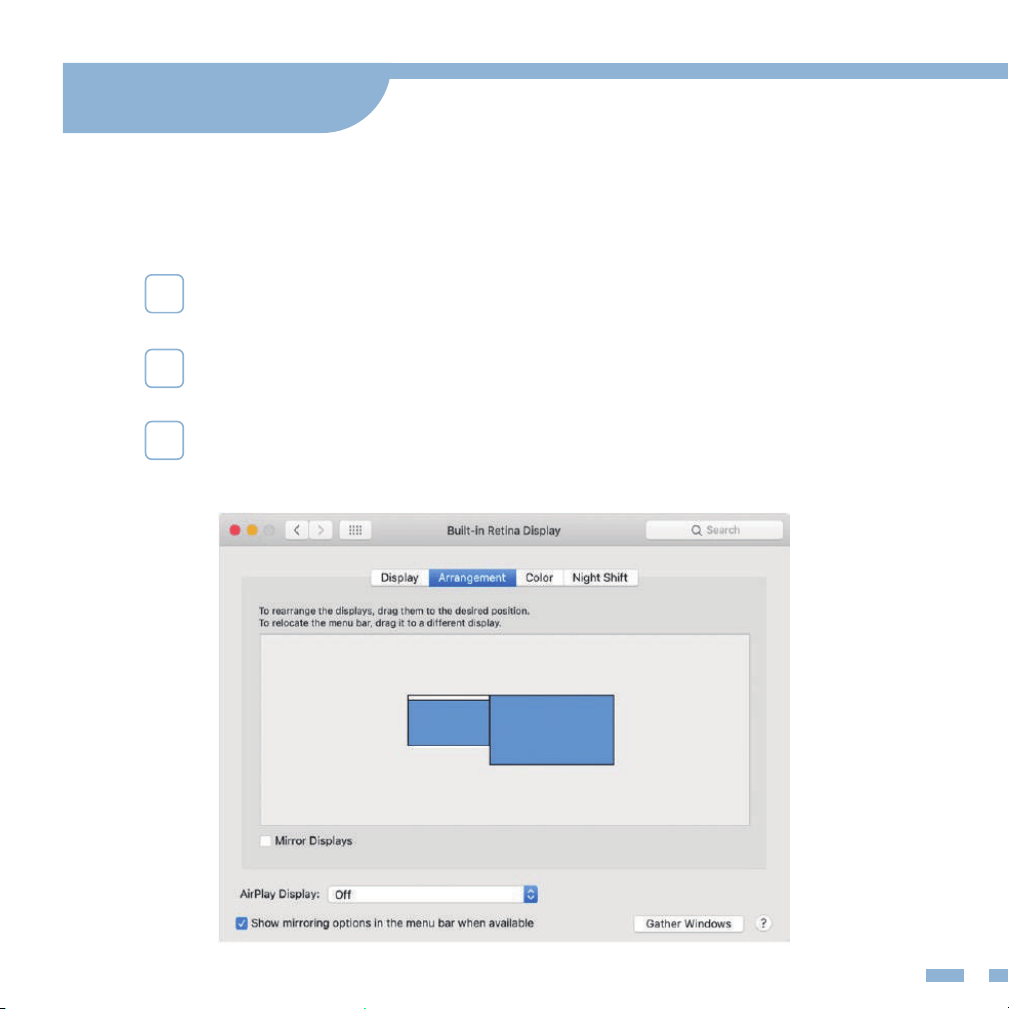
Choose Apple menu > System Preferences, then click Displays.
1
Multiple-Display Setting for Mac
Click the Arrangement tab.
To change the position of a display, drag it to the desired
position. A red border appears around the display as
it's movable.
2
3
Mode Settings
13
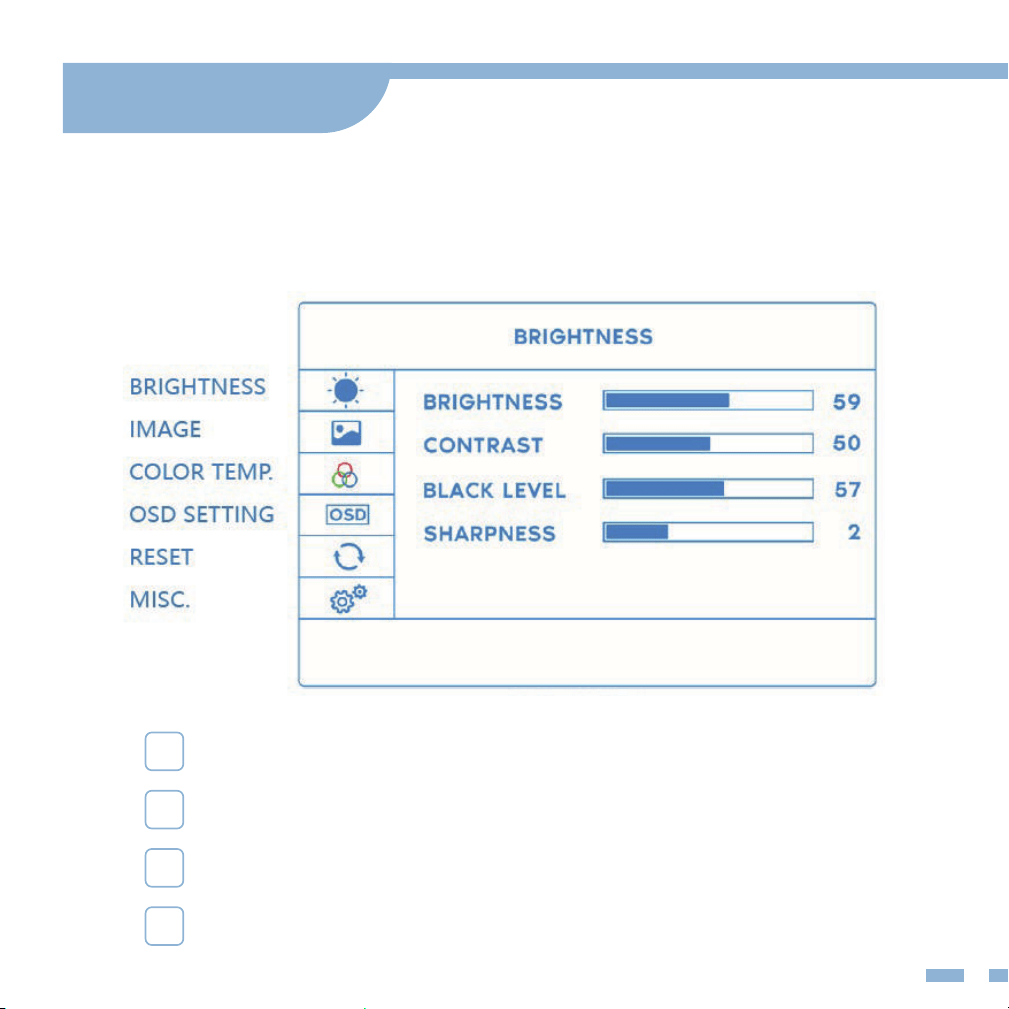
Press the trackwheel to turn on the OSD menu.
1
Scroll the trackwheel to control the cursor on the menu.
2
Press the trackwheel to conrm.
3
Short press the back button to back to the upper page.
4
Mode Settings
OSD (On Screen Display) Menu
14
BRIGHTNESS
BRIGHTNESS
Adjust the brightness of display.
CONTRAST
Adjust the dierence in color and light
between parts of an image.
BLACK
LEVEL
Adjust the level of brightness at the
darkest part of a visual image.
SHARPNESS
Adjust the sharpness of graphics.
IMAGE
ECO
Adjust the applicable scene: such as TEXT
mode, increase the contrast and reduce
the brightness to protect the eyes.
DCR
Dynamic Contrast Ratio. Adjust the
brightness according to the display to
better display the color contrast.
ASPECT
Adjust the proportional relationship
between the width and height of the
display. Such as 4:3.
Mode Settings
OSD (On Screen Display) Menu
15
COLOR
TEMP.
COLOR TEMP.
Adjust the screen
color temperature.
RED
Adjust the brightness
of the RGB colors.
GREEN
BLUE
OSD SETTING
LANGUAGE
Modify the OSD Menu
interface language,
default is English.
OSD TIMER
OSD TIMER
Adjust the time th
OSD Menu display
remains on the screen.
TRANSPARENCY
Adjust the
transparency of the
OSD menu.
Mode Settings
OSD (On Screen Display) Menu
16
RESET
RESET
Reset all the items to factory defaults.
MUTE
Mute the display.
VOLUME
Adjust the display volume.
MISC
SIGNAL SOURCE
Switch signal sources such as HDMI or
Type-C.
LOW BLUE LIGHT
Filters out harmful blue light, which can
cause eye fatigue.
HDR MODE
Enables the monitor to display a wider
range of colors and contrast.
Mode Settings
OSD (On Screen Display) Menu
17
Supported Devices
and Models
Phone
Brand Model
SAMSUNG DEX, S8/S9/S10/S20 Series, Note 8/Note 9/Note 10 Series
HUAWEI Mate 10/Mate 20/Mate 30 Series, Mate RS, P20/P30/P40 Series
HONOR Note 10, V20/V30 Seris
OPPO R17 Pro, Reno, Find
Razer Razer Phone, Razer Phone 2
HTC U Ultra
LG G5, G6, G7
ASUS ROG Gaming Phone
More Brands Updating
18
Laptop
Brand Model
Apple MacBook 12 in, MacBook Pro 2016/2017/2018
MacBook Air 2018, iPad Pro 2018
Google Chromebook Pixels, Pixelbook Pen
Lenovo Savior Y7000, Savior Y7000P, Savior Y9000K, YOGA 6 Pro,
ThinkPad X1 Carbon, Yoga 5 Pro, Miix 720
DELL G3 Series, G5 Series, G7 Series, Inspiron 5000,
Inspiron 7000, XPS13, XPS15
HP EliteBook 1050G1, EliteBook Folio G1, Omen 4 Pro, Pavilion X2
Microsoft Surface Book 2
ASUS Lingyao 3, U306, U321 Series, U4100, ROG Series
HUAWEI MateBook D,
Razer Blade Stealth
More Brands Updating
Supported Devices
and Models
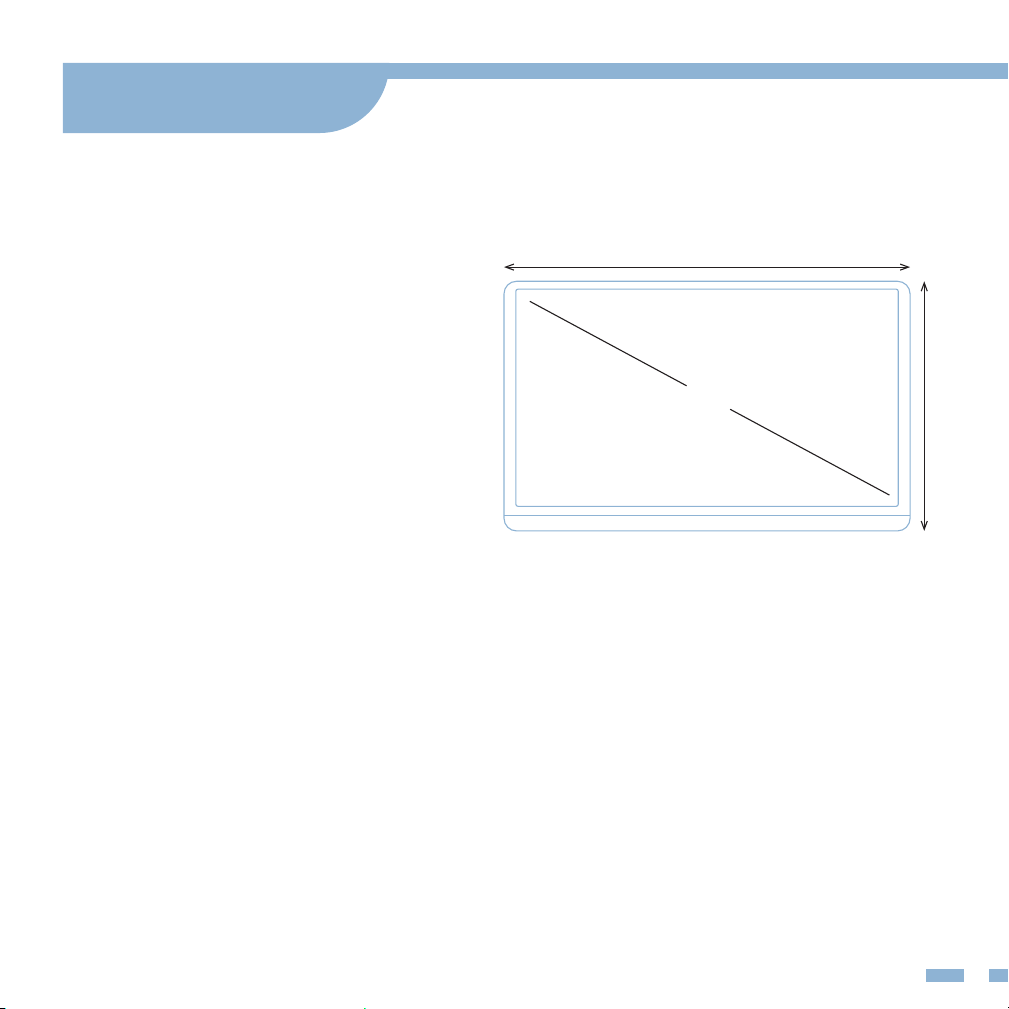
15.6 inch
368mm
225mm
19
Product: KYY K3 Portable Monitor
Visible Area: 344.16*194.59mm
Panel Type: IPS LCD
Contrast Ratio: 1000: 1
Resolution: 1920*1080
Color Temperature: 6800K
Brightness: 300cd/m²
Aspect Ratio: 16:9
Display Color: 16.7M
Speaker: Built-in Speaker (1W*2)
Visual Angle: H 85°/85°Min V 85°/85°Min
Product Dimensions: 368*225*9.0mm
Output Interface: 3.5mm Headphone Interface
Input Interface: Mini HD (Video signal), Type-C Full
Function (Video data, Power supply), Type-C power supply.
System Requirement: Devices with HD output interface.
Computers or mobile phones with Type-C Fully Functional port.
Specifications

20
• Before setting up the monitor, carefully read all the
instructions with the package.
• To prevent re or shock hazards never expose the monitor to
rain or moisture.
• Never attempt to open the monitor cabinet.
• Before using, make sure all the cables are correctly connected
and power cable is not damaged.
• Avoid dust, humidity, and temperature extremes. Do not place
in any area where it may be wet.
• Place the monitor on a stable surface.
• Never push objects or spill liquid of any kind into the slots on
the monitor cabinet.
Notices
21
Troubleshooting
Problem Possible Solution
Power LED is not ON.
• Press the power button to check if the monitor is
in the ON mode.
• Check if the USB cable is properly connected
to the monitor and the power outlet.
Can't connect
• Check if the monitor and the computer are in the
"ON" mode.
• Make sure the cable is properly connected between
the KYY monitor and the computer.
• Please make sure that the monitor has been charged
by the connected device or by the included 5V/2.4A
power adapter.
• Inspect the signal cable and make sure none of the
pins are bent.
• Connect the monitor with other available devices to
check.
• (Note: 1.the FIRST USB-C port only supports power
supply, the SECOND USB-C port supports power
supply and video output.
• 2.The monitor doesn't have an internal battery,
and the HDMI port does not supply power.
• If still can’t connect, pls contact
[[email protected]] to consult.
Screen image is too
light or dark.
• Adjust the Brightness settings via OSD.

Screen image bounces
or a wave pattern is
present in the image.
• Make sure the USB cable is properly connected
between the USB monitor and the computer.
• Move electrical devices that may cause
electrical interference.
Screen image has
color defects.
• Inspect the USB cable and make sure that none
of the pins are bent.
22
Problem Possible Solution
The screen ickers in
various colors when
starting up.
• Long press the power button for 3s to turn o the
monitor and restart it again.
• The second usb-c full-function port does not have
a data storage function, pls plugin the power
supply cable into the rst usb-c port, then the
parameters can be saved.
Unable to save
brightness and volume
parameters.
• Please make sure that HDR mode is turned o and
Scene(ECO) Mode is not adjusted
(Stay"Standard Mode").
Brightness/Volume
shows grey and can't
be adjusted.