
Installation and
Use & Care Manual
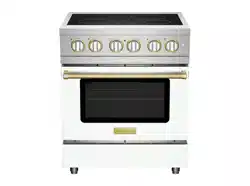
Freestanding Range Induction
BSIR30
Part # 100657 revision 0 © Prizer Painter Stove Works, Blandon, PA 19510

2 (800) 449-8691
Thank You and Welcome
Thank you for your purchase and welcome to the BlueStar
®
family!
BlueStar
®
appliances are designed for discerning home chefs who demand restaurant-quality results in their own kitchens. As the
owner of a new BlueStar
®
appliance you can look forward to years of precise and high performance cooking in your home kitchen.
Here are a few ps to get started:
1. Review this Use & Care Manual, which includes instrucons and ps for geng the most out of your new appliance.
2. Register your product online at www.bluestarcooking.com/support/product-registraon to stay in touch and allow us to send
you valuable product news and updates.
3. Review our products and help us spread the word at hps://www.bluestarcooking.com/inspiraon/reviews. We’ll send you
some BlueStar gear to thank you for your me.
Thank you again for choosing BlueStar
®
.
The BlueStar
®
Team
Proudly Producing Quality Kitchen Appliances in the U.S.A. since 1880.

bluestarcooking.com 3
Contents
Safety Informaon……………………………………………………………4
Electrical Requirements…………………………………………………...11
Site Preparaon………………………………………………………………..13
Installaon Instrucons…………………………………………………….14
Specicaons………….………………………………………………………..17
Operaon of the Appliance…….…………………………………..…...18
Cooking Guide and Tips…...……………………………………………….30
Maintenance and Cleaning…………………………………………..…..32
Troubleshoong Guide……………………………………………………..34
Warranty…………………………………………………………………………..35
The model and serial numbers can be found on the serial plate,
which is located behind the oven on the front wall. Please
complete the informaon below for warranty purposes and
future reference:
Model Number ______________________________________
Serial Number _______________________________________
Installaon Date _____________________________________
Dealer’s Name ______________________________________
Dealer’s Phone Number _______________________________
Date of Purchase _____________________________________
Register your product online at www.bluestarcooking.com/
support/product-registraon or call customer service at (800)
449-8691.
If service is required under the warranty, it must be performed
by authorized service personnel. BlueStar also recommends
using authorized service personnel if service is required aer
the warranty expires. To locate authorized service personnel in
your area, go to www.bluestarcooking.com/support/nd-a-
service-center or call customer service at (800) 449-8691.
Model Informaon
Locaon of serial plate

4 (800) 449-8691
Safety Informaon
• A child or adult can p the range and be killed.
• Install the an-p device to the structure as shown in Step
4.
• Re-engage the an-p device if the range is moved.
• See installaon instrucons for details.
• Failure to do so can result in death or serious burns to
children or adults.
• Verify that the an-p device is engaged by slowly
aempng to lt the range forward. If you encounter
immediate resistance, the an-p device is engaged.
WARNING
IMPORTANT: Save these instrucons for the local electrical
inspector’s use.
• If your product is damaged upon receipt, contact your
dealer or builder immediately. Do not install or use a
damaged appliance.
• Keep these operang instrucons in a safe place and pass
them on to any future user.
Your safety and the safety of others are very important. Please
read and comply with the following safety messages to
ensure your cooking product is installed and operated as safely
as possible. Take note of the following types of highlighted
informaon throughout this manual:
IMPORTANT: Highlights informaon that is especially
important.
Can cause minor injury or product damage if instrucons are
not followed.
CAUTION
Can cause serious injury or death if instrucons are not
followed.
WARNING
Will cause serious injury or death if instrucons are not
followed.
DANGER

bluestarcooking.com 5
• Un enfant ou un adulte peut faire basculer la cuisinière et
être tué.
• Installez le disposif an-basculement sur la structure
comme indiqué à l'étape 4.
• Réenclenchez le disposif an-basculement si la cuisinière
est déplacée.
• Voir les instrucons d'installaon pour plus de détails.
• Le non-respect de cee consigne peut entraîner la mort
ou des brûlures graves chez les enfants ou les adultes.
• Vériez que le disposif an-basculement est engagé en
essayant lentement d'incliner la cuisinière vers l'avant. Si
vous rencontrez une résistance immédiate, le disposif
an-bascule est enclenché.
Informaon sur la sécurité
Votre sécurité et celle des autres sont très importantes.
Veuillez lire et respecter les messages de sécurité suivants et
assurez-vous que votre produit de cuisson est installé et ulisé
de manière aussi sûre que possible. Prenez note des diérents
types d'informaons mis en surbrillance ci-dessous tout au long
de ce manuel:
IMPORTANT : met en évidence les informaons
parculièrement importantes.
AVERTISSEMENT
Peut causer des blessures mineures ou des dommages au
produit si les instrucons ne sont pas suivies.
Peut causer des blessures graves ou la mort si les instrucons
ne sont pas suivies.
Causera des blessures graves ou la mort si les instrucons ne
sont pas suivies.
DANGER
AVERTISSEMENT
MISE EN GARDE
IMPORTANT : Conservez ces instrucons pour l'usage de
l'inspecteur électrique local.

6 (800) 449-8691
Safety Informaon (connued)
• Storage in or on Appliance—Flammable
materials should not be stored in the oven
or near surface units.
• Do not use water on grease res. Smother
re or ames or use a dry chemical or
foam-type re exnguisher.
• Use only dry potholders. Moist or damp
potholders on hot surfaces may result in
burns from steam. Do not let potholder
touch hot heang elements. Do not use a
towel or other bulky cloth.
• Use Proper Pan Size – This appliance is
equipped with one or more surface units
of dierent size. Select utensils having at
booms large enough to cover the
surface unit heang element. The use of
undersized utensils will expose a poron
of the heang element to direct contact
and may result in ignion of clothing.
Proper relaonship of utensil to burner
will also improve eciency.
• Never Leave Surface Units Unaended at
High Heat Sengs—Boilover causes
smoking and greasy spillovers that may
ignite.
To reduce the risk of re, electric shock,
serious injury, or death when using your
appliance, follow basic safety precauons,
including the following:
• Read all instrucons.
• This product must be properly installed
and grounded by a qualied electrician.
The installer must show the customer the
locaon of the circuit breaker panel or
fuse box so that they know where and
how to turn o electric power to the
product.
• Never use the appliance for warming or
heang the room.
• Do Not Leave Children Alone—Children
should not be le alone or unaended in
area where appliance is in use. They
should never be allowed to sit or stand on
any part of the appliance.
• Wear Proper Apparel— Loose-ng or
hanging garments should never be worn
while using the appliance.
• User Servicing—Do not repair or replace
any part of the appliance yourself unless
specically recommended in the literature
accompanying it. All other servicing
should be referred to a qualied
technician.
IMPORTANT INSTRUCTIONS

bluestarcooking.com 7
Safety Informaon (connued)
• Do Not Cook on Broken Cooktop - If
cooktop should break, cleaning soluons
and spillovers may penetrate the broken
cooktop and create a risk of electric
shock. Contact a qualied technician
immediately.
• Clean Cook-Top with Cauon – If a wet
sponge or cloth is used to wipe spills on a
hot cooking area, be careful to avoid
steam burn. Some cleaners can produce
noxious fumes if applied to a hot surface.
• Metallic objects such as knives, forks,
spoons, and lids should not be placed on
the cooktop surface, since they can get
hot.
• Do not clean the oven door gaskets. The
door gaskets are essenal for a good seal
of the oven. Care is to be taken during
cleaning to prevent rubbing, damaging, or
moving the gasket from its installed
posion.
• Clean Venlang Hoods Frequently –
Grease should not be allowed to
accumulate on hood or lter.
• When aming foods under the hood, turn
the fan on.
• Protecve Liners—Do not use aluminum
foil to line oven boom or wire racks.
Installaon of these liners may result in a
risk of electric shock or re.
• Utensil Handles Should Be Turned Inward
and Not Extend Over Adjacent Surface
Units – To reduce the risk of burns,
ignion of ammable materials, and
spillage due to unintenonal contact with
the utensil, the handle of a utensil should
be posioned so that it is turned inward
and does not extend over adjacent
surface units.
• Use cauon when opening the oven door.
Let hot air or steam escape before
removing or replacing food in the oven.
• Do not heat unopened food containers.
Build up of pressure may cause the
container to burst and result in injury.
• Do not obstruct any venng areas or slots.
• Oven racks are to be posioned when the
oven is cool to prevent burns. If a rack
must be moved while the oven is hot, do
not let the potholder contact hot heang
elements in the oven.
IMPORTANT INSTRUCTIONS (connued)

8 (800) 449-8691
Informaons de sécurité (suite)
• Entreposage dans ou sur l'appareil — Les
matériaux inammables ne doivent pas
être entreposés dans le four ou près des
éléments de surface.
• Ne pas uliser d'eau sur les feux de
graisse. Étouer le feu ou les ammes ou
uliser un exncteur à poudre ou à
mousse.
• N'ulisez que des maniques sèches. Des
maniques humides ou mouillées sur des
surfaces chaudes peuvent provoquer des
brûlures dues à la vapeur. Ne laissez pas la
manique toucher les éléments chauants
chauds. N'ulisez pas de serviee ou
autre ssu volumineux.
• Ulisez la bonne taille de casserole – Cet
appareil est équipé d'une ou plusieurs
unités de surface de diérentes tailles.
Séleconnez des ustensiles dont le fond
plat est susamment grand pour
recouvrir l'élément chauant de l'unité de
surface. L'ulisaon d'ustensiles trop
pets exposera une pare de l'élément
chauant à un contact direct et peut
provoquer l'inammaon des vêtements.
Une bonne relaon entre l'ustensile et le
brûleur améliorera également l'ecacité.
• Ne laissez jamais les unités de surface
sans surveillance à des réglages de
chaleur élevés - Le débordement
provoque de la fumée et des
déversements graisseux qui peuvent
s'enammer.
Pour réduire les risques d'incendie,
d'électrocuon, de blessures graves ou de
mort lors de l'ulisaon de votre appareil,
suivez les précauons de sécurité de base,
notamment les suivantes :
• Lisez toutes les instrucons.
• Ce produit doit être correctement installé
et mis à la terre par un électricien qualié.
L'installateur doit montrer au client
l'emplacement du panneau de
disjoncteurs ou de la boîte à fusibles an
qu'il sache où et comment couper
l'alimentaon électrique du produit.
• N'ulisez jamais l'appareil pour chauer la
pièce.
• Ne laissez pas les enfants seuls—Les
enfants ne doivent pas être laissés seuls
ou sans surveillance dans la zone où
l'appareil est ulisé. Ils ne doivent jamais
être autorisés à s'asseoir ou à se tenir
debout sur une quelconque pare de
l'appareil.
• Portez des vêtements appropriés— Ne
portez jamais de vêtements amples ou
suspendus pendant l'ulisaon de
l'appareil.
• Entreen par l'ulisateur—Ne réparez ou
ne remplacez aucune pièce de l'appareil
vous-même, sauf si cela est
spéciquement recommandé dans la
documentaon qui l'accompagne. Toute
autre réparaon doit être conée à un
technicien qualié.
INSTRUCTIONS IMPORTANTES

bluestarcooking.com 9
Informaons de sécurité (suite)
• Ne cuisinez pas sur une table de cuisson
cassée - Si la table de cuisson se brise, les
soluons de neoyage et les
déversements peuvent pénétrer dans la
table de cuisson cassée et créer un risque
de choc électrique. Contactez
immédiatement un technicien qualié.
• Neoyez la table de cuisson avec
prudence – Si une éponge ou un chion
humide est ulisé pour essuyer les
déversements sur une zone de cuisson
chaude, veillez à éviter les brûlures de
vapeur. Certains neoyants peuvent
produire des vapeurs nocives s'ils sont
appliqués sur une surface chaude.
• Les objets métalliques tels que les
couteaux, les fourchees, les cuillères et
les couvercles ne doivent pas être placés
sur la surface de cuisson, car ils peuvent
devenir chauds.
• Ne neoyez pas les joints de la porte du
four. Les joints de porte sont
indispensables pour une bonne
étanchéité du four. Des précauons
doivent être prises lors du neoyage pour
éviter de froer, d'endommager ou de
déplacer le joint de sa posion
d'installaon.
• Neoyez fréquemment les hoes de
venlaon – La graisse ne doit pas
s'accumuler sur la hoe ou le ltre.
• Lorsque vous faites amber des aliments
sous la hoe, allumez le venlateur.
• Revêtements protecteurs—N'ulisez pas
de papier d'aluminium pour tapisser le
fond du four ou les grilles métalliques.
L'installaon de ces revêtements peut
entraîner un risque d'électrocuon ou
d'incendie.
• Les poignées des ustensiles doivent être
tournées vers l'intérieur et ne pas
s'étendre sur les unités de surface
adjacentes - Pour réduire le risque de
brûlures, d'inammaon de matériaux
inammables et de déversement dû à un
contact involontaire avec l'ustensile, la
poignée d'un ustensile doit être
posionnée de manière à ce qu'elle soit
tournée vers l'intérieur et ne s'étend pas
sur les unités de surface adjacentes.
• Soyez prudent lorsque vous ouvrez la
porte du four. Laissez l'air chaud ou la
vapeur s'échapper avant de rerer ou de
replacer les aliments dans le four.
• Ne chauez pas les contenants
alimentaires non ouverts. L'accumulaon
de pression peut faire éclater le récipient
et entraîner des blessures.
• Ne pas obstruer les zones ou les fentes de
venlaon.
• Les grilles du four doivent être
posionnées lorsque le four est froid pour
éviter les brûlures. Si une grille doit être
déplacée alors que le four est chaud, ne
laissez pas la manique entrer en contact
avec les éléments chauants chauds du
four.
INSTRUCTIONS IMPORTANTES (suite)

10 (800) 449-8691
Safety Informaon (connued)
• If the surface is cracked or severely pied,
switch o the appliance to avoid the possibility
of electric shock and contact an authorized
service technician for repairs.
• The space between the cooktop and the range
hood placed above must respect the
specicaons of the hood manufacturer.
• For the users of cardiac pacemakers, the
magnec eld may inuence the operaon.
Consult your doctor or the manufacturer of the
device for addional informaon.
• Risk of Electric Shock. If the cord or plug
becomes damaged, disconnect the appliance
from the power supply and replace only with a
cord or plug of the same type.
• Do not store items of interest to children in
cabinets above the range or on the backguard of
the range—children climbing on the range to
reach items could be seriously injured.
• DO NOT TOUCH SURFACE UNITS, AREAS NEAR
UNITS, OVEN HEATING ELEMENTS, OR INTERIOR
SURFACES OF OVEN – Surface units and oven
heang elements may be hot even though they
are dark in color. Areas near surface units and
interior surfaces of an oven may become hot
enough to cause burns. During and aer use, do
not touch, or let clothing or other ammable
materials contact these areas unl they have
had sucient me to cool. Other surfaces of the
appliance may become hot enough to cause
burns—among these surfaces are oven doors
and windows of oven doors.
• Do not excessively load the oven door by
stepping, leaning, or sing on it at any me.
Damage to the appliance and/or personal injury
can occur.
• To eliminate the risk of burns or re by reaching
over heated surface units, cabinet storage space
located above the surface units should be
avoided. If cabinet storage is to be provided, the
risk can be reduced by installing a range hood
that projects horizontally a minimum of 5 inches
beyond the boom of the cabinets.
CAUTION
CAUTION

bluestarcooking.com 11
Informaons de sécurité (suite)
MISE EN GARDE
MISE EN GARDE
• Ne rangez pas d'arcles intéressants pour les
enfants dans des armoires au-dessus de la
cuisinière ou sur le dosseret de la cuisinière – les
enfants grimpant sur la cuisinière pour aeindre
des arcles pourraient être gravement blessés.
• NE PAS TOUCHER LES ÉLÉMENTS DE SURFACE,
LES ZONES PRÈS DES ÉLÉMENTS, LES ÉLÉMENTS
CHAUFFANTS DU FOUR OU LES SURFACES
INTÉRIEURES DU FOUR – Les éléments de
surface et les éléments chauants du four
peuvent être chauds même s'ils sont de couleur
foncée. Les zones proches des éléments de
surface et des surfaces intérieures d'un four
peuvent devenir susamment chaudes pour
provoquer des brûlures. Pendant et après
l'ulisaon, ne touchez pas ou ne laissez pas des
vêtements ou d'autres matériaux inammables
entrer en contact avec ces zones jusqu'à ce qu'ils
aient eu susamment de temps pour refroidir.
D'autres surfaces de l'appareil peuvent devenir
susamment chaudes pour provoquer des
brûlures - parmi ces surfaces gurent les portes
du four et les fenêtres des portes du four.
• Ne chargez pas excessivement la porte du four
en marchant, en vous appuyant ou en vous
asseyant dessus à tout moment. Des dommages
à l'appareil et/ou des blessures corporelles
peuvent survenir.
• Pour éliminer le risque de brûlures ou d'incendie
en aeignant les unités de surface chauées, les
espaces de rangement situés au-dessus des
unités de surface doivent être évités. Si des
armoires de rangement doivent être fournies, le
risque peut être réduit en installant une hoe de
cuisinière qui dépasse horizontalement d'au
moins 5 pouces au-delà du bas des armoires.
• Si la surface est ssurée ou gravement
endommagée, éteignez l'appareil pour éviter
tout risque d'électrocuon et contactez un
technicien de service agréé pour les réparaons.
• L'espace entre la table de cuisson et la hoe
placée au-dessus doit respecter les
spécicaons du fabricant de la hoe.
• Pour les ulisateurs de smulateurs cardiaques,
le champ magnéque peut inuencer le
fonconnement. Consultez votre médecin ou le
fabricant de l'appareil pour plus d'informaons.
• Risque de choc electrique. Si le cordon ou la
che est endommagé, débranchez l'appareil de
l'alimentaon électrique et remplacez-le
uniquement par un cordon ou une che du
même type.

12 (800) 449-8691
Electrical Requirements
This appliance requires a grounded dedicated circuit with the
following requirements:
240/208 VAC, 60Hz, 50 amp
Performance may be compromised if the electrical supply is
less than 240 volts.
For US models, the power cord is not included with the range.
If a power cord kit is used, it shall be rated 240V, 50 amps. It
must include three or four conductors with closed loop
terminals and be marked for use with ranges with nominal 1
3/8” (35mm) diameter connecon openings. A 4-conductor
cord is required for installaons where grounding through the
neutral is prohibited such as:
• New branch-circuit installaons (1996 NEC)
• Mobile homes
• Recreaonal vehicles
• In an area where local codes prohibit grounding through
the neutral.
For Canadian models, the power cord is included.
Cet appareil nécessite un circuit dédié, mis à la terre, avec les
exigences suivantes:
240/208 VAC, 60Hz, 50 amp
Les performances peuvent être compromises si l'alimentaon
électrique est inférieure à 240 volts.
Pour les modèles américains, le cordon d'alimentaon n'est
pas fourni avec la cuisinière. Si un kit de cordon d'alimentaon
est ulisé, il doit être spécié pour 240 V, 50 ampères. Il doit
comprendre trois ou quatre conducteurs avec des cosses à
boucle fermée et être marqué pour une ulisaon avec des
cuisinières ayant des ouvertures de connexion d'un diamètre
nominal de 1 3/8" (35 mm). Un cordon à 4 conducteurs est
nécessaire pour les installaons où la mise à la terre par le
neutre est interdite :
• Nouvelles installaons de circuits de dérivaon (NEC 1996)
• Mobile homes
• Véhicules de loisirs
• Dans une zone où les codes locaux interdisent la mise à la
terre par le neutre.
Pour les modèles canadiens, le cordon d'alimentaon est
inclus.
Exigences électriques

bluestarcooking.com 13
Site Preparaon –Specicaons and Clearances
UNIT CAN BE INSTALLED WITH 0” CLEARANCE FROM REAR AND SIDE WALLS.
DIMENSIONS IN ( ) ARE mm.
2 3/8” Min
29 7/8” (Body)
12 1/4”
18 1/4” 24”
28”
37 5/8” to
36 5/8”
With standard
adjustable legs

14 (800) 449-8691
Installaon Instrucons
Tools and Materials
• Phillips and Flat blade screwdrivers
• 1/2” socket wrench and 1/2” open-end wrench
• 5/16” hex head socket
• 8” to 10” (200 mm to 250 mm) carpenter level
• Gloves and safety glasses
Step 1 — Uncrate and Inspect the Range
Before starng the installaon, uncrate and inspect the range.
Remove the packing materials, but do not discard the
associated hardware.
Step 2 — Detach the Drop-Down Door
You can take the door o the oven to prevent damage and
reduce the weight of the appliance while liing and installing.
1. Open the drop-down door all the way.
2. Using a at blade screwdriver push the latch at the top of
each hinge downwards to lock the hinge for door removal.
3. Aer the hinges are locked, with care, slightly li the door,
then pull the hinge arms out of the hinge receptacles to
remove the door.
4. Lean the door against a wall or cabinet with the handle
towards the oor and facing the wall to prevent the hinge
latches from coming unlatched.
Important: Use padding beneath the door to prevent
scratching or damage. Keep ngers away from the door hinges
aer removing the door. The hinges have strong springs that
can snap closed if impacted, which can cause injury.
Step 3 — Move the Range into Posion
Remove the wood base with a 1/2” socket or open end wrench
and discard the shipping bolts and brackets. Use an appliance
cart to move the range near the front of the enclosure.
Move the range into posion but do not slide it into the
cabinet opening unl aer installing the an-p bracket and
electrical connecons.
To prevent damage, do not use the oven handles as li points
or for moving the product.
CAUTION
Pour éviter tout dommage, n'ulisez pas les poignées du four
comme points de levage ou pour déplacer le produit.
MISE EN GARDE
Push this latch down to lock the
drop-down door hinge for door
Tip Over Hazard
The range is heavy and ps easily when not fully installed. Use
two or more people to move and install the range. Failure to
follow these instrucons can result in death or serious injury.
WARNING
Risque de basculement
La cuisinière est lourde et peut basculer facilement lorsqu’elle
n’est pas complètement installée. Ulisez deux personnes ou
plus pour déplacer et installer la cuisinière. Le non-respect de
ces instrucons peut entraîner la mort ou des blessures
graves.
AVERTISSEMENT

bluestarcooking.com 15
Installaon Instrucons
Step 4 — Install the An-Tip Bracket
Important: An an-p bracket is required for all ranges. You
must install the an-p bracket before installing the range to
reduce the risk of pping the appliance. Use the an-p
bracket provided to install and secure your range in place.
Contact a qualied oor covering installer for the best
procedure for drilling mounng holes through your oor
covering or a contractor for aaching to the wall.
1. Use the holes provided in the bracket to aach the bracket
to the rear wall or oor. The bracket should overhang the
base of the range as shown in the following illustraon.
2. Put the bracket 1 1/2” (38.1 mm) from the le side of the
edge of the range and ush against the wall with the
fastener hole closest to the wall.
IMPORTANT: Should you move the range, remove the an-p
bracket before the move, then reinstall the bracket with the
range in the new locaon. Do not operate the range without
the an-p bracket engaged.
IMPORTANT : Si vous déplacez la cuisinière, rerez le support
an-basculement avant le déplacement, puis réinstallez le
support avec la cuisinière au nouvel emplacement. Ne faites
pas fonconner la cuisinière sans que le support an-
basculement ne soit engagé.
Step 5 — Connect Electrical Supply
Observe all local and other codes regarding electrical
connecons.
Important: save these instrucons for the local electrical
inspector’s use.
1. Remove the electrical box cover to expose the terminal
block. Route the wires through the strain relief (not
supplied) through the boom of the electrical enclosure.
The terminal block allows for a 4-wire installaon.
Four Wire Installaon
2. If a four wire connecon is used, leave the metal ground
strap in its inial posion.
3. Connect green/ground to G.
4. Connect white/neutral to N.
5. Connect red to L1.
6. Connect black to L2.
lmportant: All electrical wiring should be free and clear.
Wires or cables should not be pinched or otherwise
obstructed.
7. Tighten the screws on the strain relief and aach the
electrical cover.
8. If the power cord (supplied with Canadian models) is used,
locate the electrical outlet and plug the range into the
outlet.
Hole to fasten
to wall
Hole to fasten
to oor
Place against
the wall
Hole to fasten
to oor
Bracket should be over
the appliance base
when the range is
pushed into its nal
posion.
Verify that the an-p device is engaged by slowly aempng
to lt the range forward. If you encounter immediate
resistance, the an-p device is engaged.
WARNING
AVERTISSEMENT
Vériez que le disposif an-basculement est engagé en
essayant lentement d'incliner la cuisinière vers l'avant. Si vous
rencontrez une résistance immédiate, le disposif an-bascule
est enclenché.
This appliance must be grounded. Do not cut, remove, or
disregard the grounding wire in this appliance. If the appliance
is not grounded, severe shock hazards can exist.
WARNING
Cet appareil doit être mis à la terre. Ne coupez pas, ne rerez
pas et ne négligez pas le l de mise à la terre de cet appareil. Si
l'appareil n'est pas mis à la terre, de graves risques
d'électrocuon peuvent exister.
AVERTISSEMENT

16 (800) 449-8691
Installaon Instrucons
Step 6 — Final Install
Slide the appliance into the opening.
Step 7 — Level the Range
Your range has legs you can adjust between 2 1/2” to 3
1/4” (63.5 mm to 82.6 mm) up or down.
When leveling your range, use a 8” to 10” (200 mm to 250 mm)
carpenter level in the center of the top, front-to-back, and side-
to-side. The legs are screwed partway in, so you will need to li
the range a bit and turn the leg in (or out) a few turns to adjust
its height.
Aer adjusng each leg, make sure the range does not rock. If
the range is sll unsteady, connue adjusng each leg outward
to lengthen or inward to shorten unl the range is level front-
to-back and side-to-side.
Step 8 — Reaach the Drop-Down Door
1. Hold the door with the handle side facing the ground.
2. Align and insert the door hinges with the openings on the
range.
3. Push up the latch at the top of each hinge to secure each
hinge.
4. The drop-down door should close easily.
Push up on the latch to secure
Three Wire Installaon
1. Move the metal ground strap to posions N and G as
shown below.
2. Connect the white/neutral to G
3. Connect red to L1
4. Connect black to L2.
Important: all electrical wiring should be free and clear. Wires
or cables should not be pinched or otherwise obstructed.
5. Tighten the screws on the strain relief and aach the
electrical cover.
6. If the power cord (supplied with Canadian models) is used,
locate the electrical outlet and plug the range.

bluestarcooking.com 17
Specicaons
Technical Characteriscs of the Cooktop
Total Power
Cooking Zone
Position
Diameter
Nominal
Power*
Power Boost*
Minimum Detection
Diameter
7400 W
Front left 7 7/8” (200 mm) 1850 W 3000 W 3 15/16” (100 mm)
Rear left
7 7/8” (200 mm)
1850 W 3000 W
3 15/16” (100 mm)
Rear right
8 5/8” (220 mm)
2300 W 3700 W
4 3/8” (110 mm)
Front right
6 1/4” (160 mm)
1400 W 2200 W
3 3/16” (80 mm)
7 7/8” (200 mm)
1850 W
3000 W Boost
8 5/8” (220 mm)
2300 W
3700 W Boost
6 1/4” (160 mm)
1400 W
2200 W Boost
7 7/8” (200 mm)
1850 W
3000 W Boost
* The given power may change according to the dimensions and material of the pan.
Total Power Heating element Nominal Power*
4350 W
Top 2500 W
Fan 1800 W
Bottom 2500 W
Technical Characteriscs of the Oven

18 (800) 449-8691
Operaon—Cooktop
Before the rst use of the cooktop:
• Clean your cooktop with a damp cloth and then dry
the surface thoroughly. Do not use detergent; this
can create a blue-nted color on the glass surface.
• Remove all labels and self-adhesives from the ceramic
glass.
Cookware compability:
• The cookware has to be inducon compable.
• All ferromagnec cookwares are recommended. You can
check this with a magnet – if the magnet holds to the
cookware boom, it is likely to be inducon compable.
Compable cookwares are usually cast iron and steel pans,
enameled pans, stainless-steel pans with ferromagnec
booms.
• Excluded: copper, pure stainless-steel, aluminum, glass,
wood, ceramic, stoneware.
• It is recommended to use cookware with the inducon
compable logo shown here.
• The inducon cooking zone automacally recognizes the
size of the pan. With a diameter that is too small, the pan
doesn’t work. This minimum allowed diameter varies with
the cooking zone diameter.
• If the pan is not adapted to the inducon cooktop, the
display will show.
• For beer eciency and funcon, the cookware should
always have a at boom.
Noise:
• Certain cookware can make noise when placed on an
inducon cooking zone. Some cookwares are noisier
than others. When used at maximum power, the
cookware will hum, similar to a transformer. This noise
is normal and does not mean that there is something
wrong with the appliance, nor does it inuence its
funcon.
Cooling Fan:
• The cooling system is fully automac. The cooling fan
starts at a low speed when the heat generated by the
electronic system reaches a certain level. The cooling fan
increases to high-speed when the cooktop is intensively
used. The cooling fan reduces its speed and stops
automacally when the electronic circuit has cooled down
enough.

bluestarcooking.com 19
Before the rst use of the oven:
• Remove and properly discard all temporary labels and
packaging material, including cardboard, zip es, paper and
wrapping from the oven and exterior surfaces. Remove
protecve plasc lm from any stainless-steel surfaces.
• BEFORE turning on your oven for the rst me, remove and
wash the oven racks and rack glides in hot, soapy water.
Rinse well and dry thoroughly. See the Care and Cleaning
guide for more details.
Oven burn-o procedure:
• New appliances are wiped clean with solvents at the
factory prior to shipping. The burn-o procedure burns o
any remaining processing residue.
• Failing to perform the oven burn-o procedure before rst
use of the oven may result in undesirable odors, avors,
and excessive smoke when you use your oven the rst
me.
• Make sure your appliance has been installed properly and
all performance checks and adjustments are completed.
• Turn on venlaon hood and make sure enre room is well
-venlated.
• Check that the oven cavity is empty. Oven racks, oven
guides, and any other objects should NOT be in the oven.
• Place the mode selector on the ‘Preheat’ posion, and the
temperature set to 400 F and run the oven for 1 hour.
• Allow oven to cool completely.
• Insert oven rack guides and racks.
• Your oven is now ready for use.
Important: During this process, you may noce a strong odor,
some smoke, and/or condensaon on the front of the oven
(including the oven doors, oven windows, control panel, and
side panel) as any oils and solvents on internal parts are
burned o. This is normal and is the primary reason for this
burn-o.
Operaon—Oven

20 (800) 449-8691
Note: Each oven comes equipped with one standard rack.
Follow your recipe guidelines to determine the best rack
posion for your dish.
Take Out the Standard Rack
1. Grasp both sides of the front of the rack.
2. Slightly li the rack up, then pull the rack unl the ball tabs
on the boom of the rack clear the rack guide.
3. Connue to pull the rack all the way out of the oven.
Put the Standard Rack Back in the Oven
1. Hold both sides of the rack and align the rack onto the rack
guide posion you want to use.
2. Push in the rack up to the ball tabs, then slightly li the
rack unl the ball tabs are past the front of the rack guide.
3. Set the rack onto the rack guide, then push the rack into
the oven the rest of the way unl the rear hook tab stops
at the rear vercal rack guide bar.
Operaon — Standard Oven Racks
Ball tab
Rear hook tab
Rack guide posion
Rack guide
Standard rack
Guide rack
Rear hook tab stopped at
rear vercal rack guide bar
Standard rack

bluestarcooking.com 21
Important: The slides should be fully closed during this
procedure.
Put the Extension Rack Back in the Oven
1. To make sure the extension rack is fully closed, rmly hold
the front ends of the rack at your waist, then touch the
back of the extension rack to the oor. Slide the front end
of the rack downward unl all the slides are fully in place.
2. Firmly grasp all of the slides on each side of the extension
rack, slightly elevate the rack above the rack guide you
want to use, then gently nudge the rack onto the rack
guide.
3. Connue to slightly li the extension rack over the rack
guide as each tab reaches the rack guide.
4. When the extension rack is pushed in all the way, make
sure it is securely locked in posion, or it will slide out
when the door is opened.
Operaon — Full Extension Rack
Slides touching
Slides fully in place
Locking tabs
Note: Each oven comes equipped with an extension rack that
you can pull out 100% from the oven to load or unload your
larger baking dishes more easily. Follow your recipe guidelines
to determine the best rack posion for your dish.
Important: Make sure your oven is level before your rst use.
Extension racks move very easily and an unlevel oven can
cause the extension rack to roll out of the oven when the door
is opened. This can cause spills, burns, and other injuries.
Take the Extension Rack from the Oven
1. Push the extension rack all the way into the oven.
2. Firmly grasp all of the slides on both sides of the extension
rack. You will need to pull everything out at the same me.
3. As you pull, be sure to slightly li each me you need to
clear the tabs on the rack from the rack guide.
4. Carefully pull the extension rack all the way out of the
oven.
Important: Be aware the extension rack is heavy and could
drop unexpectedly aer you pull it completely from the oven.
Back of oven
Rack pulled out

22 (800) 449-8691
Display
Each knob controls a cooking zone, and operaon indicators are displayed in the display area.
Display Operaon Indicator Descripon See page
. . . . . .
Cooking level Selecon of the cooking level 23
No pan detecon No pan or inadequate pan 23
Power Boost Power Boost is acvated 24
Heat accelerator Automac cooking 25
Keep warm Automacally maintain 150° F (70°C) 26
Keep warm Automacally maintain 201°F (94°C) 26
Residual heat The indicated heang zone is hot 27
Lock Knobs are locked 26
Error message Electronic failure 33
Operaon—Controls
Display area

bluestarcooking.com 23
Operaon—Controls
Operaon of the cooktop
Start-up / switch o a cooking zone:
1. Place cookware on the cooking zone (in case you try to start without cookware on the cooking zone, the display will show
and the zone will not acvate.
2. Push and turn the knob corresponding with the desired zone clockwise.
3. The display will illuminate
4. You can now adjust to the desired amount of power (1 to 9)
The values below are indicave
Note: If the pan is removed from the cooking zone, the operaon is stopped. The display shows. . The symbol disappears
when the pan is put back to the cooking zone. The cooking connues with the power level set before.
Aer use, switch the heat element o by turning back the knob to
Do not leave the pan detecon acve.
1 to 2
Melng, Re-heang Sauces, buer, chocolate, gelan. Dishes
prepared beforehand
2 to 3
Simmering, Defrosng
Rice, pudding, sugar syrup
Dried vegetables, sh, frozen products
3 to 4 Steam Vegetables, sh, meat
4 to 5 Water Steamed potatoes, soups, pasta, fresh vegetables
6 to 7
Medium cooking
Simmering
Meat, eggs, sausages Goulash, roulade, tripe
7 to 8 Cooking Potatoes, friers, wafers
9
Frying, roasng, boiling water Steaks, omelets, fried dishes
P Boiling water Boiling signicant quanes of water

24 (800) 449-8691
Power Boost funcon
Power Boost gives a boost to the selected cooking zone. When this funcon is acvated, the cooking zones work for 10 minutes at
an ultra-high speed. This is meant to be used for heang large quanes of water very quickly (e.g., pasta).
To acvate the Power Boost funcon:
1. Set the knob of the desired zone to
2. Rotate and hold the knob to the [P] posion for 2 seconds unl the display shows
IMPORTANT: Power management
The cooktop has a maximum potenal power. When the Power Boost funcon is acvated, the electronic system
automacally reduces the power level of another cooking zone, if it is exceeding the maximum potenal. The display blinks
for a few seconds, then shows the maximum power allowed.
You can only acvate the Power Boost on one le-hand side and one right-hand side cooking zone at the same me.
Operaon—Power Boost

bluestarcooking.com 25
Operaon—Heat Accelerator
Heat accelerator
All the cooking zones are equipped with heat accelerator funcon. The cooking zone starts at full power for a certain amount of
me, then automacally reduces its power unl it reaches the pre-selected power level.
1. Push and turn the knob counter-clockwise unl you reach the stop and hold 2 seconds unl the display shows
2. Rotate the knob clockwise and select the desired power level (For example here). and are blinking, showing
the funcon is acvated.
3. The power is automacally adjusted, so the cookware gets to temperature faster. Touching the knob will cancel the funcon.

26 (800) 449-8691
“Keep Warm” funcons
This funcon allows the cooking zones to reach and automacally maintain a temperature of 150° F (70°C) or 201°F (94°C). This
avoids liquids owing over and pans burning.
1. The (Keep warm 150° F) and (Keep warm 201° F) are slightly before the posion of the knob.
2. Push and turn the knob slightly clockwise to reach those funcons unl or shows on the display.
Control panel locking
To avoid engaging or modicaon of the seng of the cooking zones, parcularly when cleaning, the control panel can be locked.
1. Push and turn the front le and rear le knob simultaneously counter-clockwise and hold for 3s.
2. “L” shows on the display and the unit is locked.
3. To unlock, repeat the same operaon (Push and turn the front le and rear le knob simultaneously counter-clockwise and
hold for 3s).
Operaon—Keep Warm and Lock

bluestarcooking.com 27
Operaon—Residual Heat
Residual heat indicaon
Heat sensors are located underneath the cooking surface and will be displayed on cooking zones that remain hot.
H
O
T
H
O
T
Do not touch the heang zones and do not put any heat-sensive objects on them if the residual heat indicators are switched on.
The symbol disappears when the heang zones can be touched without danger.
WARNING
H
O
T
Ne touchez pas les zones de chaue et ne posez pas d'objets sensibles à la chaleur sur celles-ci si les indicateurs de chaleur
résiduelle sont allumés.
Le symbole disparaît lorsque les zones de chauage peuvent être touchées sans danger.
AVERTISSEMENT
H
O
T
For example, do not touch
this zone while shows on
the display.
H
O
T

28 (800) 449-8691
Operaon of the Oven
Push and turn the oven operaon knob to select the desired oven operaon.
Push and turn the oven temperature knob to select the desired temperature.
It is recommended that you preheat the oven on the fast preheat posion for 10 to 15 minutes before doing any cooking.
When the oven is at temperature, the thermostat light will goes o.
It is normal that the light goes on and o during cooking. This shows the thermostat in normal operaon.
Operaon—Oven Control
Broiler element + fan
Bake element only
Bake element + convecon
fan
Broiler element
Bake element + convecon
fan + preheat element

bluestarcooking.com 29
The oven light switch is located on the far right side of the
control panel.
Operaon—Oven Light
Oven light switch

30 (800) 449-8691
Cooking Guide and Tips — Convecon Cooking
Convecon Cooking
Convecon cooking uses a fan inside the oven to circulate the
heated air more evenly, resulng in beer heat distribuon
and a more consistent temperature. In general, convecon
roasng takes less me at lower temperatures than tradional
roasng.
For best results:
• As a general rule, reduce the temperature 25° F (-4° C) or
reduce the amount of me by 25% from that used in a
standard/convenonal oven. Cooking me may also be
shorter. Closely monitor the rst batch of each recipe
prepared.
• Cooking mes and temperatures will vary depending upon
such factors as size of the load, temperature, mixture of
ingredients (parcularly moisture), and density.
• Center pans on racks and load each shelf evenly to allow
for proper air circulaon within the oven.
• Select a roasng dish that has no or low sides, like a broiler
pan, so that the air can circulate freely around the food.
• When thawing frozen casseroles, preheat the oven 100° F
(38° C) over the suggested temperature. Return the
cooking temperature to the normal seng once the oven
is loaded. This will help compensate for the large frozen
casserole.
• Covered dishes do not benet from convecon baking or
roasng.
• Place mun pans in the oven back to front or with the
short side of the pans facing the front. This will result in
the most evenly baked food.
Convecon Baking
Convecon ovens can handle larger loads than standard ovens
with a high degree of consistency. In a convecon oven, cool
air is quickly and consistently replaced by hot air, which pro-
vides beer browning of baked goods and poultry. Meats are
seared and self-basted, which result in more avor and less
shrinkage as well as quicker cooking mes.
Important: You may nd that your new oven cooks dierently
than the old one. Take a few weeks to get comfortable and
familiar with your new oven. Do not use thermostats such as
those found in grocery stores to check your oven tempera-
tures. These thermostats may vary by 40° F (22° C) or more.

bluestarcooking.com 31
Cooking Guide and Tips — Food Handling
Safe steps in food handling, cooking, and storage are essenal in prevenng food-borne illness. You can't see, smell, or taste
harmful bacteria that may cause illness. In every step of food preparaon, follow these four guidelines to keep food safe:
• Clean—Wash hands and surfaces oen
• Separate—Keep raw meat apart from other foods
• Cook—Cook to the right temperature
• Chill—Refrigerate food promptly
Cook all food to these minimum internal temperatures as measured with a food thermometer before removing food from the heat
source. You may choose to cook food to higher temperatures. A holding temperature of 140° F (60° C) or higher is recommended
for food safety.
Source: FoodSafety.gov, United States Food Safety and Inspecon Service, as of April 2019.
High Altudes
For helpful informaon on cooking in high altudes, visit: hps://www.fsis.usda.gov/food-safety/safe-food-handling-and-
preparaon/food-safety-basics/high-altude-cooking.
Category Food Temperature Rest Time
Ground Meat, Stung, and
Meat Loaf
Beef, Pork, Veal, Lamb 160° F (71° C) None
Turkey, Chicken 165° F (74° C) None
Fresh Beef, Veal, Lamb Steaks, Roasts, Chops 145° F (63° C) 3 minutes
Poultry Chicken & Turkey (breasts, whole bird, legs,
thighs, wings, ground poultry, giblets, and
stung)
165° F (74° C) Whole: 10-15 minutes
Breasts: 5 minutes
Pork and Ham Fresh Pork 145° F (63° C) 3 minutes
Fresh Ham (raw) 146° F (63° C) 3 minutes
Precooked Ham (to reheat)
Note: Reheat cooked hams packaged at
USDA-inspected plants .
140° F (60° C)
165° F (74° C) if not from USDA-inspected
plants
None
Eggs and Egg Dishes Eggs Cook unl yolk and white are rm. None
Egg Dishes (such as friata, quiche) 160° F (74° C) None
Leovers and Casseroles Leovers and Casseroles 165° F (74° C) None
Seafood Fish with ns 145° F (63° C) or cook unl esh is opaque
and separates easily with a fork.
None
Shrimp, Lobster, Crabs, Scallops Cook unl esh is pearly or white, and
opaque.
None
Clams, Oysters, Mussels Cook unl shells open during cooking. None

32 (800) 449-8691
Maintenance and Cleaning
To prevent damaging your appliance:
• Cookware with rough booms may damage the ceramic
glass surface. Check the boom of the cookware before
seng it down.
• Salt, sugar, or sand may damage ceramic glass. Never use
the cooktop as a working surface or for seng things
down.
• Avoid dropping objects, even lile ones, on the ceramic
glass surface.
• Make sure that the venlaon of the appliance works
according to the manufacturer’s instrucons.
• Plasc or aluminum foil must not contact the hot cooking
zones. This may cause breaks or other alteraons of the
ceramic glass by cooling. Take them immediately out of the
hot cooking zone (be careful: do not burn yourself).
• Never place a hot container on the control panel to avoid
overheang the electronics.

bluestarcooking.com 33
PART/ MATERIAL CLEANING FREQUENCY ATTENTION
Convecon Fan Guard Remove obstrucons like
aluminum foil or other parcles.
Apply commercial oven cleaner to
a cloth and wipe the guard.
Follow manufacturer’s
instrucons.
Once a month; more
oen with frequent use.
Turn on venlaon fan and make sure
room is well vented.
Do NOT use steel wool, metal pads or
abrasive cleaners. They may scratch
and damage the coang. Line oor
with newspaper to catch drips.
Exterior Body Clean with hot, soapy water.
Rinse well and dry thoroughly. For
tough stains, apply a cloth soaked
in hot water for several minutes.
Scrape LIGHTLY with a nylon or
rubber spatula.
As needed. Do NOT use steel wool, metal pads or
abrasive cleaners.
Do NOT use any metal objects to
scrape the surface.
Do NOT allow citrus or tomato juices
to sit and dry on the surface. Citric acid
will discolor stainless steel.
Oven Interior / Porcelain
Enamel
Use a commercially available oven
cleaner. Follow cleaner
manufacturer’s instrucons.
Once a month; more
oen with frequent use.
Turn on venlaon fan and make sure
room is well vented.
Do NOT apply commercial oven
cleaners to the oven door gasket.
Do NOT rub or scrub the gasket. This
may damage the oven door seal.
Do NOT use steel wool, metal pads or
abrasive cleaners. They may scratch
and damage the coang.
Oven Racks and Guides Remove and wash in hot, soapy
water. Rinse well and dry
thoroughly.
Once a month more
oen with frequent use.
Dishwasher safe.
Cooktop Remove small spots with a damp
cloth using dishwashing liquid
diluted in a lile water. Then rinse
with cold water and dry the
surface thoroughly.
Aer each use.
Spillages of sugar, jam,
jelly, etc. must be
removed immediately to
prevent damaging the
surface.
Never use a steam cleaner or high-
pressure washer.
Do not use objects that might scratch
the ceramic glass.
Ensure that the pan is dry and clean
and that there is no dust on your
ceramic cooktop or on the pan. The
use of rough saucepans will scratch
the surface.
Copper / Brass Trim
(Select Models)
Clean with warm soapy water and
a microber cloth and dry
thoroughly.
As needed. Our copper and brass trim is protected
with a clearcoat to prevent tarnishing.
DO NOT use copper or brass polishes,
such as Brasso or Brite Boy, as they
will remove the clearcoat protecon.
Cleaning
Highly corrosive or abrasive detergents and cleaning equipment are likely to cause scratches and must be avoided.
Maintenance and Cleaning

34 (800) 449-8691
Troubleshoong Guide
Problem
The cooktop or the cooking zone
does not start:
• The appliance is badly connected to the electrical network.
• The safety fuse is cut o.
• The lock funcon is acvated.
One or all cooking zone(s) are cut
o:
• The safety system funconed. This system works when you forgot to switch o the cook-
ing zone.
• The pan is empty and its boom overheated.
• The cooktop also has an automac reducon of the power level (see Power Boost func-
on) and is switched o automacally when there is a possibility of overheang.
The display area shows:
• There is no pan on the cooking zone.
• The pan is not compable with inducon.
• The pan’s boom diameter is too small.
The display area shows:
• The electronic system is defecve.
• Disconnect and reconnect the cooktop.
• Call service.
The venlaon system is sll
working aer switching o the
cooktop:
• This is not a failure; the fan connues to protect the electronic device.
• The fan stops automacally.
The automac cooking system
does not start:
• The cooking zone is sll hot.
• The highest Power Boost level is set.
The display area shows or
• See chapter “Keep warm “.
The display area shows [ E2 ] :
• The cooktop is overheated. Let it cool and then turn it on again.
The display area shows [ E8 ] :
• The air inlet of the venlator is obstructed. Release it.
The display area shows [ U400 ] :
• The cooktop is not connected to the network. Check the connecon and reconnect the
cooktop.
The display area shows [ Er47 ] :
• The cooktop is not connected to the network. Check the connecon and reconnect the
cooktop.
Convecon fan does not turn:
• Fan guard is obstructed or clogged.
• No electrical power to the unit.
H
O
T

bluestarcooking.com 35
Warranty
Prizer-Painter Stove Works, Inc. (“Prizer-Painter”) warrants
your BlueStar® appliance (“product”) purchased in the U.S. and
Canada and installed in residenal properes for normal
residenal use.
What Is Covered
Subject to the specic condions and limitaons below, this
warranty covers parts and/or labor necessary to repair or
replace any part of the product that contains defects in
materials and workmanship.
Two Year Warranty. For two (2) years from the date of
installaon, this warranty covers all parts and labor necessary
to repair or replace any part on the product except for the
Cosmec Component Warranty below.
Cosmec Component Warranty. For thirty (30) days from the
date of installaon, this warranty covers scratches and dents,
paint and porcelain blemishes, visible chips, etc.
Limitaons of Coverage
• Floor Models. For one (1) year from the date of
installaon, this warranty covers all parts and labor
necessary to repair or replace any part on the product
except for cosmec parts for which there is no warranty.
• The replacement of a part under this warranty does not
extend the warranty period.
• Warranty service outside normal business hours and in
areas beyond 50 miles one way from an authorized
BlueStar® retailer or service provider. The owner will be
responsible for any and all costs associated with addional
mileage, non-standard service or overme, and special
equipment required to remove the product so service may
be performed.
This warranty is void:
• If the product is removed from where it was originally
installed.
• If the original factory installed serial number is altered or
removed from the product.
• if gas cooking products are converted by someone other
than a BlueStar® authorized service company.
What Is Not Covered
This warranty does not cover, and specically excludes:
• Product installed or used in any commercial or other
non-residenal property such as, but not limited to, day
care facilies, re staons, hotels, nursing homes, etc.
• Installaon related issues including improper badge
placement or installaon inconsistent with the product
specicaons/installaon instrucons.
• Damage or repairs caused by alteraons or modicaons,
abuse, misuse, neglect, or improper installaon, mounng,
handling, operaon, maintenance, or storage.
• Normal adjustments aer installaon and setup.
• Normal wear, care, and maintenance of the product as
described in the user manual.
• Service calls to educate the customer on the proper use
and care of the product.
• Consumable parts such as water lters.
• Damage or repairs caused by unauthorized service or
repairs, including unauthorized adjustments or calibraons
performed on the product.
• Accidental or intenonal damage.
• Damage or repairs as a result of natural disasters, res,
oods, earthquakes, winds, lightning, corrosive
atmosphere, loss of electrical power to the product for any
reason, or other condions beyond Prizer-Painter’s
control.
• Damage or repairs caused by alteraon for outdoor use.
• Damage or repairs caused by the use of harsh chemicals or
cleaning products improperly applied.
• Liability or responsibility for damage to surrounding
property including cabinetry, oors, ceilings, etc.
• Consequenal or incidental damage, including but not
limited to food or medicine loss, me away from work,
restaurant meals, etc.
The terms of this warranty provide for repair of the product
only. If the product cannot be repaired, Prizer-Painter, at its
sole discreon, will determine whether to exchange the
product.
Please see the Arbitraon Clause and Related Provisions, which
aect your legal rights. The Arbitraon Clause is available at
www.bluestarcooking.com.

36 (800) 449-8691

bluestarcooking.com 37
