Loading ...
Loading ...
Loading ...

17
EN
OPERATING INSTRUCTIONS
NOTE: Before using the tool, read the
instruction book carefully.
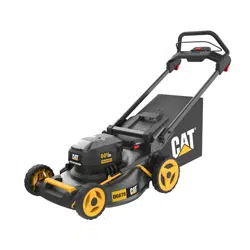
INTENDED USE
This product is intended for domestic lawn mowing.
BEFORE OPERATION:
Assembling the handle bar & Adjusting Handle’s
height (See Fig. A1, A2)
NOTE: Press and hold Quick-release button during
operation.
Assembling the grass collection bag (See Fig. B)
Assembling the grass collection bag to the lawn
mower (See Fig. C1, C2, C3)
NOTE: Depress the grass collection bag slightly to
ensure that it is completely installed.
NOTE: Push the mulching-bag switch lever to open the
mulching outlet before tting the grass collection bag.
Assembling the side-discharge chute (See Fig. D1, D2)
Lift the Side-discharge cover to assemble the side-
discharge chute.
NOTE: Remember to remove the grass collection bag
rstly and then push the mulching-bag switch lever to
close the mulching outlet before assembly.
Checking the battery charge condition (See Fig. E1)
NOTE: Fig. E1 only applies for the battery pack with
battery indicator light.
The battery level can be determined by pressing the
power indicator button beside the battery lights. Press
the button before and after each use to check the
battery
Remarks
LED-light
Battery condition
Five green
lights are
illuminated.
70% ≤ Power level≤100%
Four green
lights are
illuminated.
50% ≤ Power level < 69%
Three green
lights are
illuminated.
35% ≤ Power level < 49%
Two green
lights are
illuminated.
20% ≤ Power level < 34%
One green
light are
illuminated.
10% ≤ Power level < 19%
No light is
illuminated.
Power level < 10%
Charging the battery pack(See Fig. E2)
- Your battery pack is partly charged and needs to
be fully charged before rst use.
- More details can be found in charger’s manual.
NOTE: Always fully charge the two batteries.
Installing & removing the battery pack (See Fig. F1, F2)
NOTE: Depress the battery release button to release
battery pack(s) from your tool. After recharging, insert
the battery pack into tool’s battery compartment until
you hear a “click”. A simple push and slight pressure
will be sufcient.
NOTE: Front battery port is the position of powering
while rear battery port is the position of storing spare
battery pack.
Checking the power indicator light (See Fig. F3)
Press the switch button for battery indicator light and
the power indicator light will be on.
OPERATION
Starting and Stopping (See Fig. G1, G2)
Press the Safety lock-out button, then the push
Operating bail to start. Release the operating bail to
stop.
NOTE: For starting, press both the Safety lock-out
button and the operating bail at the same time. Place
the Mulch-Bag lever in the bag position after each use.
(See Fig. C1)
Operating the self-propel system (See Fig. H)
Press Safety lock-out button, then push the Self-propel
speed-control lever to operate.
NOTE: To activate self-propel, press both the Safety
lock-out button and the Self-propel speed-control lever
at the same time.
Loading ...
Loading ...
Loading ...