Loading ...
Loading ...
Loading ...
Installation instructions en
15
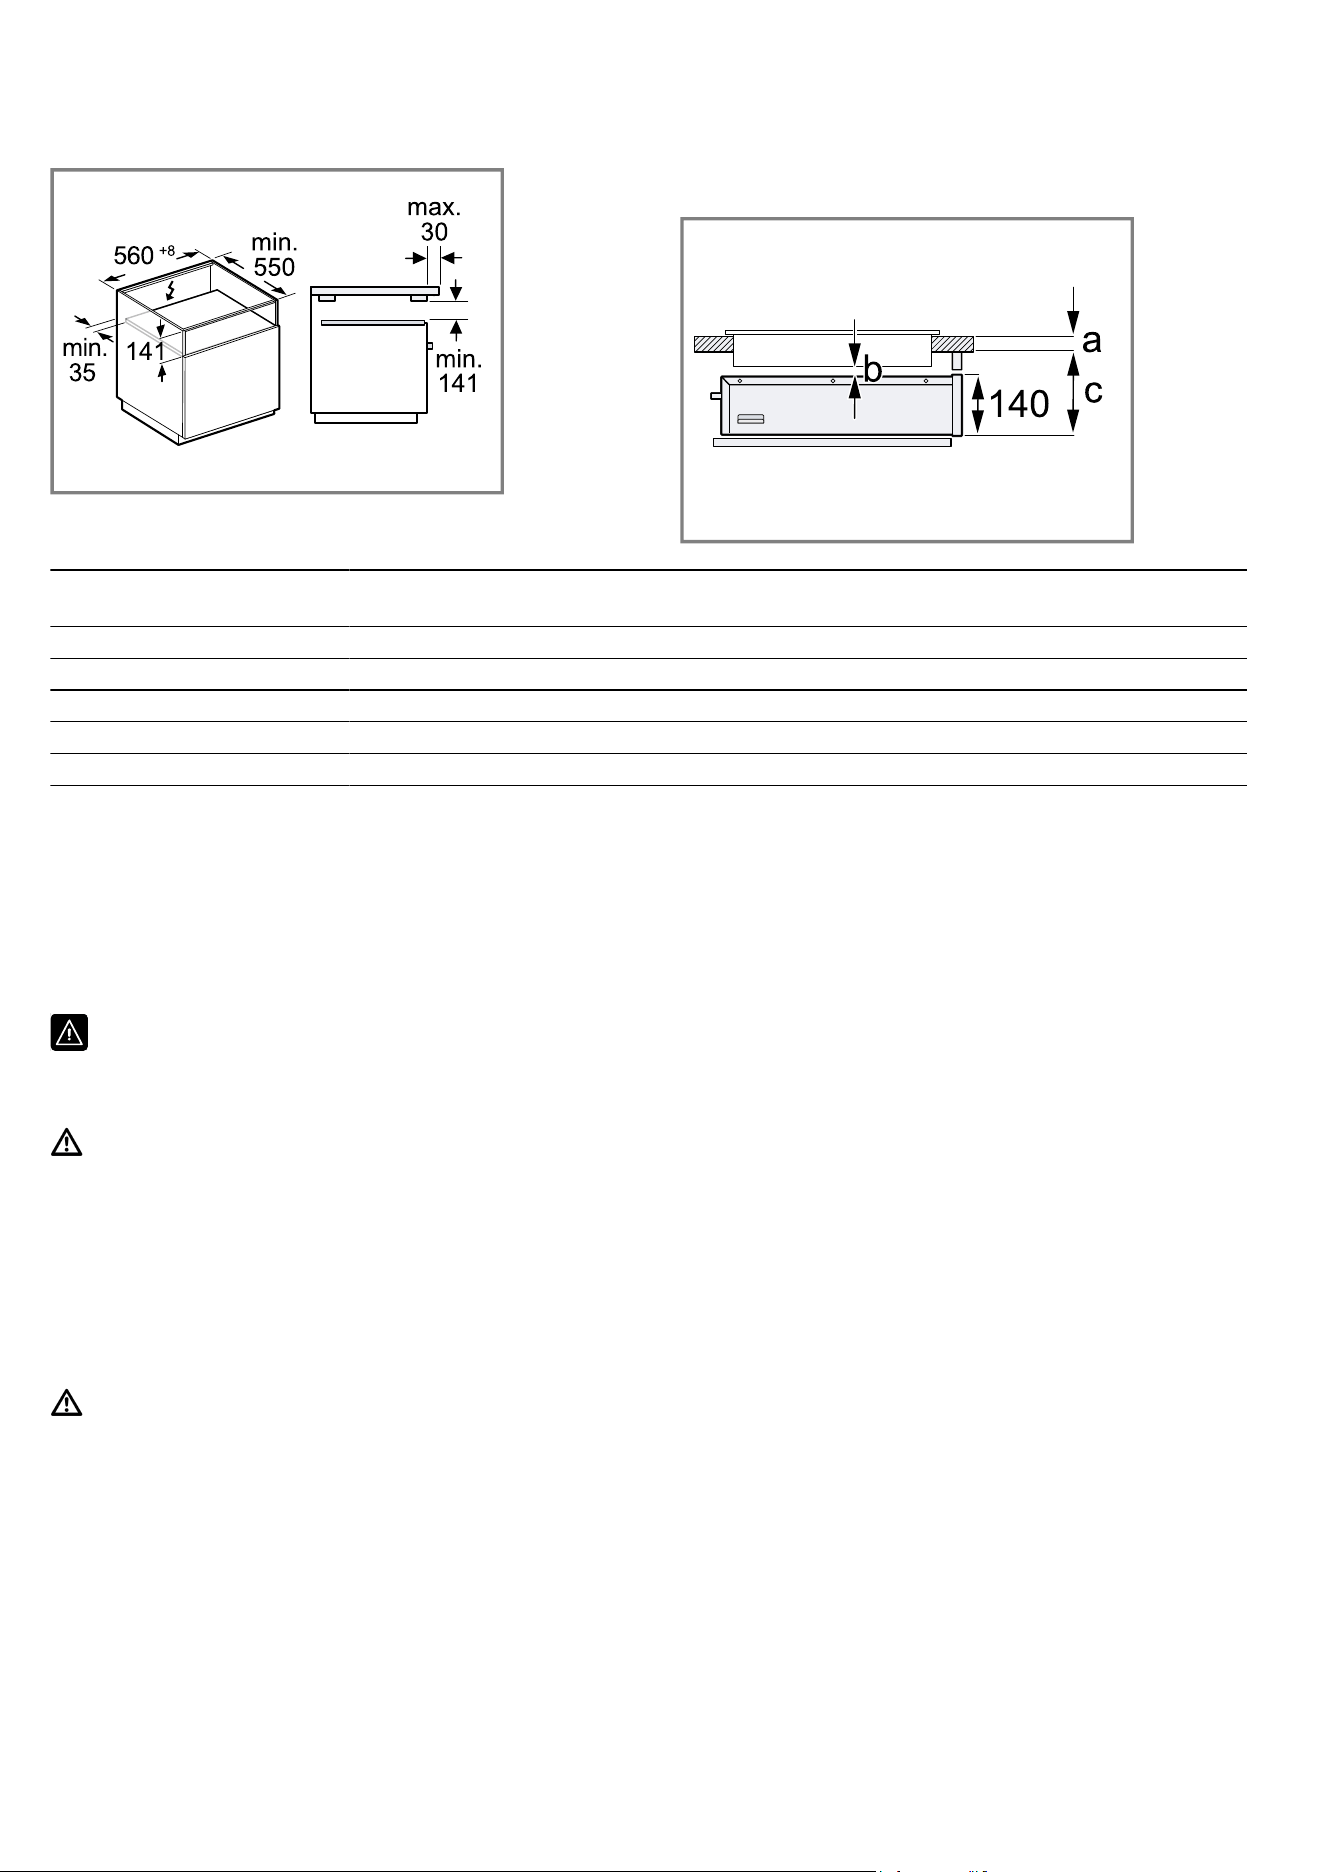
Installing the appliance under the worktop
If you wish to install the appliance under a worktop or
under a hob, you will need to use the following dimen-
sions:
Dimensions in mm a: Surface-mounted or
flush-mounted
b c: Surface-mounted or
flush-mounted
No hob 160
Induction hob 30/30 5 200/201
Full-surface induction hob 40/40 5 210/211
Gas hob 20/30 2 190/193
Electric hob 30/30 5 190/197
a: Recommended worktop thickness according to the
hob installation instructions.
b: Required distance between the hob and the vacuum-
ing drawer.
c: Required distance between the bottom of the vacu-
uming drawer and the bottom of the worktop.
Note:Observe the installation instructions for the hob.
15.5 Safe installation
Follow these safety instructions when in-
stalling the appliance.
WARNING‒Risk of suffocation!
Children may put packaging material over
their heads or wrap themselves up in it and
suffocate.
▶ Keep packaging material away from chil-
dren.
▶ Do not let children play with packaging ma-
terial.
WARNING‒Risk of electric shock!
If the insulation of the power cord is dam-
aged, this is dangerous.
▶ Never let the power cord come into contact
with hot appliance parts or heat sources.
▶ Never let the power cord come into contact
with sharp points or edges.
▶ Never kink, crush or modify the power
cord.
15.6 Instructions for the electrical
connection
In order to safely connect the appliance to the elec-
trical system, follow these instructions.
¡ The appliance must only be connected to a protect-
ive contact socket that has been correctly installed.
Only a qualified electrician may install a socket or
replace the connecting cable, taking the appropriate
regulations into account.
¡ The appliance must only be connected with the
power cable provided. Connect the power cable to
the back of the appliance.
¡ Connecting cables with various plug types are avail-
able from after-sales service.
¡ No multi-plugs, multiple connectors or extension
leads must be used. Overloading causes a risk of
fire.
¡ If the plug can no longer be reached after the in-
stallation, a partition must be provided in the phases
in the permanent electrical installation in accord-
ance with the installation regulations.
15.7 Tools
You require the following tools for the installation.
¡ Measuring tape
¡ Calliper
¡ Pencil
¡ Angle bracket
¡ Torx 20 screwdriver
¡ Large flat-tipped screwdriver
¡ Combination pliers
Loading ...
Loading ...
Loading ...