
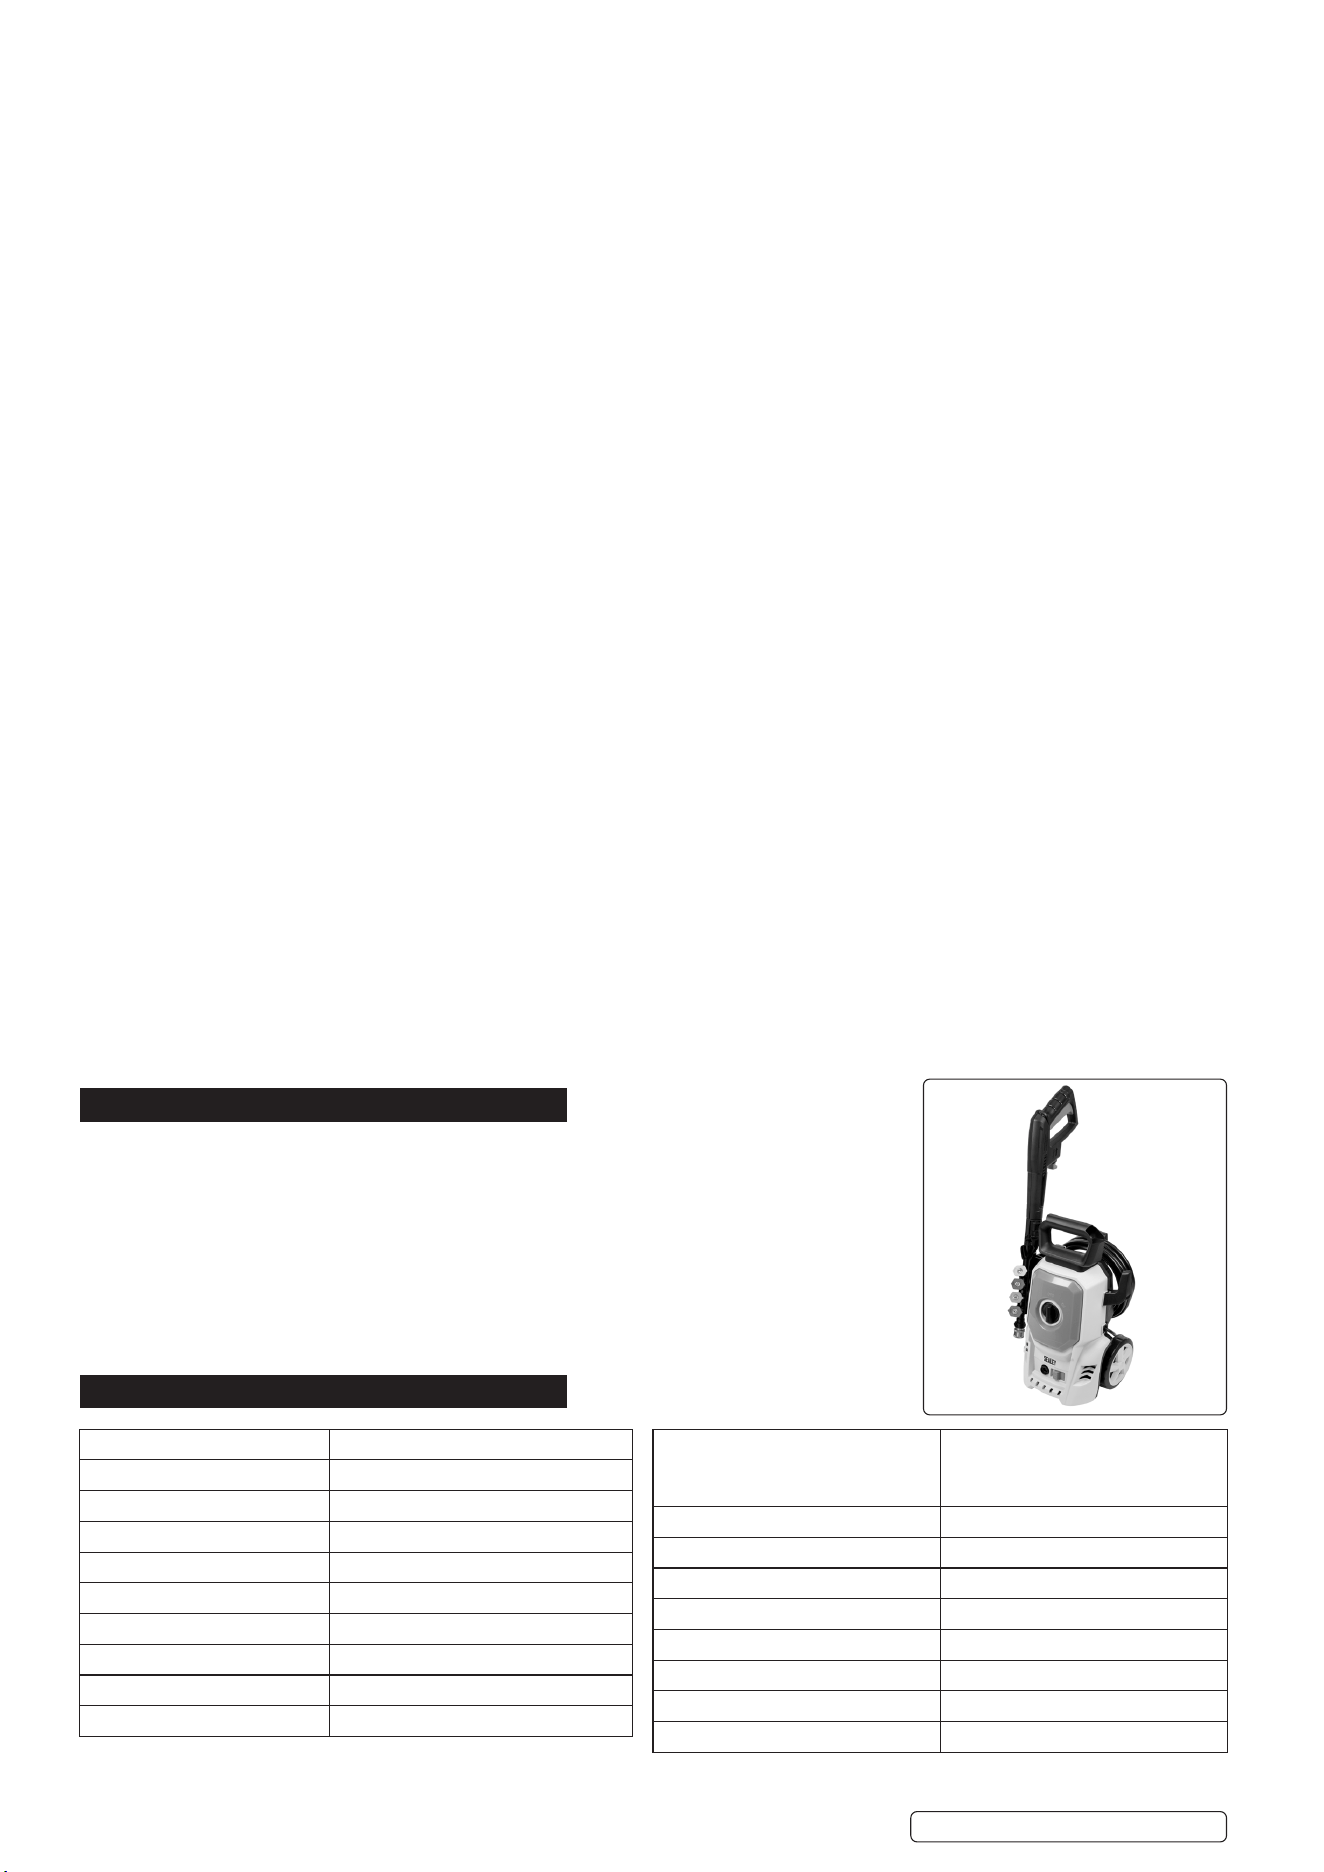
PRESSURE WASHER WITH TSS & ROTABLAST®
NOZZLE 100BAR, 390L/HR 1200W
MODEL NO: PW1610.V2
1. SAFETY
CAUTION - READ THE INSTRUCTIONS BEFORE USING THE MACHINE.
1.1. ELECTRICAL SAFETY
WARNING! It is the user’s responsibility to check the following:
9 Check all electrical equipment and appliances to ensure that they are safe before using. Inspect power supply leads, plugs and all
electrical connections for wear and damage. Sealey recommend that an RCD (Residual Current Device) is used with all electrical
products.
Electrical safety information. It is important that the following information is read and understood:
9 Ensure that the insulation on all cables and on the appliance is safe before connecting it to the power supply.
9 Regularly inspect power supply cables and plugs for wear or damage and check all connections to ensure that they are secure.
Important: Ensure that the voltage rating on the appliance suits the power supply to be used and that the plug is tted with the correct
fuse.
8 DO NOT pull or carry the appliance by the power cable.
8 DO NOT pull the plug from the socket by the cable.
8 DO NOT use worn or damaged cables, plugs or connectors. Ensure that any faulty item is repaired or is replaced immediately by a
qualied electrician.
If the cable or plug is damaged during use, switch o the electricity supply and remove from use. Cable must be replaced by the
manufacturer, its service agent or similarly qualied persons in order to a void a hazard.
9 The Electric supply connection shall be made by a qualied electrician and comply with IEC 60364-1.
9 It is recommended that the electric supply to this machine should include either a residual current device that will interrupt the supply if
the leakage current to earth exceeds 30mA for 30ms or a device that will prove the earth circuit.
WARNING! Inadequate extension cords can be dangerous. If an extension cord is used, it shall be suitable for outdoor use, and the
connection has to be kept dry and o the ground. It is recommended that this is accomplished by means of a suitably rated cord reel
which keeps the socket at least 60mm above the ground.
9 Ensure that repairs are carried out by a qualied electrician.
1.2. PRESSURE WASHER SAFETY
9 Read the instructions fully before use. The manual forms an integral part of the appliance and should be kept for future reference
Please read it carefully before installing/using the unit. If the appliance is sold, the seller must pass on this manual to the new owner
along with the appliance.
WARNING! Wear appropriate personal protective equipment for the task in hand. Risk assess the task and select: safety boots, safety
gloves, safety helmets with visors, protective clothing, hearing protection as necessary.
WARNING! Machine/high pressure cleaners, shall not be used by children or untrained personnel.
8 DO NOT allow children to use the appliance; supervise them to ensure that they do not play with it.
WARNING! RISK OF EXPLOSION. DO NOT use the appliance to spray ammable liquids.
8 DO NOT use the appliance with ammable or toxic liquids, or any products which are not compatible with its correct operation. Use of
the appliance in a potentially inammable or explosive atmosphere is forbidden.
WARNING! HIGH PRESSURE JETS can be dangerous if subject to misuse. The jet must not be directed at persons, live electrical
equipment or at the unit itself.
WARNING! HIGH PRESSURE HOSES, ttings and couplings are important for the safety of the machine. Use only hoses, ttings and
couplings recommended by the manufacturer.
8 DO NOT point the water jet at people or animals.
8 DO NOT splash or wash the machine down.
WARNING! ENSURE that all people or animals keep a minimum distance of 15m.
8 DO NOT use the appliance with people within its range of action unless they wear protective clothing.
8 DO NOT direct the jet at yourself or others in order to clean clothing or footwear.
8 DO NOT use the appliance outdoors when it is raining.
8 DO NOT touch the plug and/or socket with wet hands.
8 DO NOT use the appliance if the electric cable is damaged. If the electric cable is damaged, it must be replaced by the manufacturer,
one of its authorised Service Centres or similarly qualied persons in order to avoid a safety hazard.
8 DO NOT use the appliance if important parts such as the safety devices, high pressure hoses, trigger or gun are damaged.
Original Language Version
© Jack Sealey Limited
PW1610.V2 Issue 1 08/03/24
Thank you for purchasing a Sealey product. Manufactured to a high standard, this product will, if used according to these instructions,
and properly maintained, give you years of trouble free performance.
IMPORTANT: PLEASE READ THESE INSTRUCTIONS CAREFULLY. NOTE THE SAFE OPERATIONAL REQUIREMENTS, WARNINGS &
CAUTIONS. USE THE PRODUCT CORRECTLY AND WITH CARE FOR THE PURPOSE FOR WHICH IT IS INTENDED. FAILURE TO DO
SO MAY CAUSE DAMAGE AND/OR PERSONAL INJURY AND WILL INVALIDATE THE WARRANTY. KEEP THESE INSTRUCTIONS SAFE
FOR FUTURE USE.
Refer to
instructions
DO NOT
drink water
from pressure
washer
Wear face
protection
Wear protective
gloves
DO NOT direct jet
against yourself,
other persons,
animals, electrical
equipment or the
machine itself
Wear ear
protection
Wear safety
footwear
Wear protective
clothing
8 DO NOT jam the trigger in the operating position.
9 Check that the data plate is axed to the appliance. If not, inform your supplying stockist. Appliances without plates must NOT be
used as they are unidentiable and potentially dangerous.
8 DO NOT tamper with or adjust the setting of the safety valve or the safety devices.
8 DO NOT move the appliance by pulling on the ELECTRIC CABLE. Use the handle and transport by use of the wheels.
8 DO NOT allow vehicles to drive over the high pressure hose.
8 DO NOT move the appliance by pulling on the high pressure hose.
WARNING! Use the washer on a at, level surface in an upright position. NEVER lay the washer down during use.
WARNING! When directed towards tyres, tyre valves or other pressurised components, the high pressure jet is potentially
dangerous. DO NOT use the rotating nozzle kit, and always keep the jet at a distance of at least 30 cm during cleaning.
WARNING! The use of non-original accessories and any other spare parts not specically intended for the model in question is
prohibited. All modications to the appliance are prohibited.
WARNING! The electric supply connection must be made by a qualied electrician and comply with IEC 60364-1. Either a residual
current device that will cut o the power supply if the leakage current to earth exceeds 30 mA for 30 ms or a ground fault interrupt
device must be installed.
WARNING! Use of a residual current breaker (RCB) will provide additional protection for the operator (30 mA).
WARNING! Always turn o the switch when leaving the appliance unattended. The machine must be attended during operation.
WARNING! High pressure may cause parts to rebound: wear all the protective clothing (PPE) and equipment needed to ensure the
operator’s safety.
WARNING! Before performing Maintenance, making adjustments to the appliance, converting to another function ALWAYS
disconnect from mains supply.
9 Supply hose must be reinforced and have an internal diameter of 1/2” (13mm).
9 Water supply must be equal to cleaner capacity. Water temperature must not exceed 60°C. Water supply pressure must be to
Specication (see Specication section below.)
9 Only use where air can circulate freely, DO NOT block ventilation grilles.
WARNING! Before pressing the trigger, GRIP the gun rmly to counteract the recoil.
WARNING! COMPLY WITH the local water supply authority regulations. The appliance may only be connected to the mains drinking
water supply if the supply hose is tted with a back-ow preventer valve.
WARNING! Water that has passed through a backow preventer is considered to be non-potable.
WARNING! Maintenance and/or repair of electrical components MUST be carried out by suitably qualied sta.
WARNING! DISCHARGE residual pressure before disconnecting the hose from the appliance.
WARNING! CHECK before each use and at regular intervals that the screws are fully tightened and that there are no broken or worn
parts.
WARNING! This appliance is designed for use with the detergent supplied or recommended by the manufacturer. The use of other
detergents or chemicals may adversely aect the appliance’s safety.
WARNING! To ensure the appliance’s safety, only use original spare parts from the manufacturer or approved by the manufacturer.
WARNING! Switch the appliance o and disconnect it from the power supply before assembly, cleaning, adjustments, maintenance,
storage and transportation.
Commercial use: This machine is not intended for use by persons (Including children) with reduced physical, sensory or mental
capabilities, or lack of experience and knowledge.
Not for commercial use: This machine can be used by people with reduced physical, sensory or mental capabilities or lack of
experience and knowledge if they have been given supervision or instruction concerning use of the machine in a safe way and
understand the hazards involved.
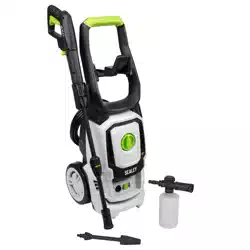
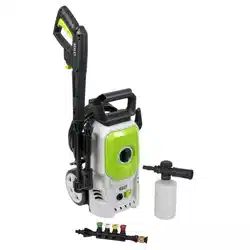
2. INTRODUCTION
Ideal for cleaning vehicles, machinery, as well as patios and other outdoor surfaces.
Brass quick release system allows for fast selection between nozzles and allows
compatibility across the Sealey range of pressure washers and accessories. Pressure
gun includes lock to avoid accidental start. 1200W motor produces up to 100bar of
pressure with an impressive 390L/hr ow rate. Automatic Total Stop System (TSS)
which switches the motor on and o when the trigger is operated, prolonging motor
life. Self-priming motor can be used with a still water source for maximum portability.
Supplied with 5m pressurized hose for ease of use and 5m power cable for extended
reach. Supplied with Rotablast® nozzle, snow foam gun, adjustable fan nozzle and set
of 4 interchangeable nozzles (0°, 15°, 25° & 40°) supplied on a lance storage sleeve.
3. SPECIFICATION
Original Language Version
© Jack Sealey Limited
PW1610 Issue 1 08/03/24
Model No: PW1610.V2
Eective Cleaning Power: 100bar
Fuse Rating: 13A
Hose length: 5m
IP rating: IPX5
Maximum Inlet Pressure: 1.2bar
Maximum Pressure: 100bar(1450psi)
Maximum Water Flow: 390L/hr
Motor Power: 1200W
Nett Weight: 5.44Kg
Nozzles: Rotablast®, Adjustable Fan,
Snow Foam Gun & 4pc Nozzle
Set (0°, 15°, 25° & 40°)
Peak Water Temperature: 50°C
Plug Type: 3-Pin BS
Rated Pressure: 70bar(1015psi)
Rotablast Nozzle®: 160bar
Supply: 240V
Water Flow Rate: 5.5L/6.5L/min
Noise Emisions [dB(A)]: 90 dB(A)
Vibration [m/s²]: 2,089 m/s²
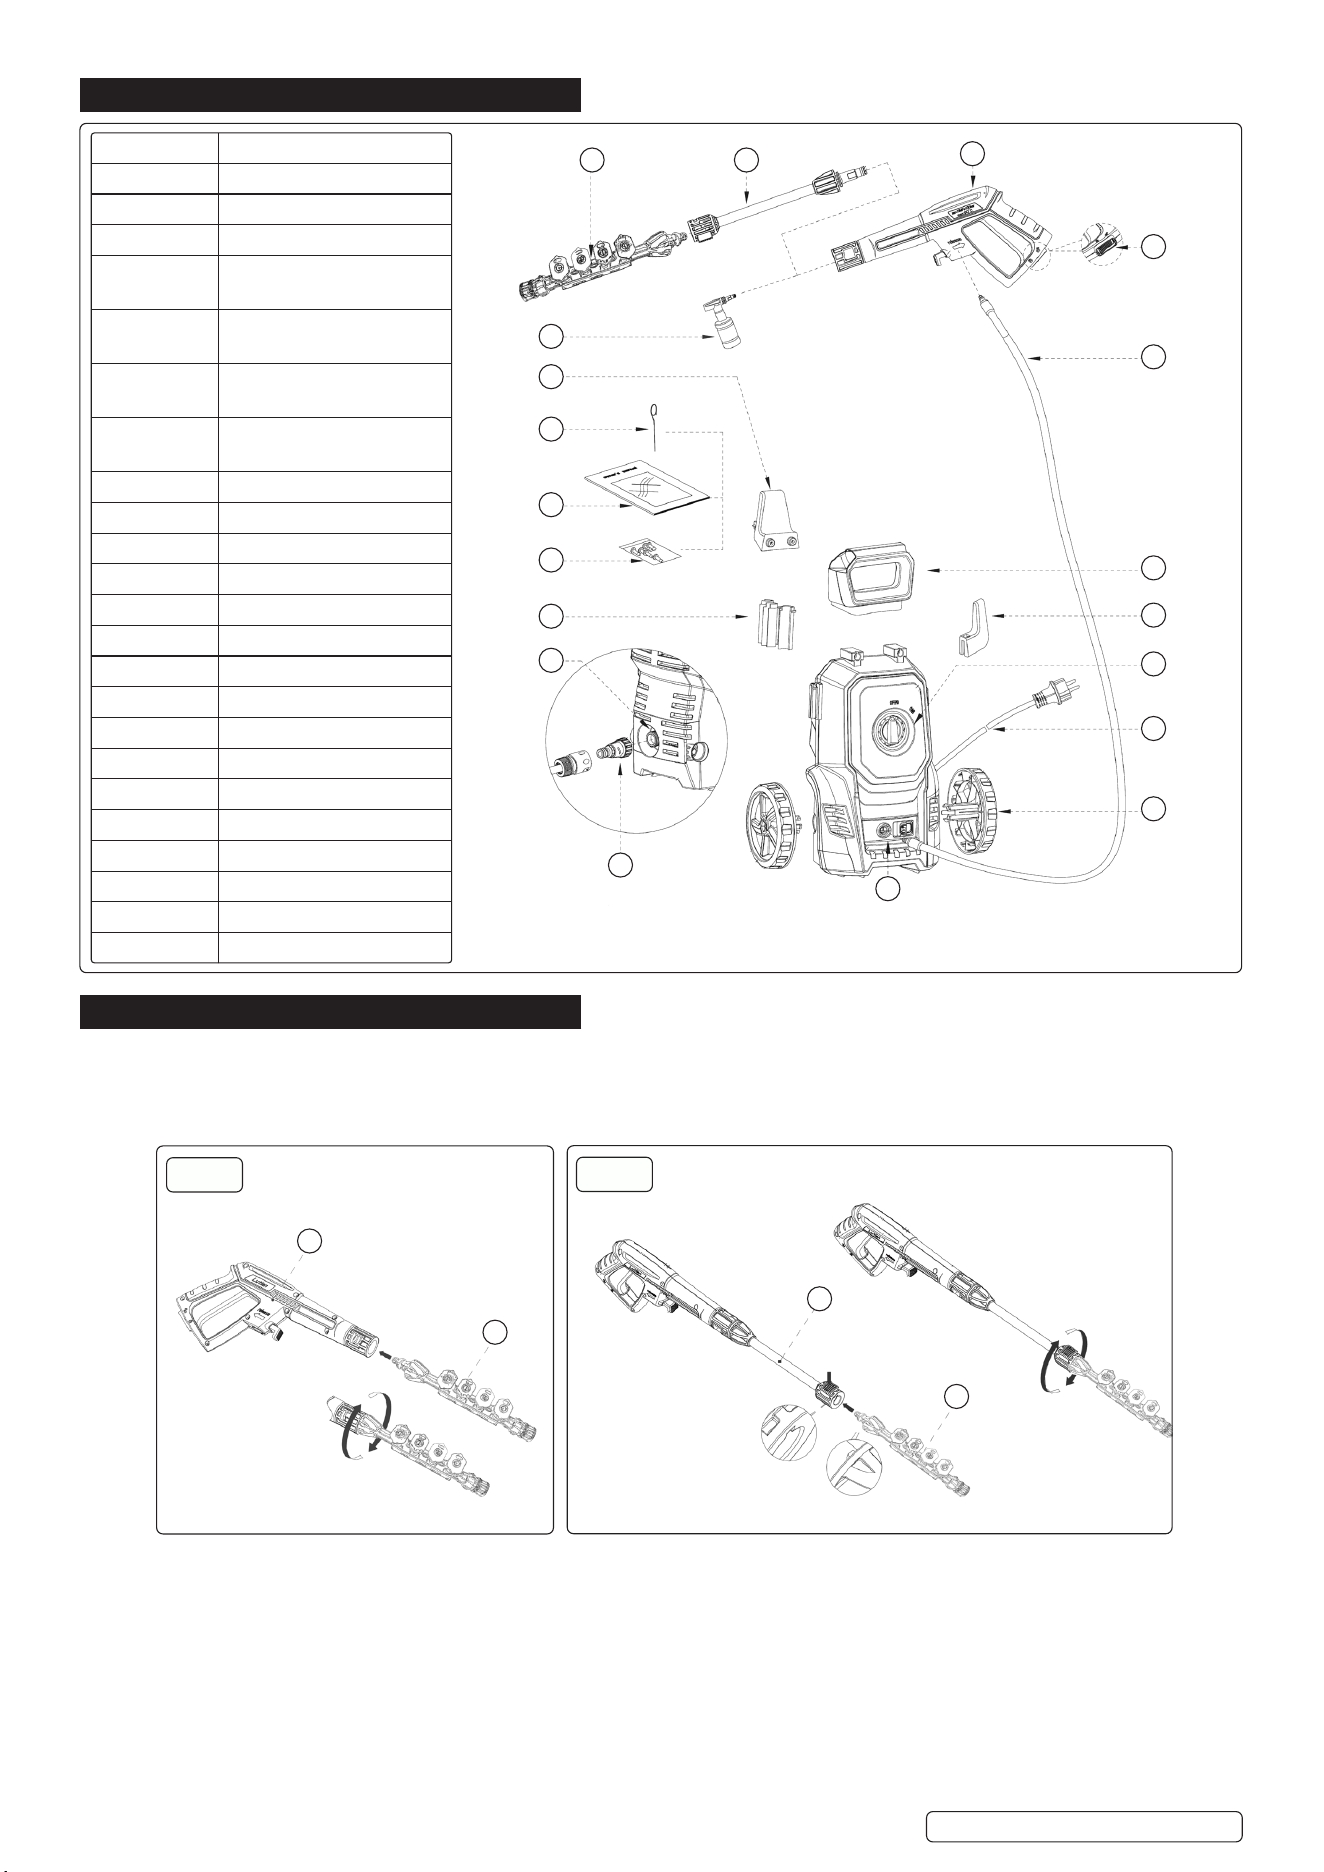
4. CONTENTS
5. ASSEMBLY
5.1. ATTACH THE MIDDLE EXTENSION LANCE TO WAND (FIG.1 & 2)
Note: When attaching, align the two projections on the middle extension lance with the grooves on the lance.
5.2. Attach the main lance to the middle extension lance.
Item No. Description
1 Wand
2 Middle extension lance
3 Main Lance
Red (A)
Nozzle
0°
Yellow (B)
Nozzle
15°
Green (C)
Nozzle
25°
White (D)
Nozzle
40°
4 Detergent Bottle
5 High pressure hose hook
6 Cleaning pin
7 Manual
8 Screws package
9 Gun holder
10 Water inlet opening
11 Water inlet connector
12 Water outlet opening
13 Wheel
14 Power cord
15 ON/OFF switch
16 Power Cable Hook
17 Short handle
18 High pressure hose
19 Lock-o switch
Original Language Version
© Jack Sealey Limited
PW1610.V2 Issue 1 08/03/24
3 2
1
19
18
17
16
15
14
13
4
5
6
7
8
9
10
11
12
A
B
C
D
1
2
2
3
g.1
g.2
2
3
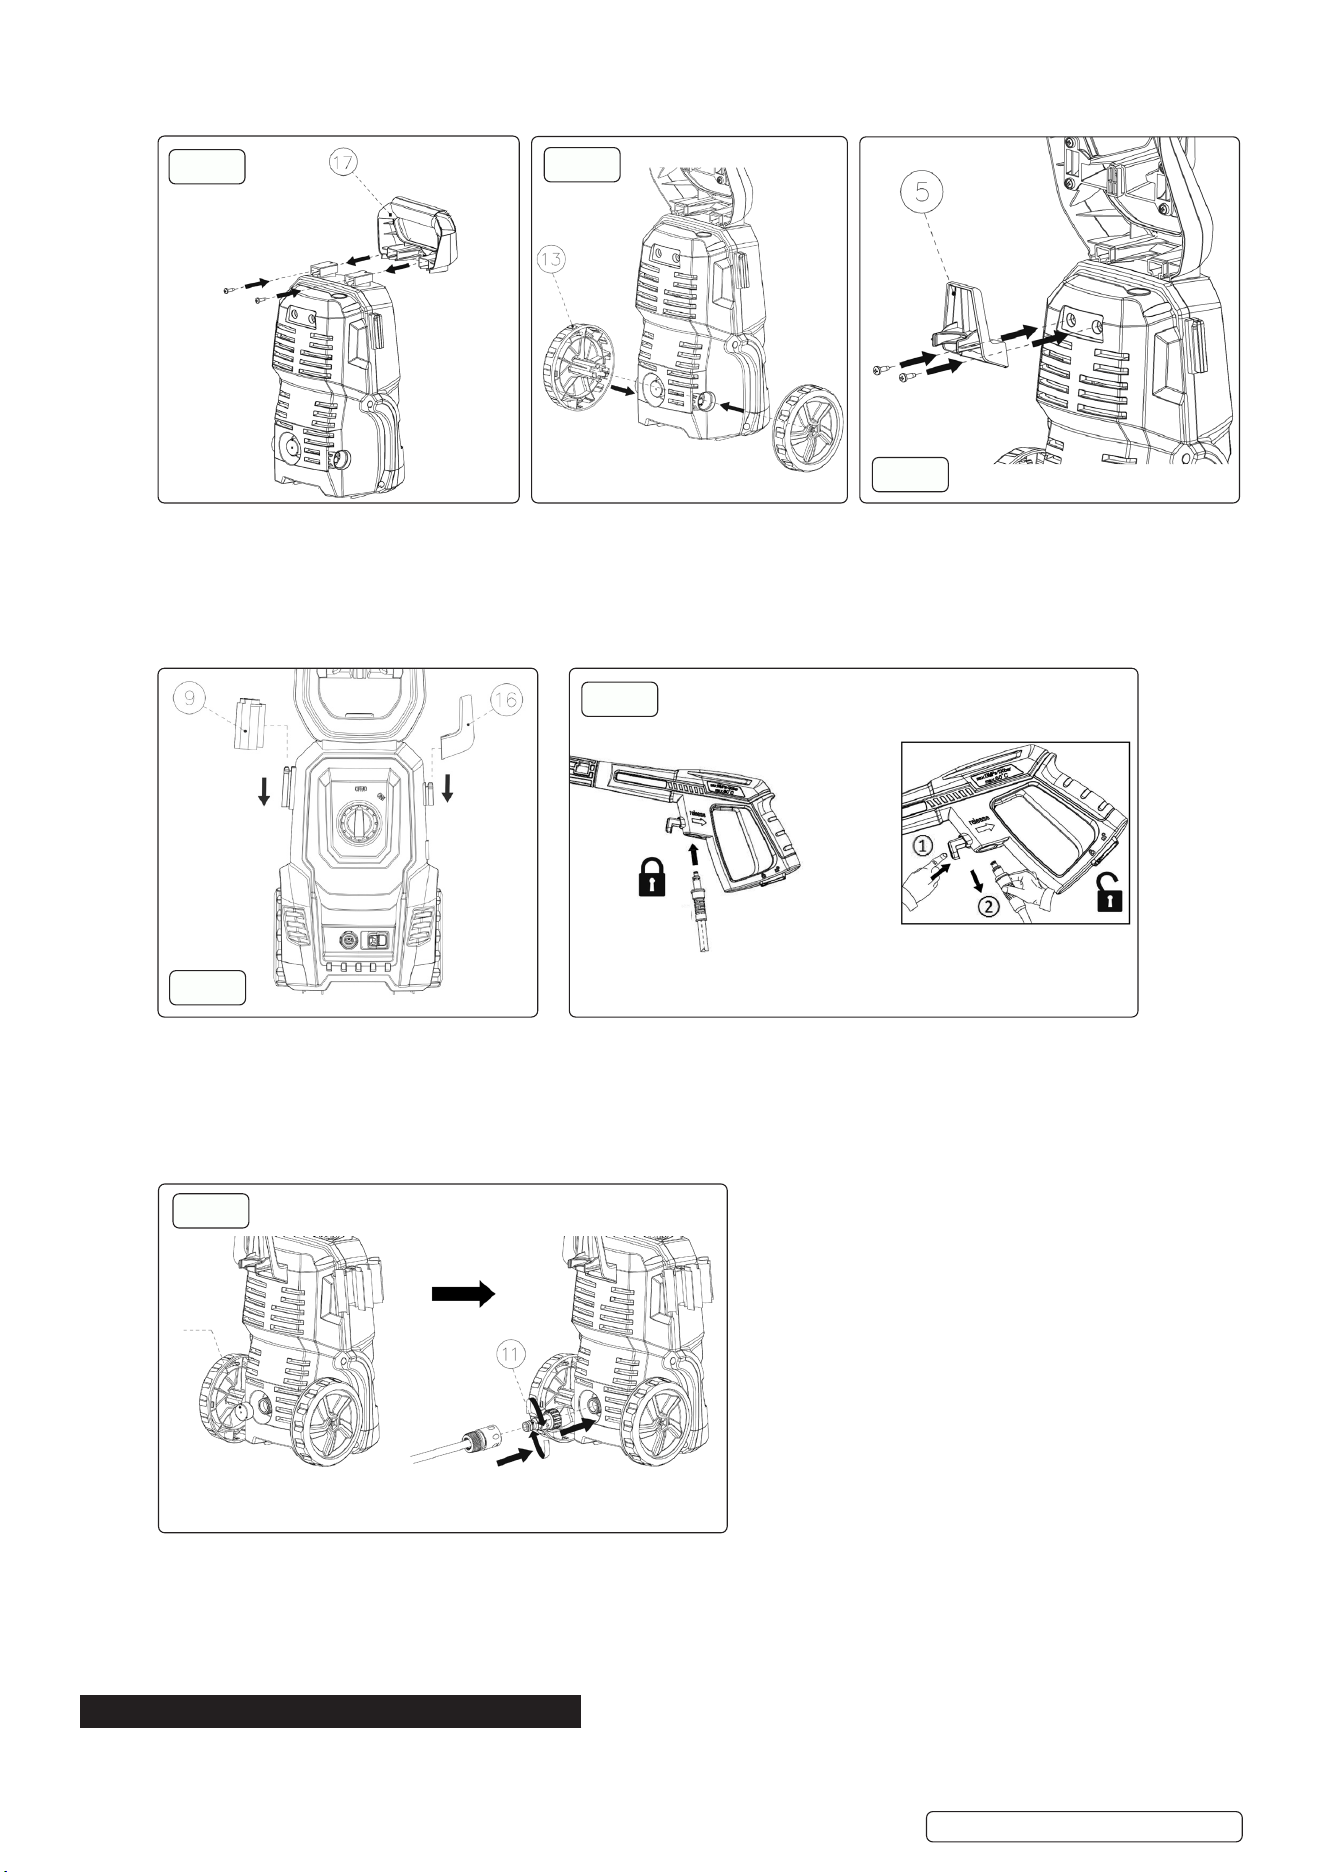
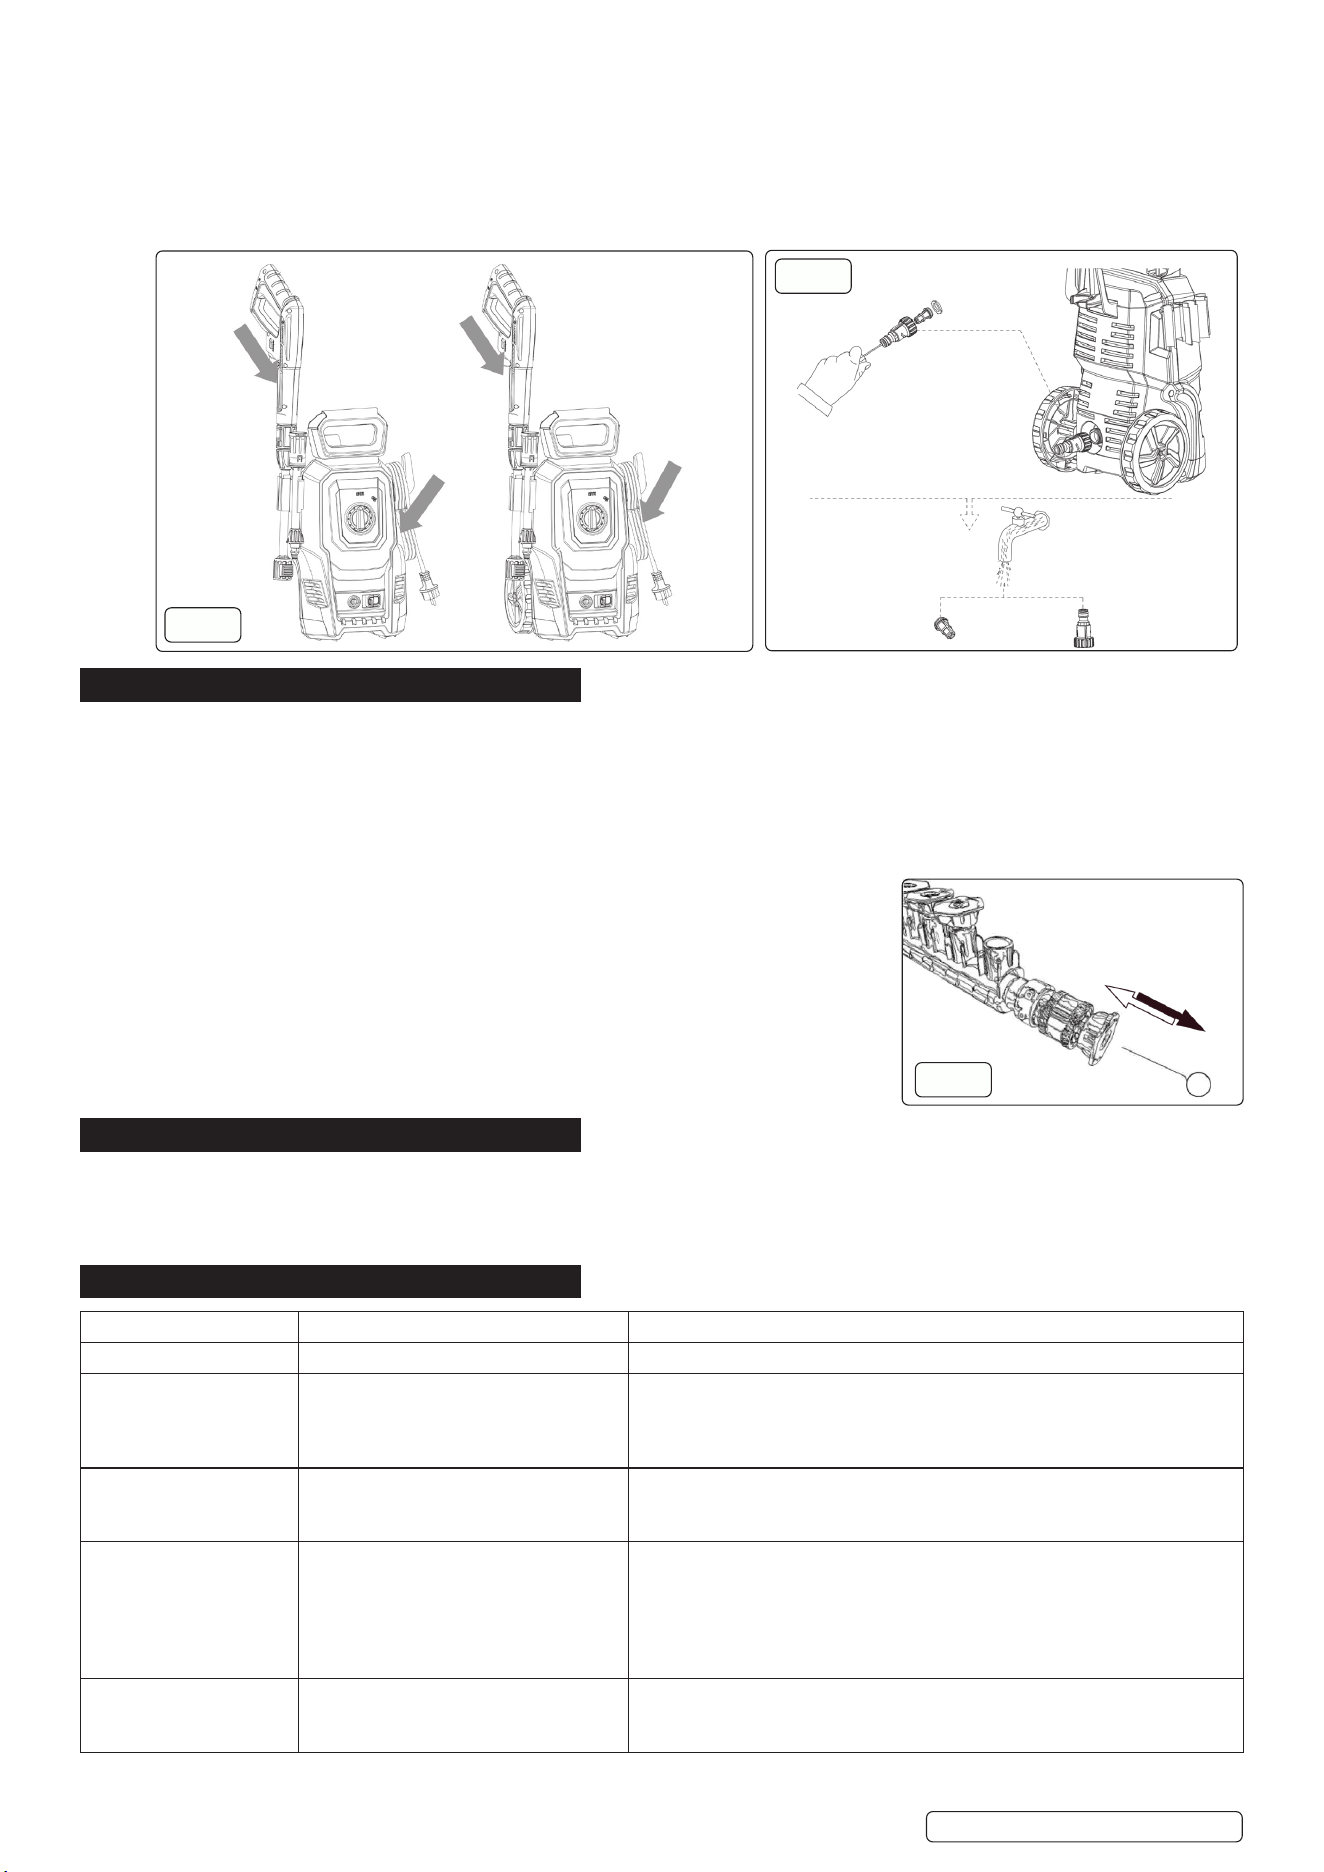
5.3. MOUNTING THE HANDLE (FIG.3)
Screw the handle tight to the main unit (2 screws). Note: The screws will be packed together with the manual.
5.4. FIT WHEELS (FIG.4)
5.4.1. Align each wheel axle with corresponding shape on the body of the washer. Press to t.
5.5. MOUNTING THE HIGH PRESSURE HOSE HOOK (FIG.5)
5.5.1. Screw the high pressure hose hook to the main unit (2 screws). The screws will be packed together with the manual.
Note: All screws are packed in one bag.
5.6. FIT GUN HOLDER AND POWER CABLE HOOK (FIG.6)
5.7. ATTACH & DETACH THE HIGH PRESSURE HOSE FIGS (7 & 7A)
5.7.1. Attach: one end of the high pressure hose to the pressure water outlet of the machine and the other end of the high pressure hose
to the wand. Note: After the high pressure hose is connected, check the connection by gently pulling on the hose to ensure it stays
connected.
5.7.2. Detach: To detach the hose, turn switch to OFF/II position and pull the trigger to drain water from wand. Push the lock button and pull
to detach the high pressure hose.
5.8. ATTACH THE GARDEN HOSE (FIG.8)
5.8.1. Remove the plastic plug from the water inlet pipe of the machine and screw the water inlet connector onto the water inlet pipe.
5.8.2. Connect one end of the garden hose (not supplied) to the water inlet connector and another end to water source.
WARNING! The appliance is INTENDED to be used at temperatures above 0°C.
WARNING! Garden hose must not be damaged and leak. Inner diameter no less than 1/2”, length can not be greater than 8m.
5.9. Connect to mains power.
6. OPERATION
WARNING! During operation appliance must be positioned on rm, stable surface. High pressure hose must not be coiled on the
washer.
g.6
g.7
Push button to remove hose
Original Language Version
© Jack Sealey Limited
PW1610.V2 Issue 1 08/03/24
g.3
g.4
g.5
Plastic
Plug
g.8
WARNING! Check that the supply voltage and frequency correspond to those specied on the appliance data plate. The appliance
should only be connected to a mains power supply via a security breaker (Max.30mA) to cut o the electricity supply in the instance of
a short circuit.
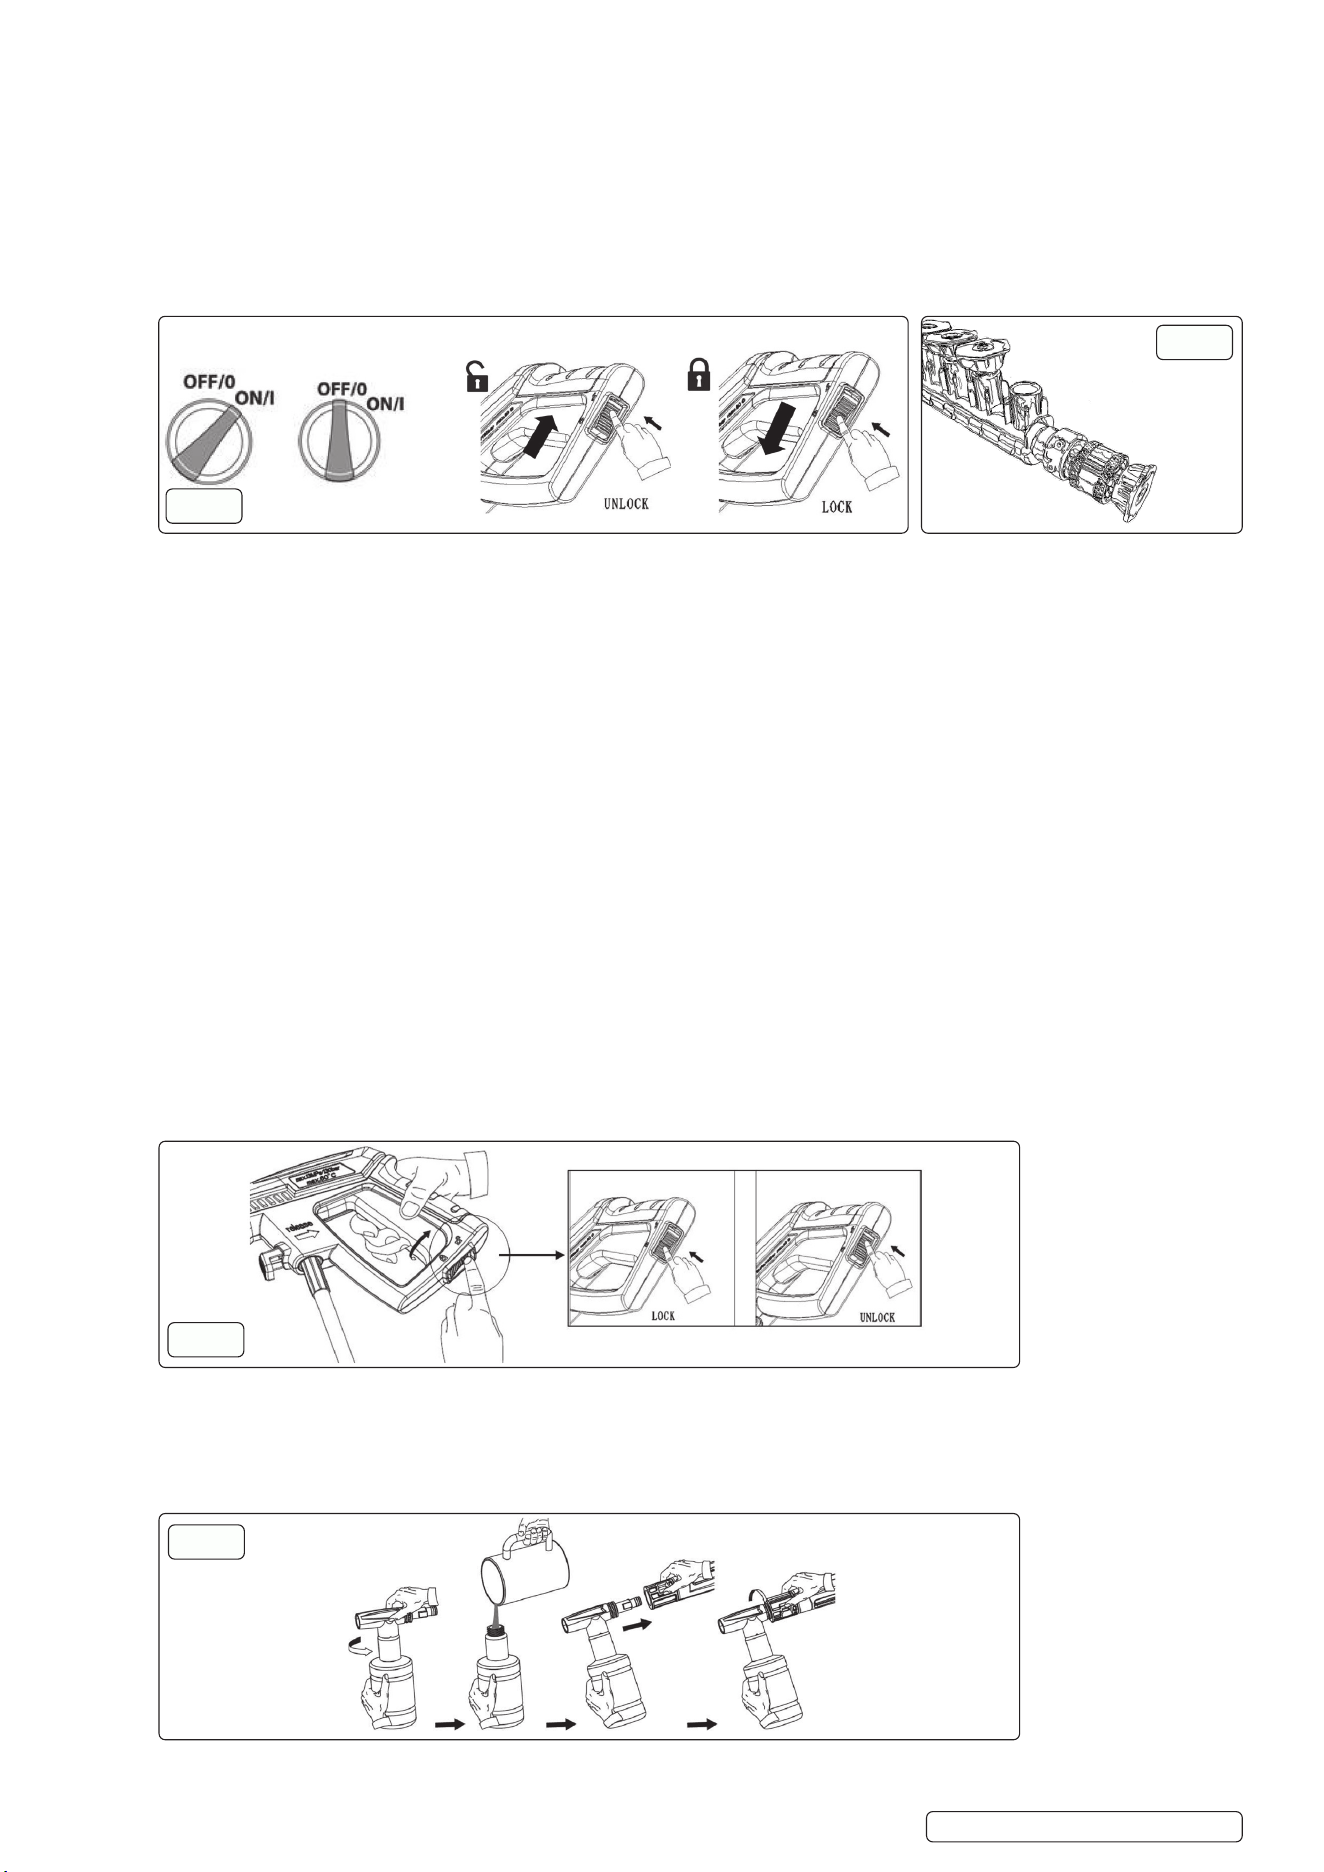
6.1. START UP (FIG.9)
6.1.1. Turn water on. Squeeze trigger for approx. 1 minute until low pressure water ows out, to empty air out of the unit.
WARNING! For use with cold water only.
Note: Before pressing trigger,make sure lock-o switch is in “unlock” position.
6.1.2. Turn the switch of the pressure wash to “ON/I” position, then press trigger.
WARNING! DO NOT start the machine without connecting and turning on the water supply, it may cause damage to high pressure
seals and reduce the service life of the pump.
6.2. CLEANING
6.2.1. Squeeze the trigger, high pressure water ow will come out.
6.2.2. Pull back quick release mechanism at the end of the main lance g.9A, select the nozzle required and insert. Release the mechanism
to change nozzle, store nozzle on the top of lance.
WARNING! When operating the machine, it must only be used upright.
Note: Begin with the nozzle 1-2ft away from the surface and approach with caution until it reaches the desired position. Too close a
spray may do harm to the surface.
WARNING! DO NOT connect the machine to water supplies that are dirty, rusty, muddy, or corrosive: including window cleaning
liquids, plant foods, or fertilizers etc.
6.2.3. When cleaning is nished, release the trigger and turn the switch to “OFF/O” position, then turn o the water supply.
Note: When not in use, make sure Lock-o switch is in “Lock” position.
Note: Using the pressure washer after water supply has been turned o, serious damage could occur to the pump and/or motor.
WARNING! Never disconnect high pressure discharge hose from machine while system is pressurized. To de-pressurise, turn motor
o, turn water supply o and squeeze gun trigger 2-3 times.
6.2.4. Disconnect from mains supply.
6.3. SAFETY VALVE/PRESSURE LIMITING VALVE
WARNING! DO NOT tamper with or adjust the safety valve setting.
6.3.1. The safety valve is also a pressure limiting valve. When the gun trigger is released, the valve opens, pressure switch operates, the
machine automatically shuts down. If the gun nozzle is blocked,this will cause the machine pressure to rise, the safety valve opens,
and the pressure switch activates, the machine automatically shut down.
6.3.2. Refer to section 7.2 to use a needle to clean the nozzle.
6.4. GUN SAFETY BUTTON (FIG.10)
6.4.1. Operator needs to press the unlock button and then actuate the trigger to release spray.
6.4.2. When trigger is released, trigger will return to the o position automatically.
6.4.3. When not using the pressure cleaner, press the lock button to keep from accidentally engaging the high pressure spray.
6.5. HOLDING THE GUN
6.5.1. Hold the gun correctly to resist kickback force: one hand on the handle, one on the lance.
6.6. TO WASH WITH DETERGENT (FIG.11)
6.6.1. Fill bottle with a recommended detergent or cleaner with a water ratio according to instructions on the container. Connect nozzle to
lance.
6.6.2. Squeeze the wand trigger, detergent will come out through the nozzle.
g.9
g.9A
Original Language Version
© Jack Sealey Limited
PW1610.V2 Issue 1 08/03/24
g.10
g.11
6.6.3. Apply detergent so it thoroughly covers cleaning surface.
6.6.4. Allow detergent to remain on the surface for a few minutes. Use a brush to lightly scrub heavily soiled areas.
6.6.5. Change to spray nozzle, Rinse detergent from surface.
6.6.6. Cleaning up: Always draw fresh water through the detergent bottle when done to ush any remaining detergents from the injection
system. The bottle could be detached if necessary.
6.7. PLACEMENT OF ACCESSORIES ON THE MACHINE (FIG.12)
6.7.1. Gun, power lead, hose and accessories are placed as shown below.
7. MAINTENANCE
WARNING! Always disconnect from mains supply before carrying out any work on the appliance.
Note: Any maintenance operations not covered by this chapter should be carried out by an properly qualied persons or the
manufacturer.
7.1. CLEANING OF WATER INLET FILTER (FIG.13)
7.1.1. Water lter installed inside the water inlet connector, should be cleaned periodically. Rinse with clean tap water, and then place it back
into the water inlet connector.
7.2. CLEANING THE NOZZLE (FIG.14)
7.2.1. Using the nozzle tip cleaner provided (or an unfolded paper clip), insert the wire into the
nozzle hole and move back and forth until debris is dislodged. Back ush water through the
nozzles using garden hose and highest pressure available (either standard water nozzle or
use your thumb over the nozzle to create water pressure for back ush).
7.3. CLEANING OF MACHINE VENTS
7.3.1. The machine should be kept clean so as to let cooling air pass freely through the machine
vents.
7.4. GREASE COUPLINGS
7.4.1. To ensure easy connection and that o-rings work eectively, the couplings should be
greased regularly.
8. STORAGE
8.1. Disconnect the water source, turn on the pressure washer for a few seconds until the remaining water ows out, then turn it o quickly.
8.2. Unplug the power supply.
8.3. Disconnect the high pressure hose and the garden hose, and coil high pressure hose for storage.
8.4. Store in a frost free area with a temperature above 0°C.
9. TROUBLESHOOTING
Symptom Cause Recommended action
PROBLEM REASON ACTION
Machine refuses to run a). Machine not plugged in.
b). Defective socket.
c). Fuse has blown.
d). Defective extension cable.
a). Plug in machine.
b). Try another socket.
c). Replace fuse.
d). Try without extension cable.
Fluctuating pressure a). Pump sucking air.
b). Valves dirty, worn or stuck.
c). Pump seals worn out.
a). Check that hoses and connections are airtight.
b). Clean and replace or return for repair.
c). Clean and replace or return for repair.
Machine stops a). Fuse has blown.
b). Incorrect mains voltage.
c). Thermal sensor activated.
d). Nozzle partially blocked.
a). Replace fuse.
b) Switch off machine.
b). Check that the mains voltage corresponds to specification on the model
tag.
c). Leave the washer for 5 minutes to cool down.
d). Clean the nozzle.
Fuse blows a). Fuse too small. a). Change to an installation higher than the amps consumption of the
machine.
b). Try without an extension cable.
g.12
g.13
Original Language Version
© Jack Sealey Limited
PW1610.V2 Issue 1 08/03/24
g.14
Original Language Version
© Jack Sealey Limited
PW1610.V2 Issue 1 08/03/24
Machine pulsating a). Air in inlet hose/pump.
b). Inadequate supply of mains water.
c). Nozzle partially blocked.
d). Water filter blocked.
e). Hose kinked.
a). Allow machine to run with open trigger until regular working pressure
resumes.
b). Check that the water supply corresponds to specifications required.
c). Clean the nozzle.
d). Clean the filter.
e). Straighten out hose.
Machine often starts
and stops by itself
a). Pump/hose or accessory frozen.
b). No water supply.
c). Water filter blocked.
d). Nozzle blocked.
a). Wait for pump/hoses or accessory to thaw.
b). Connect inlet water.
c). Clean the filter.
d). Clean the nozzle.
Machine starts, but no
water comes out
a). Pump/hose or accessory frozen.
b). No water supply.
c). Water filter blocked.
d). Nozzle blocked.
a). Wait for pump/hoses or accessory to thaw.
b). Connect inlet water.
c). Clean the filter.
d). Clean the nozzle.
Sealey Group, Kempson Way, Suffolk Business Park, Bury St Edmunds, Suffolk. IP32 7AR
01284 757500 sales@sealey.co.uk www.sealey.co.uk
WEEE REGULATIONS
Dispose of this product at the end of its working life in compliance with the EU Directive on Waste Electrical and Electronic
Equipment (WEEE). When the product is no longer required, it must be disposed of in an environmentally protective way. Contact
your local solid waste authority for recycling information.
ENVIRONMENT PROTECTION
Recycle unwanted materials instead of disposing of them as waste. All tools, accessories and packaging should be
sorted, taken to a recycling centre and disposed of in a manner which is compatible with the environment. When
the product becomes completely unserviceable and requires disposal, drain any uids (if applicable) into approved
containers and dispose of the product and uids according to local regulations.
REGISTER YOUR
PURCHASE HERE
Note: It is our policy to continually improve products and as such we reserve the right to alter data, specications and component parts
without prior notice. Please note that other versions of this product are available. If you require documentation for alternative versions, please
email or call our technical team on technical@sealey.co.uk or 01284 757505.
Important: No Liability is accepted for incorrect use of this product.
Warranty: Guarantee is 12 months from purchase date, proof of which is required for any claim.