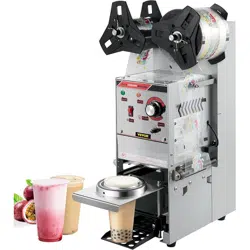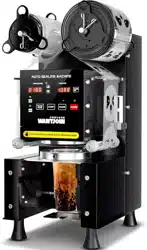
CUP SEALING MACHINE
95B

For your safety, please read the instructions before using the machine.
WARNING
1.DO NOTtouch the hot surface to avoid burns.
2.DO NOTimmerse product and cable into water to avoid electric shock.
3.MUSTbeware all age under 18 or area which near children when using the product
4.ONLY use the correct Voltage Frequency for using the machine:110-120V 60HZ
5.NEVER place your hand in the working machine to avoid harm.
6.NEVERuse not from the manufactured electrical appliance to avoid injury.
7.SWITCH off the power after using the machine.
8.Exchange the sealing film after the machine cool down or switch off.
9.DO NOTclean the machine with any Harsh chemicals or corrosive washing liquid.
10.NEVER use water to spray or immerse the machine or electronic parts in water to
avoid electric.
11.CONTACT the after-sales team for further support if happened with any error or
abnormality while using.
12.NEVERuse the product for other purposes.
13KEEPandSAVEthe instruction properly
01
COPYRIGHT
STATEMENT
The owner of the manual is belong to the owner of WANTJOIN.
Without permission and cannot be reproduced or disseminated
in any form.
08
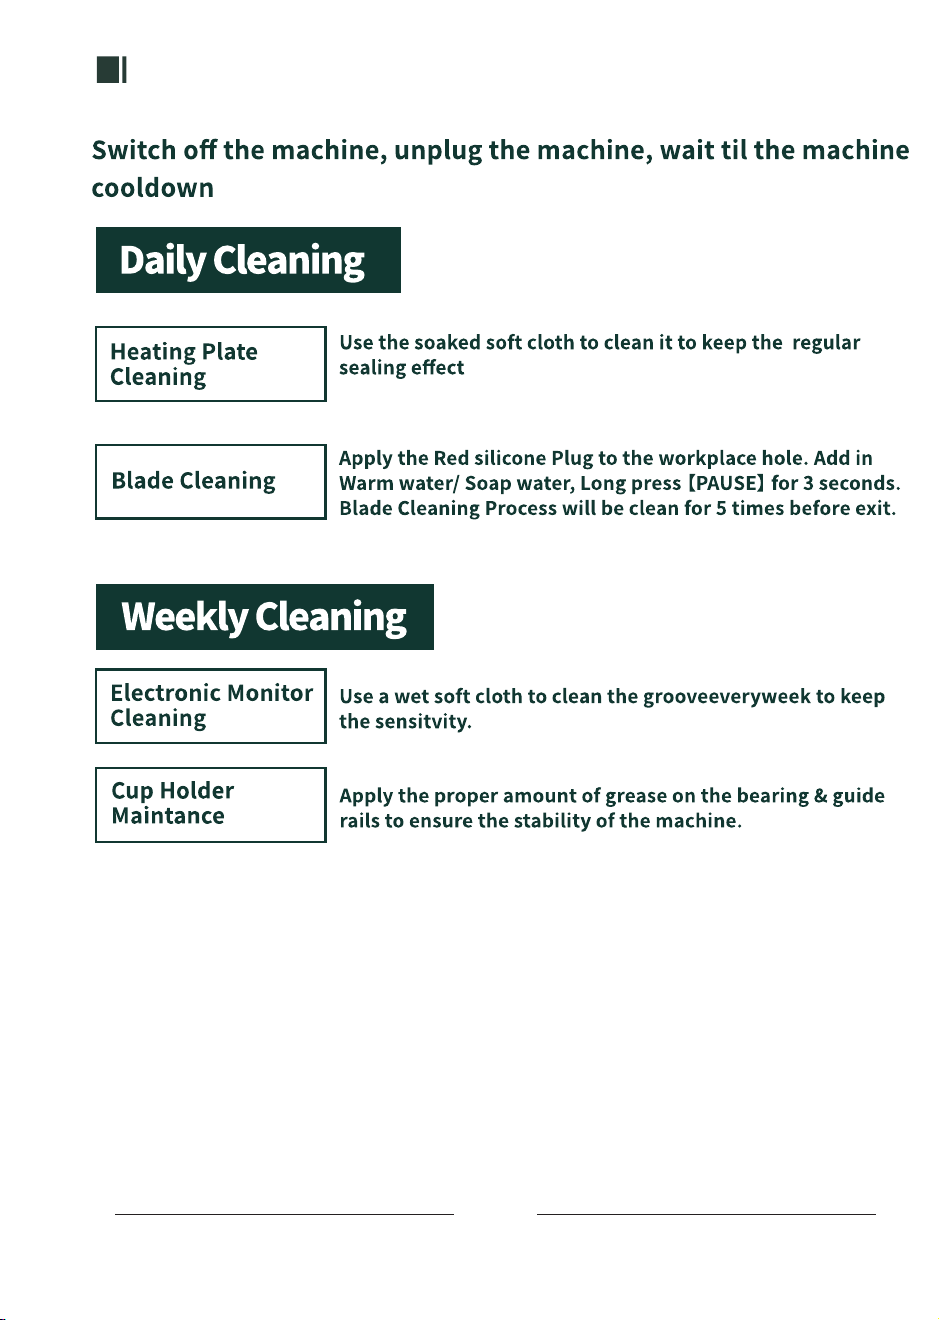
MAINTENANCE
INSTALLATION
02
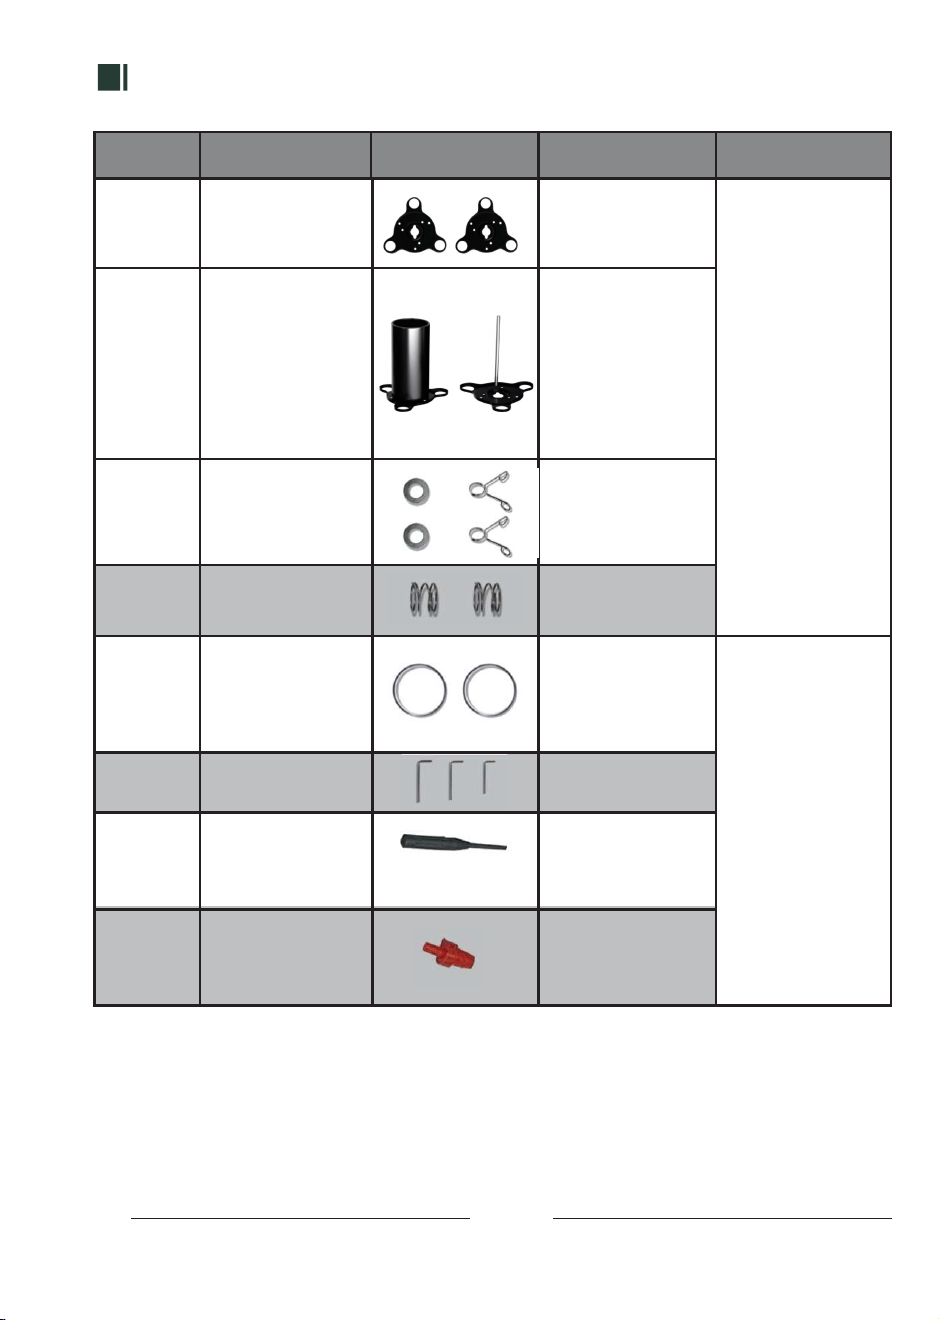
NameNumber UsePicture Note
1
2
3
4
5
6
7
8
2x Left Wheel Installing
parts
2x Right Wheel
Installing parts
Roller is
installed on the left
side of the front of
the machine
Install for the rotating
shaft left front wheel
Accessories for
sealing film
installation:
2x spacers
2x clips
2 x spring
1x 90 aluminum ring
3x L -Wrench
1x Motor Sensor
Needle
Ix Silicone Plug
To hold sealing film
left and right
for clamping and
buffering of the left
wheel, no clamping
on the right
Fit with 3-1/2 inch or
3-2/3 inches sealing
cups
Please save the
important parts
For unscrewing the
aluminum plate screws
Use for debugging the
electronic eye to
avoid E51/E52 error
Block the heating plate
hole to avoid dirty
liquid flow on
the desktop.
If you have any further needs or question, please look into the Question & Answer
booklet. To solve all the information.
REMIND
07
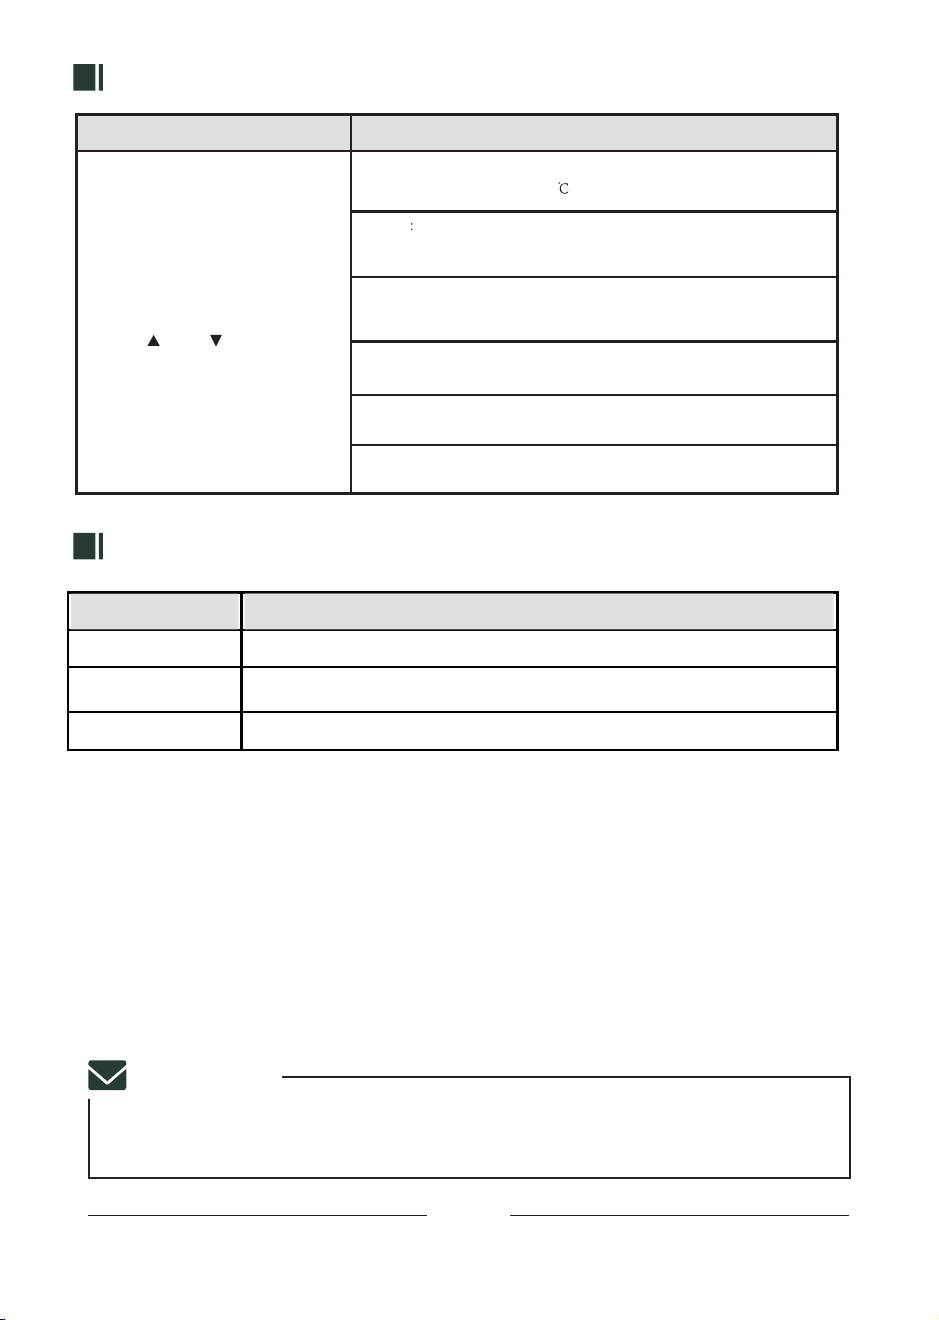
PARAMETER
ERROR CODE TIPS
RESET SETTINGS SETUP PARAMETER
1. Press "Sound" for 3 sec to enter
the parameter adjustment mode.
2. Press "Sound" to exchange the
selection mode: P001-P006
3. Press " " and " " to adjust the
value.Press to ROLLING/CANCEL
to save the setting and return to
the working interface.
P001: Use for temperature adjustment, Range :0-230,
Default Value is 180
P002 Contain 2 mode: ON/OFF. ON: able to use for clear data;
OFF/CLEAR cannot be cleared (CLEAR key lock),
the default is OFF
P003: Sealing cups' time adjustment, Range: 0-50,
Default Paramater:15, Each Valve: represent 0.1sec
P004: Cup pushing in time range:0-30, default set:15
P005: Cup launching time range:0-60, default set:0
P006: Re-seal mode, repeat sealing twice . Default OFF,
choose when the weather is cold
E1-E4,E11-E14
E10
E51/E52
Machine wires error, Contact the After-Sales team
The temperature of the Heating Plate is over 350°C,
Turn off the machine & contact the after-sales team.
Motor Sensor Error. Use the Motor Sensor Needle to Adjust it.
ERROR CODE
SOLUTION
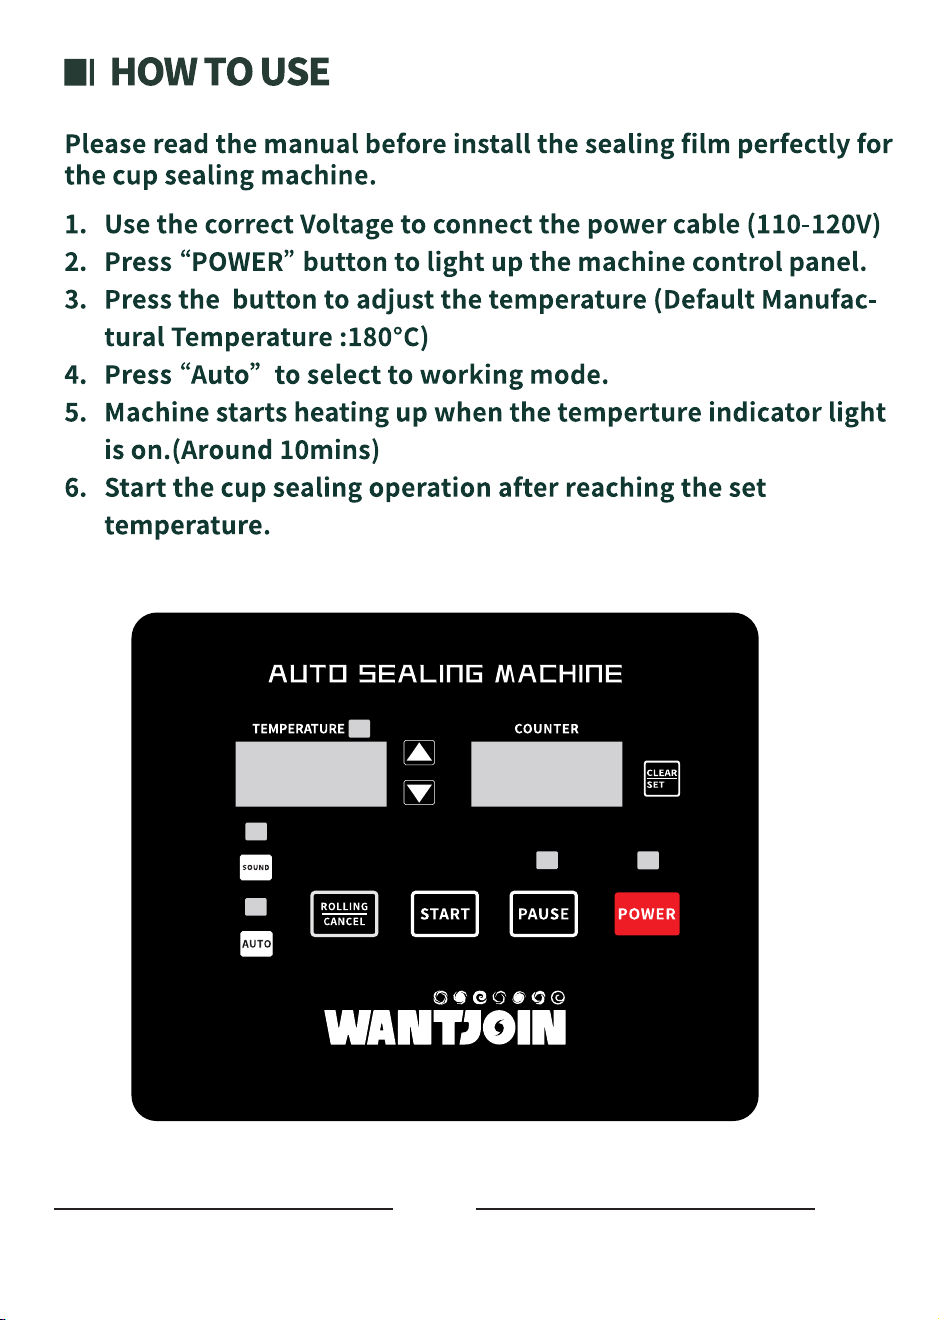
BUTTON FEATURES
06
FUNCTION KEY
POWER
TEMPERATURE
SOUND
Auto
ROLLING/CANCEL
PAUSE
CLEAR/SET
USAGE
Flashing Power indicatior lights after plugin. Press "POWER" button
to start the machine.
Press to close the Countings from the LED display.
Press for 3 secs to clear the counter data.
(If P002 set to OFF counter will be refuse to clear the data.)
Press the button to stop all functions and maintains to current state.
Press "ROLLING/CANCEL" to cancel the function.
Long Press for 3 seconds, Machine start the blade cleaning program,
the blade will exits after auto working for 5 times and removing
stickies from blades.
Long Press to use the Rolling Function, the sealing film rolling function
will start and helps for adjusting the sealing flim.
Only Use the Cancel Button to leading the cup holder to return to the
machine when in the Pause Mode.
Automatic Sealing Mode: Default mode: Indicator lights on. Place the cup
in and start working. Works for batch operations.
Manual Sealing Mode: Press for 3 secs, Indicator lights off. Press "START" to
start working. Works for short-term operations.
Leaking Mode: Press for a sec, the green indicator lights flash, machine
reseal unfinished films instead of using a new film. Press "START" to return
to the previous working mode. Works for second sealing for solving
the unseal or non proper sealing cups issues.
Short /Long Press can be selected by the 3 Working Mode
Indicator lights & the beep sound both on, machine will send out a beep
after work completed. Press the button, indicator lights off means the
beeps sound off.
Use to adjust the temperature depends to specific area temperature
& cup texture.
DIRECTION POSITION
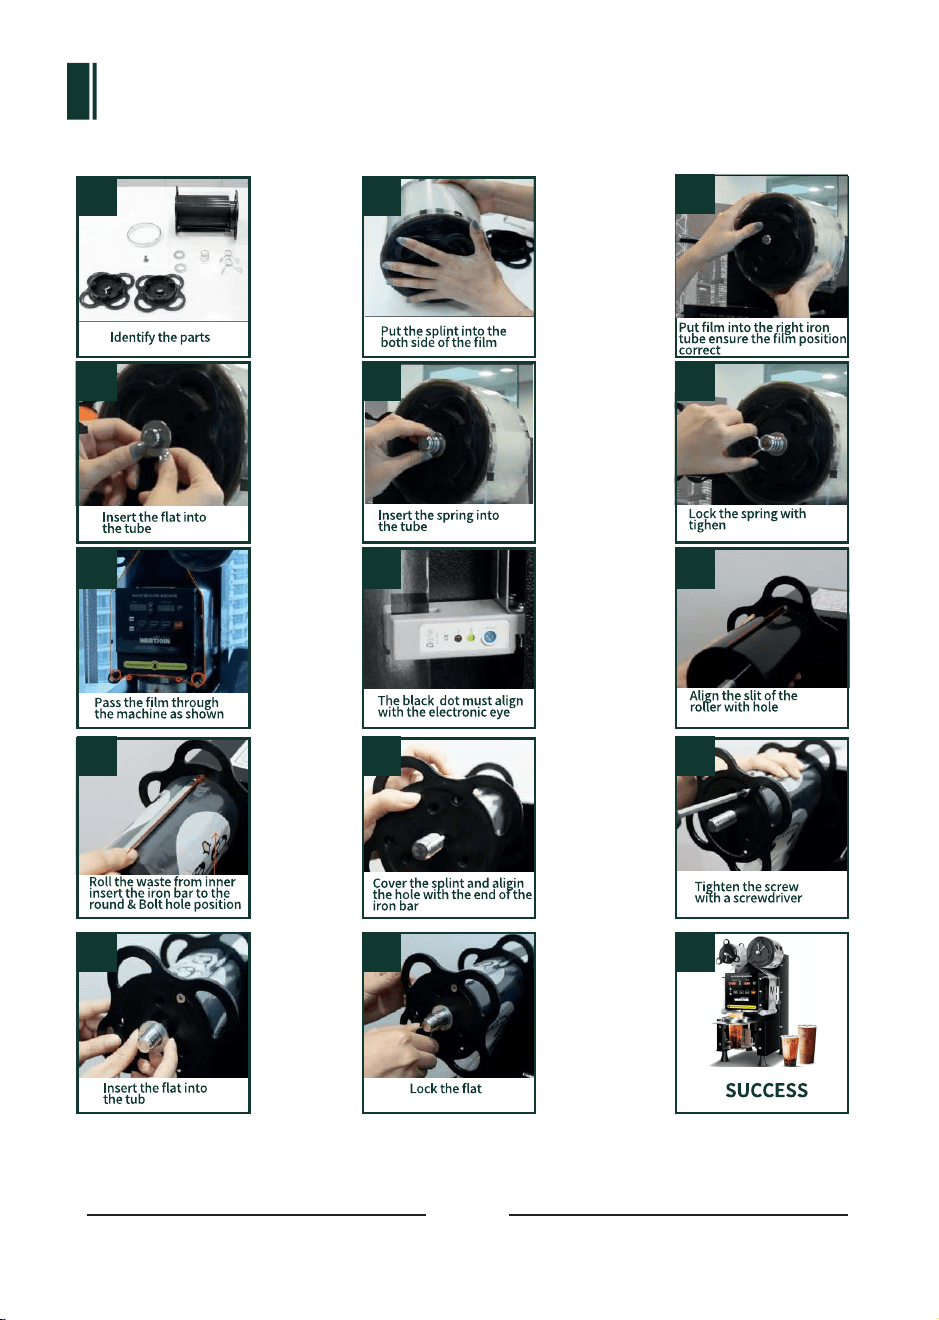
FOR INSTALL SEALING FILM
03
1 2
3
4 5 6
7
10
8 9
11 12
13 14 15

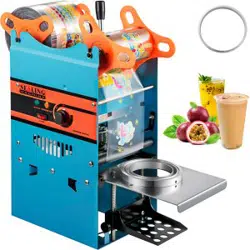
INSTALLATION TIPS
Please follow the direction shown in the picture to install the sealing film.
04
05
INSTALLATION TIPS
Please follow the direction shown in the picture to install the sealing film.
04
05
BUTTON FEATURES
06
FUNCTION KEY
POWER
TEMPERATURE
SOUND
Auto
ROLLING/CANCEL
PAUSE
CLEAR/SET
USAGE
Flashing Power indicatior lights after plugin. Press "POWER" button
to start the machine.
Press to close the Countings from the LED display.
Press for 3 secs to clear the counter data.
(If P002 set to OFF counter will be refuse to clear the data.)
Press the button to stop all functions and maintains to current state.
Press "ROLLING/CANCEL" to cancel the function.
Long Press for 3 seconds, Machine start the blade cleaning program,
the blade will exits after auto working for 5 times and removing
stickies from blades.
Long Press to use the Rolling Function, the sealing film rolling function
will start and helps for adjusting the sealing flim.
Only Use the Cancel Button to leading the cup holder to return to the
machine when in the Pause Mode.
Automatic Sealing Mode: Default mode: Indicator lights on. Place the cup
in and start working. Works for batch operations.
Manual Sealing Mode: Press for 3 secs, Indicator lights off. Press "START" to
start working. Works for short-term operations.
Leaking Mode: Press for a sec, the green indicator lights flash, machine
reseal unfinished films instead of using a new film. Press "START" to return
to the previous working mode. Works for second sealing for solving
the unseal or non proper sealing cups issues.
Short /Long Press can be selected by the 3 Working Mode
Indicator lights & the beep sound both on, machine will send out a beep
after work completed. Press the button, indicator lights off means the
beeps sound off.
Use to adjust the temperature depends to specific area temperature
& cup texture.
DIRECTION POSITION
FOR INSTALL SEALING FILM
03
1 2
3
4 5 6
7
10
8 9
11 12
13 14 15
INSTALLATION
02
NameNumber UsePicture Note
1
2
3
4
5
6
7
8
2x Left Wheel Installing
parts
2x Right Wheel
Installing parts
Roller is
installed on the left
side of the front of
the machine
Install for the rotating
shaft left front wheel
Accessories for
sealing film
installation:
2x spacers
2x clips
2 x spring
1x 90 aluminum ring
3x L -Wrench
1x Motor Sensor
Needle
Ix Silicone Plug
To hold sealing film
left and right
for clamping and
buffering of the left
wheel, no clamping
on the right
Fit with 3-1/2 inch or
3-2/3 inches sealing
cups
Please save the
important parts
For unscrewing the
aluminum plate screws
Use for debugging the
electronic eye to
avoid E51/E52 error
Block the heating plate
hole to avoid dirty
liquid flow on
the desktop.
If you have any further needs or question, please look into the Question & Answer
booklet. To solve all the information.
REMIND
07
PARAMETER
ERROR CODE TIPS
RESET SETTINGS SETUP PARAMETER
1. Press "Sound" for 3 sec to enter
the parameter adjustment mode.
2. Press "Sound" to exchange the
selection mode: P001-P006
3. Press " " and " " to adjust the
value.Press to ROLLING/CANCEL
to save the setting and return to
the working interface.
P001: Use for temperature adjustment, Range :0-230,
Default Value is 180
P002 Contain 2 mode: ON/OFF. ON: able to use for clear data;
OFF/CLEAR cannot be cleared (CLEAR key lock),
the default is OFF
P003: Sealing cups' time adjustment, Range: 0-50,
Default Paramater:15, Each Valve: represent 0.1sec
P004: Cup pushing in time range:0-30, default set:15
P005: Cup launching time range:0-60, default set:0
P006: Re-seal mode, repeat sealing twice . Default OFF,
choose when the weather is cold
E1-E4,E11-E14
E10
E51/E52
Machine wires error, Contact the After-Sales team
The temperature of the Heating Plate is over 350°C,
Turn off the machine & contact the after-sales team.
Motor Sensor Error. Use the Motor Sensor Needle to Adjust it.
ERROR CODE
SOLUTION
For your safety, please read the instructions before using the machine.
WARNING
1.DO NOTtouch the hot surface to avoid burns.
2.DO NOTimmerse product and cable into water to avoid electric shock.
3.MUSTbeware all age under 18 or area which near children when using the product
4.ONLY use the correct Voltage Frequency for using the machine:110-120V 60HZ
5.NEVER place your hand in the working machine to avoid harm.
6.NEVERuse not from the manufactured electrical appliance to avoid injury.
7.SWITCH off the power after using the machine.
8.Exchange the sealing film after the machine cool down or switch off.
9.DO NOTclean the machine with any Harsh chemicals or corrosive washing liquid.
10.NEVER use water to spray or immerse the machine or electronic parts in water to
avoid electric.
11.CONTACT the after-sales team for further support if happened with any error or
abnormality while using.
12.NEVERuse the product for other purposes.
13KEEPandSAVEthe instruction properly
01
COPYRIGHT
STATEMENT
The owner of the manual is belong to the owner of WANTJOIN.
Without permission and cannot be reproduced or disseminated
in any form.
08
MAINTENANCE

CUP SEALING MACHINE
95B