
Loading ...
Loading ...
Cuisinart
®
SmartPower
®
Blade
with BladeLock™
System
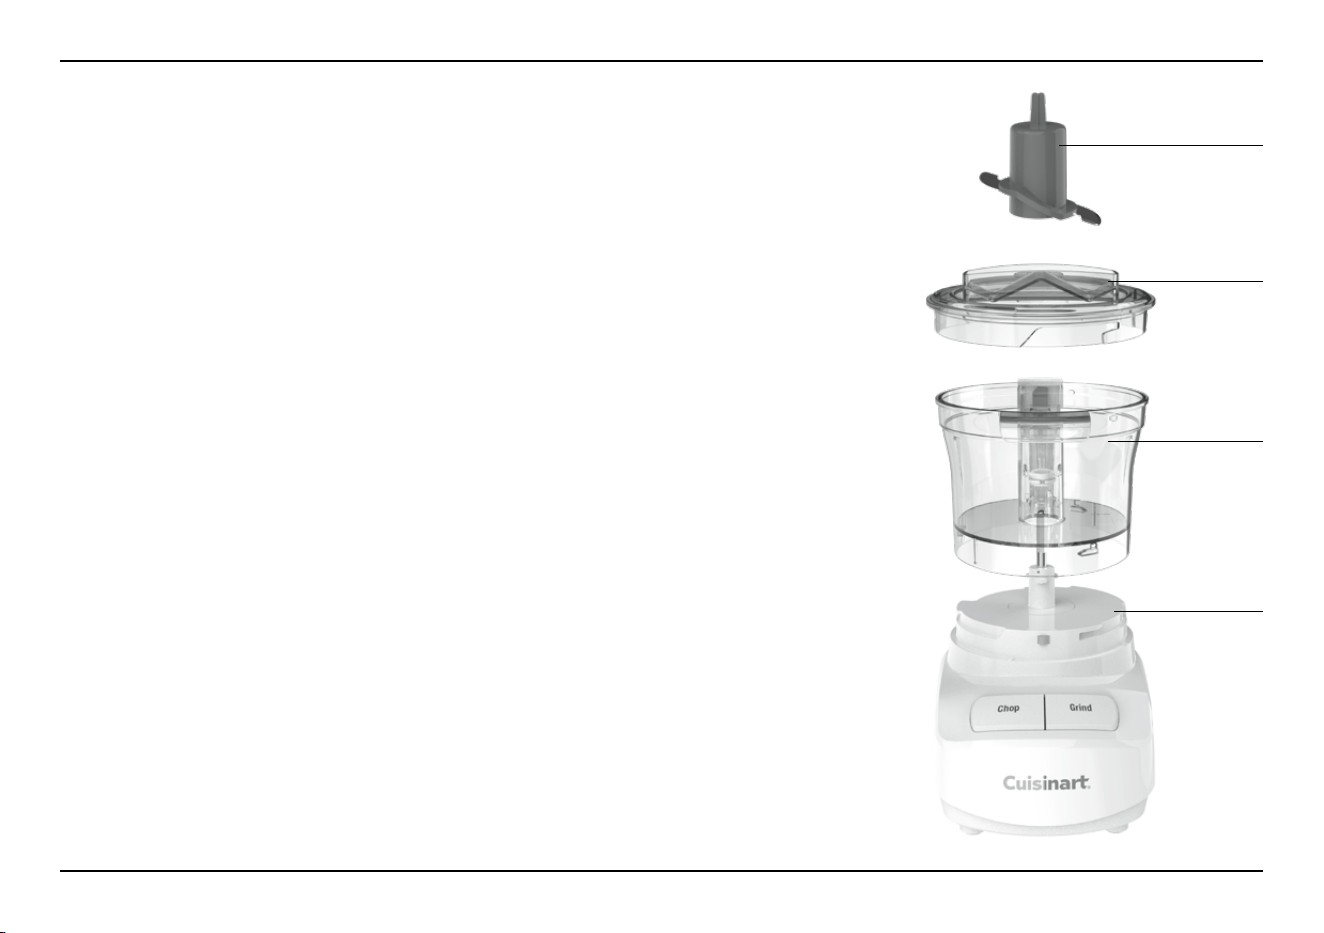
Motor Base
Cover
3-Cup
Work Bowl
with Handle
3
SAVE THESE
INSTRUCTIONS
FOR HOUSEHOLD
USE ONLY
NOTICE
This appliance has a polarized plug (one blade is
wider than the other). As a safety feature, this plug
will fit only one way in a polarized outlet. If the plug
does not fit fully in the outlet, reverse the plug.
If it still does not fit, contact a qualified electrician.
Do not attempt to defeat this safety feature.
INTRODUCTION
Congratulations on your new Cuisinart
®
3-Cup
Mini Chopper! It handles a variety of food
preparation tasks, such as chopping, grinding,
puréeing, emulsifying, and blending. The patented
SmartPower
®
auto-reversing blade features an
incredibly sharp edge for delicate chopping and
puréeing soft foods. The reverse edge is blunt to
grind through spices and harder foods. And the
exclusive BladeLock™ System enables the blade
to lock into the bowl, so you can pour ingredients
out of the bowl without first having to remove
the blade.
The powerful high-speed motor works hard and
fast to accomplish small jobs with ease. Chop
herbs, onions, garlic; grind spices, hard cheese;
purée baby foods; and blend homemade mayo and
flavored butter all in this single compact
machine. You have virtually unlimited options
with the Cuisinart
®
3-Cup Mini Chopper. Enjoy!
ASSEMBLY INSTRUCTIONS
1. With the motor base on the tabletop, place
the work bowl firmly on the motor base.
2. Turn the work bowl clockwise to lock onto base.
3. CAREFULLY pick up the blade by its hub and place
on the center stem until it drops to the bottom of
the stem. Firmly push to ensure that the blade is
locked into position. IMPORTANT: HANDLE
WITH CARE. The blade is razor sharp.
4. Add food to be processed.
5. Place the cover on the work bowl with the small
tab to the left of the white column in the back of
the work bowl.
6. Turn cover clockwise (toward the back column) to
securely lock.
7. Plug unit into wall socket.
8. You are ready to chop/grind.
Loading ...
Loading ...
Loading ...