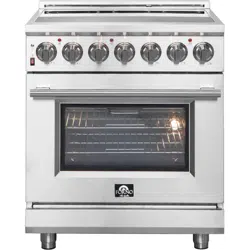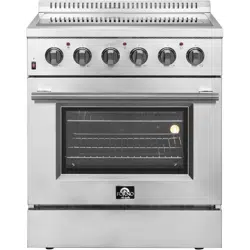
FFSEL6020-30
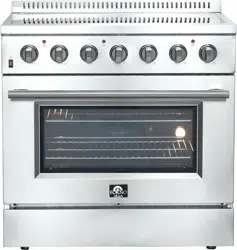
FFSEL6020-36
FREESTANDING
ELECTRIC RANGES

2
IMPORTANT PRECAUTIONS AND RECOMMENDATIONS
3
6
8
12
INSTALLATION INSTRUCTIONS
16
DOOR HANDLE INSTALLATIONS
16
17
17
PRODUCT DIMENSIONS AND CABINETS
19
15
22
23
ELECTRIC OVEN FUNCTIONS
23
23
USING THE SURFACE UNITS
23
24
25
25
25
26
26
26
26
27
13
14
INSTALLATION OF ELECTRIC RANGE
15
23
Wire Diagram
Features of Your Range
INSTALLATION INSTRUCTIONS
CARE & MAINTENANCE
GENERAL RECOMMENDATION
ENAMELED PARTS STAINLESS
STEEL ELEMENTS INSIDE OF
OVEN
CUSTOMER CARE
CONTENTS
IMPORTANT SAFETY INFORMATION
CONSUMER INFORMATION
COOKTOP HEATING CONTROL KNOB
24
25
OVEN RACKS INSTALLATION
ELECTRICAL
EXHAUST HOOD INSTALLATION
COOKTOP
CONV. HIGH BAKE
23
CONV BAKE
CONV BROIL
LOW BAKE
BROIL
COOKWARE TIPS
OVEN LIGHT
TROUBLESHOOTING GUIDE
LED LIGHT SWITCH
25
4
Warranty

3
Thank you for purchasing a FORNO product. Please read the entire instruction manual before operating
your new appliance for the first time. Whether you are an occasional user or an expert , it will be beneficial
to familiarize yourself with the safety practices, features, operation and care recommendations of your
appliance.
Both the model and serial number are listed inside the product. For warranty purposes, you will also need
the serial number, the date of purchase & a copy of your proof of purchase.
Record this information below for future reference.
Use these number in any correspondance or
service calls concerning your product.
If you received a damaged product,
immediately contact FORNO.
Save time and money. Before you call for
service,
check the Troubleshooting Guide. It
lists
the
causes
of
minor
operating
problems
that you can
correct
yourself.
CUSTOMER CARE
SERVICE IN CANADA & UNITED STATES
Keep the instruction manual handy to answer your questions. You can also find all the information
you need online at www.forno.ca.
If you don't understand something or need more assistance, please visit our website or email:
If there is a problem, please contact FORNO customer service. Please note that troubleshooting
with a customer service representative will be needed before being able to send a service
provider. All warranty work needs to be authorized by FORNO customer service. All our
authorized service providers are carefully selected and rigorously trained by us.

What this limited warranty covers:
The Warranty coverage provided by Forno Appliances in this statement applies exclusively to the original Forno
appliance (“Product”) sold to the consumer (“Purchaser”) by an authorized Forno dealer/distributor/retailer,
purchased and installed in the United States or Canada, and which has always remained within the original
country of purchase (the United States or Canada). Warranty coverage is activated on the date of the Product's
original retail purchase and has a duration of two (2) years.
Warranty coverage is non-transferable. In the event of replacement of parts or of the entire product, the
replacement Product (or parts) shall assume the remaining original Warranty activated with the original retail
purchase document. This Warranty shall not be extended with respect to such replacement. Forno Appliances
will repair or replace any component/part which fails or proves defective due to materials and/or workmanship
within 2 years of the date of the original retail purchase and under conditions of ordinary residential,
non-commercial use. Repair or replacement will be free of charge, including labor at standard rates and shipping
expenses. Purchaser is responsible for making the Product reasonably accessible for service. Repair service
must be performed by a Forno Authorized Service company during normal working hours.
IMPORTANT
Retain proof of original purchase to establish warranty period. Forno’s liability on any claim of any kind, with
respect to the goods and/or services provided, shall in no event exceed the value of the goods or service or part
there of which has given rise to the claim.
30-Day Cosmetic Warranty
The Purchaser must inspect the product at the time of delivery. Forno warrants that the Product is free from
manufacturing defects in materials and workmanship for a period of thirty (30) days from date of the original retail
purchase of the Product.
This coverage includes:
- Paint blemishes
- Chips
- Macroscopic finish defects
Cosmetic warranty does NOT cover:
> issues resulting from incorrect transport, handling and/or installation (e.g.: dents, broken, warped or deformed
structures or components, cracked or otherwise damaged glass components);
> slight color variations on painted/enameled components;
> differences caused by natural or artificial lighting, location or other analogous factors;
> stains/corrosion/discoloration caused by external substances and/or environmental factors;
> labor costs, display, floor, B-stock, out- of-box,“as is” appliances and demo units.
How to receive service
To receive warranty services, the Purchaser must contact the Forno Support department in order to determine
the problem and the required service procedures. Troubleshooting with a customer service representative will be
necessary before moving forward with the service. Model number, serial number and date of original retail
purchase will be requested.
Warranty
4

THERE ARE NO EXPRESS
WARRANTIES OTHER THAN THOSE LISTED AND DESCRIBED ABOVE, AND NO
WARRANTIES, EITHER EXPRESS OR IMPLIED, INCLUDING, BUT NOT LIMITED TO, ANY IMPLIED
WARRANTIES OF MERCHANTABILITY OR FITNESS FOR A PARTICULAR PURPOSE THAT SHALL APPLY
AFTER THE EXPRESS WARRANTY PERIODS STATED ABOVE, AND NO OTHER EXPRESS WARRANTY OR
GUARANTEE GIVEN BY ANY PERSON, FIRM OR CORPORATION WITH RESPECT TO THIS PRODUCT
SHALL BE BINDING ON FORNO. FORNO SHALL NOT BE LIABLE FOR LOSS OF REVENUE OR PROFITS,
FAILURE TO REALIZE SAVINGS OR OTHER BENEFITS, TIME AWAY FROM WORK, MEALS, LOSS OF FOOD
OR BEVERAGES, TRAVELING OR HOTEL EXPENSES, EXPENSES TO RENT OR PURCHASE APPLIANCES,
REMODELING/CONSTRUCTION EXPENSES IN EXCESS OF DIRECT DAMAGES WHICH ARE UNDENIABLY
CAUSED EXCLUSIVELY BY FORNO OR ANY OTHER SPECIAL, INCIDENTAL OR CONSEQUENTIAL
DAMAGES CAUSED BY THE USE, MISUSE OR INABILITY TO USE THIS PRODUCT, REGARDLESS OF THE
LEGAL THEORY ON WHICH THE CLAIM IS BASED, AND EVEN IF FORNO HAS BEEN ADVISED OF THE
POSSIBILITY OF SUCH DAMAGES. NOR SHALL RECOVERY OF ANY KIND AGAINST FORNO BE GREATER
IN AMOUNT THAN THE PURCHASE PRICE OF THE PRODUCT SOLD BY FORNO AND CAUSING THE
ALLEGED DAMAGE.WITHOUT PREJUDICE TO THE FOREGOING, PURCHASER ASSUMES ALL RISK AND
LIABILITY FOR LOSS, DAMAGE OR INJURY TO PURCHASER AND PURCHASER’S PROPERTY AND TO
OTHERS AND THEIR
PROPERTY ARISING FROM THE USE, MISUSE, OR INABILITY TO USE THIS PRODUCT
SOLD BY FORNO THAT IS NOT A
DIRECT RESULT OF NEGLIGENCE ON THE PART OF FORNO THIS
LIMITED WARRANTY SHALL NOT EXTEND TO ANYONE OTHER THAN THE ORIGINAL PURCHASER OF
THIS PRODUCT, IS NON-TRANSFERABLE, AND STATES YOUR EXCLUSIVE REMEDY.
> Use of the Product in any non-residential,
commercial application.
> Use of the Product for anything other than its
intended purpose.
> Repair services provided by anyone other than a
Forno Authorized Service
agency.
> Damages or repair services to correct services
provided by unauthorized parties or the use of
unauthorized parts.
> Installation not in accordance with
local/state/city/county fire codes, electrical codes, gas
codes, plumbing codes, building codes, laws or
regulations.
> Defects or damage due to improper storage of the
Product.
> Defects,damage or missing parts on products sold
out of the original factory packaging or from displays.
> Service calls or repairs
to correct an incorrect
installation of the Product and/or related accessories.
> Replacement of parts/service calls to connect,
convert or otherwise repair the electrical wiring and/or
gas line in order to properly use the product.
> Replacement of parts/service calls to provide
instructions and information
on the use of the Product.
> Replacement of parts/service calls to correct issues
arising from the product being used in a manner other
than what is normal and customary for residential use.
> Replacement of parts/service calls due to wear and
tear of components such as seals, knobs, pan
supports, shelving, cutlery baskets, buttons, touch
displays, scratched or broken ceramic-glass tops.
> Replacement of parts/service calls for lack
of/improper maintenance, including but not limited to:
build up of residues, stains,
scratches, discoloration,
corrosion.
> Defects and damages arising from accidents,
alteration, misuse, abuse or improper installation.
> Defects and damages arising from Product
transport, logistics and handling.
Inspection of the
product must be made at time of delivery. Following
receipt and inspection, the selling dealer/delivery
company must be notified of any issues arising from
handling, transport and logistics.
> Defects and damages arising from external forces
beyond the control of Forno Appliances, including but
not limited to wind, rain, sand, fires,
floods,
mudslides,
freezing temperatures, excessive moisture or
extended exposure to humidity, power surges,
lightning, structural failures surrounding the appliance
and other acts of God.
> Products whose serial number has been
altered/damaged/tampered with. In no case shall
Forno be held liable or responsible for damage to
surrounding property, including furniture, cabinetry,
flooring, panels, and other structures surrounding the
Product. Forno is neither liable nor responsible for the
Product if it is located in a remote area or an area
where certified trained technicians are not reasonably
available. Purchaser must bear any transportation and
delivery costs of the Product to the nearest Authorized
Service Center or the additional travel expenses of a
certified trained technician
Warranty Exclusions: What Is Not Covered
5

Your safety and the safety of others are very important.
We have provided many important safety messages in this manual and on your appliance.
Always read and obey all safety messages.
This is a safety alert symbol. It will alert you to potential personal or property safety hazards.
Obey all safety messages to avoid any property damage, personal injury or death.
WARNING indicates a potentially hazardous situation which, if not avoided, could result in
serious injury or death.
CAUTION indicates a moderate hazardous situation which, if not avoided, could result in
minor or moderate injury.
All safety messages will alert you what the potential hazard is, tell you how to reduce the
chance of injury, and let you know what can happen if the instructions are not followed.
6

ANTI-TIP DEVICE
Safely tilt the front of the range upward slightly
and move back against wall. Making sure the pin
slides under bracket.
5
WARNING
This product can expose you to chemicals including carbon monoxide, which is known to the
State of California to cause developmental harm.
For more information go to www.P65Warnings.ca.gov
WARNING
Never operate the top surface cooking section of the appliance unattended
Failure to follow this warning statement may result in fire, explosion or burn hazard that could
cause property damage, personal injury or death.
If a fire should occur, keep away from the appliance and immediately call your fire
department. DO NOT ATTEND TO EXTINGUISH AN OIL/GREASE FIRE WITH WATER
7
WARNING
Tip-over Hazard
A Child or adult can tip the range which can result in serious injuries or death.
Install the anti-tip device to the range and/or structure per installation instructions.
Engage the range to the Anti-tip device installed to the structure.
Re-engage the anti-tip device if the range is removed.
Failure to follow these instructions can result in death or serious injuries and/or
burns to children and adults.
To reduce the risk of tipping the range, the range must be secured by properly installed anti-tip device
packed with the range. See installation instructions shipped with the bracket for complete details before
attempting to install.
All ranges can tip and cause injuries.
Make sure the anti-tip bracket is installed.
Slide range forward.
Make sure the anti-tip bracket is securely attached
to the wall behind the range.
Anti-tip bracket
Range back panel
Read all safety instructions before using the product. Failure to follow these
instructions may result in fire, electrical shock, serious injury or death.
1. Use this range for its intended purpose as described in this instruction manual.
2. Have your range installed and properly grounded by a qualified installer in accordance with
the provided installation instructions.
3. Any adjustment and service should be performed only by a qualified Professional installation
or service technician. Do not attempt to repair or replace any part of your range unless it is
specifically recommended in this manual.
4. Your range into a 240-volt grounded outlet only. Do not removed the round grounding
prong from the plug. If in doubt about the grounding of the home electrical system, it is your
responsibility and obligation to have an ungrounded outlet in accordance with the National
Electrical Code. Do not use an extension code with this range.
5.
Before any maintenance, unplug the stove or disconnect the power supply by turning off
the circuit breaker.
6. Be sure all packing materials are removed from the range before operating to prevent
ignition of these materials.
7. Avoid scratching or impacting glass displays. Doing so may lead to glass breakage. Do not
cook on a product with broken glass. Shock, fire, or cuts may occur.
8. Do not leave children alone or unattended in an area where an appliance is in use. They
should never be allowed to climb, sit or stand on any part of the range.
9. Do not store items of interest to children in cabinets above an oven-children
who climb onto the oven to reach items could be seriously injured.
10. Never block the vents (air openings) of the range. They provide the air inlets and outlets
that are necessary for the range to operate properly with correct combustion. Air openings are
located at the rear of the cooktop, at the top and bottom of the oven door, and at the bottom of
the range.
11.
Only use dry pots - moist or damp pots on hot surfaces may cause steam burns. Don't put
towels or other heavy fabrics under the bottom of the pot.
8

Extremely Heavy.
Proper equipment and adequate manpower are needed when move the range to avoid
personal injury or damage to the unit or the floor.
Failure to follow this advice may result in damage or personal injury.
DO NOT carry or lift the cooking range by the oven door handle or the control panel!
12.
Do not touch the heating elements or the interior surface of the oven. These surfaces may
be hot enough to burn even though they are dark in color. During and after use, do not touch, or
let clothing or other flammable materials contact any interior area of the oven; allow sufficient
time for cooling first. Other surfaces of the appliance may become hot enough to cause burns.
Potentially hot surfaces include the heater, grates, oven vent opening, surfaces near the
opening, crevices around the oven door, metal trim parts above the door, any backguard, or
high shelf surface.
13. Do not heat unopened food containers. Pressure could build up and the container could
burst, causing any injury.
9
Cook food thoroughly to help protect against foodborne illness. Minimum safe food temperature
recommendations can be found at www.IsItDoneYet.gov and www.fsis.usda.gov. Use a food
thermometer to take food temperatures and check several locations.
Do not allow anyone to climb, stand or hang on the oven door, drawer or cooktop. They could
damage the range or tip it over causing severe injury or death.
Keep the ventilator hood and grease filter clean to maintain good venting and to avoid grease
fires. Turn the ventilator OFF in case of a fire or when intentionally "flaming" liquor or other
spirits on the cooktop. The blower if in operation, could spread the flames.
Do not store or use flammable materials in an oven or near the cooktop, including paper,
Do not use water on grease fires. Never pick up a flaming pan. Turn the controls off. Smother a
flaming pan on a surface unit by covering the pan completely with a well-fitting lid, cookie sheet
or flat tray. Use a multi-purpose dry chemical or foam-type fire extinguisher.
If there is a fire in the oven during baking, smother the fire by closing the oven door and
turning the oven off or by using a multi-purpose dry chemical or foam-type fire extinguisher.
If there is a fire in the oven during self-clean, turn the oven off and wait for the fire to go out.
Do not force the door open. Introduction of fresh air at self-clean temperatures may lead to a
burst of flame from the oven. Failure to follow this instruction may result in severe burns.
10
Do not store or use flammable materials in an oven or near the cooktop, including paper,
plastic, pot holders, linens, wall coverings, curtains, drapes and gasoline or other flammable
vapors and liquids.
Never wear loose-fitting or hanging garments while using the appliance. These garments may
ignite if they contact hot surfaces causing severe burns.
Do not let cooking grease or other flammable materials accumulate in or near the range.
Grease in the oven or on the cooktop may ignite.

NEVER cover any slots, holes, or passages in the oven bottom or cover an entire rack with
materials such as aluminum foil or oven liners. Doing so blocks air flow through the oven and may
cause carbon monoxide poisoning. Never place foil or oven liners on the oven bottom. They can trap
heat causing risk of smoke or fire.
Stand away from the range when opening the oven door. Escaping hot air or steam can cause
burns to hands, face and/or eyes.
Never place cooking utensils, pizza or baking stones, or any type of foil or liner on the oven floor.
These items can trap heat or melt, resulting in damage to the product and risk of shock, smoke or
fire.
Place oven racks in desired location while oven is cool. If the rack must be moved while the oven is
hot, be careful to avoid touching hot surfaces.
Do not leave items such as paper, cooking utensils, or food in the oven when not in use. Items stored
in an oven can ignite.
Do not leave items on the cooktop near the oven vent. Items may overheat resulting in a risk of fire
or burns.
Never broil with the door open. Open-door broiling is not advised due to overheating of control knobs.
Never leave the surface heater unattended at medium or high heat settings. Foods, especially oily
foods, may ignite resulting in fire that could spread to surrounding cabinets.
Never leave oil unattended while frying. If allowed to heat beyond its smoking point, oil may ignite
resulting in fire that may spread to surrounding cabinets. Use a deep fat thermometer whenever
possible to monitor oil temperature.
To avoid oil spillover and fire, use the minimum amount of oil when frying in a shallow pan and
avoid cooking frozen foods with excessive amounts of ice.
Use the proper size of the pot to avoid instability or easy tilting. Select a cooker that matches the
size of the heater. The heater temperature should be adjusted, and excessive heating may be
dangerous.
When using glass/ceramic cookware, make sure it is suitable for cooktop use; others may break
because of a sudden change in temperature.
To minimize the possibility of heater, ignition of flammable materials and spillage, cookware handles
should be turned toward the center of the range without extending over nearby heater.
Do not cover any part of the heater or decorative stove with aluminum foil. Doing so may cause
overheating of the furnace top surface and fire hazard.
11
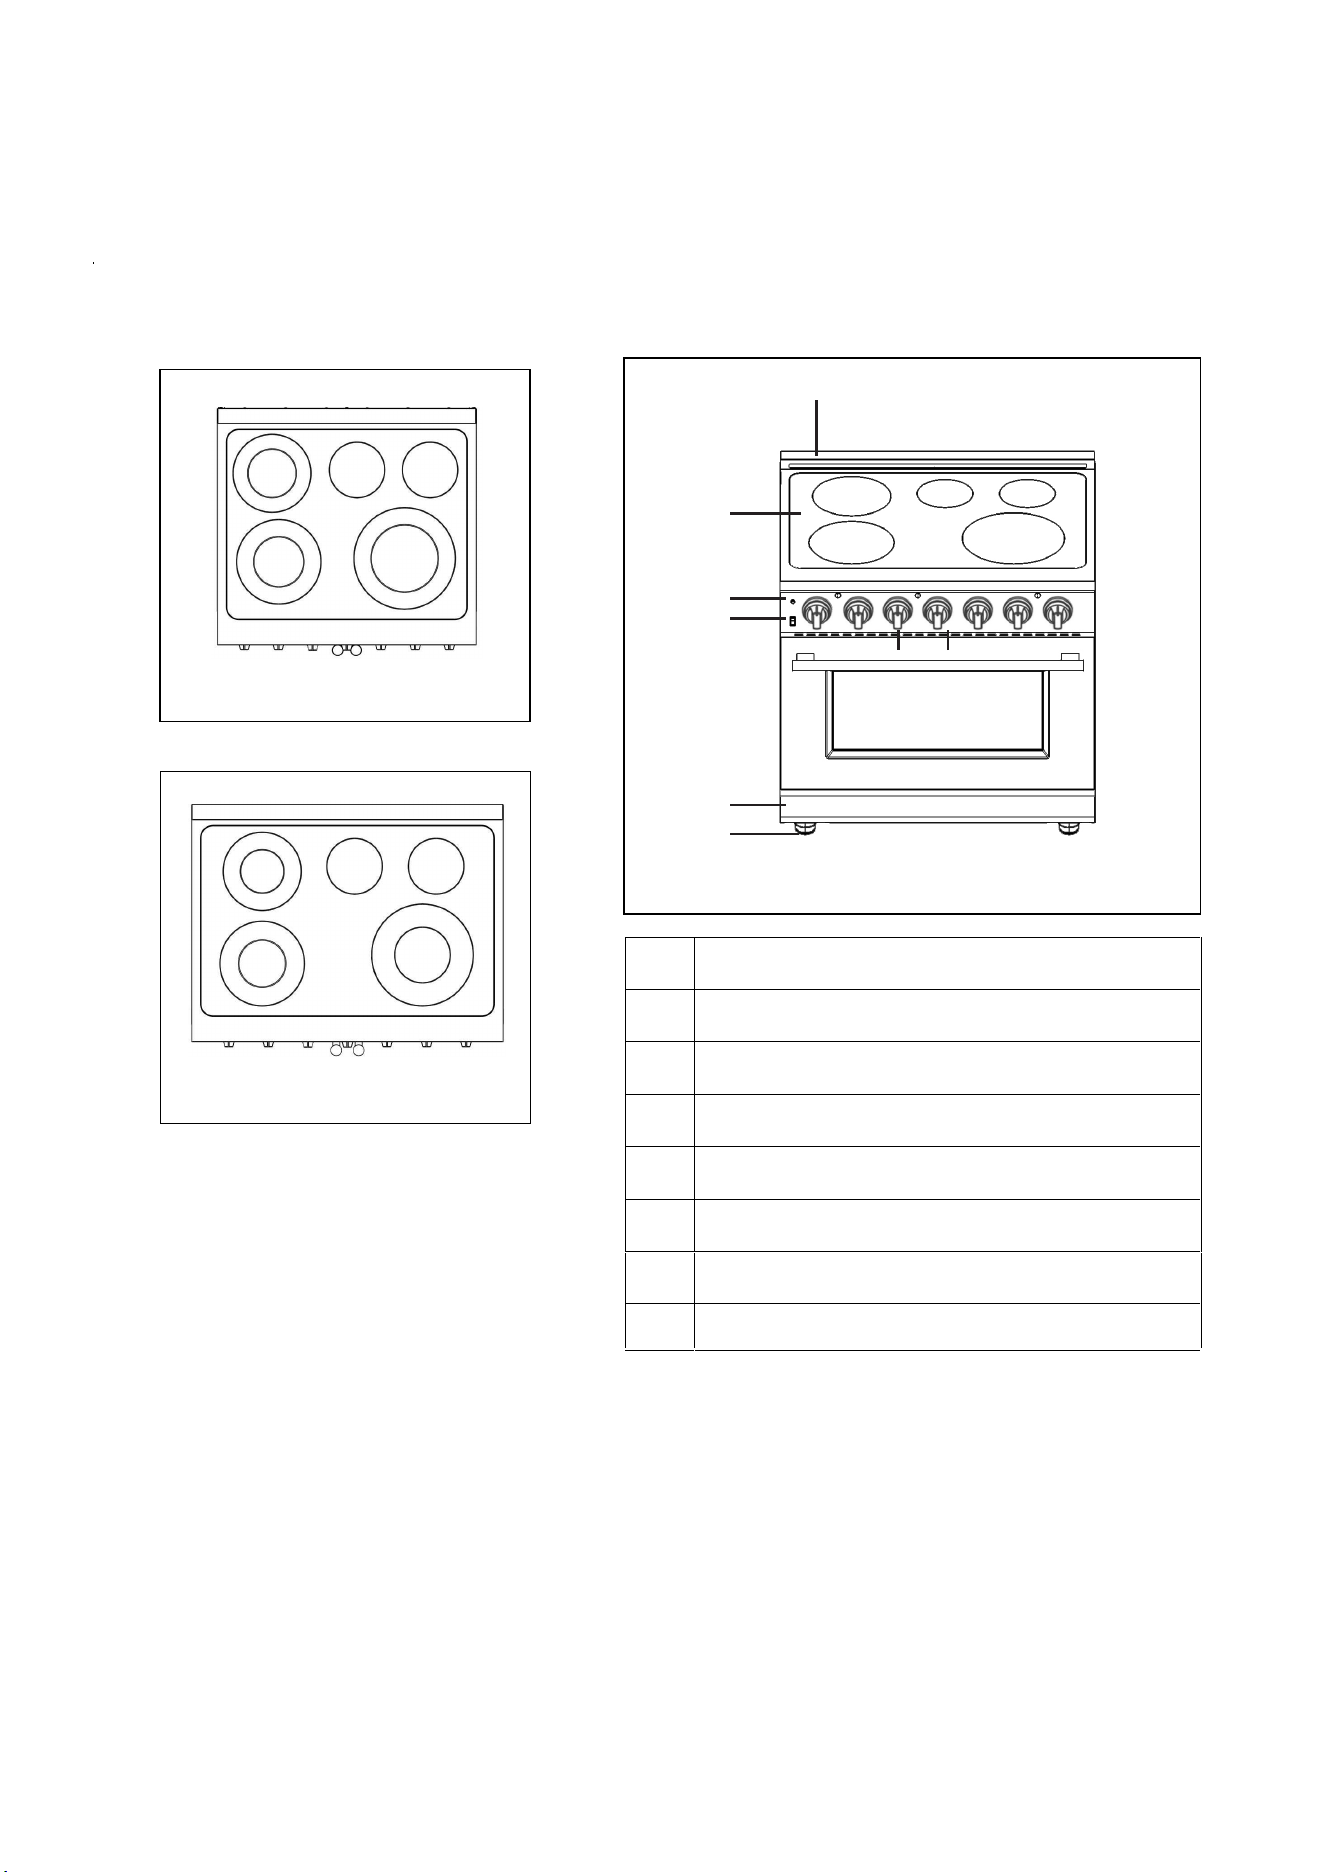
12
Features of Your Range
1 Oven Vents
2
Cooktop
3
4
5
LED Lights Switch
6
Broil/Oven Control Knob
7
Oven Lights Switch
Temperature Control Knob
Kick Panel
30" 5 burners
36" 5 burners
8
Not all features are on all models.Appearance may vary.
1
2
3
7
5
6
4
8
Leveling System(Oven legs)

13
WARNING
HAVE THIS RANGE INSTALLED BY A QUALIFIED INSTALLER.
Improper installation, adjustment, alteration or maintenance can cause injury or property damage.
Consult a qualified installer or service agency.
NOTICE
Before you use this range for the first time: The heating elements have a protective coating, which
must be burned off before use. To do this, open the oven door and set the temperature control knob to
550°F. Turn the function selector to the Bake element and the Broil element separately to approximately
15 minutes. It is important to ensure adequate ventilation during this period.
INSTALLATION INSTRUCTIONS
IMPORTANT – SAVE FOR THE LOCAL ELECTRICAL INSPECTOR’S USE.
BEFORE USING YOUR ELECTRIC RANGE
•
Remove the exterior and interior packing.
•
Check to be sure you have all of the following parts:
•
2 Oven Racks
•
2 Wall-against mat
(Packed in the Styrofoam packing above the range – DO NOT DISCARD)
•
1 Anti-tip Bracket
(Packed in the Styrofoam packing above the range – DO NOT DISCARD)
•
1 Manual
•
Clean the interior surface with lukewarm water using a soft cloth.
•
Have your range installed and properly grounded by a qualified installer in accordance with
the installation instructions.
•
Do not attempt to repair or replace any part of your range unless it is specifically
recommended in this manual.
•
Do not remove permanently affixed labels, warnings, or plates from the product. This may
void the warranty.
•
The installer should leave these instructions with the consumer who should retain for local
inspector’s use and for future reference.
•
Please observe all local and national codes and ordinances.
IMPORTANT:
This range is designed and manufactured solely for the cooking of domestic (household) food and
is not suitable for any non-domestic application and therefore should not be used in a commercial
environment.
The range warranty will be void if the range is used within a non-domestic environment i.e. a semi
commercial, commercial or communal environment.
•
2 Oven door handle

14
IMPORTANT PRECAUTIONS AND RECOMMENDATIONS
After having unpacked the range, check to ensure that it is not damaged, and the oven door closes
correctly. In case of doubt, do not use it and consult your supplier or a professionally qualified
technician.
Packing elements (i.e. plastic bags, polystyrene foam, packing straps, etc.) should not be left around
within easy reach of children, as these may cause serious injuries.
The range has been thoroughly tested for safe and efficient operation. However, as with any
appliance, there are specific installation and safety precautions that must be followed to ensure safe
and satisfactory operation.
•
Do not attempt to modify the technical characteristics of the appliance as this may become
dangerous to use.
•
Do not carry out cleaning or maintenance operations on the appliance without having
previously disconnected it from the electric power supply.
•
After use, ensure that the knobs are in position or the “standby” position.
•
Never touch the appliance with wet hands or feet.
•
Do not operate the appliance barefooted.
•
Do not allow children or other incapable people to use the appliance without supervision.
•
During and after use of the range, certain parts will become very hot. Do not touch cooktop.
•
Keep children away from the range when it is in use.
•
Fire Risk! Do not store flammable materials in the oven or in the bottom drawer.
•
Fire Risk! Do not attempt to dry clothing or any other type of textile in the oven or in the
bottom drawer.
•
Make sure that electrical cables connecting other appliances in the proximity of the range
cannot come into contact with the hob or become entrapped in the oven door.
•
Do not line the oven walls with aluminum foil. Do not place shelves, pans, backing trays, broil
tray or other cooking utensils on the base of the oven chamber.
•
The manufacturer declines all liability for injury to persons or damage to property caused by
incorrect or improper use of the range.
•
To avoid any possible hazard, the appliance must be installed by qualified personnel only.
Any repairs by unqualified persons may result in electric shock or short circuit. In order to
avoid possible injuries to your body or to the range, do not attempt ant repairs by yourself.
Such work should be carried out by qualified service personnel only.
•
Burn Hazard! The oven and cooking accessories may become very hot during operation.
Make sure children are kept out of reach and warn them accordingly. To avoid burns use
clothes and gloves when handling hot parts or utensils.
•
Stand away from the range when operating oven door. Hot air or steam which escapes can
cause burns to hands, face, and/or eyes.
•
Never clean the oven with any high-pressure steam cleaning devices, as it may provoke a
short circuit.
•
Do not leave anything on the top of oven vent. Never cover the oven vent opening with
aluminum foil or any other material.
•
This range is intended for household use. Never use the appliance for any other purpose.
•
If you should decide not to use the range any longer (or decide to substitute an older model),
before disposing of it, it is recommended that it be made inoperative in an appropriate manner
in accordance to health and environmental protection regulations, ensuring in particular that
all potentially hazardous parts be made harmless, especially in relation to children who could
play with old appliances. Remove the door before disposal to prevent entrapment.

Opening width
30" Model
36" Model
W
30" (762mm)
36" (914mm)
Exhaust Hood Installation
The bottom of the hood should be 30" min. to 36"
above the countertop. This would typically result in
the bottom of the hood being 66" to 72" above the
floor. These dimensions provide safe and efficient
operation of the hood.
Minimum to cabinets on either sides of the range
W
Opening width
Min.
To wall either side
Maximum depth for cabinets above countertop
Front edge of
the range side
panel forward
from cabinet
To countertops
below cooktop and
at the range back
15
INSTALLATION OF ELECTRIC RANGE

16
INSTALLATION OF ELECTRIC RANGE
•
The electric range must be installed by a qualified technician. Make sure you have everything
necessary for correct installation. It is the installer’s responsibility to comply with installation
clearances specified in the manual.
•
Cabinet opening dimensions that are shown above must be used. Given dimensions are
minimum clearances. The minimum spacings must be maintained between the appliance
cooking surface and the horizontal surface above the cooking top.
•
30 inches is the minimum clearance between the top of the cooking surface and the bottom of
an unprotected wood or metal cabinet
•
To eliminate the risk of burns or fire by reaching over heated surface units, cabinet storage
space located above the surface units should be avoided. If cabinet storage is to be provided,
the risk can be reduced by installing a range hood that projects horizontally a minimum of 5
inches beyond the bottom of the cabinets.
•
Place your electric range on a floor that is strong enough to support it when it is fully
assembled as above picture. To level your electric range, adjust the leveling legs at the
bottom of the unit.
•
Avoid locating the unit in moist areas. As this may result in the risk of electrical shock.
Installation Instructions
Door handle installations
The door handle is not pre-installed. Follow the illustrations
below to install the door handle quickly and easily.
1. Remove the black rubber cap on the inside of oven door. (Do not throw it away).
2. Insert the screwdriver to the hole to reach the embedded screw.
3. Position the handle holder correctly to accept the screw bolt on the outside of oven door, tighten the
screw.
4. Repeat step No. 1 to 3 for the other side.
5. Put the black rubber caps back to cover the two holes on the inside of oven door.

17
Oven Racks Installation
Electrical
Your range must be electrically grounded in accordance with local codes or, in the absence of local
codes, in accordance with the National Electrical Code (ANSI/NFPA 70, latest edition). In Canada,
electrical grounding must be in accordance with the current CSA C22.1 Canadian Electrical Code Part 1
and/or local codes.
The power supply must be the correct polarity. Reverse polarity will result in continuous sparking of
the electrodes, even after flame ignition. If there is any doubt as to whether the power supply has the
correct polarity or grounded, have it checked by a qualified electrician.
ELECTRICAL REQUIREMENTS
Electrical Supply
FFSEL6020-30 13015W Grounded, 240 VAC, 60Hz
FFSEL6020-36 13015W Grounded, 240 VAC, 60Hz
Service
Receptacle
4-prong grounding-type
Power Cord
3.9' (1.2m)
WARNING
Electrical grounding Instructions: This range is equipped with a four-prong (grounding) plug
for your protection against shock hazard and should be plugged directly into a properly grounded four-prong
receptacle.
Do not cut or remove the grounding pin from the plug.
2/C 8AWG+2/C 10AWG
Socket
Installation Hang the rack to the side rails and push in slowly
Disassemble
Lift the rack up and pull out slowly until free of the side rails.

18
CAUTION Label all wires prior to disconnection when servicing controls. Wiring errors can
cause improper and dangerous operation. Verify proper operation after servicing.
Grounding
The power cord is equipped with a four-prong (grounding) plug which mates with a standard four-prong
grounding wall receptacle to minimize the possibility of electrical shock hazard from the range.
All cord connected appliance shall include instructions relative to location of the wall receptacle and a
warning to the user to disconnect the electrical supply before serving the appliance.
Where a standard three-prong wall receptacle is encountered, it is the responsibility and obligation of
the customer to have it replaced with a properly
grounded four-prong wall receptacle. Do not cut or
remove the grounding prong from the power cord.
ELECTRICAL SHOCK HAZARD Disconnect electrical power at the circuit breaker box or
fuse box before installing the appliance. Provide appropriate ground for the appliance. Use copper
conductors only. Failure to follow these instructions could result in serious injury or death.
Wire Connection:
1. Connect the L1 receptacle terminal to the incoming RED electrical supply wire (L1-hot wire).
2. Connect the L2 receptacle terminal to the incoming BLACK electrical supply wire (L2-hot wire).
3. Connect the NEUTRAL receptacle terminal to the incoming NEUTRAL (WHITE) electrical
supply wire.
4. Connect the GROUND receptacle terminal to the incoming GROUND (GREEN) electrical
supply wire.
This appliance is equipped at the factory with an electric supply cord set 4 wires type with ring
terminals (L1, L2, N, Ground) suitable for range use UL/CSA listed type SRDT/DRT 2X8AWG
(L1, L2) + 2X10AWG (N,G) rated 300V, 40A with fused plug type NEMA 14-50P; cable length 1.2m;
in case the supply cord set must be replaced, it shall be replaced with an identical set having the
same technical specs and following carefully the instructions and diagrams from the last 3 pages of
this manual.
Electric Power Supply Requirements
Recommended
power outlet area
28" (715)
34" (866)
For reference only, please refer to the real object.

19
Product Dimensions and Cabinets
Model#: FFSEL6020-30
Model#: FFSEL6020-36
This range may be installed directly adjacent to existing countertop-height cabinets (36" or 91.5 cm from the
floor). To achieve the best look, the cooktop should be level with the cabinet countertop. This can be
accomplished by raising the unit using the adjustment spindles on the legs.

20
7" 4/5(197)
1" 2/5(35)
33"(
840)
29" 2/5(748)

21
Model#: FFSEL6020-30
Model#: FFSEL6020-36

Model:FFSEL6020-30
Model:FFSEL6020-36
100W
22
COOKTOP
1200W
2200W
3000W
3000W
100W
1200W
2200W
3000W
3000W

23
ELECTRIC OVEN FUNCTIONS
Various oven functions allow the user to operate flexibly to achieve different cooking result.
(Temperature control knob)
(Oven function knob)
Professional Range Oven Cooking quick-start Guide !
Conv. Bake Function provides a more uniform heat result than a conventional oven (seal) quickly.
Pre-heating is not necessary. This setting is ideal for batch baking or a complete meal. It is highly
recommended for any cooking style, or for pre-heating.
CONV BROIL
Two strong heat elements at the top and fan working under this function. Spreading heat evenly around the
oven, allowing faster and better cooking results. To be used for roasting larger joints of meat or poultry on
one level. Suitable for browning. Work with temperature setting at Maximum for broiling.
BROIL
Two strong heat elements at the top working under this function. It provides direct radiant heat onto the food.
To be used for broiling large quantities of food and cook faster than the normal baking function. Temperature
setting at Maximum.
CONV. HIGH BAKE
Two heat two elements and fan working together under this function - top and bottom, for faster heat-up
and shorter cooking times at lower temperatures. Better cooking results can be achieved with hot air
circulating around the oven cavity evenly. Ideal for baking or cooking on up to 3 levels. Temperature
setting from 250°F to MAX.
CONV BAKE
Bottom heat element and fan working together under this function. Heat is distributed around the oven to
allow getting extra bake at the bottom of pastries. Temperature setting from 250°F to MAX.
LOW BAKE
Heat elements at the bottom working under this function. Bake on one level. Suitable for cakes,
muffins, pizzas, and delicate egg dishes. Temperature setting from 250°F to MAX.

24
USING THE SURFACE UNITS
•
Use care when touching the cooktop. The glass surface of the cooktop will retain heat after the controls have
been turned off.
•
Do not use the cooktop if broken. If the glass should break, cleaners and or spills may penetrate the broken
cooktop and present a risk of electric shock. Contact a qualified technician
immediately.
•
Avoid scratching the glass. The cooktop can be easily scratched by using items similar to knives, sharp object,
rings, jewelry.
•
Avoid storing items that can melt or possibly catch fire on the glass cooktop, even if not in use. In the even the
cooktop is accidentally turned on and or heat from the oven vent may cause items to melt or ignite.
•
NEVER COOK DIRECTLY ON THE GLASS, ALWAYS USE APPROPRIATE COOKWARE.
COOKTOP HEATING CONTROL KNOB
The range comes with five cooktop heating . To operate the cooktop heating simply push in and turn the
knob to the desired position. These controls go from low to high power output, having a number of positions
To switch off the cooktop heating , turn the cooktop heating control knob to the setting position.
Your series is equipped with four or five surface units of different sizes. There are 6
inches, 9 inches, 10 inches and 12 inches. The surface control device is easy to
operate. Simply push the knob in and turn it to the desired position.
-
6” : 100 W
-
9” : 1200 W
- 10” : 2200 W
- 12” : 3000 W
When the element is e
nergized, the indicator light will be lit
regardless of the setting when one or more of the elements are turned on. The control
has a variable of power output from MIN to MAX with a number of positions. The
range of heat is increased by turning the knob to MAX, decreased by turning the knob
to MIN.
IMPORTANT: To switch on, always lightly press the control knob inwards
then turn.
TO AVOID OVERCOOKING, REMOVE POTS / PANS FROM THE COOKTOP WHEN THE FOOD IS
COOKED. AVOID PLACING ANY OBJECTS ON THE COOKTOP UNTIL IT HAS COOLED DOWN
COMPLETELY.
WARNING
Make sure that the handles of cookware do not stick out over the edge of the range, to
avoid them being knocked over by accident. This also makes it more difficult for children to
reach the cooking pots/pans.

25
CARE & MAINTENANCE
GENERAL RECOMMENDATION
Important: Before any operation of cleaning and maintenance disconnect the appliance from
the electrical supply.
It is advisable to clean when the appliance is cold and especially for cleaning the enameled parts.、
Avoid leaving alkaline or acidic substances (lemon juice, vinegar, etc.) on the surfaces.
Avoid using cleaning products with a chlorine or acidic base.
T
he
ov
en
m
ust always be cleaned after every use, using suitable products and keeping in mind that
its operation for 30 minutes on the highest temperature eliminates most grime reducing it to ashes.
Oven Light
The oven light is controlled by a push switch on the control panel.
The light can be used while cooking or cleaning the oven.
Check that power is disconnected from the electrical box before replacing the
light bulb. Allow the oven to cool completely, then unscrew the light cover and remove the light
bulb by unscrewing it from the socket. Replace with a 40-watt halogen bulb.
COOKWARE TIPS
The physical characteristics of pots and pans
i
nfluence the performance of
an
y cooking s
ystems.
T
her
ef
ore, emphasis must
be placed
on the i
mportance of
us
i
ng
proper cookware.
•
Use cooking vessels with flat bottoms and tight-fitting lids to conserve energy and shorten cooking
times.
•
Only certain types of glass, glass/ceramic, ceramic, earthenware or other glazed cookware are
suitable for use on glass cooktops. Manufacturers suggest using low to medium heat selections
when using glass cookware.
•
Pan size should match the element size. A slightly larger pan covers the entire element and
prevents spillovers from contacting the heat surface and burning in. Using a smaller pan than the
element is a waste of energy.
•
To avoid spattering and to maximize efficiency, pan bottoms should be clean and dry before
coming in contact with the cooktop.
LED Light Switch
Use the LED light switch to turn on the LED lights when the room becomes dark.
Electrical Shock Hazard
Plug into a grounded 4-prong outlet.
Do not remove ground prong.
Do not use an adapter.
Failure to follow these instructions can
result in death, re, or electrical shock.
WARNING

26
P
ROBLEMS W
ITH YOUR ELECTRIC RANGE?
You c
an s
olve many common appliance problems easily, saving you the cost of a possible service
call. Try the suggestions below to see if you can solve the problem before calling the servicer.
TROUBLESHOOTING GUIDE
PROBLEM POSSIBLE CAUSE
Surface units will not maintain a rolling boil or
frying rate is not fast enough
•
You must use pans that are absolutely flat.
•
Pan bottoms should closely match the
diameter of the surface unit selected.
Foods cook slowly
•
Improper cookware being used.
Surface units do not operate
•
You have blown a household fuse or tripped
a circuit breaker.
•
The surface units are not plugged in all the
way.
•
You have not set the control knobs correctly.
Control knobs will not turn
•
If it is a surface unit control knob, you are not
pushing in before turning.
•
If it is oven control knob, you are trying to
turn the knob to wrong direction.
Oven light does not work
•
Light bulb is loose or defective.
•
Switch operating oven light is broken.
Oven does not work
•
You have blown a household fuse or tripped
a circuit breaker.
•
You have not set the control knobs correctly.
Food does not broil properly
•
The oven control knob is not set at Broil.
•
Improper rack position being used.
•
Cookware is not suited for broiling.
•
Oven thermostat is defective.
Food does not bake properly
•
The oven control knob is not set properly.
•
Rack position is incorrect.
•
Incorrect cookware or cookware of improper
size is being used.
•
Oven thermostat is defective.
ENAMELED PARTS
All the enameled parts must be cleaned with a sponge and soapy water only or other non-abrasive
products.
Dry preferably with a chamois leather.
If acid substances such as lemon juice, tomato conserve, vinegar etc. are left on the enamel for a
long time they will etch it, making it opaque.
STAINLESS STEEL ELEMENTS
Stainless steel can be wiped with a wet cloth, For difficult dirt, use a specific non-abrasive product
available commercially or a little hot vinegar.
Note: Due to high temperature, frequent use may cause discoloration around the heater.
INSIDE OF OVEN
This must be cleaned regularly. With the oven warm, wipe the inside walls with a cloth soaked in very
hot soapy water or another suitable product.

WIRING DIAGRAM
27

2022.12