Loading ...
Loading ...
Loading ...
Installation instructions en
43
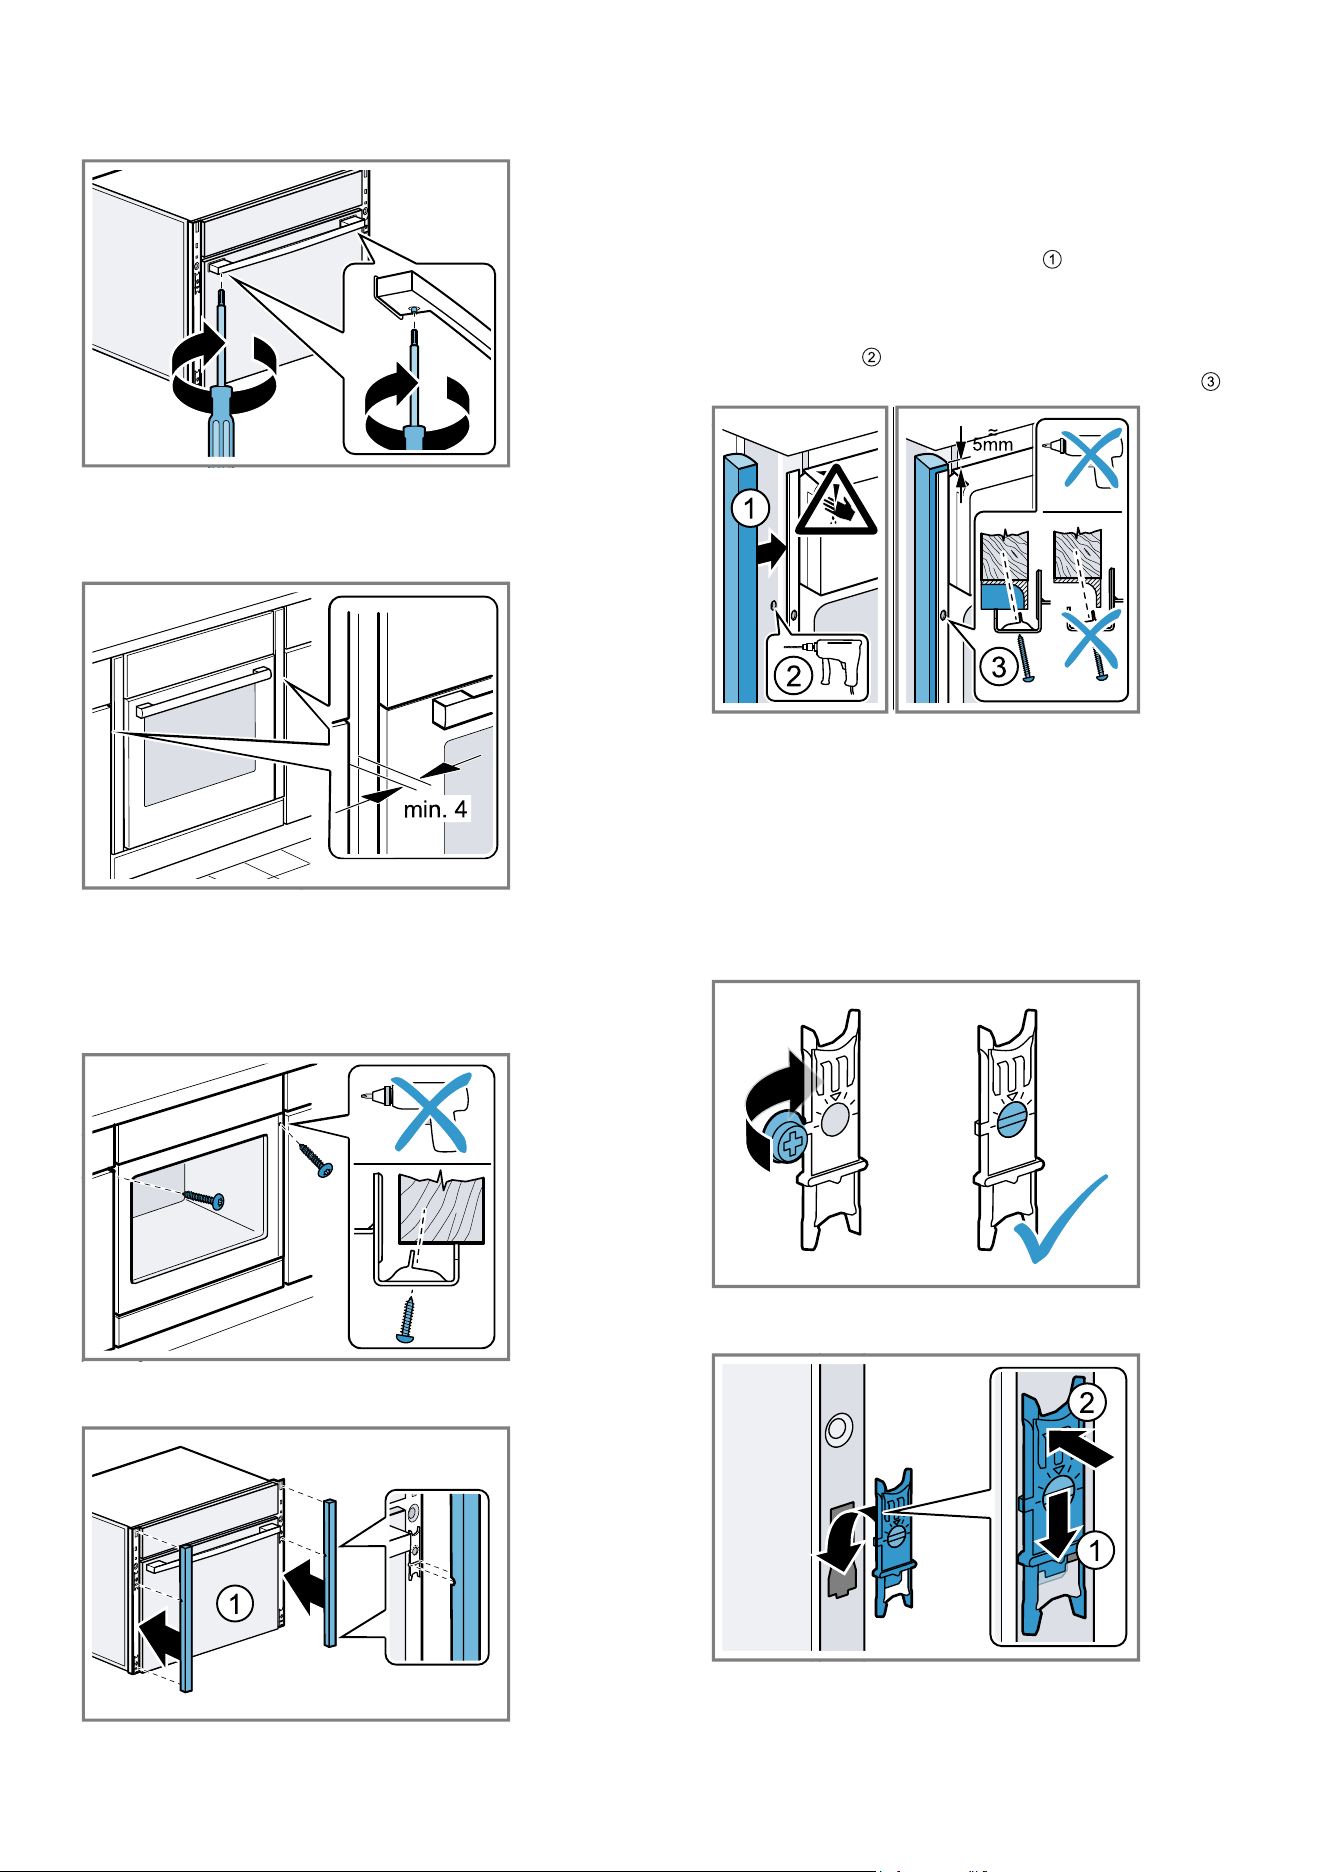
4.
Tighten the screws until the door handle is secured.
5.
Push the appliance in fully.
Do not kink or trap the connection cable, or route it
over sharp edges.
6.
Centre the appliance.
There must be an air gap of at least 4mm between
the appliance and adjacent unit fronts.
7.
Attach the four fastening elements. →Page43
Attach the red fastening elements at the top.
Attach the green fastening elements at the bottom.
8.
Screw the appliance into place.
9.
Insert the left- and right-hand panels until a clicking
sound is heard.
a The panels are engaged.
10.
Check whether the left- and right-hand panels are
vertically aligned.
11.
If necessary, align the panels. →Page44
12.
For handleless kitchens with vertical bar handle
strips:
‒ Attach a suitable filling piece
in order to cover
any sharp edges and to guarantee a safe install-
ation.
‒ Pre-drill aluminium profiles to establish a screw
connection .
‒ Secure the appliance using a suitable screw .
Note:The gap between the worktop and the appliance
must not be sealed by additional strips.
Thermal insulation strips must not be fitted to the side
panels of the surround unit.
27.10 Attaching the fastening elements
In order to attach the panels, the four fastening ele-
ments must be fitted beforehand.
1.
Fold together the fastening element.
2.
Hook in the fastening element at the bottom and
press down at the top until it is in place.
Attach the red fastening elements at the top.
Attach the green fastening elements at the bottom.
Loading ...
Loading ...
Loading ...