Loading ...

2
Installation
Instalación / Installation / Installation / Installazione
Eaton
1000 Eaton Boulevard
Cleveland, OH 44122
United States
Eaton.com
© 2023 Eaton
All Rights Reserved
Publication No. 23-07-735 / 93-3592_RevB
August 2023
Eaton has a policy of continuous improvement.
Specifications are subject to change without
notice. Photos and illustrations may differ
slightly from actual products.
Eaton is a registered trademark.
All trademarks are property
of their respective owners.
11 22
1
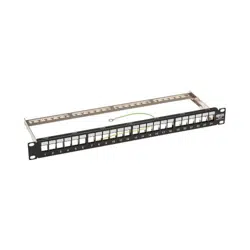
Attach the rear cable manager to the patch panel a and secure the patch panel to the rack with user-supplied screws b.
2
Connect the grounding wire between the panel and rack.
Español
1
Fije el administrador de cables de la parte posterior al panel de conexiones a y je el panel de conexiones al rack con los
tornillos b suministrados por el usuario.
2
Conecte el cable de tierra entre el panel y el rack.
Français
1
Fixez le gestionnaire de câbles arrière au panneau de brassage et xez le panneau de brassage a et xez le panneau de
brassage au rack à l’aide des vis b fournies par l’utilisateur.
2
Connectez le l de mise à la terre entre le panneau et le rack.
Deutsch
1
Bringen Sie den hinteren Kabelmanager an dem Steckfeld an und sichern Sie das Steckfeld a, sichern Sie das Steckfeld mit den
vom Benutzer zur Verfügung gestellten Schrauben b am Gestell.
2
Verbinden Sie das Erdungskabel zwischen dem Steckfeld und dem Gestell.
Italiano
1
Fissare il cable manager posteriore al pannello patch e ssare il pannello patch a e ssare il pannello patch al rack con le viti b
fornite dall’utente.
2
Collegare il cavo di messa a terra tra il pannello e il rack.
aa
bb