User Manual of
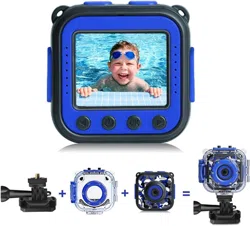
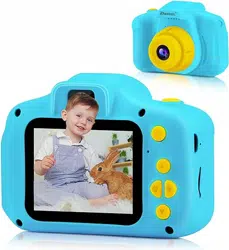
Kids Camera
Please read the instruction carefully before use
日本語取扱説明書

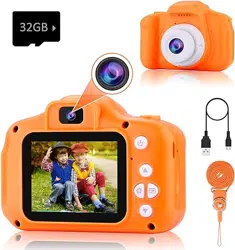
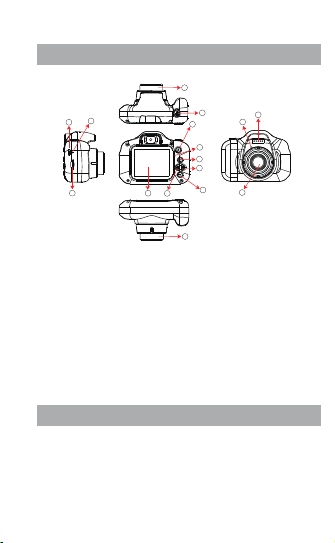
Contents Product structure
1.USB
3.SD card slot
5.Microphone
7.Power button
9.Display
2.Mode button
4.Speaker
6.Lens
8.Video button/Camera button
1.USB
USB data interface, 1 is used to connect PC to
transmit data; 2 is used to connect external power
supply to charge battery or provide working power;
Button function description
10.Menu button
12.Up button
14.Reset button
11.Down button
13.Indicator light
1
4
5
6
6
14
13
12
2
11
10
9
3
1
7
6
8

2.Mode key
The following modes can be switched in standby
mode:1 recording mode. 2 camera mode. 3 video
playback and photo browsing mode;
3.SD card slot
Please use the Micro SD Card, which supports up to
32 cards; Please turn off the power before extracting
the
Micro
SD card;
Note: This product has no memory, please insert
Micro
SD card before use;
(1)In the camera mode, short press this button to
start recording, short press again to stop recording;
(
2)Short press this button to take a photo in the
camera mode;
(
3)In the menu mode it is the confirmation button;
4.Speaker
Play a sound of a sound video or file;
9.Display
2.0 inch IPS display;
5.Microphone
Built-in Microphone (Sensitivity: -42±3DB), Support
frequency :50-16000Hz
6.Lens
Viewfinder window;
7.Power button
(
1) For equipment switching machine;
(2) It is the exit button under game mode.
8.Recording button /camera button
10.Menu button
Short press this button to call up the function setting
menu; press this button again to exit the function
setting menu;
11.Down button
In the menu options, select the function key down;
12.Page up
In the menu options ,select the function key up;
13.Indicator light
(1) Charging: RED (2)Charging completed: OFF
(3) Working: BLUE
14.Reset button
When the device crashes or does not boot, perform
a reset operation;
2 3

Basic operating instructions
1.Power on and off
Press and hold the power button for about 5-15
seconds to start, the display will show the start
LOGO
, release the button, the blue indicator will
light up.press and hold the power button again to
turn off the power, then the blue light is off.
2.Video Mode
Press the “Mode button” to switch to video mode,
on the right above corner the screen will show the
video resolution and the video icon, press “Video
but
ton/Photo button” to begin recording, blue indicator
w
ill be blinking when recording, at the same time
the recording time will be displayed on the screen
s
howing the video function is running. (This function
will work only when a
Micro
SD card is inserted)
3.Photo Mode
Short press the “Mode button” to switch to the
camera mode, and the camera resolution and
camera icon are displayed in the upper right corner
of the screen;
Short press the “Video/Photo button” to take a picture.
W
hen the picture is taken, the blue indicator flashes
once, indicating that the picture is completed. (This
4.Video /photo playback
S
hort press the “Mode Key” button to switch to the
playback mode, and the playback icon will be
displayed in the upper right corner of the screen;
Short press the “Up” button to select the file upwards;
Short press the “Down” button to select the file down;
Press “Video” or “Photo” button to play back the
selected videos;
function will work only when a Micro SD card is
inserted)
5.Menu settings
Short press “Menu” to call up the setup menu;
By pressing the “Up Button” or “Down Button”, you
can
cycle up and down in each setting item;
Select the setting item that needs to be changed,
and confirm the change by short pressing the “Video/
Camera Button”.
6.Delete the Photo/Video
Press the “Menu” to call up the setup menu;
Find the setting of the delete selection by pressing
the “Up Button” or “Down Button”
,
Press “Video Button
/
Photo Button” for confirmation
,
select “deleting a
single picture” or “Delete All”, Press “Video/Photo”
button after select “Execute” or “Cancel”.
4 5

Frames & Filters guide
1.Frames
After the camera is turned on, enter “Photo” mode,
under this mode press “Down” button to choose 5
different frames.
Operation guide for the games
1.Game operation
Press the “Menu” button to enter “Selection”, press
2.Filters
After the camera is turned on, enter “Photo” mode,
under this mode press “Up” button to choose 6
different filters.
Press the “Menu” to call up the setup menu;
Find the “Format” setting by pressing the “Up button”
or “Down button”,press “Video button/Photo button”
for confirmation,select “Format”,press “Video/
Photo” button after select “Execute” or “Cancel”.
7.Format
continuous shooting. Press “Photo/Video” button
to enter the menu, then press “Down” button and
select “ON”. Press the ”Photo/Video” button to
confirm your setting, then the continuous shooting
function is activated.
8.Volume
Press “Menu” to call out the setting menu.
Press “Up” and “Down” to select the setting of the
volume. Press “Photo/Video” button to enter the
menu, then press “Up” or “Down” button to adjust
the volume from 0-6 level. Press the “Photo/ Video”
button to confirm your setting, then the volume is set.
9.Time-lapse capturing
Press “Menu” to call up the setup menu;
Press the “Up” button or “Down button”to find the
time-lapse selection, press “Photo/Video” as the
confirmation, select the time: 2s/5s/10s, the default
value is off.
10.Continious shooting
Press “Menu” to call out the setting menu.
Press “Up” and “Down” to select the setting of
11.Exit the setup menu
Short press the “Menu Button” to exit the setting
state;
6 7

Computer connection
USB cable and computer connection;
Open the computer and find the device with
removable storage to view/copy video files or photo
files on the removable disk.
“Up” or “Down” to enter Game Menu. Under this menu,
press video/camera button for confirmation, select the
preferable games, confirm again to enter games.Eg:
In retro Snake game, photo/video button stands
for
pause (“Restart Game” in Sokoban/Maze,“Confirm”
in “Monkey Guess”, “Shoot” in “Hit Airplane”) “Up”
button for “Go Up”, “Down” button for “Go Down”,
“Menu” button for “Go left”, “Mode” button for
“Go Right”, power button for “Exit Game”.
Battery
1.Charging the battery, red light will be on indicating
the device is charging. The red indicator will be off
after fully charged. It takes 3.5 hours before the
camera fully charged.
2.There are two ways to charge the battery,the blue
indicator light will illuminate when charging and will
go out after three minutes, the red indicator light
Attention
1.Please use 5V-1A、5V-1.5A、 5V-2A adapter
for
charging.(The adapter is not included)
2.Please insert the Micro SD card before taking
photos/videos. (
Micro
SD card is not included)
3.Under “Video” mode, the camera will go to “Energy
Saving Mode” when no action within 3 minutes, any
button will activate the screen under this mode.
4. When using this product, it may cause a crash
due to improper operation, you can press the reset
button and turn it on again to return to normal.
will illuminate.
(1) Charging with the power adapter
(2) Charging with PC-USB
8 9

Specification
VGA: 640×480 AVI
1080P: 1280×720, 720P: 1280×720,
3M(1920×1440),2M(1600×1200),
Picture Resolution
Resolution
Games
External Memory
Retro Snaker, Sokoban,Maze,Monkey
Guess,Hit Airplane.
Max Support 32GB (Higher than Class
6, FAT32 format)
3.7V 600mAh Li-ion Battery
Built-in Rechargeable
Battery
Screen
English/Japanese/French/German/
Portuguese/Italian/Spanish etc.
Language
Video
Port USB
Power Supply
2.0" IPS screen
Micro USB 2.0
Limited by the dimension of the camera, the IPS
screen is relatively small, we will recommend you
to view the videos/photos on a PC.
(please check if the charging cord or adapter is
damaged)
Q: Why the camera fails to response when I
press
any button?
There is a reset hole “R” on this device, please
reset with a suitable pin.
A: Th
is camera will maximum support 32GB Micro
SD card. Please kindly check.
1.3M(1280×960),VGA(640×480) JPEG
5V-1A、5V-1.5A、5V-2A
Q: The camera can not take photos/videos.
A: Please check if the Micro SD card works properly.
(Please check if the Micro SD card is formatted to
FAT 32 or no spare space available)
Q: Why do the videos/photos are not clear?
Q: Why there is no sound when playing videos?
A: Please check if the microphone is off.
Please also check if the MIC hole is stucked.
Q:
Why the camera fails to turn on after working
for
sometime?
A: Please check if the camera is out of power.
Ple
ase check if the red light is on when charging
If no
.
Q: Why this camera fails to connect to a PC?
A: Please check if the drive of the PC is up to
date.Please check if the USB cord is damaged.
A:Please check if the glass on the lens is clear.
Q&A:
10 11
外観
ボタン機能案内
①USBケーブルでPCに連続しファイルを転送する;
②USBケーブルでアダプターに連続・充電する;
1.USBポート
待機状態でモード切替:①ビデオモード、
②写真モード、③再生;
2.モードボタン
①マイクロSDカードをご使用ください、最大32GBの
をサポートする;
②メモリカードを挿入/取り外す前に必ず電源を切
ってくだ さ い;
3.SDカードスロット
注:本製品はメモリが無い為、ご使用する前に必ず
1枚メモリカードをご挿入ください;
ビデオファイルを再生する時のスピーカです;
4.スピーカー
内臓マイク(感度:-42±3DB 周波数:50-16000HZ)
5 . マイクロ
ファインダの窓口です;
6.レンズ
①電源オン/オフ;②ゲームモード場合は”終了”機能
で す;
7.電源ボタン
2.モードボタン
4.スピーカー
6.レンズ
8.シャッター/ビデオボタン
14 .リセット穴
1.USBポート
3.SDカードスロット
5.マイク
7.電源ボタン
9.スクリーン
11.ダウンボタン
13.ランプ
10.メニューボタン
12.アップボタン
12 13
4
5
6
6
14
13
12
2
11
10
9
3
1
7
6
8

基本操作の説明
①ビデオモ ード場 合 はこのボタンを押 すと
録画初め、もう一度押すと録画停止する;
②写真モード場合はこのボタンを押すと写
真 を 摂 る;
③設定モード場合はこのボタンを押すと確
認 ボ タ ン で す;
2.0インチIPSスクリーン;
9.スクリーン
8.シャッター/ビデオボタン
このボタンを押すとシステム設定モードを入
り、もう一度押すとシステム設定モードを終了
す る;
10.メニューボタン
メニューの項目を次へ移動する;
11.ダウンボタン
メニューの項目を前へ移動する;
12.アップボタン
①充電中:赤ランプ点灯、充電完了:赤ランプ
消え;②作業中:青ランプ点灯
13.ライト
カメラがフリーズした或いは電源が入れない場合はリ
セットくだ さ い 。
オン:電源ボタンを長く(約5〜15S)押すと電源が入れ
スクリーンが点灯し(LOGOが表示)
同時に、青いランプがずっと点灯する;
オフ:もう一度電源ボタンを長く押すと電源が切り、青
いランプも同時に消える;
1.オン/オフ
①
“モードボタン”を押すと動画モードが入り、画面の
右上に解像度とビデオマークが表示する;
2 .ビデ オモ ード
“モードボタン”を押すと写真モードに切替、画面の右上
に解像度と摂るマークが表示する;
“シャッターボタン”を押すと写真摂り、写真を撮るとた
ん青いランプが1回点滅し、写真摂る完了する(メモリ
3.写真モード
14.リセット穴
②“ビデオボタン”を押すと録画開始、録画する時に青
いランプが点滅、画面も右下に録画時間が表示する
(メモリカードが無いとご使用しかねます)。
14 15

“モードボタン”を押すと再生モードに切替、画面
の右
上に再生マークが表示する;
“アップボタン”を押すと前のファイルを選択する;
4.ファイル再生
“メニューボタン”を押すと設定一覧が出る;
“アップボタン”或は“ダウンボタン”で項目を回覧す
る;
“シャッター/ビデオボタン”が確認ボタンします。
5.メニュー設定
“ダウンボタン”を押すと次のファイルを選択する;
“シャッター/ビデオボタン”を押すと、選択されたファ
イルを再生する;
“メニューボタン”を押すと設定一覧が出る;
“アップボタン”或いは“ダウンボタン”で削除項目を見
つかって、“シャッター/ビデオボタン ” が確 定ボタンと
して、一枚/全部を選択し確定すれば削除にする。
6.ファイル削除
“メニューボタン”を押すと設定一覧が出る;
“アップボタン”或いは“ダウンボタン”でフォーマット
項目を見つかって、“シャッター/ビデオボタン”を押す
とキャンセル/確定する。
7 . フォー マット
“メニューボタン”を押し設定一覧が表示します、
アップボタン”或は“ダウンボタン”で音量を見つけ,
シャッター/ビデオボタンを押して入り、”ダウンボタ
ン”で音量0-6段階を選択し、シャッター/ビデオボタ
ンを押すと確定として設定完了です。
8.音量
“メニューボタン”を押し、設定一覧を表示する;
“アップボタン”或いは“ダウンボタン”でタイマー撮影
の項目を見つけ、“シャッター/ビデオボタン”で確認
ボタンとして、2s/5s/10sをご選択ください(デフォル
ト : オ ン );
9.タイマー撮影
メニューボタン”を押し設定一覧が表示します、
“アップボタン”或は“ダウンボタン”で連写を見つけ、
シャッター/ビデオボタンを 押して入り、”ダウンボタン”
で”オン”を選択し、”シャッター/ビデオボタン”を押す
と確定として設定完了です。
10.連写
再び“メニューボタン”を押すと設定退出になる。
11.設定退出
(1)充電中:赤いランプが付け、充電完了:赤いランプ
が 消 え る;
カードが無いとご使用しかねます)。
16 17

フォトフレ ームとフィルター 操 作
フォトフレーム:写真モードで“ダウンボタン”を押すと
フレームが表示し、4種類選択可能;
フィルター:“ビデオモード”“アップボタン”を押すとフ
ィルターが表示し、6種類選択可能;
コンピュータ接続
①コンピュータにUSBケーブルで接続し、
キッズカメラは自動的にUSBモードが入る;
ゲーム操作
①“メニューボタン”を押して設定一覧を入り、
②
“アップボタン”或いは“ダウンボタン”でゲーム項目
を見つけて、③“シャッター/ビデオボタン”を押し・確定
し(シャッター/ビデオボタンは確定ボタンです)、遊
びしたいゲームを選択し、④再び“シャッター/ビデオ
ボタン”を押し、ゲームが入る。
バッテリー
(3)バッテリーを充電する方法は2つあります,充電中
は青いランプが点灯し、3分後に消え、赤いランプが
点灯する;
①:アダプターでご充電ください、
②:PC-USBでご充電ください。
ご注意事項
(1
)5V1Aのアダプターでご充電ください(アダプター
が付属しておりません);
(
2)写真摂りとビデオ動画録
画する
時、1枚メモリーカードをご挿入ください(メモ
リーカード
;
が付属しておりません、事前にご用意く
ださい、それにPCでフォーマットください)
;
(3)動画を
録画する時、何にも操作しない場合は3分間後に節
電が入り(録画中)、どのボタン
;
を押すと画面を点灯
する
;
(4)不適切な操作によりフリーズ可能性があり、
リセット穴でリセットした後に電源を入れご使用くだ
さい。
②マイコンピュータのリム ー バブルディスクにファイ
ルを回覧/コピーできる。
(2)充電時間:約3.5時間(アダプター)
(1)充電中:赤いランプが付け、充電完了:赤いランプが消える;
18 19
VGA:640×480AVI
1080P:1280×720,720P:1280×720,
1.3M(1280×960),VGA(640×480)JPEG
画像解像度
ゲーム
ストレ ージ
ヘビゲーム、箱運びゲーム、迷宮ゲーム、
数字ゲーム、飛行機ゲーム
外付けマイクロSDカード(最大32GB、
CLASS6以上、FAT32にフォーマットく
ださい)
リチウム電池:3.7V600mAh内臓充電バッテリ
IPS
スクリーン
英語/日本語/フランス語、ドイツ語/
ポルトガル語/イタリア語/スペイン語等
メニュー言葉
録画解像度
USBポート
5V-1A、5V-1.5A、5V-2A
2.0インチIPSスクリーン
MicroUSB2.0
商品仕様
入力電圧範囲
3M(1920×1440),2M(1600×1200),
Q&A:
2
.レンズに異物/キッズがあるのかご確認くだ
さい
(使用する前にレンズを拭いてください)
3.本製品はミニタイプでコンピューターにファイルを
再生をお勧めます。
Q:写真摂りと録画できません
A:1.メモリーカードを挿入しましたか/メモリーカー
ドが見つかりません(メモリ−カードが破損)
2.初めてメモリーカードご使用する場合はPCでフォ
ーマットください(様式:FAT32)、
3.メモリーがいっぱいになったのかご確認くだ
さい。
Q:ビデオと写真がはっきり見えません?
A:1.レンズに保護フレームが付けており、保護フレ
ームが取れましたか?
Q:動画を再生する時、音がありません
A:1.マイクの設置をオフにしたのかご確認ください、
2.スピーカーに異物などがあるのかご確認ください。
Q:
電源が入れません或いはしばらく使用した後に電
源が入れません
A:1.電池があるのかご確認ください(初めご使用す
る場合はフルにご充電ください)、充電する時に
インターゲージが赤いになったのかご確認ください
(そうではない場合はUSBケーブル/アダプターが壊
れた可能性がある);
Q:フリーズ(どんなボタンを押しても反映が無い)
A:1.メモリーカードが製品の規格にあわせるの
のかご確認ください、
2.細いピンで“リセット穴”にリセットください。
Q:PCに接続できません
A:1.コンピュータが最新のドライバをインストール
されたのかご確認ください、
2.USBケーブルトが良いのかご確認ください、
3.USBケーブルを間違ったのかご確認ください。
20 21

User Manual of
Kids Camera
Please read the instruction carefully before use
日本語取扱説明書