DEHUMIDIFIER
FOR MODELS:
Before using your dehumidifier, please
read this manual carefully and keep it for
future reference, along with your receipt.
USER MANUAL
1PFD22
1PFD35
1PFD50
1PFDP50


1
Contents
Preparation
Safety Precautions
Cautions
Operation
Maintenance
Faults Diagnosis
Sociable Remark
4
5
6
9
9
1 0
------------------
-------------------
7
-----------------
---------------
---------------
-------------
--------------------
4
2
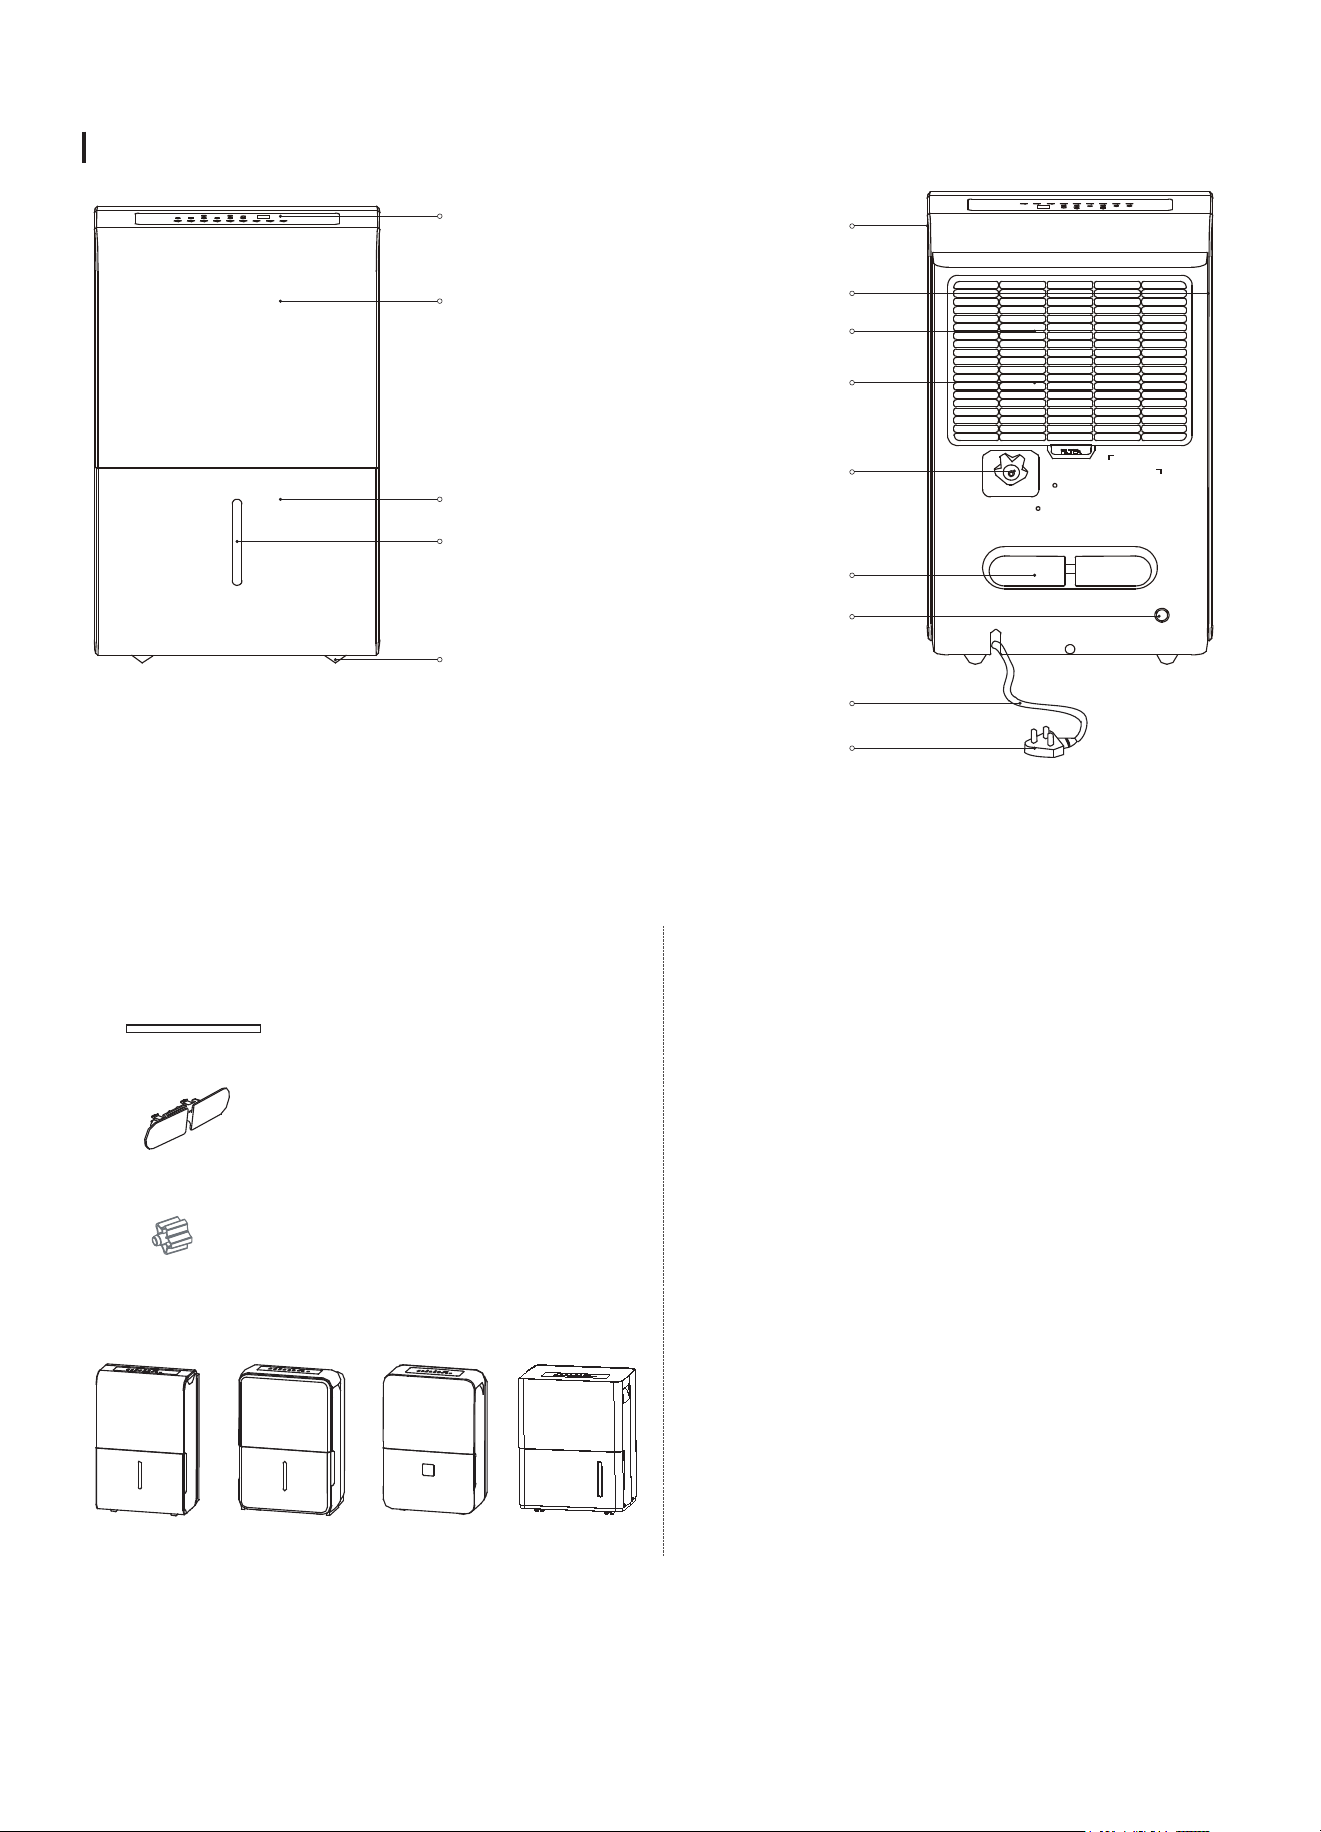
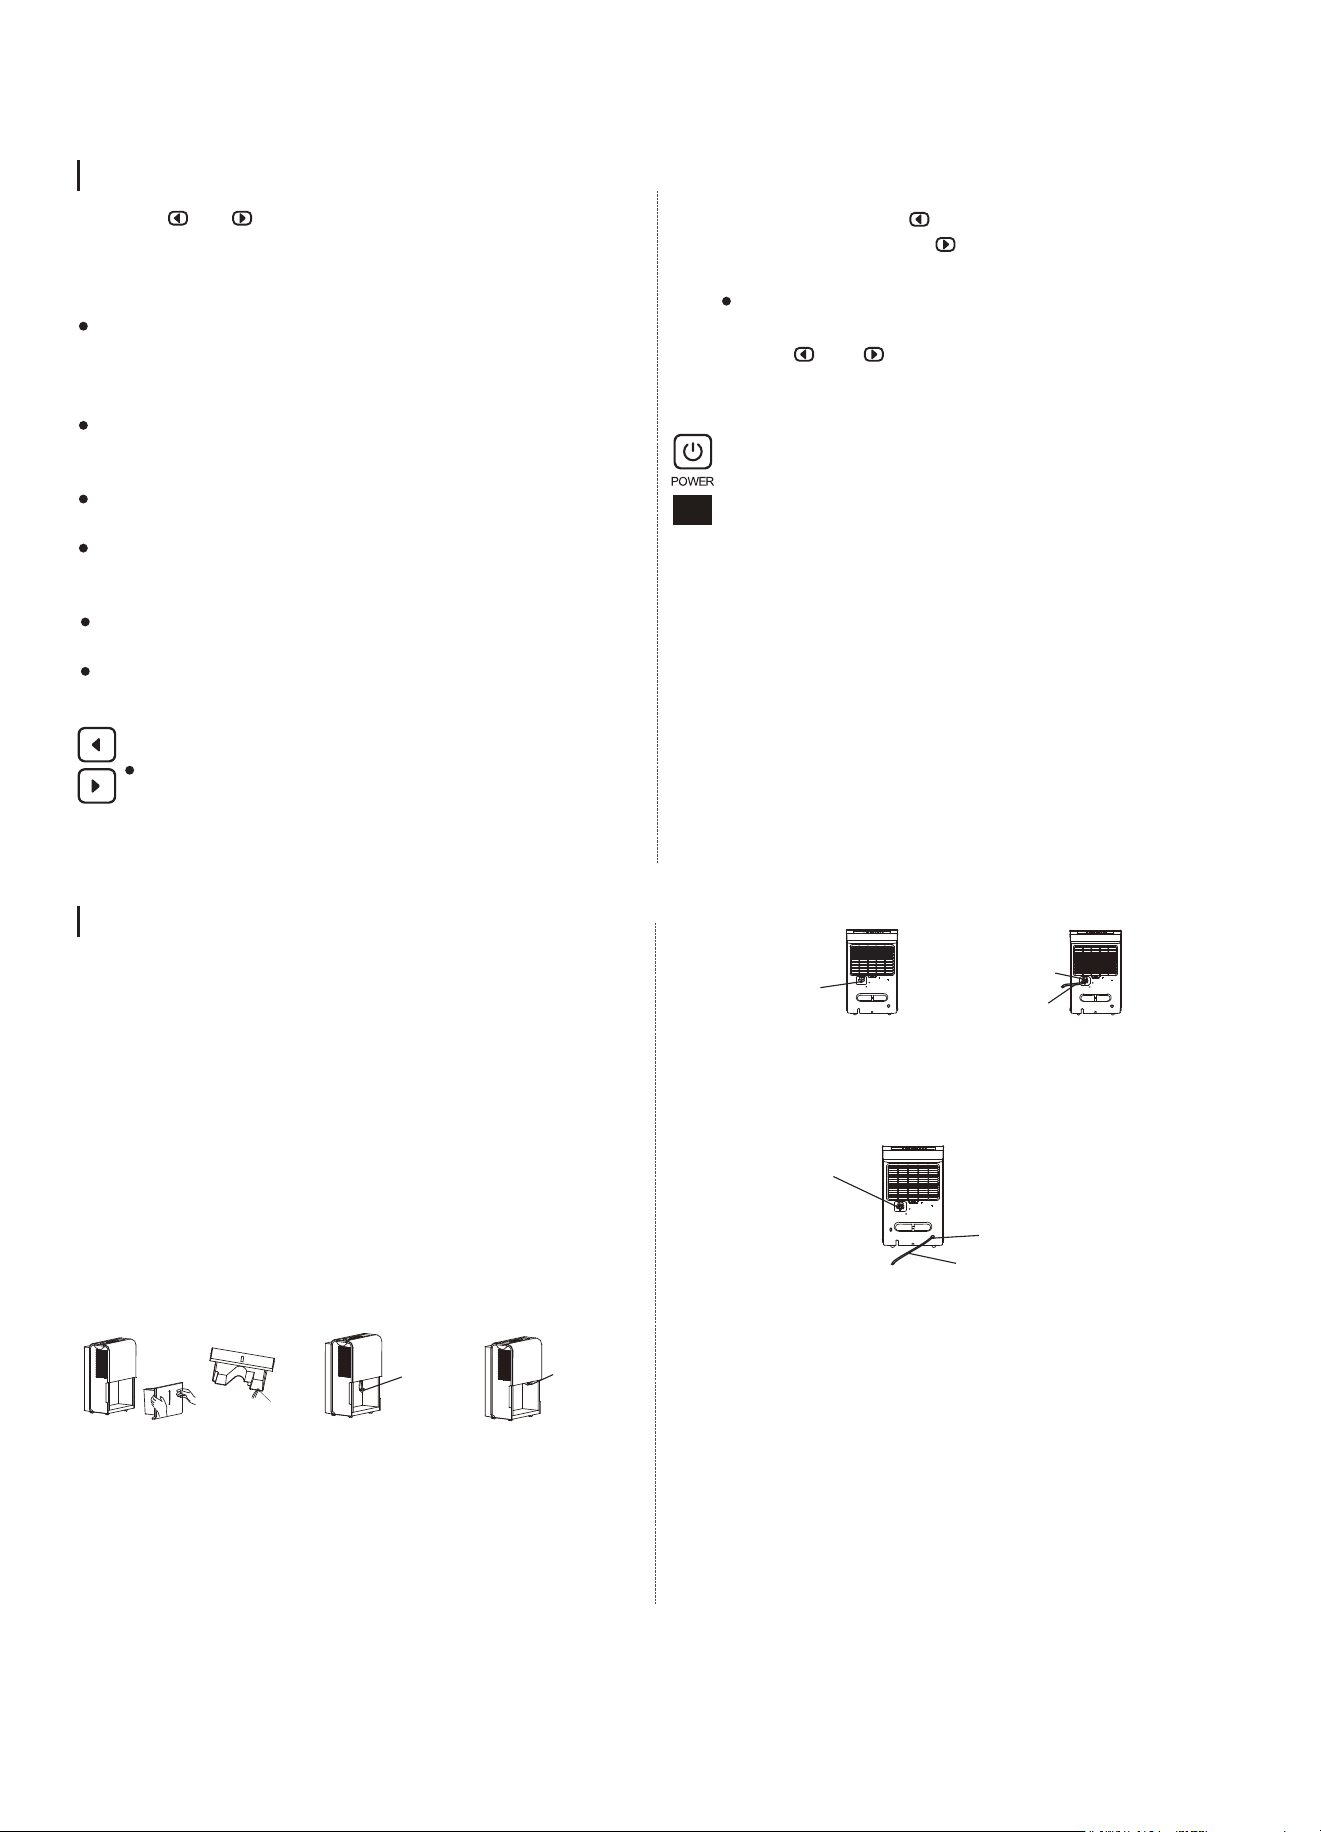
Preparation
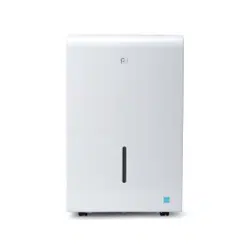
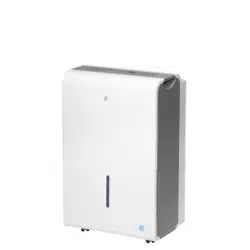
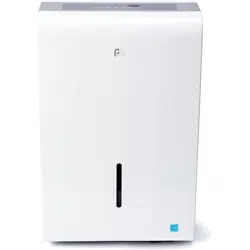
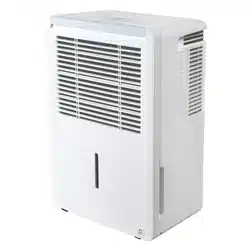
rearfront
control panel
panel
handle
(both sides)
air intake grille
air filter (behind
the grille)
bucket
water level window
caster
power cord
power plug
air outlet grille
drain hose outlet
pump drain hose outlet
(on some models)
power cord buckle
(placed in bucket)
3
-Fluorinated greenhouse gases are contained in
hermetically sealed equipment. For specific
information on the type, the amount and the CO2
equivalent in tonnes of the fluorinated greenhouse
gas(on some models), please refer to the relevant
label on the unit itself.
-Installation, service, maintenance and repair of this
unit must be performed by a certified technician.
-Product uninstallation and recycling must be
performed by a certified technician.
Note About Fluorinated Gasses
NOTE:
All the illustrations in the manual are for explanation
purpose only. Your machine may be slightly different.
The actual shape shall prevail. The design and
specifications are subject to change without prior
notice for product improvement. Consult with the
sales agency or manufacturer for details. Any updates
to the manual will be uploaded to the service website,
please check for the latest version.
NOTE: The unit you purchased may be look like
one of the followings:
Accessories:(placed in the bucket of the unit)
pump drain hose(1pc) (only for the unit with pump featrue)
power cord buckle(1pc)
female threaded end(1pc)(on some models)

5
2
3
4
- Do not exceed the rating of the power outlet or
connection device.
- Do not operate or stop the unit by switching on or
off the power supply.
- Do not damage or use an unspecified power cord.
- Do not modify power cord length or share the outlet
with other appliances.
- Do not insert or pull out plug with wet hands.
- Do not install the appliance in a location that may be
exposed to combustible gas.
- Do not place the unit near a heat source.
- Disconnect the power if strange sounds, smell, or
smoke comes from it.
- You should never try to take apart or repair the unit
by yourself.
cause death, harm or damage.
Before cleaning, turn off the power and unplug
the unit.
Do not use the machine near flammable gas or
combustibles, such as gasoline, benzene, thinner, etc.
Do not drink or use the water drained from the unit.
Do not take the water bucket out during operation.
Do not use the unit in small spaces.
Do not put in places where water may splash onto
the unit.
Place the unit on a level, sturdy section of the floor.
Do not cover the intake or exhaust openings with
cloths or towels.
Care should be taken when using the unit in a room
with the following persons: infants, children, elderly
people and people not sensitive to humidity.
cause death, harm or damage.
5
-
The manufactures nameplate is located on the rear
panel of the unit and contains electrical and other
technical data specific to this unit.
-
Be sure the unit is properly grounded. To minimize
shock and fire hazards, proper grounding is
important. The power cord is equipped with a three
prong grounding plug for protection against
shock hazards.
-
Your unit must be used in a properly grounded wall
receptacle. If the wall receptacle you intend to use is
not adequately grounded or protected by a time
delay fuse or circuit breaker(please refer to the
nameplate for the electrical data), have a qualified
electrician install the proper receptacle.
Do not use in areas where chemicals are handled.
Never insert your finger or other foreign objects
into grills or openings. Take special care to warn
children of these dangers.
Do not place heavy object on the power cord and
take care so that the cord is not compressed.
Do not climb up on or sit on the unit.
Always insert the filters securely. Clean filter once
every two weeks.
If water enters the unit, turn the unit off and
disconnect the power , contact a qualified service
technician.
Do not place flower vases or other water container
on top of the unit.
Do not use extension cords.
5
The manufactures nameplate is located on the rear
panel of the unit and contains electrical and other
technical data specific to this unit.
Be sure the unit is properly grounded. To minimize
shock and fire hazards, proper grounding is
important. The power cord is equipped with a three
prong grounding plug for protection against
shock hazards.
Your unit must be used in a properly grounded wall
receptacle. If the wall receptacle you intend to use is
not adequately grounded or protected by a time
delay fuse or circuit breaker(please refer to the
nameplate for the electrical data), have a qualified
electrician install the proper receptacle.
Electrical Information:
- Do not use in areas where chemicals are handled.
- Never insert your finger or other foreign objects
into grills or openings. Take special care to warn
children of these dangers.
- Do not place heavy object on the power cord and
take care so that the cord is not compressed.
- Do not climb up on or sit on the unit.
- Always insert the filters securely. Clean filter once
every two weeks.
- If water enters the unit, turn the unit off and
disconnect the power , contact a qualified service
technician.
- Do not place flower vases or other water container
on top of the unit.
- Do not use extension cords.
4
Do not exceed the rating of the power outlet or
connection device.
Do not operate or stop the unit by switching on or
off the power supply.
Do not damage or use an unspecified power cord.
Do not modify power cord length or share the outlet
with other appliances.
Do not insert or pull out plug with wet hands.
Do not install the appliance in a location that may be
exposed to combustible gas.
Do not place the unit near a heat source.
Disconnect the power if strange sounds, smell, or
smoke comes from it.
You should never try to take apart or repair the unit
by yourself.
-
Before cleaning, turn off the power and unplug
the unit.
-
Do not use the machine near flammable gas or
combustibles, such as gasoline, benzene, thinner, etc.
-
Do not drink or use the water drained from the unit.
-
Do not take the water bucket out during operation.
-
Do not use the unit in small spaces.
-
Do not put in places where water may splash onto
the unit.
-
Place the unit on a level, sturdy section of the floor.
-
Do not cover the intake or exhaust openings with
cloths or towels.
-
Care should be taken when using the unit in a room
with the following persons: infants, children, elderly
people and people not sensitive to humidity.
4
Do not exceed the rating of the power outlet or
connection device.
Do not operate or stop the unit by switching on or
off the power supply.
Do not damage or use an unspecified power cord.
Do not modify power cord length or share the outlet
with other appliances.
Do not insert or pull out plug with wet hands.
Do not install the appliance in a location that may be
exposed to combustible gas.
Do not place the unit near a heat source.
Disconnect the power if strange sounds, smell, or
smoke comes from it.
You should never try to take apart or repair the unit
by yourself.
WARNING: To prevent death or injury to the user or other people and property damage, the
following instructions must be followed. Incorrect operation due to ignoring of instructions may
cause death, harm or damage.
This symbol indicates that ignoring instructions may cause death or serious injury.
Safety Precautions
Before cleaning, turn off the power and unplug
the unit.
Do not use the machine near flammable gas or
combustibles, such as gasoline, benzene, thinner, etc.
Do not drink or use the water drained from the unit.
Do not take the water bucket out during operation.
Do not use the unit in small spaces.
Do not put in places where water may splash onto
the unit.
Place the unit on a level, sturdy section of the floor.
Do not cover the intake or exhaust openings with
cloths or towels.
Care should be taken when using the unit in a room
with the following persons: infants, children, elderly
people and people not sensitive to humidity.
4
Do not exceed the rating of the power outlet or
connection device.
Do not operate or stop the unit by switching on or
off the power supply.
Do not damage or use an unspecified power cord.
Do not modify power cord length or share the outlet
with other appliances.
Do not insert or pull out plug with wet hands.
Do not install the appliance in a location that may be
exposed to combustible gas.
Do not place the unit near a heat source.
Disconnect the power if strange sounds, smell, or
smoke comes from it.
You should never try to take apart or repair the unit
by yourself.
- Before cleaning, turn off the power and unplug
the unit.
- Do not use the machine near flammable gas or
combustibles, such as gasoline, benzene, thinner, etc.
- Do not drink or use the water drained from the unit.
- Do not take the water bucket out during operation.
- Do not use the unit in small spaces.
- Do not put in places where water may splash onto
the unit.
- Place the unit on a level, sturdy section of the floor.
- Do not cover the intake or exhaust openings with
cloths or towels.
- Care should be taken when using the unit in a room
with the following persons: infants, children, elderly
people and people not sensitive to humidity.

6
6
Cautions
Cautions
- This appliance can be used by children aged from 8 years and above and person with reduced physical,
sensory or mental capabilities or lack of experience and knowledge if they have been given supervision
or instruction concerning use of the appliance in a safe way and understand the hazards involved. Children
shall not play with the appliance. Cleaning and user maintenance shall not be made by children without
supervision. (be applicable for the European Countries)
- This appliance is not intended for use by persons (including children) with reduced physical, sensory or
mental capabilities or lack of experience and knowledge, unless they have been given supervision or
instruction concerning use of the appliance by a person responsible for their safety. Children should be
supervised to ensure that they do not play with the appliance.(be applicable for other countries except the
European Countries )
- If the supply cord is damaged, it must be replaced by the manufacturer,its service agent or similarly qualified
persons in order to avoid a hazard.
- Prior to cleaning or other maintenance, the appliance must be disconnected from the supply mains.
- Do not install the appliance in a location that may be exposed to combustible gas. If combustible gas
7
- If the appliance is knocked over during use, turn off the unit and unplug it from the main power supply
immediately. Visually inspect the unit to ensure there is no damage. If you suspect the unit has been
damaged, contact a technician or customer service for assistance.
- In a thunderstorm, the power must be cut off to avoid damage to the machine due to lightning.
- Do not run cord under carpeting. Do not cover cord with throw rugs, runners, or similar coverings. Do not route
cord under furniture or appliances. Arrange cord away from traffic area and where it will not be tripped over.
- Do not operate unit with a damaged cord or plug. Discard unit or return to an authorized service facility for
examination and/or repair.
- To reduce the risk of fire or electric shock, do not use this fan with any solid-state speed control device.
- The appliance shall be installed in accordance with national wiring regulations.
- Contact the authorised service technician for repair or maintenance of this unit.
- Turn off the product when not in use.
accumulates around the unit, it may cause fire.
8
9
7
6
Cautions
re
7
8
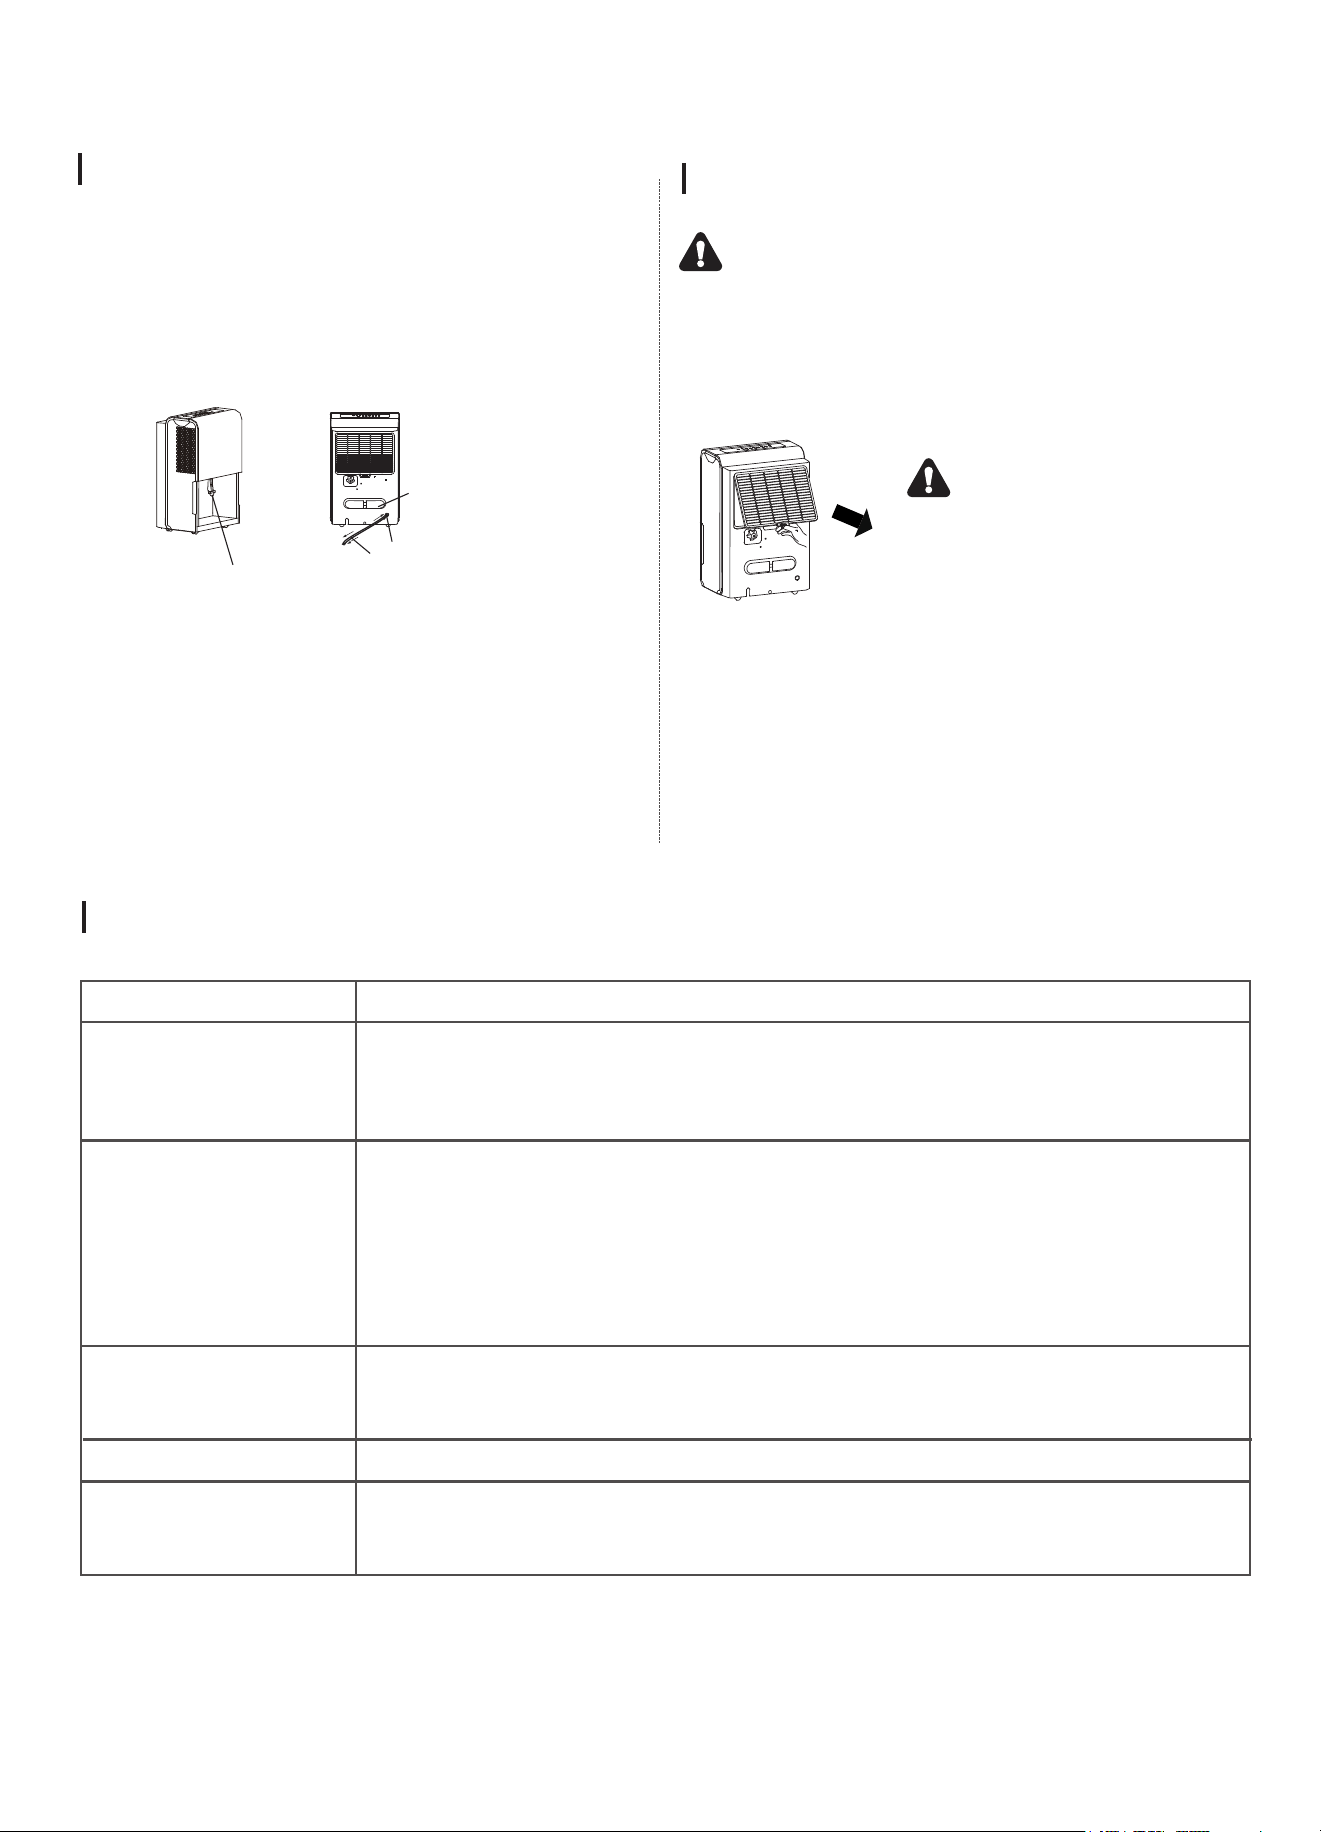
Operation
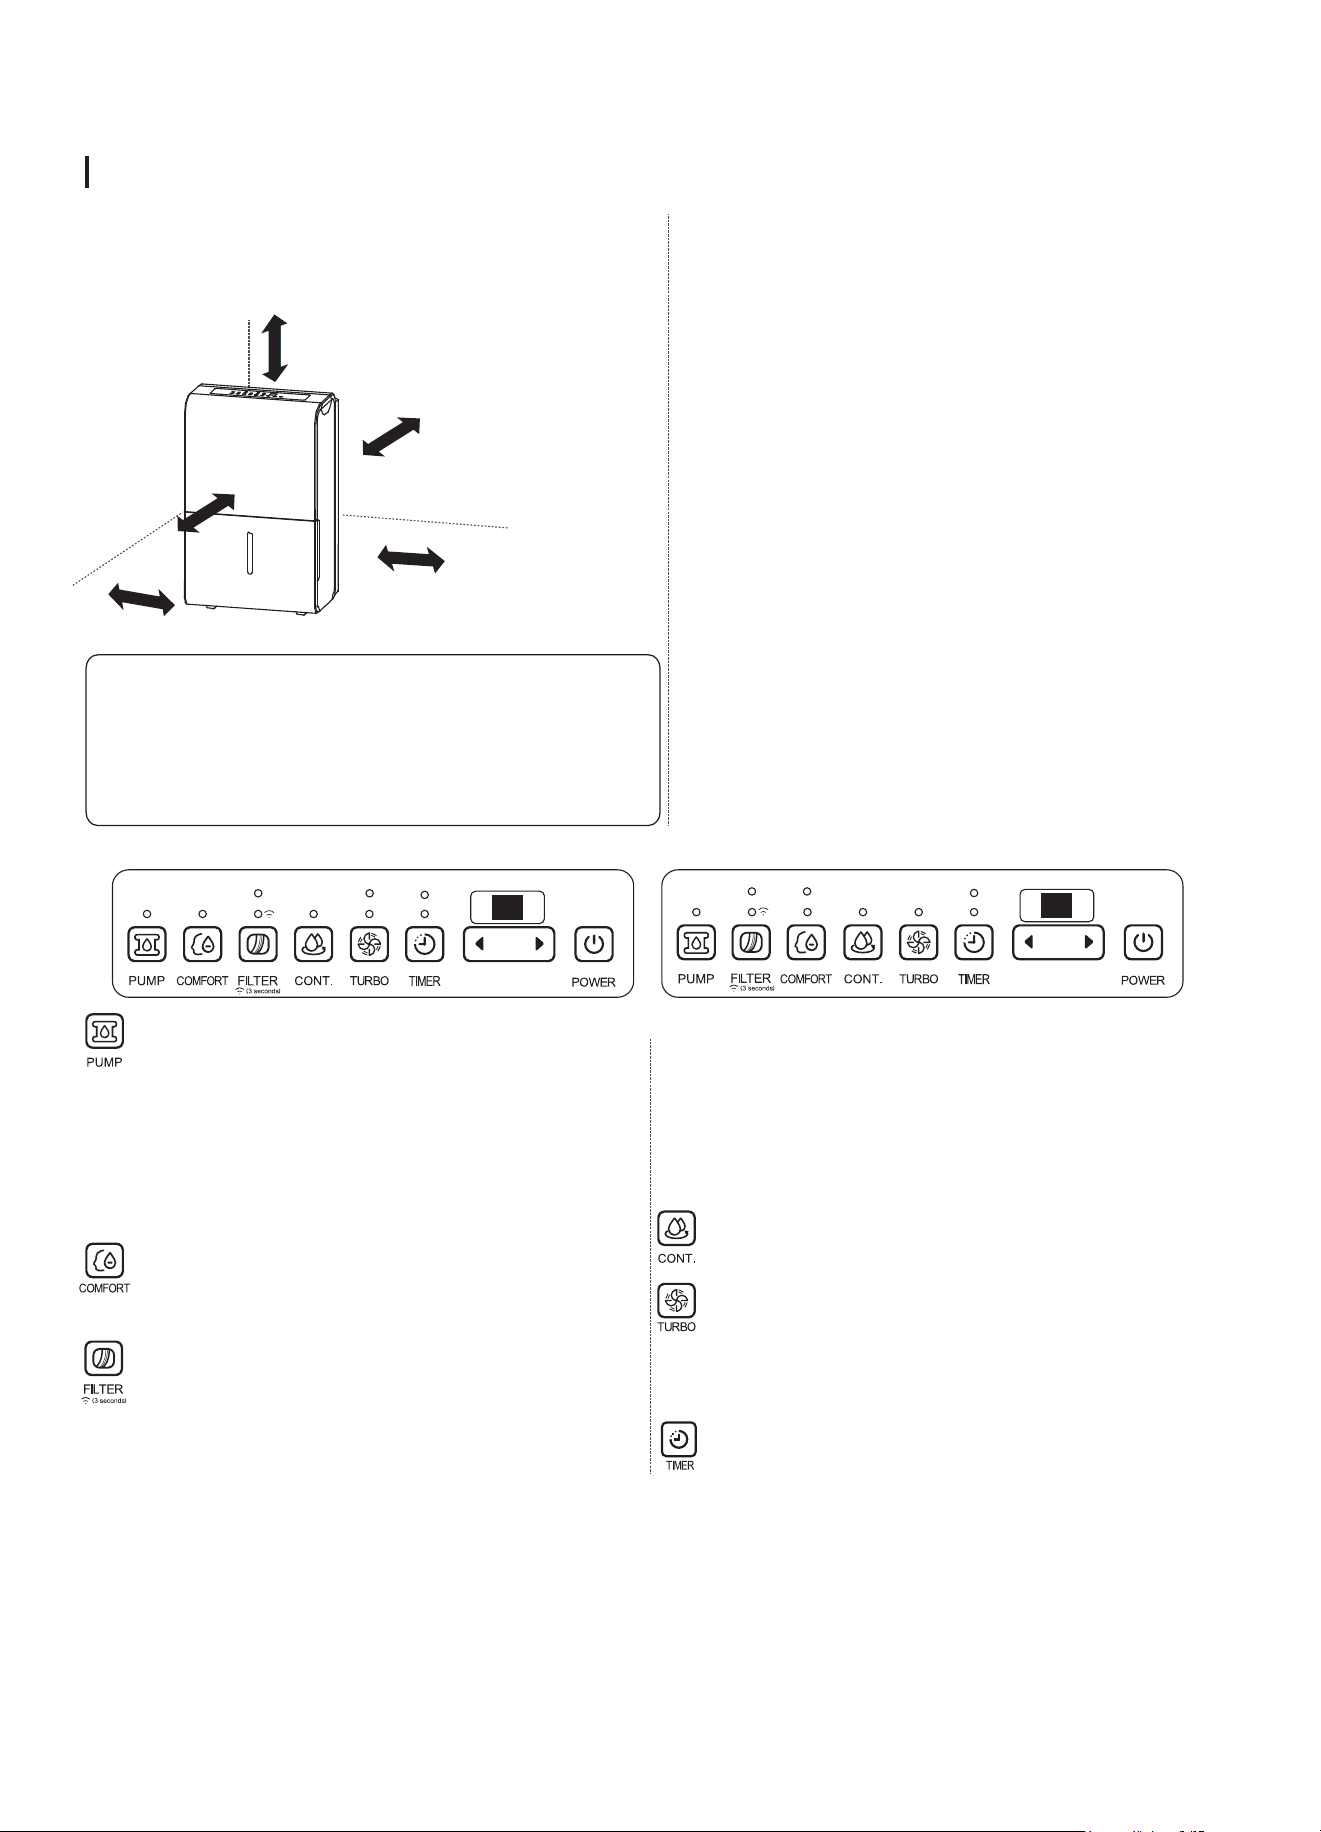
Place correctly
-This unit is designed to operate with a working
environment between 5°C(41°F) and 32°C(90°F).
more than 40cm
more than 20cm
more than 20cm
more than 40cm
more than 20cm
Casters(Installed at four points on the bottom of unit)
-Do not force casters to move over carpet, nor
move the unit with water in the bucket.
(The unit may tip over and spill water.)
NOTE: Casters is optional, some models without.
Smart functions:
-Auto Shut Off
When the bucket full indicator light illiminates or the
setting humidity is reached, the unit will be shut off
automatically.
-Wait 3 minutes before resuming operation
After the unit has stopped, it can not be restart
opertation in the first 3 minutes. This is to protect the
unit. Operation will automatically start after 3 minutes.
-Auto Defrost
When frost builds up on the evaporator coils, the
compressor will cycle off and the fan will continue to
run until the frost disappears.
-Auto-Restart
If the unit breaks off unexpectedly due to the power
cut, it will restart with the previous function setting
automatically when the power resumes.
9
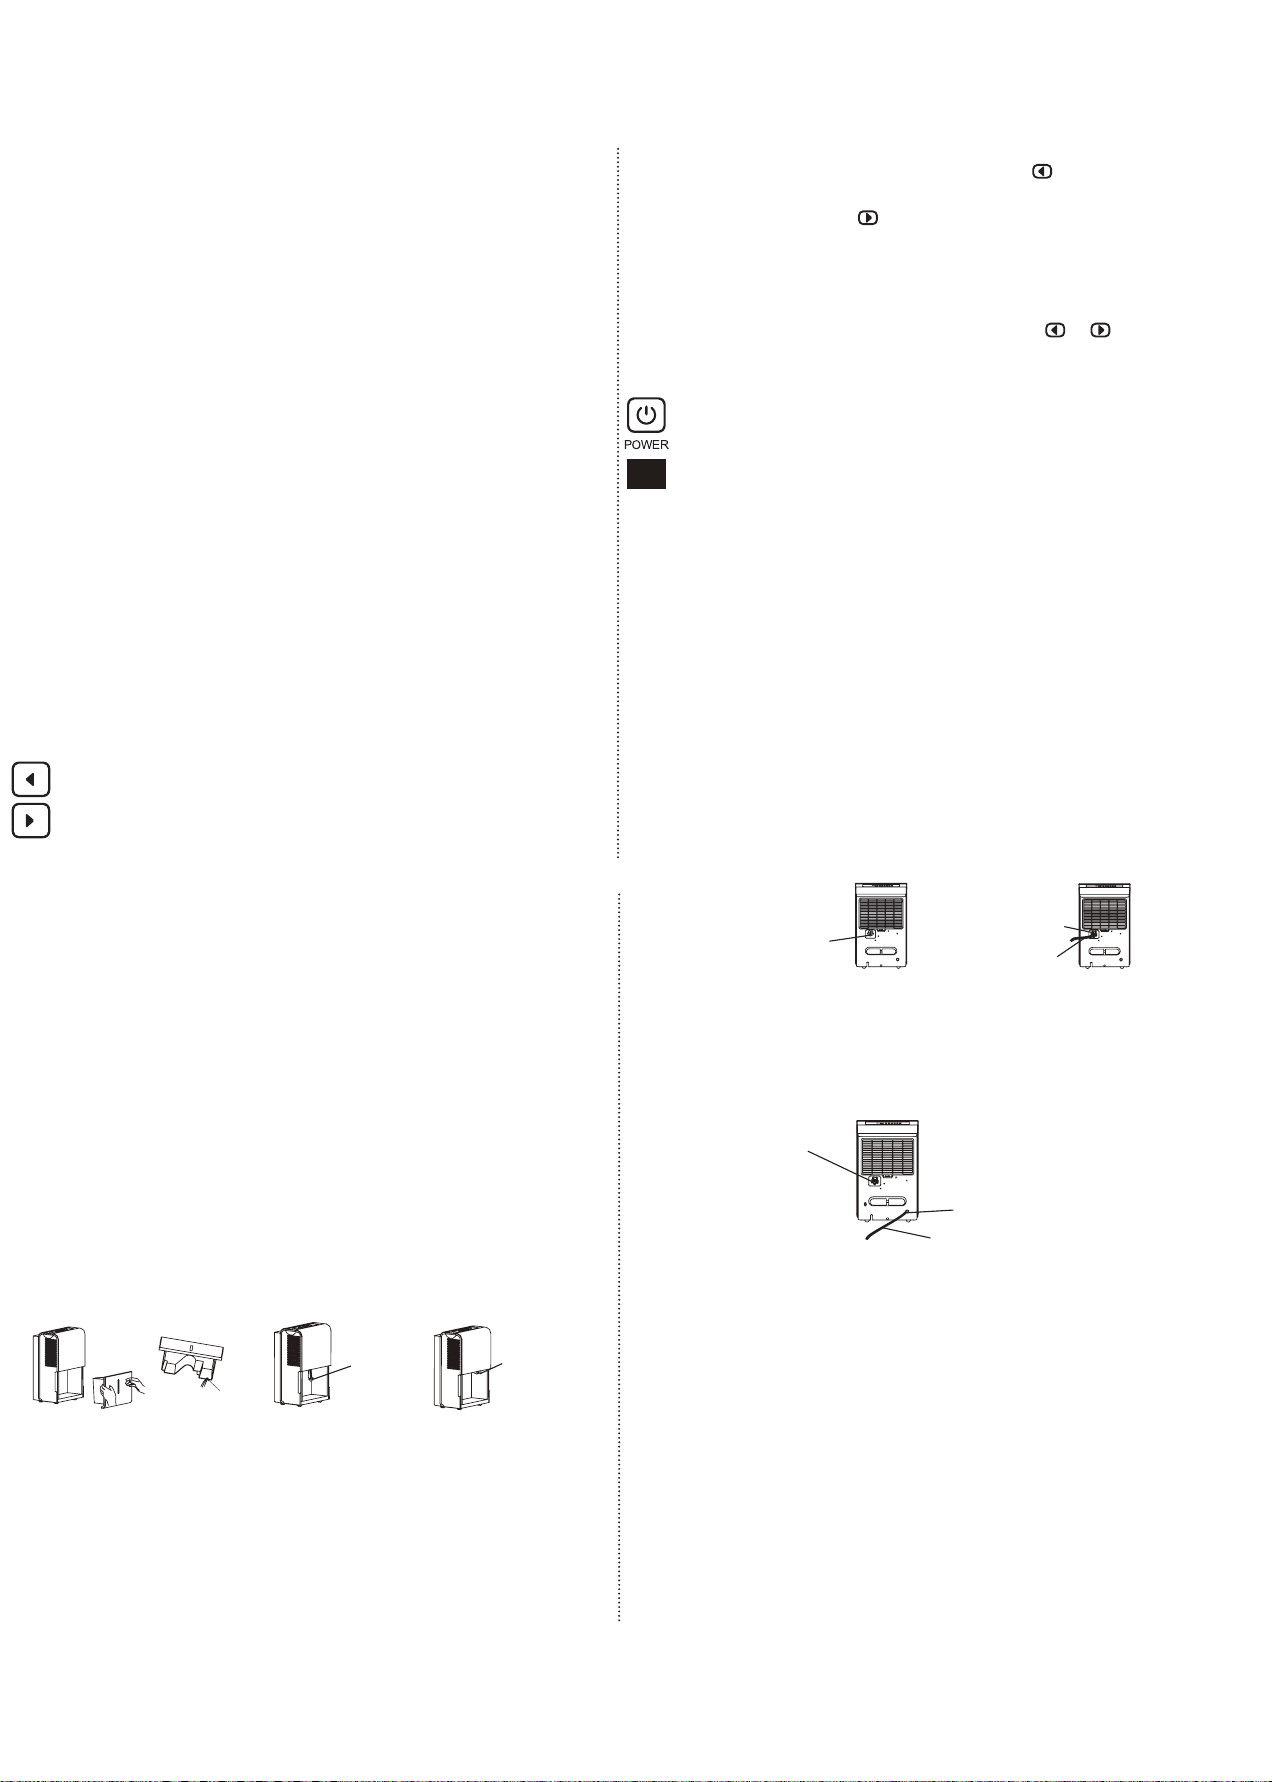
PUMP button(optional)
Press to activate the pump operation.
NOTE: Make sure the pump drain hose is installed into the
unit and the continuous drain hose is removed from the unit
before the pump operation is activated. When the bucket is full,
the pump starts to work. Refer to the next pages for removing
the collected water. Do not use this operation when the outdoor
temperature is equel to or less than 0ºC (32ºF).
COMFORT button
Press to activate the comfort dehumidifying operation.
NOTE: On this operation,the unit can not be set humidity level.
FILTER button
The check filter feature is a reminder to clean the Air Filter for
more efficient operation. The Filter light(Clean filter light) will
flash after 250 hours of operation. To reset after cleaning
the filter, press the Filter button and the light will go off.
Press the filter pad for 3 seconds when the unit is on or off to
CONTINUE button
Press to activate the continuous dehumidifying operation.
NOTE: The control panel of the unit you purchased may be look like one of the followings:
On
Off
Full
Auto defrost
On
Off
Full
Defrost
TURBO button
Control the fan speed. Press to select either High or Normal fan
speed. Set the fan control to High for maximum moisture removal.
When the humidity has been reduced and quiet operation is
preferred, set the fan control to Normal.
Press to initiate the Auto start and Auto stop feature, in conjuction
Timer button
initiate the Wireless connection mode.The LED DISPLAY shows
AP to indicate you can set Wireless connection and the
compressor is forced off. If connection (router) is successful within
8 minutes, the unit will exit Wireless connection mode automatically
and the Wireless light(Filter light) illuminates and the compressor
reverts previous state. If connection is failure within 8 minutes, the
unit exits the Wireless connection mode automatically.
8
Operation
10
Timer Set Control Buttons
For drier air, press the button and set to a lower percent value(%).
For damper air, press the button and set a higher percent value
(%).
Down/Up buttons
Humidity Set Control Buttons
The humidity level can be set within a range of 35%RH(Relative
Humidity) to 85%RH (Relative Humidity) in 5% increments.
When the unit is off, first press the Timer button, the TIMER ON
indicator light illuminates. It indicates the Auto Start program is
initiated. Press it againthe Time Off indecator light illuminates. It
indicates the Auto Stop is initiated.
Press or hold the UP or DOWN button to change the Auto time by
0.5 hour increments, up to 10 hours, then at 1 hour increments up to
24 hours. The control will count down the time remaining until start.
The selected time will register in 5 seconds and the system will
automatically revert back to display the previous humidity setting.
When the Auto start & Auto stop times are set, within the same
program sequence, TIMER ON OFF indicator lights illuminate
identifying both ON and OFF times are now programmed.
Turning the unit ON or OFF at any time or adjusting the timer setting
to 0.0 will cancel the Auto Start/Stop function.
When LED display window displays the code of P2, the Auto Start/
Stop function will also be cancelled.
Press to initiate the Auto start and Auto stop feature, in conjuction
with the and buttons.
Power button
Press to turn the dehumidifier on and off.
LED display
Shows the set % humidity level from 35% to 85% or auto start/stop time
(0~24) while setting, then shows the actual (±5% accuracy) room %
humidity level in a range of 30% RH(Relative Humidity) to 90%RH
(Relative Humidity).
Error Codes: AS- Humidity sensor error;
ES- Temperature sensor error;
Eb- Bucket is removed or not in right position--Replace the bucket in the
right position. (only available for the unit with pump feature).
Protection Codes:
P2- Bucket is full or bucket is not in right position--Empty the bucket and
replace it in the right position.(only available for the uint with no
pump feature.)
P2- Bucket is full -- Empty the bucket.(only available
for the unit with
pump feature
with the and buttons. When the unit is on, first press the
Timer button, the Timer Off indicator light illuminates. It indicates
the Auto Stop program is initiated. Press it again the Time On
indecator light illuminates.It indicates the Auto Start is initiated.
11
NOTE:The indicator light illuminates when the function is selected.
Operation
Note: When one of the above malfunctions occurs, turn off the unit,
and check for any obstructions. Restart the unit, if the malfunction is
still present, turn off the unit and unplug the power cord. Contact
the manufacturer or its service agents or a similar qualified person
for service.
Removing the collected water
There are three ways to remove collected water:
1.Use the bucket
When the bucket is full, remover the bucket and empty it.
water outlet
NOTE: If the pump hose drops when you remove the bucket , you must
reinstall the pump hose properly to the unit before replace the bucket
into the unit.
2.Continuous draining
Water can be automatically emptied into a floor drain by attaching the
unit with a water hose (Id≥Φ 5/16",not included) with a female threaded
end (ID:M=1" , not included). (NOTE: On some models, the female
threaded end is included)
Pump hose
drops
Reinstall pump
hose properly
Water hose
Female
threaede
end
Remove the
plastic cover
by couter-clockwise
rotation.
NOTE: The pump operation on light blinks at 1Hz when the pump is
operational failure. Please turn off the unit and plug the power cord out.
Check the following things:
Cleaning the filter of the pump.
-Remove the bucket from the unit, take down the pump and clean the
filter of the pump.
-Check that the pump drain hose does not link or block.
-Empty the water of the bucket.
-Reinstall the pump hose if it drops and reinstall the bucket properly.
Turn on the unit. If the error repeats, call for service.
Remove the water hose and
reinstall the Plastic cover
3.Pump draining (on some models)
Water can be automatically emptied into a floor drain or a suitable
drainage facility by attaching the pump drain out with a pump drain hose
(od=Φ1/4" , supplied).
Insert pump
drain hose to
the drain hose
outlet
Pump drain
hose outlet
Pump drain hose
NOTE: The pump may cause big noise when it starts to work for 3~5
minutes. It is a normal phenomenon.
12
13
9
10
pump feature
11
unit with a water hose (Id≥Φ 5/16",not included) with a female threaded
end (ID:M=1" , not included). (NOTE: On some models, the female
(od=Φ1/4" , supplied).
12
NOTE:
-Make sure the connection is tight and there is no leak.
-Lead the water hose to the floor drain or a suitable drainage facility,
the drainage facility and the water hose should be lower than the
drain outlet of the unit.
-Be sure to run the water hose sloping downward to let the water flow
out smoothly.
-When the continuous drain feature is not being used, remove the
drain hose from the outlet.
Maintenance
NOTE: Do not use this operation when the outdoor temperature is equal to
or less than 0°C (32°F), otherwise water tunrs into ice that will cause the
water hose blocked up and the unit failure. Make sure to empty the bucket
once a week when using the pump draining feature. When the pump
draining feature is not being used, remove the pump drain hose from the
outlet. Press the pump drain hose outlet in and take the pump drain hose
out from it . Make sure do not let the water in the pump hose drip to the floor.
Filter of the pump
2,Take the pump
drain hose out
1,Press the pump drain
hose outlet in
Press the power cord
buckle into the rear
cover.
Clean the bucket with water every few weeks.
Clean the filter with water at least every 30 days or
more often if necessary.
Care and cleaning of the dehumidifier
WARNING: Turn the dehumidifier off and remove the
plug from the wall outlet before cleaning.
1.Clean the bucket
2.Clean the air filter
3.Store the unit
When not using the unit for long time periods
-After turning off the unit, wait one day before emptying
the bucket.
-Clean the main unit, bucket and air filter.
-Wrap the cord and bundle it with the band.
-Cover the unit with a plastic bag.
-Store the unit upright in a dry, well-ventilated place.
CAUTION: DO NOT
operate the dehumidifier without
a filter because dirt and lint will
clog it and reduce performance.
Operation
13
Faults Diagnosis
Unit does not start
Water on floor
Frost appears on the coils
The unit makes a loud
noise when operating
Dehumidifier does not
dry the air as it should
-Make sure the dehumidifier s plug is pushed completely into the outlet.
-Check the house fuse/circuit breaker box.
-Dehumidifier has reached its preset level or bucket is full.
-Bucket is not in the proper position.
-The air filter is clogged.
-The unit is tilted instead of upright as it should be.
-The floor surface is not level.
-Hose to connector or hose connection may be loose.
-Intend to use the bucket to collect water, but the back drain plug is
removed.
-This is normal. The unit has Auto defrost feature.
-Did not allow enough time to remove the moisture.
-Make sure there are no curtains, blinds or furniture blocking the front or
back of the dehumidifier.
-The humidity selector may not be set low enough.
-Check that all doors, windows and other openings are securely closed.
-Room temperature is too low, below 5°C(41°F).
-There is a kerosene heater or something giving off water vapor in the room.
Please check the machine according to the following form before asking for maintenance:
Faults Diagnosis
What to check
Please request for repair if operate abnormally or does not operate, and the solutions above is useless.
10
14
Sociable Remark
When using this dehumidifier in the European countries, the following information must be followed:
DISPOSAL: Do not dispose this product as unsorted municipal waste. Collection of such waste separately
for special treatment is necessary.
It is prohibited to dispose of this appliance in domestic household waste.
For disposal, there are several possibilities:
A) The municipality has established collection systems, where electronic waste can be disposed of at least
free of charge to the user.
B) When buying a new product, the retailer will take back the old product at least free of charge.
C) The manufacture will take back the old appliance for disposal at least free of charge to the user.
D) As old products contain valuable resources, they can be sold to scrap metal dealers.
Wild disposal of waste in forests and landscapes endangers your health when hazardous substances leak
into the ground-water and find their way into the food chain.

14

Distributed by:
Perfect Aire, LLC
5401 Dansher Rd.
Countryside, IL 60525
844-4PA-AIRE | 844-472-2473
www.perfectaire.us
PA/User_1PFD22_1PFD35_1PFD50_1PFDP50_ 1PFDP50/04062020
Specification and performance data is subject to change without notice.
Printed in China
DÉSHUMIDIFICATEUR
MANUEL DE L’UTILISATEUR
POUR LES MODÈLES :
1PFD22
1PFD35
1PFD50
1PFDP50
Avant d’utiliser votre déshumidificateur, veuillez
lire attentivement ce manuel et le conserver
pour référence ultérieure, avec votre reçu.


|
Contenu
Préparation -----------------------4
Précautions en matière de sécurité--------5
Mises en garde ---------------------6
Fonctionnement --------------------7
Entretien -------------------------9
Diagnostic des défauts ----------------9
Remarque relative à l’élimination --------10

panneau
fenêtre de
niveau d’eau
roulette
sortie du tuyau de vidange de la
pompe (sur certains modèles)
| Préparation
panneau de
commande
avant
Accessoires : (posé dans le seau de l’appareil)
tuyau de vidange de la pompe (1 pc) (seulement pour l’appareil avec
fonction de pompe)
boucle du cordon d’alimentation (1 pc)
extrémité letée femelle (1 pc) (sur certains modèles)
poignée
(les deux côtés)
REMARQUE : L’appareil que vous avez acheté
peut ressembler à ce qui suit :
4
cordon d’alimentation
arrière
REMARQUE :
Toutes les illustrations gurant dans ce manuel
sont fournies à titre d’explication uniquement. Votre
machine peut être légèrement différente. La forme
réelle prévaudra. La conception et les caractéristiques
peuvent faire l’objet de modications sans préavis en
vue de l’amélioration du produit. Veuillez consulter
l’agence de vente ou le fabricant pour plus de détails.
Toutes les mises à jour de ce manuel seront mises
en ligne sur le site Web de service. Veuillez consulter
cette page pour trouver la dernière version.
Remarque sur les gaz uorés
- Les gaz à effet de serre uorés sont contenus dans
des équipements hermétiquement scellés. Pour des
informations spéciques sur le type, la quantité et
l’équivalent CO
2
en tonnes de gaz à effet de serre
uorés (sur certains modèles), veuillez vous reporter
à l’étiquette pertinente sur l’appareil lui-même.
- Installation, l’entretien, la maintenance et la
réparation de cet appareil doivent être effectués par
un technicien certié.
- L’installation et le recyclage du produit doivent être
effectués par un technicien certié.
seau
boucle du cordon
d’alimentation
(posé dans le seau)
grille de sortie d’air
grille d’entrée d’air
ltre à air
(derrière la grille)
sortie du tuyau de vidange
prise d’alimentation

| Précautions en matière de sécurité
- Ne pas dépasser la capacité électrique de la prise ou
du dispositif de raccordement.
- Ne pas faire fonctionner ou arrêter l’appareil en
allumant ou en éteignant l’alimentation.
- Ne pas endommager ou utiliser un cordon
d’alimentation non spécié.
- Ne pas modier la longueur du cordon d’alimentation
ni partager la prise avec d’autres appareils.
- Ne pas insérer ni retirer la che les mains mouillées.
- Ne pas installer l’appareil dans un emplacement qui
peut être exposé à des gaz combustibles.
- Ne pas mettre l’appareil à proximité d’une source de
chaleur.
- Couper l’alimentation si l’appareil émet des bruits
étranges, des odeurs ou de la fumée.
- Il ne faut jamais tenter de démonter ou de réparer
l’appareil vous-même cet appareil.
- La plaque signalétique du fabricant est située sur
le panneau arrière de l’appareil et comprend des
données électriques et d’autres données techniques
relatives à cet appareil.
- S’assurer que l’appareil est correctement mis à la
terre. An de minimiser les risques de choc électrique
et d’incendie, une mise à la terre correcte est
importante. Le cordon d’alimentation est équipé d’une
che de mise à la terre tripolaire de protection contre
les risques de chocs électriques.
- Votre appareil doit être utilisé avec une prise de
courant murale correctement mise à la terre. Si
la prise de courant murale que vous prévoyez
d’utiliser n’est pas correctement mise à la terre ou
protégée par un fusible temporisé ou un disjoncteur
(veuillez vous reporter à la plaque signalétique pour
les données électriques), faire installer la prise de
courant appropriée par un électricien qualié.
5
Ce symbole indique que le non respect des instructions peut entraîner la mort ou de graves
blessures.
AVERTISSEMENT : Pour éviter des blessures graves, voire mortelles à l’utilisateur ou à d’autres
personnes et des dommages matériels, les instructions suivantes doivent être respectées. Un
mauvais fonctionnement en raison du non respect des instructions peut entraîner la mort, des
blessures ou des dommages.
- Avant le nettoyage, couper l’alimentation et
débrancher l’appareil.
- Ne pas utiliser la machine à proximité de gaz
inammables ou de substances combustibles, telles
que l’essence, le benzène, les solvants, etc.
- Ne pas boire ou utiliser l’eau évacuée de l’appareil.
- Ne pas retirer le seau d’eau pendant le
fonctionnement.
- Ne pas utiliser l’appareil dans des espaces réduits.
- Ne pas mettre dans des endroits où des
éclaboussures d’eau sont possibles.
- Poser l’appareil sur un sol stable et de niveau.
- Ne pas couvrir les ouvertures d'arrivée et d'évacuation
de chiffons ou de serviettes.
- Faire preuve de prudence lors de l’utilisation de
l’appareil dans une pièce en présence des personnes
suivantes : nourrissons, enfants, personnes âgées et
personnes sensibles à l’humidité.
Informations électriques :
- Ne pas utiliser là où des substances chimiques sont
manipulées.
- Ne jamais insérer le doigt ou d’autres objets dans les
grilles ou les ouvertures. Veillez à prévenir les enfants
de ces dangers.
- Ne pas mettre d’objets lourds sur le cordon
d’alimentation et faire attention à ce que le cordon ne
soit pas comprimé.
- Ne pas monter ni s’asseoir sur l’appareil.
- Toujours insérer les ltres de manière sécuritaire.
Nettoyer le ltre une fois toutes les deux semaines.
- En cas de pénétration d’eau dans l’appareil, éteindre
l’appareil et couper l’alimentation, contacter un
technicien d’entretien qualié.
- Ne pas poser de vases à eurs ou d’autres
contenants d’eau sur l’appareil.
- Ne pas utiliser de rallonges.

| Mises en garde
Mises en garde
- Cet appareil peut être utilisé par des enfants de 8 ans et plus et des personnes ayant des capacités
physiques, sensorielles ou mentales réduites ou qui manquent d’expérience ou de connaissances s’ils
sont surveillés ou s’ils ont été informés sur l’utilisation sécuritaire de l’appareil et comprennent les dangers
présents. Les enfants ne doivent pas jouer avec l’appareil. Le nettoyage et l’entretien utilisateur ne doivent
pas être effectués par des enfants sans surveillance. (s’applique pour les pays européens)
- Cet appareil n’est pas destiné à une utilisation par des personnes (y compris des enfants) ayant des
capacités physiques, sensorielles ou mentales réduites ou qui manquent d’expérience ou de connaissances,
à moins d’être surveillés ou d’être informés sur l’utilisation de l’appareil par une personne responsable de
leur sécurité. Les enfants doivent être surveillés an d'éviter qu'ils ne jouent avec l'appareil. (s’applique pour
les autres pays sauf les pays européens)
- Si le cordon d’alimentation est endommagé, il doit être remplacé par le fabricant, son agent d’entretien ou
d’autres personnes qualiées an d’éviter les risques.
- Avant le nettoyage ou d’autres travaux d’entretien, l’appareil doit être débranché de l’alimentation secteur.
- Ne pas installer l’appareil dans un emplacement qui peut être exposé à des gaz combustibles. Si des gaz
combustibles s’accumulent à proximité de l’unité, cela pourrait provoquer un incendie.
- Si l’appareil est renversé en cours de fonctionnement, éteindre l’appareil et le débrancher immédiatement
de l'alimentation électrique principale. Inspecter l’appareil visuellement pour s’assurer qu’il n’a pas été
endommagé. En cas de dommages soupçonnés à l’appareil, contacter un technicien ou le service à la
clientèle pour obtenir une assistance.
- En cas d’orage, l’alimentation doit être coupée pour éviter des dommages à la machine provoqués par
la foudre.
- Ne pas passer le cordon sous un tapis. Ne pas couvrir le cordon de moquettes, de tapis longs ou d’autres
revêtements de sol. Ne pas passer le cordon sur des meubles ou des appareils. Installer le cordon à l’écart
des zones de circulation de manière à éviter qu'il soit possible de trébucher dessus.
- Ne pas faire fonctionner l’appareil avec un cordon ou une prise endommagé(e). Éliminer l’appareil ou le
retourner à un établissement de service autorisé en vue d’un examen et/ou réparation.
- Pour réduire le risque d’incendie ou de choc électrique, ne pas utiliser ce ventilateur avec un dispositif de
contrôle de la vitesse semi-conducteur.
- Cet appareil doit être installé conformément aux réglementations nationales en matière de câblage.
- Contacter le technicien autorisé pour la réparation ou l’entretien de cet appareil.
- Éteindre le produit lorsqu’il n’est pas utilisé.
6

Poser correctement
- Cet appareil est conçu pour un fonctionnement dans un
environnement entre 5 °C (41 °F) and 32 °C (90 °F).
plus de 40 cm
Roulettes (installées à quatre emplacements en
bas de l’appareil)
- Ne pas forcer le déplacement des roulettes sur un
tapis ni déplacer l’unité avec de l’eau dans le seau.
(L’appareil risque de basculer et de renverser de l’eau.)
REMARQUE : Les roulettes sont fournies en option,
certains modèles sans roulettes.
| Fonctionnement
Bouton POMPE (en option)
Appuyer pour activer le fonctionnement de la pompe.
REMARQUE : S’assurer que le tuyau de vidange de la pompe est
installé sur l’appareil et que le tuyau de vidange continu est retiré
de l’appareil avant que le fonctionnement de la pompe soit repris.
Lorsque le seau est plein, la pompe commence à fonctionner.
Se reporter aux pages suivantes pour l’élimination de l’eau
recueillie. Ne pas effectuer cette opération lorsque la température
extérieure est égale ou inférieure à 0 ºC (32 ºF).
Bouton CONFORT
Appuyer pour activer la déshumidication.
REMARQUE : Dans ce mode, le niveau d’humidité de l’appareil ne
peut être réglé.
Bouton FILTRE
L’option de vérication du ltre est un rappel pour nettoyer le
ltre à air pour un fonctionnement plus efcace. Le témoin du
Filtre (témoin de nettoyage du ltre) clignotera après 250 heures
de fonctionnement. Pour réinitialiser après le nettoyage du ltre,
appuyer sur le bouton Filtre et le témoin s'éteindra. Appuyer
sur le tampon du ltre pendant 3 secondes lorsque l’appareil
est allumé ou éteint pour passer en mode connexion sans l.
Fonctionnalités intelligentes :
-Arrêt automatique
Lorsque le témoin de seau plein s’allume ou que le
réglage d’humidité est atteint, l’appareil s’éteindra
automatiquement.
-Attendre 3 minutes avant de reprendre le
fonctionnement après l’arrêt de l’appareil. Il n’est pas
possible de reprendre le fonctionnement pendant les
3 premières minutes. Cela sert à protéger l’appareil.
Le fonctionnement reprendra automatiquement
après 3 minutes.
-Dégivrage automatique
Lorsque du givre se forme sur les serpentins de
l'évaporateur, le compresseur se mettra en arrêt et le
ventilateur continuera de fonctionner jusqu’à ce que
le givre soit éliminé.
-Redémarrage automatique
Si l’appareil se met en pause de manière inattendue
suite à la coupure du courant, il redémarrera de
façon automatique avec le réglage précédent
lorsque le courant est rétabli.
L’AFFICHAGE À DEL afche AP pour indiquer que vous pouvez
régler la connexion sans l et que le compresseur est désactivé.
Si la connexion (routeur) est réussie dans les 8 minutes, l’appareil
quittera le mode connexion sans l de façon automatique et le
témoin Sans l (témoin du Filtre) s’allumera et le compresseur
revient à l’état précédent. Si la connexion échoue dans les
8 minutes, l’appareil quitte le mode connexion sans l de façon
automatique.
Bouton CONTINUER
Appuyer pour activer la déshumidication continue.
Bouton TURBO
Contrôler la vitesse du ventilateur. Appuyer pour sélectionner la
vitesse de ventilation Élevée ou Normale. Régler la commande du
ventilateur sur Élevée pour une élimination maximale de l’humidité.
Lorsque l’humidité a été réduite et qu’un fonctionnement silencieux
est souhaitable, régler la commande du ventilateur sur Normale.
Bouton Minuteur
Appuyer pour lancer l’option de démarrage automatique et d’arrêt
automatique, conjointement avec les boutons
et . Lorsque
7
plus de 20 cm
plus de 40 cm
plus de 20 cm
plus de 20 cm
évacuation
d’eau
Extrémité
letée
femelle
Insérer le tuyau de
vidange de la pompe
dans la sortie du
tuyau de vidange
Sortie du tuyau de
vidange de la pompe
Retirer le couvercle en
plastique en le faisant
pivoter dans le sens
contraire des aiguilles
d’une montre.
| Fonctionnement
l’appareil est allumé, appuyer d’abord sur le bouton Minuteur. Le
témoin Éteindre le minuteur s’allumera. Cela indique le programme
d’Arrêt automatique a été lancé. Appuyer de nouveau. Le témoin
Activer le minuteur s’allume, indiquant que le démarrage automatique
est activé.
• Lorsque l’appareil est éteint, appuyer d’abord sur le bouton Minuteur.
Le témoin ACTIVER LE MINUTEUR s’allumera. Cela indique le
programme de Démarrage automatique a été lancé. Appuyer de
nouveau. Le témoin Arrêt du minuteur s’allume. Cela indique l’Arrêt
automatique a été activé.
• Appuyer ou maintenir enfoncé le bouton HAUT ou BAS pour modier
le temps automatique par intervalles de 0,5 heure, jusqu’à 10 heures,
puis par intervalles de 1 heure jusqu’à 24 heures. La commande fera
le compte à rebours du temps qui reste jusqu’au démarrage.
• Le temps sélectionné sera enregistré en 5 secondes et le système
retournera à l’afchage du réglage d’humidité précédent.
• Lorsque les temps de démarrage et d’arrêt automatiques sont réglés,
dans la même séquence de programme, les témoins ACTIVER LE
MINUTEUR/DÉSACTIVER LE MINUTEUR s’allument pour identier
les temps ALLUMER et ÉTEINDRE maintenant programmés.
• ALLUMER ou ÉTEINDRE l’appareil à tout moment ou modier le
réglage du minuteur sur 0,0 désactivera l’option de Démarrage/Arrêt
automatique.
• Lorsque la fenêtre d’afchage à DEL afche le code P2, l’option de
Démarrage/Arrêt automatique sera également désactivée.
Boutons Bas/Haut
• Boutons de réglage de l’humidité
Le niveau d’humidité peut être réglé dans une plage de HR
(humidité relative) de 35 % à 85 %, par paliers de 5 %.
| Fonctionnement
Remarque : En cas d'apparition d'une des anomalies mentionnées
ci-dessus, éteindre l’appareil et vérier qu’il n’y ait aucune
obstruction. Redémarrer l’appareil. Si l’anomalie est encore
présente, éteindre l’appareil et débrancher le cordon d’alimentation.
Contacter le fabricant ou ses agents de service ou une autre
personne qualiée pour obtenir un service après-vente.
REMARQUE : Le témoin s’allume lorsque l’option est sélectionnée.
Éliminer l’eau recueillie
Il y a trois façons d’éliminer l’eau recueillie :
1. Utiliser le seau
Lorsque le seau est plein, retirer le seau et le vider.
REMARQUE : Si le tuyau de pompe descend lorsque le seau
est retiré, il faut réinstaller le tuyau de pompe correctement dans
l’appareil avant de remplacer le seau dans l’appareil.
Descente
du tuyau
de la
pompe
Réinstaller
le tuyau de
la pompe
correctement
2. Vidange continu
L’eau peut être vidée de façon automatique dans un drain de plancher
en xant l’appareil avec un tuyau d’eau (Id≥Φ 7,9 mm (5/16 po), non
fourni) avec une extrémité letée femelle (ID:M=25,4 mm (1 po), non
fournie). (REMARQUE : Sur certains modèles, l’extrémité letée femelle
est fournie)
8
Pour un air plus sec, appuyez sur le bouton
et régler sur une
valeur en pourcentage inférieure (%). Pour un air plus humide,
appuyer sur le bouton
et régler sur une valeur en pourcentage
supérieure (%).
• Boutons de réglage du minuteur
Appuyer pour lancer l’option de démarrage automatique et d’arrêt
automatique, conjointement avec les boutons
et .
Bouton d’alimentation
Appuyer pour allumer ou éteindre le déshumidicateur.
Afchage à DEL
Afche le % niveau d’humidité réglé de 35 % à 85 % ou le temps de
démarrage/arrêt automatique (0~24) lors du réglage, puis afche le
niveau d’humidité réelle dans la pièce (précision de ±5 %) dans une
plage de HR (humidité relative) de 30 % à 90 %.
Codes d’erreur : AS - Erreur du capteur d’humidité;
ES - Erreur du capteur de température;
Eb - Le seau est retiré ou n’est pas correctement placé--Remettre le
seau dans la bonne position (uniquement disponible pour l’unité
avec l’option de pompe).
Codes de protection :
P2- Le seau est plein ou n’est pas correctement Vider le seau et le
remettre dans la bonne position (uniquement disponible pour l’unité
avec l’option de pompe).
P2- Le seau est plein -- Vider le seau (uniquement disponible pour
l’unité avec l’option de pompe
3. Vidange de la pompe (sur certains modèles)
L’eau peut être vidée de façon automatique dans un drain de plancher
ou un dispositif de drainage convenable en xant le drain de pompe
avec un tuyau de vidange de la pompe (od=Φ6,35 mm (1/4 po), fourni).
Retirer le tuyau d’eau et
réinstaller le couvercle en
plastique
REMARQUE : La pompe peut générer un bruit fort lorsqu'il se met à
fonctionner pendant 3 à 5 minutes. Il s'agit d'un phénomène normal.
REMARQUE : Le témoin de fonctionnement de la pompe clignote
à 1 Hz en cas de défaillance opérationnelle de la pompe. Veuillez
éteindre l’appareil et débrancher le cordon d’alimentation. Vérier les
éléments suivants :
Nettoyage du ltre de la pompe.
- Retirer le seau de l’appareil, enlever la pompe et nettoyer le ltre de
la pompe.
- Vérier que le tuyau de vidange de la pompe ne soit pas entortillé ni
obstrué.
- Vider l’eau du seau.
- Réinstaller le tuyau de la pompe s’il descend et réinstaller le seau
correctement. Allumer l’appareil. Si l’erreur persiste, appeler un
technicien.
Tuyau d’eau
Tuyau de vidange de la pompe
Filtre de la pompe
2,Retirer le tuyau de
vidange de la pompe
| Fonctionnement
REMARQUE : Ne pas effectuer cette opération lorsque la température
extérieure est égale ou inférieure à 0 °C (32 °F), sinon l’eau gèle,
provoquant l’obstruction du tuyau d’eau et la défaillance de l’appareil.
S’assurer de vider le seau une fois par semaine lors de l’utilisation de
l’option de vidange de la pompe. Lorsque l’option de vidange de la pompe
n’est pas utilisée, retirer le tuyau de vidange de la pompe de la prise.
Appuyer sur la sortie du tuyau de vidange de la pompe et retirer le tuyau
de vidange de la pompe. S’assurer que l’eau du tuyau de la pompe ne
s’égoutte sur le sol.
Appuyer pour enfoncer le
boucle du cordon d’alimentation
dans le couvercle arrière.
1,Appuyer sur la sortie du tuyau
de vidange de pompe
REMARQUE :
- S’assurer que la connexion est bien serrée et qu’il n’y a pas de fuites.
- Diriger le tuyau d’eau vers le drain de plancher ou un dispositif de
drainage convenable. Le dispositif de drainage et le tuyau d’eau
doivent être plus bas que la sortie de vidange de l’appareil.
- S’assurer de poser le tuyau d’eau en pente descendante pour laisser
l’eau s’écouler doucement.
- Lorsque l’option de vidange continu n’est pas utilisée, retirer le tuyau
de vidange de la sortie.
| Entretien
Entretien et nettoyage du déshumidicateur
AVERTISSEMENT : Éteindre le déshumidicateur et
retirer la che de la prise murale avant le nettoyage.
1. Nettoyer le seau
Nettoyer le seau à l’eau à quelques semaines d’intervalle.
2. Nettoyer le ltre à air
Nettoyer le ltre à l’eau au moins tous les 30 jours ou plus
souvent si nécessaire.
ATTENTION : NE PAS faire
fonctionner le déshumidicateur
sans ltre car les saletés et les
peluches l’obstrueront et diminueront
sa performance.
3.Ranger l’appareil
Lorsque l’appareil n’est pas utilisé pendant de longues périodes
- Après avoir éteint l’appareil, attendre un jour avant de vider
le seau.
-Nettoyer l’appareil principal, le seau et le ltre à air.
-Enrouler le cordon et l’envelopper avec la bande.
-Couvrir l’appareil avec un sac en plastique.
- Ranger l’appareil en position verticale dans un endroit sec
et bien aéré.
| Diagnostic des défauts
Veuillez vérier la machine selon le formulaire suivant avant de demander un service d’entretien :
9
Diagnostic des défauts Éléments à vérier
L’appareil ne démarre pas -S’assurer que la che du déshumidicateur est bien enfoncée dans la prise.
-Vérier le fusible/boîtier de disjoncteurs.
-Le déshumidicateur a atteint le niveau prédéni ou le seau est plein.
-Le seau n’est pas dans la bonne position.
Le déshumidicateur
n’assèche pas l’air comme
il le faudrait
-Temps insufsant accordé pour éliminer l’humidité.
- S’assurer qu’il n’y a pas de rideaux, de stores ou de meubles qui obstruent l’avant ou
l’arrière du déshumidicateur.
-Le réglage du sélecteur d’humidité n’est pas sufsamment bas.
-Vérier que toutes les portes, fenêtres et autres ouvertures sont correctement fermées.
-La température de la pièce est trop basse, inférieure à 5 °C(41 °F).
- Il y a un appareil de chauffage au kérosène ou quelque chose qui émet de la vapeur
d’eau dans la pièce.
L’appareil génère un bruit fort
pendant le fonctionnement
-Le ltre à air est obstrué.
-L’appareil est incliné plutôt que droit, comme il le faudrait.
-La surface du sol n’est pas de niveau.
Du gel est présent sur
les serpentins
-Cela est normal. L’appareil possède une option de dégivrage automatique.
De l’eau sur le sol -Le tuyau vers le connecteur ou le raccordement du tuyau peut être desserré.
-Usage du seau prévu pour recueillir l’eau, mais la prise de vidange arrière est retirée.
Veuillez demander une réparation en cas de fonctionnement anormal ou de défaillance, et que les solutions ci-dessus ne
permettent pas de résoudre le problème.
| Remarque relative à l’élimination
Lorsque cet déshumidicateur est utilisés dans les pays de l'Union européenne, les informations suivantes
doivent être respectées :
ÉLIMINATION : Ne pas jeter ce produit comme déchets municipaux. La collecte de tels déchets se fait
séparément, car ils nécessitent un traitement particulier.
Il est interdit de jeter cet appareil avec les ordures ménagères domestiques.
Plusieurs possibilités existent pour l’élimination :
A) La municipalité a mis en place des systèmes de collecte permettant l’élimination des déchets
électroniques au moins sans frais pour l’utilisateur.
B) Lors de l’achat d’un nouveau produit, le détaillant reprendra l’ancien produit au moins gratuitement.
C) Le fabricant reprendra l’ancien appareil en vue de son élimination au moins gratuitement pour
l’utilisateur.
D) Étant donnée que les anciens produits contiennent des ressources précieuses, ils peuvent être vendus
auprès de revendeurs de ferraille.
L’élimination sauvage de déchets dans les forêts ou les paysages met en danger la santé lorsque des
substances dangereuses se répandent dans l’eau souterraine ou nissent par aboutir dans la chaîne
alimentaire.
10


Distribué par :
Perfect Aire, LLC
5401 Dansher Rd.
Countryside, IL 60525
844-4PA-AIRE | 844-472-2473
www.perfectaire.us
PA/User_1PFD22_1PFD35_1PFD50_1PFDP50_ 1PFDP50/04062020
Les données relatives aux caractéristiques et à la performance peuvent faire l’objet de modifications sans préavis.
Imprimé en Chine