Loading ...
Loading ...
Loading ...

8 49-1000491 Rev. 3
Using the Beverage Center
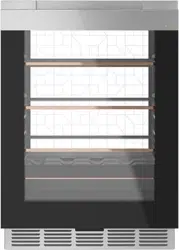
USING THE BEVERAGE CENTER: Shelves and Drawers
GLASS SHELVES
Tempered glass shelves in the beverage center unit are
removable for easy cleaning or for storing larger items.
To remove a shelf, open the door completely to avoid
potential damage to the gasket. Lift up on the back of
the shelf slightly. Tilt the shelf to one side at an angle
while pulling forward.
Appearance may vary
To replace a shelf, open the door completely to avoid
potential damage to the gasket. Tilt the shelf to one side
at an angle and slide toward the back wall, placing one
side onto the shelf support. Place the other side onto
the opposite shelf support. Ensure rear locking tabs are
engaged. When installed properly, the shelf will not slide
forward when gently pulled.
To remove, lift up on the back of
the shelf
Tilt the shelf at an angle while
removing or replacing
Place in slots when replacing the
shelf
QUICKSPACE
™
SHELF
This shelf splits in half and slides under itself for storage
of tall items on the shelf below.
Step 1: Lift the front edge of the front half of the shelf.
Step 2: Lower the back edge of the front half of the shelf
while sliding it underneath the back half.
The entire Quick Space shelf can be removed and
replaced (see Glass Shelves section).
Step 2
Step 1
FULL EXTENSION DRAWERS
All of the full extension drawers pull out so bottles can be
conveniently added or removed.
To remove:
1. Pull the full extension drawer out to the STOP position.
2. Push the tab on right drawer guide down while pulling
the tab on left guide up, and pull the drawer out.
To replace:
1. Push the drawer slide arm back
into the unit.
2. Pull the small slide sub-
assembly completely forward.
3. Insert the sides of the drawer
back into the guides.
4. Push until the tabs lock into
place.
Tab (push tab down
on right drawer
guide, pull tab up on
left drawer guide)
NOTE: Make sure the tabs on
the full extension drawer guides
are fully engaged before loading
any bottles. Pull the drawers out
all the way to the STOP position
and push back in several times
to make sure locking tabs are
properly engaged.
To replace, push drawer
slide arm back into unit
Pull small slide sub-
assembly completely
forward
Appearance may vary
Sub-assembly
Sub-assembly
Loading ...
Loading ...
Loading ...